Advertising Illustration Tutorial in Photoshop CC
Skills:
UI Design90%
Key Takeaways
Designs an advertising illustration in Adobe Photoshop CC
Full Transcript
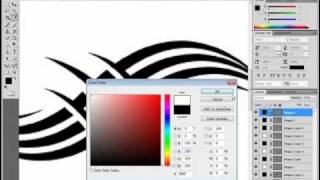
[Music] hello Gary Simon of designc course.com and today is January 17th with our 17th consecutive video of the year and today we're going to use Adobe Photoshop CC to create a really cool and unique and interesting looking product illustration for a fictional company called Heavenly eggs so as always the project files are available for free in the description below this video and also please check out designcourse tocom there may be courses and full awesome tutorials that aren't quite up yet I'm working on creating those but depending on when you're watching this uh whether it be a few months or a year down the road they may be there so go ahead hurry up hit contrl t on your browser and check out designc course.com to see what's going on there so uh let's get started okay so the first thing we want to do is go to file new and we'll call this heavenly I was completely wrong position on my keyboard Heavenly eggs for the width I'm going to choose I let's see 850 and then 600 so basically for my resolution that fits well at 100% so we'll hit okay let me zoom up here at 100% okay and I'm going to fill in the background with an orange color pretty bright so it's FFC 0000 being the color code hit okay and paste that in paste it in I am not on my game today we're not pasting anything we're just filling it in okay so now what we want to do is kind of create like a backdrop or kind of like a gradient in the background so what we'll do is hit control shift n for a new layer hit okay drag out for the gradient tool and we'll switch to the the background of the foreground and we'll just go darker right right around there and then what I want to do is with the gradient tool selected and we have this option right here that preset rather hold shift and just pull up just right around there roughly and then we're going to move it right around here and then go to filter blur gaji sorry filter blur gajian blur I'm going too fast aren't I and take the radius up right around there and hit okay and it's a little bit too dark so we take the opacity down and I me uh control T and I'm just got to shift and drag that up a little bit right around there and then I'm going to take the Eraser tool a large one as I'll just thousand not too I'll say 700 all right and I'm going to zoom out yeah right around there is fine just once go back to that eraser tool and I think I just go right around here there just like that all right so now what I want to do is is actually create the egg shape so we're going to take the ellipse tool and we're going to take a white color for the foreground and we're going to create basically an oval and it doesn't matter where you set it initially I think right there is a pretty decent egg shape except I'm I'm would take the direct selection tool select that portion hit shift and do those two so we want these two points select Ed and then just hold shift and bring them down right around there h no I think that was good right there all right and hit control h to get rid of those points and we're going to pos position it right around here all right so far so good all right so now what we want to do is create kind of like a shadow right here so underneath it we'll go ahead and take our brush see how big that is that looks pretty much the same almost the same size it's fine if it's off a little bit and we're going to change the foreground color do something dark hit okay and then just come up here in the middle somewhere and then just click once hit contrl t hold shift and oh no oh no I put that on the same layer oops I'm just going to hit contrl Z and then Control Alt z a couple times so we can undo that mistake control shift n for a new layer we'll call this egg Shadow sorry about that we could go ahead and do that real quick control T shift maybe right around there so we're really flattening it out we want to be like just like right there all right so that looks good so far and I now what I want to do is we're going to give it some shading this egg so we're going to take it uh which is called ellipse one we're going to call this egg control shift end for a new layer make it a clipping mask hit okay and we're going to go back to our brush and you know this is pure white right now so we're going to go a little bit darker of a gray hit okay and just like that and so you know this is a pretty large brush 330 pixels so all you have to do is just very lightly wrate along that portion now what I want to do is create another layer I'm going to call this background Shadow make sure that's a clipping mask I forgot to check it off all you have to do is right click and fix that and let me name this real quick too so take a background Shadow and now what we want to do is go ahead and take take the eye dropper click right around there and drop our size down just a little bit uh or maybe not and we're just going to click right here so that doesn't look correct but that's okay all I have to do is go to contrl T and I'm holding shift and scaling that down just a bit and you could also hold alt and increase the size widthwise all right select apply and you can experiment with moving these up uh and down I mean you can even change the blend mode of the egg Shadow so we could see this underneath it and you can play with that just by using your arrows um I think I'm just going to leave it normal and leave this there and then what I can do is take the Eraser tool and just very slightly get rid of oh that's the egg Shadow part nope yeah it is okay there that's the one I wanted sorry about that all right and then just kind of get rid of very bottom portion of it okay so so far so good I want to create one more Shadow though uh underneath this so on top of egg Shadow uh control shift n for a new lay layer egg Shadow two and I'm going to take I kind of a darker color here we're going to bring the scale down just a little bit and kind of go right here in the center there and then I'm going to to take the sides of the Eraser like around there maybe I'm going to make it a little bit larger capacity maybe just down very slightly okay I'm going to leave it there for now I don't know if I like that but we'll see all right so now what I want to do is go ahead and start cracking this thing so we're going to have a cracked shell so what we'll do is we'll just I click up here on the top layer take our shape our pen tool make sure shape is selected we're going to choose the uh background color just right around the area where it's going to be cut out and this is just temporary but you'll see what we're going to do real quick zoom up here and we're going to crack it right around here so just select just a outside of the shell and then just click all around to make it look like this thing has been cracked open oops sometimes that'll happen you just undo it like that all right now we'll select to our original point now we hit c contrl c just to copy that's going to copy this path now we can get rid of this layer so hit delete now click on the egg layer and hit paste contrl V and then we can come over here sub subtract front shape all right so hit crl H now we can see you know the actual background that's back behind there all right so now what we want to do is go ahead and create yoke so and I'm not talking about the a yolk I'm talking about the uh the white stuff the egg white so what we want to do is I'm going to select on the top layer and this is going to be we're going to make this white it's not White in real life it's actually very faint type of uh translucent color but just for now we're going to make it white so we're clicking just above that eggshell and we want to come down right right around here and just drag out and it's going to basically overflow this portion just like that all right cool all know if you've never played with the plant tool it could be a pain uh at first trying to learn but it just takes practice all right so now what I want to do I'm going to write click and I'm going to rasterize that okay so I'm going to zoom out here I say control one just to get to 100% And now what we could do is take this eraser tool and let's see here I think that 240 might be a good size and just click once so now we can see we've kind of made it slightly uh transparent so I'm going to go to image adjustments H and saturation I shouldn't have made that white initially um but we're just going to colorize it so select colorize and turn lightness down just slightly saturation up and we can see that it does have a very faint almost like a skin tone type of color it's we want it to be yellow slightly I think we're at there is probably good and then hit okay okay and then what I want to do is then create the yolk inside of this so it's going to get real close and let's take the pen tool and this is going to go beneath this shape one so we'll just call this egg white all right so let's start right here and we're going to try to follow the shape of the egg white like this and then just go all the way out right there and then we want to make this yellow like a real yellow and we're going to drag this beneath uh the egg layer right there all right so now what I want to do we're going to zoom out here just get 100% all right so I'm going to call this yoke and now I want to create some highlights so obviously when it comes to a Yo and it's very reflective so we're going to take the pen tool we'll come up here to the top layer and these are going to be reflections of like lights basically and so you want to follow the shape basically of the top portion here maybe another one right there all right and maybe we'll do one coming down here do another one over here oops maybe another one right here all right we'll do like a large one right here and take the opacity down just a little bit and maybe another one right here all right so V control one now it looks uh pretty decent um we want to create kind of like a let's see a shadow that's going from the eggshell to the actual yolk so we're going to hit uh control shift n with the yolk layer selected create a clipping mask and let's go ahead with the brush tool I need to close this thing out all right so I we'll go ahead and take that down a bit change the color here something darker H you know what I don't like that of course there's a massive plane outside you guys could probably hear that all right let's see very faint and then I'm going to take the opacity and drop that down quite a bit all right and another thing I want to do is is I'm going to slightly change the color of the yolk so double click on that square portion of the layer and yeah just dropping it down slightly so it's a little bit more orange than it is yellow and hit okay all right and let's see if there's any other adjustments I want to make um actually I think that looks pretty good right there um we're not done yet though so what I want to do now I want to get some type going real quickly so I'm going to go to the very top and all these shapes these are all of our shadows so I can just group those Control G all this highlights I mean rather not Shadows all right so get this off like that all right and then what I want to do I'm just going to click want right here we just call this heavenly EG oh man Heavenly eggs all right and we'll take the color make it white this will be a yellow real bright one contrl t we'll scale this up right around there and we'll get rid of that space and then we will duplicate that real quick control T and I'm just going to put um the most wholesome organic eggs you can imagine all right so we'll take this top one we'll make these line up evenly this background layer I want to make it slightly darker so I'm going to come over here just fill this in just like that not too too much there all right so now what I want to do is go ahead and use our brush tool and create some clouds and so I've linked uh some Cloud photoshop brushes in the description of my video and you can download this one uh which will work or you could uh just check out all these other ones there's there's tons of different sites that offer free photoshop brushes for clouds so you know basically the way you load those up is you know once you download them they're just a file you can double click and uh Photoshop will automatically recognize those and so when you when you do that nothing will happen but if you take your your uh your eraser tool or your paintbrush you'll see if you drop down here you have they'll show up at the bottom all right so these are all different clouds so I'm just going to experiment here I'm going to choose this one these are real large so I'm going to create a new layer above Layer Two control shift n just hit enter call this clouds real quick oops double click clouds and take the size down a lot oops we need we need actually be white all right okay and I'm going to create a new layer clouds 2 and you obviously want these to be different you want to vary the clouds a little bit and some may look good some may not um so let's just try one right there and we could try putting this above everything so it kind of goes in front so looks like there's some depth here and let me see if I want to do one more not you don't want to overdo it but we'll see if we can get away this is kind of different type of clouds here yeah that's a it's like a little bit too much in my opinion you know really it's just a matter playing around uh I think that looks good right there all right not done yet though I want to create another layer and I think I'm going to do it just above that layer two and I'm going to take the paintbrush tool and go up to a feather brush and make it real well we'll see how big we want to make this thing maybe 600 and with the white in the foreground we're just going to click right here and that really just brightens things up a little bit we can drop the opacity down slightly if we want all right I think that is pretty good I like it um so hopefully I you've created something that you're proud of and you know and hopefully this is a good tutorial for you to learn how to use the the uh the pen tool because we use that a lot um so as always go ahead and visit designcourse decom check it out there we will have uh premium courses up very shortly and they may already be up depending on when you're watching this uh and also check out the social profiles um like us on Facebook and of course subscribe here on YouTube and you'll get an email every day as I release a tutorial every day in 2014 all right I'm Gary Simon and I will see you tomorrow [Music]
Original Description
http://goo.gl/BBse40 - Design + Code a Professional Android App from Scratch
*
**Join DesignCourse Premium for 1-on-1 Design Training with Me:**
http://goo.gl/qSOory
Project Files - http://www.designcourse.com/videos/design-an-advertising-flyer-in-photoshop-cc/23
- Learn how to design an eye catching product advertisement for a fictional company, "Heavenly Eggs." We'll use a lot of the pen tool and paintbrush to create a realistic egg.
Free Cloud Brushes:
http://www.brusheezy.com/brushes/1227-cloud-photoshop-brushes
Follow us:
Facebook: http://www.facebook.com/designcourses
Twitter: http://twitter.com/designcoursecom
Google+: http://plus.google.com/+DesignCourse
Dribbble: http://dribbble.com/designcourse
- - - - - - - - - - - - - - - - - - - - - -
Subscribe for NEW VIDEOS weekly!
My site: https://designcourse.com
My personal FB account: http://fb.com/logodesigner
Coursetro FB: http://fb.com/coursetro
Coursetro's Twitter: http://twitter.com/designcoursecom
Join my Discord! https://discord.gg/a27CKAF
^-Chat with me and others
- - - - - - - - - - - - - - - - - - - - - -
Who is Gary Simon? Well, I'm a full stack developer with 2+ decades experience and I teach people how to design and code. I've created around 100+ courses for big brands like LinkedIn, Lynda.com, Pluralsight and Envato Network.
Now, I focus all of my time and energy on this channel and my website Coursetro.com.
Come to my discord server or add me on social media and say Hi!
Watch on YouTube ↗
(saves to browser)
Sign in to unlock AI tutor explanation · ⚡30
Playlist
Uploads from DesignCourse · DesignCourse · 38 of 60
1
 2
2
 3
3
 4
4
 5
5
 6
6
 7
7
 8
8
 9
9
 10
10
 11
11
 12
12
 13
13
 14
14
 15
15
 16
16
 17
17
 18
18
 19
19
 20
20
 21
21
 22
22
 23
23
 24
24
 25
25
 26
26
 27
27
 28
28
 29
29
 30
30
 31
31
 32
32
 33
33
 34
34
 35
35
 36
36
 37
37
 ▶
▶
 39
39
 40
40
 41
41
 42
42
 43
43
 44
44
 45
45
 46
46
 47
47
 48
48
 49
49
 50
50
 51
51
 52
52
 53
53
 54
54
 55
55
 56
56
 57
57
 58
58
 59
59
 60
60

Photoshop Pen Tool Tutorial (Tattoo Design)
DesignCourse
How to Design the Microsoft Logo in Photoshop
DesignCourse
Photoshop Gradients Video Tutorial
DesignCourse
Your Guide to Layer Styles
DesignCourse
Layer Masks in Photoshop
DesignCourse
iOS App Icon Design Tutorial in Illustrator CS6
DesignCourse
Illustrator CS6 Logo Design Tutorial - Archfold
DesignCourse
Photoshop CS6 3D Tutorial - Magic Tent Illustration
DesignCourse
How to Design a Tshirt Tutorial - Adobe Illustrator
DesignCourse
Types of Logos - Lettermark & Monogram Logo Type
DesignCourse
Banner Design in Photoshop CS6
DesignCourse
How to Design a Logo in Illustrator CC
DesignCourse
Designing a Logo in Photoshop CC
DesignCourse
1. Launch & Market a Web Based Business - Introduction
DesignCourse
2. Launch & Market a Web Based Business - Logo Design
DesignCourse
3. Home Page Mockup in PS : Part 1
DesignCourse
4. Home Page Mockup in PS : Part 2
DesignCourse
5. Home Page Mockup in PS : Part 3
DesignCourse
6. Home Page Mockup in PS : Part 4
DesignCourse
7. Home Page HTML & CSS - Part 1
DesignCourse
8. Home Page HTML & CSS - Part 2
DesignCourse
Using Photoshop to Showcase Mobile Projects
DesignCourse
Flat Icon Design Tutorial in Illustrator CC
DesignCourse
Illustrator CC Logo Design Tutorial - A Logo That "Pops"!
DesignCourse
Logo Design Follow Along 1: Emblem Logo Design
DesignCourse
Showcasing Logos in 3D with Blender
DesignCourse
How to Design an Effective Lettermark Logo
DesignCourse
Squeeze Page Design Tutorial in Photoshop (Part 1)
DesignCourse
Squeeze Page Design Tutorial in Photoshop (Part 2)
DesignCourse
Mobile GUI Element Design in Adobe Photoshop CC (Part 1)
DesignCourse
Mobile GUI Element Design in Adobe Photoshop CC (Part 2)
DesignCourse
Flat Mobile App Design in Photoshop CC - Weather App
DesignCourse
Create Reflective 3D Text in Blender (Beginner)
DesignCourse
Animating a Logo with Adobe After Effects CC (Beginner)
DesignCourse
Design a Game Website Mockup in Photoshop CC (Part 1)
DesignCourse
Design a Game Website Mockup in Photoshop CC (Part 2)
DesignCourse
Photo Manipulation Tutorial in Photoshop CC (Beginner)
DesignCourse
Advertising Illustration Tutorial in Photoshop CC
DesignCourse
Perspective Warp Tool Tutorial in Photoshop CC
DesignCourse
Free Giveaway Contest. (WiseBanner Banner Maker).
DesignCourse
Design an Animated Loading/Download Icon (GIF)
DesignCourse
Contest Winners (WiseBanner)
DesignCourse
Model & Animate a 3D Push Button in Blender (Beginner)
DesignCourse
Mega Tutorial - iPhone Breathalyzer - Project Introduction
DesignCourse
Part 1 - iPhone Breathalyzer - Blender
DesignCourse
Part 2 - iPhone Breathalyzer - Rendering & GUI Design
DesignCourse
Part 3 - iPhone Breathalyzer - UI Animation in After Effects
DesignCourse
Part 4 - iPhone Breathalyzer - Website Design in Photoshop CC
DesignCourse
Part 5 - iPhone Breathalyzer - HTML Part 1
DesignCourse
Part 6 - iPhone Breathalyzer - HTML/CSS Part 2
DesignCourse
Part 7 - iPhone Breathalyzer - HTML/CSS Part 3
DesignCourse
Part 7 - iPhone Breathalyzer - Finishing Touches
DesignCourse
Square Space Logo Maker - C'mon People.
DesignCourse
Design a Bloody Knife in Photoshop CC
DesignCourse
Typographic Poster Design Tutorial in Illustrator (Part 1)
DesignCourse
Typographic Poster Design Tutorial in Illustrator (Part 2)
DesignCourse
Modern Business Card Design in Illustrator CC (Part 1)
DesignCourse
Modern Business Card Design in Illustrator CC (Part 2)
DesignCourse
Parallax Tutorial using Parallax.JS
DesignCourse
Interview: Andrew Price of BlenderGuru.com
DesignCourse
More on: UI Design
View skill →


Related Reads
📰
📰
📰
📰
I Accidentally Stumbled Into an AI Side Hustle — Here's Everything I've Learned
Dev.to AI
How I Made $700 in 2 Weeks Selling AI Automation Templates
Dev.to AI
MCP Server Tutorial: Build Your Own AI Tools in 30 Minutes
Dev.to · NeuroLink AI
AI didn’t replace the work for me. It moved the stress to a different place.
Reddit r/artificial
🎓
Tutor Explanation
