Animating a Logo with Adobe After Effects CC (Beginner)
Skills:
AI Design Tools80%
http://goo.gl/BBse40 - Design + Code a Professional Android App from Scratch
*
**Join DesignCourse Premium for 1-on-1 Design Training with Me:**
http://goo.gl/NVKYxs
Project Files: http://www.designcourse.com/videos/learn-to-animate-a-logo-in-adobe-after-effects-cc/19
- Learn how to create an attractive logo animation/introduction in this Adobe After Effects CC tutorial. If you've never used After Effects before, this tutorial is perfect for you. I highly suggest learning some basic after effects skills.
Sound file:
http://www.freesound.org/people/victorcenusa/sounds/148785/
Previous Lesson for the Logo Design used in this Video:
http://www.youtube.com/watch?v=bILPAfbH05I&list=UUVyRiMvfUNMA1UPlDPzG5Ow
Follow us:
Facebook: http://www.facebook.com/designcourses
Twitter: http://twitter.com/designcoursecom
Google+: http://plus.google.com/+DesignCourse
- - - - - - - - - - - - - - - - - - - - - -
Subscribe for NEW VIDEOS weekly!
My site: https://designcourse.com
My personal FB account: http://fb.com/logodesigner
Coursetro FB: http://fb.com/coursetro
Coursetro's Twitter: http://twitter.com/designcoursecom
Join my Discord! https://discord.gg/a27CKAF
^-Chat with me and others
- - - - - - - - - - - - - - - - - - - - - -
Who is Gary Simon? Well, I'm a full stack developer with 2+ decades experience and I teach people how to design and code. I've created around 100+ courses for big brands like LinkedIn, Lynda.com, Pluralsight and Envato Network.
Now, I focus all of my time and energy on this channel and my website Coursetro.com.
Come to my discord server or add me on social media and say Hi!
What You'll Learn
Animates a logo with Adobe After Effects CC for beginners
Full Transcript
[Music] All right, hello and welcome. I'm Gary Simon of designcourse.com and today is January 13th with the 13th video of the year. And today we're going to focus on something new, which is going to be Adobe After Effects and we're going to use it to create a logo animation. Now, logo animations are relevant for several different you can use them at the beginning of videos if you ever do any type of video series much like I do. I created the custom designcourse.com logo animation and After Effects. So After Effects is very powerful. If you never used it, this tutorial would be perfect for you to get your feet wet in After Effects. So I as always check out the project files. They are available for free in the description below the video and also check out designcourse.com. Right now there's no courses paid courses up yet, but enter your email and you will be notified. All right, here is a preview of the logo animation we're going to create. [Music] Okay, so let's first open up Adobe Illustrator and download the project files in the link below to get our logo design that we're going to work with. Now this was a logo design we created basically it was on January 3rd, it was the third video and I'm going to link that here for you to check out if you want to first design this logo. Otherwise it's not necessary. It's in the project files already here for you today. So basically this logo design is I in three different groups. So say for example you want a logo or you created a logo and the client or for yourself you want to create an animation maybe an intro to your videos much like I have here on designcourse.com. So basically one way we can do that we can just kind of take apart the logo and then recreate it I through animation in Adobe After Effects. So what we would do is first take this highlight portion. I'm going to just going to move it up here. And then I'm going to take the actual type. We'll move that down here. And so now everything's kind of separated out and we can use Adobe After Effects to basically bring this all together. So what I want to do is separate each one of these into its own file. So I'm going to go to file new. The size really doesn't matter. It could be something large. And then I'm going to take the top portion up here. Control C and then paste it control V. And you know what? I'm going to back up real quick. I want these these to be large. So if I take them all a little bit closer together and bring up the scale just a little bit more. All right, so now I'm going to copy that, paste that in here and then go to file and then export it. And I'm going to save this as highlight and we'll choose PSD and then export. This options portion will come up here. We can just leave that for now. Oops. And we want to do the same thing with this. So we'll take that, copy it delete this, paste it, file export we'll call this stroke. Hit okay. And then finally take the type paste it export and we'll call it type. All right, so now we have our three layers to work with that we're going to import into After Effects. So this is the After Effects interface. It's probably very confusing if you never used it before, but don't worry. All it takes just a little bit of practice here and you'll get familiarized pretty quickly. So for this animation we're not going to do something like really insane, but we're going to do something that's simple but looks good. So basically the first thing we want to do if if you go to file new new project, you're presented with the same screen. Go to composition new composition. Now this is the composition settings dialogue and we can give it a name. I will just call this logo animation. And 1280 by 720 is what I want to use. You have different presets. I'm just going to leave it on the default one right here. And then we have a frame rate. And I'm not going to leave it at that. And then we have the duration. So right here this is the seconds and then this is minutes and this is hours. So I'm just going to leave it at around 15 seconds even though we're not going to quite use that much time. It's going to only going to be about 5 or 6 seconds. All right, so the background color we can specify that here as well. And I'm just going to leave it at that. It doesn't really matter for now. All right, so if I want to scale this down I I can specify fit just to fit it in this current window. Usually my my default resolution is 1900 by 1200, but for this these tutorials I have it scaled down to 1280 by 720. So you know, use whatever fits your screen. So now what we want to do is import those files that we created. So you just right click over here import file and I'm going to go to mine wherever you saved yours. Hold control and just select those three and then hit import. Okay, so now what we want to do is take all three of these and drag them over here. All right, so now we see that it added our three layers right here in the actual timeline area. So they're kind of in the wrong order. So the first thing we want is the stroke. We can drag this to the bottom. The highlight needs to go up top. And we can see that it's not really lined up. So we can use our up arrow key with it selected to get that into the correct position. And that looks pretty good. If I go to 100% we'll see what this looks like. All right, that looks to be lined up pretty evenly. Okay. So I now what we want to do is my idea is to first have the stroke come into play. So the way I can animate the stroke well there's a tons of ways, but if we go over here we go to effects and presets we'll see this screen right here. So basically we have all these options and these are all basically effects that we can drag on to any of these layers and animate them through key frames over here in the timeline. So I want it to kind of it's called a linear wipe. So it basically will take this and just reveal it from left to right. So in the search area we can find that by just typing in what we want. So linear. I the first thing that comes up is the animation presets. These basically are presets that are already key framed to give you certain animation so you don't have to do that work, but I think it's important to do that yourself when you're learning. So we're going to come down here where it says transition and take linear wipe and drag it onto stroke. So now it switches our tab from here from project where it just basically lists all our assets to the effects. So the effects tab basically lists out all the effects that you've currently applied to the selected object layer. So we can see right here there's nothing on these two. But we have linear wipe here. So over here we have these little icon which means to key frame it. So what that means is if we apply a key frame or click on this for example right here and we hit U on our keyboard we'll see this little key frame icon. And if we move this over and as you can see we have 0 1 2 3 4 seconds. I and maybe just put it right around here maybe 1 second. And click over here. This will add a new key frame. We want it to go from basically we want it to end up here. And then we'll take the transition complete and add it to a 100. Okay, so now if we want to go through the animation and actually play it, we hit the zero on our number pad. All right, so first it'll render it and then it will show you exactly what it looks like. So if we take this over here, we pull this basically this is the length of the movie. That's what that looks like. Not very impressive. Now I want it to go from left to right not right to left. So we can change the angle to -90. So now it's going to go from left to right. Now also I kind of want there to be a feather or a fade. I don't want it to be such a hard line right there. So we can increase this. And now that gives us a nice fade. All right, so so far so good. I'm going to drag this key frame in so it'll be a little bit quicker. And then I'm going to take these two and hit control C to copy. Now I'm going to take the type that will be the next thing that will come in right around here. And by the way this right here can allow you to zoom so you can see a little bit more of what you're doing. All right, so we want to do the same thing. So what we can do now that we have those two key frames copied we can paste those. So control V and we'll paste. Now, it didn't copy the angle or the feather. So, we'll adjust those real quick. Now, let's go back here to see what our feather was. 138, so we'll keep that consistent and just apply 138 there. All right. So, that's what that looks like. And now, we're going to do that one more time. Right around there. All right. So, we'll go ahead and control V once again. And we'll make those adjustments. 138 over here and -90 right here. Okay. So, we could see it coming into play there. If I go to 100%, we'll see it a little bit more clearly and we'll hit zero. And that is what it looks like. So, it's not too impressive right now. So, we have a little bit more work to do. So, I'm going to go back to fit here. And I want to create kind of like a radio feather out here. So, I'm going to create a couple of layers here. So, we're going to go to layer, new, solid. So, basically, I want the first solid here the color to be kind of like a gray. Right around there will work. AAA. And we want to drag it beneath. We want it to be the first layer. And now, we want to create a new one. So, we'll go to layer, new, solid. And this time, we're going to make it white. We'll hit okay. Drag that beneath. All right. So, now what we want to do is create a clipping mask. So, we'll take come up here and select the ellipse tool. And then, we'll hold shift and control and scale up. And then, we want to feather this. So, we'll come down here and we see mask feather. All right. So, that's just kind of creates a nice background for it. All right. So, now what I want to do is take these three layers and I want to basically group them or precompose. So, if you're familiar with Photoshop, this is much in the same way as taking three layers and then just grouping them together. So, what we do is go to layer and then select at the bottom. I know it's off screen. You can't see it, but it's at the very bottom and it says precompose. And the precomposed dialogue will come up and you can give it a custom name. We can we can just give it a uh name of logo. And then, hit okay. So, what happens is it names this new precomposition or like a layer group. Uh And it takes everything and sticks it on one single layer and we can also give this animation as a whole. All right. So, if we double-click on it, it brings up a new tab. And this is where all of our individual layers went. All right. So, what I want to do is make this entire precomposition kind of just scale in and up real fast and then down a little bit. So, we can do this through some keyframes on the position or scale, rather. So, what we'll do is come over here to drop this down and we see our scale right here. Um we can also access that through hitting S on the keyboard. So, what we want to do is come up here, I'd say Well, we'll just start at the very beginning and click that for a keyframe and we'll make it zero. So, now it's non-existent, basically. We won't we won't ever see it. All right. So, we just move forward just a little bit cuz we want this to come in fast and we'll type in something like 100 and 10%. Maybe 120. And then, we'll make it taper off slowly. We'll try maybe 100% and we'll drag this up here to 5 seconds. All right. So, let's go ahead and see what that looks like. Hit zero on your number pad for just going to reload it and that's what this looks like. And it will just keep on looping until we click somewhere and stop it. So, we could drag this out just a little bit more just to see how that looks. And you can also adjust how this comes up. Right now, it's a linear in terms of the animation. So, if we select these two keyframes, right-click, go to keyframe assistant, we can do easy ease, easy in out, easy you know, easy ease in or out. So, if we wanted to ease in, you could see it changes the direction or the icons of these to to illustrate that it's going to ease in or out. Okay. So, I think that animation looks a little bit better. Okay. And then, what I want to do is, you know, we can apply a lot more to this if we want. So, we can come over here to the effects and presets. And you know, really, you have the options of there's so many different things in each one of these. It's kind of like the effects filter on um Adobe Photoshop. So, we can go to distort and we can go to play around maybe with uh spherize. So, if we take that, place it on here, by default, the radius is zero, so it doesn't affect the appearance. But, if we go like this, you can kind of see how it affects that. So, if we leave it real high, I have it on 738. And then, give it a keyframe right here. And if we hit U, we can see that keyframe in our timeline. And then, real quickly drop that down. We'll go back down to zero. We'll see what that kind of does to the animation. So, hit zero on your number pad. And if you want that to go a little bit faster, we can just move those in closer. And also, another thing over here, um if you hit F4, it kind of changes the view of the options basically for each object. So, we want to make sure we have the this view right here. This view, we can basically change the blend mode of the object. So, it's just like Photoshop in that way. So, let's go over here and then this is motion blur. So, if we enable this and then enable it up here as well, then, as you seen that I did that, it will automatically blur whatever object it is based on the speed at which it's moving. So, if we hit zero and let it run through, you'll see that it kind of gives it a a nice blur effect there. All right. And consequently, when you do do that, it uh takes a just a tad bit longer to render it out. All right. So, with that done, we can add another one. Just I'm just trying to you know, you obviously you don't want to overdo the animation or add too many things to it, but it's it's worth it's good practice basically if you're new. So, I'm going to add another um effect here and we'll go to color correction and then we'll go to hue and saturation. All right. So, we'll drag this onto there. And this comes up. So, we can see we have all of our different uh effects listed here already. So, this one has a single keyframe that we can adjust and then any of these adjustments that are made, uh it will be animated. So, if I just wanted to change the color real quickly, I'm going to put a keyframe right around here cuz nothing has been adjusted. So, if I click that, and if we hit U, we can see that. And right around here, we'll make some adjustments. So, we have the hue, we could change it from any color. I want it to be kind of like a I want to stay kind of close to it. It'd be kind of like red. And then, you could also play with the saturation and the lightness if you wanted to. So, I'm just basically just tinkering around with those to see how that'll look. We don't want that to happen, I don't think. Uh so, let me go over here to our keyframe. All right. And I was just tinkering around to see All right. And let's go ahead and hit zero to see what this looks like. All right. So, here's the actual All right. That looks okay. Uh I It's kind of really quick. Oh, what happened was I adjusted that right there. Oops. So, if I take this, we'll delete that. Just hit the delete the delete key. Yeah, that's what I That's what I Ultimately I was trying to go for. So, it's just negative negative 15 right here. I was kind of going through all those color modes. All right. So, that that looks better in my opinion. All right. So, just a couple more things I wanted to do. Um we can duplicate this entire pre-composition. So, control D and I want to select the one beneath it. And we're going to hit F4 to go to the blend mode and we'll change it to luminosity. So, if I use my arrow keys, the down arrow key to get this into view, we'll see what happens. Now, I also want to add real quickly uh I brightness and contrast. So, if I add that right here and and I want to come over here take the brightness and just drop that down and the contrast all the way down as well. All right. So, then what I want to do is take the opacity hit T and that gives us opacity and drop that down quite a bit as well around 16%. All right. So, now we can see it kind of follows it, but I don't want it to follow. So, what we have to do is change the uh position and keyframe it. So, to get position, we'll hit P and we basically want them to fall in line with each other initially and then out here extend it prior to where it is now and then bring it back down closer. So we go ahead so I can view more of these layers. All right. So what we'll do is go out here to position at the very end where this stops. So, let's bring up hit U. This is the keyframe where it stops moving. And so, that's where I want to put the keyframe here. And we want them to match. So, I'm going to just hit the up arrow. And right around there looks good. And then right when it gets to its largest point I want to put I want to drag this down a little bit. So, with it selected I'll hold the down arrow right around here and then we'll bring it back up to where it was. So, if we double-click on a keyframe, it'll give us the the properties of it. So I X and Y. So, the Y is 362. That's what we want to remember. And then we'll come out here X and Y 362 and now created that new keyframe. All right. So, now let's go ahead and view what that looks like by hitting zero. All right. All right. There it goes. And I want it to blur as well. So, I mean it's not a necessary thing to add, but we'll just go ahead and add it anyhow. So, what we'll do is come over here. We'll just take just type in blur and this gives us a ton of blurs, but I know what type I want. So, let's get get Gaussian blur and we'll drag it onto this bottom one. And basically, I want it to be most blurry right here. The you know, obviously the further away it is, that's how an actual shadow would work. So, I'm going to click right around here and I'm going to change the blurriness right here amount. Something pretty high. Uh I think 31 would look good and and I'm going to hit U over here. So, we can get our Oh, I don't think I set a keyframe. So there. So, we hit U now the Gaussian blur will show up and then we're going to come over here and just put zero. And then we'll come back here and hit zero as well. Sorry, I had to pause there. My toddler downstairs was like throwing a fit. Hopefully that didn't come through. All right. So, now let's go ahead and hit zero on the number pad to see how this works. So, obviously because we have more layers and they're motion blurred, they will go a little bit slower. So, it's loading loading loading loading and now we'll get to see the actual speed. All right. So, that looks good. Um now what I want to do for one final thing is just go ahead and add some music. So we'll go ahead and stop this and I'm going to bring up the page that has a free sound. And that page is linked in the description of this video. It's right here. I And this is what it sounds like. If we go back here Okay. So uh this will line up pretty well with our animation. So in order to download this, you have to register on their site. It's free, of course. I know it's a pain to register, but I just register, go ahead and then download this file and it's Again, it's linked here in the description. And so, once you have that downloaded we're going to go ahead and import that into the project files here. So, you just right-click and import it. And I just paused it and imported it. I wasn't sure where I had that. So basically, once this is imported, it'll be right here and then you just drag it onto the scene and we'll go ahead and hit zero to see what this sounds like. It's going to first uh load this here into the memory. And we should hear it now. It may not be the uh the best sound for this, but hey, it's free and it kind of works and it goes with it well. And then one last thing if you wanted to kind of add like a tagline or something uh you could do that pretty easy. So, what we'll do is just go over here to this uh the logo pre-composition take the type tool and we'll just click once. Learn design now. And we'll hold shift and scale that in maybe right around there. And we don't want this to show up immediately. So we'll make it show right around there and we'll give it opacity so we'll have it fade in. So, we'll hit T click for a keyframe, change this to zero and then maybe right around here type in 100% and go back out here and we'll run through this again and see what that looks like when it actually fades in. All right. Pretty cool. Um so, hopefully you're able to learn quite a bit if you were new to After Effects. I think it's it's a huge asset to know this as a designer just for being able to create simple animations like this that also look good. Okay. So, as always, check out designcourse.com. I In the future, I may have a paid course for After Effects. I don't yet at the time of recording this video. Um so, just check out designcourse.com right now and check out I If you go there, I and you see an email area to put at the top put in your email and you will get notifications of when I do relate release different courses. Uh so, um as always, check out the social profiles in the description of this video. Like us on Facebook Twitter, Google Plus if you can. It always helps out and I will see you tomorrow. All right. Goodbye. [Music]
Watch on YouTube ↗
(saves to browser)
Sign in to unlock AI tutor explanation · ⚡30
Playlist
Uploads from DesignCourse · DesignCourse · 34 of 60
1
 2
2
 3
3
 4
4
 5
5
 6
6
 7
7
 8
8
 9
9
 10
10
 11
11
 12
12
 13
13
 14
14
 15
15
 16
16
 17
17
 18
18
 19
19
 20
20
 21
21
 22
22
 23
23
 24
24
 25
25
 26
26
 27
27
 28
28
 29
29
 30
30
 31
31
 32
32
 33
33
 ▶
▶
 35
35
 36
36
 37
37
 38
38
 39
39
 40
40
 41
41
 42
42
 43
43
 44
44
 45
45
 46
46
 47
47
 48
48
 49
49
 50
50
 51
51
 52
52
 53
53
 54
54
 55
55
 56
56
 57
57
 58
58
 59
59
 60
60

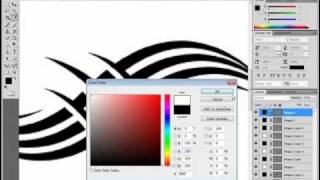
Photoshop Pen Tool Tutorial (Tattoo Design)
DesignCourse
How to Design the Microsoft Logo in Photoshop
DesignCourse
Photoshop Gradients Video Tutorial
DesignCourse
Your Guide to Layer Styles
DesignCourse
Layer Masks in Photoshop
DesignCourse
iOS App Icon Design Tutorial in Illustrator CS6
DesignCourse
Illustrator CS6 Logo Design Tutorial - Archfold
DesignCourse
Photoshop CS6 3D Tutorial - Magic Tent Illustration
DesignCourse
How to Design a Tshirt Tutorial - Adobe Illustrator
DesignCourse
Types of Logos - Lettermark & Monogram Logo Type
DesignCourse
Banner Design in Photoshop CS6
DesignCourse
How to Design a Logo in Illustrator CC
DesignCourse
Designing a Logo in Photoshop CC
DesignCourse
1. Launch & Market a Web Based Business - Introduction
DesignCourse
2. Launch & Market a Web Based Business - Logo Design
DesignCourse
3. Home Page Mockup in PS : Part 1
DesignCourse
4. Home Page Mockup in PS : Part 2
DesignCourse
5. Home Page Mockup in PS : Part 3
DesignCourse
6. Home Page Mockup in PS : Part 4
DesignCourse
7. Home Page HTML & CSS - Part 1
DesignCourse
8. Home Page HTML & CSS - Part 2
DesignCourse
Using Photoshop to Showcase Mobile Projects
DesignCourse
Flat Icon Design Tutorial in Illustrator CC
DesignCourse
Illustrator CC Logo Design Tutorial - A Logo That "Pops"!
DesignCourse
Logo Design Follow Along 1: Emblem Logo Design
DesignCourse
Showcasing Logos in 3D with Blender
DesignCourse
How to Design an Effective Lettermark Logo
DesignCourse
Squeeze Page Design Tutorial in Photoshop (Part 1)
DesignCourse
Squeeze Page Design Tutorial in Photoshop (Part 2)
DesignCourse
Mobile GUI Element Design in Adobe Photoshop CC (Part 1)
DesignCourse
Mobile GUI Element Design in Adobe Photoshop CC (Part 2)
DesignCourse
Flat Mobile App Design in Photoshop CC - Weather App
DesignCourse
Create Reflective 3D Text in Blender (Beginner)
DesignCourse
Animating a Logo with Adobe After Effects CC (Beginner)
DesignCourse
Design a Game Website Mockup in Photoshop CC (Part 1)
DesignCourse
Design a Game Website Mockup in Photoshop CC (Part 2)
DesignCourse
Photo Manipulation Tutorial in Photoshop CC (Beginner)
DesignCourse
Advertising Illustration Tutorial in Photoshop CC
DesignCourse
Perspective Warp Tool Tutorial in Photoshop CC
DesignCourse
Free Giveaway Contest. (WiseBanner Banner Maker).
DesignCourse
Design an Animated Loading/Download Icon (GIF)
DesignCourse
Contest Winners (WiseBanner)
DesignCourse
Model & Animate a 3D Push Button in Blender (Beginner)
DesignCourse
Mega Tutorial - iPhone Breathalyzer - Project Introduction
DesignCourse
Part 1 - iPhone Breathalyzer - Blender
DesignCourse
Part 2 - iPhone Breathalyzer - Rendering & GUI Design
DesignCourse
Part 3 - iPhone Breathalyzer - UI Animation in After Effects
DesignCourse
Part 4 - iPhone Breathalyzer - Website Design in Photoshop CC
DesignCourse
Part 5 - iPhone Breathalyzer - HTML Part 1
DesignCourse
Part 6 - iPhone Breathalyzer - HTML/CSS Part 2
DesignCourse
Part 7 - iPhone Breathalyzer - HTML/CSS Part 3
DesignCourse
Part 7 - iPhone Breathalyzer - Finishing Touches
DesignCourse
Square Space Logo Maker - C'mon People.
DesignCourse
Design a Bloody Knife in Photoshop CC
DesignCourse
Typographic Poster Design Tutorial in Illustrator (Part 1)
DesignCourse
Typographic Poster Design Tutorial in Illustrator (Part 2)
DesignCourse
Modern Business Card Design in Illustrator CC (Part 1)
DesignCourse
Modern Business Card Design in Illustrator CC (Part 2)
DesignCourse
Parallax Tutorial using Parallax.JS
DesignCourse
Interview: Andrew Price of BlenderGuru.com
DesignCourse
More on: AI Design Tools
View skill →


![How to Make Youtube Thumbnail in Inkscape [2026 Full Guide]](https://img.youtube.com/vi/Ju-qqAqvRxk/mqdefault.jpg)

Related AI Lessons
🎓
Tutor Explanation