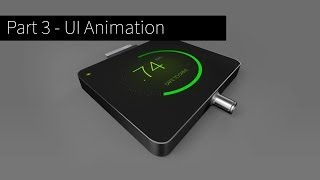
Part 2 - iPhone Breathalyzer - Rendering & GUI Design
Key Takeaways
Makes adjustments to the textures, creates a few renders, and designs a GUI for the iPhone Breathalyzer in Photoshop
Full Transcript
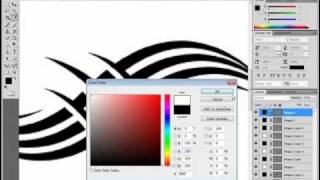
[Music] hello Gary Simon of design course calm today is Jerry 25th or 25th video of the year and we're going to continue on with our iPhone breathalyzer by creating a few renders in blender and then we're going to take those into Photoshop and design user interface that's going to be animated in after effects so as always visit design course calm see what's going on there and also subscribe here on YouTube and of course the project files are available for free in the description below this video alright let's get started alright so this was the last view from yesterday I want to make some adjustments real quick so we're going to separate the top of this from this bottom so what we're do is go to solid hit five to go back into or thumb graphic mode and we'll hit one to get a side view and we will select this object hit tab to go into edit mode we can see this kind of like a slight you know like a bevel up here we don't select those ones so we're going to hit be ok well hit a first make sure nothing selected hit be and just right up there we'll select those and then we'll go ahead and hit p to separate that so now that if we go back here is its own object right here ok now what we want to do is select this portion we're going to click this little plus sign to create a new material we're going to change it from mixed shader right down to their it's going to render to see how this looks now has more texture it looks better in my opinion so we'll right-click the top portion and we can just make that a little bit darker come around here now this one I remember it was separated and kind of looks cool but now we'll make sure it has the same material so if we select this and then over here click on this down I think there's a last one that we created now that is the correct color now I want to make an adjustment here too you know what we have going on for roughness you can turn that up a bit okay and yeah that looks good okay so now that we're going to consider this basically ready to go for renders so to get your rendering ready I'm going to hit five here we want to set up a camera so hit zero on your number pad and go to view properties lock camera to view that's something I do every single time I'll learn that from a different dude through tutorials and now we can basically position what we want in view or how we want it to be viewed let me just go up here I'm going to hit zero to get back into user perspective mode i'm going to right click on these two go two solid pull them up and kind of out of the way alright so zero to go back to our view and hit rendered and i'm going to leave it right there alright so now we're going to redeye to the render panel and i want to select i'm going to change a couple things here for 1920 x 1080 we're going to leave that there but change 52 all the way to honor basically what that means is if you left at a 1920 x 1080 it only do fifty percent of that resolution so you want it to go hundred and let me come down here for render i'm going to choose 1200 and i think everything else is good to go so i'm going to go ahead and hit that wait i forgot about something i want to click on this object let's make sure it's selected okay go back to rendered and i'm going to go back to their our object modifier for the subdivisions i want to turn this up to four well maybe not the view we don't need that but for the render we want it to be four ok so I'm going to click on render and this will take a little oh no I wanted to change the tile size so to do that escaped twice down here under performance I'm going to change this to 256 and this works well if you have a GP if you're processing with the graphics card so alright so now it's going to change the style size to be a bigger so I'm going to pause this until it's done ok so now that it's rendered I'm going to going to hit f3 now i'm going to save this as phone perspective view jpg and you can set the file types down here one hundred percent save and once that saves our jars being slow alright so now i want to get out the next view hit escape and we're going to do a side view so i'm going to hit let's see three is a front view one is the side and i'm just going to slightly change the view here actually we'll just do this I'm going to right-click in it s5 one second let me go into solid mode that's five again I don't base achill II want this to go all the way so let's go back into rendered here I think that's pretty good just for now I'm going to hit zero though to get out wanna see about something I'm going to select that and playing around with these a little bit I'm going to take another light real quick I'm going to duplicate it and on X and then come over here and then hit G well now we could just take it over here r z come move around I'd are again all right so just kind of so it's facing that I'm going to see if that affected anything needed a little bit lighter over here i'm going to right click on this yeah that's fine right there I think all right so I another thing i'm going to do is right click on yeah we're and three this will render smoother because we change out the for all right so let's go back to our camera view and i'm going to render this view right here so let's go back to render and hit render i'll pause this and I will unpause prematurely because I want to push everything down or rather bring the plane up so go ahead scape I'm go to solid view select on our plane and temporarily just right there all right let's go back to rendered here all right now I'm going to hit render see you at that edge okay that looks much better alright so I'll pause it here and you guys are going to kill me again cuz I'm playing I made a mistake over there I'm gonna hit escape to select this I forgot this is not a part of that so we have to go back here sorry about that change at the four I am an idiot okay render again maybe the third time you know we'll get lucky here pause okay so I'm going to save that f3 phone why do you keep on call on the phone it's on phone oh well phone side view and make sure jpg is down here save and then we're going to get a top view on the escape we're going to hit seven let's see here yeah keep doing that to myself I have to go back and review and do this there you go now because our resolution is big I kind of wanted to make sure that yeah this is there's a lot of space around here and you'll kind of realize once we get to after effects we want a lot of room so we can kind of scale in slightly all right so let me hit rendered view okay I'm going to go with that i'll hit render pause all right I there's a an issue here you can see everything has this I think it's called Nancy otro pic or whatever I'm kind of like a radial gradient thing it has it on this and this and that doesn't look quite correct and I know are typically on oops a actual like this metal part I know it doesn't really have that on a an actual you know if you were to hold on your hand I but for this one right here I kind of want to change that just for this view we're not going to have any other views so I'm going to hit escape out of there and I'm just going to zoom up here and i'm going to right click it to make sure it's selected and a way to fix that is let's go back to rendered is to go to a mixer add diffuse and then add that right there and let's take these down a notch terms of color and then you can kind of push it towards point 28 and take that down a little bit now it looks better I think they look better for our final render all right right there render and pause ok hit f3 and save this phone I'm not a phone will do top view and take this to jpg save ok so now I've switched to photoshop and I've opened up those three images so basically I want to get an idea of you know what this interface will look like for our animation so I'd zoom up just to right around here and also you can notice like kind of looks like I don't know like there's a its kind of beveled right here so if you wanted to go back into Photoshop you could adjust that by flattening it that down or removing the inner edges and then filling it back then but I'm not going to really do that and that work too worried at this point so what I'm going to do is just get a rough idea of what we want the interface to kind of look like and then we'll take that and kind of recreate it and after effects so I right off the bat I'm gonna hit can let me zoom out real quick oops I'm going to take everything ctrl a ctrl C and then just well wait one second file new layer and I'm just going to paste it in here and let me zoom out one more time hit ctrl T there I didn't have a perfect angle on that one issue that just realized you know this because we change this it's not going to look like or is that yeah it's actually pretty close it's not a big deal alright so the interface that what basically i wanted to do is have we're gonna have like a little like a power icon or a status icon right here so i'm going to hold shift and drag out right around there and ctrl h twice get rid of that view and then just come over here to the direct selection tool take the fill make it a gradient make it radial actually you know what a bunch quicker way of doing this let me delete that I'm going to take the paintbrush you know right around there we'll make this a green color okay all right just like that that's fine and then I want to have like a circular like percentage radio bar type thing so what we'll do is go ahead and take the ellipse tool hold shift and it will be roughly this size will get rid of the fill their changes this now right around there roughly all right and click out of there and then we can create a new layer ctrl shift n use a clipping mask take the pen tool make sure shape is selected make this black hold shift and create two points right here in the middle come down and connect it ctrl H and then in the middle point 74 ctrl T and i'm using source sans pro it's available for free use Google to find that we're going to just do this all right and I want to make this a little bit closer those so we go to our or we can go over here just go to may be 0 or maybe negative 25 that's better and we will duplicate this a text control Andy scale this down ctrl t hold shift alright so i can move till it apply BAC as in blood alcohol content oh i didn't get rid of that period ctrl T will make this a little bit smaller apply and maybe we'll change it from extra light to light change this to a bluish color it around there and then I think we'll go ahead down here yeah we'll go ahead and type good to drive scale it down take this color actually I don't like that blue color doesn't doesn't fit so just make it white so the idea is to have this animate once we have in after effects to this point and then do a red variation as well alright so now that we have our image is saved we have an idea of what we want the interface to look like I tomorrow we can go into After Effects and then recreate this and make it look really cool and animate it and then after that of course will deal with the web design all right so I'm Gary assignment now I'll see you tomorrow also as always out sometimes I forget to say this please check out design course com if you like this tutorial subscribe to the channel and we're going to be having paid courses for a variety of topics shortly and they may be up depending on when you're watching this so check out design course com alright goodbye [Music] you
Original Description
http://goo.gl/BBse40 - Design + Code a Professional Android App from Scratch
http://www.designcourse.com - We'll make some adjustments to the textures, create a few renders, and then design a GUI for the breathalyzer in Photoshop.
Follow us:
Facebook: http://www.facebook.com/designcourses
Twitter: http://twitter.com/designcoursecom
Google+: http://plus.google.com/+DesignCourse
Dribbble: http://dribbble.com/designcourse
- - - - - - - - - - - - - - - - - - - - - -
Subscribe for NEW VIDEOS weekly!
My site: https://designcourse.com
My personal FB account: http://fb.com/logodesigner
Coursetro FB: http://fb.com/coursetro
Coursetro's Twitter: http://twitter.com/designcoursecom
Join my Discord! https://discord.gg/a27CKAF
^-Chat with me and others
- - - - - - - - - - - - - - - - - - - - - -
Who is Gary Simon? Well, I'm a full stack developer with 2+ decades experience and I teach people how to design and code. I've created around 100+ courses for big brands like LinkedIn, Lynda.com, Pluralsight and Envato Network.
Now, I focus all of my time and energy on this channel and my website Coursetro.com.
Come to my discord server or add me on social media and say Hi!
Watch on YouTube ↗
(saves to browser)
Sign in to unlock AI tutor explanation · ⚡30
Playlist
Uploads from DesignCourse · DesignCourse · 46 of 60
1
 2
2
 3
3
 4
4
 5
5
 6
6
 7
7
 8
8
 9
9
 10
10
 11
11
 12
12
 13
13
 14
14
 15
15
 16
16
 17
17
 18
18
 19
19
 20
20
 21
21
 22
22
 23
23
 24
24
 25
25
 26
26
 27
27
 28
28
 29
29
 30
30
 31
31
 32
32
 33
33
 34
34
 35
35
 36
36
 37
37
 38
38
 39
39
 40
40
 41
41
 42
42
 43
43
 44
44
 45
45
 ▶
▶
 47
47
 48
48
 49
49
 50
50
 51
51
 52
52
 53
53
 54
54
 55
55
 56
56
 57
57
 58
58
 59
59
 60
60

Photoshop Pen Tool Tutorial (Tattoo Design)
DesignCourse
How to Design the Microsoft Logo in Photoshop
DesignCourse
Photoshop Gradients Video Tutorial
DesignCourse
Your Guide to Layer Styles
DesignCourse
Layer Masks in Photoshop
DesignCourse
iOS App Icon Design Tutorial in Illustrator CS6
DesignCourse
Illustrator CS6 Logo Design Tutorial - Archfold
DesignCourse
Photoshop CS6 3D Tutorial - Magic Tent Illustration
DesignCourse
How to Design a Tshirt Tutorial - Adobe Illustrator
DesignCourse
Types of Logos - Lettermark & Monogram Logo Type
DesignCourse
Banner Design in Photoshop CS6
DesignCourse
How to Design a Logo in Illustrator CC
DesignCourse
Designing a Logo in Photoshop CC
DesignCourse
1. Launch & Market a Web Based Business - Introduction
DesignCourse
2. Launch & Market a Web Based Business - Logo Design
DesignCourse
3. Home Page Mockup in PS : Part 1
DesignCourse
4. Home Page Mockup in PS : Part 2
DesignCourse
5. Home Page Mockup in PS : Part 3
DesignCourse
6. Home Page Mockup in PS : Part 4
DesignCourse
7. Home Page HTML & CSS - Part 1
DesignCourse
8. Home Page HTML & CSS - Part 2
DesignCourse
Using Photoshop to Showcase Mobile Projects
DesignCourse
Flat Icon Design Tutorial in Illustrator CC
DesignCourse
Illustrator CC Logo Design Tutorial - A Logo That "Pops"!
DesignCourse
Logo Design Follow Along 1: Emblem Logo Design
DesignCourse
Showcasing Logos in 3D with Blender
DesignCourse
How to Design an Effective Lettermark Logo
DesignCourse
Squeeze Page Design Tutorial in Photoshop (Part 1)
DesignCourse
Squeeze Page Design Tutorial in Photoshop (Part 2)
DesignCourse
Mobile GUI Element Design in Adobe Photoshop CC (Part 1)
DesignCourse
Mobile GUI Element Design in Adobe Photoshop CC (Part 2)
DesignCourse
Flat Mobile App Design in Photoshop CC - Weather App
DesignCourse
Create Reflective 3D Text in Blender (Beginner)
DesignCourse
Animating a Logo with Adobe After Effects CC (Beginner)
DesignCourse
Design a Game Website Mockup in Photoshop CC (Part 1)
DesignCourse
Design a Game Website Mockup in Photoshop CC (Part 2)
DesignCourse
Photo Manipulation Tutorial in Photoshop CC (Beginner)
DesignCourse
Advertising Illustration Tutorial in Photoshop CC
DesignCourse
Perspective Warp Tool Tutorial in Photoshop CC
DesignCourse
Free Giveaway Contest. (WiseBanner Banner Maker).
DesignCourse
Design an Animated Loading/Download Icon (GIF)
DesignCourse
Contest Winners (WiseBanner)
DesignCourse
Model & Animate a 3D Push Button in Blender (Beginner)
DesignCourse
Mega Tutorial - iPhone Breathalyzer - Project Introduction
DesignCourse
Part 1 - iPhone Breathalyzer - Blender
DesignCourse
Part 2 - iPhone Breathalyzer - Rendering & GUI Design
DesignCourse
Part 3 - iPhone Breathalyzer - UI Animation in After Effects
DesignCourse
Part 4 - iPhone Breathalyzer - Website Design in Photoshop CC
DesignCourse
Part 5 - iPhone Breathalyzer - HTML Part 1
DesignCourse
Part 6 - iPhone Breathalyzer - HTML/CSS Part 2
DesignCourse
Part 7 - iPhone Breathalyzer - HTML/CSS Part 3
DesignCourse
Part 7 - iPhone Breathalyzer - Finishing Touches
DesignCourse
Square Space Logo Maker - C'mon People.
DesignCourse
Design a Bloody Knife in Photoshop CC
DesignCourse
Typographic Poster Design Tutorial in Illustrator (Part 1)
DesignCourse
Typographic Poster Design Tutorial in Illustrator (Part 2)
DesignCourse
Modern Business Card Design in Illustrator CC (Part 1)
DesignCourse
Modern Business Card Design in Illustrator CC (Part 2)
DesignCourse
Parallax Tutorial using Parallax.JS
DesignCourse
Interview: Andrew Price of BlenderGuru.com
DesignCourse
🎓
Tutor Explanation