Design a Game Website Mockup in Photoshop CC (Part 2)
Skills:
UI Design90%
http://goo.gl/BBse40 - Design + Code a Professional Android App from Scratch
Project Files: http://www.designcourse.com/videos/gaming-website-design-in-adobe-photoshop-cc-part-2/21
- In this tutorial, we'll finish up designing the game website from the previous tutorial released yesterday. And yes, I'm speeding through this one!
Blood spatter brushes:
http://www.brusheezy.com/brushes/1290-13-blood-and-splatter-brushes
Follow us:
Facebook: http://www.facebook.com/designcourses
Twitter: http://twitter.com/designcoursecom
Google+: http://plus.google.com/+DesignCourse
- - - - - - - - - - - - - - - - - - - - - -
Subscribe for NEW VIDEOS weekly!
My site: https://designcourse.com
My personal FB account: http://fb.com/logodesigner
Coursetro FB: http://fb.com/coursetro
Coursetro's Twitter: http://twitter.com/designcoursecom
Join my Discord! https://discord.gg/a27CKAF
^-Chat with me and others
- - - - - - - - - - - - - - - - - - - - - -
Who is Gary Simon? Well, I'm a full stack developer with 2+ decades experience and I teach people how to design and code. I've created around 100+ courses for big brands like LinkedIn, Lynda.com, Pluralsight and Envato Network.
Now, I focus all of my time and energy on this channel and my website Coursetro.com.
Come to my discord server or add me on social media and say Hi!
What You'll Learn
Finishes designing a game website mockup in Photoshop CC
Full Transcript
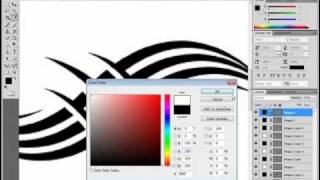
[Music] hello my name is Gary Simon of designc course.com and today is January 15th with our 15th video of the year and today we're going to continue on with the from the previous lesson from yesterday with creating the game layout interface in Adobe Photoshop CC all right so as always visit designc course.com and put in your email uh to get notified of future released courses and also the project files for today are available for free in the description below this video all right let's get started okay so I first just to preface this I'm going to have to speed through this as fast as possible right now it's 7:54 p.m. eastern time and that means I have very little time to get this done plus I have the wife wanting to get a shower and our toddlers you know know they're just going crazy because they're tired but I told them listen I have to do this this is a video every day of the year I got to get it done I can't miss a day so I'm going to be going quick through this unfortunately but you know what you'll just have to pause and uh move along as I do if you want to follow along exactly that is life so uh I'm going to make some adjustments to this uh and this is something that happens routinely in the course of Designing a website throughout several days you may look at something and say you know what I want to change this uh or you may have a better idea so that was the case for me today so I what I want to do off the bat is kind of just take this layer one right or the rectangle one which is the container for this layer mask right here for this building and hit control t hold shift just scale down well you don't even have to hold shift really but we're going to uh shift it all the way down and of course there's a helicopter outside so it's probably really loud but oh well uh just to the bottom of that image yeah you know what we're going to go further maybe around there and we're going to also take Auto Select layer make sure that's selected with the move tool and move this down a bit we want this to go down a decent amount all right so then I now what I want to do is go ahead and I'm going to take up uh pull up this website this is linked in the description of this video in the bottom here of YouTube if you're watching on YouTube if you're not make sure you are and that way you can get to this link uh and these are blood spatter brushes and they're free and if you just go to Google and type this in you'll get a ton of you know free blood spatter brushes for Photoshop or whatever you'll see there's a lot to choose from so it's not really important which you choose from just just so you get some that work and just download it and then if you have a later version of Adobe Photoshop you just double click on your extracted uh brush file and it will Lo load automatically into Photoshop so to access that all we have to do is take our brush and we can I click the down aror here and we'll see all of these brushes that are added and there's a ton of them by default Photoshop has you know these brushes right here uh and then anything that you load externally is just loaded beneath that so these are blood spatter brushes right here before I get to that I want to move some things around so I want to move the skull down a bit so if I just select on this right side it gives a skull right we'll hold control select uh these two layers here and then also the circles and wire as well and we'll just move these down right around here and then if we just click over here to select these uh ellipses and select those three deselect Auto Select layer that way you can click anywhere without it selecting it and just hold shift and bring it down I'd say right to around there all right so now just above layer one that I have labeled hit control shift end bring up a new layer hit okay or enter and now we want to get our blood spatter brush okay so I'm just going to choose one of these I I want to choose one that will work well I'm not sure which one I'm going to choose so we'll just have to see how we choose it and these are large 1250 PX so if we go over here this is a real large brush so I'm going to scale down I'm going to just put in 800 by default H enter and then choose and just click right there make sure you have a red color all right so that kind of looks cool um you know what I'm going to undo that let me go back and try to find something else obviously you can see I have quite a bit here I'll try that that's 1250 as well so I'm just going to put 800 now what I want to do is go to edit transform and flip horizontal and then take the move tool maybe go like right around there okay that's cool all right so now what I want to do is we're going to move this stuff around just a tad bit over here so I'm going to take the move tool with Auto Select layer applied we're going to take Play Skull Wars now we're also going to take and hold shift uh that layer and then hold control and select those two layers and we'll drag all those down right around there and then I want to take the bottom layer and this is the one that's actually orange and I'm going to change the color to a red right around there will work so that's CC o eoe hit okay and the black uh text there's not enough contrast I'm going actually want to make it white so I'm going to select our allout action layer right click copy layer style and then click back to it it right click past layer style and I'm going to zoom up just so we can get to 100% here and then I'm going to take uh just underneath this layer right here I'm going to select this layer hit control shift n for a new layer take our brush again and we're going to choose a different brush so I want to some blood to kind of just show around the button here now you don't want to use the same one to look a little bit too repetitive is that that's not the same one okay cool all right now oops now I'm going to zoom out here that looks good now I'm going to take our text up here oops take these two take them down and I'm going to add some more text to this portion so I'm just going to zoom up so it'll be it be like three more lines so I rip apart your enemies solely through decapitation and yes I'm I'm messed up so I came up with this silly uh description here of this game with only your hands no weapons allowed and then I'm going to take this right here I'm going to bold that and okay right click we'll zoom out all right so far so good uh now what I want to do just beneath here um first I'm going to select on the background layer we're going to make this all black and then just fill that in with the paint bucket tool and I'm going to take the Eraser all right so we're at 332 for the size we want to select the building image and and just kind of get rid of and fade that off okay same thing over here because we dropped that image down a little bit all right and then down here I I'm just going to have a three different video thumbnails that a person could click on just to view content of the actual game so obviously for a game the first thing person who' be interested in want to see is actual gameplay footage so we're going to bring up a grid and since we're going to have three of these we want these to span the width of four columns because this is a 12 grid uh 12 column grid so we'll go ahead and take our rectangle tool and hold uh alt just to scale out just to around here hit controll H twice to get rid of everything and and get rid of the grid I'll drop this beneath there or maybe at the top and can't really see it so we could change the color slightly and now what I want to do is obviously in the context of actually developing this website or designing it for a real game they would provide you with screenshots you would have that but we don't so what I'm going to do is open up the project file the of this Warehouse from the previous lesson so assuming you've watched that first lesson go ahead and open up the warehouse image from the the project file so I've gone ahead and done that so hitr A contrl C close that out and with this this uh rectangle selected hit uh control shift and N use previous layer to create clipping mask hit okay control V to paste contrl T to transform this or scale it down and hit shift and ALT and just scale this thing down a lot maybe around here so this will be one image of the game and then we will create a real quick play icon on top of this so somewhere in the center with the ellipse tool selected we'll hold shift scale up Center it with your arrow keys if you need to and then the actual play Arrow I'm just going to real quick try to eyeball this and that's not right so we can use our arrow keys and we will change the color by double clicking over here on the layer and changing that to White and that's obviously incorrect so we can take the direct selection tool and adjust this as needed all right that looks pretty decent now we can take the bottom layer right here the black circle take the opacity down just a little bit just around 63 and we can give these names if we wanted to so I can go ahead and take both of those layers and these basically all four of these layers drop it down just a little it we could take this all out action text we'll duplicate that just so we have the um the layer star already applied control T scale that down we can give each one of these its own sort of caption and I'll call this one um I don't know catacombs action you know whatever and change this to let's try 20 we'll move that into place right around there get rid of that get our grid back and we want to um well before we get the grid let's take all these layers so we got the text layer we got this layer which is the actual image then we got the layer beneath that acts as a clipping mask and hit contrl G and we'll group those and we'll call this video all right so now we'll get the grid out right click video duplicate the group I'm sorry I have to go so fast but I got a warning from my wife I'm such a h pansy all right and then duplicate it one more time over here and get that lined up correctly and there we go okay so if you wanted to make this look different you know whatever purpose this isn't real obviously maybe I'll move this up and down move this one over here okay now they actually look somewhat different for the thumbnails and that is basically it I'm going to stop there of course you can have different things down here or maybe a little bit more but you know I looked at a couple different current games like Battlefield 4 their website they they keep their landing pages that sell the game pretty minimal uh and they let the content and the videos do the speaking for themselves so I I'm going to end it there and so hopefully I can be excused about how quickly I rushed this wanted to get the video done uh so yeah uh tomorrow we're going to tackle something quite different I I know this is only our 15th video today's January 15th I but I'm going to tackle something different we're going to work with a little bit of an introductory to photo manipulation and so I got that project done and it looks really cool so hopefully you know if you're a front-end guy or you're only interested in in website design or front end or you're only interest in visual identity uh hopefully you just keep your mind open and you try to learn something new um and so that's what tomorrow will be all right so I I'm Gary Simon check out designcourse outcom and and also as always I please subscribe to the YouTube channel if you haven't yet and also check out the social media profiles that are linked in the description as well all right I will see Tom all [Music]
Watch on YouTube ↗
(saves to browser)
Sign in to unlock AI tutor explanation · ⚡30
Playlist
Uploads from DesignCourse · DesignCourse · 36 of 60
1
 2
2
 3
3
 4
4
 5
5
 6
6
 7
7
 8
8
 9
9
 10
10
 11
11
 12
12
 13
13
 14
14
 15
15
 16
16
 17
17
 18
18
 19
19
 20
20
 21
21
 22
22
 23
23
 24
24
 25
25
 26
26
 27
27
 28
28
 29
29
 30
30
 31
31
 32
32
 33
33
 34
34
 35
35
 ▶
▶
 37
37
 38
38
 39
39
 40
40
 41
41
 42
42
 43
43
 44
44
 45
45
 46
46
 47
47
 48
48
 49
49
 50
50
 51
51
 52
52
 53
53
 54
54
 55
55
 56
56
 57
57
 58
58
 59
59
 60
60

Photoshop Pen Tool Tutorial (Tattoo Design)
DesignCourse
How to Design the Microsoft Logo in Photoshop
DesignCourse
Photoshop Gradients Video Tutorial
DesignCourse
Your Guide to Layer Styles
DesignCourse
Layer Masks in Photoshop
DesignCourse
iOS App Icon Design Tutorial in Illustrator CS6
DesignCourse
Illustrator CS6 Logo Design Tutorial - Archfold
DesignCourse
Photoshop CS6 3D Tutorial - Magic Tent Illustration
DesignCourse
How to Design a Tshirt Tutorial - Adobe Illustrator
DesignCourse
Types of Logos - Lettermark & Monogram Logo Type
DesignCourse
Banner Design in Photoshop CS6
DesignCourse
How to Design a Logo in Illustrator CC
DesignCourse
Designing a Logo in Photoshop CC
DesignCourse
1. Launch & Market a Web Based Business - Introduction
DesignCourse
2. Launch & Market a Web Based Business - Logo Design
DesignCourse
3. Home Page Mockup in PS : Part 1
DesignCourse
4. Home Page Mockup in PS : Part 2
DesignCourse
5. Home Page Mockup in PS : Part 3
DesignCourse
6. Home Page Mockup in PS : Part 4
DesignCourse
7. Home Page HTML & CSS - Part 1
DesignCourse
8. Home Page HTML & CSS - Part 2
DesignCourse
Using Photoshop to Showcase Mobile Projects
DesignCourse
Flat Icon Design Tutorial in Illustrator CC
DesignCourse
Illustrator CC Logo Design Tutorial - A Logo That "Pops"!
DesignCourse
Logo Design Follow Along 1: Emblem Logo Design
DesignCourse
Showcasing Logos in 3D with Blender
DesignCourse
How to Design an Effective Lettermark Logo
DesignCourse
Squeeze Page Design Tutorial in Photoshop (Part 1)
DesignCourse
Squeeze Page Design Tutorial in Photoshop (Part 2)
DesignCourse
Mobile GUI Element Design in Adobe Photoshop CC (Part 1)
DesignCourse
Mobile GUI Element Design in Adobe Photoshop CC (Part 2)
DesignCourse
Flat Mobile App Design in Photoshop CC - Weather App
DesignCourse
Create Reflective 3D Text in Blender (Beginner)
DesignCourse
Animating a Logo with Adobe After Effects CC (Beginner)
DesignCourse
Design a Game Website Mockup in Photoshop CC (Part 1)
DesignCourse
Design a Game Website Mockup in Photoshop CC (Part 2)
DesignCourse
Photo Manipulation Tutorial in Photoshop CC (Beginner)
DesignCourse
Advertising Illustration Tutorial in Photoshop CC
DesignCourse
Perspective Warp Tool Tutorial in Photoshop CC
DesignCourse
Free Giveaway Contest. (WiseBanner Banner Maker).
DesignCourse
Design an Animated Loading/Download Icon (GIF)
DesignCourse
Contest Winners (WiseBanner)
DesignCourse
Model & Animate a 3D Push Button in Blender (Beginner)
DesignCourse
Mega Tutorial - iPhone Breathalyzer - Project Introduction
DesignCourse
Part 1 - iPhone Breathalyzer - Blender
DesignCourse
Part 2 - iPhone Breathalyzer - Rendering & GUI Design
DesignCourse
Part 3 - iPhone Breathalyzer - UI Animation in After Effects
DesignCourse
Part 4 - iPhone Breathalyzer - Website Design in Photoshop CC
DesignCourse
Part 5 - iPhone Breathalyzer - HTML Part 1
DesignCourse
Part 6 - iPhone Breathalyzer - HTML/CSS Part 2
DesignCourse
Part 7 - iPhone Breathalyzer - HTML/CSS Part 3
DesignCourse
Part 7 - iPhone Breathalyzer - Finishing Touches
DesignCourse
Square Space Logo Maker - C'mon People.
DesignCourse
Design a Bloody Knife in Photoshop CC
DesignCourse
Typographic Poster Design Tutorial in Illustrator (Part 1)
DesignCourse
Typographic Poster Design Tutorial in Illustrator (Part 2)
DesignCourse
Modern Business Card Design in Illustrator CC (Part 1)
DesignCourse
Modern Business Card Design in Illustrator CC (Part 2)
DesignCourse
Parallax Tutorial using Parallax.JS
DesignCourse
Interview: Andrew Price of BlenderGuru.com
DesignCourse
More on: UI Design
View skill →


Related AI Lessons
⚡
⚡
⚡
⚡
Japan Gave the World Robots, Bullet Trains, and PlayStation. So Why Is It Losing the AI Race?
Medium · AI
Japan Gave the World Robots, Bullet Trains, and PlayStation. So Why Is It Losing the AI Race?
Medium · LLM
Boardroom Priority : Why Data Trust Is Now a Leadership Metric for AI-Ready Enterprises
Medium · AI
AI Glossary I Wish I Had When I Started
Medium · Programming
🎓
Tutor Explanation