Mega Tutorial - Every Vote Counts - Part 4
Skills:
UI Design70%
Key Takeaways
Designs a ballot box in Photoshop and sets up a scene in Blender
Full Transcript
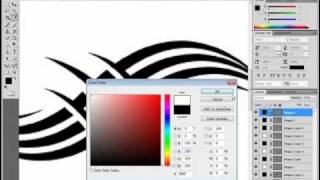
hello gear salmon of design course calm today we're going to add the details to the ballot box and we're also going to set up the scene and work a little bit more on other various aspects of the poster design all right so check out design course calm if you haven't yet in subscribe here on YouTube alright let's get started alright so this is where we left off from yesterday's tutorial and we focus solely on this ballot box and UV unwrapping it and making the wood here in Photoshop so now what I want to do is add some decals to this thing to make it look a little bit more realistic alright so I'm going to switch back to photoshop here and this is where we left off with the ballot that's you V dot PNG what we want to do is by the way save as and I'm going to save this in the latest project folder which I let me go to recent 28 value V dot PSD always a good idea to save the PSD so if you want to make changes to in the future you can bring back the UV layer just so we can see what's going on here this is the front so the front corresponds to this portion right here so what I want to do is put a decal on this and I'm going to just make it every vote counts oh god and so we're going to switch over here back to photoshop and i'm going to zoom up a bit just so we can see a little bit better now i'm going to use the type tool and just left click and just put in every and i'm going to hit enter and then just face a few times vote space a few times more counts with an exclamation point ctrl t hold shift and scale that sucker up like that except this looks like crap so we're going to make some more adjustments alright so i have to find the croc font so let me pause real quick alright so the font is called art brush and i believe it's free so if you just go to google and type in art brush want if you want to you same font as me you don't have to I then you can just go ahead and download that real quick so I'm going to fix the spacing a little bit and make it like right around there and then i'm going to select this option right here and this is warped x so we can warp this and you have all these different things you make it a go wave which it looks like crap although you can change the settings like that but i'm going to use i think when you use arc and then no I don't like that one bit i think i'm going to use arch this way and this can take a little bit of finessing i'm going to experiment with this and pause it just so that i can get the right setting here alright so i pause it came back this is the setting on e to use its lie plus 35 negative 18 plus 18 right around there hit OK and then hit ctrl T and we'll kind of just skew it slightly like that hit ok and if you want to adjust the line height between click right here every in vote is kind of close to each other and then we have vote and counts a little bit further away what you can do is if we select a vote and we go to window character or click right here if it's available there and the line height right here we can we can I experiment with like that now it's a little bit more even between the three words alright so what I want to do now is apply what is called a few strokes so what we can do is I want to hide the UV just for now and I'm going to change I want to make this so that it is red white and blue just for the u.s. theme I guess you could say so red white and blue wait red white and blue let me check the preimage real quick the one that it created yeah I think that's right so we want the text to be blue and so will come out here just choose a blue color like that double click on the right side of layer to bring up the layer styles and then we'll choose stroke and its positions outside by default which is good and will come up here around nine pixels we're going to make this white hit okay and then we're going to duplicate it right click the duplicate the layer or I have a I'm going to use my shortcut key and the one beneath it double click on stroke and we're going to make this one even larger and I'm going to make this red there you go all right so now if we take both of these layers I let's go ahead and group them ctrl G with both of them selected and just going to rename it real quick to every vote counts I we can use a layer blend mode set on the group so if you click this and then click it again you can see it's blue and it's highlighted sorry now you can use your arrow keys hit the down arrow key to go through these just so we can get I a potential blend mode that looks realistic with how paint would be overlaid on top of wood so I think I did see one and so that looks pretty good that doesn't look to let me see let me zoom up here it's not really bleeding through it I kind of like the look of this even though we don't get the white it still looks realistic you can see the wood beneath the blue and the red so I'm going to diverge from the original image just a little bit by making it look like that alright so I've used i multiply for that okay so let's get back are you vs so this is what's going to be on the front of it let's go ahead real quick hide the UV layer and let's save this so control look it's such a long shortcut on your essay first a file save for web is alt shift ctrl s and I know that by heart so I just do it quickly just overwrite the ballot diffuse let's go back to blender and then just click on let me zoom up so you can see it this folder right here you'll see now it has our very awesome every vote counts all right I think it would also be worth it to put a decal on the top which kind of has like a pointy arrow to this like insert your vote so let's go over to photoshop again zoom out here get our UV up and this is the front alright so i'm going to get i'm going to use like one of the custom shapes so if you just left click and drag out over here custom shape tool and we can choose one of these arrows you can make your own error if you want with the pen tool i'm just going to use this to make it quick and i'm going to use this middle one right here and hold shift and just scale it right around there i'm going to make it black ctrl T shift and rotate it up select move tool hit apply you can also adjust this like if you don't want the tail like this all we can do is take the direct selection tool left click select those bottom ones and hit the up arrow key if you want it to be a little bit shorter so now what we'll do is if you want to make the centered left click and drag between the distance of these two UV points and hit center right here so now we'll just put in your vote we want to make it big enough so people can see it so that's one error I made on the initial project just like that alright so now I you know we can add you know if you want you can add details on these other ones and I kind of do I want to add one on the right side which is right here and so is there one available in a custom shape now there's not so I didn't I record this beforehand so I'm just going to wing it right now so what I'm going to do zoom up here and we're real quick I think I'm going to yeah I'm going to take this every vote counts text right here and I'm just going to take the top one duplicate that or you can right-click and duplicate it move it above and just going to drag it down here temporarily and I'm going to put in your choices now because we have a single line of text we can go ahead and modify the warp options for this so we want this to be readable so ok the kids are yelling stop that damn it all right I i think i'm going to you know right around there should be pretty good I mean that's pretty readable so your choices ctrl T and right around there and then down here I may make that a little bit smaller ctrl T shift and alt will leave it right around there all right and then I'm going to use a the ellipse tool shift oh no no no left click shift and we'll choose right around there and it's the same colors the background side so it's hard to see what I want to do is over here or by taking the direct selection tool we can get rid of the fill by clicking on it and choosing this red / and then get a bit of stroke and we'll make this one read and then increase the stroke size right around there ctrl T we can scale it up a little bit and I'll new shift sup move till it apply and then we'll put in will take this text duplicate it or right-click and duplicate on the layer all right idiot one all right now this text is a little bit hard to read so i think i'm going to get rid of that I the warp on it scale it down and I i may get rid of as well let me I take off the effect here and make this red and I may change the font as well just so it's a little bit easier to see yeah that's fine so I'm going to leave this idiot one right there now I'm going to take these layers and then duplicate them so those two layers holding shift select both left click right click and duplicate them or if you've set up a custom key like I have oh man I did the wrong ones let me delete those it needs to just be this layer yeah and that ok so it's these two layers duplicate them move them over we're going to change this to oops let me delete that idiot one needs to change to idiot to the color needs to change to blue as well as the stroke okay and they're all right so let's see here I think that's you know I may want to make this black just so and also get rid of the stroke there all right now I'm going to get control t yeah that'll be good move to apply bring this down alright that's good ok so those are the only decals i'm going to add you know what it would probably be worth it just to take all these layers right here that the decals and put them over here as well on the left side that way if we want to render on the other side it shows the same thing so what we'll do is I think I think it's all these layers up here I'm going to group those yep that's them so i'll change it to your choices real quick duplicate that move it over here very simple alright so now let's go ahead and hide our UV layer ctrl s to save this by the way and take the UV hide it save for web file save for web i just did the shortcut overripe out to fuse go back to blender and there we go awesome alright so i'm going to right click on this join area and get this joint over here and we could do some more work getting this to look a little bit more realistic so what I want to do now is I'm going to add a wall so to kind of upright right up against it so I'm going to go to solid view and i'm going to select just right around there shift a mesh and plain our x 90 to get it up and down and s and I don't know 25 and so that looks like a decent distance so let's go to rendered view see what this looks like alright pretty good and I i'm going to set up so I in a new mission plane it's called so by default we have this one light over here which is right there I'm going to delete that so now if we can hit rendered will see it doesn't affect things too much what really affects the lightness is over here in the world setting so if we drag this down and I believe it right around here for now I go to solid you can see our cameras like right around there if we click no more like over here no no no no if I hit three and click right there one yeah that's right by the camera which is fine shift a mesh plane and RX 45 and bring this over around there and hit s2 just I scale it by two and then we'll go ahead and go to materials hit new the surface is emission right there and real quick just so i can show you go to rendered strength is one which is not very much hit 10 we'll see now it gets a little bit brighter now I would say that's too bright so what we can do is drag scale this down a little bit try maybe five and we can also experiment between this value here and the world setting value so if we drag this down and then we go back over here and then hit 10 you can see it gives us a little bit more shadows alright so i don't really like the way this is looking this is looking like a strange like aluminum type of material so if we click on it we right click it and let's drag this down we'll change this view to the node editor this view can change to rendered you can experiment with these values a little bit so bringing it more towards the side of the diffuse will give you a certain odd look let's drag this to the right though and experiment with the roughness value so if you try to change it to zero you can see it completely makes it one hundred percent reflective and glossy and strange looking so if we try point one that gives us a certain look and so there's just a lot of different possibilities that you can use based on playing with these values I think I'm going to leave mine right around there though all right alright so let me write click this to join this area down and now I we still a little bit of time it's been about 19 minutes so I'm gonna add a floor right here so this will be very easy going to use cg textures calm again so if we go back here switch back to cg textures com you know you try to find any type of floor you want I use the tiles section right over here last time I'm gonna see what floors give us um might be okay to add this might be interesting actually you know what I want to use just died I think I'm going to go back to tiles it's going to make it a little bit easier so if i choose plain tiles i think i used this looks pretty decent i think i use the other one though on what I initially did it I so yeah I'm just going to choose meat well yeah seven by seven hundred by seven hundred that's a perfect square oh it just makes it real easy for us to work with i'm going to use this so i'm going to download that i'm going to open this up real quick show in folder right click and open with photoshop and if you want to make changes to this in terms of color you can go to image adjustments hue and saturation or come out here if you go to windows and then select i think this is the adjustments area yeah adjustments you can add all these color balance hue/saturation if you want to give this a certain Hugh if you want to make it more white or no saturation or a lot of saturation that's completely up to you I'm just going to leave it basically how it is just to make things simple and then save this real quick and we're going to call this floor dash diffuse okay so let's go back to blunder alright so the floor right here is this option let me go to solid view and we can see it's massive but we can tile the actual floor diffuse jpg that we've saved so first if you're adding any texture remember you have to unwrap it now because this is a square and it's very simple all we have to do is go to tab into edit mode with it selected make sure everything is selected hit a and a again just to make sure it's toggled on you unwrap we don't have to bring out the unwrapped window because we know it's going to work I know if let's go ahead real quick and add a okay so there is already a mixed shader added to this I'm going to just click on this and I'm just going to call this floor and we're going to make this just die you believe it as a mixed shader so what we want to do is drag us down change to UV image editor and no sorry node editor and I what we'll do is hit shift a text your image texture connect this to the diffuse color hit open and or my at first I gotta save this correctly floor two views right there alright so now if we view this thing it's going to look messed up let's duplicate this shift D add it to this one as well so watch what happens when we go to rendered absolutely way way way way too massive so that's because this is a large object but we can basically multiply this so what we can do is scale over here if we click on this I option right here okay so these are all changed to 50 by 50 by 50 for the x y&z n scale with this image texture selected but it didn't really seem like it made a change but it actually did you'll see them in here but we have two of these so we have to click on this one and change this to 50 50 and 50 hit enter now we have a floor a glossy sort of floor basically and you can play around with these values to turn this up it gets real glossy doesn't kind of look too realistic so somewhere in the middle probably will work decently all right so let me write click join area down alright and if you want the wall to line up to the edge of one of these which would probably be worth it I let's go to real quick it's currently selected but we're in edit mode hit tab to go to object mode and what we can do is go back to rendered and we can see it's kind of like in the middle of one of these or off to the side right here hit G and why to move it and move it just left a little bit so if we get in real close gee why they're right there is perfect now it lines up with this wall it looks a little bit more realistic basically all right and you can also select the wall here that doesn't even have a texture i believe so you hit new and it's diffuse I we can change it to some type of off-white color if you want to or go crazy which is this is a little strange but yeah you can experiment I'm going to make mine just more towards the yellow end but nothing too crazy I think right there all right so all right where are you at 26 minutes so we're going to end this here and in the next lesson we're going to go ahead or tomorrow we're going to go ahead and add a flag and do some cool cloth simulation all right so I'll see you then all right you
Original Description
http://goo.gl/BBse40 - Design + Code a Professional Android App from Scratch
http://www.designcourse.com/videos/mega-tutorial-every-vote-counts-part-4/137 - Now we will design the ballot box decals in Photoshop and work with the scene in blender more.
Follow us:
Facebook: http://www.facebook.com/designcourses
Twitter: http://twitter.com/designcoursecom
Google+: http://plus.google.com/+DesignCourse
Dribbble: http://dribbble.com/designcourse
- - - - - - - - - - - - - - - - - - - - - -
Subscribe for NEW VIDEOS weekly!
My site: https://designcourse.com
My personal FB account: http://fb.com/logodesigner
Coursetro FB: http://fb.com/coursetro
Coursetro's Twitter: http://twitter.com/designcoursecom
Join my Discord! https://discord.gg/a27CKAF
^-Chat with me and others
- - - - - - - - - - - - - - - - - - - - - -
Who is Gary Simon? Well, I'm a full stack developer with 2+ decades experience and I teach people how to design and code. I've created around 100+ courses for big brands like LinkedIn, Lynda.com, Pluralsight and Envato Network.
Now, I focus all of my time and energy on this channel and my website Coursetro.com.
Come to my discord server or add me on social media and say Hi!
Watch on YouTube ↗
(saves to browser)
Sign in to unlock AI tutor explanation · ⚡30
Playlist
Uploads from DesignCourse · DesignCourse · 0 of 60
← Previous
Next →
1
 2
2
 3
3
 4
4
 5
5
 6
6
 7
7
 8
8
 9
9
 10
10
 11
11
 12
12
 13
13
 14
14
 15
15
 16
16
 17
17
 18
18
 19
19
 20
20
 21
21
 22
22
 23
23
 24
24
 25
25
 26
26
 27
27
 28
28
 29
29
 30
30
 31
31
 32
32
 33
33
 34
34
 35
35
 36
36
 37
37
 38
38
 39
39
 40
40
 41
41
 42
42
 43
43
 44
44
 45
45
 46
46
 47
47
 48
48
 49
49
 50
50
 51
51
 52
52
 53
53
 54
54
 55
55
 56
56
 57
57
 58
58
 59
59
 60
60

Photoshop Pen Tool Tutorial (Tattoo Design)
DesignCourse
How to Design the Microsoft Logo in Photoshop
DesignCourse
Photoshop Gradients Video Tutorial
DesignCourse
Your Guide to Layer Styles
DesignCourse
Layer Masks in Photoshop
DesignCourse
iOS App Icon Design Tutorial in Illustrator CS6
DesignCourse
Illustrator CS6 Logo Design Tutorial - Archfold
DesignCourse
Photoshop CS6 3D Tutorial - Magic Tent Illustration
DesignCourse
How to Design a Tshirt Tutorial - Adobe Illustrator
DesignCourse
Types of Logos - Lettermark & Monogram Logo Type
DesignCourse
Banner Design in Photoshop CS6
DesignCourse
How to Design a Logo in Illustrator CC
DesignCourse
Designing a Logo in Photoshop CC
DesignCourse
1. Launch & Market a Web Based Business - Introduction
DesignCourse
2. Launch & Market a Web Based Business - Logo Design
DesignCourse
3. Home Page Mockup in PS : Part 1
DesignCourse
4. Home Page Mockup in PS : Part 2
DesignCourse
5. Home Page Mockup in PS : Part 3
DesignCourse
6. Home Page Mockup in PS : Part 4
DesignCourse
7. Home Page HTML & CSS - Part 1
DesignCourse
8. Home Page HTML & CSS - Part 2
DesignCourse
Using Photoshop to Showcase Mobile Projects
DesignCourse
Flat Icon Design Tutorial in Illustrator CC
DesignCourse
Illustrator CC Logo Design Tutorial - A Logo That "Pops"!
DesignCourse
Logo Design Follow Along 1: Emblem Logo Design
DesignCourse
Showcasing Logos in 3D with Blender
DesignCourse
How to Design an Effective Lettermark Logo
DesignCourse
Squeeze Page Design Tutorial in Photoshop (Part 1)
DesignCourse
Squeeze Page Design Tutorial in Photoshop (Part 2)
DesignCourse
Mobile GUI Element Design in Adobe Photoshop CC (Part 1)
DesignCourse
Mobile GUI Element Design in Adobe Photoshop CC (Part 2)
DesignCourse
Flat Mobile App Design in Photoshop CC - Weather App
DesignCourse
Create Reflective 3D Text in Blender (Beginner)
DesignCourse
Animating a Logo with Adobe After Effects CC (Beginner)
DesignCourse
Design a Game Website Mockup in Photoshop CC (Part 1)
DesignCourse
Design a Game Website Mockup in Photoshop CC (Part 2)
DesignCourse
Photo Manipulation Tutorial in Photoshop CC (Beginner)
DesignCourse
Advertising Illustration Tutorial in Photoshop CC
DesignCourse
Perspective Warp Tool Tutorial in Photoshop CC
DesignCourse
Free Giveaway Contest. (WiseBanner Banner Maker).
DesignCourse
Design an Animated Loading/Download Icon (GIF)
DesignCourse
Contest Winners (WiseBanner)
DesignCourse
Model & Animate a 3D Push Button in Blender (Beginner)
DesignCourse
Mega Tutorial - iPhone Breathalyzer - Project Introduction
DesignCourse
Part 1 - iPhone Breathalyzer - Blender
DesignCourse
Part 2 - iPhone Breathalyzer - Rendering & GUI Design
DesignCourse
Part 3 - iPhone Breathalyzer - UI Animation in After Effects
DesignCourse
Part 4 - iPhone Breathalyzer - Website Design in Photoshop CC
DesignCourse
Part 5 - iPhone Breathalyzer - HTML Part 1
DesignCourse
Part 6 - iPhone Breathalyzer - HTML/CSS Part 2
DesignCourse
Part 7 - iPhone Breathalyzer - HTML/CSS Part 3
DesignCourse
Part 7 - iPhone Breathalyzer - Finishing Touches
DesignCourse
Square Space Logo Maker - C'mon People.
DesignCourse
Design a Bloody Knife in Photoshop CC
DesignCourse
Typographic Poster Design Tutorial in Illustrator (Part 1)
DesignCourse
Typographic Poster Design Tutorial in Illustrator (Part 2)
DesignCourse
Modern Business Card Design in Illustrator CC (Part 1)
DesignCourse
Modern Business Card Design in Illustrator CC (Part 2)
DesignCourse
Parallax Tutorial using Parallax.JS
DesignCourse
Interview: Andrew Price of BlenderGuru.com
DesignCourse
More on: UI Design
View skill →


Related Reads
📰
📰
📰
📰
I built a free ATS resume checker that runs entirely in your browser - here's how
Dev.to · Dipesh Gyawali
3 Free AI Tools I Use to Save Hours Every Week
Dev.to · Hari Haran
My AI Bill Dropped 95% When I Switched to Chinese Models
Dev.to AI
AI Dubbing for Short Drama: The 2026 Playbook That Actually Scales
Dev.to AI
🎓
Tutor Explanation
