Intro to Deep Learning -- L11 Common Optimization Algorithms [Stat453, SS20]
Key Takeaways
Introduction to deep learning with common optimization algorithms
Full Transcript
hi everyone I'm super excited about this week so sun is shining the weather is nice outside spring is finally here and I am back with to lecture recordings so last lectures we talked about tricks for training neural networks more efficiently so that also includes getting a better predictive performance building models with a good generalization performance and one of the tricks was dropout which helped us to reduce the degree of overfitting another trick was batch norm which normalizes the inputs to each hidden layer and that also helps us training more efficiently and getting models with a better performance and finally we talked about weight edge realization which includes topics like aiming her initialization and Savior glory initialization which add a certain scaling factor to the initial starting weight which also helps the optimization algorithms so today we will talk about optimization algorithms themselves and in particular we'll focus on stochastic gradient descent that's our usual algorithm in the context of deep learning for performing the back propagation so we talked about stochastic grinders and many times in this course already and today we will make some modifications to it adding a momentum term or using an inductive learning rate so that will also help with the network to learn faster so also super excited about Thursday because on Thursday hopefully that means I finished up this lecture I will talk about convolutional neural networks and convolutional neural networks are a new architecture or at least a new architecture in this course and many of you will be using convolutional networks in the final project because these allow us to do interesting tasks such as image recognition image classification object detection object segmentation and all the fun things you can do with photos and videos so finally we'll be also something exciting like something new not just tricks and then also at the end of this lecture I will be back with the stuff in the new section which I think was always fun where I have reef leeteuk tobacco things in the realm of artificial intelligence deep new networks in machine learning so last lectures I was already struggling with getting the recording done in time but I think it might be more I'm just to add the section at the end this time so if you don't want to watch it you can just skip it but yeah anyway to not waste too much time on this introduction again let me get started with a real lecture recording now okay let's talk about common optimization algorithms so nectar 11 the reason why I call this topic common optimization algorithms is because there are many many different types of optimization algorithms and especially also in deep learning there are many different types currently being used like little tweaks and I will only talk about the most common ones that may be most useful ones in deep learning and all of them are based on stochastic gradient descent so that way you can also think of everything we talked about today as improvements to stochastic grain descent which helped us learn different networks more efficiently so the slides for today's lecture are again on github like always so maybe it's useful if you download them before the lecture so you can take notes on the slides before we get started with the optimization algorithms just a brief overview of where we are in this course so we have already covered a lot of topics here parts 1 2 3 we are almost finished with part 3 so next lecture we can talk about architectures such as convolution in your networks and recurrent neural networks so they are mostly so convolutional networks are mostly for nowadays videos but mostly images and recurrent neural networks are mostly for text and also time series analysis so many people also apply them for example for stock market predictions and other tasks so it will actually some students in this class for the final project presenting on stock market and analysis for with recurrent neural networks so once we come at these topics we will also talk about deep generative networks which are models that generate new data so models that help us generating new data okay so just briefly to recap last lecture we talked about tricks so input normalization and weight initialization that helped us learn more efficiently today we will talk about more tricks but these tricks are for the to my zation algorithms for example where we can decay the learning rate that optimization algorithm uses we can add a momentum term or we can also use adaptive learning rates at a depth to the task or we can use a combination of all of them so it's also possible to combine all of them okay I edit some note to myself here so I also wanted to mention all of these tricks we will talk about today are based on stochastic gradient descent like I said in the beginning so they are modifications of stochastic grain descent and they are all still first optimization algorithms there are some second-order optimization algorithms you probably heard about them in other classes especially if you took the course and computer science and optimization theory so but these are very I would say tricky in deep learning because they are very expensive and in practice there's only a little benefit from using second-order optimization methods so as of today second-order optimization is not very popular and deep learning and that is why we still mostly focus on first-order stochastic gradient descent methods for example stochastic green descent and maybe in a few years it will be different maybe in a few years there are efficient on promising second-order methods out there for deep learning but yeah until now we we have our first order optimization algorithms which are pretty robust in deep learning and commonly used but not too expensive most of all so yeah before I talk more about the optimization algorithm though let me just briefly recap homework three so I'm actually not Rick paying homework 3 exactly but I wanted to apply some of the tricks we recently focused on Nasdaq cha - homework 3 to see them in action basically and then we will talk about the optimization so first let's focus on this part and then later we will focus on on the second half but I will try to keep this short now so recall in homework 3 I gave you a multi-layer perceptron and I give you the whole notebook with different hyper parameters and I gave you the task to optimize or to find good settings for the high parameters that you get a good validation accuracy and test accuracy so here I'm just showing you an example network so this network has three hidden layers call them linear one linear 2 and linear 3 and one output layer and here I'm just using the 10h activation function and that's about it so the first hidden layer has 75 units the second hidden layer has 50 units and the third hidden there has just 25 units this is just relatively arbitrary architecture it's not the best one or that you can use for that task so it's just just one example so for this example what I did is so what I showed you before I used a random uniform distribution to sample the initial weights so this is uniform weight initialization and at the top I'm showing you the cross entropy during training so from the first step up to the last epoch and you can see that the training and validation as they go down so over time so doesn't really matter that one higher than the other you can just you know that just what we can see here is that they go down and it looks like the training converged so that is pretty cool however what we can also see is actually what we can see is that we can't see anything so here plotting on the bottom I'm plotting the accuracy for the training she said and I clipped the plot at 80% because that made the comparison that I have in the following slides a little bit easier so here the curves don't even appear on this plot because the test accuracy is pretty low 11.7% also the training and radiation accuracies are too low to reach to a percent threshold and remember we had 10 classes and they were evenly distributed so that was this fashion MLS dataset so at 10 classes they were uniformly distributed so even just randomly predicting a class what give me about 10% accuracy right so this is really not a good model so how can we improve that well but can we do based on what we've learned in the last lectures to get the network to train better and also I should say I played around with a running rate a little bit and it did not help it's likely zoom that because it's a relatively deep network for multi-layer perceptron for material perceptrons three hidden layers is already quite a lot so it's likely that the initial weights are so bad that it can't even learn anything because of the vanishing gradient maybe or exporting gradient okay so then here again this is what I showed you in the previous night and then what I did is I instead of using a uniform distribution I chose a normal distribution for initializing the starting weights this is a small improvement or actually a pretty significant improvement from 11 to 66% but so not great so I'm really happy with that one so what I did then is I didn't do my own weight initialization I just used the weight initialization that pyro chooses so here in this notebook I was just using what Python uses and as you can see the training improved by a lot so now we actually see some accuracy values here in this part so the training accuracy goes up and the validation accuracy goes up and then it plateaus at some point it's a little bit noisy but yeah it's it's what it is the test accuracy is eighty-seven point eight percent so it's much much better than this moment again it's actually pretty good and recall for what Pedro just by default is it uses the initialization that is quite similar to the Savior gloried initialization which is again more optimal for 10h compared to just a uniform random uniform or random normal weight initialization so that's good so what I did then is I used a rayleigh function so I replaced an H with ready so the performance is about the same so it's me it's actually lower it's point six percent lower sometimes rather is good sometimes it's not so good but also I should say here here and we are using again the Savior gloried initialization scheme so this is better for 10h usually so I had what I did then is I replaced this random sorry the gloried initialization by becoming her initialization we talked about like last time you can see this is a small improvement here so it's not bad I would say it's may be hard to see but this is maybe it's relatively horizontal but it's maybe rather going more up rather than this one is maybe going more down so maybe more epochs would also get the same performance as this one okay so next what I did is I added pitch norm so last time we talked about metronome and would be interesting to see how that performs we can see this is again a pretty big jump I mean the jump looks hot to be honest but if you think about it if you only or if you have 50,000 classes and 50,000 is pretty small for deep learning let's say we have these 50,000 class sorry data points in the data set in the training set so improve them by 1% on a 50,000 example data set is actually pretty substantial so if you have 50,000 times 0.01 this should be 500 right so if you have just a 1% improvement you already make 500 more predictions that are correct if you have 50,000 data points and in practice I mean in deep running let's say we have datasets that are huge they're like 5 million examples so in that case for 5 million examples you would get 50,000 data points more correct if you only 1% improvement and now think about Google who has like billions of customers we use the search engine every day and if you have a billion customers in here just 1% more correct in getting a good search result then this is actually a pretty substantial improvement ok so that's not where it ends I have some more to show you here so here I am also to the better-known coming huh initialization didn't make much of a difference because maybe veg mom already helps a lot with everything so here maybe choosing a white energization scheme is not so crucial anymore if we already have better on next so what I saw here of course hopefully also saw that there's a lot of overfitting going on next I thought what happens if I used robots to reduce that overfitting so it seems like it's a bit hard to see because I use the same clipping for the y-axis but you can see maybe that the training and validation accuracy are very close to each other so if you look closely the orange and blue line are overlapping almost perfectly so that tells me that the network is not overfitting anymore but I added maybe too much regularization if I recall I added 50% dropout to each hidden layer what's maybe a little bit too much because ok now I don't have overfitting but the performance went 10% down right so that's also not great so what I thought then ok what happens if I make the drop a little bit weaker reduce the dropout probability maybe by from 50 to 20% I forgot the exact number but you can double-check so I have all the code here if you want to double-check so what I can see now is there is again some overfitting but again the performance is back to I would say normal it's at 87% here so this is without batch norm so this is almost like what I had before but with less overfitting and then I thought okay if I have reduced my overfitting here better no makes things better so what happens if I combine dropout and no so that's what I did here so here in this one I have patch gnome entrepot and you can see the performance is now 89% and you can also see maybe it's hard to say but it looks like this one goes rather up a little bit so if I would train it wrong let's say for 100 epochs I would maybe get more than 90% performance so for the homework I asked you not to use Petzschner because we haven't covered it back then when the homework was announced but also even without using batch gnome and without using these wait and translation schemes you can get a pretty good performance so one student got almost 91% performance the student is also the winner of this homework because I said the winner of the zoom with the highest performance will get a small reward a small book or rather a big book but yeah since we don't have any class sessions in person anymore I will have to mail the book a book physically but I will make announcement on the mailing lists or to announce the winner and also to arrange the book shipping so but ok this was just a brief recap of homework 3 not exactly homework 3 but just applying some of the recent tricks to homework 3 so what we learned about today will be optimization algorithms and I also encourage you maybe to go back to this code homework 3 code and apply the optimization tricks we learn about today to the somewhere to see if you get maybe even better results ok so the simplest way for modifying stochastic gradient descent is learning rate decay where we shrink the running rate over time so before we get to that just let's briefly recap me learning so mini batch learning is a form of stochastic gradient descent it depends a little bit on how we draw the mini batches so there many different ways we can not do that so if this is my training set I usually usually do is we divide the training set into multiple mini batches and then we draw on one mini batch at a time and after each epoch we shuffle the training set there are different types of drawing yeah mini Petrosky for example can also randomly draw a mini batch without shuffling and without replacement or with replacement if you draw samples randomly with replacement that would be most or truly stochastic because then each sample can is independent of each other so what in practice what's commonly done is not in the air so not completely who'd say stochastic because there's a dependence on each sample or each training example because we usually sample without replacement but it does not matter here really so what I'm just trying to say here mini batch learning is the form of stochastic or in descent so it's no idea then on the normal gradient descent what we called batch gradient descent again we use the classic trend batch gradient descent which means there's no stroke a statistic so we learn based on the whole training set we don't have these mini batches so if we use batch gradient descent so we would make in this case steps perpendicular to these contour lines again I want to explain this every time but this is like our surface plot of the loss function know what happened here I don't know so of the loss function and we want to reach this global minimum here and again this is a very simple cost surface it's convex which is something we don't have if we trained deep neural networks in any case what we have when we have stochastic gradient descent is some that is a little bit more noisy so here we don't make steps directly leading to the cost minimum we oscillate it a little bit and also it's very important to choose a good learning rate because if we choose learning rate it is too small the steps will be too small and it will take forever to reach this cost minimum if the learning rate is too large it will maybe happen that we overshoot so we go here then we go here and then we go here depends on the learning rate how large it is and how noisy the updates are so it's also not great if we choose learning rates that are too large yeah so an advantage of using stochastic gradient descent in deep learning compared to a normal batch gradient descent is not only that it is faster but also it can help us to escape local minima so in deep learning usually we have these highly non convex loss surfaces so if this is my loss with respect to only looking at only one weight it's usually much more complicated than that in that case here where we have a convex loss function so in this case depending on where we start we may not reach the global minimum so imagine this is here the global minimum if we start here we go down this hill then maybe we'll get stuck here because then the gradient is not 0 at this plateau and then we can't update anymore on sometimes it can help though to have some noise because just due to the random noise you will have an update here although there's no gradient and then you will jump out of these local minima and then you have an opportunity to maybe at least go to this point here which is not exactly the global minimum let's say but it is a good local good local minimum yes so another advantage is the convergence speed so stochastic rain descent converges faster then grain in descent and especially mini-batch great dissent is much faster than either of the two mini-batch gradient descent is faster then then the regular stochastic ranges and the online one with only one training example and it is also faster than batch gradient descent and why that is we discussed this early in the introduction or maybe lecture form so that is maybe a question for you do you know why mini-batch Granderson is much faster than stochastic rain descent because there were these two opportunities I'm just seeing I have a typo here this should be two because of two opportunities for parallelism so this makes it faster compared to online learning so we can paralyze two things and this is a question for you to answer don't want to answer all the questions for you yeah and also like I said in the beginning second water methods may even be better for minimizing or convicts loss function such as this one however like I said in deep learning we have this highly non convex as both surfaces and in these cases second-order methods usually don't work so well so in that way first order methods are still preferred so I found a nice website that visualizes different optimization algorithms so I'm not exactly sure how these are created so because it should be an actually a little bit noisier for stochastic gradient descent but probably depends on how complex the loss function is in that case in anyway so what we can see here at the top I use the STD setting here with a relatively large or high learning rate what you can see is I'm over so the point where we start on this lost purpose is this one here and using the big learning rate its overshooting so here again in the center is the global minimum and then it oscillates so it goes back and forth many times to find the global minimum which is not ideal the other case here is I'm using a small learning rate so this is actually better so in this case it's not overshooting so but it may it's kind of impossible to see how many steps there are but it would take more steps to reach the global minimum here so in in both cases I mean it's it's kind of tricky to find a good learning rate that is not too slow and that is also not overshooting so it requires some tuning and what are good mini-batch Sciences so like I said in the last lecture usually we choose them in powers of two like 32 64 128 256 512 1024 and the common recommendation is that people are advised to choose a batch size that is as large as the GPU memory allows so again remember in deep learning especially if you have fully connected layers like with multi-layer perceptrons you have a large matrix multiplication so for example if we have our weight so the weight it has has the rows are the sorry the rows are the I'm not writing Rosie the number of hidden units and the columns are the number of features in the data set and then our X our data matrix is number of features and this is the number of examples so which is the new nice and this matrix multiplication for this one we would for example write W X transpose or we can also write you see number of features X tint doesn't really matter so we can write it either and this is a big matrix multiplication it depends essentially on the number of examples so reducing the number of examples will make the X matrix smaller it will be a smaller multiplication here and that will usually save GPU memory so sometimes it's beneficial to just choose a mini veg size that fits into GPU but again we want to choose it as large as possible because usually it helps us with running faster due to that - no - opportunities for parallelism like I said before one more thing to say about this here so I included this figure I just wanted to also say you remember this figure from the model aberration part but I what I wanted to say here is also the smaller the batch size the more skewed your label distribution will be so it may happen that the label distribution in each sample will be noisier or even just the samples will be noisier and then you will have more oscillation again but again there are also papers showing that it's actually beneficial to have a small batch size because the noise can help with escaping this local minima so like I said before if you have this lost surface and you get let's say stuck here there's no gradient here at this point if you look only at the whole training set it may be though if you have a mini chat is extremely noisy that the network will jump out of this for example so in some time sometimes it's actually not too bad to have small many batch size yeah so like I said the mini batch loss is just an approximation of the training set loss so the mini batches if you plot it over the for each iteration for example or for each over the course of the a box you will find it is oscillating so because like I said also before each mini batch is just a random sample drawn from the training set so it's not fully representing the data set well training set it's just a small approximation of it and approximations are usually noisy so what I'm what I'm drawing here is in blue the mini batch loss this is for each iteration and you can see the overall trend so I'm also adding the exponentially weighted average here or you can also think of it as the loss on the whole training set so if you would take the whole training set and compute the loss on the training set you would get maybe something like this this line for the mini batch loss you will because it's an approximation you will see it's more like oscillating this is maybe not too bad because like I said this random noise can help it jump out of local minima however may be a little bit problematic when we want to really anneal the algorithm and then we want to stop it we wanted to convert we don't want it to jump out of local minima sometimes sometimes we want to want it just to anneal to a certain point so there's no fluctuation anymore and then for example the oscillation in the end may be a little bit annoying so we maybe want to want to get something that converges more like this so dampening the oscillation and that can be achieved by just decaying the running rate that may mean so making or shrinking oops drinking the learning rate during training so the longer we train the smaller we make the learning rate so there's one danger of using a decaying learning rate and that is it may happen that we decay the learning rate too early and then we don't learn so well anymore so what can happen is for example that we have a lot of oscillation and we decrease the learning rate but we decrease it too early and then the network doesn't learn anymore and the performance will be worse than using no learning rate decay so personally what I would recommend is just train the not model without the learning rate ek and then see if you whether you even need it because sometimes the oscillation at the end is already very small there are also different algorithms we'll talk about some of them that don't have such huge oscillations so maybe you don't even you don't even need it and after you trained your model you can just add it later so I would recommend training the model without learning rate okay and then adding learning or indicate and see if it makes things better because like I said the danger is if you just add learning rate akane from the start you may be decrease the learning rate too much too fast and then you don't get a good model out of it so you can for example look at the validation performance to see whether with or without learning rate decay things get better okay now I want to show you some types of learning rate decay so there are multiple types I will only show you a small number of the most common ones so one I would say that is most common is the exponential learning rate decay all of them are pretty simple to be to be honest so this one is just became the learning rate exponentially so how that works is we have our learning rate at time T and we multiply it by decay rate sorry by a learning rate times e to the power of minus K times T so we're this is our initial learning rate okay so this is pretty straightforward I on the right side editor plot to illustrate this I just see that this is not well ordered so I would this is actually the smallest one would be nice if this would be on top that doesn't matter now let's just focus on what I've plotted here so in green so this month I'm showing you the highest decay rate and this is on the x-axis the number of iterations it could be the number usually the number of epochs so usually we decay the learning read each epoch but you can also just do it often if you like you know sometimes also people not decay every a pop but maybe every tenth Epoque or every 100th pork and so forth really depends and this is yeah why using a decay rate is a little bit tricky because it's hard to tell how much decay you need so using a decay rate of 0.1 we get this green one so it's on flattens pretty early at around I would say 50 it's pretty flat up that at that point using a smaller decay rate of 0.5 this is the blue one it decays a little bit larger a slower and then the smallest one in this part is the orange one so that the case the least but again these are just some examples so that you get an idea we start with the learning rate of 0.5 and then the case I mean it will converge to 0 basically another very straightforward way to decay the learning rate is just having it so again you use the same approach except now you have the learning rate so maybe this is not ideal how I've written this let's just call this t minus 1 not T equals 1 so every time point also to compute the current learning rate we divide the previous learning rate by half so that's pretty straightforward and then what we also have is the inverse decay so this is the one I'm plotting here so here I'm just dividing the initial learning rate by 1 plus K my times T where again case the decay rate and T is the iteration which one you use doesn't really matter I think I mean all of them save the same purpose-- shrinking the learning rate over time and like I said it's kind of tricky to find good values for that so it needs it some experimentation was an interesting paper I've seen that was 2 years ago by left knee and Smith so in this paper the author's it's some experiments with a cyclical learning rate which is it looks may be a little bit strange but it seems to work well in the paper at least so what the author did is for the learning rate just cycling it between maximum and base learning rate just going back and forth increasing decreasing increasing decreasing may be the reason why it works could be for example sometimes you want some noise to escape local minima but then you want to not jump out or out of other regions so you in that way Anila and then jump out of local minima and anneal again and so forth maybe that's why it helps I have no idea to be honest personally I tried this on some of my projects in my case unfortunately it did not do better but I heard from some people that it helped so it's maybe also something interesting how can we learn apply learning rate decay in PI torch so we can option one just write our own function so for inks for instance I'm showing you a function that I've wrote that would update the learning rate every tenth epic so in this function we give it an optimizer the epoch index an initial learning rate and the decay rate so this ball implements the exponential decay so how this works is I'm just multiplying my initial learning rate by this exponential term and then I'm updating the learning rate inside the optimizer so I'm applying this pirata groups loop here so in case there are multiple pirata groups and the optimizer it will update the running rate for all of them it is usually not the case that you have multiple parameter groups but it's just more in general to do it this way so there are also multiple versions of running rate schedulers in Python so these are a little bit more I would say sophisticated and the function that I just showed you so for example here I'm showing you a lambda running rate scheduler which accepts two arguments so one is when we want to update so how many um so which epoch we want to update for example every 30th epoch here and also how we want to update this is a second and that room and then we just provide it to this optimizer and then during the training what we do is we call this step the method of the scheduler and this will update the learning rate so this would be typical training loop so train would perform them the model training and validation some validation of the model on the validation set but this is something that's what you would write and this is a schedule step what you want to do just for optimizing or not optimizing but for decaying the learning rate so here's another example of doing exactly that for the expen exponential learning rate decay so here I'm using one of the inbuilt learning rate schedulers and Patridge and I'm using the stochastic granderson that we used previously the STD optimizer with an initial learning rate of 0.1 so what i'm doing here is i'm simply initializing the optimizer and I'm initializing my scheduler which depends on the optimizer right so this is the optimizer contains the learning rate that we want to update then we choose our gamma which is or decay rate k and also I give it the index of the epoch so here I'm just saying the last epic next so here this is the training loop how the training loop actually looks like so in the previous slide I initialized everything and now I'm training it so like always I would plot my data transfer to the GPU if I have a GPU and then do the forward pass compute the loss and set the gradients to zero perform back propagation and here I'm just logging the results if I want to plot them later and here I'm applying my schedule a dot step and again I don't have to do that every epoch I can skip epochs if I like for example so for example I can do if not a pork let's say 30 and then I indent this by 4 spaces then it would only perform this update every for every 30 epochs one last note about the coding part also when you want to save your model in paid watch you want to save the state of the scheduler because the scheduler keeps track of the epochs and took a count to get the updates right you also want to save the state so in this case there are not many parameters there's only the epoch a parameter so we want to keep track of the epochs that would be our T so T is always so it is when we call step it's counting the epoch so T would be the count of the epochs we want to keep track of it when we save our model in case we want to train our model further so in order to do that it's the same approach that we use for saving the model itself for example what I usually do is I transfer the model to the CPU first before I save it it's not necessary because when you load the model there's an option that you can load it onto the CPU it can be a little problematic though if you don't transfer the model to the CPU and then if you forget to add I think that current is called device if you add if you forget to add the device CPU here and you want to load it into your main device then you may get an error because here it thinks the parameters are on the GPU if you don't call this device with CPU and then it gets confused you just have to make sure that you use the same device for saving that you use for loading but usually this is not an issue just so I don't forget on the one because some people don't know about this device so some people when they when I sent them a model they don't know how to run it so I usually export the model to the CPU first so what I'm doing here is I'm saving the model itself so I'm saving as State Dictionary of the model then I'm saving the optimizer state so that is also helpful stochastic graininess and it does not matter but there are some other algorithms we'll talk about shortly where it doesn't matter where we want to also keep track of the state and then here I'm saving this state of the learning rate scheduler so I'm saving three things here and then let's assume I want to continue training I have to load all of them but it's actually pretty straightforward if we want to load something we first define it the model then load the parameters from this state dictionary and we do the same thing for the optimizer so initializer optimize a lot of static this case it's not necessary because there's nothing really fancy going on in the stochastic current descent about fundamental learning which we'll talk about shortly in both matter and then we also yeah Lord the learning rate of scheduler so using torch note and then these PT fans so PT's fats are can think of them as Python dictionaries that save the model state so just a few last words about the learning rate and the batch science so there was recently this interesting paper I mean that recently it's 2017 but I was just recently remembering it so here the authors looked into the relationship between learning rate and batch size and they give the advice so instead of so they say it's common practice to decay the running rate but they advise for example instead of decaying the learning rate increasing the batch size so with decreasing the better increasing the batch size you can get similar good properties as with learning rate Akane so here are two plots from that paper using an inception and resonant architecture we'll talk about inception and resonate later and the convolution in the network architect lecture so here what we can see as the validation accuracy for the number of epochs stays or is about the same for all the different methods so they have two learning rate decay methods and two in increasing the batch size approaches so they have just different settings for those and they compare the validation accuracy it's almost the same I would say for the red one and blue one they are almost identical on the red one this increasing batch size and the purple one is a blue one is decaying the learning rate however what is interesting here is on the right side what you can see is so here what you can see is that so here they are plotting the number of product days you need fewer parameter updates for reaching this performance so for increasing the batch size these two you can see after board I would say 5500 parameter updates you already achieve the performance here and for the learning rate decay you need much much more many more updates more than twice as many updates so in that way just increasing the batch size may already be doing what you want so maybe you don't need running rate TK to get good performance and also it's faster okay next we will talk about momentum so momentum is the first trick we can apply to help SGD to learn better and that is by dampening the oscillations so the term momentum is probably inspired by physics or Newtonian mechanics where the momentum is the product between mass and velocity so in deep running I mean we use a lot of jargon terms and we borrow a lot of terms from different fields and make them mean something different so here we will talk about momentum that is maybe inspired by the storm but it's not the same so here we are only focusing on the velocity term but again the focus here really is to accelerate the convergence so that SGD may converge faster and to reduce the oscillations so with reducing the oscillations what I mean is so I was drawing here two loss surfaces and sorry if I'm going a bit fast now but I'm just looking at the clock and I want to keep the lecture short because yeah some students complained it was too long last time so I want to keep it to the regular time so I'm going maybe a little bit skipping the trivial parts so here on the Left we have optimization without momentum so it's usually a little bit oscillating as we have seen before and if we add this momentum term the velocity will dampen it a little bit so it will be the if the velocity is in this direction for example then we will have this gradient direction plus the velocity and together we will have more something like like this where we oscillate less and make more progress into the right or straight direction okay so the key takeaway is that we not only move in the direction of the negative gradient but we also move in the average direction from the last few updates so we kind of keep a memory of the last updates and move into that direction so this helps with the oscillation aspect so we dampen the oscillations with this velocity term momentum or momentum term that we add but at the same time we can also avoid getting stuck in local minima because we still have this momentum from previous updates that allows us if we have a flat gray region to jump over these rate regions so that we don't get stuck there so the equation looks more complicated than it really is so all we do with momentum is we add an the Lassa T term which is this one we add this term to the regular gradient term that we usually compute in stochastic ran descent so usually we compute the partial derivative of the loss with respect to the weight that we want to update it's a it's a time point t we multiply it by a learning rate and in addition to that now we add this momentum term which is an alpha which is the momentum rate which is some number between point nine and point nine nine nine usually if it can can be smaller it can be bigger but usually that is a number that works well in practice so the larger this number the stronger the momentum term and we just add the small thing to our partial derivative times the learning rate and we are in practice we call it usually the velocity term yeah and then we use the velocity which is the previous velocity time point t minus one plus the green update to update the weights so this is just the regular way to update that we you know the form son usually in practice what we do is we subtract the negative gradient so then that term but now in addition we have this whole term which is the momentum term plus the negative gradient or in this case it's not a negative grade which is why we subtract okay so here's our illustration of how that looks like in practice so I'm using momentum term actually they call the momentum term 0.99 but yeah we I just called it alpha in the previous slide and here they call here the alpha is actually what we call Etta the learning rate but this is just a minor detail so what I'm trying to show you is with zero momentum so this would be alpha zero in our previous slide which would mean that we cancel this whole term here we have a large oscillation this is just regular location grain descent then it gets maybe even stuck here maybe it doesn't even find the optimum because the learning rate also is relatively small and it converges you to isn't your flat region so there's no gradient anymore so it doesn't reach this optimum if I add my momentum term now I have some velocity from the previous updates so with that but also the term it goes a little bit zigzag like before but it doesn't oscillate so much because it has this velocity that drives it in this direction and you can see it doesn't get stuck here it goes thanks to the velocity over this point here and gains again some gradient to find a solution which is very close to the optimum so how can we do momentum training and Patridge that is actually super simple so we don't have to do anything fancy we can just use the regular SGD optimizer and we can set the momentum rate here by default it's zero so that means there is no momentum but we can then just set it to a number let's say between point nine and point nine nine nine can also use it like I said it bigger smaller number but these are usually numbers that work very well you may also see there are additional terms so there is a term dampening and there is yeah this is maybe the most interesting part because it says dampening for momentum so how is that related to momentum yes since we are short on time I don't want to spend too much time on the dampening term which is not super interesting anyways so the dampening term is an optional term for momentum learning and this is simply scaling the gradient component of this velocity so in that way it's not super important or super interesting to use that one you may use that one it can help in practice so if you for example and choose the value smaller than one then this value will be larger than one and then this gradient term will be larger compared for example to the second term so this is just another parameter to control how much influence each of the terms has so another so it was also mentioned here another interesting modification of the momentum method is the nester of accelerated gradient which was first it's just based on a method by yuri Nesterov in the 9mm was written up in 1983 and then adopted for stochastic grain descent in deep running by suits kevin martins down in Hinton in 2013 and this is a small modification to momentum that applies this correction term here so the gradient incorporates the term that we also use as the momentum update term so when we compute the velocity term we use the previous velocity this term multiply it by the momentum so this term here and notice the this is actually subtracted from WT so here what we do is we perform an update and then we subtract in the way based on the gradient based on how where the method would have ended up with a regular update so this is maybe a little bit complicated to conceptualize so I posted the illustration from the paper so from the suit scalar paper so at the top they have the regular update regular momentum so this is just the direction of the gradient and this is the momentum term so it's the previous velocity times the momentum coefficient so together this is simply this term and we add them together so we end up with this new velocity term here and this is also by how much we update the gradients so in the modified version what we do is we have still the momentum term but then so this is again still this term but then we correct this term using by subtracting this term so here this is a plus but it's just the way they've written the equations this is equivalent to this minus term here so we correct the direction so this is not pointing down so this is maybe useful if we want to do the update in most modern way because the gradient here and the top is computed without knowing so we don't know this velocity so when we compute this gradient here we don't this one doesn't know about this velocity here so this is maybe not a good gradient if it's done in the abscissa absence of the velocity so here we have this correction term to correct for the velocity also okay so that was about anything I wanted to say about momentum like I said don't want to take too much of your time so let's go to adaptive learning rates so adaptive learning rates are based on the concept that we adapt to the current situation for example if the gradient changes the direction we decrease the learning rate and if the gradient stays consistent we can increase it for example if we have update let's say like this where it's going to the right direction we can also increase the learning rate every time because we know we go into the right direction but let's say we have something crazy where we have an update like this and then like this that is going in the wrong directions that changed the direction maybe because with this noisy sample we want to decrease the learning rate because we don't want to make a large step in the wrong direction basically so just to set up the scene how that might look like in a very simple scenario so the simplest way we can adapt the learning rate that would be for example just by using a game parameter so the scheme parameter is for each weight and we can then monitor during training the weights whether they change the direction or not based on the gradient so we would have usually we compute the loss with derivative to each weight we use usually linear algebra or we can still look at the gradients for each weight and then we say if the gradient is consistent we add a term here a term beta so we'll show you in a moment what beta is but I can just tell you for example if this number say 0.99 so we add a number if the gradient is consistent so we make larger step into this direction every time so we increase the gain and again again this is not added to the gradient itself it's multiplied by the gradient so if a positive number it will increase the gradient at some buy some value but if the gradient is this is when the grain is consistent if it's not consistent we do this update so here we multiplied the gain so t minus 1 means the previous step in the previous iteration and T is the current current one so here what we do if we are inconsistent we multiplied by 1 minus beta this has a dampening effect and multiplying this gain by a number has more effect if gain is large so here we always add a constant here we multiply which has a larger effect if the gains are already large so this is kind of important because if we make steps in the right direction for a long time we can just increase it because we are sure we make steps in right direction but if we suddenly change the direction like this we don't want to make a huge update we if we already accumulated a large gain for example we don't make want to make a huge update if it's a different new direction we might maybe want to adapt to the new direction slowly so here the gain will be having a bigger impact if it's already large because we multiplied by this factor here popular method where an adaptive learning rate is used as the rmsprop algorithm by jove hidden as far as I know this is unpublished algorithm and your fintan talked about it in Coursera class that he taught unfortunately the class is not online anymore anyways so this rmsprop is based on our prop which is a by Christian Eagle and Michelle who skin' and it's conceptually very similar to another concept called error Delta as well so we are not going to cover at a delta but just to give you the brief idea so what we do is we divide the learning rate by an exponentially decreasing moving average of the squared radians sounds like a lot it actually looks simpler than it really is and that the purpose of this is it takes into account that the gradients can vary when they have a large magnitude they can vary more so gradients that are large they can fluctuate more than small gradients so the idea is to also take that into account and the reason why it's called our mass prop is because uses a mean squared term here for decreasing the moving average basically so similar to momentum this has a dampening effect as well but in practice it works a little bit better best prop is really simpler than it looks like so there are only two things going on one thing is that we modify the gradient update so this is the regular stochastic gradient descent update and now what we do is we in addition to following the regular update we we scale the gradient term here so we use a term that is the mean square term and we have a root here so the root mean square prop algorithm so here we have a square root and the mean square I'll show you in a moment how the mean square is computed for a second also look at this epsilon term here this is just edits to avoid division by zero error so the mean square term here this term is computed so it's replaced every epoch by itself basically whether the last iteration so this time step t minus 1 so at the current time step this means greater on gets updated by this whole thing then becomes the new mean square term and why it's called mean square is simply because we have squared weight gradient here sorry square and we square the gradient of the loss with respect to the weight here and that is all there is to it so we have these betas which are usually numbers between 0.9 and point 9 9 9 and these are then also like the dampening terms so with that we can influence the the dampening so the whole thing is similar to a moving average except that we have the square term here okay so the last algorithm for today is Adam and Adam is you can think of it as a combination between momentum and the rmsprop which is more as like an adaptive learning rate so with Adam so the most maybe the easy way to explain this is by combining what we have seen before but let me just simplify it a little bit so here this is the original velocity and that we computed in momentum so I call it the momentum like term so here what I'm simply doing is I'm replacing this part by just empty -1 so M for momentum so easier to memorize and then I am also replacing this by M T for the current time step and I'm getting rid of n here so I will instead of n I will use 1 minus alpha here so I'm writing a term that is not exactly like momentum but very similar so except for the learning rate I have no 1 minus alpha where alpha is this one here alpha was our momentum coefficient so it's very similar to the original momentum a little bit different so the reason why I'm doing that will be clear in a second so in the center here I have my arm s proper term this is what I just introduced two sites ago I'm just calling it R here just for short and in Adam now so each weight in Adam will be updated using both the momentum component and an RMS prop component and this is also why it's called adaptive moment estimation so the adaptive part from the rmsprop idea and then the moment part from momentum running so how this works is simply when we perform the weight update we have the momentum like term at the top where we have an alpha and 1 minus alpha here again this is similar to momentum but not exactly the same because of the momentum we also have the learning rate here but doesn't matter for now so we have this momentum bank term and in the denominator we have the AR term here from rmsprop this is very similar to what we've seen the previous slide so in the previous slide sorry two slides ago we also had square root of the mean square term here plus scaling the learning rate the gradient here we use same same thing and yeah this is Adam it's just combining momentum and as prop and it works super well in practice so here um is somewhat detail this is the whole algorithm from the paper so the paper is from 2014 2014 is hold in terms of deep learning because the field is moving super fast however this is still a very commonly used algorithm very popular algorithm and most of the time most of the people still use it because it works great yes just one little modification that I didn't have in the slides so there's a bias correcting term here for the first moment instrument in the second roll moment estimate so here beta this is for our moment sorry momentum like term and here the beta is similar to beta 1 is similar to what I've written here is alpha and beta - what you see here is beta 2 is simply what I have as beta here I find it easier to have alpha and beta it's easier to distinguishing the two here they just call it beta 1 and beta 2 but it's the same thing okay so in Python there's also of course an atom optimizer and I recommend from now on using that one instead of GDS 2d because it's easier to get this to work well you have to spend less time with learning rate tuning and yeah also the they have a pirata the betas here so for the first beta usually people choose a point 9 and for the second beta it's a point 9 9 so in our case this was the Alpha oops yeah so there's not much more to say about this so this is the one that we can use now instead of SGD here's nice article that has a visualization so here all the algorithms start at this point and for example for STD it goes like this it's a black line and momentum goes like this it has like this huge velocity build-up and then it overshoots a little bit and then goes to the center rmsprop does something a little bit weird but also finds the center and Adam is a little even more extreme because now has the in momentum term so it goes more motor oops no to the right and then comes back here the reason why I'm showing you that is that in practice Adam works often much better but it's not always true and this is also maybe a bad example because it's a very simple gloss surface and here in this case maybe it's not great to use a sophisticated algorithm using so casing radius and maybe sometimes just fine however it really depends sometimes one algorithm is better than the other in this case they are all quite fine okay how do we use that in pi torch so this is a very very short section I know I'm running out of time here so how do we do optimization using these algorithms and PI torch you have already seen the STD optimizer so the STD optimizes what we have used before all the time if we want to do momentum running we can just add this momentum parameter value here let's model that will give us momentum and phone Adam for Adam we can use this Adam algorithm here so instead of using s to D we will just use Adam and like I've shown you here there's the beta products that you can change but usually people don't change them usually you can keep the defaults and it will work quite well okay I have one more note is to safe the optimizer state if you are using momentum or Adam because now we have some parameters that are updated over the epics for example the velocity of momentum term that will build up so it's also important to save the state of these if you save the model I've shown you that in the earlier slides one last note about SGD versus Adam like I said I recommend really using Adam however if you have a lot of time and do a lot of tweaking usually SGD will give you better results but it requires a lot of tuning often also weight decay and it's kind of tricky but if you really want to get the best performance and you have a lot of time then SGD may actually be better so there was a paper 2017 comparing the different algorithms so on the left this is the Adam paper and Adam here is the one so they show the training cost the lowest better Adam is the one that gets the best performance here compared to other methods for example a mess prop SGD with nestor of a delta and Annegret so but if we look at just the regular STD this is done here on the right side when we what we see here is su da oscillates more this is something we already suspected because we don't have this dampening term we don't have momentum and velocity stuff like that so we have more of this random noise oscillation however you will see that eventually it will find a lower or a better local minimum it will result in a lower test error the reason is why people think that is noise can be good because if you may be fit optimized or lost surface too close the lost too closely if you optimize too well you maybe find a local minimum that is really good in terms of minimizing the loss however it's may be overfitting so the generalization performance will not be so good so that is why you sometimes observe that regularity will give you a better generalization performance than Adam for example okay I hope I am staying on time here so because there were some complaints the lecture was a little bit too long last time so I want to keep the one hour and 15 minutes official lecture time that's just a short reason it's actually a long reading but you don't have to read all of it but it's a good overview of the different optimization algorithms in deep learning by another Sebastian it's not me but it's a great article so I really recommend this one and yeah that's about it so in the next couple of sites I will briefly talk about stuff in the news but if you have to go now we should be at the one in 15 minutes so then yeah see you on Thursday well let's talk about some of the cool things that happened in the machine learning and deep learning world last week so just today I saw this nice interesting cool library called torch layers so this is not an official Python library so you always have to be a little careful because they may not be maintained forever so sometimes people stop making them or updating them so this was a library by Pedro user but still a very nice and cool project so here this library simplifies how you can set up your PI touch model so you can just use sequential without any other additional steps and also what's interesting is it's doing some auto guessing of the input dimensions for example if for the linear one you only have to specify the number of outputs you don't have to specify the number of inputs so it's automatically guessing so here at the bottom it they basically illustrate with a question mark what the network is guessing yeah so there are also convolutional layers and conversion layers is something we'll talk about on Thursday so in two days I hope you are excited ok so that was one nice thing what also was super cool and this is not super new but it was recently shared in the news is this anime again so it's already a year old so it doesn't technically count as stuff that happened last week but anyways it's so cool that I wanted to share it with you so what they did here is they trained gam and combined it with neural try a style transfer so this is the original photo and here this is their enemy game and what they try to do is to make a photo more look more like an enemy that people would draw from the photo in a certain style in the Japanese anime style so what it does it's combining neural style transfer and generative adversarial networks and games also topic or again the generators that's were serial knit works so this is something we will talk about also in a later lecture in this course and they are models for generating new content or data for example here they are making a forum looking more like an anime which I think looks super cool especially I liked especially this picture here which is taking this photograph and converting it into some enemy and I would say this really looks like something someone would draw in an enemy in what you would see as a video for example things look super cool yeah another thing that happened this week is response to the increased usage people of the increased use of technology for telecommuting so for example conference calling software like Microsoft teams so I think teams is currently Microsoft's most popular conference call - I usually use other tools but I heard for many this is a pretty cool tool and they just added a new feature to it based on deep learning so in another article that was described as a neural network that is doing that and what they are doing is they are playing deep learning to remove background noise that is annoying in a call for example leafblower a barking dog or even if you eat a bag of chips during or during the call it may be able to filter out the noise but I wouldn't rely on that so maybe don't eat backs of potato chips during a conference call but yeah that might be something that is not too bad that's actually a pretty cool idea there are some students asking questions about what is a good model size and what is a good size of a data set for deep learning it's how to answer I mean what is the expected performance for a certain type of network always depends on the data set however there was recently a really cool research project that designed an equation or cross-entropy or loss landscape that can relate the model size and the data set size with the expected generalization performance so here they try to model the data size and the model size and the data size in relation to the error so here they have the log 10 of the error they look to of the data set size and the rock - of the model size and I think with model size they were only looking at the width of the network and I'm not sure about the depth but doesn't matter also the depth okay both so that was actually pretty cool so with that looking at the depth and width they couldn't come up with an equation that can capture the relationship between the error the data set size and the model size pretty well here as shown in these two figures which is I think also nice cool research
Original Description
Sebastian's books: https://sebastianraschka.com/books/
The lecture slides are available at: https://github.com/rasbt/stat453-deep-learning-ss20/tree/master/L11-optim
0. Homework from the previous lecture (HW3): 6:45
1. Learning rate decay: 17:31
1.1. Learning rate decay in PyTorch: 37:10
2. Momentum learning: 46:51
2.1. Momentum learning in PyTorch: 52:53
3. Adaptive learning: 57:37
3.1. Adaptive learning in PyTorch: 1:09:01
4. Using optimization algorithms in PyTorch (SGD, ADAM): 1:10:55
5. Interesting stuff in the news: 1:14:52
Introduction to Deep Learning and Generative Models (Spring 2020). Lecture on tricks for improving stochastic gradient descent. Covers
- learning rate decay,
- momentum learning,
- adaptive learning,
- RMSProp,
- and ADAM.
Watch on YouTube ↗
(saves to browser)
Sign in to unlock AI tutor explanation · ⚡30
Playlist
Uploads from Sebastian Raschka · Sebastian Raschka · 5 of 60
1
![Intro to Deep Learning -- L06.5 Cloud Computing [Stat453, SS20]](https://i.ytimg.com/vi/9eH1SAs8K3o/mqdefault.jpg) 2
2
![Intro to Deep Learning -- L09 Regularization [Stat453, SS20]](https://i.ytimg.com/vi/KwaxQKiLkFY/mqdefault.jpg) 3
3
![Intro to Deep Learning -- L10 Input and Weight Normalization Part 1/2 [Stat453, SS20]](https://i.ytimg.com/vi/QQD9Y2FiotQ/mqdefault.jpg) 4
4
![Intro to Deep Learning -- L10 Input and Weight Normalization Part 2/2 [Stat453, SS20]](https://i.ytimg.com/vi/H_hrdUUrjho/mqdefault.jpg) ▶
▶
![Intro to Deep Learning -- L11 Common Optimization Algorithms [Stat453, SS20]](https://i.ytimg.com/vi/MyWwxEHC5zE/mqdefault.jpg) 6
6
![Intro to Deep Learning -- L12 Intro to Convolutional Neural Networks (Part 1) [Stat453, SS20]](https://i.ytimg.com/vi/7ftuaShIzhc/mqdefault.jpg) 7
7
![Intro to Deep Learning -- L13 Intro to Convolutional Neural Networks (Part 2) 1/2 [Stat453, SS20]](https://i.ytimg.com/vi/mZmyp0JjH6s/mqdefault.jpg) 8
8
![Intro to Deep Learning -- L13 Intro to Convolutional Neural Networks (Part 2) 2/2 [Stat453, SS20]](https://i.ytimg.com/vi/ji05GxulVuY/mqdefault.jpg) 9
9
![Intro to Deep Learning -- L14 Intro to Recurrent Neural Networks [Stat453, SS20]](https://i.ytimg.com/vi/tFWex9e-sg8/mqdefault.jpg) 10
10
![Intro to Deep Learning -- L15 Autoencoders [Stat453, SS20]](https://i.ytimg.com/vi/iddlDHXDxc0/mqdefault.jpg) 11
11
![Intro to Deep Learning -- L16 Generative Adversarial Networks [Stat453, SS20]](https://i.ytimg.com/vi/aka29GqbsEM/mqdefault.jpg) 12
12
![Intro to Deep Learning -- Student Presentations, Day 1 [Stat453, SS20]](https://i.ytimg.com/vi/e_I0q3mmfw4/mqdefault.jpg) 13
13
 14
14
 15
15
 16
16
 17
17
 18
18
 19
19
 20
20
 21
21
 22
22
 23
23
 24
24
 25
25
 26
26
 27
27
 28
28
 29
29
 30
30
 31
31
 32
32
 33
33
 34
34
 35
35
 36
36
 37
37
 38
38
 39
39
 40
40
 41
41
 42
42
 43
43
 44
44
 45
45
 46
46
 47
47
 48
48
 49
49
 50
50
 51
51
 52
52
 53
53
 54
54
 55
55
 56
56
 57
57
 58
58
 59
59
 60
60

Intro to Deep Learning -- L06.5 Cloud Computing [Stat453, SS20]
Sebastian Raschka
Intro to Deep Learning -- L09 Regularization [Stat453, SS20]
Sebastian Raschka
Intro to Deep Learning -- L10 Input and Weight Normalization Part 1/2 [Stat453, SS20]
Sebastian Raschka
Intro to Deep Learning -- L10 Input and Weight Normalization Part 2/2 [Stat453, SS20]
Sebastian Raschka
Intro to Deep Learning -- L11 Common Optimization Algorithms [Stat453, SS20]
Sebastian Raschka
Intro to Deep Learning -- L12 Intro to Convolutional Neural Networks (Part 1) [Stat453, SS20]
Sebastian Raschka
Intro to Deep Learning -- L13 Intro to Convolutional Neural Networks (Part 2) 1/2 [Stat453, SS20]
Sebastian Raschka
Intro to Deep Learning -- L13 Intro to Convolutional Neural Networks (Part 2) 2/2 [Stat453, SS20]
Sebastian Raschka
Intro to Deep Learning -- L14 Intro to Recurrent Neural Networks [Stat453, SS20]
Sebastian Raschka
Intro to Deep Learning -- L15 Autoencoders [Stat453, SS20]
Sebastian Raschka
Intro to Deep Learning -- L16 Generative Adversarial Networks [Stat453, SS20]
Sebastian Raschka
Intro to Deep Learning -- Student Presentations, Day 1 [Stat453, SS20]
Sebastian Raschka
1.2 What is Machine Learning (L01: What is Machine Learning)
Sebastian Raschka
1.3 Categories of Machine Learning (L01: What is Machine Learning)
Sebastian Raschka
1.4 Notation (L01: What is Machine Learning)
Sebastian Raschka
1.1 Course overview (L01: What is Machine Learning)
Sebastian Raschka
1.5 ML application (L01: What is Machine Learning)
Sebastian Raschka
1.6 ML motivation (L01: What is Machine Learning)
Sebastian Raschka
2.1 Introduction to NN (L02: Nearest Neighbor Methods)
Sebastian Raschka
2.2 Nearest neighbor decision boundary (L02: Nearest Neighbor Methods)
Sebastian Raschka
2.3 K-nearest neighbors (L02: Nearest Neighbor Methods)
Sebastian Raschka
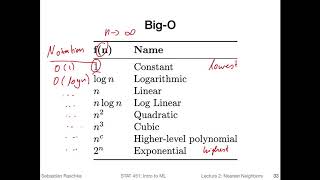
2.4 Big O of K-nearest neighbors (L02: Nearest Neighbor Methods)
Sebastian Raschka
2.5 Improving k-nearest neighbors (L02: Nearest Neighbor Methods)
Sebastian Raschka
2.6 K-nearest neighbors in Python (L02: Nearest Neighbor Methods)
Sebastian Raschka
3.1 (Optional) Python overview
Sebastian Raschka
3.2 (Optional) Python setup
Sebastian Raschka
3.3 (Optional) Running Python code
Sebastian Raschka
4.1 Intro to NumPy (L04: Scientific Computing in Python)
Sebastian Raschka
4.2 NumPy Array Construction and Indexing (L04: Scientific Computing in Python)
Sebastian Raschka
4.4 NumPy Broadcasting (L04: Scientific Computing in Python)
Sebastian Raschka
4.5 NumPy Advanced Indexing -- Memory Views and Copies (L04: Scientific Computing in Python)
Sebastian Raschka
4.3 NumPy Array Math and Universal Functions (L04: Scientific Computing in Python)
Sebastian Raschka
4.7 Reshaping NumPy Arrays (L04: Scientific Computing in Python)
Sebastian Raschka
4.6 NumPy Random Number Generators (L04: Scientific Computing in Python)
Sebastian Raschka
4.8 NumPy Comparison Operators and Masks (L04: Scientific Computing in Python)
Sebastian Raschka
4.9 NumPy Linear Algebra Basics (L04: Scientific Computing in Python)
Sebastian Raschka
4.10 Matplotlib (L04: Scientific Computing in Python)
Sebastian Raschka
5.1 Reading a Dataset from a Tabular Text File (L05: Machine Learning with Scikit-Learn)
Sebastian Raschka
5.2 Basic data handling (L05: Machine Learning with Scikit-Learn)
Sebastian Raschka
5.3 Object Oriented Programming & Python Classes (L05: Machine Learning with Scikit-Learn)
Sebastian Raschka
5.4 Intro to Scikit-learn (L05: Machine Learning with Scikit-Learn)
Sebastian Raschka
5.5 Scikit-learn Transformer API (L05: Machine Learning with Scikit-Learn)
Sebastian Raschka
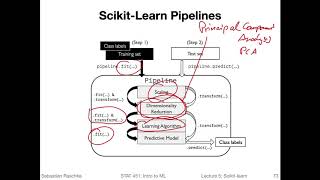
5.6 Scikit-learn Pipelines (L05: Machine Learning with Scikit-Learn)
Sebastian Raschka
6.1 Intro to Decision Trees (L06: Decision Trees)
Sebastian Raschka
6.2 Recursive algorithms & Big-O (L06: Decision Trees)
Sebastian Raschka
6.3 Types of decision trees (L06: Decision Trees)
Sebastian Raschka
6.5 Gini & Entropy versus misclassification error (L06: Decision Trees)
Sebastian Raschka
6.6 Improvements & dealing with overfitting (L06: Decision Trees)
Sebastian Raschka
6.7 Code Example Implementing Decision Trees in Scikit-Learn (L06: Decision Trees)
Sebastian Raschka
7.1 Intro to ensemble methods (L07: Ensemble Methods)
Sebastian Raschka
7.2 Majority Voting (L07: Ensemble Methods)
Sebastian Raschka
7.3 Bagging (L07: Ensemble Methods)
Sebastian Raschka
7.4 Boosting and AdaBoost (L07: Ensemble Methods)
Sebastian Raschka
7.5 Gradient Boosting (L07: Ensemble Methods)
Sebastian Raschka
7.6 Random Forests (L07: Ensemble Methods)
Sebastian Raschka
7.7 Stacking (L07: Ensemble Methods)
Sebastian Raschka
8.1 Intro to overfitting and underfitting (L08: Model Evaluation Part 1)
Sebastian Raschka
8.2 Intuition behind bias and variance (L08: Model Evaluation Part 1)
Sebastian Raschka
8.3 Bias-Variance Decomposition of the Squared Error (L08: Model Evaluation Part 1)
Sebastian Raschka
8.4 Bias and Variance vs Overfitting and Underfitting (L08: Model Evaluation Part 1)
Sebastian Raschka
More on: Supervised Learning
View skill →


Related AI Lessons
🎓
Tutor Explanation