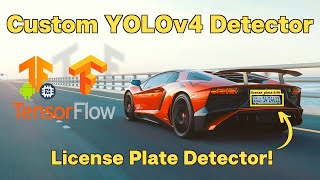
How to Build a Custom YOLOv4 Object Detector using TensorFlow (License Plate Detector)
Key Takeaways
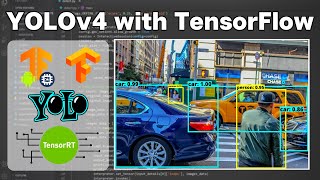
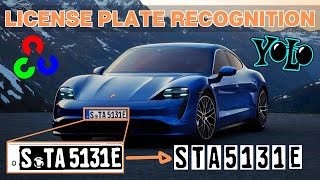
This video tutorial demonstrates how to build a custom YOLOv4 object detector using TensorFlow, TensorFlow Lite, and TensorFlow TensorRT Models for license plate detection, achieving high accuracy and speed on images, video, and webcam.
Full Transcript
[Music] hey everyone in today's video i'll be showing you how to run your custom yolo v4 object detector with tensorflow and tensorflow lite perfect for mobile or edge devices i'll be walking you through step by step how i convert my custom yolo v4 object detector that detects license plates into a tensorflow and tensorflow lite model so that i can run it on images video and webcam using tensorflow as always smash that like button and i hope you enjoy [Music] as always guys first things first to get the code you're gonna go look in the description of the video and i will post the link to the github repository it's the ai guys code tensorflow yolov4tflight the exact same repository used for my previous video but in today we're going to go over how to run the code on your custom object detector so prerequisite for this video is that you already have a custom object detector trained if you don't already have this i recommend checking out one of my previous videos as well it will go over i'll pop it up above it'll go over how to train your own custom yolo v4 object detector in the cloud for free extremely fast and you can get up and running uh in no time so go do that if you don't already have a custom object detector and then come back so i'm going to assume now that you have trained your own custom yolo v4 object detector and we're going to move forward with the tutorial in my previous video i showed how to clone the code as well as for this repository as well as getting it running with tensorflow tensorflow lite on the pre-trained out of the box yolo v4 object detector that's trained on over 80 classes so if you haven't checked out that video i recommend checking it out first i'll link it up above and go ahead and check that one out if you're new to object detection it's a great video to get you up and running um but this video is purely for how to show you guys how to to run your own custom yolo v4 objectors using tensorflow and tensorflow lite so we will move forward um i'm not going to show you guys how to clone the code as i did that in my previous video as well as getting it started i'm getting up and running i'm going to be using the anaconda version that i set up in my previous tutorial um so you're going to see me conda activate this yolo v4 gpu environment but as always you can just pip install the requirements if need be uh so get the requirements set up and then let's hop right back into it uh so i've already cloned the code in here and i've cd into the the folder and then i'm just going to go honda activate yolo v4 dash gpu that's the name of the environment and it's going to go ahead and now it shows that i'm i have i mean it's tied to the environment with all the required dependencies so once you have your environment set up or you've gone ahead and downloaded all the required dependencies it now comes time to go and get that custom trained dot waits file that you've previously trained on so based off my previous video where i did it in using google collab in the cloud i'm going to go ahead and get that file so it's in my yolo v4 backup folder where it got saved to and these are all my saved weights from my training and then i'm just going to go ahead and grab the last one so you'll look before obs last that's my uh most up-to-date one that got trained the most on we're going to go ahead and right click and then download it so you're going to have to go ahead and grab your dot weights file and then there's one more file we need to configure the tensorflow model and it's going to be your object.names file that has your classes in it once per line so we're just going to go ahead and download this as well and it's going to take a couple of minutes here for the dot waits file to download as it is quite a big file so i'll come back when it's fully downloaded so once the files have successfully downloaded um just for simplicity's sake i'm going to go ahead and rename them so i'm going to rename my custom weights i'm just going to rename it to custom.weights so that i know that's my custom weights and i'm going to right click and rename my object.names to just custom.names for simplicity's sake and then you're going to go ahead and ctrl c to copy the custom.weights and you're gonna go to wherever you saved your code to where you saved the repository so mine's in my c drive repos and then it's v4 tf lite and then you're going to go ahead into the data folder so once again from the home repository you're going to go into the data folder and alongside your other your v4.weights you're just going to go ahead and paste it in there so there we go we've got my custom.weights and now i go back to my downloads and i'm going to grab my custom.names so i'm going to copy that ctrl c and then i'm going to go back to my repository where i saved it right back and then this one goes into your data folder as well but then it goes into the classes folder so data classes and then you're just gonna paste it in here beside these other dot names files so there we go there's my custom.names so now we're going to go back to your command shell and i'm just going to run code dot to open up my code editor this opens up vs code but if you use a different code editor just open it up in there and then here we are so here's the file we're going to want to change to enable our custom tensorflow model so you're going to go into the into the folder core so from the home tensorflow v4 tf lite folder you're just going to go into core and you're going to go ahead and open config.pi so i've got it open here and the only line you have to change within the code base in order to enable your custom model is you're going to go ahead and change in the config where it points to the classes file it's going to go ahead and change that to our custom dot names file so right now it's pointed at the pre-trained coco dot names file which has the 80 classes so if you are using the pre-trained like my previous video you would leave this that's why we don't didn't change it but for our custom we're going to go ahead and change this to our custom.names and save it we've saved it and what this does is when it loads in your model and saves the model it raids this file to know the proper size of how many classes your train model is on how many it's actually been trained for so that's why it goes ahead and reads in your custom dot names so i've only trained my custom object detector from my previous video on license a license plate detector so it's got one class so if we were gonna go actually into the data classes and open up my custom dot names it's only got the one class license plate but if we look in the coco.names you can see it loads in all of these classes that it's trained on so our custom my custom detector for the sake of this video is just trained on one single class so now if we go back to my uh readme of my repository and we scroll on down to running you'll only before using just plain tensorflow and not tensorflow light to use the custom model we're going to run this commit command right here so i'm going to copy it and what this does is instead of pointing to the old weights file uh the pre-trained one it points to our custom.weights so if you didn't call it custom.weights make sure to edit this line so that it uh doesn't point to a folder that or a file that doesn't exist and then we're going to output it as checkpoints and custom so those are really the only changes you have to make you point to your custom weights and update the config file to point to the custom dot names so now i can go in here and just right click and paste it in and it's going to go ahead and save my darknet yolo v4 model that we trained on as a tensorflow.pb model file so it's pretty cool and pretty sweet and in a second i'm going to let it run and then i'll hop back in and we will show it in action so if everything went successfully which i hope it did you should see an output like this that shows your total parameters and means it saved uh your custom model into a tensorflow model so now you should be able to go ahead and actually run detector so i can go here and then i've actually set it up to run the custom detector so i'm just going to copy this line and this is going to run it on a picture of a car that i've saved in my images folder so data images car jpeg you guys won't have this car.jpeg so just upload an image to this images folder of whatever you are trying to detect whatever your custom object detector is trained for and it'll work just fine so i'm just going to go ahead and paste that command in here it's going to go ahead and execute and hopefully it'll work successfully it's loading in the model right now as we speak and you'll see hopefully that fingers crossed that it works as planned which i'm sure it will uh and it should be able to detect license plate on my image of a car so it's just loading up on my gpu right now and then in a second it will show the detection it will output it with the bounding box around the license plate as expected so let's see this bad boy run and there we go let me enlarge the image for you guys and you can see that with a 98 accuracy my model has picked up the license plate pretty spot on perfectly around it so it's working correctly which we like to see and if you didn't check my previous video it actually saves your detections so if we go back out and we go to this detections folder it will actually go ahead and save the image in this folder so you always have it saved uh so if you exited by accident you can just go check this folder and you'll see the image saved and now we can actually run our custom object detector on video as well so oh let me get back up there we're going to go ahead and run this command right here for the olivier forum video and it just points to our custom model and it points to a video that i've uploaded of a few cars so once again you won't have this video of the cars because that's what my my custom model is trained on for license plates um so once again go to this data video folder and upload your own uh custom.mp4 file which you can find online at like sites like pixels or pixabay they have great free videos that you can just download and test out your model with so we're going to go back to the command shell and we're going to paste in the custom command for detecting the video so it's going to once again load in the model and then run it it's loading up my gpu and configuring it and then it's going to go ahead and run our custom license plate model ulv4 on a video that i've just taken from the web so so here we go the video's pretty large file uh video file so it's widescreen but we can see it picking up license plates some low accuracy some high accuracy and i'll show you guys this this video once it actually finishes and i can show you uh the full full speed but as you can see it's detecting it a pretty high frame rate it's a little bit slow a little bit delayed with leggy but uh for my gpu not the strongest gpu it's not too bad actually um so it's doing a pretty decent job and you can see that actually every frame it outputs the frames per second that we're getting we're getting roughly on average around 12.5 to 13 frames per second uh which isn't too bad if you're running this strictly on cpu you would likely see half of this uh so maybe anywhere between like three frames per second to six frames per second and just like the images it actually saves your results if you have the flag enabled to the detections folder as results.avi file which is another type of video file so we can actually go ahead and actually just open this and see it running detecting with 90 confidence 50 confidence grabbing the license plates from the video with uh decent accuracy uh pretty high accuracy you can see here 99 at some point so the closer it is uh the better it is at detecting the farther away the object is the more in the background it's going to get a lower accuracy as expected um but overall you can see i successfully ran on the video which we like to see love to see it um and also in my if you haven't seen my previous video in this repository uh readme i go over how to run using tensorflow lite and just like up above i have the commands here to save your model your custom model as tensorflow lite model so if you're trying to run either on a mobile application like android or ios or you're trying to run your custom object detector on let's say a raspberry pi or a jetson nano any edge device you're going to want to go this route right here it's almost the exact same as above so i'm not going to show it and the commands are right here to follow along with so you're just going to go and everyone that says custom you're going to run these convert and then detect and you can actually run it on video as well using the above command with the appropriate flag so it works on video images all the same and i didn't show above but you can actually run your custom object detector on webcam as well and there's a command up above and the normal tensorflow that shows that so i'm not going to go over this because i want to keep this video short but i hope you guys enjoyed this video and as well there is a tensor rt you can do to custom on tensorrt if you guys are super super advanced and trying to optimize uh as much as much as you can i hope you guys enjoyed this video and if you did please smash that like button and if you're not already subscribed to the channel please subscribe it means a lot and it helps my channel grow so thanks guys i hope you enjoyed this one [Music] [Applause] [Music] you
Original Description
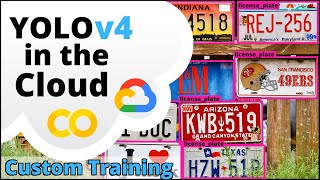
Learn how to implement and build your own Custom YOLOv4 Object Detector with TensorFlow 2.0, TensorFlow Lite, and TensorFlow TensorRT Models. Perform custom YOLOv4 object detections on images, video and webcam with high accuracy and speed. In this tutorial I will be running a custom object detector trained to detect license plates on cars!
#yolov4 #tensorflow #objectdetection
This video will walk-through the steps of converting your custom YOLO Darknet style weights into saved TensorFlow models, and running these models. Take advantage of YOLOv4 as a TensorFlow Lite model, it's small lightweight size makes it perfect for mobile and edge devices such as a raspberry pi. Looking to harness the full powers of a GPU? Then run YOLOv4 with TensorFlow TensorRT to increase performance by up to 8x times.
GET THE CODE HERE: https://github.com/theAIGuysCode/tensorflow-yolov4-tflite
DOWNLOAD MY LICENSE PLATE WEIGHTS FILE: https://drive.google.com/file/d/1EUPtbtdF0bjRtNjGv436vDY28EN5DXDH/view?usp=sharing
In this video I cover:
1. Cloning the code for tutorial
2. Downloading and Converting custom YOLOv4 weights into a saved TensorFlow model
3. Performing Custom YOLOv4 Object Detections with TensorFlow on images, video and webcam
-----------------------Resources------------------------
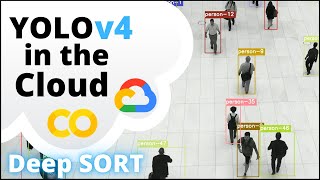
Train Your Own YOLOv4 Custom Object Detector in the Cloud: https://youtu.be/mmj3nxGT2YQ
Running Pre-trained YOLOv4 model with TensorFlow, TFLite, TensorRT: https://youtu.be/iPwepy-SVCQ
The Official YOLOv4 paper: https://arxiv.org/abs/2004.10934
If you enjoyed the video, toss it a like! 👍
To Subscribe: https://www.youtube.com/channel/UCrydcKaojc44XnuXrfhlV8Q?sub_confirmation=1
Thanks so much for watching!
- The AI Guy
Watch on YouTube ↗
(saves to browser)
Sign in to unlock AI tutor explanation · ⚡30
Playlist
Uploads from The AI Guy · The AI Guy · 20 of 28
1
 2
2
 3
3
 4
4
 5
5
 6
6
 7
7
 8
8
 9
9
 10
10
 11
11
 12
12
 13
13
 14
14
 15
15
 16
16
 17
17
 18
18
 19
19
 ▶
▶
 21
21
 22
22
 23
23
 24
24
 25
25
 26
26
 27
27
 28
28

How to Setup a Machine Learning and AI Environment
The AI Guy
Introduction to Machine Learning | | Learning ML with Scikit | Iris Dataset
The AI Guy
Introduction to Machine Learning | Learning ML with Scikit | Iris Dataset | Part 2
The AI Guy
How to Install OpenCV on Windows | OpenCV Python Tutorial | Setting up Computer Vision
The AI Guy
How to Build and Install OpenCV from Source | Using Visual Studio and CMake | Computer Vision
The AI Guy
YOLOv3 Object Detection with Darknet for Windows/Linux | Install and Run with GPU and OPENCV
The AI Guy
Creating a YOLOv3 Custom Dataset | Quick and Easy | 9,000,000+ Images
The AI Guy
Train YOLOv3 Custom Object Detector with Darknet | Aimbot and Security Camera | Fast and Easy
The AI Guy
Create Labels and Annotations for Custom YOLOv3 Google Images Dataset | LabelImg Tutorial
The AI Guy
How to Build an Object Detection Classifier with TensorFlow 2.0 on Windows/Linux
The AI Guy
YOLOv3 in the CLOUD : Install and Train Custom Object Detector (FREE GPU)
The AI Guy
A.I. Learns to Play World's Hardest Game (QWOP)
The AI Guy
How to Build Object Detection APIs Using TensorFlow and Flask
The AI Guy
Getting Started with Azure Machine Learning Studio
The AI Guy
Real-time Yolov3 Object Detection for Webcam and Video (using Tensorflow)
The AI Guy
How to Build an Object Tracker Using YOLOv3, Deep SORT and TensorFlow
The AI Guy
YOLOv4 in the CLOUD: Install and Run Object Detector (FREE GPU)
The AI Guy
YOLOv4 in the CLOUD: Build and Train Custom Object Detector (FREE GPU)
The AI Guy
YOLOv4 Object Detection with TensorFlow, TensorFlow Lite and TensorRT Models (images, video, webcam)
The AI Guy
How to Build a Custom YOLOv4 Object Detector using TensorFlow (License Plate Detector)
The AI Guy
Counting Objects Using YOLOv4 Object Detection | Custom YOLOv4 Functions with TensorFlow
The AI Guy
Object Tracking Using YOLOv4, Deep SORT, and TensorFlow
The AI Guy
Crop and Save YOLOv4 Object Detections | Custom YOLOv4 Functions with TensorFlow
The AI Guy
License Plate Recognition Using YOLOv4 Object Detection, OpenCV, and Tesseract OCR
The AI Guy
YOLOv4 in the CLOUD: Build Object Tracking Using DeepSORT in Google Colab (FREE GPU)
The AI Guy
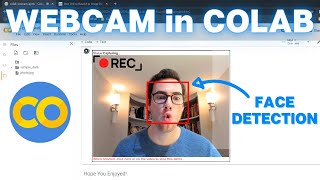
How to Use Webcam In Google Colab for Images and Video (FACE DETECTION)
The AI Guy
Real-time YOLOv4 Object Detection on Webcam in Google Colab | Images and Video
The AI Guy
Getting Started with Agent Development Kit Tools (MCP, Google Search, LangChain, etc.)
The AI Guy
More on: CV Basics
View skill →


Related Reads
📰
📰
📰
📰
CCTV Action Recognition: Comprehensive Fine-Tuning & Real-Time Deployment Guide
Medium · Python
I built a background remover that keeps the fine hair edges
Dev.to · KunStudio
I Built a Python Package to Solve My Own CV Frustration — 7K Downloads in a Week
Medium · Machine Learning
I Built a Python Package to Solve My Own CV Frustration — 7K Downloads in a Week
Medium · Programming
🎓
Tutor Explanation