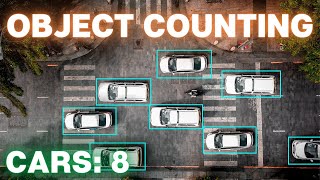
Counting Objects Using YOLOv4 Object Detection | Custom YOLOv4 Functions with TensorFlow
Key Takeaways
This video demonstrates how to use YOLOv4 object detection with custom functions in TensorFlow to count objects in images and videos, utilizing tools such as YOLOv4, TensorFlow, and GitHub.
Full Transcript
[Music] what is going on everyone welcome to the video in today's video i'll be showing you how to create custom functions implemented within yolo version 4. i'll be walking you through how i created a object counter to count all the detections found within images and video ran using yolo version 4 and you're going to see you can do it total objects or you can count per class so a lot of custom ability i'm gonna be showing you guys the code and stepping you through it if you enjoy the video please smash that like button it helps the channel grow and subscribe to the channel if you want to stay up to date with all videos ai and object detection [Applause] [Music] alright everyone so how today's video is going to work is i'm going to first show you in action the two custom functions that i've currently implemented in this new repository and then secondly i'm going to be showing you line by line how i created one of these custom functions in hopes that you can begin to implement your own custom functions and see how easy it is to integrate them with yolo version 4. so the first custom function that i'm going to show you is how to count objects either the total objects in the image or video or per class and actually distinguish and count the different classes found and then the second custom function and flag that i've added to this repository is the ability to print detailed information about each detection so it's going to print the class the confidence and the bounding box coordinates and i'm going to show you how you can even add more information if you want so first things first you're going to want to go ahead to my github the ai guys code yolo v4 custom functions this is the repository i've created where i will be playing around and creating cool custom functions it's very similar to my repository from my previous two videos however i wanted to create a repository that wasn't a forked repository and was my own uh repository so that people can go ahead into the issues tab right here and create issues and they can actually create issues on what custom functions you want me to do next so i actually urge you to create issues as it will allow me to know what you guys want to see in future videos where i add to this repository adding other custom functions so to get the code for this tutorial you're going to go ahead and click the code green button and then hit the little clipboard to copy it and then you're going to go over to your command window or terminal and then you're just going to go and do the old get clone and then paste it in there wherever you want to download the code to so that's going to go ahead and download the repository and then once it's finished i'll jump right back into it so once the code is finished cloning you can just cd into the repository so yolov4 custom functions and now we're going to go ahead and install all the dependencies i'm not going to go ahead and bore you guys with showing you how it's all done i've done so in my previous videos so i'll link it up above if you get stuck with any of the dependencies for the sake of this video i will be using the official pre-trained yolo v4 weights that are able to detect over 80 classes however this does work this repository for custom trained ulv4 models so if you have trained one or you want to train one you can check out one of my previous videos where i show you how to train it and a separate one where i show you how to walk through running your custom model in tensorflow so both are available to you and i hope you've enjoyed them but for the sake of this one i'm just going to go ahead and download the pre-trained weights so click here i already have it downloaded so i'm just going to go ahead and copy it and then you're going to go to wherever you cloned the code so mine's repos yolov4 custom functions is the repository and then you're going to go into this data folder right here data and you're going to go ahead and control v to paste it in here so once you've done that you can now go ahead and run this save model command what this does is it converts the dark net style weights into a tensorflow model that we can run so we're just going to go ahead and paste that command in here and while it runs i'm just going to show you guys that you can indeed run on your custom model and you can also run uh using tensorflow lite so tf lite model if you're trying to run or create custom functions for android or ios or edge devices like a raspberry pi and you can also use tensor rt which is the most optimized if you have a high performance gpu but i'm just using the regular tensorflow so it'll be a dot pb model so yeah the first command saves the model from convert from the darknet style weights into a tensorflow model weights file so once the first command is finished you're just going to want to scroll down to where i go over the custom functions and flags so the first one like i said is the ability to actually count objects either by total objects or per class so you're just going to go ahead and copy this command over copy and then paste it in here and the actual only difference between this is that it has the flag dash dash count so that is the flag that activates or enables the counting of the objects and i'll show you how you can code and add your own flags um later when i'm showing line by line the code but yes it's just dash dash count that is the flag for counting objects and by default you'll see that it's going to count the total objects in the image or video so if i expand this you can see that it prints on the screen total objects detected three so you saw the truck the bicycle and the dog which is indeed correct so we're gonna go ahead and close that and now i'll show you guys how to in the code change it to be her class so you're gonna go back to your command prompt and i'm using vs code so i can use code dot to open up my vs code but you can open this up in every code editor you want so this is going to go ahead and open up the code base so where we're actually going to want to edit the line to enable it per class counting is either in detect or detect video dot pi depending on whether you or trying to run it on video or images so both of these commands can be referenced within the readme up above so if you're trying to see the video or webcam or the image commands they're all up here so for detect.pi we're just going to scroll down and it is right here so on line 100 this is where it says if the flag count is activated run this function count objects which i'll show you how to code and then it's this parameter right here by class equals false if you set that to true and save that will now enable per class so run the exact same detect pi command with pointing to the dog.jpg which is in the repository so you will have it and with account flag and now we will see that it actually detects and or counts rather the detections per class instead of the total objects like it did prior so you can see it says bicycles detected one dogs detected one and trucks detected one so it's counting each class and how many there are only one of each so it is correct and i didn't show this before but it actually outputs to the terminal or command prompt the exact same as what you see written on the image and you can disable that so we can actually run the exact same command on video or webcam as well and add the count flag and so depending on whether we wanted it to be per class account per class or total objects once again there's going to be a line down here on line 121 counted classes equals count objects that's a function we're going to be creating or i'll be showing you guys how to create that i've created and then it's set to false so right now again it's going to be total objects but if we want to show per class which i think is a little more exciting you can set it to true and then we can go ahead and run the command python detect video dot pi point to the weights which is dot slash check points slash yellow v4 dash 416 dash dash model yolo v4 so that you can actually change this to yellow version 3 and the exact same stuff the exact same functions will all work with the old version three and then we set this to video now because we're running on detect video and we do data slash video slash test.mp4 and this is a file that you guys have as well so you can run this exact same command and then we add the flag output if we want to save the resulting video with the detections and counting overlaid if we want to save that so we do so i'm going to save that to the detections folder slash and i'm going to call it results.avi has to be avi file extension because that's what it's configured to save as and then now we just go ahead and add our dash dash count flag so that is the detection to run it on video if you wanted to run it on webcam you would set this video parameter to zero but we want to run it on our video so we're going to set it back to videotest.mp4 and we're going to go ahead and run this and you will see that it will count all the classes per class up in that top left corner and once again that can be removed you don't have to print it on overlaid on the actual video or image that's something i've done just for the purpose of showing you guys that it works and you'll see as the video outputs it will actually show the classes up there so you can see it's got 14 15 16 it's counting the people as they come in and out of the screen it's got a potted plant bicycle is detected people walk in their bikes so as you can see the counting objects works for video as well which is pretty darn sweet so when the video or image detections finishes just want to point out that your detections or results video gets saved to this detections folder so right here every image that you point to will get saved right here and then if you add that output flag that i showed you the resulting video will be outputted to here as well so just to point that out so now on to the second custom function that i've added we just showed you the counting objects but now i'll show you the ability to print detailed information about each detection and once again this will work on both the image and video so all you have to actually do is run that exact same command that we were just that i just showed you either the detect dot pi or detect video.pi whether you're doing it on images or video i'm gonna do it on an image so i'm back on that jpeg and all you have to do for this one the flag to enable detailed output is dash dash info and you could if you wanted to add this on top of the command the flag dash count so you could do both flags if you wanted to so i'll just go ahead and so once the command runs you'll see this is what it outputs object found the class confidence so how confident it is that it found that that object and then it actually gives you the outputted bounding box coordinates in the format of the bottom left corner coordinate so x min and y min and then the top right coordinate of the bounding box which is x max y max so these are the outputs right here of the coordinates relative to that image so as you can see the second custom function just adding the flag for the detailed output it's quite simple not much to show so let's dive into the code of how you can create your own custom function and where to add the code so now i'm going to step through the code that i created for the custom function line by line and show you guys where to implement your own custom functions and how to do so so i'm going to show you guys in detect.pi but it's exact same for detectvideo.pi so what i've gone ahead and done is the way detect.pi works is first up here you have all of your flags so this is how you define flags and they can be a list string float boolean so you're going to see that what i've done for count is i've created a flag that is boolean so it's either true or false and it's set default to false and then a little description so the way it works is the name of the flag defaulted value and then load description so we have this this count flag and it's set to false so detect apply the way it works is loads in all of your configurations like your number of classes etc loads in the model that you've saved so if it's tf lite it will load in a tf lite model otherwise it does regular tensorflow and then it goes through loops through each image whereas if this was a video it looped through each frame of the video it does a little bit of reading in the image and uh resizing it for the model and then it runs the model either on the tf light or for roller v3 or yolo over four there's a bunch of flags for if else statements depending on what flag you have set so if you're running the regular tensorflow it does down to this else right here and this is what happens and then you run non-max suppression on the detections to get the best overall detections uh that can be found so right here is some key variables in the file so but the bounding boxes here are all the bounding boxes the scores the classes and then how many valid detections there are so the number of total detections so if you're ever trying to run anything i recommend just writing a print statement and just printing these boxes or scores so you can just print all of these and see what they look like in order to properly get the handle of what you're going to be working with so i've created a function to format the bounding boxes because originally they come out of this detector in a kind of a normalized version so normalize means it's a ratio so you can scale it depending independent of what the image size is and it's it came back in y min x min y max x max so i did a little a function here that you can find in the utilities dot pi utils utils.pi uh script which is in the core folder utils.i and you can see that i've created this little function format bounding boxes just takes in the bounding boxes and outputs them and returns them into xmin ymin y max relative to the image size so now you can have bounding boxes if you're using a function that needs them in the proper format and then there's this prediction b box which is used to store all of the relevant information on the detections into one variable so it has bounding boxes the scores classes and the number of detections stored in it so that you can pass just one variable into functions and then expand them within the function back out into their individual states and then so this is where i've created my custom function so the way it works is it's just if the flags.count is set so the saying if flags.count is set to true then run the following code and it just runs counted classes and calls the function that i've created which i'll show you guys in a sec and the two parameters and then loops through the dictionary that is returned and prints a key value format number of blank being the key is the num the class name so the number of persons or dogs and then the value which is the count how many they found and then it goes ahead and actually draws the count on the uh image over itself it overlays it so i'll show you guys what that looks like and then this is just the normal uh i'm writing the detections to the folder so that's kind of how it works uh the big value that you'll want to or variable you'll want to use your custom functions is just this predict underscore b box and you'll see i passed it in to my uh count objects function so where i'm i have all my i'm going to be having all my custom functions stored is in the core folder i've created a functions.pi script this is where i'm going to be creating all of my custom functions just kind of clean easy space to work from you could also put them in utils.pi if you want but i'm running them out of functions.pi so this is where you'll find the code for count objects so i'll just step you guys through the function itself so we've got our define our count objects function it takes in two parameters first one being the data which is that prediction underscore b box that i showed you and then the second one is by class this is just a boolean value set to true or false and it's defaulted to false right now so by default it will just do total objects counted but if you want them to be per class you would just pass in true as the second parameter so right off the bat what i said is it expands those what's in prediction. underscore v box the data back into its respective individual fields so boxes scores classes and number of objects detected so that we can work with them and then i go ahead and i simply create a dictionary because dictionary to me seemed like the easiest way to create a counter because you can have the key to the dictionary be the class name like person dog etc and then the value that is also stored relative to that key be the actual count of how many of that object has been detected so i've created a dictionary if you see an easier way by all means you can change it and then now we run into the code where if you've set that by class boolean to true it will run this code otherwise it will just output total objects and add it to the dictionary so if you have set the class to true it's going to load in the class names from the config so that's why we've done these two imports here it reads class names from your object.names file so if we go into the config you'll see that this is where it points to what's being loaded in the configulo classes and it points to where your classes are stored so by default it will use coco.names but if you've set up a custom object detector you'll want to put your custom.names here so hopping back in to the func to the function we now have all of our class names like persons dog etc loaded in before they were just indexes like zero one two three and now we look through the total number of objects detected so that is that's num num object parameter or variable it actually has how many detections there are that we have found and then we grab the class index so the zero one two three value corresponding to person dog etc because that is what comes from the detector it returns an integer 0 1 2 3 which is just the index so now we're converting we're grabbing the class name by using our class index so grabbing from the list of class names what index 0 1 2 3 its corresponding class name and then all we do is we add to our dictionary under the class name uh so for persons it's going to add persons and this simple little account function it gets what the value is of that key and then just adds one so it just counts it'll as people are getting detected it'll just keep adding one to the count so it's pretty simple and not too hard of a function to understand and then else otherwise it just adds to the dictionary total object's key and the value being the total number of objects and then just returns the dictionary to the function so it's pretty straightforward and i'll show you detect up video it's pretty much the exact same it just has the if flags.count and the exact same right here so that's why we have this drawbee box because we've actually been we've drawn on and overlaid on the image or video some text i'll show you what we've added there so in utils.pi is where the drawb box function is so if you're ever trying to add anything to the image or video frame you're going to want to customize this function so what i've gone ahead and done is i've added a new parameter called counted classes defaulted it to none because by default the count flag is in detect.pi or detectvideo.pi it's set to false so we don't want always outputting on the image the number of classes only when that count counted classes flag is set to true so by default it's none and then we just run a little if statement here that says if counting classes does not equal none so if we've passed in the dictionary of our accounts then it goes ahead and does this code so it does another for loop for key value for for the class and the count it's going through and it's going to cp2 draws the text on the image so it puts it on the image we format it to say so person's detected and then the count and then this right here is where it's going to start the text so that is saying 5 pixels from the x value and then this offset value so it's going to be in the top left corner and what this offset value does is it starts it at 15 but then it's going to add on this height ratio so that if we have multiple classes detected it's not just overlaying them on top of each other and not drawing all the text in one single spot so this is a fancy way of just making sure that they don't get drawn on top of each other and that you can take a ratio of your height and just keep adding that ratio so that the more the more classes it detects uh the farther down the page it'll go down the left side so yeah right here is the little snippet that i've added to draw on and this parameter right here is color so if you want to change it not to be green i've just set it to rgb color code for green it's zero two five five zero this is the thickness of the text so i'll just add it to two so it's a little bolded and then this value right here where it's set to one is just a multiplier of the actual font size so you could put if you put it to two three four the font would be a lot bigger so i hope that kind of clears up how i drew on to the image the count in that top left corner and this is also where you can find the actual info flag the detailed info i've added it to this function as well so if you're wanting to play around and customize what the flag for detailed uh the info flag will output to the console or terminal you can do it here as well so that's pretty much it guys i hope you enjoyed the video uh please let me know in the description below what custom functions you want me to work on next i'll be working on cropping images and as well as using tesseract to extract text from detections so let me know down below what you want to see in future videos and as always smash that like button and subscribe subscribe to the channel if you haven't already thanks have a good day [Music] [Applause] [Music] you
Original Description
Learn how to code your very own Custom Functions to work with YOLOv4 Object Detections! In this video I will walk-through how to run an object counting app using YOLOv4, YOLOv4-tiny, YOLOv3 or YOLOv3-tiny. The commands can be run using TensorFlow 2.0, TensorFlow Lite or TensorRT models on images, video and webcam!
#yolov4 #objectdetection #tensorflow
This video will cover two custom functions that have been created with YOLOv4. The first being for counting objects within images and video, and the second being a custom flag to show detailed information on YOLOv4 detections (class, confidence score, bounding box coordinates).
GET THE CODE HERE: https://github.com/theAIGuysCode/yolov4-custom-functions
Follow the tutorial to be able to convert YOLO style Darknet weights into saved TensorFlow models, and run these models. Using easy command line flags to enable custom functions like object counting. Take advantage of YOLOv4 as a TensorFlow Lite model, it's small lightweight size makes it perfect for mobile and edge devices such as a raspberry pi. Looking to harness the full powers of a GPU? Then run YOLOv4 with TensorFlow TensorRT to increase performance by up to 8x times.
In this video I cover:
1. Show Custom Functions Repository and Explain Object Counting
2. Cloning or Downloading the Code
3. Downloading and Converting YOLOv4 Weights into a saved TensorFlow Model
4. Enabling Object Counting while performing YOLOv4 Object Detections with TensorFlow on images, video and webcam
8. Printing Detailed Information About Object Detections to command prompt
9. Stepping through the code to create custom functions
--------------------------Resources---------------------------
Train Your Own YOLOv4 Custom Object Detector in the Cloud: https://youtu.be/mmj3nxGT2YQ
Running Pre-trained YOLOv4 model with TensorFlow, TFLite, TensorRT: https://youtu.be/iPwepy-SVCQ
running Custom YOLOv4 License Plate Detector Model with TensorFlow, TFLite, TensorRT: https://www.youtube.com/watch
Watch on YouTube ↗
(saves to browser)
Sign in to unlock AI tutor explanation · ⚡30
Playlist
Uploads from The AI Guy · The AI Guy · 21 of 28
1
 2
2
 3
3
 4
4
 5
5
 6
6
 7
7
 8
8
 9
9
 10
10
 11
11
 12
12
 13
13
 14
14
 15
15
 16
16
 17
17
 18
18
 19
19
 20
20
 ▶
▶
 22
22
 23
23
 24
24
 25
25
 26
26
 27
27
 28
28

How to Setup a Machine Learning and AI Environment
The AI Guy
Introduction to Machine Learning | | Learning ML with Scikit | Iris Dataset
The AI Guy
Introduction to Machine Learning | Learning ML with Scikit | Iris Dataset | Part 2
The AI Guy
How to Install OpenCV on Windows | OpenCV Python Tutorial | Setting up Computer Vision
The AI Guy
How to Build and Install OpenCV from Source | Using Visual Studio and CMake | Computer Vision
The AI Guy
YOLOv3 Object Detection with Darknet for Windows/Linux | Install and Run with GPU and OPENCV
The AI Guy
Creating a YOLOv3 Custom Dataset | Quick and Easy | 9,000,000+ Images
The AI Guy
Train YOLOv3 Custom Object Detector with Darknet | Aimbot and Security Camera | Fast and Easy
The AI Guy
Create Labels and Annotations for Custom YOLOv3 Google Images Dataset | LabelImg Tutorial
The AI Guy
How to Build an Object Detection Classifier with TensorFlow 2.0 on Windows/Linux
The AI Guy
YOLOv3 in the CLOUD : Install and Train Custom Object Detector (FREE GPU)
The AI Guy
A.I. Learns to Play World's Hardest Game (QWOP)
The AI Guy
How to Build Object Detection APIs Using TensorFlow and Flask
The AI Guy
Getting Started with Azure Machine Learning Studio
The AI Guy
Real-time Yolov3 Object Detection for Webcam and Video (using Tensorflow)
The AI Guy
How to Build an Object Tracker Using YOLOv3, Deep SORT and TensorFlow
The AI Guy
YOLOv4 in the CLOUD: Install and Run Object Detector (FREE GPU)
The AI Guy
YOLOv4 in the CLOUD: Build and Train Custom Object Detector (FREE GPU)
The AI Guy
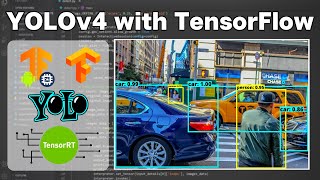
YOLOv4 Object Detection with TensorFlow, TensorFlow Lite and TensorRT Models (images, video, webcam)
The AI Guy
How to Build a Custom YOLOv4 Object Detector using TensorFlow (License Plate Detector)
The AI Guy
Counting Objects Using YOLOv4 Object Detection | Custom YOLOv4 Functions with TensorFlow
The AI Guy
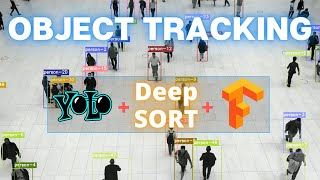
Object Tracking Using YOLOv4, Deep SORT, and TensorFlow
The AI Guy
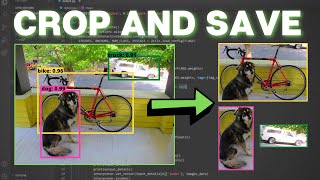
Crop and Save YOLOv4 Object Detections | Custom YOLOv4 Functions with TensorFlow
The AI Guy
License Plate Recognition Using YOLOv4 Object Detection, OpenCV, and Tesseract OCR
The AI Guy
YOLOv4 in the CLOUD: Build Object Tracking Using DeepSORT in Google Colab (FREE GPU)
The AI Guy
How to Use Webcam In Google Colab for Images and Video (FACE DETECTION)
The AI Guy
Real-time YOLOv4 Object Detection on Webcam in Google Colab | Images and Video
The AI Guy
Getting Started with Agent Development Kit Tools (MCP, Google Search, LangChain, etc.)
The AI Guy
More on: CV Basics
View skill →


Related AI Lessons
⚡
⚡
⚡
⚡
Vision AI: Transforming Business Operations with Computer Vision AI
Medium · AI
Vision AI: Transforming Business Operations with Computer Vision AI
Medium · Machine Learning
Cloud-Optimized OpenCV + A Special Surprise Announcement on OpenCV Live
OpenCV Blog
When the Camera Becomes an Exam Proctor: Building an AI-Powered Exam Monitoring System with…
Medium · Python
🎓
Tutor Explanation