How to Build and Install OpenCV from Source | Using Visual Studio and CMake | Computer Vision
Skills:
CV Basics90%
Key Takeaways
This video teaches how to build and install OpenCV from source using Visual Studio and CMake
Full Transcript
[Music] what's going on guys I hope everyone's having a great day and welcome to the video today's video is gonna be similar to the last video or I went over how to install OpenCV with Python but in today's video we're gonna install and build open CV from source so that this will be used with programming languages such as C and C++ so today's video we're going to install the dependencies C make in Visual Studio then we're going to download and build open CV from source and then we're gonna verify through a short command that we have installed open CV correctly so let's get into it so first things first we're gonna want to go and get C makes we're gonna go download C make click on the first link here supervisors were to see me which is used to download binary and source code it helps build source code so that's what we're gonna do with how we're gonna build open CV so I'm going to Windows machine so I'm going to go down here to the windows 64-bit installer click on that and I'm gonna let that download come back was downloaded so when it's done downloading the Installer will pop ups like this go ahead and click Next accept the Terms of agreement next I'm gonna add C make to path and I'll carry desktop welcome as well I said put it in my Program Files just perfect next and then now it's gonna go ahead and install this alright we'll come back when it's done when it's done installing this final statement pop-up you shouldn't go ahead and click finish and now we have C make downloaded installed so now we're gonna go and get the visual studio so Visual Studio is the IDE we will be using to write our cnc plus plus so we're gonna go to downloads and pops up community versions free so this is one i recommend for everyone you're gonna go ahead and click this download link and it's going to go ahead and download on your machine i already have it downloaded so i'm just going to skip this step all right when Visual Studio is done downloading it'll open up the Installer that looks like this and you're gonna be able to add which add-ons you want so the only one that really matters and you need for open CV is this one right here desktop development with C++ so we're gonna go ahead and make sure that checkbox is checked then you're gonna go down here and it'll say install for you or modify I already have this downloaded so I'm going to skip this step but for you just go down to this word it says closed for me and click that modify our install button and that'll go ahead and download the required packages for us so now that we have Visual Studio downloaded we're gonna go on to the last step which to get OpenCV so we're just gonna Google open CV hit the first link that pops up so press the open CV home page and now we can check out this is if you want the latest release you just go right away and click on learn more I'm gonna click on the releases it'll bring us to all of the releases of open CV that have happened if you want four or three this is where you decide the star means it's the up most up-to-date recent version so I'm gonna go up and just get the for cuz it has more features and for this purpose we just want to do it from source we're gonna download the zip and the source and it will download and we'll come back when it's done so once you see that your open CV is downloaded and in your downloads whatever other folder you downloaded to just double click open it up and then go to extract all you can leave it here and your downloads if you want but for me I've created in my C users and myself I've created an open CV folder so I'm gonna have this is the destination and extract it there and it'll come back when this is finished so once it's downloaded you'll see that the folder is now in your open CV folder and open CV out of the box comes with a lot of functionality but it actually doesn't have all the functionality you could ever want and all the different functions so we're gonna go ahead and get the rest of the functions so we're gonna Google open CV contribs and then our gonna click on the first link which brings us to the github of open C beacon Trevon what is this this is all of the extra modules and functions that you could ever want and allows you to do every single type of functionality with open CV that the out-of-the-box base version doesn't have so this is a recommendation that I would recommend to do so once we're here we're gonna go to branch master and you're gonna click on the tags here to the right of branches and then you're just going to go ahead and choose whichever version of open CV you downloaded it from the official open CV page so I did 4.1.2 and I'm gonna click on the clone and download and I'm just gonna hit this download zip and that will download the open CV modules contribs for the version that you chose so go ahead and download that and we'll come back when it's downloaded so open CV contributes now downloaded so we're gonna do the exact same thing we did with open CV base where we are going to extract all to our open CV folder perfect struct we'll come back when this is done and get into the meat of it so now my open CV folder has both the contribs and the open CV base so next you're gonna want to go is create a new folder in here called build and this is where all of our build files that come from the building open CV will be located so once you have these three file folders set up you're going to want to go and open CMake and you're gonna go to browse source and this is where you're gonna choose the main base open CV so I once my c e users open CV and you're gonna choose the base version that you downloaded from the site and then for your build folder here browse build you're gonna go to the build folder that we just created so you know users wo open CV and this is the build one so this is where it'll put all of the folders that get built through C make so we're gonna select that folder and now you're going to go configure from the drop-down choose either if your ex 64 or 132 they finish and the first round of configuration will now happen you'll get a bunch of boxes that pop up in red where we're all going to have to adjust maybe and add some folders that's fine I'm not Python - I have Python 3 so we'll come back when this is done configuring and I'll show you what the red boxes look like so you'll know configuration is done when you see the configuring done below and if you don't see any giant red errors that pop up at the bottom then you're good so you'll see the red screen this means that we have to do another wave of configuration this is what happened from our last one so really the only thing you have to do here is scroll on down to where you see OpenCV enable extra modules OpenCV extra modules paths so this is where if you decided to download the contribu gonna want to go here and choose this so go OpenCV OpenCV it can't read and you're going to choose the modules folder i'm just select folder so that's all you have to do now we can configure again at the end of this one we should see that there are no more red red lines it should all be white and that means that configuration is done and you're now able to generate your code so we'll wait for this to finish it doesn't take too long the second time around it's a lot faster and then we can generate our code and start to build it so now that it's configured and we don't see any red lines we can go ahead and generate our code if you happen to see when you ran it a second time and you configured and you still saw red lines try configuring again and then if you still continue to see them message me down in the comments below and tell me your issue and I can try to help sort you through it so now we're gonna go generate this will actually create the files within the build folder that we specified so see this is very quick generating is done and now if we go back here to our build folder we can see all these files and folders that were not there before so now that we've generated all the files in Cerie it comes time to actually build OpenCV within Visual Studio so within the build folder you're going to want to scroll down and find the opencv solution file folder so this is the solution file that will actually be able to build open see these you're gonna go ahead and double click that and have it open and Visual Studio so once it comes up in Visual Studio it's gonna load all the projects in and you're gonna want to expand the C make targets folder and first things first you're going to want to go to over here to the mode and debug change that to release it's just a good practice that I like to do so we're gonna change that to release and now we're gonna go to right click on all build and build the the file the project so once we build this it's gonna take a fair amount of time to go through everything and build it it probably could take up to five minutes so I'm gonna come back when it's done when the build finally finishes its forever Ness you'll hopefully see that all succeeded and none failed if you can check that you can check the errors and hopefully you don't have any errors or warnings as well so secondly you're gonna want to right click on install and build install this will go ahead and actually install OpenCV so once this is down dunk this is a quick one you can see cuz it just has to do two but now you should have OpenCV installed and built so now we can go ahead and run a quick program to verify this so to verify that OpenCV is properly built and installed i'm going to go through the same example i showed in my previous video where I showed how to download open CV for Python but this is a Python code but it just shows the fact that open CV is now built from source on our machine so so you're gonna open a command prompt and then go if you have open CV Python version you're sure I want to go pip uninstall open CV Python so this doesn't mess with the current version that we have so okay it's not installed good so now we're gonna go python import c v2 and now go same command prynt see v2 dot underscore underscore version underscore underscore and as we can see it prints out open TV version four point one point two which is indeed the correct version that we had downloaded from source so this goes to verify that we have actually succeeded with building and installing open CV from source and now we can go ahead and you can use it for python c c++ every language you haven't configured now so that kind of wraps up this video I hope you all enjoyed if you have any other videos concerning open TV maybe some tutorials or demos that you want to see let me know down in the comments below I hope you guys enjoyed this thanks for watching [Music]
Original Description
How to Build and Install OpenCV from Source | Using Visual Studio and CMake - In this video I will show you how build and install OpenCV (Open Source Computer Vision) from source code. This will allow you to use OpenCV with every programming language! OpenCV is a library for computer vision and machine learning that contains over 2500 algorithms for you to use. OpenCV gives you the tools to perform facial detection, object identification, and much more.
#opencv #computervision #tutorial
Learn more about OpenCV on their official site: https://opencv.org/about/
Install CMake: https://cmake.org/download/
Install Visual Studio: https://visualstudio.microsoft.com/downloads/
Download OpenCV source: https://opencv.org/releases/
OpenCV contrib repo: https://github.com/opencv/opencv_contrib
In this video I cover:
1. Installing CMake so you can generate binary source code.
2. Installing Visual Studio so you can build source code.
3. Building and Installing OpenCV from source and verifying it works.
If you enjoyed the video, toss it a like! 👍
To Subscribe: https://www.youtube.com/channel/UCryd...
Thanks so much for watching!
- The AI Guy
Watch on YouTube ↗
(saves to browser)
Sign in to unlock AI tutor explanation · ⚡30
Playlist
Uploads from The AI Guy · The AI Guy · 5 of 28
1
 2
2
 3
3
 4
4
 ▶
▶
 6
6
 7
7
 8
8
 9
9
 10
10
 11
11
 12
12
 13
13
 14
14
 15
15
 16
16
 17
17
 18
18
 19
19
 20
20
 21
21
 22
22
 23
23
 24
24
 25
25
 26
26
 27
27
 28
28

How to Setup a Machine Learning and AI Environment
The AI Guy
Introduction to Machine Learning | | Learning ML with Scikit | Iris Dataset
The AI Guy
Introduction to Machine Learning | Learning ML with Scikit | Iris Dataset | Part 2
The AI Guy
How to Install OpenCV on Windows | OpenCV Python Tutorial | Setting up Computer Vision
The AI Guy
How to Build and Install OpenCV from Source | Using Visual Studio and CMake | Computer Vision
The AI Guy
YOLOv3 Object Detection with Darknet for Windows/Linux | Install and Run with GPU and OPENCV
The AI Guy
Creating a YOLOv3 Custom Dataset | Quick and Easy | 9,000,000+ Images
The AI Guy
Train YOLOv3 Custom Object Detector with Darknet | Aimbot and Security Camera | Fast and Easy
The AI Guy
Create Labels and Annotations for Custom YOLOv3 Google Images Dataset | LabelImg Tutorial
The AI Guy
How to Build an Object Detection Classifier with TensorFlow 2.0 on Windows/Linux
The AI Guy
YOLOv3 in the CLOUD : Install and Train Custom Object Detector (FREE GPU)
The AI Guy
A.I. Learns to Play World's Hardest Game (QWOP)
The AI Guy
How to Build Object Detection APIs Using TensorFlow and Flask
The AI Guy
Getting Started with Azure Machine Learning Studio
The AI Guy
Real-time Yolov3 Object Detection for Webcam and Video (using Tensorflow)
The AI Guy
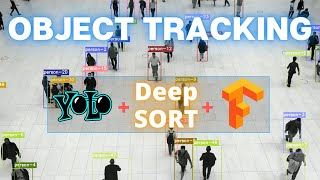
How to Build an Object Tracker Using YOLOv3, Deep SORT and TensorFlow
The AI Guy
YOLOv4 in the CLOUD: Install and Run Object Detector (FREE GPU)
The AI Guy
YOLOv4 in the CLOUD: Build and Train Custom Object Detector (FREE GPU)
The AI Guy
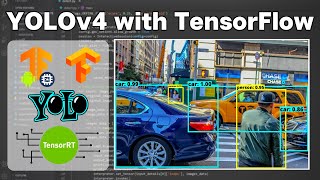
YOLOv4 Object Detection with TensorFlow, TensorFlow Lite and TensorRT Models (images, video, webcam)
The AI Guy
How to Build a Custom YOLOv4 Object Detector using TensorFlow (License Plate Detector)
The AI Guy
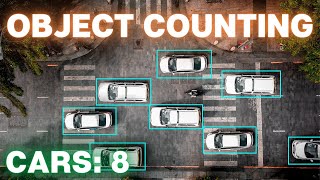
Counting Objects Using YOLOv4 Object Detection | Custom YOLOv4 Functions with TensorFlow
The AI Guy
Object Tracking Using YOLOv4, Deep SORT, and TensorFlow
The AI Guy
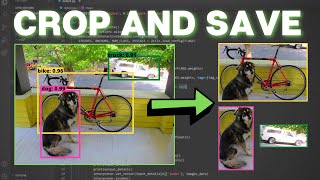
Crop and Save YOLOv4 Object Detections | Custom YOLOv4 Functions with TensorFlow
The AI Guy
License Plate Recognition Using YOLOv4 Object Detection, OpenCV, and Tesseract OCR
The AI Guy
YOLOv4 in the CLOUD: Build Object Tracking Using DeepSORT in Google Colab (FREE GPU)
The AI Guy
How to Use Webcam In Google Colab for Images and Video (FACE DETECTION)
The AI Guy
Real-time YOLOv4 Object Detection on Webcam in Google Colab | Images and Video
The AI Guy
Getting Started with Agent Development Kit Tools (MCP, Google Search, LangChain, etc.)
The AI Guy
More on: CV Basics
View skill →


Related AI Lessons
⚡
⚡
⚡
⚡
Cloud-Optimized OpenCV + A Special Surprise Announcement on OpenCV Live
OpenCV Blog
When the Camera Becomes an Exam Proctor: Building an AI-Powered Exam Monitoring System with…
Medium · Python
When the Camera Becomes an Exam Proctor: Building an AI-Powered Exam Monitoring System with…
Medium · Deep Learning
When the Camera Becomes an Exam Proctor: Building an AI-Powered Exam Monitoring System with…
Medium · Cybersecurity
🎓
Tutor Explanation