Getting Started With LEGO Spike Prime (Full Lesson)
Skills:
AI Pair Programming60%
Key Takeaways
Builds a LEGO Spike Prime robot for beginner robotics using LEGO bricks and motors
Full Transcript
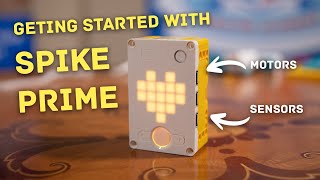
everyone welcome to the stream today we are going to look at our first lesson for spike prime okay so today we're not going to do too much building what we're going to do is we're going to understand the Smart Hub beyond the spike right hub and also to get to know how we can do some basic debugging exercises and also at the same time to look at the different peripherals that we have that come with spike prime so if you are following at home then make sure that you have your spike prime hub ready and then we can turn it on and begin okay so it's knowledge to turn it on make sure it's fully charged if it's not fully charged there's a USB cable you can plug into the computer and then you will challenge by a USB cable but to turn it up you press the middle button in the middle here we place up you over here so I press this a little back [Music] you then we start off with this symbol okay so first thing we want to do is we want to test out the motors okay with EB 3 there is a very handy port view where you can look at a glance in on the AV 3 hub and see what the angles are of all the motors and all the other different things that are plugged into the ev3 hub with Spike Prime it's slightly different because there is a limitation with the screen obviously it's not as high resolution as an 83 hub but it is still going to be very useful so grab yourself the medium motor and then plug it in to port pay okay miyamoto so unlike Eve III spike Prime doesn't doesn't mind if you plug an input or output port in any of these port and letters it's because they are all input and output ports and you can see just from the side here if i zoom in a little bit you can actually see there's a really small symbol that's that's pointing that's two arrows is pointing up and down so it's to symbolize that these are both input and output ports and it's just really useful so that you can have multiple important words and output boards and not be limited by the the four maximum or ports so here we've plugged in our motor so here we have our heart what we need to do is we need to press the middle button here and then you can see that it is now lighting up at a okay it's just a symbol that represents that port a is being occupied by a peripheral and obviously that's correct because we have our medium motor here in order to test it so so just by looking at this you can see that a is active all right a has a motor inside but if we wanted to move the motor then we can press the these arrows so here I can keep pressing and then press the other direction to slow it down and also to eventually spin it the other way they're being able to control being able to control the motor like this is going to be really handy because we're able to do a very simple functionality to test different parts of your robot right you don't have to plug it into your computer and do some code blocks and then run the test that way you can just simply run the test off your block and that makes it a little bit more handy okay and the cool thing is that this works was not just the medium motor it also works with the large motor as well so if I plugged in the large motor as well it's plugging the large measure into port B here's my large motor into port B yes I got two motors connected and I'm at the heart so I can press the middle button and you can see now that both a and B lit up it's just to show that both these ports are occupied by your peripherals and then I can press these arrows to increase the speed of these motors and then I can crisp other arrow to reduce the speed and adventury spin it the other way and if I want to get out of this then all I have to do is press the middle button again okay pretty cool right so it also means that if you had a very simple robot that does not require any programming this is how you can write you can for example if you're doing some sort of kinetic sculpture or a very simple say great ball contraption module for example then you can just simply switch on the motor and then adjust the speed and then just keep it like that okay so you don't have to do whole standard programming unless you needed to have more logic inside your app okay so that is how we can test and also do an onboard control of our motors but now let's look at my favorite sensor for well spike Prime and that is the force sensor okay so the force sensor looks a bit like it looks a bit like the touch sensor now this is the force sensor okay it has a little button here that takes that is able to measure your resistance okay so let's plug this in to see okay so in order to test the force sensor what we need to do is do the same thing let's go back into that this motor control view and then you'll see that here we have C is occupied okay and you'll recognize that this this flashing light is moving away from C okay so this just represents an input port an input object if I unplug the the last memory you'll see that on a it is an output okay you can see it's an output because there is a dot that's moving out of a right whereas in C it's coming into the machine so you can tell that a is a motor and C is a sensor okay so that's how we can tell the difference and now if I press on C the hotter I press the more squares will light up and there's actually also partial lit up squares divided into play if I press really gently as well you see that so just like this you'll be able to measure how how effective or how your force sensor is recognizing different forces different measurements very cool now let's look at the ultrasonic sensor sonic sensor is also known as a distance sensor and will plug this into E because then we won't have any too many that's running into each other so here you can see that E is also a an input port because the dot is coming into E and it's coming into the the machine right but also if I put my hand in front of it it will also track the distance of objects that are in front of it okay so if I'm really close then it all lines up but as I move further away it starts to fail yet it's not doing it very well for me at the moment but you can see that it will start to fade out based on the distance of my in my hand okay let's Travis you it looks like it's so it's not doing it exactly as I as I wanted to but that's the that's the idea okay so the idea is that you're able to test the measurements of your ultrasonic sensor even though it's just plugged into the hub and you haven't opened up spike grime and the last sensor that we're going to have a look at is our color sunset so the color sensor looks very similar to the ev3 version of sensors that's the cube version with the two lenses let's have a look at that one so first of all that attract the other equal parts then I'll plug in my color sensor at this interview as well in the consensus White's up and again showing that it's an input port and now it is also showing I believe that this is the reflected light intensity so if I if I move it away and shine it further away from my hand then it's going to show a lower reading but then as it gets closer and it gets brighter it's going to show a higher reading right there you have it guys so that is our first lesson on Spike Prime and to understand how the different peripherals and the spike up can interact with each other and it is a very crucial step in understanding how to debug your programs and also your robot if there are any problems and you weren't sure well is it is the motor working or is it plugged into the wrong spot or is the sensor working well with these on hub controls and and these little visual guides you'll be able to have a very quick look without even plugging in your robot into the computer just to check and make sure so hope you enjoyed the lesson I'll see you again
Original Description
Enjoy this preview of the Intermediate Robotics course from Creator Academy.
For more in-depth science, building and coding on this subject, visit www.creatoracademy.com.au
Support us and gain access to teaching materials at www.patreon.com/creatoracademy
LEGO® is a trademark of the LEGO Group of companies which does not sponsor, authorise, or endorse this video.
Watch on YouTube ↗
(saves to browser)
Sign in to unlock AI tutor explanation · ⚡30
Playlist
Uploads from Creator Academy Australia · Creator Academy Australia · 34 of 60
1
 2
2
 3
3
 4
4
 5
5
 6
6
 7
7
 8
8
 9
9
 10
10
 11
11
 12
12
 13
13
 14
14
 15
15
 16
16
 17
17
 18
18
 19
19
 20
20
 21
21
 22
22
 23
23
 24
24
 25
25
 26
26
 27
27
 28
28
 29
29
 30
30
 31
31
 32
32
 33
33
 ▶
▶
 35
35
 36
36
 37
37
 38
38
 39
39
 40
40
 41
41
 42
42
 43
43
 44
44
 45
45
 46
46
 47
47
 48
48
 49
49
 50
50
 51
51
 52
52
 53
53
 54
54
 55
55
 56
56
 57
57
 58
58
 59
59
 60
60

LEGO Wedo 2.0 Kangaroo and Joey Demonstration
Creator Academy Australia
LEGO Wedo 2.0 Koala Demonstration
Creator Academy Australia
LEGO WeDo 2.0 Eagle vs Rabbit Demonstration
Creator Academy Australia
Animatronic Australia: The Kangaroo
Creator Academy Australia
How Semiconductors Work: 3D Animation
Creator Academy Australia
LEGO Wedo 2.0 Koala
Creator Academy Australia
First impressions and unboxing First Lego League: Into Orbit 2018
Creator Academy Australia
FLL Into Orbit Team Ranking Gears talks about Artificial Gravity
Creator Academy Australia
FLL Into Orbit team Ev3lution discusses isolation in space
Creator Academy Australia
PI3-BOT (Pie Bot) Prototype
Creator Academy Australia
Dynamic display stand for LEGO Bugatti Chiron (preview)
Creator Academy Australia
Creative Kids TV announcement featuring Creator Academy
Creator Academy Australia
LEGO WeDo 2.0 Guided Lesson: Milo
Creator Academy Australia
LEGO SPIKE PRIME: Turtle Prime Demonstration
Creator Academy Australia
LEGO SPIKE PRIME "Wheelchair Prime"
Creator Academy Australia
10 Reasons why EV3 is SUPERIOR to SPIKE Prime
Creator Academy Australia
Your first launch after installing Python: Python for Kids Webinar Highlight
Creator Academy Australia
What is "Sharpening the Saw": Python for Kids Webinar Highlight
Creator Academy Australia
Why We Use Comments: Python for Kids Webinar Highlight
Creator Academy Australia
Build a Scratch Dinosaur Park (Full Lesson)
Creator Academy Australia
Scratch 3.0: Cat and Mouse Game Stream (Krunal)
Creator Academy Australia
Python Tutorial: Make a Toilet Paper Calculator (Full Lesson)
Creator Academy Australia
Scratch 3.0 Tutorial: Making a chatbot that plays 'heads or tails' (Full Lesson)
Creator Academy Australia
Getting Started with MicroPython on SPIKE PRIME (old)
Creator Academy Australia
Easter Egg Game Tutorial in Scratch (Full Lesson)
Creator Academy Australia
Accessing Weather API with Python (Highlights)
Creator Academy Australia
Accessing Translate API with Python (Highlights)
Creator Academy Australia
Scissors, Paper, Rock with Scratch 3.0 (Highlights)
Creator Academy Australia
Making a really scary game with Scratch 3.0 (Highlights)
Creator Academy Australia
Making a Lemmings game with Scratch 3.0 (Highlights)
Creator Academy Australia
Space Navigation Game in Scratch (Highlights)
Creator Academy Australia
Scratch Supercat Game (Full Lesson)
Creator Academy Australia
Introduction to Robots with LEGO Wedo 2.0 (Full Lesson)
Creator Academy Australia
Getting Started With LEGO Spike Prime (Full Lesson)
Creator Academy Australia
Scratch Walk Cycle Animation Tutorial (Full Lesson)
Creator Academy Australia
Building a Scissor Lift with LEGO Simple Machines (Highlights)
Creator Academy Australia
EV3 datalogging RPM challenge (highlights)
Creator Academy Australia
Learning about buses with LEGO (Full Lesson)
Creator Academy Australia
Make "Flappy Bird" in Scratch 3.0 (Highlights)
Creator Academy Australia
"Memory Arrows" game with Scratch 3.0 Lists (Highlights)
Creator Academy Australia
Learning about Gear Ratios with LEGO Simple Machines (Highlights)
Creator Academy Australia
Scratch 3.0 Bouncing Ball with Stretch, Speed and Acceleration (Full Lesson)
Creator Academy Australia
LEGO SPIKE Prime Order Tracking Robot (Highlights)
Creator Academy Australia
Scratch 3.0 Race Guesser (Full Lesson)
Creator Academy Australia
How Banks Work - a quick explanation for kids
Creator Academy Australia
SPIKE Prime Safe + importance of passwords (Highlights)
Creator Academy Australia
Combination Safe Coding Guide with LEGO SPIKE Prime
Creator Academy Australia
LEGO SPIKE Prime Parcel Scanning Robot
Creator Academy Australia
Building "Addy" the Addition Chatbot
Creator Academy Australia
SPIKE 2.x PID Balancer with Scratch for SPIKE Prime / 51515: Gyro Girl
Creator Academy Australia
What is Procedural Programming
Creator Academy Australia
Zombie game in SCRATCH (plus horrifying zombie facts!)
Creator Academy Australia
Swarming Bugs Scratch Game
Creator Academy Australia
LEGO Mindstorms/SPIKE Prime Scanner and Printer
Creator Academy Australia
Fishing Game with SCRATCH (For Fathers Day!)
Creator Academy Australia
Measuring Paper Plane Speed with SPIKE Prime Line Graphs
Creator Academy Australia
Comparing Mindstorms Robot Inventor and SPIKE Prime
Creator Academy Australia
Code a 'Knock Knock Joke' game in Scratch 3.0
Creator Academy Australia
Creator Academy Australia Live Stream
Creator Academy Australia
Discovering LEGO Mindstorms/SPIKE Gyro Pitch Deadzone
Creator Academy Australia
More on: AI Pair Programming
View skill →






Related Reads
📰
📰
📰
📰
Runway Can’t Win on ‘Best Model’ Anymore. So It Stopped Trying To.
Medium · AI
Ferramentas de IA gratuitas para opções em Portugal (2026)
Dev.to AI
Free AI APIs you can use right now without a credit card
Dev.to · David García
Automated Property Tax Appeal Letters for Homeowners: Earn $500–$2,000/Month with Manus AI
Dev.to AI
🎓
Tutor Explanation

 DeepCamp AI