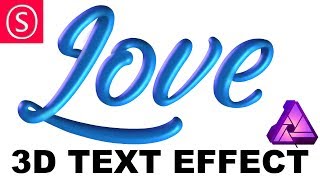
Affinity Photo - 3D Text Effect
Skills:
AI Productivity Tools80%
Key Takeaways
The video demonstrates how to create a 3D text effect using Affinity Photo, covering the 3D Font tool, layer effects, and manual painting of 3D details. The tutorial provides step-by-step instructions on adjusting settings and using various tools to achieve a realistic 3D look.
Full Transcript
today we are going to create an amazing 3d look for fonts hello my friends and let's get started so this is the direction we're going in it's not finished yet and this is the font we started with you can see it's a nice calligraphic font but it's just 2d and we will create this effect it looks 3d is not actually 3d let's delete the group so we can start from scratch click delete here and then we will select the font layer and over here with this effect click on that because these are the layer effects and down here make a hook where it says 3d and right now we have just two settings opacity and radius this is not good enough for us so click over here on this little wrench and the window pops up and gives us all the effects that we have for this kind of 3d look so I will go over them so you can see what they do the first one is radius and radius gives us the roundness of the object you can see if I have it like this it looks like it's flat and just have a little bit of curve on the side but if I push it up more it looks like a balloon so it gets really round we will use it maybe like this is okay good softn is how soft the light or the gradient is onto the object so if you look over here with the e is you can see that let's zoom in a little bit one second there we go if I have it very the softness to zero it's kind of hard and the more I push it up the softer it gets you can see this right good so the next one is profile I'm not going to talk about this right now all the next one is opacity your pencil is just how strong the effect is on to the font where I set it to 100% profile I will show you later diffuse specular and shininess is the quality of the material that is going to be simulated in this 3d effect so diffuse is the way the light is reflected from the object so if it's more like let's say paper compared to a mirror arrow has no diffusion so it's reflecting almost all of the light and paper is more very diffused so it's just very soft and doesn't reflect any details you know specular is the specular light that is highlighted you can see here if you pump this up it's getting even blown out so this is how much light is reflected on the very light edges yeah there we go and shininess is of course how shiny the object is so how good the overall surface is reflecting light so you can go very shiny or not very shiny so you this can also help you to simulate a material that looks more like metal or more like rubber maybe this is more like a rubber kind of thing right now I was zoom out a little bit so we see the complete font again there we go and you can also of course set the specular color so you can change this to anything that you want to have and you can see here so this is very nice and then we have ambient light and ambient light is the light of the room that is surrounding an object so it's the ambience of the room the light ambience of the room and if the room of course is brighter you get a lot more light onto the object and if the room color is different then the how can say the light of the room is mixing with the surface color of the object so right now the surface color is blue and if we imagine that we are right now in a forest we would have a lot of green light coming towards us from the leaves of the reflections of the leaf so as you can see here if we make green color the green is mixing a little bit with the blue so it's looking different then we have just white light we will use white light for this right now and below the most important part is the light sources that is the light is directly shining onto the object and you can change the direction any way you want it's calculated life so you can get a effect to see where the light is coming from and to position it in any way you want or towards the light source that you're using from the picture in the background if you want to put an 3d object into a real space inside of a photograph for example okay and the interesting part that we have here is that you can see we have different light sources so here says one that's just one but we have next to it add and remove so you can add a second light source and you can move it around you can see right now just some of the specular light is moving it's just some of the shadows are moving while the others are stand still because they come from the first light source yeah okay so by the way an important thing to know about this is that the all the other settings up here are not changing they're not saved with the light sources it's kind of a pity I would wish that would happen but the only thing that is saved with the light source is the direction of the light color nothing else or everything else is kept the same for all the light sources used okay so we will set the first light source to a light blue in our case maybe like this okay and set it to come from the lower right side like this and then we will select the second light source that comes from the upper left there we go and we will set this to a nice pink the reason for that is that we are going to use a color contrast with our lights so it looks even more 3d you can see here now we have a light pink on the left side and a light blue on the right side so these are kind of contrasting colors which even highlights the 3d shape even more so this is pretty good and now I will also show you what these profiles are we're not going to go into them too much today because it's more of an advanced thing but what this does is simulating the surface of the object and how it should look so if you click down here you have some standard profiles if you click on one you can see that the surface structure is changing for our font and how the light reflects from it it suddenly looks very different so you can create really interesting in specific kind of surface shapes with this we're not going to use this today so we just leave this empty and when you leave this empty we'll just create a round shape and this is good enough for us so right now we could almost be happy and it looks pretty good but there is still a problem because although it can simulate the surface pretty nicely it doesn't know which in the font is in front or behind something so you can see if you look here this looks like it's connected so it's not very cool we don't want this for our object and we will just fake it by painting into this a little bit of shadow so let's create over here a new pixel there there we go and we will make this really cheap from the work process you can go a lot more complicated with different masks and selections and stuff like that we're not going to do this today the only thing we're going to do is to take our paint brush set it to a nice size set the hardness to zero set the opacity fairly low I have 70% 17% right now you can go even lower if you want you and we will use the color picker up here as a scholar color picker select one of our given shadow colors maybe down here good click on it so it's used onto the brush and then we will just paint onto here until it looks good enough as a shadow and then we will erase the rest so this is the very very cheap way to do this let's paint on here a little bit it's kind of hard to see at first what is going on okay let's go like this and then we're gonna use our erase brush set the hardness fairly high maybe go to 80% opacity 100% the size depends on the curvature you have here and you get a little bit nice preview when you move over it with your mouse and now try to softly kind of erase it over here let's go from the inside so we kind of get the shape right because we're not setting a complicated mask we're just kind of faking it and see if we can do that you can always go back and do it again but I think this starts to look pretty good and you can see up here we have a little bit painted over so we will remove this too there we go it's pretty good let's zoom out a little bit that looks pretty good that looks pretty good like the shape is really going under there maybe we go over here and make this a little bit different one seconds take our brush again select the color from over here maybe I will create a second pixel layer so we are not destroying what we have so far let's paint onto this a little bit and then selects this color again and just give it a hint down here okay and erase the rest that we don't want to use mmm there we go and over here so it's the background is white and clean there we go this is good or it looks pretty nice that looks pretty interesting I will put these two into a group so we can hide them and you can see pretty nice it looks like the other part is going behind the part in the front and you can use this to create all the other overlaps in your picture let's go over here try this again maybe in this time we will prolong the highlight and make some shadows down here so it's looking like this shape is above okay I will do some more layers I like a lot of layers because if you have a lot of layers you can always go back and nothing is lost or destroyed so let's see I will use this color here and paint this on here a little bit like this and then we will take oh no wait a second oh yeah we can already do that so let's select this color I will erase this really quickly here this already looks pretty nice there we go okay let's make a second layer take our brush again paint in here a little bit like this and our eraser again delete what we don't need there we go also on the outside so it's not too messy maybe I make this a little bit softer here take some of this color so this is nice I would like maybe I make another layer sorry take this light here it's a bit brighter again take the brush and where do we go here why is it now okay I see I see it's easy okay let's delete this part here okay let's see how good that looks wait I will add a little bit more over here that's okay that's very nice and now we do the other side so it's a little bit work-intensive maybe but it's a pretty easy and cheap kind of thing to do let's create another layer we will take the shadow color from down here and just paint it in here is this uh no yeah no okay could be maybe even darker let's make this opacity a bit different there we go let's delete what we don't want to use okay good so that already looks a lot more 3d of course you can really play around this more with this kind of technique and make it look even better maybe this highlight here could be a little bit longer and look a little bit softer by the way you can also of course go in here let's use all of this and merge it down whereas it's layer merge selected so this is all one part now and you can use the smudge brush over here smudge tool always is way too big and smudge this around a little bit so you get a little bit more softness and maybe pull over some this didn't work at all okay why okaythat's ranch I don't know why this is happening hmm normally this should pull it over but it doesn't do it right now let's use the blur tool to make this a little softer look at it again okay very nice and you can do this with all these kind of shapes here's one up here and there's one over here so everywhere was overlaps you can even make this so you have a shape over here that's sticking out a little bit more than it is right now I will do this real quick so you can see what I'm doing let's see let's take the brush and I will take the highlight color from here and just pull this out so we have a little bit of an edge over here just like this here we go and now we'll use our erase tool to remove what we don't want to use in our picture there we go there was a little bit too much so you can see with just go back and start again if something didn't work out as you wanted it to work out and this is why I like layers because you can always go a step back and do it again this is kind of nice let's create a second layer oh I create a tool pull this below the other one go back to our brush tool select the dark color from down maybe here so it's a bit darker even paint this in here a little bit there we go and our razor tool again nice okay this is this is too hard let's make the eraser a little bit softer okay before I get sucked up into all the kind of details that you can put onto this to make it look even better because you can play around this with for hours I will stop here you see the general idea the general technique and you can do something that is really cool and looks really very nicely and 3d ish so this was the tutorial for today thank you for watching if you want to see more of my videos consider subscribing I do a new video every three days and if you even want to support me head over to patreon where you get a lot more benefits for example you get the full layered file of this video today see you in the next video and have a nice day bye
Original Description
Today I will show you how to create a cool looking 3D font effect. I will explain to you in detail how the 3D Font tool works and what the different settings are.
After that we will paint in some more 3D details to make it look even better and create some overlaps that the software can not find on its own.
Support me on PATREON and get my Affinity Photo File with all layers as a Thank You:
https://www.patreon.com/sarikas
Find me on Steemit:
https://steemit.com/@multi4g
Font used:
https://www.dafont.com/reality-sunday.font?psize=l&text=Love
#font #3d #space #color #contrast #simulation #light #shadow #photo #design #art #colorful #fun #dtube #artistic #creative #steemit #easy #tutorial #education #handson #learning #free #affinity #editing #episode #series #making #DIY #minute #quick #pictures #howto #designer #cover #elearning #video #online
Watch on YouTube ↗
(saves to browser)
Sign in to unlock AI tutor explanation · ⚡30
Playlist
Uploads from Olivio Sarikas · Olivio Sarikas · 40 of 60
1
 2
2
 3
3
 4
4
 5
5
 6
6
 7
7
 8
8
 9
9
 10
10
 11
11
 12
12
 13
13
 14
14
 15
15
 16
16
 17
17
 18
18
 19
19
 20
20
 21
21
 22
22
 23
23
 24
24
 25
25
 26
26
 27
27
 28
28
 29
29
 30
30
 31
31
 32
32
 33
33
 34
34
 35
35
 36
36
 37
37
 38
38
 39
39
 ▶
▶
 41
41
 42
42
 43
43
 44
44
 45
45
 46
46
 47
47
 48
48
 49
49
 50
50
 51
51
 52
52
 53
53
 54
54
 55
55
 56
56
 57
57
 58
58
 59
59
 60
60

Remove breathing sound from your audio recording // Audacity
Olivio Sarikas
Noise Removal for Audio Recordings - fast & easy // Audacity
Olivio Sarikas
In the Bazar - NI Maschine Audio Sketch
Olivio Sarikas
Submarine Concerto - NI Maschine Audio Sketch
Olivio Sarikas
Affinity Photo - Creating a Photo Font
Olivio Sarikas
Affinity Photo - Rusty Metal Font Tutorial
Olivio Sarikas
Affinity Photo - How to remove things from a photo
Olivio Sarikas
Affinity Photo - How to replace a Sky
Olivio Sarikas
Affinity Photo - How to put Patterns on Clothing
Olivio Sarikas
Affinity Photo - Vintage Look Tutorial
Olivio Sarikas
Affinity Photo - Photo Letter Font Tutorial
Olivio Sarikas
Affinity Photo - Print Ready Tutorial
Olivio Sarikas
Affinity Photo - Grunge Maps Tutorial
Olivio Sarikas
Affinity Photo - White Teeth Tutorial
Olivio Sarikas
Affinity Photo - Frequency Separation Tutorial
Olivio Sarikas
Affinity Photo - Double Exposure Tutorial
Olivio Sarikas
Affinity Photo - 5 Tricks for better Pics
Olivio Sarikas
Affinity Photo - Realistic Fog
Olivio Sarikas
Affinity Photo - How to Match Color
Olivio Sarikas
Bokeh Balls Trick - Affinity Photo Tutorial
Olivio Sarikas
Affinity Photo - Remove Fog, Smog, Haze and Dust
Olivio Sarikas
Affinity Photo - Orange & Teal Look
Olivio Sarikas
Affinity Photo - 5 MORE Tricks for better Pics
Olivio Sarikas
Affinity Photo - World in a Light Bulb
Olivio Sarikas
Affinity Photo - Watercolor Effect
Olivio Sarikas
Affinity Photo - 5 Tricks for better Composition
Olivio Sarikas
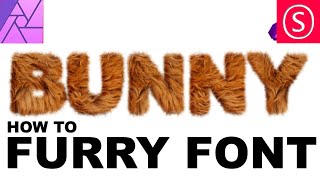
Affinity Photo - Fur Text Tutorial
Olivio Sarikas
Affinity Photo - Skin Color & Tan
Olivio Sarikas
Affinity Photo - Oil Paint Look Tutorial
Olivio Sarikas
Histogram explained EASY & FUN - Affinity Photo Beginner Tutorial
Olivio Sarikas
Affinity Photo - Text in Perspective
Olivio Sarikas
Affinity Photo - Dramatic Sky Colors
Olivio Sarikas
Why Black & White Photography is amazing!
Olivio Sarikas
Affinity Photo - Stunning Black & White Photos
Olivio Sarikas
Affinity Photo - 5 Filters for Landscape Photography
Olivio Sarikas
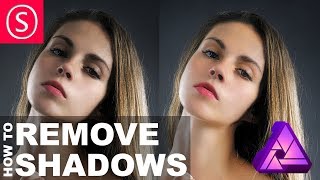
Affinity Photo - Remove Shadows EASY
Olivio Sarikas
Let's Talk - Where we go from here :)
Olivio Sarikas
Affinity Photo - Realistic Image on a Screen
Olivio Sarikas
Affinity Photo - 4 Perspective Tools explained
Olivio Sarikas
Affinity Photo - 3D Text Effect
Olivio Sarikas
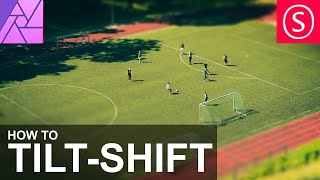
Affinity Photo - Tilt Shift done right
Olivio Sarikas
Affinity Photo - Blur Filters Explained - Part 01
Olivio Sarikas
Affinity Photo - Design Project: Enigma Lounge
Olivio Sarikas
Affinity Photo - Fake Colorized Look
Olivio Sarikas
Affinity Photo - Tiny Planet Tutorial
Olivio Sarikas
Affinity Photo - Change Day to Night - Tutorial
Olivio Sarikas
Affinity Photo - Neon Text Tutorial
Olivio Sarikas
Affinity Photo - Wood-burn Effect
Olivio Sarikas
Affinity Photo - NEON Portrait Look
Olivio Sarikas
Affinity Photo - Angel Wings Tutorial
Olivio Sarikas
Affinity Photo - Remove any Logo
Olivio Sarikas
Affinity Photo - Portrait Design - SUPER EASY!
Olivio Sarikas
Affinity Photo - Make a Planet
Olivio Sarikas
Affinity Photo - Brushes Explained
Olivio Sarikas
Affinity Photo - Design your own Brushes
Olivio Sarikas
Affinity Photo - Flame Soccer Tutorial
Olivio Sarikas
Affinity Photo - How to save a bad Shooting
Olivio Sarikas
Behind the Scenes - Special Episode
Olivio Sarikas
Affinity Photo - Cyber Demon Tutorial
Olivio Sarikas
Affinity Photo - Red Riding Hood Project EP 03
Olivio Sarikas
More on: AI Productivity Tools
View skill →


🎓
Tutor Explanation
