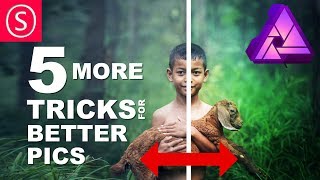
Affinity Photo - 5 MORE Tricks for better Pics
Key Takeaways
The video demonstrates five quick tricks for improving photos using Affinity Photo, including using Gaussian blur, converting to black and white, adjusting individual color layers, adding a gradient map for a sunny effect, and creating a warm glow using a mask layer and gradient map.
Full Transcript
five more tricks for better pics hello my friends and let's get started with some other tricks on how to really fastly improve your pictures the first thing we're gonna do is we duplicate the layer and then we go over here where it says effects and select Gaussian blur PAMP that up to the maximum and it's really blurry but the edges are not blurry so make sure you click preserve alpha so it looks like this then we go back to the layers window and now we can set it to either to either overlay soft light or hard light and you can see you get a really nice and dreamy atmosphere in your picture very nice dark and saturated colors on the outside very dreamy and lights colors on the inside of course with opacity you can set the effect to your taste and the picture looks a lot more interesting that way and has a dreamlike atmosphere this was the first trick the second trick that we are going to do is when you want to set your picture to black and white don't just go to HSL and reduce the saturation yes this is black and white but it's not enough control it doesn't look good enough so what you want to do instead is go down here to adjustments and go to black and white adjustments because here you can set what part of the black and white picture should come from the different colors from the original picture you can see here there's a lot of green and the picture and you can do a lot with that for example if I push the green colors down a lot that the boy is sticking out with his code so this is a much much better way to create a black and white picture and to find the look that you really want to have in your picture really try each of these sliders to see what effect it has sometimes it's very small so for example the magenta slider is just influencing a little bit of the goats feet and the shadows down here so if you don't see it right away just jiggle it a little bit so it's kind of popping and jiggling in your pictures it makes it easier to see so this is the correct way to convert a picture from color to black and white so this is the second trick and like I said you can do a lot with that in the sense of storytelling in your picture and it's very quick to do okay let's go to the next effect the one thing you can do is again click down here in adjustment layers and select HSL to adjust the colors but the problem is when I adjust the colors are just all of the colors and that is not good because I want to adjust some just some of them so up here it says master let's reset this up here it says master and you can select a bunch of different colors so in this photo we have a lot of green so let's select the greens and you can see we can move that around and the boy stays the same but the green colors change so we can make it a more intense green maybe we can also make the green darker in the background so we can work with a lot of things here set the saturation in whatever way we want and of course we can also go over here and influence the Reds and the yellows other colors in the picture so this should more influence the skin color of the boy you can see this is more the skin and the goat in his arm that you can influence here and less of the background so this is a nice way to select and adjust individual color layers basically in your picture and work with that in a quick way without having to select anything and as you can see and let's let's do some extreme things here so if I push this up here and then I go to the Reds and push this over here each of these settings stay where you have left them even if you change the colors is not just for one color you can use it for all the different calls that suggested here I will reset this let's go to the green again push it down and you can see now I can even make it so the boy pops out more of the picture because I can set the background green to a darker green so he doesn't have too much of this very light color in his backgrounds it's a very easy and fast way to adjust your pictures okay let's go to our next one and this is a really nice one if you want to bring some sunny light into your picture it doesn't really help to just put some yellow color all over the picture instead what you want to do is again we go down here to the adjustments and you want to select the gradient map this is very important you can see here really freaky colors in the picture but you can also see that the gradient map influences different parts of the image or different brightnesses of the image in a different way so what we want to do is we will go on the Left to black on the right we set it to white and in the middle we set it to a nice warm tone orange or yellow tone so maybe like this is kind of good you can still move this around if you want to and of course this is too extreme but what we can do with this is that we will set this do we set it no we leave it normal and we just reduce the opacity and you can see here that you can get some really nice sunny colors in your picture and you can always click here go back and readjust your gradient if something didn't work out or maybe you want to have another kind of orange another kind of yellow in your picture of course you can also you use blue colors to make the image a lot colder of course you need to reduce the opacity a lot in that case so let's rather make a warm picture I go back to a rather orange color in the middle so this looks pretty nice so this is a very fast and easy way to bring some sunny feeling into your picture and we can work with this to create the fifth quick tip for you and that is to use this again so I will use the same gradient just duplicate it there we go and now I'm going to set it to scream and make it much more intense so it's way too much but what we're going to do is we are going to create a mask layer down here so there we have the mask layer and then you take your brush set it to a pretty big size and first you paint everything with black so all of the mask is empty and then you set it again to white and you can paint in some kind of nice warm glow in your picture wherever you feel like it should be so let's in this case set it to the left side there we go and again of course like I said you can adjust your gradient so this layer is set to screen don't forget that and we will readjust the color a little bit maybe let's see maybe like this is a nice color so a reddish orange in the background and of course again you can adjust the opacity to see how much of a light a warm light you want to have and you can also adjust the other layer to get it closer to your warm glow because if you don't have this so i if i hide this one you can see there is a warm glow in the picture but the rest is still pretty cold so you want to have this warm glow but at the same time influence the rest of the picture is pretty important because if it's a sunny day everything is sunny so you don't have just a sunny part in the world the rest is a cold part you have to recolor everything and you do that with a gradient map and with the chess ting the opacity you can see how much of a glow you want to have and of course you can exaggerate it if you want to be more artistic with your picture with a more natural style try to use a very low opacity on the gradient map that goes over all of the picture and a higher opacity on the one that is creating the warm glow on the outside okay so basically this have been our five quick tricks quick no sorry quick tips for today thank you very much for watching and if you want to support me head over to patreon the link is in the information of the video so you can be part of our community I give you feedback on your pictures you get more of a say on which topic is going to come next in my videos and of course you get other benefits that you can look up at the side like some goodies crunch maps brushes stuff like that okay thank you very much and have a nice day looking forward to your feedback and your comments see you
Original Description
Here is a powerful video for you, that gives you very quick tricks on how to improve your photos. All of them can be done in minutes. You can use them as quick fixes, but they are also all solid techniques to improve your daily work as a photographer and make your family, friends and customers happy.
Brushes, LUTs and Designs for Affinity Photo:
https://gumroad.com/sarikasat
Support me on PATREON and get my Affinity Photo File with all layers as a Thank You:
https://www.patreon.com/sarikas
Find me on Steemit:
https://steemit.com/dtube/@multi4g
Photos used:
https://pixabay.com/en/boys-outdoor-thailand-baby-1807545/
#gradient #map #dream #dreamy #blur #photo #design #art #colorful #fun #dtube #artistic #creative #steemit #easy #tutorial #education #handson #learning #free #affinity #editing #episode #series #making #DIY #minute #quick #pictures #howto #designer #cover #elearning #video #online
Watch on YouTube ↗
(saves to browser)
Sign in to unlock AI tutor explanation · ⚡30
Playlist
Uploads from Olivio Sarikas · Olivio Sarikas · 23 of 60
1
 2
2
 3
3
 4
4
 5
5
 6
6
 7
7
 8
8
 9
9
 10
10
 11
11
 12
12
 13
13
 14
14
 15
15
 16
16
 17
17
 18
18
 19
19
 20
20
 21
21
 22
22
 ▶
▶
 24
24
 25
25
 26
26
 27
27
 28
28
 29
29
 30
30
 31
31
 32
32
 33
33
 34
34
 35
35
 36
36
 37
37
 38
38
 39
39
 40
40
 41
41
 42
42
 43
43
 44
44
 45
45
 46
46
 47
47
 48
48
 49
49
 50
50
 51
51
 52
52
 53
53
 54
54
 55
55
 56
56
 57
57
 58
58
 59
59
 60
60

Remove breathing sound from your audio recording // Audacity
Olivio Sarikas
Noise Removal for Audio Recordings - fast & easy // Audacity
Olivio Sarikas
In the Bazar - NI Maschine Audio Sketch
Olivio Sarikas
Submarine Concerto - NI Maschine Audio Sketch
Olivio Sarikas
Affinity Photo - Creating a Photo Font
Olivio Sarikas
Affinity Photo - Rusty Metal Font Tutorial
Olivio Sarikas
Affinity Photo - How to remove things from a photo
Olivio Sarikas
Affinity Photo - How to replace a Sky
Olivio Sarikas
Affinity Photo - How to put Patterns on Clothing
Olivio Sarikas
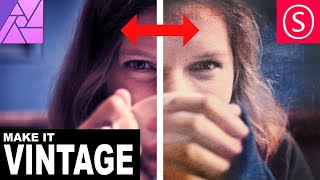
Affinity Photo - Vintage Look Tutorial
Olivio Sarikas
Affinity Photo - Photo Letter Font Tutorial
Olivio Sarikas
Affinity Photo - Print Ready Tutorial
Olivio Sarikas
Affinity Photo - Grunge Maps Tutorial
Olivio Sarikas
Affinity Photo - White Teeth Tutorial
Olivio Sarikas
Affinity Photo - Frequency Separation Tutorial
Olivio Sarikas
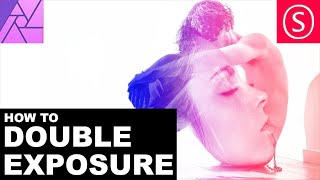
Affinity Photo - Double Exposure Tutorial
Olivio Sarikas
Affinity Photo - 5 Tricks for better Pics
Olivio Sarikas
Affinity Photo - Realistic Fog
Olivio Sarikas
Affinity Photo - How to Match Color
Olivio Sarikas
Bokeh Balls Trick - Affinity Photo Tutorial
Olivio Sarikas
Affinity Photo - Remove Fog, Smog, Haze and Dust
Olivio Sarikas
Affinity Photo - Orange & Teal Look
Olivio Sarikas
Affinity Photo - 5 MORE Tricks for better Pics
Olivio Sarikas
Affinity Photo - World in a Light Bulb
Olivio Sarikas
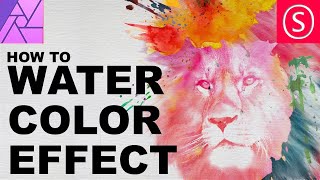
Affinity Photo - Watercolor Effect
Olivio Sarikas
Affinity Photo - 5 Tricks for better Composition
Olivio Sarikas
Affinity Photo - Fur Text Tutorial
Olivio Sarikas
Affinity Photo - Skin Color & Tan
Olivio Sarikas
Affinity Photo - Oil Paint Look Tutorial
Olivio Sarikas
Histogram explained EASY & FUN - Affinity Photo Beginner Tutorial
Olivio Sarikas
Affinity Photo - Text in Perspective
Olivio Sarikas
Affinity Photo - Dramatic Sky Colors
Olivio Sarikas
Why Black & White Photography is amazing!
Olivio Sarikas
Affinity Photo - Stunning Black & White Photos
Olivio Sarikas
Affinity Photo - 5 Filters for Landscape Photography
Olivio Sarikas
Affinity Photo - Remove Shadows EASY
Olivio Sarikas
Let's Talk - Where we go from here :)
Olivio Sarikas
Affinity Photo - Realistic Image on a Screen
Olivio Sarikas
Affinity Photo - 4 Perspective Tools explained
Olivio Sarikas
Affinity Photo - 3D Text Effect
Olivio Sarikas
Affinity Photo - Tilt Shift done right
Olivio Sarikas
Affinity Photo - Blur Filters Explained - Part 01
Olivio Sarikas
Affinity Photo - Design Project: Enigma Lounge
Olivio Sarikas
Affinity Photo - Fake Colorized Look
Olivio Sarikas
Affinity Photo - Tiny Planet Tutorial
Olivio Sarikas
Affinity Photo - Change Day to Night - Tutorial
Olivio Sarikas
Affinity Photo - Neon Text Tutorial
Olivio Sarikas
Affinity Photo - Wood-burn Effect
Olivio Sarikas
Affinity Photo - NEON Portrait Look
Olivio Sarikas
Affinity Photo - Angel Wings Tutorial
Olivio Sarikas
Affinity Photo - Remove any Logo
Olivio Sarikas
Affinity Photo - Portrait Design - SUPER EASY!
Olivio Sarikas
Affinity Photo - Make a Planet
Olivio Sarikas
Affinity Photo - Brushes Explained
Olivio Sarikas
Affinity Photo - Design your own Brushes
Olivio Sarikas
Affinity Photo - Flame Soccer Tutorial
Olivio Sarikas
Affinity Photo - How to save a bad Shooting
Olivio Sarikas
Behind the Scenes - Special Episode
Olivio Sarikas
Affinity Photo - Cyber Demon Tutorial
Olivio Sarikas
Affinity Photo - Red Riding Hood Project EP 03
Olivio Sarikas
More on: AI Productivity Tools
View skill →


🎓
Tutor Explanation
