Affinity Photo - Double Exposure Tutorial
Key Takeaways
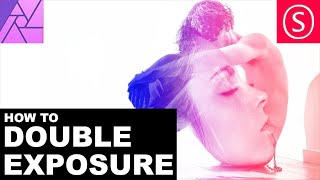
This tutorial demonstrates how to create a double exposure effect in Affinity Photo, a classic analog era technique, using layers, masks, and blend modes.
Full Transcript
hello my friends and welcome to another affinity photo tutorial today we are going to talk about the double exposure a topic requested by Linda and we are going to do something like this it's just an inspiration let's hide this again we will take this photo of the guy and blend the picture of this woman onto his body let's get started first we're going to select the layer with the guy on it and select our selection brush tool make a very rough selection of the body and we're going to fade it afterwards so it's not too important how exact it is doesn't have to be down to one single hair let's see here for the shoes click on refine up here to see what we got let's refine this a little bit maybe okay we don't have to do much with the hair because like I said it's not too important in this case this should be good enough okay let's click on apply and then we go up to select and go to feather set it to 5 pixel in this case and then we click on the mask layer down here mask layer so you see we have just the guide and we will drag the mask out and go to select deselect we don't need a selection anymore now we want to do is a very nice trick click on the girl right click and create a group and then we are not going to apply the mask to the girl we are just putting it as a layer into the group above the girl and what this does is that now I can move the picture of the girl the layer and the mask is still sitting in the background so this is very very nice and this gives us the ability to resize the face to where we think ok this is the perfect mix we have to blend it of course let's see let's resize it's black this so it sits in here and if you want to you can finish it like this but we're going to do more stuff to the picture so this is already interesting blending of course you see up here there's up there we have the dark background of the picture with the woman you can paint into the mass to reduce that or you can even create a mask for the woman to hide her face so maybe we want to do that let's make the woman visible there we go click again on our mask to mask brush and just paint in here a little bit to select her face because we already have to find the position where we want to have her head so there we go again it doesn't have to be too perfect maybe here on the edges whether you have hard edges is more important and it's perfect let's click on refine again and background tell it that this is all background down here give it a bit for the selection there we go and this is foreground there we go that should be good enough okay perfect so let's click on apply and then we click on mask so now we have a mask on her face and let's deselect again and now we drag this back into our group under the other mask there we go in here now is it's sharper you see it's better because the rest of the collar is not going on to his body next what we can do is we click on the girl layer again and click on black and white so we will set also her face to black and white and we can adjust what kind of black and white picture do we want to have this looks pretty good and the next thing we can do is we click again on the girl layer and set a blend mode that we want to have so and this is very much up to your personal choice to your personal artistic decision of what kind of picture you want to achieve because a lot of modes that can how cuz I produce different kinds of expression in the picture screen is pretty interesting ad is pretty interesting there's a lot of different ways to do this you can even go with normal if you want to and just reduce the opacity so this is also a very nice effect this would probably be closer to the classic double exposure but of course the other blend mode gives you different abilities to do things another thing we can do right now let's set it to normal and 100% click on the layer with the guy and go over to the rectangle tool here and then we will drag a rectangle over all of the picture and set it to the color white and pull it in the background and now click again on the layer with the guy and reduce the opacity so he is becoming more faded and we can play with this and with the opacity of the girl to achieve an interesting effect that is a bit more faded and maybe less harsh in the picture so there's a lot of possibility there let's let the guy do a little bit more and another thing that you have seen before a little bit is that we can do a gradient so let's click up here and on the on the group and make a new rectangle with our rectangle tool so this is sitting over all of everything and not into the group but over the group and now we will do a gradient select the first color maybe we do a blue color select the second color maybe we do should be to an orange color or a pink color let's try Orange let's see what this gives us and now you could also play around with the blend modes I will try scream which is pretty nice but there's a lot of other interesting plant mouse - let's try screen and change the colors quickly inner inner gradient select the gradient click on adjustments and click on H SL and if it's not as an effect on here just pull it down onto the gradient layer and now what you can do is move around the color selection to see if there is something that you like more from the color selection also from the saturation which is the color intensity and the luminosity which is how dark or bright and the colors are going to be in your picture so there's a lot of possibilities to play around and to get a artistic result that is something that you're looking for that you're interested in a lot of this is based on what is it that you want to have what is it that you want to get out of this picture yeah so basically this is our tutorial for this time it looks nice all set to screen really beautiful ok I play around with it I'm happy to I'm looking forward to see you your results you can link it in the comments if you want to you can support me on patreon and of course if you want to see more of my tutorials subscribe look at my channel and leave comments if there is a topic that you are interested in and that you want to see in the next tutorial thank you very much for watching and see you in the next episode bye
Original Description
Let's get artistic with this Affinity Photo Tutorial on how to create beautiful and easy double exposures. This is a classic analog era technique, that looks still very interesting and gives you a lot of choices and individual forms of expression.
I use a portrait to do this, but of course you can blend any two pictures you like. The mask servers as a edge protection that makes the blending more controlled and gives you a very crisp and interesting result.
Support me on PATREON and get my Affinity Photo File with all layers as a Thank You:
https://www.patreon.com/sarikas
Find me on Steemit:
https://steemit.com/dtube/@multi4g
Photos used:
https://pixabay.com/en/girl-hands-the-act-of-portrait-1527959/
https://pixabay.com/en/lonely-portrait-advertisement-814631/
#exposure #double #model #photo #design #art #colorful #fun #dtube #artistic #creative #steemit #easy #tutorial #education #handson #learning #free #affinity #editing #episode #series #making #DIY #minute #quick #pictures #howto #designer #cover #elearning #video #online
exposure, double, double exposure, model, professional, face, facebook, patreon, photo, design, art, colorful, fun, dtube, artistic, creative, steemit, easy, tutorial, education, handson, learning, free, affinity, editing, episode, series, making, DIY, minute, quick, pictures, howto, designer, cover, elearning, video, online
Watch on YouTube ↗
(saves to browser)
Sign in to unlock AI tutor explanation · ⚡30
Playlist
Uploads from Olivio Sarikas · Olivio Sarikas · 16 of 60
1
 2
2
 3
3
 4
4
 5
5
 6
6
 7
7
 8
8
 9
9
 10
10
 11
11
 12
12
 13
13
 14
14
 15
15
 ▶
▶
 17
17
 18
18
 19
19
 20
20
 21
21
 22
22
 23
23
 24
24
 25
25
 26
26
 27
27
 28
28
 29
29
 30
30
 31
31
 32
32
 33
33
 34
34
 35
35
 36
36
 37
37
 38
38
 39
39
 40
40
 41
41
 42
42
 43
43
 44
44
 45
45
 46
46
 47
47
 48
48
 49
49
 50
50
 51
51
 52
52
 53
53
 54
54
 55
55
 56
56
 57
57
 58
58
 59
59
 60
60

Remove breathing sound from your audio recording // Audacity
Olivio Sarikas
Noise Removal for Audio Recordings - fast & easy // Audacity
Olivio Sarikas
In the Bazar - NI Maschine Audio Sketch
Olivio Sarikas
Submarine Concerto - NI Maschine Audio Sketch
Olivio Sarikas
Affinity Photo - Creating a Photo Font
Olivio Sarikas
Affinity Photo - Rusty Metal Font Tutorial
Olivio Sarikas
Affinity Photo - How to remove things from a photo
Olivio Sarikas
Affinity Photo - How to replace a Sky
Olivio Sarikas
Affinity Photo - How to put Patterns on Clothing
Olivio Sarikas
Affinity Photo - Vintage Look Tutorial
Olivio Sarikas
Affinity Photo - Photo Letter Font Tutorial
Olivio Sarikas
Affinity Photo - Print Ready Tutorial
Olivio Sarikas
Affinity Photo - Grunge Maps Tutorial
Olivio Sarikas
Affinity Photo - White Teeth Tutorial
Olivio Sarikas
Affinity Photo - Frequency Separation Tutorial
Olivio Sarikas
Affinity Photo - Double Exposure Tutorial
Olivio Sarikas
Affinity Photo - 5 Tricks for better Pics
Olivio Sarikas
Affinity Photo - Realistic Fog
Olivio Sarikas
Affinity Photo - How to Match Color
Olivio Sarikas
Bokeh Balls Trick - Affinity Photo Tutorial
Olivio Sarikas
Affinity Photo - Remove Fog, Smog, Haze and Dust
Olivio Sarikas
Affinity Photo - Orange & Teal Look
Olivio Sarikas
Affinity Photo - 5 MORE Tricks for better Pics
Olivio Sarikas
Affinity Photo - World in a Light Bulb
Olivio Sarikas
Affinity Photo - Watercolor Effect
Olivio Sarikas
Affinity Photo - 5 Tricks for better Composition
Olivio Sarikas
Affinity Photo - Fur Text Tutorial
Olivio Sarikas
Affinity Photo - Skin Color & Tan
Olivio Sarikas
Affinity Photo - Oil Paint Look Tutorial
Olivio Sarikas
Histogram explained EASY & FUN - Affinity Photo Beginner Tutorial
Olivio Sarikas
Affinity Photo - Text in Perspective
Olivio Sarikas
Affinity Photo - Dramatic Sky Colors
Olivio Sarikas
Why Black & White Photography is amazing!
Olivio Sarikas
Affinity Photo - Stunning Black & White Photos
Olivio Sarikas
Affinity Photo - 5 Filters for Landscape Photography
Olivio Sarikas
Affinity Photo - Remove Shadows EASY
Olivio Sarikas
Let's Talk - Where we go from here :)
Olivio Sarikas
Affinity Photo - Realistic Image on a Screen
Olivio Sarikas
Affinity Photo - 4 Perspective Tools explained
Olivio Sarikas
Affinity Photo - 3D Text Effect
Olivio Sarikas
Affinity Photo - Tilt Shift done right
Olivio Sarikas
Affinity Photo - Blur Filters Explained - Part 01
Olivio Sarikas
Affinity Photo - Design Project: Enigma Lounge
Olivio Sarikas
Affinity Photo - Fake Colorized Look
Olivio Sarikas
Affinity Photo - Tiny Planet Tutorial
Olivio Sarikas
Affinity Photo - Change Day to Night - Tutorial
Olivio Sarikas
Affinity Photo - Neon Text Tutorial
Olivio Sarikas
Affinity Photo - Wood-burn Effect
Olivio Sarikas
Affinity Photo - NEON Portrait Look
Olivio Sarikas
Affinity Photo - Angel Wings Tutorial
Olivio Sarikas
Affinity Photo - Remove any Logo
Olivio Sarikas
Affinity Photo - Portrait Design - SUPER EASY!
Olivio Sarikas
Affinity Photo - Make a Planet
Olivio Sarikas
Affinity Photo - Brushes Explained
Olivio Sarikas
Affinity Photo - Design your own Brushes
Olivio Sarikas
Affinity Photo - Flame Soccer Tutorial
Olivio Sarikas
Affinity Photo - How to save a bad Shooting
Olivio Sarikas
Behind the Scenes - Special Episode
Olivio Sarikas
Affinity Photo - Cyber Demon Tutorial
Olivio Sarikas
Affinity Photo - Red Riding Hood Project EP 03
Olivio Sarikas
More on: AI Productivity Tools
View skill →


Related AI Lessons
⚡
⚡
⚡
⚡
This ChatGPT Prompt Replaced 3 Hours of PowerPoint Work
Medium · AI
This ChatGPT Prompt Replaced 3 Hours of PowerPoint Work
Medium · ChatGPT
How AI Assist Turns a Rough Draft into a Polished Document in Minutes
Dev.to · paperquire
13 ways to make money with AI in 2026, ranked by how fast you will see your first dollar.
Medium · AI
🎓
Tutor Explanation