Complete Ethical Hacking Course #2 - Installing Kali Linux
Key Takeaways
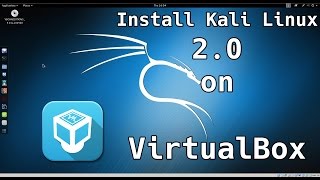
This video covers the installation of Kali Linux, a crucial tool for ethical hacking, and introduces viewers to the Linux terminal and basic functionalities, including the use of VirtualBox and Linux Command Line Interface (CLI).
Full Transcript
hey guys hackersploit here back again with the second video in the ethical hacking course uh which will take you from beginners to advanced users or ethical hackers so in this video as i mentioned in the earlier video i'm going to be talking about setting up your hacking environment so this is actually uh to do with just setting up your environment so you're good to start hacking so we're going to be using kali linux as the primary os because it has a lot of tools and features that are just mandatory for hacking so apart from that we're going to use virtualbox for operating system virtualization which means that we're going to be running kali linux virtually on our windows or mac um operating system or primary pc if that's what you guys are running so this will work on even linux so yeah the reason i'm saying we're gonna run this on virtualbox is just because it's much better for my for me personally uh so i can actually record the videos and show you i would recommend you install it on any of your computers if you're using that for hacking but either way you can learn hacking perfectly via this method of running it virtually so the first thing we're going to do is we have to install a software called virtualbox so just open your browser and google virtualbox and there you are just click on the first uh first or second link and here you are virtualbox virtualbox is just a virtualizer for windows mac linux that allows you to run a operating system within an operating system so you want to go into downloads now the reason i'm using virtualbox is it's very very easy to set up and i would recommend this for beginners uh so here we are virtualbox binaries um so we have virtualbox 5.1.1 platform packages that's basically the setup and you have windows mac os x and linux distributions and solaris so this can run on any of the operating systems that you're currently running i'm running windows and for the purpose of this tutorial i'm going to use this as my example i'm going to open that in a new tab and it's going to start downloading uh it's about 118 megabytes so yeah just let that download i already have it installed but the setup is pretty simple once it finishes downloading just run through the setup and just hit next next and you know the pretty standard stuff all right so once you have that installed it'll give you this icon here or alternatively you could search for it here there you are so there we are but i already have my icon here then just start it up and do note that when you start it up for the first time you're not going to have any of these here these are my virtual machines that i've just created my virtual operating systems but i'm going to show you how to set it up with kali linux so just make sure it's up and running and now we want to go into google let's just go into google again and you want to hit kali linux kali linux and you're going to open the first link and you're going to downloads and here you are you have your kali linux downloads now depending on the operating system or the amino processor architecture you're either running 64-bit or 32-bit if your processor is a 32-bit make sure you download the uh the 32-bit iso which you can download directly or using a torrent client if that's your thing uh you then have your 64-bit uh which is currently for 64-bit processors so whatever you have is fine so what i'm going to do now once you have downloaded it uh just make sure you hit uh direct or torrent whatever once it finishes downloading you want to go back into virtual box and you want to hit new all right so once you hit new it's giving you the option of creating a new virtual machine so we're going to give it a name let's call it kali um hacking let's just call it um kelly linux [Music] hb hacking box all right so uh the type is linux and the version is uh yeah uh the latest version 2.63 i mean 2.63 and four uh this is the linux kernel again make sure you select your the appropriate one according to your processor's uh architecture i have a 64-bit so that's what i'm going to use next now this is your memory size this is how much ram you want to dedicate to kali linux now if you're running a 4 gigabyte machine or computer i would recommend just leaving this where it is or you could give it about two gigs of ram that's what i would recommend so uh two gigs of ram is about 2048 megabytes that's two gigs of ram which is perfectly fine for kali linux and whatever we're going to be doing or alternatively if you have more ram you could increase that but i really don't see the need to hit next and create a virtual hard disk now make sure that is the option as we are going to install kali linux so here we have uh this is basically where you want the kali linux to be installed we're going to create a virtual hard drive we're going to create it and make sure it's a virtual virtual box disk image not a virtual hard drive i'll explain that later hit next and we want to give it a dynamically allocated um just basically it increases as we need it so uh hit next and here we can basically specify where we want to save the virtual uh the virtual hard drive i'm going to save mine um i'm going to save mine on the desktop for this for this tutorial i'm just going to save it there you can save it anywhere and then what i recommend as the storage space is about uh 20 20 gigabytes just give it about 20 gigabytes and just create hit create and there you are now once you've created the virtual machine you want to go select it and you want to go into settings so just let it open settings and don't be overwhelmed here we're going to go through it step by step so basically that as it is we have already done that you don't need to touch anything else here just make sure you specify here whatever you want it to be called you can change it there next you want to go into system now again you can change how much ram you want at any time now in boot order just leave everything the way it is we don't have a floppy drive so you might as well just leave that with hard drive and optical just leave it at those two but you can leave you can check them uh if you want to um chipset pi x3 is fine um leave everything the way this is now the processor the most important thing is you have to enable pae or nx all right now basically this is uh this is going to use the processor's physical address and it's just going to be communicating with the processor directly to increase the speed of the virtual machine so make sure this is checked and here you can select how many uh calls that you want to uh allocate to do the virtual machine i usually leave it at one because i want my one of my calls on my computer is about 3.2 gigahertz and that's perfectly normal uh to support kali linux now an acceleration you don't want to touch anything in display uh here you can basically in video memory dedicate how much video memory you want to give it i usually find 128 megabytes is fine but if your computer has less you can also reduce that to how much you have make sure you enable 3d acceleration and if you wanted to run on multiple monitor mode you could but i only wanted to run on my current monitor so that's fine now the next tab here is video capture if you want to record your screen you can actually enable that i don't really need that now because i have an external video recorder so now the most important step is the storage now the controller we have already created a virtual hard drive so that's already it already uh linked it to the virtual machine now we need to specify where the iso is now uh wherever you've downloaded it make sure you just go there and select it i'm going to go to where my mine is and you can see i have this one here i have a multiple but for this tutorial i'm going to use my kali linux just select it and that's it so you've loaded the iso and you've loaded the hard drive next in audio you can basically just choose whatever all your drivers you have in network make sure you have uh make sure it's in that uh network adapter you don't need anything else for this um for these tutorials so that's all good so after this you must your you you're you're good after this after you've just followed those settings you should be good just hit ok and we're going to give it a test we're going to hit start all right so just hit start and it's going to start the virtual machine so just give it a few seconds to boot up and we should be good there we are all right so it's going to say starting virtual machine and there you are and here we are this is the first screen so i kali linux is actually booted up and you can you have a few options here so what you could do is uh live you can run it live uh that means you will not install kali linux but in this video i'm going to show you how to install it step by step uh so yeah so that's basically running it live you can then run it live with forensic mode where you're analyzing the repositories you then have live usb persistence this if you're running it on a usb which you are not and finally we have the installation for beginners outreach men uh and graphical installation so that's what we're going to do just hit enter and we'll start the graphical installation so just give it a few seconds um if it gives you this error don't worry about this it's it's just gonna it's gonna switch from that so again here we are graphical select the language that you are using or that you are comfortable with and hit continue i'm okay with english and you can select whichever country you're from i'm just going to select united kingdom and hit ok uh british english configure the keyboard no i use uh i use united states english right if this does not work it does not work in my mouse but my mouse scroll will um we're just going to go back up here american english i did not see that hit continue and it's going to say detect and mount cd rom it's just going to start reading from the iso so give that a few seconds it's just going to read all the files it needs so all right so once it's done all that it needs to do and it's successfully connected to the internet uh it's going to ask for the host name for this system so the hostname is a single word that identifies your system on the network so what i'm go this is basically your username i'm just going to create mine as kelly kelly excuse me um hb all right um let's just say let's just give it my name alexis there we are and we're just going to hit continue you can name it whatever you want as long as you're able to identify it or just for simplicity if you're really a beginner i would recommend just leaving it as kali right so hit continue and then you have your domain name you can just hit continue and just uh skip that you don't really need to do that right now now your root password you can um this is basically your password for accessing root on linux so this you can use anything you want to use here for me i'm just going to use um i'm just going to say kali one two three because i don't really need it to be secure uh kali one two three you can see there uh there we are and here kelly one two three continue and it's gonna start setting up the clock and other stuff so let me just go through that and let's see what where it goes next all right all right so in the next step um it's going to ask you to start partitioning disks and where you want kali linux to be installed so uh here we have um we have guided we have a few options you can actually use use the entire disk you can use the entire disk and setup lvm but what we're going to do for the sake of this tutorial is use the entire disk which we've already created so don't worry about it it's just going to give you the the disks that are currently available and as you can see we have the 20 gigabytes of virtual box hard drive it's not going to scan any hard drives of your computer this is 100 safe it's only going to use the one that you've created virtually so as you can see here vbox hard disk i'm going to say continue and i'm going to say all files in one partition that's recommended for new users make sure you select that and continue finish partitioning and write changes to the disk as you can see it's created two partitions one is a swap partition and one is a xt4 partition so hit continue and i'm going to say right changes to disk make sure you select yes and hit continue and it's going to start partitioning the disks and it's going to start installing the system so i'll catch you guys once it's done all right guys so once it's finished installing the operating system it's going to ask you to install the grub bootloader on hard disk so this is very very important uh this is basically give the it'll give kali linux the ability to boot up correctly so it's going to ask you to install the grub bootloader to the master boot record uh just hit yes that's very important uh and this is the hard drive here make sure you select it it's the virtual hard drive select install and it's going to start installing it uh into into the virtual hard drive so let it just finish the installation uh just have uh has a few more things left um yeah all right so once it's done installing everything it's going to give you this prompt finish the installation installation is complete so you're basically done there just hit continue and it's going to start removing the live packages and finishing the installation give it a few seconds and we should be good to run kali linux for the first time in this series of lessons so hope you guys are excited let's see where this goes right so just again let it just finish the installation might take a few minutes or a few seconds i don't know let's see alrighty guys so once it's installed it's going to reboot and it's going to reboot into kali linux so everyone welcome to kali linux um now i want one thing i wanted to point out here if you go ahead and write your username and your password that we set earlier in during the installation you're going to get something really weird so i remember my username was kali and my password was kali123 now if i hit enter um when it's gonna say sorry that didn't work now what i wanted to say to you is the username will change back to root after the installation so you have to change it again in kali linux once we log in so the username after in installation of kali linux is always root and the password remains the same it remains the same password you kept during the installation so cali one two three there we are and it's going to start up uh kali linux we've logged in and yeah there we are let's just give it a few seconds to start and there you are welcome to calais linux how exciting we're already i know we're getting really really excited to start hacking so that's basically it for this lesson guys i hope you guys uh found the video helpful if you did please leave a huge like and comment down below if you didn't understand anything i'll gladly help you um otherwise have a fantastic day guys peace
Original Description
Welcome to the best ethical hacking course on the internet, i will be taking you through all you need to know from terminology to sql
Everything you need to get started as a hacker and take your hacking skills to an expert level is included in this series. Begin with the basics of hacking including what is ethical hacking, introduction to hacking terms, and how hackers setup their computers. Follow along as you see exactly what software you need including VirtualBox and Kali Linux. See what to do next after you download VirtualBox, create your virtual environment, and install Kali Linux. Meet the Linux terminal you will use to do your work in including the basic functionalities and Linux Command Line Interface (CLI). See how to navigate in Kali Linux and then get started with the real hacking! Learn Tor, proxychains, Virtual Private Networks (VPN), Macchanger, Nmap, and get an introduction to wifi hacker cracking for WPA and WPA2 security with aircrack and reaver.
I Hope you enjoy/enjoyed the video.
If you have any questions or suggestions feel free to ask them in the comments section or on my social networks as well as mu blog.
SOCIAL NETWORKS
-------------------------------
Facebook: https://www.facebook.com/HackerSploit/
Twitter: https://twitter.com/HackerSploit
Instagram: https://www.instagram.com/alexisayub/
--------------------------------
Visit My website/Blog for all documentation and downloads, as well as forums for communication with me and other members.
Website: http://www.hackersploit.netne.net
PEACE!
Playlist
Uploads from HackerSploit · HackerSploit · 10 of 60
1
 2
2
 3
3
 4
4
 5
5
 6
6
 7
7
 8
8
 9
9
 ▶
▶
 11
11
 12
12
 13
13
 14
14
 15
15
 16
16
 17
17
 18
18
 19
19
 20
20
 21
21
 22
22
 23
23
 24
24
 25
25
 26
26
 27
27
 28
28
 29
29
 30
30
 31
31
 32
32
 33
33
 34
34
 35
35
 36
36
 37
37
 38
38
 39
39
 40
40
 41
41
 42
42
 43
43
 44
44
 45
45
 46
46
 47
47
 48
48
 49
49
 50
50
 51
51
 52
52
 53
53
 54
54
 55
55
 56
56
 57
57
 58
58
 59
59
 60
60

How To Install Kali Linux 2.0 On Virtual Box
HackerSploit
100 Subscriber Q&A! - How I Learned Ethical Hacking
HackerSploit
BlackArch Linux Review - Better Than Kali Linux?
HackerSploit
How to Access the Deep Web Safely | Deep Web Starter Guide 1.0
HackerSploit
Wireshark Tutorial for Beginners - Installation
HackerSploit
Wireshark Tutorial for Beginners - Overview of the environment
HackerSploit
Wireshark Tutorial for Beginners - Capture options
HackerSploit
Wireshark Tutorial for Beginners - Filters
HackerSploit
Complete Ethical Hacking Course - Become a Hacker Today - #1 Hacking Terminology
HackerSploit
Complete Ethical Hacking Course #2 - Installing Kali Linux
HackerSploit
Parrot OS 3.5 Review | The Best Kali Linux Alternative
HackerSploit
Nmap Tutorial For Beginners - 1 - What is Nmap?
HackerSploit
Katoolin | How To Install Pentesting Tools On Any Linux Distro
HackerSploit
Nmap Tutorial For Beginners - 2 - Advanced Scanning
HackerSploit
Nmap Tutorial For Beginners - 3 - Aggressive Scanning
HackerSploit
Zenmap Tutorial For Beginners
HackerSploit
How To Setup Proxychains In Kali Linux - #1 - Stay Anonymous
HackerSploit
How To Setup Proxychains In Kali Linux - #2 - Change Your IP
HackerSploit
How To Change Mac Address In Kali Linux | Macchanger
HackerSploit
How To Setup And Use anonsurf On Kali Linux | Stay Anonymous
HackerSploit
Ubuntu 17.04 "Zesty Zapus" Review - Bye Unity
HackerSploit
VPN And DNS For Beginners | Kali Linux
HackerSploit
Tails OS Installation And Review - Access The Deep Web/Dark Net
HackerSploit
Steganography Tutorial - Hide Messages In Images
HackerSploit
The Lazy Script - Kali Linux 2017.1 - Automate Penetration Testing!
HackerSploit
Best Linux Distributions For Penetration Testing
HackerSploit
Netcat Tutorial - The Swiss Army Knife Of Networking - Reverse Shell
HackerSploit
Gaining Access - Web Server Hacking - Metasploitable - #1
HackerSploit
Web Server Hacking - FTP Backdoor Command Execution With Metasploit - #2
HackerSploit
How To Install Kali Linux On VMware - Complete Guide 2018
HackerSploit
Q&A #1 - Best Cyber-security Certifications?
HackerSploit
Terminator - Kali Linux - Multiple Terminals
HackerSploit
Shodan Search Engine Tutorial - Access Routers,Servers,Webcams + Install CLI
HackerSploit
Q&A #2 - Mr Robot?
HackerSploit
Metasploit Community Web GUI - Installation And Overview
HackerSploit
Linux Expl0rer - Forensics Toolbox - Installation & Configuration
HackerSploit
QuasarRAT - The Best Windows RAT? - Remote Administration Tool for Windows
HackerSploit
Metasploit For Beginners - #1 - The Basics - Modules, Exploits & Payloads
HackerSploit
Metasploit For Beginners - #2 - Understanding Metasploit Modules
HackerSploit
Kali Linux Quick Tips - #1 - Adding a non-root user
HackerSploit
Metasploit For Beginners - #3 - Information Gathering - Auxiliary Scanners
HackerSploit
Spectre Meltdown Vulnerability - How To Check Your System
HackerSploit
Metasploit For Beginners - #4 - Basic Exploitation
HackerSploit
ARP Spoofing With arpspoof - MITM
HackerSploit
WordPress Vulnerability Scanning With WPScan
HackerSploit
Generating A PHP Backdoor with weevely
HackerSploit
Nikto Web Vulnerability Scanner - Web Penetration Testing - #1
HackerSploit
How To Install Kali Linux On Windows 10 - Windows Subsystem For Linux
HackerSploit
Stacer - System Optimizer And Monitoring Tool For Linux
HackerSploit
Kali Linux 2018.1 - Kernel Updates & Patches
HackerSploit
MITM With Ettercap - ARP Poisoning
HackerSploit
Password Cracking With John The Ripper - RAR/ZIP & Linux Passwords
HackerSploit
How To Detect Rootkits On Kali Linux - chkrootkit & rkhunter
HackerSploit
Channel Updates - How To Post Questions & Video Suggestions
HackerSploit
Web App Penetration Testing - #1 - Setting Up Burp Suite
HackerSploit
Web App Penetration Testing - #2 - Spidering & DVWA
HackerSploit
Cl0neMast3r - GitHub Repository Cloning Tool
HackerSploit
Kali Linux On Windows 10 Official - WSL - Installation & Configuration
HackerSploit
DoS/DDoS Protection - How To Enable ICMP, UDP & TCP Flood Filtering
HackerSploit
Web App Penetration Testing - #3 - Brute Force With Burp Suite
HackerSploit







Related Reads
📰
📰
📰
📰
When 1 Tbps Isn’t Enough: Understanding Modern DDoS Attacks
Medium · Cybersecurity
Best Cyber Security Company in Dubai | Secure UAE Businesses
Medium · Cybersecurity
UAE, Saudi Arabia Face Onslaught of Increasingly Complex Cyberattacks
Dev.to AI
One Firewall, Any Framework: Why I Built Mini-WAF for Node.js
Medium · JavaScript
🎓
Tutor Explanation

 DeepCamp AI