Dreambooth tutorial for stable diffusion. Quick, free and easy!
Key Takeaways
This video tutorial demonstrates how to use Dreambooth with Stable Diffusion for image-to-image synthesis and image generation, utilizing Google Collab and Hugging Face's Stable Diffusion model. The tutorial provides step-by-step instructions on training a custom model using personal images and generating images based on prompts and class names.
Full Transcript
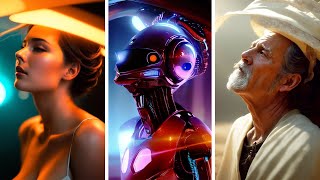
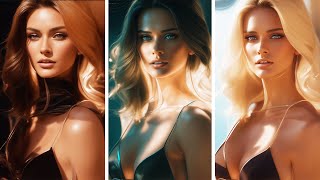
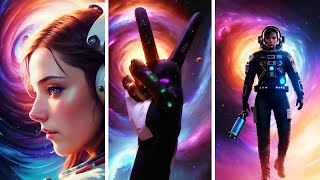
now you've probably seen the video with carer crew where they put Sam G's face into all sorts of images obviously you wanted to do that yourself then you realized what kind of Hardware They're ran on and went into the bathroom to cry for 3 hours me too buddy me too until I found out that you can do all this without owning any hardware at all without installing anything so I tried it put my face in and these are some of the results with no editing now let me show how you can do it as well now what you need to get started is images of yourself so I've pulled together a bunch of images of me from Facebook and then I walked around my house and took pictures of me in various angles it's important that you have a variety of these and with different backgrounds I'd say that a number of between 10 and 30 images is a good start then we need to resize this to fit 512 x 512 so we're doing that by going to a site called b.net and then just inputting all of these and you're going to see here how you can crop these so make sure your face is in them you don't need to be super centered or anything just make sure that you're in the images save them and now we're going to input these into dream booth and create our model so I'm going to link all the important links in the description below so this this is dream Booth with Google collab and running in this way won't require anything from your own computer Google will run all the hardware so you can run this on any computer or even your cell phone now there are however some prerequisites since this is all kind of put together with duct tape and it's all brand new technology when I say brand new this collab has only been live for a couple of hours and we're all new with this learning testing processing doing our best to move this further on so anything I say here today could change by tomorrow but I hope it will get you on the process of learning so take anything I say here with a grain of salt for example as of today it's only possible to run this with a Tesla T4 so if you would get an a100 for example it won't run so you need to disconnect your run time and try again until you get a T4 this will probably change in the coming days but let's work on what we have right now so we're going to start by running each cell so we have a T4 that's all good we're going to install the requirements this is going to take some time but I'll speed this up and catch up with you when it's done all right let's move on to the next and install this now you need to make sure that you have a hugin face account and uh if you don't you can go to huggingface doco and create an account up here and then you're going to want to request access to the stable diffusion uh model so I'm going to link this below when you logged in and enter this site scroll down down you press I read license agree with these terms access repository and while you're in hugging phase go into your account settings go to access tokens make a new token let's name this dream Booth put it at right generate a token copy that and we're going to save that for dream Booth so let's run this out now we're running this cell and this is where we need to input the token log and these are the settings that we want to change so the class name is dependent of of what your subject is let's say for example that you take images of yourself and your a man then this could for example be guy or man or person let's put this as man for now this folder is where I'm going to upload all my images to change this to Seb input so I know which one that is and let's change this one to Seb output let's run this and then open our folder structure go to data Seb input which is the newly created folder that we created while running this cell and here we're going to place all of our images now the images are being uploaded and it's fairly quick now in the next cell here the instance prompt that is what you're going to use to prompt yourself into the image so let's change this to my name and let's change this to our class name which is what we set up here you could also leave this which would read from that but let's put man in there the rest we're going to leave it default now the learning rate here joen recommends 1 E minus 6 but for EAS of use let's just leave this at default for now if you want to learn more about these settings you can go into uh dream Booth Discord I can link that in description we're going to up the max training steps usually a number between 1,000 1500 is a good start so let's go with a th000 for now the more steps you put in the longer it will take and it's a quite time intensive process let's run this and when I say quite a long time I mean quite a long time it could be an hour or two or even more depending on how many steps you put in now at first here it will generate your class images and remember we put class man so it will first learn from the stable diffusion model Manis and gather those images and after that it will compile a model based on your input images together with man now the model that we created is saved in Google collab under models this is Seb output so this is the model now if you were to close this Google collab this would all disappear and you would have to retrain your model so either you would have to save that by by starting a new cell putting in z-r the name of your zip file then you put content models and your model name which in this case would be Seb output then you would run that now this would be a pretty large file and it will be saved in diffusers examples dream booth and when that finishes you're going to see a sip here you just press that zp and press download it will take quite some time uh it's almost faster to just retrain the model just make sure that you make all the images you want to do before you quit Google collab so the training is now completed so we can go down run the inference and this next cell here and while that's loing we can start inputting our prompt so let's try pencil drawing of man so this is your to token name that you set up and this is the class name you should always use the token name and the class name together let's set the batch size to two and U let's see what we get as with every other stable diffusion setup you can change the steps here and the strength scale here and here we are our first samples of images from me now to get cooler results you're going to have to look at prompting a little more interesting than this but for a first try I think these are pretty sweet now let's look at some of the results I got here I think this one's super cool it's in a Diablo esque type Universe here I am as a soldier out in the jungle this pencil drawing I think is fantastic captures the hair very cool this I don't even know what it is but some kind of futuristic me this is me in Game of Thrones and here I am again in some kind of game Universe these turned out pretty sweet all of them and this is uh well I don't know some kind of dreamy an older dreamy and here I am in a spacit or a futuristic spacit at least this in an older style painting and here I am in Lord of the Rings so let's say the results aren't what you're looking for well I would recommend you to go to dream Booth's Discord server I'll link that in the description and there are a couple of tips you can try here's a post from yena where he goes through a few options option one here they not not looking at you at all make sure that you have your token and your class and not just your token so remember this should be this is my name and then man if it still doesn't look like you you didn't train long enough so you can try option three you could try token class in a portrait photograph token class in a 85 MIM whatever whatever just remember to put token class in several times however if they're looking like you but they're all looking like your training images well you might have trained too long or the images were too similar perhap you took all your images in your bedroom and didn't change the angle at all you can adapt that with your prompt and stable diffusion it's a lot of Merit to whatever you type first so if you have overtrained your your model just put your token class further back in the prompt so I hope this is going to help you to create some cool images of yourself or whatever you choose as your input model if you like this content please please like And subscribe that's going to help me a lot good luck have fun create some great art and if you have any questions or comments just put them below I'll make sure to read all of them have a great day now
Original Description
In this tutorial I'll go through #dreambooth for #stablediffusion and how you can train your own stable diffusion model based off of your own images. You can run this on any system for free, even without a gpu.
Links:
https://www.birme.net/?target_width=512&target_height=512
https://colab.research.google.com/github/ShivamShrirao/diffusers/blob/main/examples/dreambooth/DreamBooth_Stable_Diffusion.ipynb
https://huggingface.co/CompVis/stable-diffusion-v-1-4-original
https://discord.gg/9MAy7PcWK5
Chat with me in our community discord: https://discord.com/invite/dFB7zuXyFY
Support me on Patreon to get access to unique perks!
https://www.patreon.com/sebastiankamph
Ultimate Stable diffusion guide
https://youtu.be/DHaL56P6f5M
The Rise of AI Art: A Creative Revolution
https://youtu.be/Ujpr62w7qcU
Ultimate Animation guide in Stable diffusion
https://youtu.be/lztn6qLc9UE
Dreambooth tutorial for Stable diffusion
https://youtu.be/Z-hyKADmHmE
5 tricks you're not using
https://youtu.be/-5TaeHvnVxE
Avoid these 7 mistakes
https://youtu.be/b8xWjrzTAPY
How to fix live render preview:
https://youtu.be/_4rY0oPbUYA
CHAPTERS
0:00 Introduction
0:26 Input images
1:29 Dreambooth Colab
7:13 Prompting
7:48 Results
8:41 Troubleshooting
9:52 Closing words
Watch on YouTube ↗
(saves to browser)
Sign in to unlock AI tutor explanation · ⚡30
Playlist
Uploads from Sebastian Kamph · Sebastian Kamph · 10 of 60
1
 2
2
 3
3
 4
4
 5
5
 6
6
 7
7
 8
8
 9
9
 ▶
▶
 11
11
 12
12
 13
13
 14
14
 15
15
 16
16
 17
17
 18
18
 19
19
 20
20
 21
21
 22
22
 23
23
 24
24
 25
25
 26
26
 27
27
 28
28
 29
29
 30
30
 31
31
 32
32
 33
33
 34
34
 35
35
 36
36
 37
37
 38
38
 39
39
 40
40
 41
41
 42
42
 43
43
 44
44
 45
45
 46
46
 47
47
 48
48
 49
49
 50
50
 51
51
 52
52
 53
53
 54
54
 55
55
 56
56
 57
57
 58
58
 59
59
 60
60

How to install stable diffusion tutorial (automatic1111)
Sebastian Kamph
Inpainting in Stable diffusion for beginners.
Sebastian Kamph
OpenAI NEW Whisper is AMAZING!
Sebastian Kamph
Tutorial - Free AI Game assets in Stable diffusion. Episode 1: Sword
Sebastian Kamph
Game assets in Stable diffusion. Ep 2: Jewelry
Sebastian Kamph
Stable diffusion Animation tutorial with AUTOMATIC AUDIO SYNC. Make your own AI music video!
Sebastian Kamph
Stable diffusion img2img tutorial.
Sebastian Kamph
Stable diffusion tutorial - AI Game assets. Episode 3: Treasure chest
Sebastian Kamph
Stable diffusion animation tutorial. Deforum ALL settings explained. Make your own AI video!
Sebastian Kamph
Dreambooth tutorial for stable diffusion. Quick, free and easy!
Sebastian Kamph
Dreambooth to CKPT. NEW VERSION! Dreambooth locally on potato pc.
Sebastian Kamph
Stable diffusion tutorial. ULTIMATE guide - everything you need to know!
Sebastian Kamph
AI music video. Neffex - Winning
Sebastian Kamph
Stable diffusion video input tutorial. How I made this music video singing animation.
Sebastian Kamph
Stable diffusion color grading tutorial. Quick trick!
Sebastian Kamph
Prompt Editing and Alternating Words in Stable Diffusion.
Sebastian Kamph
Stable diffusion gui most important setting. Live render preview.
Sebastian Kamph
NEW Voice2img prototype! This AI assistant is using Stable diffusion!
Sebastian Kamph
Prompts and FREE ONLINE stable diffusion. OpenArt AI tutorial
Sebastian Kamph
Stable diffusion Halloween concept art tutorial.
Sebastian Kamph
Stable diffusion GTA 6 style image tutorial. Quick and EASY!
Sebastian Kamph
Stable diffusion prompt tutorial. NEW PROMPT BOOK released!
Sebastian Kamph
Stable diffusion GTA 6 style image tutorial. Quick and EASY!
Sebastian Kamph
How to install Deforum locally. Stable diffusion animation.
Sebastian Kamph
Dreambooth in Automatic1111. Cpu only & gpu option.
Sebastian Kamph
Nvidia's NEW text to image AI eDiff-I. Will it dethrone Stable diffusion?
Sebastian Kamph
NEW VR in Stable diffusion? The future is now!
Sebastian Kamph
Motion capture workflow implementation with Stable diffusion
Sebastian Kamph
Don't make these 7 mistakes in Stable diffusion.
Sebastian Kamph
Stable diffusion up to 50% faster? I'll show you.
Sebastian Kamph
Stable diffusion 2.0 Released
Sebastian Kamph
Top 5 Stable diffusion tips for newcomers.
Sebastian Kamph
3 AMAZING Stable diffusion models that will change your life!
Sebastian Kamph
Best NEW AI tool? InvokeAI tutorial for Stable diffusion.
Sebastian Kamph
Monetize your AI art on Creative Fabrica with CF Spark.
Sebastian Kamph
NEW Stable diffusion 2.1 RELEASED!
Sebastian Kamph
Stable diffusion 2.1 is GREAT. At this one thing. 2.1 install tutorial.
Sebastian Kamph
Your face in AI images? The EASY way.
Sebastian Kamph
3 FANTASTIC Stable diffusion models you don't know about!
Sebastian Kamph
Unstable diffusion JUST GOT BANNED! 😲
Sebastian Kamph
The end of AI Art? Lawsuit against Stable diffusion
Sebastian Kamph
Stable diffusion TIER LIST. Best GUI ranked.
Sebastian Kamph
Google's ChatGPT rival Bard. Is it better?
Sebastian Kamph
7 Secrets in ChatGPT (Don't tell your boss!)
Sebastian Kamph
How to ChatGPT? Chat GPT explained!
Sebastian Kamph
How to ChatGPT in 20 seconds!
Sebastian Kamph
Midjourney 4C Features
Sebastian Kamph
NEW ControlNet for Stable diffusion RELEASED! THIS IS MIND BLOWING!
Sebastian Kamph
Revealing my Workflow to Perfect AI Images.
Sebastian Kamph
LIVE Pose in Stable Diffusion's ControlNet.
Sebastian Kamph
Control Light in AI Images
Sebastian Kamph
Multi-ControlNet tutorial.
Sebastian Kamph
Control Text in AI Images
Sebastian Kamph
Full AI Art Workflow. ControlNet & Stable diffusion.
Sebastian Kamph
ControlNet Guidance tutorial. Fixing hands?
Sebastian Kamph
Illuminati Model with Noise Offset & Weekly AI Art Challenge
Sebastian Kamph
Paint&Text2Image - MultiDiffusion Region Control.
Sebastian Kamph
Style2Image in ControlNet (T2I)
Sebastian Kamph
Gen-1 AI Animation is WILD
Sebastian Kamph
Famous Scenes Remade by ControlNet AI
Sebastian Kamph
More on: Multimodal LLMs
View skill →


Related AI Lessons
⚡
⚡
⚡
⚡
FREE AI Sin City Photo Generator — Turn Any Photo Into High-Contrast Noir Art (2026)
Dev.to AI
Google makes Gemini’s personalized image generation free for all US users
The Next Web AI
Gemini’s personalized AI image generation is now free for U.S. users
TechCrunch AI
WebP's Compression Secret: How a 1MB PNG Becomes a 200KB WebP
Dev.to · swift king
Chapters (7)
Introduction
0:26
Input images
1:29
Dreambooth Colab
7:13
Prompting
7:48
Results
8:41
Troubleshooting
9:52
Closing words
🎓
Tutor Explanation