Stable diffusion tutorial. ULTIMATE guide - everything you need to know!
Key Takeaways
The video provides a comprehensive guide to using Stable Diffusion for image generation, covering topics such as installation, text-to-image generation, image-to-image translation, and upscaling. It also explores various tools and techniques, including sampling methods, prompting, and masking.
Full Transcript
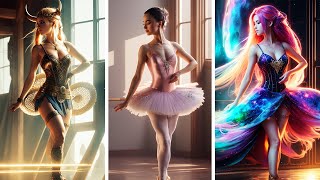
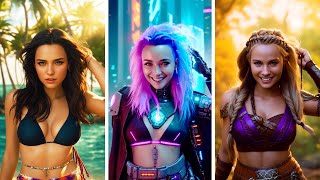
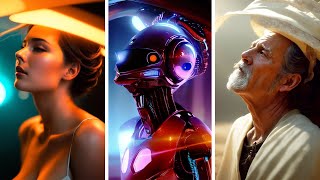
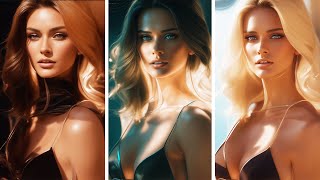
Are all your friends and colleagues posting AI images? Even your sweaty neighbor John is getting more attention than ever after updating his dating profile with images of his vacation. Do you feel left out, have no idea what to do, and just want to create pictures of dogs wearing Star Wars clothes? Then this tutorial is for you. My name is Seb and I'll be your guide. Now, one of these six images is real and the rest are AI made. Can you spot which one? If you dare, post the one you thought in the comments. I'll give you a second. If you stick around, I'll show you which one was the real image. In the end, I'll show you how to make AI images just as good as these. And all I spent was five minutes. All right. So, what I'm about to show you might feel like a daunting task, but it's really, really easy. I'm going to guide you through every step of the way. So, we're going to Google automatic 111. Enter the GitHub. I'll also provide this link in the description. Stable diffusion web UI. Then you're going to scroll down and you have the installation instructions here for Windows. Going to start with Python. Scroll down. Windows installer 64-bit. Download that. Run it. It's super important that you check this box. Add Python to path. Check it. Then just install. We can close this and this. Head back into the GitHub. We're going to install Git. Download that 64-bit Git for Windows. Save. You can just run all this through. You don't need to change anything. Leave everything at default. Close this and then we're going to open command by typing cmd down here. Start the command prompt and then copy paste this git clone. That will copy the files needed to your computer. So you just copy paste that. Then you're going to go to hugging face and download the models for this. So I'm going to link that in the description. You can also go click this link here. Click here official download. Now first you need to make an account. And when you've created an account, go back to this page. Click here to access the repository. And when you've done that, you should reach this page. So when you've logged in, you're going to see the weights here. Ignore the full one. Just go the standard one. Click that download. It's a pretty big file, about 4 GB. It's going to take some time. When that's finished, you're going to enter your users folder. And there's a folder here, stable fusion web UI. This has been created from the command prompts, the git clone we ran earlier. So just enter this folder. Enter models interstable diffusion. And this is where you're going to put your model. So just drag that in there. Rename it to model. And now we can run stable diffusion. So, let's back into the directory here. And you're going to look at this file, the web UI- user. Let me give you a little tip. We're going to first open Notepad. [Music] I'm going to drag that there. And before this line here, going to add get pull. So what happens here that before you run stable diffusion every time this command will pull the files from GitHub the latest files so it would automatically update to the latest version. So let's save that exit and run the web UI user. Now it says already up to date. That's because we ran the git pull and we have already the latest files. Now, this may take some time depending on your uh computer and bandwidth. I've spoken to users that have been waiting at this stage for about 50 minutes, but that's like worst case. So, just stick with it. Leave it as is. It's going to finish up eventually. Now, the installation has completed and this took about 5 minutes on my system, which is a fairly fast system. stable diffusion is now up and running locally on your computer. And how you access that is entering a web browser and this URL. So let's do that. We're going to copy that in here. Then this is our user interface for stable diffusion. Now everything runs in the background here. And here's where you're going to see all your progress from creating the images. But you don't need to look at this. You can use the web user interface for now. So let's talk about what this is. First, we have some tabs up here. And the first one is text to image. So this is where you would create an image out of pure text. So let's say for example, we want a photograph of a woman with brown hair. Portrait. Now, before you get antsy and press generate, I want you to go into the settings here because we're going to change one thing. And this is the progress bar. And we want to show the image creation progress for every step. Uh well, not every step, but let's put it like for every three steps. And apply settings. And then go back. And now we can generate our first image. And here we have a photograph of a woman with brown hair and a portrait. Now, it isn't the best result that we can get in stable diffusion, but then again, we didn't do much here. So, what you need to do first is work with the prompts. And what you do is you say what you want, which is first your object. And this is the photograph of a woman with brown hair. And then you could add more information like we do here. It's a portrait. We could say photo by Irving Pam. We could add details like hyper realism or 8K. So let's run this again and see if anything changes. And now we get a much more interesting result. Now it may not be what you were looking for, but you can change that with a prompt. And if you're feeling a little lost with the prompts, I would recommend you to look at some great stable diffusion images and copy those prompts and then change it the way you want it. And how do you find those prompts, you may ask? Well, let's go to lexica.art. And here you have a stable diffusion search engine, a huge library of images where every image shows you a prompt. So let's say here for example, let's look at this image. It looks like Albert Einstein. Someone has actually written a portrait of a Kurdish Albert Einstein in Kurdish clothes. And then there's lots of info here is by an artist Greg Kowski which is very infamous in the stable diffusion community. They wanted this in digital art style, not a not a photo which is clearly shown here. And more styles here, trending on art station, anime arts, HD, 8K, highly detailed, etc., etc. So, you could add anything you want here to try and adapt the prompt to style your image better. Now, let's see if we can find anything that we can play with. Now, let's copy this prompt. So, let's take this prompt, go back here. Let's keep the photograph of woman with brown hair because that's what we wanted. And let's paste the rest in and remove the friendly humanoid robot. Now, we have a little too much prompting here, so it's going to cut some of the end. We'll just run it anyway. See what happens. And this compared to our starting image is looking a lot more creatively interesting. So this is how you can play with the prompts to get the results you want. Now let's look a little more at the settings that you can change. Now the prompt is one of the hugest parts in stable diffusion, but there are a lots and lots of other options. The second thing here you're going to see is the sampling steps. And now we ran this at default which is a sampling steps of 20 with the uler ancestral sampling method. And 20 sampling steps is usually quite low. But uler ancestral is one of the samplers that can handle that pretty good. And if we look at this sampler versus steps comparison here we have the the kuler and ancestral here and it's we had 20 steps. So let's uh it should be somewhere between here. But since the 16 steps here shows it's a good result, well, 20 would work as well. Now, the steps are like iterations of your image. So, if your image starts with blur like this, like every image does, like you see here on all the samplers, for every step or every iteration going forward, it would try to create more of your image. So if you have this and apparently they tried to create some sort of Medusa woman here. It's trying in this noise to find an image of a woman or Medusa. You can see it's getting a little closer here every time. Now you would say, well why don't I use uterest for everything since it seems to make images even at lower step counts. Well, you could do that, but it's a bit inconsistent with what you're getting. As you can see from the steps 8 to 16 up to 64, the image is changing, which it isn't at well many of the others. LMS here, or KL LMS, which is one of the most widely used because it gives consistent results. Here you can see that the image stays consistent most of the way. I would recommend you to start with KMS, but you would need to use at least 50 sampling steps. I would say a value between 50 and 70 is a good start for you if you're a beginner. Stick with 50, but play around with the other samplers as well. So, we're going to take that advice. We're going to change the sampling steps here to 50. We're going to change it to LMS. And we're going to remove some of the text here in the prompt. So we get down to um 75 again. Now since we changed both the prompt and the sampling steps and and the sampling method, our image is going to change quite a lot. But let's run it and see what happens. So this is a fairly interesting image. Now the eyes look a little weird, but there's an option to fix that, which is restore faces. However, if you would want this image and you want it restored with this function, you can just press this and generate again because there's one thing down here called the seed and this is randomized each time. And if you run this now, you will get a new noise from the start that will produce a completely new image. Let's save this and I'll show you. Let's go back to restore faces. So, we're running this again with the exact same settings. And as you can see, we're getting a different image. Now, if you want to go back to the other image, we actually have that saved in our outputs folder in the stable diffusion web UI. So, you can find the settings there. So, you can always find an old image and the settings for it. So, if we would have copy pasted all those settings from that file would be the same prompt here, the same sampling steps and the sampler and the seed. Now we will get the same image we had previously and this is super important and something you can learn much from. So the see if restoring faces here actually does something about the eyes here. Now this generation took a little longer than previously. I sped this up, but first you saw the image as before and then it started a new generation which would fix the face and now the eyes are looking much much better and the whole face looks well more normal. Now let's look at the rest of the settings. So you have the width and the height here and stable diffusion has been trained on images of 512 x 512. So you're going to get the most consistent results using this size. Now, you're thinking, well, I want to go 1024 by 1024 or 1920 by 1080. Well, if you have hardware that can handle that, sure, go ahead. But most likely, it's going to crash your disabled diffusion. So, let's leave this at 512 x 512 for now. The batch count and the batch size here are how many images you want regenerated. So, you can just up or down this. And if you create more images, you will get a grid as well. Let's look at that. But let's remove restore faces to save some time. I'm gonna add this up this to four. We're going to generate So now we have four new images and these are all saved in your output folder as well. So you can look at them individually here or you can see the grid. Now if you're a keen observer you might say well Seb why aren't all these four images the same since you have the seed put in down here. You said if you have all the settings the same, the images will be the same. Well, you're absolutely right. But when we're running batches like this, every new image gets a new seed. So, the first image here gets this seed, but this image gets the seed after that and this after that and this after that. Now, if we would want all new images, we could just go back to minus one or press this, which is set to minus one. If you did run a random seed, you can just press this button to reuse the old seed if you want it back. You'll always have it down here from your last generation and in your output folder. But it's easy to just be able to press the button. Now, let's get the batch count back and let's talk about the scale here. Now, the scale is how closely the the AI will listen to your prompt. So, working with this image, the lower the scale down to one, that means the AI will not listen to your prompt. It will have a glance at it and say, "Well, all right. This looks cool. H maybe I'll listen to it, but I'll make something that I like instead." So, let's see what happens. Now, we did get a woman. The hair is well, it could be brown. It's not a portrait and it feels like it hasn't listened a lot to what was going on here. So, let's up this to the max. And now we're basically telling the AI. Now, you better look at this. We're going to have a talk later. So, let's see what the AI does. So, now we have a photograph of a woman with brown hair. Art deco style is much much clearer now. It's in a portrait. Now, looking at the prompt here that we copied from Lexiga, you might also be saying, "Well, wait a minute. This woman doesn't have exotic alien features, and it's well, probably supposed to be cyberpunk here, but it's cyber punk background." And well, yeah, I agree with you. There's not a lot of exotically alien features here. And that could be based on several factors. Firstly, this is a very long prompt, so it will evaluate everything here differently. the items in the in the beginning will have a high importance and the items in the end will have lower importance. You can change this. Let's say we want the exotic alien features. I have no idea what that would look like, but let's try it. So, we could add parentheses here. This would accentuate this these words. And you can add as few or as many as you want. The more you add, the more focus it will give to these words. Now, let's run this with the exact same settings we had last time. However, I'm expecting less than great results. Let's see. Now, we started to see some exotic alien features here, but we ended up with this warped mess. And you might say, well, well, Seb, what's happening? Well, I'm going to tell you the reason we're getting this is because our scale is too high. Now, KMS is very consistent, but it has issues under 50 sampling steps, and it has issues when going too high on the scale. So, we're going to drop this down. I say a value between 7 and 14 is usually good. So, you know, let's set it at 14. You can go higher. You can go up to 20, but you have to play around with that value. So, let's run this again and let's keep the exotic alien features in here and see what happens. And now the AI is starting to understand what we want. And all these features here, I would assume would be the exotic alien features. We can actually try that. We can remove these parenthesis and run this again and see what happens. And this is now removed. Now it's a piece of cloth. So that's a way how you can adapt the prompt that you already have without reworking it. Prompting is the primary way to work with your images. Now the rest of the settings here, they need to be understood obviously, but as soon as you understand them, most of the work is going to be with your prompts. Now let's randomize the seed again. Let's generate four new images and let's see if we can get something to work with in image to image. and I'll show you how that works. Now we have four completely new images and I'm thinking that we should change one of them into a photograph. So let's take let's take this one here which is a little bit resemblant of the woman in Battlestar Galactica and let's send it to image to image. Now, what this is is that you can use an input image to create images from. It could be a paint sketch that you have or a more refined image like this. So, let's remove everything here cuz we want some something new. Now, let's put in photo. So, I put in photo of woman with brown hair. I put ocean in background 8K in outdoor photography. I figured since we already have a blue background, we might use this and see if we can get an ocean out of it. Now, we have the same settings. We have sampling steps here, 50. We're going to change it to KMS that we talked about earlier. And for image to image, we have a new setting, which is the noising strength. And this is the most important setting that you will ever use for image to image. I've made a whole tutorial about this setting. What happens here? Since you already have an image, you can't just have a full starting noise like in the images we saw previously because then you would have nothing resembling this image. That's why you can adjust the strength here of how much you are going to make this into noise and then back into a new image. So let me show you how that works. So let's say we set this to zero. That would mean we're not dnoising this at all. We're saving everything from this. and just generate and see what happens. And we should get the exact same image back. And we do because we don't give stable diffusion any new noise to work with. Now, let's set this to one, which would break it down to nothingness and try to build it up again, which would give us problems in stable diffusion because we want something that resembles this. And now we're not getting that. Now we're getting the prompt here because we have deninoised this and broken this down so much that it can't remember what this was. So I mean we have the photo of a woman with brown hair ocean in background. This is all correct that we're not getting this. So this is where you need to play with the dnoising strength. And I would say the more you want to move away from your image, the higher the settings would be and the more you want to keep this, the lower it would be. So let's say that we want to start up here because we want to change a fair amount. We want to change the art style and everything, but we don't want to change her position or her angle. Let's generate and see if we're going too far away from the image or staying true to it. Now, I think this is a pretty good result. We have the ocean in the background here. We have a beautiful sky and we have a woman with brown hair. Now, it's not as resemblant as the original image, but the angle is correct. This object here has been a hat, which looks fairly decent. Now, let's say that you feel that your image here didn't resemble this one as much. Then you can put the strength down, say 35, and you should be even closer to your input image. And we are. We're much much closer, but we're also further away from the prompt. So that's why you need to play with this. See what you want. A way when working with image to image is you can start high and when you're reaching what you want with your image, you can lower the strength. Let's try 0.5 and see where that gets us. Now the face is very close to our original image, but the background is not. Let's see if we can work with that. Let's say you have this and you want to play with it. You want to change the background because you're super happy with this. You don't want to change this. If you would run it again and have the seed randomized or change the strength, you would get a new iteration. So what we can do is we can send this to inpaint. So let's send this to inpaint now and it's it's this tab here. Now what this is is you can actually mask out a part of your image and change only that part. So you can change the size of your brush here and then you can paint either what you want to save or what you want to remove. So, let's paint here. Let's say we want to save this. We want to save the woman as much as possible. Now, this doesn't need to be perfect, but as close as possible will always help you. Now, let's change the prompt to what we want because since we're saving the woman now, we want ocean here in the background. And if we keep the prompt, then we're going to go get a photo of a woman with brown hair and the ocean in the parts where we only want the ocean. So let's put photo of ocean background. And if we leave the setting as is, it's going to try and make the ocean here. And we don't want that. We want the ocean where we haven't painted. So let's change this to inpaint, not masked. You can also upload a mask that you've made in Photoshop or or whatever. It would accept a mask that is black or white. Now, this masked content setting here. Now, let's say this is the part that you've masked. Now, this setting decides what should be filled before stable diffusion starts creating your new prompt. 90% of the time, you're going to want original or Latin noise. And that's kind of depending on what you had in the image before. Now, since they've masked here, which would be here in the original, if they would want to add something that's already white and and gray, like the mountain here and some parts of of green, that would work perfectly. But if they would want something that's completely different, I would recommend working with Latin noise. Now, Latin noise can produce issues where it doesn't blend properly into the background. original is better at that. Now, I wouldn't recommend you working with Latin nothing or fill for now. You can play around with them, but you're probably going to get inconsistent results. So, let's keep original for now. And we have the same sampling sampling steps, sampling method sizes as before. And like in our image to image, there's a dnoising strength here. The more you up this, the more it will change. But since we're not saving much of the ocean here, we can change a lot of this image. So, let's up this and see what happens. Now, we get did get a photo of the ocean in the background, and we have the sky here, which is all looking decent. However, this part here actually turned into some kind of hair up here, and that's not something that we wanted. I'm going to show you how you can paint the parts you want. So, open Photoa, which is basically Photoshop online. Going to take this image that we got or the original one. Put that back. Put that in there. And then we're going to paint. I'm going to paint with blue. And now we just want to remove this this hat here or whatever it is. So stable diffusion thinks it's ocean or sky. Now again, this doesn't doesn't have to be perfect. The AI is pretty good at understanding what things are as long as you give them a reference. Okay, let's try with this one. Export as a JPEG. Save that woman ocean. Now, we're going to go back into stable diffusion and we're just going to drag and drop that in here. Now, you do need to repaint the mask. So, if you have a mask image, that could work as well. then you would just go here and upload the mask here. But we're going to draw. So, let's continue with that and let's generate. And now we're getting much closer to the result that we're looking for. We still have some artifacts around here and here, but you can play with this. Um, either work with the mask a little better or the painting or just play with the mask blur setting here, which is basically how much blur you're going to have to the edge of this mask. Now, what you can do is you can just take this and keep working from this. A good way when you have something you like is that you can send it to image to image and just generate a new image from the one you have here. So let's say photo of woman with brown hair and ocean in background. Now we're redrawing the whole image. We don't have a mask here. Previously we had a very high dn noising strength because we wanted to change the image a lot. But now we don't want that. So let's lower this. So run it to.3 and let's generate and see what we get. And this is starting to look much better. The artifacts are starting to remove around the face. Now the eye has turned a little weird here. But if we just press restore faces here, we can generate a new one. Just remember that if you want this exact face, you need to save the seed and input it here. Again, we're just going to run with a random seed. This time, let's generate. So, this is a pretty good result. The eye is better. It's still not perfect, but you can work with that by running new generations until you find one you like. Let me show what I would do to get a perfect result out of this one. I would drag this back into here. I might up the strength just a little bit and I would run this in several images because you can can't always expect to get a good image every time. So you're going to need to run multiple batches that will generate this. We still have restore faces clicked in. Now this one's pretty close to original. I think this is the best one. Now the eye looks completely normal. So does the mouth. So let's just send this to extras. Now let's talk upscalers. Here you can enlarge your image and you do that with something called an upscaler. And you have a couple of options here. I would recommend going with swir which is my favorite. LDSR gives good good results as well but takes a lot longer time. The skunet variations give good anime results. ESR GAN is not bad, but let me show you some comparisons. We're going to look at BSR GAN, ESR GAN, and Swir. So, the first image here is BSR GAN, and the next one is ESR GAN. You can see it's definitely improving. So, this is this is totally color bleeding all over the place. So, here you have more details. It's much more crisp. And in swin IR, it takes it even further. This is my recommendation. So let's pick that. Let's blow it up to four times the size and press generate. And here we have our final image. And this is now48x 20048. And there you have it. How to work with stable diffusion from start to finish. We have installed stable diffusion. We have spoken about text to image, image to image in painting and extras. Now there are more advanced features like textural immersion, dream booth and animation in stable diffusion. If you want to learn more about that, you can check out my other tutorials on my channel. But for now, I hope you learned something and I hope you have fun while creating your very own AI art. So, good luck and have fun. Now, I almost forgot. We had these six images at the start and one of them was real and the rest were AI images. I'm not sure which one you guessed, but if you did and put it in the comments, I applaud you for your braveness. And it was actually number four. So from number four, I created all the other generations.
Original Description
In this tutorial I'll go through everything to get you started with #stablediffusion from installation to finished image. We'll talk about txt2img, img2img, prompting, sampling methods, inpainting, upscalers and more! Start using stable diffusion today and forget about midjourney and dalle2.
Make sure you install Python 3.10.x like 3.10.7. This will NOT work with Python 3.11
Please support my work on Patreon for early access videos. It will also help me keep creating these videos: https://www.patreon.com/sebastiankamph
Links:
https://github.com/AUTOMATIC1111/stable-diffusion-webui
You don't need the model from Huggingface anymore. Just get a random model from https://civitai.com/ that you think looks cool. I recommend Deliberate.
Model 1.4 is replaced by 1.5.
Model 1.5: https://huggingface.co/runwayml/stable-diffusion-v1-5/blob/main/v1-5-pruned-emaonly.safetensors
Model 2.1: https://huggingface.co/stabilityai/stable-diffusion-2-1/blob/main/v2-1_768-ema-pruned.safetensors
Prompt styles here:
https://www.patreon.com/posts/sebs-hilis-79649068
Chat with me in our community discord: https://discord.gg/sebastiankamph
My Weekly AI Art Challenges
https://www.youtube.com/playlist?list=PLXS4AwfYDUi7RvFm4K6lKBH_acaZQMKY4
My Stable diffusion workflow to Perfect Images
https://youtu.be/4u-Ytioi3DM
ControlNet tutorial and install guide
https://youtu.be/vFZgPyCJflE
Famous Scenes Remade by ControlNet AI
https://youtu.be/wVbWZ-Ph9lE
LIVE Pose in Stable Diffusion
https://youtu.be/uAI_FBK6UPc
Control Lights in Stable Diffusion
https://youtu.be/_xHC3bT5GBU
Ultimate Stable diffusion guide
https://youtu.be/DHaL56P6f5M
Inpainting Tutorial - Stable Diffusion
https://youtu.be/No1_sq-i_5U
The Rise of AI Art: A Creative Revolution
https://youtu.be/Ujpr62w7qcU
7 Secrets to writing with ChatGPT (Don't tell your boss!)
https://youtu.be/G5pld_ELBI0
Ultimate Animation guide in Stable diffusion
https://youtu.be/lztn6qLc9UE
Dreambooth tutorial for Stable diffusion
https://youtu.be/
Watch on YouTube ↗
(saves to browser)
Sign in to unlock AI tutor explanation · ⚡30
Playlist
Uploads from Sebastian Kamph · Sebastian Kamph · 12 of 60
1
 2
2
 3
3
 4
4
 5
5
 6
6
 7
7
 8
8
 9
9
 10
10
 11
11
 ▶
▶
 13
13
 14
14
 15
15
 16
16
 17
17
 18
18
 19
19
 20
20
 21
21
 22
22
 23
23
 24
24
 25
25
 26
26
 27
27
 28
28
 29
29
 30
30
 31
31
 32
32
 33
33
 34
34
 35
35
 36
36
 37
37
 38
38
 39
39
 40
40
 41
41
 42
42
 43
43
 44
44
 45
45
 46
46
 47
47
 48
48
 49
49
 50
50
 51
51
 52
52
 53
53
 54
54
 55
55
 56
56
 57
57
 58
58
 59
59
 60
60

How to install stable diffusion tutorial (automatic1111)
Sebastian Kamph
Inpainting in Stable diffusion for beginners.
Sebastian Kamph
OpenAI NEW Whisper is AMAZING!
Sebastian Kamph
Tutorial - Free AI Game assets in Stable diffusion. Episode 1: Sword
Sebastian Kamph
Game assets in Stable diffusion. Ep 2: Jewelry
Sebastian Kamph
Stable diffusion Animation tutorial with AUTOMATIC AUDIO SYNC. Make your own AI music video!
Sebastian Kamph
Stable diffusion img2img tutorial.
Sebastian Kamph
Stable diffusion tutorial - AI Game assets. Episode 3: Treasure chest
Sebastian Kamph
Stable diffusion animation tutorial. Deforum ALL settings explained. Make your own AI video!
Sebastian Kamph
Dreambooth tutorial for stable diffusion. Quick, free and easy!
Sebastian Kamph
Dreambooth to CKPT. NEW VERSION! Dreambooth locally on potato pc.
Sebastian Kamph
Stable diffusion tutorial. ULTIMATE guide - everything you need to know!
Sebastian Kamph
AI music video. Neffex - Winning
Sebastian Kamph
Stable diffusion video input tutorial. How I made this music video singing animation.
Sebastian Kamph
Stable diffusion color grading tutorial. Quick trick!
Sebastian Kamph
Prompt Editing and Alternating Words in Stable Diffusion.
Sebastian Kamph
Stable diffusion gui most important setting. Live render preview.
Sebastian Kamph
NEW Voice2img prototype! This AI assistant is using Stable diffusion!
Sebastian Kamph
Prompts and FREE ONLINE stable diffusion. OpenArt AI tutorial
Sebastian Kamph
Stable diffusion Halloween concept art tutorial.
Sebastian Kamph
Stable diffusion GTA 6 style image tutorial. Quick and EASY!
Sebastian Kamph
Stable diffusion prompt tutorial. NEW PROMPT BOOK released!
Sebastian Kamph
Stable diffusion GTA 6 style image tutorial. Quick and EASY!
Sebastian Kamph
How to install Deforum locally. Stable diffusion animation.
Sebastian Kamph
Dreambooth in Automatic1111. Cpu only & gpu option.
Sebastian Kamph
Nvidia's NEW text to image AI eDiff-I. Will it dethrone Stable diffusion?
Sebastian Kamph
NEW VR in Stable diffusion? The future is now!
Sebastian Kamph
Motion capture workflow implementation with Stable diffusion
Sebastian Kamph
Don't make these 7 mistakes in Stable diffusion.
Sebastian Kamph
Stable diffusion up to 50% faster? I'll show you.
Sebastian Kamph
Stable diffusion 2.0 Released
Sebastian Kamph
Top 5 Stable diffusion tips for newcomers.
Sebastian Kamph
3 AMAZING Stable diffusion models that will change your life!
Sebastian Kamph
Best NEW AI tool? InvokeAI tutorial for Stable diffusion.
Sebastian Kamph
Monetize your AI art on Creative Fabrica with CF Spark.
Sebastian Kamph
NEW Stable diffusion 2.1 RELEASED!
Sebastian Kamph
Stable diffusion 2.1 is GREAT. At this one thing. 2.1 install tutorial.
Sebastian Kamph
Your face in AI images? The EASY way.
Sebastian Kamph
3 FANTASTIC Stable diffusion models you don't know about!
Sebastian Kamph
Unstable diffusion JUST GOT BANNED! 😲
Sebastian Kamph
The end of AI Art? Lawsuit against Stable diffusion
Sebastian Kamph
Stable diffusion TIER LIST. Best GUI ranked.
Sebastian Kamph
Google's ChatGPT rival Bard. Is it better?
Sebastian Kamph
7 Secrets in ChatGPT (Don't tell your boss!)
Sebastian Kamph
How to ChatGPT? Chat GPT explained!
Sebastian Kamph
How to ChatGPT in 20 seconds!
Sebastian Kamph
Midjourney 4C Features
Sebastian Kamph
NEW ControlNet for Stable diffusion RELEASED! THIS IS MIND BLOWING!
Sebastian Kamph
Revealing my Workflow to Perfect AI Images.
Sebastian Kamph
LIVE Pose in Stable Diffusion's ControlNet.
Sebastian Kamph
Control Light in AI Images
Sebastian Kamph
Multi-ControlNet tutorial.
Sebastian Kamph
Control Text in AI Images
Sebastian Kamph
Full AI Art Workflow. ControlNet & Stable diffusion.
Sebastian Kamph
ControlNet Guidance tutorial. Fixing hands?
Sebastian Kamph
Illuminati Model with Noise Offset & Weekly AI Art Challenge
Sebastian Kamph
Paint&Text2Image - MultiDiffusion Region Control.
Sebastian Kamph
Style2Image in ControlNet (T2I)
Sebastian Kamph
Gen-1 AI Animation is WILD
Sebastian Kamph
Famous Scenes Remade by ControlNet AI
Sebastian Kamph
More on: Prompt Craft
View skill →


Related AI Lessons
⚡
⚡
⚡
⚡
FREE AI Sin City Photo Generator — Turn Any Photo Into High-Contrast Noir Art (2026)
Dev.to AI
Google makes Gemini’s personalized image generation free for all US users
The Next Web AI
Gemini’s personalized AI image generation is now free for U.S. users
TechCrunch AI
WebP's Compression Secret: How a 1MB PNG Becomes a 200KB WebP
Dev.to · swift king
🎓
Tutor Explanation