Scratch Tutorial || Day 6(part 1)
Skills:
Visual / Block Coding90%
Key Takeaways
Introduces game development using Scratch
Full Transcript
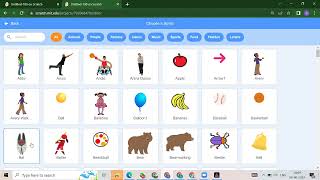
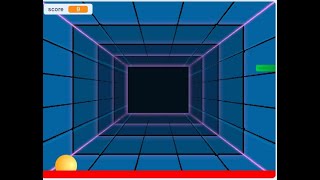
you hmm [Music] hmm hello everyone very good evening how are you all how are city and am i audible can you hear me yes i'm audible okay so now let's start our today's class which is bubble video sensing game okay so first thing what is video sensing okay so first what i will do i will open the scratch okay after that you need to just click on we need to just click on scratch.mit.edu okay so what i will do first i will show you this project which is bubble sensing game bubble video sensing game okay so it means first i will click here as you can see now you will get my video okay so if i will run this project you will get some bubble and it will follow my motion see see so without without your motion it will not work so here first we have to put some motions okay like this even you can use this motion also even you can use this motion also like even you can use this motion also so this is called as video sensing okay so now we will create this project how to start this project now i will explain you okay see if i will do nothing see not so you have to suffocate motions here like this okay so now we will start this project so how you will start this project again we will take one new project here first i will stop this so how you will take a new project okay this is the first question so always i told you you need to just click on create so once you will click on the create you will get your new project okay okay so if you want away again i will give you the project overview so this project is your bubble sensing video game i will show you this okay so if you will click on run button you will get your video here and with the help of your motion sensor you are able to play this game see even you can use this motion okay okay see so this is our today's project okay so now let's start our today's class project first i will stop this hello prop guy how are you today how was your day okay so now we will start this project okay so how you will start this project first thing we will delete this cat okay after that you have to add some background that is a backdrop and second thing we have to add some sprites okay so yes can you even tell me how you will add your backdrop because i think now you know how you can add your backdrops and how you can add your sprites right yes how we will add a backdrop so that is very simple right you need to just click here on a choose a backdrop option so here you will get lots of backdrops so whatever backdrop you want you can just click suppose i want to click this one which is your blue sky so you need to first click here on a blue sky so you will get your backdrop inside your stage area because this area is called as stage area okay so this is our first part now we will see what is our second part so in the second part we have to add some sprites okay so how we will add a sprite yes do you know how we can add a sprite yes everyone hello weedworks how are you dear how was your day very good prop guide okay so yes perfect so you need to just click on choose a sprite and whatever sprite you want suppose oh you have to just search here for bubble okay so we have a ball so if you want to draw your bubble even you can draw that how you will draw that we have a second option so instead of choose a sprite we need to add we have to click on this paint option so once you will click on your paint option you will get one paint area okay suppose you want to draw a bubble so for the bubble whatever color you want first you have to select that okay suppose i want this light shade you need to just draw one bubble okay if you want to decrease the border even you can decrease that see this is your bubble so even we can just take a darker okay so now we have this purple so what we will do we will take only one bubble now we will create a clone clone means what so we have one movie which is robot movie yes do you know robot movie in that movie we have a clone right means by using your one robot you can create a multiple robots so here also by using this one bubble we can create multiple bubbles okay so see this is our second part means in the first part we added backdrop in the second part we added the sprite very good prop guy so that is your duplicate okay means by using one bubble we will create lots of bubbles okay so this is our design part now tell me how you will add a instruction how you will add your coding part see coding is just like your instruction okay if i will give you some instruction like you have to do your homework tomorrow you have to show me one animation then only you will do because you are following my instructions right okay so same like same now we will give instruction to our bubbles okay so how you will start that yes can anyone tell me even it's very good prop guy so we will start from the event okay so which event we want so we have a lots of event if you will click on the even tab we will get lots of events right so whatever event we want for according to our choice we can add that event okay so from well we will start now so now we will start from when flag is clicked okay so where you will get inside your event you will get when flag is split see so what will happen initially we want to hide this bubble okay so how you will hide your purple you will get that inside your looks once you will scroll down you will get height it means when you click on the flag i want to hide the bubble see you will not get your bubble okay instead of fight if you will show if you will take a show block so what will happen when you will click on the flag so what will happen we want to show our bubble okay so this is our first day okay yes yes here we can make that invisible if you want okay we can do that so instead of this dark color if you will take a little bit light color see now how you will change that because you created this right so how you will change that in a costume you will get this okay so instead of this color instead of this green color if you want you can take a little bit color okay so that will look like your invisible component okay so now i will show you ready how you how we will do that okay suppose this is my sprite okay first what you have to do you have to select that suppose i want to select this okay after that what you will do instead of this shape instead of this color we can take little bit light color okay so if you will take a light color you will not get here properly that's why i took a dark color okay but you can make it invisible also and here also we have that option instead of this show okay instead of this show if you will click here so what will happen now you will get your invisible component okay like this so here you can show that and here you can hide that you understood okay so now see in the coding we added two block pin flag is clip so we want to hide this block right okay very good dear so whatever you have doubt you can ask me okay so see now how you will create a clone this is our second part okay how you will duplicate your sprites okay so we have one option you can right click here you can click on duplicate so you will get one more block but we don't want this why because we want around 100 to 200 bubbles right so this is not a proper way to duplicate your sprite we have other layers okay so i will delete that first so see when flag is clicked we want to hide now what we want we want that bubble continuously so in scratch whatever thing you want continuously for that we have one block which is forever so in the control you will get that forever block okay so now in the forever what i want i want to create a clone okay where you you will get your clone we have a clone option okay so see we have create clone of myself okay it means you can create clone of this bubble okay understood and suppose you want the gap between your clones so you can wait for that much time okay where you will get your weight block here so instead of this one second we can wait for little bit time like a 0.1 second so anyone have any doubt [Music] yes anyone have any doubt till now
Original Description
This stream is created with #PRISMLiveStudio
Watch on YouTube ↗
(saves to browser)
Sign in to unlock AI tutor explanation · ⚡30
Playlist
Uploads from Code For Kids · Code For Kids · 18 of 60
1
 2
2
 3
3
 4
4
 5
5
 6
6
 7
7
 8
8
 9
9
 10
10
 11
11
 12
12
 13
13
 14
14
 15
15
 16
16
 17
17
 ▶
▶
 19
19
 20
20
 21
21
 22
22
 23
23
 24
24
 25
25
 26
26
 27
27
 28
28
 29
29
 30
30
 31
31
 32
32
 33
33
 34
34
 35
35
 36
36
 37
37
 38
38
 39
39
 40
40
 41
41
 42
42
 43
43
 44
44
 45
45
 46
46
 47
47
 48
48
 49
49
 50
50
 51
51
 52
52
 53
53
 54
54
 55
55
 56
56
 57
57
 58
58
 59
59
 60
60

#Scratch Tutorial 1 | How to create your own Scratch account #codeforkids #scratch #Game Development
Code For Kids
#Scratch Tutorial 2 ||How to enable Share Button option in Scratch #codeforkids #scratch #game
Code For Kids
Fish Moving inside an Ocean 🌊🌊 #codeforkids #scratch 🥰
Code For Kids
Scratch Programming | Fish Aquarium game | #codeforkids #scratch #game
Code For Kids
Draw the circle in scratch#codeforkids #scratch #game
Code For Kids
Draw Circles in Scratch || How do you draw shapes on Scratch? #codeforkids #scratch #game #coding
Code For Kids
How to Make a Dino Jump Game in Scratch | Tutorial #codeforkids #scratch #game
Code For Kids
Scratch Tutorial || How to Make a Catch Game in Scratch.|| Scratch Tutorial for absolute beginer
Code For Kids
Scratch Tutorial || Day 1
Code For Kids
Scratch Tutorial || Day 2 (DJ System , Dance and Story writing)
Code For Kids
How to Make A Maze Game in Scratch 3.0 | Scratch 3.0 Tutorial |Scratch Tutorial for begineer
Code For Kids
Scratch Tutorial || Day 3
Code For Kids
Scratch Tutorial || Day 4
Code For Kids
Scratch Tutorial | Cat And Mouse Game | Scratch Tutorial for Beginner
Code For Kids
Scratch Tutorial || Day 5
Code For Kids
how to make dress up game on scratch || Scratch Tutorial for Beginner
Code For Kids
How to Make a Pong Game in Scratch || Scratch Tutorial for Beginner
Code For Kids
Scratch Tutorial || Day 6(part 1)
Code For Kids
Scratch Tutorial || Day 6( Part 2)
Code For Kids
Scratch Tutorial || Day 7
Code For Kids
Scratch Tutorial || Day 8
Code For Kids
How to Make Piano Game || Learn to Use Music Extension || Scratch Tutorial || Day 8
Code For Kids
How to Make Piano Game || Learn to Use Music Extension ||Scratch Tutorial for beginner
Code For Kids
Scratch Tutorial || Day 9
Code For Kids
Scratch Tutorial || Draw Shapes #shorts #codeforkids #youtubeshorts
Code For Kids
Scratch Tutorial |How to Draw Shapes in Scratch #scratch #scratchtutorials #codeforkids
Code For Kids
Day 10|| Scratch Tutorial
Code For Kids
Scratch Tutorial || Archery Tutorial
Code For Kids
#1 || Thunkable Beginner Tutorial Platform Overview
Code For Kids
App Development ||Tutorial 2 || how to add button in Thunkable || Thunkable for beginner #codeforkid
Code For Kids
App Development || Tutorial 3|| Beginner Tip "Change screens with a button click" in Thunkable
Code For Kids
Scratch Tutorial ||
Code For Kids
Thunkable Tutorial || Using Camera and Image Recognition components with Thunkable
Code For Kids
Build a Translator App with Thunkable ||Thunkable App Development || Tutorial 5||
Code For Kids
Thunkable Beginner Tutorial #6 || Web Viewer|| Redirecting App
Code For Kids
#1 World in Python || Python Tutorial || Python Programming || Google Colab
Code For Kids
#2 Python Tutorial for Beginners | User input in Python | Command Line Input | Python Variable
Code For Kids
#3 Python Comments | How To Write Comments In Python | Python Tutorial For Beginners |
Code For Kids
#4 Python Tutorial for Beginners | Data Types in Python
Code For Kids
#5 Numbers & Typecasting in python | Python Tutorial
Code For Kids
#6 Strings Tutorial | How To Use Strings In Python | Python Tutorial | Python Training |
Code For Kids
#7 Slicing And Other Functions In Python | Python Tutorials For Absolute Beginners.
Code For Kids
#8 Boolean in Python | Python Tutorial for Begniner
Code For Kids
#9 Python Tutorial for Beginners | Operators in Python
Code For Kids
#10 Lists And List Functions | Python Tutorials For Absolute Beginners
Code For Kids
#11 Tuple in Python | Python Tutorial
Code For Kids
#12 In Python | Python Sets Tutorial | Python Tutorial for Beginners | #python #pythonprogramming
Code For Kids
#13 If Elif Else Statement in Python || Python Tutorial for Beginners |
Code For Kids
#14 While Loop in Python ||Python Tutorial for Beginners
Code For Kids
Python Tutorial for addition of 2 numbers #shorts #youtubeshorts #codeforkids #pythonprogramming
Code For Kids
Python Tutorial for absolute Beginner|| While loop #pythonprogramming #shorts #youtubeshorts
Code For Kids
Machine learning for the kids with Scratch || Machine Learning for kids ||Day 1
Code For Kids
# Tutorial 1 || Machine Learning for kids | Image Classification example | Girl and boy
Code For Kids
#15 For loop in Python || Python Tutorial for Beginner
Code For Kids
# Tutorial 2 || Machine Learning for kids | Smart Home Automation | Turn On the Fan
Code For Kids
#Tutorial 3 || Snapchat Filter in Machine Learning|| Machine Learning for the kids ||
Code For Kids
#Tutorial 4 || Image Identification || Machine Learning for the kids|| Tiger , Elephant, boy
Code For Kids
Scratch Tutorial || Apple Catcher Game || Fruit Catcher|| catch game in Scratch
Code For Kids
Scratch Tutorial || How to record audio in Scratch || Scratch Tutorial for beginner ||
Code For Kids
Scratch Tutorial || how to translate language in scratch || Scratch tutorial for beginner
Code For Kids
More on: Visual / Block Coding
View skill →


Related Reads
📰
📰
📰
📰
My AI Bill Dropped 95% When I Switched to Chinese Models
Dev.to AI
AI Dubbing for Short Drama: The 2026 Playbook That Actually Scales
Dev.to AI
Why AI App Backends Are Becoming Accounting Systems
Dev.to · StructureIntelligence
I Let AI Build My WordPress Forms for a Week. Here’s What Actually Worked.
Medium · AI
🎓
Tutor Explanation
