Isaac Sim 2020: Deep Dive
Key Takeaways
The video provides an in-depth exploration of Isaac Sim 2020, a robotics simulation platform developed by Nvidia, with a focus on its features, tools, and applications, including ray-tracing graphics, physically based materials, and physics engine.
Full Transcript
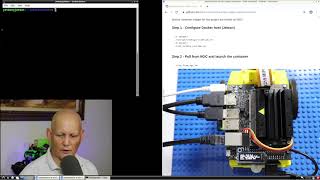
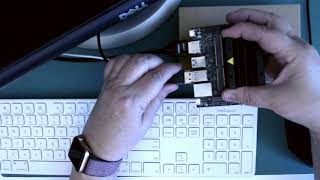
hello everyone welcome to the i-16 2020 deep dive my name is hi-low clue I'll be covering the first half of the talk my colleague Hamad will cover the second half let's start this is the gender of the talk we'll go over the Isaac seem feature overview what can I seem do where you can get it all these features currently and then we're gonna talk about the 2020 roadmap where we are and where we are going so that hopefully you have a better idea of how Isaac seen my be able to help you in the future as well how to download and run Isaacson Maxim docker container can be run on AWS you know on the cloud or locally on your bun 2:18 and then we can stream the docker container images to the omniverse git remote client for viewing and interacting and we can connect the visual studio code for remote code development amat recover the code deep dive in terms of features as an exam is our Nvidia's open robotics simulation platform developers should be able to download and try it out it has a full editor as you can see on the right hand side with both python and c++ api's and they can talk to each other as well as axiom features ray-tracing graphics with the ability to scale to multiple GPUs and physically based materials MDL this is the key for us to be able to achieve realistic look and I think this is gonna have you know the perception stack as well as you train your robots you know to perceive the world it also has physics 5.0 with robust and performant articulation so each robot can be a net equation a collection of joint we have GB use physics support it also features the Ramon iam motion policies library or RMP which enables or provides very smooth and lifelike movements for the robot we will show this later and of course you know as IMI's containerized for running on the cloud on AWS or locally in your ubuntu 18 with streaming and interacting I think this is a quite important Robotics researchers working from home you know who don't have access to a powerful machine can use you know Isaac SEMA on the cloud and stream down and continue to do that work from home where I talk about the you IDF importer now you can bring your own robot into AI 16 and more features to come in terms of role map and 2020 about a month ago we shipped the Leonardo many plays and applications we was built based on Isaac's in the Leonardo applications as the ability to perform the specific and stacking blocks tasks it features the ammonia and motion policies are arm piece or you know the robots are able to move in a very smooth and life life manner and avoid and dynamic obstacles will show this more in the later slice and of course all the features that I talked about you know running on the cloud or locally ray-tracing and you know physics 5.0 articulations so in May 2020 we will ship the Isaac's in 2020 2.1 with both navigations and manipulations as you can see some of the robots in here will will support the Isaac SDK now Isaac SDK and Ross developers should be able to use you know both Isaac SDK messages and Ross messages to communicate with a Jackson in terms of sensors it will have our GBD camera RGB and deaf lighter IMU segmentations and bounding boxes we also have a model pipeline that allows developers to import ship nets objects bring in more objects into your new environment and of course clarin and workstation a bit further out in q3 we will try to come by the mobile arm many robots combine together like this Frank Frank our arm combined with our Carter mobile base rust to support for q3 so where can we download Isaacson if you go to this website developer immediate coms less exact same you can see the dollar button on the bottom right hand corner you will need two accounts the first one is the NGC account to download the Isaac same docker container so NGC is our GPU optimized software hub that hosts all the containers for running on the cloud and it features a lot of GPU optimized some where's the second account that you need is the usual Nvidia developer account to download you know the usual guy the streaming clients which runs both on Windows and Linux in other cloud configuration files so two two accounts one is mgc account to download a 16 container and the other one is the developer account to download the streaming client and other things run through all the steps in the latest lies so how we run Isaacson so basically Isaac same content the Isaac same container can be run on the AWS instance or your local Ubuntu 18 and the container can be downloaded from NGC and Vida and GC once we run the container we can stream the images to the omniverse remote client which runs both on linux and windows so the left hand side the same container needs to be run on ubuntu and on a ubuntu instance but the promote client can be run both on linux and windows and then we can connect the visual studio code to the container instance for remote editing and co-development for the launching the AWS instance we can use the manual step or using terraform I will run through all of these four steps in the next videos be sure that all these steps in our user guide so you know if things are a bit fast you can always refer back to the user guide all right let's see how we can launch the AWS instance using the manual step first so this is the AWS console you can click the launch button here you need to select an ami which specify which graphics driver that Isaacson needs you can search for the ami in the community am eyes and then using that specific keyword and then you need to select a GPU instance let's say in this case for x-large click Next these are the default settings that we can live erase for now we need to increase the storage from 8 to 32 to be able to attract the container image enable certain ports so that we are able to attach it in and for the visual studio code and the streaming client later and I will click launch you asked for an existing key or you could create a new key I'll create a new key for now and give it a name then you can click download the key pair it will download down to your browser download folder and we can use this to etch in later ok so now it is launched as you can see this is the instant we just launched this is the public IP address that you can use later ok so now we launch the ADA Lewis instance let's see how we can ask HS in and download the docker container from NGC another way to launch the AWS is using terraform so the previous video of the I show we used step by steps or the manual steps with terraform you can run free commands tariffs I'm in it plant and apply it will take care of launching the instance for you download the NGC container and launch Isaacson it is more convenient but you need to refresh to see where you are in all those three steps the man or step you know exactly where you are but your farm is another options to launch an AWS instance ok as I said all the steps are here in the user guide it contains a lot of good information where the steps are I described also the code deep dive that uh come on we'll talk about all right let's back and see how we can entertain in selects an instance and click that connect button up there first we need to SH smartphone with the key that we just downloaded and then we can attach as in that's I and specify that key with you know the instance name that we just launched it was a succeed now and we can run nvidia SMI to verify that the card we are running into tesla t 4 and now we need to login to NGC by running the sudo doc lock in you asked for username that is the username and then the password you can get it from the NGC website when you register like here you go to setup get an API key and then generate an API key it will give you the password and you paste the password in here is to say login succeed now right now we can download the Isaac seem container docker image by running you know sudo docker run and specify the link again all the steps are capture in the user guide one is finished downloading who has a you'd accept the EULA just run the same command again with the except Euler and now the eyes exam is is running okay so now we have the exact same running on the AWS instance the next step is connecting the omniverse remote client to see what is going on you launch the visual studio the on reverse remote client specified the IP address with the resolution this is the kit the omniverse exact same URL you see if you clicked the create scenario it will import in all the robots in yours yes you're seen in the sky Frank are in other objects the left-hand side is the normal transfer transform widget the Ryan's eyes are all the objects in the scene it's now is finished compiling the materials if you click play the robot will start simulating and when you click perform tasks you will start tacking stacking the cubes so the orange arms are other possible trajectories to risk the same target again the arm piece allows the robots to avoid dynamic obstacles as you can see you can safely interrupt the robot I think this is quite important to test you know your algorithms in a safe manner okay now that we're an Isaac seam and see what is doing let's see how we can connect a Visual Studio code to do some code editing as you can see all these tables and the franca we have this exact same setup in real life as well this is Cian alcholic interacting with the real robot this is theater fox leading the robotics research lab in the sierra amazing what they have been doing as you can see the real robot and the robot in Isaac's team are using the same algorithm so they behaving they behaving exactly the same this is how we are going to use Isaac's into tests okay let's see how we use music oh so this is Visual Studio code to enter set into the 80s instant that we launched we need to specify the at estate config file host you can that's the name of the config file host name you can use the public IP address and then the identity file point to your security key or Pam key that we downloaded and of course you says Ubuntu save this file and then try to connect to a house with that Leonardo host name and now is to say succeed so once we are in we can open the source file so to point it to the source file in this case with this path again all these steps are documented in the user guide so this is the Lehrer preview dot Python so all this Python code you know all the creation arrow perform test that is where the code is as you can see now let's say we want to make some code changes we can do that let's say we want to add another button like this the important thing here is you can make code changes on the pythons eye without having to recompile Isaac seam at all so this is very fast for development let's say we create an awesome scenario button and immediately the button disappears over here so that is the end of my my portion now let's move on to Hamas thank you all right thanks luck so in this next part of the talk I'm going to go to more details about how the code is structured and how you can in general use omniverse isaacsohn for simulation related tasks so to start I'm going to talk about how how the front end for onerous as a sim which we call on reverse kit is laid out so this window has a lot of stuff going on in it but the the most important stuff I've highlighted in the colored boxes at the top you have a menu which provides you the physics authoring tools and these are important because this is where you would do things like create rigid bodies create joint between rigid bodies and set up your physics settings on the left side you have your widgets and simulation control kind of the the general things that you'd expect in such an editor that would allow you to move objects around and then start and stop simulation in the center you have your viewport which is where all the graphics are being retraced and you have your lights and other objects on the bottom is where the Leonardo previa plication that came with the release is running and that's where you can as locke showed earlier create your scenario performing tasks and also live at it if you want to change the UI see the changes down there on the right side is probably the most important part and that is on top showing the stage window and that is where you see a tree like hierarchy of all the objects in the scene and how they're organized and and the parent-child structure now if you were to click on an object in this case I've clicked on when the joints you will see the details panel will automatically populate with all the different attributes and properties that that joint has and you can change them dynamically so if you want to increase the joint stiffness and stuff like that no I want to go into lower detail about how does how does the editor basically work alongside physics and USD which is the universal scene description format so USD is a format that came out of Disney Pixar and Biscay provides you a single representation for many different kinds of data geometry materials physics you can have your own custom metadata inside of there and how we organize things is that we have a stage and a stage is a collection of USD perimeters which can be any of the aforementioned types and these prims can be of like a X form which is a transform that you can rotate and move mash which are told some sort of geometry joints lights cameras things like that and depending on the type of primitive that you have you can have different attributes on that if you can imagine a light would have additional parameters dealing with brightness and the type of light it is well a joint would have things like joint stiffness so on now let's say you have a primitive like a mesh mesh being something with geometry that you can transform if you wanted to add physics to this you could apply different schemas that would provide different additional attributes that are then automatically read in by the physics plug-in and then simulate it so in this case you could apply the physics and mass api's and then the object fall due to gravity if you wanted to apply a collision mesh to the existing mesh they had you could add the collision API and then enable something like convex decomposition and that would allow that object to fall and hit the ground and interact with other objects now all these attributes it's important to note that they can be modified from inside of the editor you can also use the USD Python API which comes with USD or if you were to save the USD file out to disk as a USDA file you can modify that directly and ask me I want to highlight this link at the bottom that link is a really good resource for finding out more information about USD in general we also had links to the Pixar documentation and their tutorials and we have our own tutorials there as well so what is kind of like so we have an empty editor now how do we get a robot into it well we have a few ways of doing that the first is via your idea files your idea files are a pretty common in the robotics field especially for using Ross and we have a one-way import built into the editor that when you go file open you can file open to your TF and it will automatically perform a one rate conversion which will convert all the meshes and as much of the valid your TF properties that it can into the physics side of things no they're a couple of caveats with this the first is that you already a file is gonna be XML and that XML must be as standard as possible if you have mistakes random non terminated items the import will fail but you can look at the console when you do the import and it should tell you some helpful information about where the import field from the mesh import side obj files are the best in terms of support but depending on how you exported at your Dae files those will sometimes work and we recommend that you use obj file so the next way to create a robot is let's imagine that you had imported a visual Rush's for your robotic arm now in this preview release we're somewhat limited in how we can import meshes but in the next release you will be able to import directly from the editor FBX files audio files and a couple other formats now once you have your visual meshes imported you can using the physics menu create joints between the original meshes assign them to rigid bodies apply mass there is a special physics properties window they can use to dial that like dial and some of the custom physics properties and it provides you a richer interface then the details panel provides and then finally let's say you wanted to write a a robot from scratch what you can do is you could start off in the editor by making let's say a rigid body and a joint and then save that to a usda a being for ascii meaning it's humanly readable and then inside the USD file you could copy/paste the joint and rigid body and then create your own structure and then set all the local transforms and so on i didn't mention earlier that USD has a python api and all of these things anything that you can do in the editor is also accessible through python so if you wanted to have a parametric robot generator that would take different rigid bodies and joints and assign them in different ways you could do that and it's it's actually pretty straightforward the python api is really rich on the USG side next I'm going to show you a video of what it looks like when importing a you RDF model so hopefully this is okay there we go so in the beginning I imported the you RDF file and it immediately converted all the meshes I then add a light just so that you can kind of see that a robot moves better and once I enables simulation I can click on a joint and immediately start dragging around its joint drives now when you import your robot by default all the drives will be set to position drives with some generic stiffness MaxxForce and damping value said those should be tuned depending on the robot that you have here the defaults are just kind of enough to get you going so that you can see that the robot is moving and then next I wanted to show again there another preview so and the next set of slides what I'm going to be talking about is kind of how this application was built now that we have a robot imported how do we make a move like this how do we make it avoid obstacles and what those ghosts mean so whenever you see one of those orange robots come out what that's actually showing you is a different motion plan given a different default configuration so imagine if the robot had its elbow out to one side how would it try to reach the same pose now in this task the most natural way to perform stacking is via the solid robot pose basically straight up and straight down but we do show that it is possible to simulate alternate directory's live and if you want to keep you decide what the best way to reach something is okay so let's look at a quick diagram of how this was all set up okay so this diagram is trying to show a high-level overview of how the omniverse isaacsohn framework which includes omniverse kit which is the editor a bunch of extensions for ray tracing and things like that tie into the rest of your another preview application so on top of omniverse isaacsohn we have a few c++ libraries one being the physics plugin which provides support for physics we had dynamic control and motion planning which I'll go into next and then on top of these c++ libraries we expose python aps for everything that a search that you can build on higher level applications so on top of this we would build our simulated frança which is supposed to replicate what you'd have in the real world as well as creating the state machine and high-level tax planning so what is the dynamic control API so we found that while the physics APA is very rich in some cases it is a little bit too verbose when you want to do robotics applications so we still provide the full physics API to the user but we also provide this slightly higher level API called dynamic control the main use case at least why I find it interesting useful is that whenever you press play and stop instead of the editor the physics state is destroyed and recreated and that is so that all the physics pointers can be cleared up and if you make any changes on the USD side they can be replicated back into physics now the downside is that if you did have a physics pointer it would disappear as soon as you press stop and if you try to do anything with it your program would crash so dynamic control provides an API through USD where you can get a opaque handle a big dynamic control handle to the physics object through a USD path and whenever the physics point are underlying it the changes it is automatically updated and things will continue to work without any trouble now at the bottom here the slide I'm providing a pretty simple code sample and the one thing I wanted to point out is that that path that I have for the get articulation call is a path that you'd find in the stage window so generally everything is organized under a root X form prim called world which has usually a zero transform and underneath that we have a robot franca and then the specific robot panda so what this code sample is doing is it's showing how you can get the articulation from that USD power and you have to wake it up because the physics simulation will try to put objects to sleep that are not moving so in case the robots not moving you need to wake it up so that when you set the position target for each degree of freedom the robot will move so here's a quick video basically showing what that looks like so inside of the university editor we have a really useful scripting window and in there you can miss the right path live and run it and what I find this most useful for is before designing a plugin or extension instead of Isaac SEM I want to prototype the physics make sure everything is working if I'm importing a new robot I can easily play with it instead of the editor by just writing Python code and there you saw me running the same script over and over again to make the joints randomly move all right so we imported a robot into the simulator we now have a way to control its joints using physics well the next thing is generating a motion plan so that you can give high-level commands now here we leverage something called Romani and motion policies or RM piece for short and I'm not going to go into details but basically the idea is that your robot has a task space in terms of joints you have the seven joints plus two do for the fingers but from the robotic side you generally want to control the robot from its end effector so you want to move the end effector forward backwards left-right up-down RMPs provide you a way to optimally compute the joint angles given a more natural kind of world space pose for the end effector and if there are obstacles in the path of that robot it will automatically avoid them for you now the API they provide is pretty straightforward if you wanted to import a brand-new robot you would need to provide a new llamo config we have one in there for the franco robot but let's say you are ten you could modify the yellow conflict to add or remove the joints needed for your new robot and then tune the parameters there such that your robot moved optimally for the next release we do plan on providing a little bit more documentation for this right now it's a little bit hard to change the robot but it is possible another thing the API is that you can specify the end effector pose in the robot coordinate frame which is the corner frame corresponding to the base of the robot you can add and remove obstacles and these obstacles are defined using primitive shapes such as spheres cubes cylinders and once you have your obstacles you can update them every single frame via ground truth data from physics so that is where you would want to for example all the cubes and blocks that you saw in the Leonardo stacking scene every single one of them is updated per frame from the physics data and at the bottom I have a reference for if anyone's interested if they want to read the paper about RMP it is out of our group out of our Seattle robotics lab led by a professor dieter fox and here's a quick video showing what the obstacle avoidance looks like this is one of the three samples that you provide as part of the Leonardo preview this will be the obstacle avoidance sample and here we have two Rubik's cubes which are just moving in a sinusoidal pattern where the robot is trying to maintain a fixed pose and it will automatically avoid the cubes and try to reach that fixed pose as best as it can we have three examples total as part is release the first one being the ghost robot fully stacking scene we have another one that stacks two blocks and then the final one it avoids obstacles and the idea here was to provide one full example and then two simpler examples that could be ripped apart put back together to build more complex scenarios so next I'm going to talk about the the frança interface itself so we we have the robot being simulated we had a way to interact with it we can provide high level motion plans but now we want to somehow have a way to interface with our simulated robot exactly like we would for the physical robot so here in Franco de pie we have a Franco class which initializes the motion planning framework loads all the config files sets everything up inside of this class we have an end effector and this naturally is what you would send your end effector target commands and we have a function called go local which means you want to set the local pose sorry set the pose of the end effector in the local reference frame of the robot base this then sends the target request to the motion funding extension which then runs the arm Pico and that will automatically every single frame update the robot and try to move to that target we had a grouper class which allows you to open close the gripper fingers the gripper is separate for the end effector because as you can imagine you can have a fixed robot arm but then attach a different end of focus to it so this would be the point let's say if you wanted to attach them like a suction cup gripper you can modify the gripper class and interface with that then finally we have a status class and the main use this is that inside of your code you want to know what the status of the RMP is and if it's reached its target so every single frame it updates where it currently is and where it is being pulled to go and if you wanted to query whether it reaches target or if it's within a threshold you can check the status and then do that distance computation and so on okay so we now have a simulated robot well how do we generate kind of tasks in terms of super high-level I want the robot to do XYZ we provide a a simple but powerful state machine in state machine at PI which is based around an article state and this part of the state it has a couple of basic functions though and I also apologize for the numbering this slide it kind of got weird I don't know why they're all one but in this hierarchical state machine you have a function that is called whenever you enter a state exit a state every single frame as you step through that state there's a transition function where you can check to see if you're ready to move on to the next state and then as part of this you can provide additional higher rule states so in its state is the state that you start at active state is the current active state and the next state will be the next hierarchical state they want to transition into once the transition condition is met now all these states are defined in behavior state step I and that for example is where we have a pick block state machine which does a basic simple and moves above the block goes down and picks it we have a place block which then moves places the block and lets go we can build higher level tasks called for example pick-and-place machine will do both to pick and place operations and then we can build the full state machine which is what we use for the ghost robot scenario and stack blocks economical where it does the look at it looks at a block before going down and reaching for it the ghosts come out and show kind of potential motion plans that the robot could have done and so on the example that does a simple stack which is basically it picks up one block and puts on top of the other is a really good way to learn how to build your own state machine and it provides a pretty simple example that is easy to read and you could make that more interesting by adding more blocks or stagnant different way so going back to put in context I just talked about how Leonardo predation was built so the goal of all of this is that we want to provide Python api's for everything where you can rip out whatever piece that you wanted so for example let's say you had your own motion planning code you could integrate that yeah Python replace our entire motion planning stack and have your own controller if I interact with physics directly you can get rid of the dynamic control side and have the low level of physics access if you wanted to change the robot you get get rid of the simulated frança and introduce your own robot class that would leverage everything else motion plans dynamic control or any subset and then on top of that introduce your own state machine your own high level task planning that it would interact with the robot so the goal of this preview is to kind of show where we're going with I'm nervous Isaacson and trying to provide a Python centric interface that also gives you access to C++ the rendering and things like that so that you can build interesting robotics applications and do research on top of that so to end with I'm going to talk about what's in the next release so the focus of this next release apart from improving support for navigation and more manipulators is that we want to get into synthetic data generation which is very important when you want to Train robots your classifiers College detection networks things like that so to this end we're going to have support for ground truth sensor simulation starting off with RGB depth cameras we'll have our simulation the ability to get ground truth bounding boxes as well as segmentation both for the classes and instances now synthetic data generation is kind of useless unless you have a good way to randomize your scene so we'll provide a domain randomization pool box which will allow you to leverage a lot of different functionality which I'll show in the next slide in a video but it allows you to randomize many different aspects of the scene like lighting camera position object position textures materials and that come under the ground crit sensor simulation will allow you to permit regenerate your environments you could do training kind of in a randomized fashion look at educators and things like that we will also provide communication layer support for raus raus one to start with and as well as the Isaac SDK the Isaac SDK will be the primary sample said the primary SDK used for the navigation samples but if you had your own navigation stack running in Ross there should be no issues running that Whitson will also provide more assets and environments in the original isaacsohn release with you before we had a lot of different varmints we had at office Hospital warehouse and we're going to start pulling some of those into omniverse isaacsohn starting off probably the warehouse and the idea there being that will provide a lot of the building blocks that you would want in a warehouse like shelves and boxes and lights and so on and you could reorganize those and generate an infinite number of warehouses by parametrically moving those objects around randomizing them things like that we will be supporting more robots in that image we show the Carter robot which is our kind of navigation base that we use for a navigation testing as well as the UART in robot and we will also document better I guess how you can create robots from scratch and things like that a lot of the tooling that was in the preview release has been improved upon by the physics team a lot and now it is much more intuitive to build robots so and I have two videos the first one showing a contrived domain randomization example so here you have a scene with the blocks are being moved on the table we have light being moved around the color of the ground and the block on the right are randomized and the background textures are being randomized as well now obviously in an actual scenario there'd be a lot more happening but we just kind of wanted to show some of the basic features that you would get with this and finally the last video it shows the navigation sample so basically on in the omniverse isaacsohn we have this Carter robot driving around our little block world and we have the camera data being sent to the SDK where it then uses lidar and the camera to localize and then navigate between different way points and with that we will transition to the Q&A section thank you home art I'll try to answer some of the questions that you guys have posted I think the most common question is what is the minimum hat where I can it run on you know sound card so because axiom is featuring ray tracing graphics so if you run locally on your button 218 it is recommended that you use the RT x and 2070 that will ensure you know certain optimal performance you know anything above it that should be good 2017 because it it might be able to run on older cards too but we can guarantee that the performance and of course you can also run on a tip device which has test 34 cards and when you run with a delay of cursor you need to pay for you know the address service but Isaac same container can be run locally on your you want to a machine another questions you know the people as is what Cairo BOTS can be simulated so as Hamad said if you have a you refl you can try to import in as exam we try to pass that and then import the robots for you of course you are EF might come with you know like Sun values might not be correct or missing so you know we try our best to pass that but you RAF is one way another way as Hamad said you can try to set up your robot manually in the editor you know imports in your objects and set up the joins yourself as well so there were two questions I want to quickly answer one is I didn't provide too much explanation for what you RDS stood for so that stands for the universal robotics description format your idea files are generally provided sometimes by the manufacturers or by researchers so for example for the frança panda arm you can go to there's a github repository that provides you the RDF they could load into Ross into our base and that same your idea is what we load into the simulator the you are ten robot that is a robot from Universal robotics they have several different models there is that you are three or five or ten and will probably support at least the you are ten but that will probably easily transition into the you are five and the you are three as well there's a question about when the Ross to interface will be available Locke covered that in the beginning so that is going to be our release following the one in May we plan on adding Ross to support for now we're supporting Ross one because a lot of the researchers in the Seattle robotics group use Roslin so naturally we have a customer internally that we can work with to make sure that our simulator works for researchers before we release that to the public we have one questions about whether I support simulating destruction cup grippers yes we can use a physics fix joint to simulate destruction cup with open and closed as well there are the physics physics features that you can use to simulate different physics and behaviors or effects like you know applying forces they keep their some wind and other physics features as well another question is will it have the seem too real features to transfer to the real robot so as for mods that we have domain randomizations with helps your algorithms to be much more robust by randomizing you know the looks the physics properties as well so that when you transfer to the real robot reality just another randomizations from the algorithm point of view together with the realistic graphics ray tracing graphics you know I think that we have the perception stack as well when your your robot see you know very realistic and camera images just like the real life and together with the other expose physics parameters that you can randomize you can to learn to achieve this same to real so those are question kind of related about how realistic is the grasping and manipulation physics in this release so from experience I can tell you that the physics is very realistic but oftentimes the problem is that it is difficult to get the actual physics parameters so you can have a robot arm but unless you have the like a realistic mass realistic moment or shall specify the actual joint stiffness is the results that you get won't be physically accurate so it's kind of the more physically accurate the parameters you give to the physics simulation the more accurate your physics will end up being there was also a question on of what is the difference between gazebo ross and isaac stem and probably the two main things would be that in omniverse Isaac stem we're trying to leverage our ray tracing technology in Nvidia to get photorealistic sensor images and sensor generation especially for things like light our RGB cameras we can we can do ray tracing which would give us much more photorealistic images and the second thing would be that because we have a support for physics 5.0 the simulation of robotic manipulators especially when you're dealing with large mass ratios and a lot of different arms and different objects is going to be more robust and accurate than other simulators that are out there depending on your application obviously there is there's never one solution for everything but we're trying to provide one that works the best in terms of performance and scalability a thing we can take one more last question I guess there's a quick one how many degrees of freedom are needed for the robot arm that is entirely dependent on the robot you can have anywhere from one to ten twenty there's no minimum limit on that
Original Description
Join us for an in-depth exploration of Isaac Sim 2020: the latest version of NVIDIA's simulator for robotics. Isaac Sim's first release in 2019 was based on the Unreal Engine, and since then the development team has been hard at work building a brand-new robotics simulation solution with NVIDIA's Omniverse platform.
Download Isaac SDK at www.developer.nvidia.com/isaac-sdk
Join the NVIDIA Developer Community www.developer.nvidia.com
Watch on YouTube ↗
(saves to browser)
Sign in to unlock AI tutor explanation · ⚡30
Playlist
Uploads from NVIDIA Developer · NVIDIA Developer · 13 of 60
1
 2
2
 3
3
 4
4
 5
5
 6
6
 7
7
 8
8
 9
9
 10
10
 11
11
 12
12
 ▶
▶
 14
14
 15
15
 16
16
 17
17
 18
18
 19
19
 20
20
 21
21
 22
22
 23
23
 24
24
 25
25
 26
26
 27
27
 28
28
 29
29
 30
30
 31
31
 32
32
 33
33
 34
34
 35
35
 36
36
 37
37
 38
38
 39
39
 40
40
 41
41
 42
42
 43
43
 44
44
 45
45
 46
46
 47
47
 48
48
 49
49
 50
50
 51
51
 52
52
 53
53
 54
54
 55
55
 56
56
 57
57
 58
58
 59
59
 60
60

Ray Tracing Essentials Part 2: Rasterization versus Ray Tracing
NVIDIA Developer
Ray Tracing Essentials Part 3: Ray Tracing Hardware
NVIDIA Developer
Ray Tracing Essentials Part 4: The Ray Tracing Pipeline
NVIDIA Developer
NsightGraphics 2020 2 Release Spotlight
NVIDIA Developer
Ray Tracing Essentials Part 5: Ray Tracing Effects
NVIDIA Developer
Ray Tracing Essentials Part 6: The Rendering Equation
NVIDIA Developer
Ray Tracing Essentials Part 7: Denoising for Ray Tracing
NVIDIA Developer
Spatiotemporal Importance Resampling for Many-Light Ray Tracing (ReSTIR)
NVIDIA Developer
Announcing Cloud-Native Support for Jetson Platform
NVIDIA Developer
JetsonTV: Build your next project with NVIDIA Jetson
NVIDIA Developer
Nsight Compute Feature Spotlight: Roofline Analysis, Asynchronous Copy, Sparse Data Compression
NVIDIA Developer
Nsight Systems Feature Spotlight: OpenMP
NVIDIA Developer
Isaac Sim 2020: Deep Dive
NVIDIA Developer
NVIDIA Jetson: Enabling AI-Powered Autonomous Machines at Scale
NVIDIA Developer
NVIDIA Tools to Train, Build, and Deploy Intelligent Vision Applications at the Edge
NVIDIA Developer
Jetson Xavier NX Developer Kit: The Next Leap in Edge Computing
NVIDIA Developer
Synthesizing High-Resolution Images with StyleGAN2
NVIDIA Developer
NVIDIA Robotics: Isaac SDK and Sim 2020.1
NVIDIA Developer
Accelerating COVID-19 Research with GPUs
NVIDIA Developer
Visualizing 150 Terabytes of Data
NVIDIA Developer
Boosting Performance and Utilization with Multi-Instance GPU
NVIDIA Developer
Running Multiple Workloads on a Single A100 GPU
NVIDIA Developer
NVIDIA Nsight Feature Spotlight: GPU Trace
NVIDIA Developer
Spark 3 Demo: Comparing Performance of GPUs vs. CPUs
NVIDIA Developer
NVIDIA Jetson Nano Wins Edge AI and Vision Alliance Award
NVIDIA Developer
NVIDIA IndeX on Google Cloud Platform Marketplace
NVIDIA Developer
DeepStream SDK: Best practices for performance optimization
NVIDIA Developer
Efficiently Deploying GPU Accelerated 5G CloudRAN for Edge AI Inferencing
NVIDIA Developer
NVIDIA PhysicsNeMo - Accelerating Scientific & Engineering Simulation Workflows with AI
NVIDIA Developer
NVIDIA Deep Learning Institute Instructor-Led Training Available Remotely
NVIDIA Developer
Advancing AR Glasses
NVIDIA Developer
Blender Cycles: RTX On
NVIDIA Developer
Real-Time GPU-Accelerated Data Analytics of 250 million Flight Data Records of 737 Max grounding
NVIDIA Developer
Assessing Property Damage with AI
NVIDIA Developer
RAPIDS: GPU-Accelerated Data Analytics & Machine Learning
NVIDIA Developer
DaVinci Resolve Turns RTX On
NVIDIA Developer
RAPIDS with Plotly Dash : GPU-Accelerated Census 2010 Visualization
NVIDIA Developer
NVIDIA IndeX for arivis5D Cloud Platform
NVIDIA Developer
NVIDIA Backchannel: Behind the Scenes of Marbles at Night RTX
NVIDIA Developer
NVIDIA Backchannel: Sneak Peek into Marbles RTX in Omniverse
NVIDIA Developer
How to Create "Paint" in Substance Painter
NVIDIA Developer
Accelerate AI development for Computer Vision on the NVIDIA Jetson with alwaysAI
NVIDIA Developer
Securing Next Generation Apps over VMware Cloud Foundation with Bluefield-2 DPU
NVIDIA Developer
Accelerated Data Centers with NVIDIA and VMware
NVIDIA Developer
GPU-Accelerated Motion Blur in Blender Cycles
NVIDIA Developer
NVIDIA Clara Guardian Virtual Patient Assistant
NVIDIA Developer
Revolutionizing Supercomputing with NVIDIA UFM Cyber-AI
NVIDIA Developer
Inventing Virtual Meetings of Tomorrow with NVIDIA AI Research
NVIDIA Developer
Learning a Contact-Adaptive Controller for Robust, Efficient Legged Locomotion
NVIDIA Developer
Getting started with Jetson Nano 2GB Developer Kit
NVIDIA Developer
NVIDIA Jetson Developer Community AI Projects
NVIDIA Developer
Open-source projects on NVIDIA Jetson Nano 2GB Developer Kit
NVIDIA Developer
Real-Time Ray Tracing with Project Lavina
NVIDIA Developer
Jetson AI Fundamentals - S1E2 - Hello Camera
NVIDIA Developer
Develop Optimized Conversational AI Models with NVIDIA NeMo on DGX A100
NVIDIA Developer
Jetson AI Fundamentals - S1E4 - Image Regression Project
NVIDIA Developer
Jetson AI Fundamentals - S2E1 - JetBot Intro and Hardware
NVIDIA Developer
Jetson AI Fundamentals - S2E2 - JetBot Software Setup
NVIDIA Developer
Jetson AI Fundamentals - S1E1 - First Time Setup with JetPack
NVIDIA Developer
Jetson AI Fundamentals - S1E3 - Image Classification Project
NVIDIA Developer
More on: AI Systems Design
View skill →


Related AI Lessons
🎓
Tutor Explanation
