POWER Templates - Affinity Photo Tutorial
Key Takeaways
This video tutorial by Olivio Sarikas covers the creation and use of POWER Templates in Affinity Photo, a feature that enables users to create and save custom templates for repeated tasks, enhancing their workflow and consistency in design. The tutorial demonstrates how to create a template, stylize images, and reuse templates for similar images, as well as export and save them correctly.
Full Transcript
hello my friends how are you doing today i want to show you something i call power templates and i'm willing to bet this is going to be your favorite new function in affinity photo my name is olivio i'm a professional designer sharing my industry secrets with you so maybe subscribe to my youtube channel for free also this week i have an awesome surprise for you filterforge reached out to me during my last live stream and said you are doing a challenge every week so why not give away one of our keys as a prize originally they suggested a basic edition key but i reached out to them after the stream and say let's make it a professional edition key and they agreed by the way this is not a paid advertisement or anything i'm getting nothing from that i will link to the challenge which is happening inside of my super fan group on facebook and please read through the rules of course it's completely free to be part of that challenge let's get started with this tutorial what are power templates what are normal templates actually in affinity photo what do they do why should you use them well here we go when you go to file and new up here first of all you will see these presets that affinity photo has created for you these are different kinds of resolutions dpi values color formats and bit depths but templates are a lot more powerful and they are created by you so when you click on templates here's the first secret source power tip to use you can create subfolders and this makes it extremely useful so for example you can see here i have a folder for creative and inside i have subfolders for analog for sci-fi for wintage then i have a folder for mockups and then also different kind of social media formats this makes it extremely powerful and this is not just about the resolution what you want to think about here is for example if you create stuff often for instagram you want to have maybe your logo in there your watermark you want to set up different kind of styles and looks and with this with these templates you can create amazing quality and amazing consistency this is the important part because consistency is key when you create something for online here's the really cool part a template file is basically just an affinity photo file with different file ending so instead of af photo it is af template and this means for us that you can use everything inside of affinity photo that is non-destructive this is the really important part non-destructive by the way while we're at it this time i want to ask you how do you organize your images just folders are you using a software let me know down in the comments so you can use all kinds of layers layer blend modes layer effects adjustment layers live filters all these kinds of amazing things can be used for a template so let's create one together to see how really powerful that is and again before you do that think about the size and also the ratio you want to have for your file so for example if you use files from your camera make a template that is for vertical and then also make a template that is for the horizontal resolution of that file with everything set up in the right position because this is an amazing time saver and again creates amazing quality and consistency if you want to have your watermark in there if you want to use text you can choose the font for example the font size put it everything up with the layer effects maybe you want to have some shadow behind the text stuff like that and you save so much time because you don't have to do that every single time you don't have to think about what was the font i used what was the blend mode i used what i have what kind of blend range settings i used last time for the stylus everything is saved in there this is so so powerful okay now if you do have one or maybe many of my creative packs this is a really amazing starting point let's go for example for my analog dreams pack so i go to file and place and you can see that inside of my analog dreams pack there is a ton of stuff to play with right let's for example say we want to have a discoloration uh let's use this one this is blue and pink and put this right in here like so and you can see it's an overlay we have some hairs in here also so pretty cool uh let's go and set this to soft light and you can see i can move this around and i can also resize that and rotate that right so there's a ton of possibilities in here as a template let's go to the next one file place give me a vignette please so let's go to vineyards here i want to have one of these more intense vignettes they have a different format but that's not a problem so we're going to zoom out here a little bit like so hold the shift key grab one of the edges and just put it in the right size like this now this time i'm going to set the blend mode for multiply and you can see when i turn this on and off i now have a beautiful analog vignette let's go with the next one file and place this is just for inspiration you can do a million different things with this right let's go for film grain here uh we're gonna use a grain with has some color in there yes this one okay that's good so let's again place this in here like so i want to put this in the background right over the picture and also resize that because that grain is way too big so let's go like this okay this time i want to set my blend mode to soft light and i want to reduce the opacity like so and also here's a little trick here's a little extra secret sauce what you want to do is to click on blend ranges and for the underlying composition you want to pull down the right side the right handle and this means that the effect is applied less in the areas where we have more light and this is how a camera actually works where you have of course more noise in darker areas you can see if i zoom in here this has less noise and this has a lot more noise around these areas right so that's very very helpful let's resize this make it even smaller like so now keep in mind this is something you only have to do once and then you save it as a template and you come back and can use it on a ton of other pictures let's go on think a little bit technical what kind of other things could you use the next time you want to edit a picture so here are two things that are really powerful to use first of all you want to put an adjustment layer for curves in here like so down here i would say between everything else and your image and then i want to pull this up here a little bit and i want to pull this down so i have less contrast like so maybe pull this up a little bit more that already looks pretty good very nice okay cool what else do we want to have here i want to have actually a light leak in here so let's go to file and place again go to my light leaks like so and this time uh let's take this pink one over here that's pretty good put this on here like so i want to set this to screen very nice very good okay cool we can leave that here and now i want to set another adjustment layer for color balance on top of everything so i can just balance the colors a little bit to my taste at the end so i can create something that is more to my taste and these color balance settings they are also very useful when you want to readjust this for the next image because the next image is going to be a little bit different you can see when i move this discoloration around i can still really change the picture and i can also rotate this you can see like so for example if i want to have that i can resize that like so so you can do really really a lot of different things for that so here we have created one template for a vertical analog look now how do i save that as a template go to file and then instead of save as you go to export as template because this will then already give you the right file ending let's go to templates over here creative analog this is our analog style01 boom there we have it and now if you go to file and new you can see that here in the templates we already have this in here right so that is very very useful let's look at another example this already is finished this is what i use for all of my youtube thumbnails and the reason why this is a good example for a template is because you can see here i have the affinity photo logo on the left top side and i have my brand icon on the top right side and they are always exactly in the same size in the same location because it would be a nightmare to every time have to think about was the logo uh five pixels bigger or smaller and no don't do that you will save a lot of time like this and also down here i have set up two different kinds of texts one which already has this outline around it one without the outline the font is selected the size is selected so i just have to pull a picture in here into the background and in seconds i have created a thumbnail for my youtube video and also i can then use this i have different sizes for facebook for example where i can use that so this is extremely powerful see you my next tutorial thank you for watching bye you
Original Description
You know normal Templates. Now learn how to create POWER Templates. This will put your Affinity Photo Workflow on Steroids.
Analog Dreams Pack: https://gum.co/EwnWW
Buy me a Coffee: https://gum.co/coffeeforolivio
Weekly Challenge on FB:
https://www.facebook.com/groups/oliviotutorials.superfan/permalink/1143273606086399/
My Facebook group: https://www.facebook.com/groups/oliviotutorials.superfan/
My Newsletter: https://www.oliviotutorials.com/newsletter/
My Affinity Photo Creative Packs: https://gumroad.com/sarikasat
My Patreon Page: https://www.patreon.com/sarikas
All my Social Media Accounts: https://linktr.ee/oliviotutorials
Watch on YouTube ↗
(saves to browser)
Sign in to unlock AI tutor explanation · ⚡30
Playlist
Uploads from Olivio Sarikas · Olivio Sarikas · 0 of 60
← Previous
Next →
1
 2
2
 3
3
 4
4
 5
5
 6
6
 7
7
 8
8
 9
9
 10
10
 11
11
 12
12
 13
13
 14
14
 15
15
 16
16
 17
17
 18
18
 19
19
 20
20
 21
21
 22
22
 23
23
 24
24
 25
25
 26
26
 27
27
 28
28
 29
29
 30
30
 31
31
 32
32
 33
33
 34
34
 35
35
 36
36
 37
37
 38
38
 39
39
 40
40
 41
41
 42
42
 43
43
 44
44
 45
45
 46
46
 47
47
 48
48
 49
49
 50
50
 51
51
 52
52
 53
53
 54
54
 55
55
 56
56
 57
57
 58
58
 59
59
 60
60

Remove breathing sound from your audio recording // Audacity
Olivio Sarikas
Noise Removal for Audio Recordings - fast & easy // Audacity
Olivio Sarikas
In the Bazar - NI Maschine Audio Sketch
Olivio Sarikas
Submarine Concerto - NI Maschine Audio Sketch
Olivio Sarikas
Affinity Photo - Creating a Photo Font
Olivio Sarikas
Affinity Photo - Rusty Metal Font Tutorial
Olivio Sarikas
Affinity Photo - How to remove things from a photo
Olivio Sarikas
Affinity Photo - How to replace a Sky
Olivio Sarikas
Affinity Photo - How to put Patterns on Clothing
Olivio Sarikas
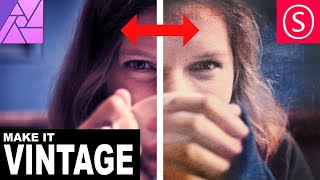
Affinity Photo - Vintage Look Tutorial
Olivio Sarikas
Affinity Photo - Photo Letter Font Tutorial
Olivio Sarikas
Affinity Photo - Print Ready Tutorial
Olivio Sarikas
Affinity Photo - Grunge Maps Tutorial
Olivio Sarikas
Affinity Photo - White Teeth Tutorial
Olivio Sarikas
Affinity Photo - Frequency Separation Tutorial
Olivio Sarikas
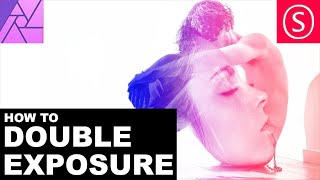
Affinity Photo - Double Exposure Tutorial
Olivio Sarikas
Affinity Photo - 5 Tricks for better Pics
Olivio Sarikas
Affinity Photo - Realistic Fog
Olivio Sarikas
Affinity Photo - How to Match Color
Olivio Sarikas
Bokeh Balls Trick - Affinity Photo Tutorial
Olivio Sarikas
Affinity Photo - Remove Fog, Smog, Haze and Dust
Olivio Sarikas
Affinity Photo - Orange & Teal Look
Olivio Sarikas
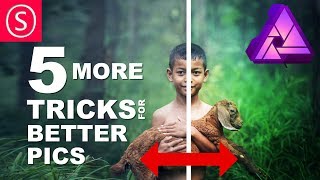
Affinity Photo - 5 MORE Tricks for better Pics
Olivio Sarikas
Affinity Photo - World in a Light Bulb
Olivio Sarikas
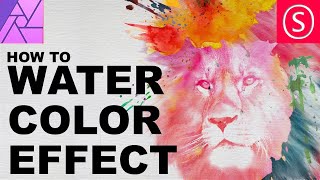
Affinity Photo - Watercolor Effect
Olivio Sarikas
Affinity Photo - 5 Tricks for better Composition
Olivio Sarikas
Affinity Photo - Fur Text Tutorial
Olivio Sarikas
Affinity Photo - Skin Color & Tan
Olivio Sarikas
Affinity Photo - Oil Paint Look Tutorial
Olivio Sarikas
Histogram explained EASY & FUN - Affinity Photo Beginner Tutorial
Olivio Sarikas
Affinity Photo - Text in Perspective
Olivio Sarikas
Affinity Photo - Dramatic Sky Colors
Olivio Sarikas
Why Black & White Photography is amazing!
Olivio Sarikas
Affinity Photo - Stunning Black & White Photos
Olivio Sarikas
Affinity Photo - 5 Filters for Landscape Photography
Olivio Sarikas
Affinity Photo - Remove Shadows EASY
Olivio Sarikas
Let's Talk - Where we go from here :)
Olivio Sarikas
Affinity Photo - Realistic Image on a Screen
Olivio Sarikas
Affinity Photo - 4 Perspective Tools explained
Olivio Sarikas
Affinity Photo - 3D Text Effect
Olivio Sarikas
Affinity Photo - Tilt Shift done right
Olivio Sarikas
Affinity Photo - Blur Filters Explained - Part 01
Olivio Sarikas
Affinity Photo - Design Project: Enigma Lounge
Olivio Sarikas
Affinity Photo - Fake Colorized Look
Olivio Sarikas
Affinity Photo - Tiny Planet Tutorial
Olivio Sarikas
Affinity Photo - Change Day to Night - Tutorial
Olivio Sarikas
Affinity Photo - Neon Text Tutorial
Olivio Sarikas
Affinity Photo - Wood-burn Effect
Olivio Sarikas
Affinity Photo - NEON Portrait Look
Olivio Sarikas
Affinity Photo - Angel Wings Tutorial
Olivio Sarikas
Affinity Photo - Remove any Logo
Olivio Sarikas
Affinity Photo - Portrait Design - SUPER EASY!
Olivio Sarikas
Affinity Photo - Make a Planet
Olivio Sarikas
Affinity Photo - Brushes Explained
Olivio Sarikas
Affinity Photo - Design your own Brushes
Olivio Sarikas
Affinity Photo - Flame Soccer Tutorial
Olivio Sarikas
Affinity Photo - How to save a bad Shooting
Olivio Sarikas
Behind the Scenes - Special Episode
Olivio Sarikas
Affinity Photo - Cyber Demon Tutorial
Olivio Sarikas
Affinity Photo - Red Riding Hood Project EP 03
Olivio Sarikas
More on: AI Productivity Tools
View skill →


Related Reads
📰
📰
📰
📰
I Accidentally Stumbled Into an AI Side Hustle — Here's Everything I've Learned
Dev.to AI
How I Made $700 in 2 Weeks Selling AI Automation Templates
Dev.to AI
MCP Server Tutorial: Build Your Own AI Tools in 30 Minutes
Dev.to · NeuroLink AI
AI didn’t replace the work for me. It moved the stress to a different place.
Reddit r/artificial
🎓
Tutor Explanation
