ControlNet Tutorial for ComfyUI.
Key Takeaways
This video tutorial demonstrates how to use ControlNet with ComfyUI for image generation and manipulation, covering topics such as installing custom nodes, downloading and installing ControlNet models, and applying ControlNet nodes in Comfy workflows. The tutorial also explores the use of ControlNet for stabilizing Fusion 1.5 models and achieving specific effects such as soft edges and detailed lines.
Full Transcript
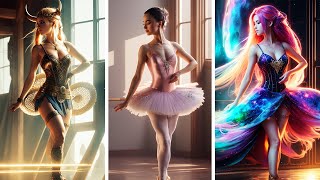
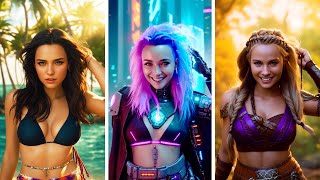
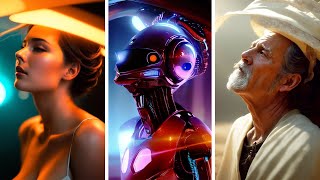
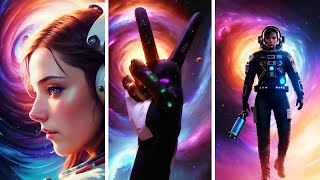
today I'm going to show you control net and how to take an image like this and turn it into this and this and this and this this is going to be a control net tutorial in comfy UI let's get started I tried doing 100 sit-ups but I failed because my stomach couldn't take that AB use so this is what you see when you startup comy right and this is no control net here so I'm going to show you how to create one from scratch and I'm also going to show you how to get more advanced workload like this and this I have just downloaded this is available for my Patron subscribers if you want this you don't need this but I'll show you how to make it so if you want it easier if you just want to download and get started available on patreon now once you download a control n workflow either if it's this one or another one you're probably going to see an error like this so you have following node types that were not found that means you need to go into your manager here and if you don't have the manager you can find my how to install comfy guide in the comments or up here somewhere that's going to guide you how to get comfy running press that then you're going to go into install missing custom nodes and all the missing nodes are going to be here you can see I only have this one so I'm just going to press install here and then it's whenever that's finished you're going to restart button down here and this is what happened for me now you're probably going to have more here so make sure that you select all of these and then press install we are restarting and once that is finished you can see also in the terminal the status of that so here's stuff going on right whenever that's finished this little thing is going to be removed and now it's done but but but but Seb what about these they're still red yes you actually need to refresh the browser window as well and now we can see that all of our nodes look fine if they don't make sure to again check your manager make sure everything is you can press update here update all update comy recheck install missing custom Noe and restart your comfy again there is some other things we're going to install as well so we're going to go into here install models we're going to search for control net and we're going to check here both the type and the base we want the type to say control net and the base to say 1.5 so we have a lot of these now they are about 700 megabytes each I'm going to download uh the canny I'm going to download the line art the open pose the scrip Ribble soft Edge probably anime line art and the tile as well now those are fairly big like I said so um get the ones that you feel that that you need but uh if you have the space you know just get uh the same ones that I do just make sure that whenever you've install them you scroll down again and uh recheck that there is control at an SD 1.5 now you might be asking well aren't there control nets for sdxl and other models yes there are there are some sdx control Nets you can download them and use them if you want to uh I do prefer using control net for stabil Fusion 1.5 models because those control Nets are uh in general a little better but that might change over time now I got a lot of these installed now you can see in the green one here I got the cany the depth the line art open post scribble soft Edge the anime line art and the tile to apply this we're just going to press close here and then if we press refresh here we're going to be able to see them in our load control net nodes here so can here for example this is the one I downloaded I have multiple so I have a pth or a safe tensor if you're downloading from the manager you're probably going to have the safe tensors but if you have a pth that you downloaded from hugging face it doesn't matter that's fine too but for this tutorial we're going to use the safe tensors that we downloaded from the manager we're also going to be downloading this QR code monster model and it's available in the description just get this one curac code monster V2 if you can't find the V2 you might be over here you got to find the QR code monster for sd15 here you go into files and versions and then you're going to go into the this little folder here this ISS V2 there you have it go into your uh comy folder models control nut and just put that right in there now if you're using my workflow you should have it running by now and U What's Happening Here is that you have an input so this is going to be your input image now right now we have this man here and we also have the prompt old man closeup portrait linen shirt back background and this is what we want to see not what we're actually seeing this image we're then setting a size here 768 x 768 we're then loading a checkpoint though so this is a model this is not a controller model but a regular stable Fusion model you can get these from Civ TI or or any other model site now if you don't have this vae here you actually need to go into the manager again install models search for 840 just install that like we did with the control models we have two nodes that load Aura here now they are disabled by default you can either press uh contrl b or right click and click bypass to enable or disable them bear in mind you need to download Laura models to use for that those go into the models Laura folder we're not going to dig into luras for this tutorial so these are only available here if you know what they are and want to use them so what's happening here now we have loaded an image we have this hold man here we have the size set which was set by default we have the prompt so that's what our image is going to look like and then we have have a lot of nodes here the blue ones here which are uh different control Nets and they tie into the output here so this is uh the end result or this is where the generation gets done so if I would press Q prompt here now I would get an image of an old man and it might or it might not resemble our input image as you can see we have some lines here from the glasses but they're not really looking uh like like the input that we had and that's because that the control n that we are using now and as you can see all these are in low opacity and purple so they are disabled it's only this control net that's enabled and this is using a canic control net and it's applying that with a strength of 0.5 the strength is uh usually set between 0o and one so if we change this to one and then we have a start percentage and an end percentage this is where the control net starts and ends so think of this as a slider between 0 and one so we're going to start at zero that's the first frame and then going to end at one which is the last frame so now we're going to run the control net high strength L for the full duration now if you press Q prompt again you will see that our image more closely resembles our input now the class glasses are full now we haven't really delt into what these controllers do yet so let's start looking at what's happening here first off all these nodes can easily be enabled and disabled right by pressing the little bypasser here and that's possible for all of these control Nets so now they're all disabled so if we would press Q prompt here now we are not getting an image that resembles this one here so we could say mid shot or actually remove closeup old man midot and you can see it's now a mid shot so it doesn't take into account this image anymore because we have disabled all of our control Nets so if we enable a control net here let's say this one line art soft Edge cany now they're enabled again and even though we are still having mid shot in the prompt it's forcing our control net image into our result and that's really what we're looking for with control Nets it's all about finding how much of these control Nets you want forced into your image let's look at what all these control Nets actually do let's take a different image let's take this ballerina here with our hands behind her head we're going to ignore the prompt right now we're just going to leave it at the old man midot and then show now if we double click we can type here and we can add a node and we want the preview image so the preview image is well it's going to preview an image and we want to see what all these control Nets are actually doing to your image so what you can do is you can take a pre-processor so in control Nets stay with me there are three parts so you're loading a control net model you're loading a pre-processor and you're applying your control net so we're we're loading a control net model line art we're applying a line art pre-processor so the pre-processor takes our input image and turn it into an image that control net can understand and then it applies that control net onto our image now let me show you what that is we're just going to press Q prompt here and as you can see here our line art pre-processor has turned our image over here into this and this is different for each control net right so if we add some more previews here let's just drop them in and we can check okay what does the soft Edge look like we can take the pre-processor here of softedge connect that there we can take the canny the pre-processor connect that there let's check the dep we can connect that there we need to enable this let's also check the open post because that that's pretty cool so the pre-processor is um always under the load control net here in the in this workflow so if you generate this again now or Q prompt we can see a lot of other control net pre-processors so we have the soft edge here which kind of gives you uh soft edges of the image we have the cany which gives us a detailed lines of the input we have the open post which is one of my favorites is actually seeing the post of the image without forcing any anything else on the image so this is kind of cool because if you have a skinny character wants to turn it into a fat character or vice versa uh it's not going to be constrained by the body proportions it can just see the limbs of the character which is is very cool and we have a depth map here so this is what happens inside of the control Nets right so it takes your input image applies a control net pre-processor and then from that image it uh applies the control Nets to your image now we we enabled a lot of control Nets here and we have have um this woman we have a prompt that says old man mid shot but if we look at our result here we can see this is not an old man it just looks like our input image that's because our control Nets are too strong here right so let's start by disabling here our control Nets so we have no control Nets enabled now let's enable the open pose we have an open POS it is applying 0.9 strength so that's fairly high and an n% of 0.95 that's fairly high as well we can just run this for 100% now it's going to retain the pose of our input image but nothing else which means that it's not constrained by the lines or anything so our old ma man here getting us the same pose as the woman now if we feel the open pose is not enough and we want to retain parts of the input we can enable something else we can enable the depth here for example can generate again we can see that our character now is starting to resemble our input so you need to play with the values here and raise or lower the different control Nets that was an added bonus I have a put in an upscaler here so if you want an image upscale you can just enable this here it's using the tile model so you need to download that if you didn't do that it's also using an upscale model if you want to download one of the UPS scalers just go into manager install models search for upscale and here you have a bunch to choose from now if you're downloading workflow sometimes and your load control net model is turning red or purple around the edges but you know that you have downloaded that specific model you just need to reclick this and reselect them mod it could be that the workflow creator has a different name for their model or that it's a safe tensor or it's a pth or a ckpt which is checkpoint but uh just go in and reselect the model now one more thing when it comes to this these controllers right we talked about loading it we talked about a little bit about the pre-processor and we talked about applying it now for each of the pre-processors there are settings and we're not going to dig deep into all the settings but one of them that's available in most pre-processors is the resolution so if we for example let's drag and drop a couple of pre-processors here canny I'm just copy pasting these from this one and then we're going to load a preview image again I'm copy pasting these like connecting them and I'm changing let's lower the resolution here let's have one low one mid and one high I'm using the anything everywhere nodes which means I don't have to connect an image here as you can see this is glowing so it has an input but if you are not using this or if you're using another workflow you need to connect a FAL image here into your images down here but as you can see it's not required for me now if I would run this you can see here now that even though that all of these pre-process are canny they are of different resolution and that's going to affect your image right so if you use this one with a resolution of 128 you're going to be able to see these uh kind of pixels in in your image if you are using a more high-risk image in this 512 one we can see it's a little better and in the 1024 our lines are even smoother just bear in mind it's also going to change what's going on in your image so here you can see in the lower resolution one we're actually getting more face detail but this can also be changed with uh the low and high threshold so let's change the low threshold on the high resolution one you can see that we're getting some more detail into back into the image but that can be a good way to check what's going on if you feel that you aren't getting the results that you are looking for let's remove these again now if you just want to create a good-looking image enable the line art enable the soft Edge start asking for what you want man in tropical Jungle Safari clothing I'm going to lower the strength here a little bit there you have it it's kind of too strongly resembling our input so let's disable the line art I'm going to lower the softage here a little bit I'm going to enable the open post instead let's try again oh maybe too strong still lower here the open pose and lower the control net uh we're getting closer but it's still kind of giving us these um non-clothing Vibes so if we disable uh the edges here now we're just using an open Poe for example and why we're getting those results previously is um as you can see in this image the lines here on the close or the the body is so tight that it has no room for any clothing basically that's when you don't why you don't want to have too much on your control net there oh and just as a reminder if you are using absat it's going to take a very long time um um since it's an a tile up scal let's load a default workflow here I'm just going to show you if you want to create a controlled workflow of your own we're going to just move these here from the K sampler and forward and we're going to load three notes we're going to have a load control net you can also rightclick add node and find the ones that you want we're going to apply a control net pre-processor and this depends on what kind of model you want to load so let's say for example that we want to use the depth then we need to search for depth here let's pick here minus depth map and then we're going to apply control net Advanced we're connect to the control net here the image here we're going to take from our prompt the positive into the positive and the negative here into the negative how do you know what's positive and negative well most of the time it's the positive on the top and the negative on the bottom but it kind of depends on how you connect them so if you connect this one to the positive that's going to become the positive and then we're going to go from the control net positive to positive negative to negative and then we need to load an image into this so we're going to load image we're going to connect that there we're going to drop an image into this going to drop this uh robot character in here and let's say um woman Android closeup portrait biom mechanical and if we generate this now we will get an image that resembles our inputs now depending on the control net you load it's um well it's going to be different because there are so many control Nets there are so many pre-processor you can use and there are so many values of strength that you can use for your image that should cover the basics of how to use control Nets thanks for watching I hope you learned something and I'll let see you in the next one see you
Original Description
Download workflow here: https://www.patreon.com/posts/multiple-for-104716094
Recommended Online ComfyUI (affiliate): https://www.thinkdiffusion.com/?via=sebastian
How to install ComfyUI: https://youtu.be/KTPLOqAMR0s
Get early access to videos and help me, support me on Patreon https://www.patreon.com/sebastiankamph
Chat with me in our community discord: https://discord.gg/dFB7zuXyFY
Stable Diffusion for Beginners Playlist https://www.youtube.com/playlist?list=PLXS4AwfYDUi5sbsxZmDQWxOQTml9Uqyd2
My Weekly AI Art Challenges https://www.youtube.com/playlist?list=PLXS4AwfYDUi7RvFm4K6lKBH_acaZQMKY4
My Stable diffusion workflow to Perfect Images https://youtu.be/4u-Ytioi3DM
ControlNet tutorial and install guide https://youtu.be/vFZgPyCJflE
Famous Scenes Remade by ControlNet AI https://youtu.be/wVbWZ-Ph9lE
Watch on YouTube ↗
(saves to browser)
Sign in to unlock AI tutor explanation · ⚡30
Playlist
Uploads from Sebastian Kamph · Sebastian Kamph · 0 of 60
← Previous
Next →
1
 2
2
 3
3
 4
4
 5
5
 6
6
 7
7
 8
8
 9
9
 10
10
 11
11
 12
12
 13
13
 14
14
 15
15
 16
16
 17
17
 18
18
 19
19
 20
20
 21
21
 22
22
 23
23
 24
24
 25
25
 26
26
 27
27
 28
28
 29
29
 30
30
 31
31
 32
32
 33
33
 34
34
 35
35
 36
36
 37
37
 38
38
 39
39
 40
40
 41
41
 42
42
 43
43
 44
44
 45
45
 46
46
 47
47
 48
48
 49
49
 50
50
 51
51
 52
52
 53
53
 54
54
 55
55
 56
56
 57
57
 58
58
 59
59
 60
60

How to install stable diffusion tutorial (automatic1111)
Sebastian Kamph
Inpainting in Stable diffusion for beginners.
Sebastian Kamph
OpenAI NEW Whisper is AMAZING!
Sebastian Kamph
Tutorial - Free AI Game assets in Stable diffusion. Episode 1: Sword
Sebastian Kamph
Game assets in Stable diffusion. Ep 2: Jewelry
Sebastian Kamph
Stable diffusion Animation tutorial with AUTOMATIC AUDIO SYNC. Make your own AI music video!
Sebastian Kamph
Stable diffusion img2img tutorial.
Sebastian Kamph
Stable diffusion tutorial - AI Game assets. Episode 3: Treasure chest
Sebastian Kamph
Stable diffusion animation tutorial. Deforum ALL settings explained. Make your own AI video!
Sebastian Kamph
Dreambooth tutorial for stable diffusion. Quick, free and easy!
Sebastian Kamph
Dreambooth to CKPT. NEW VERSION! Dreambooth locally on potato pc.
Sebastian Kamph
Stable diffusion tutorial. ULTIMATE guide - everything you need to know!
Sebastian Kamph
AI music video. Neffex - Winning
Sebastian Kamph
Stable diffusion video input tutorial. How I made this music video singing animation.
Sebastian Kamph
Stable diffusion color grading tutorial. Quick trick!
Sebastian Kamph
Prompt Editing and Alternating Words in Stable Diffusion.
Sebastian Kamph
Stable diffusion gui most important setting. Live render preview.
Sebastian Kamph
NEW Voice2img prototype! This AI assistant is using Stable diffusion!
Sebastian Kamph
Prompts and FREE ONLINE stable diffusion. OpenArt AI tutorial
Sebastian Kamph
Stable diffusion Halloween concept art tutorial.
Sebastian Kamph
Stable diffusion GTA 6 style image tutorial. Quick and EASY!
Sebastian Kamph
Stable diffusion prompt tutorial. NEW PROMPT BOOK released!
Sebastian Kamph
Stable diffusion GTA 6 style image tutorial. Quick and EASY!
Sebastian Kamph
How to install Deforum locally. Stable diffusion animation.
Sebastian Kamph
Dreambooth in Automatic1111. Cpu only & gpu option.
Sebastian Kamph
Nvidia's NEW text to image AI eDiff-I. Will it dethrone Stable diffusion?
Sebastian Kamph
NEW VR in Stable diffusion? The future is now!
Sebastian Kamph
Motion capture workflow implementation with Stable diffusion
Sebastian Kamph
Don't make these 7 mistakes in Stable diffusion.
Sebastian Kamph
Stable diffusion up to 50% faster? I'll show you.
Sebastian Kamph
Stable diffusion 2.0 Released
Sebastian Kamph
Top 5 Stable diffusion tips for newcomers.
Sebastian Kamph
3 AMAZING Stable diffusion models that will change your life!
Sebastian Kamph
Best NEW AI tool? InvokeAI tutorial for Stable diffusion.
Sebastian Kamph
Monetize your AI art on Creative Fabrica with CF Spark.
Sebastian Kamph
NEW Stable diffusion 2.1 RELEASED!
Sebastian Kamph
Stable diffusion 2.1 is GREAT. At this one thing. 2.1 install tutorial.
Sebastian Kamph
Your face in AI images? The EASY way.
Sebastian Kamph
3 FANTASTIC Stable diffusion models you don't know about!
Sebastian Kamph
Unstable diffusion JUST GOT BANNED! 😲
Sebastian Kamph
The end of AI Art? Lawsuit against Stable diffusion
Sebastian Kamph
Stable diffusion TIER LIST. Best GUI ranked.
Sebastian Kamph
Google's ChatGPT rival Bard. Is it better?
Sebastian Kamph
7 Secrets in ChatGPT (Don't tell your boss!)
Sebastian Kamph
How to ChatGPT? Chat GPT explained!
Sebastian Kamph
How to ChatGPT in 20 seconds!
Sebastian Kamph
Midjourney 4C Features
Sebastian Kamph
NEW ControlNet for Stable diffusion RELEASED! THIS IS MIND BLOWING!
Sebastian Kamph
Revealing my Workflow to Perfect AI Images.
Sebastian Kamph
LIVE Pose in Stable Diffusion's ControlNet.
Sebastian Kamph
Control Light in AI Images
Sebastian Kamph
Multi-ControlNet tutorial.
Sebastian Kamph
Control Text in AI Images
Sebastian Kamph
Full AI Art Workflow. ControlNet & Stable diffusion.
Sebastian Kamph
ControlNet Guidance tutorial. Fixing hands?
Sebastian Kamph
Illuminati Model with Noise Offset & Weekly AI Art Challenge
Sebastian Kamph
Paint&Text2Image - MultiDiffusion Region Control.
Sebastian Kamph
Style2Image in ControlNet (T2I)
Sebastian Kamph
Gen-1 AI Animation is WILD
Sebastian Kamph
Famous Scenes Remade by ControlNet AI
Sebastian Kamph
More on: Multimodal LLMs
View skill →


Related AI Lessons
⚡
⚡
⚡
⚡
FREE AI Sin City Photo Generator — Turn Any Photo Into High-Contrast Noir Art (2026)
Dev.to AI
Google makes Gemini’s personalized image generation free for all US users
The Next Web AI
Gemini’s personalized AI image generation is now free for U.S. users
TechCrunch AI
WebP's Compression Secret: How a 1MB PNG Becomes a 200KB WebP
Dev.to · swift king
🎓
Tutor Explanation