Cinematic Look - Affinity Photo Tutorial
Skills:
AI Design Tools90%
Key Takeaways
This video tutorial demonstrates how to achieve a cinematic look in Affinity Photo using various tools and techniques, including crop tools, blend modes, and color grading.
Full Transcript
hello my glorious beasts how are you doing today I'm gonna show you how to do the cinematic look in affinity photo my name is Olivia I'm a professional designer and I want to thank of my patrons who support me and make these videos possible thank you very much for that also by the way I want to invite you to my new channel which is called Olivia vlogs it's a place where I will share with you artistic and creative projects I'm doing I take you with me with my camera to photo shootings to meet other artists who art exhibition and gallery opening so a lot of culture and inspiration and cool things going on and if you like it please subscribe to me a new channel that would be cool okay so let's get started with this tutorial so here I have a photo that I've taken with my smartphone because I wanted to show you this works with any kind of photo you don't have to have a super awesome camera for that what I'd want to do first is these black bars up here and down there because this gives more of the illusion that you're looking at kind of this cinema feeling and the way you do that basically is that you click on your crop tool up here and then you push it up basically to twice the height of what you want to have as your black bar this can be anything like we can go a lot wider than with the other picture let's go like that for example so click apply and then go to your move tool and move the picture up if it doesn't move it's stuck like this look here on the right side for your layers and you see there's a little lock here so if this is locked click on it now it's removed now you can move this and then simply move it up until it snaps to the middle where you have these the red and the green line this means it is centered now okay good so the next thing we want to do is to go down here to a rectangle tool and then click here and then click and drag on our canvas to create a rectangle like this and then you can simply fill it click here on fill select the black color like that so we have the first black bar then select your move tool press ctrl on your keyboard click on your rectangle and drag it down and this will choose simply create a copy cell your rectangle and with your arrow keys on your keyboard simply move this up two pixels like hit the up arrow key two times and up here you can also use snap it to the border and then hit the arrow key twice down so there is no gap it looks good so now we can go over to these layers hit the little lock so these are protected and can't move anymore can't change anymore so now here comes the awesome trick on how to change the color and by the way this is another thing I want to point out most of the time if you see cinematic tutorial cinematic look tutorials this is about the orange teal look but cinematic look can be a lot of different things because there's a lot of cameras all of film times a lot of ways that cinema looks basically so you can do whatever you feel like what you like your artistic inner voice says hey yes that's the kind of look I'm looking for its kind of feel I want to have in my picture let's show you how it actually works click here again on the rectangle tool and drag out a rectangle over all of your pictures you want to have this rectangle below the black bars these black bars should always be on top so they are not changing their color now with this rectangle selected go to your blend modes and set this to exclusion and the reason for that is look at that if I now go here to the fill color and select any kind of color you will see that this gives me this kind of dual tone effect and you will see that always the darker areas pick up the color that I selected while the brighter areas pick the opposite color so you can see in this case if I select blue or this kind of darker blue I get the yellow that you'd be find on the other side of the circle of this color wheel so always the opposite if I move over here you can see now we have a bright blue and the orange is on the other side so this is how you can think about that and by the way if you don't have the color wheel up here click on that you have a pop down menu with all the different choices for color and there you have the HSL color wheel like that all right so of course this is too extreme we don't want to have that so what you want to do is go here to opacity and move this down to between 50 and 30% is a good measurement to try there you can always go lower you can always go higher whatever you feel like you can see like with 50% is already pretty intense so let's go to 30% and now we can play around with these settings a little bit let's go like this for example looks pretty good you can also have the color less extreme like if you click in here into this triangle and move this down a little bit until it's completely black or rather here in the middle and a little bit brighter you can see if I put it here and move it around I get a more subtle effect that also looks good okay so this is the first step and some tutorials stop here but I want to give you more steps to adjust the colors and also your contrast in the picture so go down here to adjustments and then select color balance because this allows you to individually tune the mid-tones the shadows and the highlights for us mostly in this case the interesting are the mid-tones and the shadows so I want to have the mid-tones a little bit warmer so push this over here a little bit push this over here a little bit so use your eyes to see how it changes if you like it let's go to the shadows and let's make the shadows a little bit cooler and you can see now if you look here by the nose for example let's zoom in here a little bit more you can see if I set this back this is a warm shadow and I can if I like it like that I can leave it like that that's okay but I can move it in and you can see how this shadow now turns more blue and more teal also and you can also move this over so you can see how this introduces a bigger difference on top of what we have already done so again this is up to your taste if you want to do it like that or not but you can see the before and after difference is a subtle but very nice difference and gives you more possibility to tune these different areas so that is pretty nice alright so another thing that makes it look more like a movie is that you want to adjust the contrast and for that I want to suggest to you that you use adjustment levels because here you have some very nice levers to adjust that and the ones I want to point out here are the output black level output white level both of them limit the maximum level of these values so output black level means that you limit how dark the black or the darker areas in the picture can get and the output byte level limits how bright something can get in a picture so you can move for example this a little bit up so you can see now if I move this up the dark areas can't be completely black because I limited the black it can never get completely dark you can also move around the gamma a little bit I can say okay I want to have this a little bit darker so that's pretty nice and like you have seen in my last tutorial you can use your scope here like this or for the RGB birth waveforms for the RGB parade to see which colors which channels are hitting the limits it's a pretty awesome tool and made an individual tutorial about that which is popping up on the screen right now alright so another thing you want to do is to create a vignette around that and I have done a custom video tutorial in the meantime I have improved on that technique so I want to show you the new technique so what I want you to do is go down here to adjustments and curves so you have this curve adjustment sitting there like this you can close the window now go over here to your shape tool select the ellipse tool and drag out an ellipse over your picture after you've done that set the blend mode to erase like this and then you drag this layer onto the curves adjustment do not I really want to point this out do not right-click and then mask to below that doesn't work you have to click and drag it onto here and this will create a negative mask so you can see if I pull this down this is darkening everything other than the area where our ellipse is now this is too sharp of course so we can click on our ellipse go to the layer effects up here and then set up our blur you can blur it even more by entering a number here manually so let's go to 200 pixels in my case and you can see we can get a nice ellipse I can move this in the center of my picture like so and then I can resize this by holding ctrl it's resizing in both sides at the same time and then I can go back to my curve and I can move this down even more if I want to really depending on your taste okay a last step I want to show you which includes my analog dream spec which is also still available go here to file and place and then of course to your analog dreams pack and to your grain film grain here let's take the superfine grain put this in there I want to resize that because this has a pretty high resolution so let's make this as big as my canvas like so alright and then I simply set this to soft light and I reduce the opacity a little bit so it's not too much and you can see how much this looks more like a film now than before so this is basically how you create that but again like I said the important thing here is this is about your taste this is about what you want to do with it so you can still go back in here to your rectangle and change the fill color to anything else they can say hey I want to have a different kind of film look for example I want to have it like that that is cool to that it's possible to you know don't just go for this kind of orange and teal look also let me know in the comments if you think hello my glorious beast is a cool opening for my videos or if I should stick to the classic hello my friends thank you for watching see you next time bye
Original Description
Want that Movie look? This is a Tutorial on how to create the Cinematic Look. But there is more than just one look. So feel free to experiment, explore and create your own styles.
My new Channel "Olivio Vlogs":
https://youtu.be/5dVduPB9lYY
The Analog Dreams Pack:
https://gumroad.com/l/EwnWW
My Scopes Tutorial:
https://youtu.be/UW9J0l8wFqA
Get 1 FREE Month of unlimited Data Backups:
https://secure.backblaze.com/r/00eogs
Awesome Deals for Affinity Photo:
https://gumroad.com/sarikasat
Support me on Patreon:
https://www.patreon.com/sarikas
Follow me on:
https://www.facebook.com/sarikastutorials
https://www.instagram.com/oliviotutorials/
Join my Facebook Super Fan Group:
https://www.facebook.com/groups/oliviotutorials.superfan/
Watch on YouTube ↗
(saves to browser)
Sign in to unlock AI tutor explanation · ⚡30
Playlist
Uploads from Olivio Sarikas · Olivio Sarikas · 0 of 60
← Previous
Next →
1
 2
2
 3
3
 4
4
 5
5
 6
6
 7
7
 8
8
 9
9
 10
10
 11
11
 12
12
 13
13
 14
14
 15
15
 16
16
 17
17
 18
18
 19
19
 20
20
 21
21
 22
22
 23
23
 24
24
 25
25
 26
26
 27
27
 28
28
 29
29
 30
30
 31
31
 32
32
 33
33
 34
34
 35
35
 36
36
 37
37
 38
38
 39
39
 40
40
 41
41
 42
42
 43
43
 44
44
 45
45
 46
46
 47
47
 48
48
 49
49
 50
50
 51
51
 52
52
 53
53
 54
54
 55
55
 56
56
 57
57
 58
58
 59
59
 60
60

Remove breathing sound from your audio recording // Audacity
Olivio Sarikas
Noise Removal for Audio Recordings - fast & easy // Audacity
Olivio Sarikas
In the Bazar - NI Maschine Audio Sketch
Olivio Sarikas
Submarine Concerto - NI Maschine Audio Sketch
Olivio Sarikas
Affinity Photo - Creating a Photo Font
Olivio Sarikas
Affinity Photo - Rusty Metal Font Tutorial
Olivio Sarikas
Affinity Photo - How to remove things from a photo
Olivio Sarikas
Affinity Photo - How to replace a Sky
Olivio Sarikas
Affinity Photo - How to put Patterns on Clothing
Olivio Sarikas
Affinity Photo - Vintage Look Tutorial
Olivio Sarikas
Affinity Photo - Photo Letter Font Tutorial
Olivio Sarikas
Affinity Photo - Print Ready Tutorial
Olivio Sarikas
Affinity Photo - Grunge Maps Tutorial
Olivio Sarikas
Affinity Photo - White Teeth Tutorial
Olivio Sarikas
Affinity Photo - Frequency Separation Tutorial
Olivio Sarikas
Affinity Photo - Double Exposure Tutorial
Olivio Sarikas
Affinity Photo - 5 Tricks for better Pics
Olivio Sarikas
Affinity Photo - Realistic Fog
Olivio Sarikas
Affinity Photo - How to Match Color
Olivio Sarikas
Bokeh Balls Trick - Affinity Photo Tutorial
Olivio Sarikas
Affinity Photo - Remove Fog, Smog, Haze and Dust
Olivio Sarikas
Affinity Photo - Orange & Teal Look
Olivio Sarikas
Affinity Photo - 5 MORE Tricks for better Pics
Olivio Sarikas
Affinity Photo - World in a Light Bulb
Olivio Sarikas
Affinity Photo - Watercolor Effect
Olivio Sarikas
Affinity Photo - 5 Tricks for better Composition
Olivio Sarikas
Affinity Photo - Fur Text Tutorial
Olivio Sarikas
Affinity Photo - Skin Color & Tan
Olivio Sarikas
Affinity Photo - Oil Paint Look Tutorial
Olivio Sarikas
Histogram explained EASY & FUN - Affinity Photo Beginner Tutorial
Olivio Sarikas
Affinity Photo - Text in Perspective
Olivio Sarikas
Affinity Photo - Dramatic Sky Colors
Olivio Sarikas
Why Black & White Photography is amazing!
Olivio Sarikas
Affinity Photo - Stunning Black & White Photos
Olivio Sarikas
Affinity Photo - 5 Filters for Landscape Photography
Olivio Sarikas
Affinity Photo - Remove Shadows EASY
Olivio Sarikas
Let's Talk - Where we go from here :)
Olivio Sarikas
Affinity Photo - Realistic Image on a Screen
Olivio Sarikas
Affinity Photo - 4 Perspective Tools explained
Olivio Sarikas
Affinity Photo - 3D Text Effect
Olivio Sarikas
Affinity Photo - Tilt Shift done right
Olivio Sarikas
Affinity Photo - Blur Filters Explained - Part 01
Olivio Sarikas
Affinity Photo - Design Project: Enigma Lounge
Olivio Sarikas
Affinity Photo - Fake Colorized Look
Olivio Sarikas
Affinity Photo - Tiny Planet Tutorial
Olivio Sarikas
Affinity Photo - Change Day to Night - Tutorial
Olivio Sarikas
Affinity Photo - Neon Text Tutorial
Olivio Sarikas
Affinity Photo - Wood-burn Effect
Olivio Sarikas
Affinity Photo - NEON Portrait Look
Olivio Sarikas
Affinity Photo - Angel Wings Tutorial
Olivio Sarikas
Affinity Photo - Remove any Logo
Olivio Sarikas
Affinity Photo - Portrait Design - SUPER EASY!
Olivio Sarikas
Affinity Photo - Make a Planet
Olivio Sarikas
Affinity Photo - Brushes Explained
Olivio Sarikas
Affinity Photo - Design your own Brushes
Olivio Sarikas
Affinity Photo - Flame Soccer Tutorial
Olivio Sarikas
Affinity Photo - How to save a bad Shooting
Olivio Sarikas
Behind the Scenes - Special Episode
Olivio Sarikas
Affinity Photo - Cyber Demon Tutorial
Olivio Sarikas
Affinity Photo - Red Riding Hood Project EP 03
Olivio Sarikas
More on: AI Design Tools
View skill →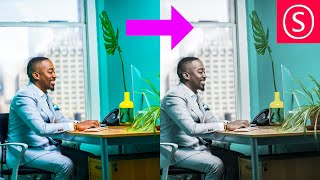




![How to Make Youtube Thumbnail in Inkscape [2026 Full Guide]](https://img.youtube.com/vi/Ju-qqAqvRxk/mqdefault.jpg)

Related Reads
📰
📰
📰
📰
Why Your AI Resume Sounds Generic (And How to Fix It)
Dev.to · Larbi Sahli
I built an AI invoicing SaaS boilerplate — here's what I learned
Dev.to · Настя Степанова
PSA: Your Claude shared chats and Artifacts may have ended up on Google
TechCrunch AI
What would a genuinely fair AI 3D tool comparison actually need to include
Reddit r/artificial
🎓
Tutor Explanation

 DeepCamp AI