How To Create An eCommerce Website With Wordpress 2017 | ONLINE STORE | NEW 3.0 Divi Theme -AMAZING!
Key Takeaways
Creates an eCommerce website with Wordpress and Divi Theme 3.0
Full Transcript
all right welcome guys my name is Daryl and today I'm going to show you all how to create an amazing e-commerce website step by step using Wordpress now you don't need to have any knowledge of coding or any sort of experience required I have helped thousands of beginners just like yourself create amazing looking websites that look just like this and you're going to come to see that it's very easy to make a website today so stick with me and by this tutorial you guys are going to come to see that it is nothing now to make a website it is so easy and we're also going to be using the number one rated theme on the planet which is also called the divy theme and I'll show you why it's number one but let me give you guys a quick tour of this website before I jump into that so right off the back you guys can see we have a big beautiful lining page with a simple two call to action and companies like Skype have done that same exact thing big beautiful lining page simple to call to action big beautiful landing page simple to call to action and also of course Apple you know they have this big beautiful landing page so we really want to incorporate that in our design so the next section we have is our products this is our specialty items so right now you guys can see we have this beautiful arcs right here it's a very modern design and look so you can actually incorporate this onto your websites and right here we have a section for women and we have a section for men up here we have a section for men and a section for woman a woman with a drop down men menu so I will show you today how you can incorporate categories onto your website maybe you're selling you know belts or shoes or whatever you're trying to sell so I'll show you how you can categorize them and also we have this really unique Arc right here we have this you know this Arc design it adds the core to our website and it adds a flavor to it so next we have our uh you know I like to call this a confidence section so it basically gives your buyer confidence you know 100% money you know satisfaction guarantee 30-day money back you know I would be much more comfortable buying on a website if I saw that right so I'll show you how to uh incorporate that onto your website and next we have our Specialty Products so if you guys have noticed right here this text is centered and it's actually colored so we can actually design the products guys we can actually make this look how we want it to look and it doesn't matter what you're selling you could be selling knives you could be selling um a beer or whatever you're trying to sell we can incorporate a font and a color to accommodate your Niche so I'll show you today how you can have these really professional looking designs and colors and next we have our connect with us section so this section right here um you know we can have an email optin form so people can actually give you their email right on your website by entering their first their last name and their email address they click on subscribe they will be subscribed to your mailing list and I will show you today how to create one and it's for free and right here we have our social icons and Guys these are always good to have on your website you know it just shows people that you're engaged in the community that you're engaged and you know it does build confidence to the buyer and right here we have a picture of um you know Jessica Alba you know she's this is just for tutorial purposes obviously but you know this is our our blog section and right here we have our contact us so somebody can just enter in their name their email and message you about a product and lastly we have our footer section and I'll also show you how you can incorporate the Google Map section on here so I did mention that I've helped a lot of people in the past and I want to kind of show you guys some of the websites that people have created that were brand new a lot of these people were 60 plus they were very old or I don't know if that's old but you know they were older in a much older generation and they weren't as fortunate to have you know technology like WordPress out so you guys can actually view a lot of these websites that people that were brand new to Wordpress brand new to the internet have created online shops so next let's go ahead now and show you how this page builder works right I bet you're wondering you know this you said it was number one but why so this right here is the Page Builder and that's it guys literally it's everything is visual so let's just say I want to drag this down whoop just like that the website is live these changes are live maybe I want to drag it back up maybe I want to change this text right here so a simple unique website just like that maybe I scroll down right here I can change this to uh you know specialty specialty items just like that so that is now how we make websites today it's never been easier with the divy theme and we can duplicate this row and we can drag it like for example this section right here I'll just drag it over here and then this section right here I'll just go ahead and just drag it over there just like that so that is now how we make websites today it's never been easier with the divy theme so also let me show you guys the um the the shop page so this right here is our shop page right this is a basic woocommerce WordPress uh shop page you guys can see we have our top rated products we have our filter by price we have our product categories but the divvy theme allows us to actually decorate our Shop theme now a lot of themes you cannot decorate it but the divvy theme you can actually make it look super professional and really cool and I've actually taken direct inspiration from American Eagle just like that you guys can see American Eagle my website American Eagle my website in fact it almost looks identical so we can take direct inspiration from these big companies and incorporate it on our website you guys can see right here we have reviews we have this beautiful Arc design as well so we can incorporate you know you can have the pink design or you can have this layout right here whatever you prefer I've actually put the text in the middle now most themes the tech is always to the left now you can put this wherever you want and I'll show you today how you can fully customize your shop and now let's go ahead and talk to you about the products so there are a little there are a lot of different products that we can make so I'll show you guys all the products we can make and this right here is what we call a variable product so this right here incorporates you know a size so we have medium and I want it a white shirt so this is $100 it's kind of a ripoff but you know that's whatever so uh maybe you want to change this to a gr shirt so I'll show you today how you can have you know a large gray and I'll show you how you can put this on your website and we can also add in reviews so this person right here said nice bot I'll put in a fourstar review said amazing quality amazing quality and I'll go ahead and submit it all right so there you go it is amazing quality so you guys can see you can add reviews to your product so next we have our uh this is what we call is a grouped product and this is actually ideal for something like phones so maybe for for example uh for this tutorial I used a silk so maybe this is a silk shirt but maybe the cotton cost 200 and so on and so forth but maybe you want to actually say you know I'm selling iPhones maybe this phone is $180 gigs for $300 maybe this one is you know 120 gigs and so on and so forth and we can actually you know put three or five or six and add it to the cart so you guys can see that we can actually uh create this like tier of items so I'll show you how you can incorporate grouped items into your store next we have affiliate products so a lot of people have been asking me how do you create an affiliate website with the divvy theme I says you can do that very simple so right here we have this product right now if I click on this it's actually going to direct me to Amazon and right here if somebody purchases this product they will receive a commission so I will show you how you can create affiliate products as well onto your website in case you're an affiliate maybe you don't want to you know sell those but you want to make a commission so I'll show you how you can uh you know incorporate the uh the affiliate products and of course we have a simple product so a simple product is basically just a product with no options it's just like a watch you buy the watch and that's it so I'll show you how to add in a simple product and next we have our cart so this section right here is our carts and we are going to talk all about shipping maybe you want to add free shipping for your customers and also a flat rate I'm also going to introduce taxes so I'll show you how to apply tax and also coupon codes so right here I'm going to enter the coupon code 626 and I'm going to apply this code and you're going to see the price drop from $1,500 to 750 so we saved 50% with that coupon code not bad and guys this is a live website so please don't buy anything on the website I've had a lot of returns so please it's just for tutorial purposes and next we have our order page so here we have our scarf that we purchased the men's shirt we can see our subtotal with the coupon uh saved us right here and also our shipping and then from here the customer can proceed to PayPal now I'm actually going to include another section where maybe you don't want people to leave to go to PayPal you want them to check out on your website I will include an introduction on how you can make people check out on your website instead of leaving to Paypal in fact I'm also going to introduce 20 to 25 different websites where you can list your products to get the most exposure for your e-commerce store and I'm also having uh I have other tutorials on Facebook ads and other things so be sure to check that out after the tutorial but I'll also talk about it as we go because uh I want you to actually sell something you know I want you to actually get engaged and learn how digital marketing works so I will show you a lot of cool ways you can sell your products how you can Market it and how you can list it on a bunch of different websites to get maximum exposure for your website next we have the related products so you know when you go to Amazon or something and it says like related products and they try to sell you other stuff I'll show you today how you can actually uh incorporate related products it's very simple it's very easy to do it and I'll also teach you guys about upsells and cross cells so next we have our other page and guys this is an example of what you can make with the divy theme so it is a total M multi-purpose theme other themes they kind of specialize in one thing but you can create beautiful websites that look just like this whether it's photography whether it's for corporate you can make all sorts of stuff now going back to this website let me show you guys the um the fax page and also the contact us page so this right here is actually a layout and I will give you this layout for free so we'll talk more about layouts a little bit later but basically all you need to do is just click on a button upload and this is all already done for you so I've actually um well I didn't create this elegant themes created this so I will give this to you guys so this saves you a lot of the hard work you know all you have to do is just click on a button add it to your website and this page will appear instantly so you can have your warranty your return policy and procedures and your return merchandise now this is another reason why the Dy theme is so popular because of the pre-made layouts and I will show you all about pre-made layouts later on this tutorial also our contact us page this is another layout so remember elegant themes the same company that made divvy is actually giving this for free so I'm going to give you guys this in the description and all you need to do is just you know add this to your library upload it and you're done all the hard work is already done guys so you're saving a lot of time with the Dy theme as well and also you know you're creating an e-commerce website so I want to show you guys how much money you're going to save now this is Shopify you know these guys spend you know 80 bucks a month you know having their e-commerce website up and it's just there's no reason for that on top of that they charge you guys you know a a transaction fee and they also charge you guys a retail package fee all sorts of fees you know but when you make the website yourself you actually have full control over it and you're not going to pay that crazy amount of money right like those people just don't know any better like look at these people on on big Commerce spending $80 a month just to have their e-commerce website up so in this tutorial I will show you guys how to master WordPress I will show you how to create beautiful websites with very modern very trending designs you guys can see also we have this category section right here I actually forgot to tell you this but you know we have our on sale shirts so I'll also show you how you can categorize your items so for example these are only the on sale shirts so guys I think that's it let's go ahead now and create this amazing e-commerce website step by step if you guys have liked what you've seen so far go ahead and give me a like and I will show you today how easy it is to make this beautiful and stunning e-commerce website all right so the first thing I'm going to do is I'm going to get out my notepad and we are going to follow these steps in order so the first thing we're going to do is get hosting and we'll also receive a free domain with that after that we are going to install WordPress next we are going to purchase the divy theme which you will also receive an additional discount for and lastly we are going to create our amazing e-commerce website step by step so go ahead and click on the link in the description it'll take you to TMD hosting.com and you'll be brought to this page so this is TMD hosting and they provide free domains and they also give you guys uh SSD hosting which is the current fastest hosting available and it's actually cheaper than companies like GoDaddy and blue host so once you're here go ahead and click on get started you guys also receive a 60-day money back guarantee they're pretty confident in their service so next we brought to this page and we have our starter our business and the professional of course I recommend the business because with the business you receive unlimited websites rather than just a single website hosted so go ahead and click on sign up all right next you'll be brought to this page which they will ask you you know what you what do you want for your domain so I'm going to enter in my uh I love kylo Ren and go ahead and click on proceed remember this is a free domain all right so it's checking all right so it's available so we brought to this page right here so go ahead and enter in your first your last name your email address your phone number uh Etc all this information right here and your password and your password again next we're going to scroll down right here and you guys can pay by credit card or you can pay by PayPal so you can you know make the decision of either one uh after you're done putting in your credit card information you can go ahead and scroll down right here and they will actually choose the uh data center closest to you to provide you the fastest hosting available and then like I said you can actually get uh domain privacy so what domain privacy is it is an feature that basically hides your personal information from people who try to who is you so if you want that domain privacy protection you can get that it's only $10 a year if not you can unselect that next you're B to your period now guys I always recommend the 12-month period because you're going to save way more in the long run you're only going to be paying $685 a month on top of that I'm going to give you another coupon code which will save you uh an additional percentage on that so I'm going to click on uh 12 months right here and go ahead and scroll down and you'll be brought to this promo code section so I actually have another coupon code you enter the coupon code darl 626 you will receive an additional 5% on top of your order so you're getting an entire year of hosting and a free domain for just 78 bucks which is pretty amazing and if you just can't afford that you can always go to the month-to month but remember you're going to be paying a lot more in the long run so you'll be you know you'll pay uh $936 as of right now but um you know you're going to save a lot more money in the long run and you won't have to worry about you know continually paying that cuz the month-to month you're going to be paying around you know $130 a year so you're getting a huge discount if you do the 12mon period or you can actually do the 24mth period where you're only be paying $133 for two years which comes out to only $585 a month so once you're done with that you can go ahead and click on I agree and then you'll proceed to checkout and once you're done with checkout you'll get these like spinning bars it'll come up to another page where it asks you to buy something uh just go ahead and click on no or what ever promotion they offer you and then you'll be brought to your client's area you'll be brought to this page right here so from this point we're actually going to install WordPress so I'm going to actually uh scroll down right here and you'll be brought to this section where it says C panel login so go ahead and just click on your Hosting account and click on login all right I gotta log in again because I was probably timed out all right so I'm going to go back over here go to my uh my Hosting account and go to log in all right so once you're here we are going to install WordPress and all we need to do is just go ahead and simply scroll down just keep scrolling just keep scrolling and you'll be brought to this uh you know I don't even know how to pronounce it Safa cois app installer so we're going to click on WordPress right here and we will install WordPress onto our website all right so right here I'm going to click on uh install WordPress that's all you need to do so I'm just going to click on uh install WordPress and they're going to ask you for your uh you know your domain right here so make sure it's the domain that you actually want to install WordPress and right here under in directory make sure there is nothing there okay do not install anything there okay so make sure that is blank next you have your site name and your site description so uh we can actually change this in the settings so it's not important you know we can change this later next we have your uh username and your password so go ahead and put in your username and then also go ahead and make sure you enter in your password maybe write it down or something you know so you don't forget it and you can change your email to you know your current email you know so like your website at gmail.com or whatever your personal email is make sure to change it right there on your admin email and we're going to scroll down and also they have a really cool feature you know if you're uh you know they actually have like a bunch of different languages they can help you with you know but uh I'm probably just going to put English right here and then um after that we're going to scroll down and we're going to click on install all right so it is installed it installs pretty fast all right so WordPress has successfully installed and you can visit our website right here so if you want to log into your website all you need to do is click on the administrative URL and guys if you ever have any problems if something doesn't work you can always go ahead and submit them a uh over here under support under submit a ticket these guys actually respond probably within like 10 minutes and they fix the problem for you so it's pretty amazing all you need to do is tell them you know hey I have a problem you know it's uh with which package uh type it in and they fix it and they respond very quickly I use them all the time so uh their customer service is pretty pretty fast so back over here we're going to go to our administrative URL which is this right here and this right here will take us to our website all right guys congratulations we have now have our domain we have hosting and we actually installed WordPress and we can actually visit our website right now but it's going to look really ugly so up here if you go to visit sites this right now is your current website so it's not really uh decorative it's not really uh you know doesn't look good but don't worry we're going to make it look amazing and it's going to be very easy so the next thing we need to do is we need to actually purchase the divvy theme and actually have a link in the description and you will also receive another small discount for that so once you're there uh I think it's uh you guys can click on the link in the description it'll take you to uh elegant themes but you'll be brought to a different screen you know it'll actually save you % so I really recommend going through my uh my link so it'll save you guys more money and you'll be brought to something that looks like this right here and of course it'll be cheaper than this you guys can click on sign up today and go ahead and enter in your username and your password and guys the great part about elegant themes is that they have technical support so if you ever have problems with your website these guys will help you it's so amazing you know they have a full Forum that will give you guys you know if you have a problem with it they will help you all every step of the way and also um you know when you guys leave me comments you know uh a lot of these problems can be fixed by their support form so if you guys want me to provide you with script or coding uh it'd be more beneficial to just contact them and ask them for it because you know they're giving you a full year of customer service uh with the the the plan on top of that you will also get the bloom plugin and the bloom plugin is an email optin form which I actually have another tutorial so maybe after this video you guys can check that out and it comes with the theme and is the number one rated email optin so go ahead and enter in your username your password confirm your password Etc and all this information and after you you know you you submit your payment and you log in you'll be brought to your dashboard so I'll go ahead and just log in right here because I have uh an account with these guys I think that's my password right yeah okay so you about to your dashboard now this is your members area so from here you can download the theme so we go right here to uh we scroll down right here under themes now right here I mentioned the bloom plugin so remember I have another tutorial on how you can use the boom plugin it's a beautiful plugin it is really amazing in fact you can preview it really quickly and um you know right off the back you're going to see this little popup come up right here it should come up let's see here so someone Scrolls down there it is so this little thing right here is the bloom plugin so if you want this on your website uh be sure to check out my other tutorial on that it's it totally comes with the theme so I'm sure you guys have seen this on a lot of different websites it's a pretty famous plugin so uh you know going back to the uh our dashboard we're going to scroll down right here and we're going to download the number one theme the divy theme go ahead and click on download and click on uh theme package and then you will see that your file has uh downloaded now simply all you need to do is go back to your website and we're going to go to our dashboard all right so from here we're going to go down to appearance and you're going to see this section called themes now basically a theme is like the structure of your website so there are a lot of themes out there people make themes all the time but the divy theme is by far the best theme because they're visual page builder so up here go and click on add new and we're going to click on upload theme now we're going to click on choose file and we're going to actually find the folder that we downloaded in so mine was over here under downloads and it is going to be under dy7 because I've downloaded them quite a bit and I'm going to click on open and then I'm going to click on install now so now the theme is installing onto our websites and from here uh it will give us the ability to start using the visual page builder it'll start giving us all these really cool features it does take some time uh to install it depends maybe you know if you're using another server uh it could take you know like uh I don't know like three four minutes uh This Server it should probably install maybe within 1 minute close this right here all right so the theme has successfully installed now all we need to do right here is click on on activate all right so we are activating the theme if you guys get these weird https up here uh depends on your server uh I know for like TM for uh for blue host it gives you these random PHP header errors uh just go ahead and ignore it uh it happens on some servers so over here we're going to go ahead and click on visit sites and there you go so the theme is installed congratulations guys pat yourself on the back we have you know made it really far we got hosting we got a domain we got the divy theme we've installed WordPress and now we are going to create our amazing website step by step so I'm going to close these right here and we're going to go ahead now and get started all right let's go ahead now and get started all right so the first thing we want to do is I want you to go to your dashboard and click on dashboard now in this section I'm going to show you how you can change your password and uh you know all that other information so right here under users just go and click on the users and click on admin now you guys can change the color scheme so maybe you wants to you know um you know change something like this or you guys can have a different color you know totally you know it's totally up to you so I'll just do midnight right here and let's just say you want to change your password and also your email so this right here is the section where you change your email and this is very important because if you lose your password they're going to email it to this address so make sure it is a email that you have access to and the next section is our password so right here you can click on generate password and let's just say you want to enter in your own you know personal password you can do it from here and click on update profile next I want you guys to go to settings and I want you to go to per links and we are going to make a a small change on our per link settings for our WordPress websites so usually when you go to a website you know it has you know your website.com contct us right so we want to make sure that our per links are under post name this is the correct setting to have and it's also good for SEO purposes so once you're done uh putting it on post name just go a and click on Save change all right now let's go ahead and do the fun part let's go ahead and create some pages so I'm going to go over here under pages and we're going to click on add new so the first page we're going to create obviously is the homepage and just go ahead over here and just click on publish all right so we've created our homepage now I want to create the fax page so I'm going to click on add new again type in you know you can enter it however you want it to look you know the fax page just like that and then right here I going to click on publish so we are actually creating our homepage our fact page and lastly we want to create our contact us page so up here click on add new and we're going to create our contact us page and don't worry about the shop page or the my account those pages will be created automatically for us with the plugin we are going to use in just a little bit okay so once you're done with that go ahead and click on publish all right so I want you to visit the website right now so up here go on over to my blog and click on visit sites you guys can see the menu up here isn't really set correctly so I'm going to show you right now how to set up your menu correctly so to do that go on over to uh you can actually go through your dashboard or go to menus but I I'll just show you how to do it the other way so it's a dashboard and then right here we can go down to um appearance and we can go to menus so this is where we actually set up and create our menu so I'm going to give my menu a name so menu one I always name it menu one in all my tutorials so uh menu one now right here on the left side you're going to see pages so I'm going to click on view all and I want you to to grab the home actually I want you to grab both homes so home home contact and the fax page and go ahead and click on primary menu and click on add to menu so now we're basically just creating our menu now the one with the custom link right here I want you to actually delete this one we don't need a custom home link so right here I'm going to click on this and click on remove so that is how you uh would delete a page now I also want to show you how you can drag it and put it in your specific order so right here now we have the homepage the fact page and the contact us page and let's say you want to create a drop down menu you know where you hover over an option and more pages come down all you need to do is take this section right here and just drag it right there so now it is a sub item so this is actually now a sub menu so this is how you create a sub menu okay but I want to go ahead and put it back and I'm going to click on Save menu and now now we are actually going to visit the site and see how our menu looks all right so you see right there we have our home we have our fax page and we have our contact us page so now we actually need to do one more thing before we start designing the website and we need to set this homepage as a static page so to do that we're going to go over here and click on theme customizer now we're not going to use a theme customizer a lot in fact I I don't really recommend it in a lot of my tutorials because a lot of the designing can be done with the visual Builder and we don't really need to use a lot of these settings but for right now we're going to scroll down to our static front page click on a static page and we want to set the front page as our homepage so you see how it says homepage now I want to click on Save and publish and then we're going to click on X and there you go so now we are actually ready to enable the visual Builder we are uh ready to start designing our website all right so the first thing you want to do is enable the visual Builder and I'm going to show you all how to create this website from scratch I'm also going to supply you with all the images and the background so you guys can sort of follow along with me in this tutorial so I'm going to click on enable visual Builder and I'm also going to open up this other website and I'm going to show you all the backend Editor to really help you all learn how to use this theme and how to uh manipulate it so I've actually created the Builder and right off the back you guys can see we have this blue section and we have this teal section so basically this section controls the entire box and then this section right here controls the uh whatever is inside of it now I want you to actually click on right here and we're going to actually do a two Box Row okay so really quickly I want to help you guys understand this so right here we have two boxes one right here and one right here so I have a text a text a text and two call to actions and don't worry uh you guys will understand this as we go so really quickly I'm just going to click on edit page and I also want you guys to download the Dropbox images you're going to uh see a um a Dropbox link and this will actually have all of the images that I currently have and this will actually help you follow along with me in this tutorial so it'll really help you understand how to use this theme and how to use WordPress so I want you to actually download all these images but before you do we can actually just upload it to our server so right here um on this blue section right here I want you to click on this gear icon and you see where it says background settings so go and click on upload now you see right here it says upload files I want you to actually upload all of those files that I currently Supply to you guys in that the uh on this Dropbox right here so take the time to actually go over here select the files and you guys can actually just download them all at once CU I'm actually going to uh download all these right now I'm not going to uh do it step by you know one by one I rather just download all of them right now so in this tutorial uh I can just show you how to do this faster so uh take the time to actually go ahead and download these so I actually have this already uh ready for me so I'm actually going to go ahead and click on all these images right here and I'm going to download all of these images right here for our website so I'm click on open now it's going to take some time so um yeah I might pause the video for one second and I'll meet you guys back in 1 minute all right so the image is uploaded now I want to apply a background so I'm going to select this image right here and this is the image I'm going to select for my background and also for those of you who want to create your own backgrounds just remember that the size I am using Is 1920 by 761 all right so I'm going to click on upload an image and you guys can see this right now is starting to put as our background now it doesn't look that good right now that's just because we want to add in some more modules and it will basically push the picture down as we create more stuff so next I'm going to click on this checkbox and we want to go ahead now and create some modules so really quickly uh just to make sure that you're on the right page click on this little three uh you know this three bar which is the column structure and make sure that it's on this section right here where it's half and half and this basically creates the design of your website so I'm going to click on these two right here now on this section over here I want to actually add a module so I'm going to click on add a new module and I'm going to scroll down and I want to put a text module and don't worry we will cover uh more of these tutorials as we go such as you know the social media follow the sidebar Etc so I'm going to click on the text module right here and I'll go ahead and just insert some text so over here on my other website I added in uh let's see what I added in here I I added in be unique it's super easy so I'm just going to put that in be unique it's super easy now let's just say I want to change the design of this but really quickly now the text orientation is to the left and I want to kind of put it in the center right there so now it's actually in the center and remember it's actually following these boxes right here so we have one box right here and we have one box right here so I want to actually change this text right here so there's two ways to do that I can do it right here where I can simply select you know the uh the text setting or I can bold it for example right here I can click on this and click on Bold or I can italicize it so you can actually see the changes you're making live to the website now that's really really cool but I actually want to go over here to the design settings and I'm going to change it on this section right here I prefer to use uh this little box I think it's more responsive so the text fonts you know I actually used Railway but you can use all sorts of different fonts you know you can use use the Black Ops which is like that military style font or you can use the coming soon you know uh you know it's like a cute font you know it's like a cutesy font or you know whatever you're trying to make you know the Josephine slab that's actually a really nice font but I'm actually going to use a font called Railway so this is going to be my font for the rest of the tutorial and for those of you who are new I recommend using you know one to two fonts Max you know you don't want a bunch of different fonts on your website because people will actually see it and they'll kind of bother them you know uh subconsciously they'll see it and they'll be like you know this website looks weird and they won't even know what it is it really is the text so make sure that you're using maybe one to two fonts maximum now let's just say you want to change the font size so right here you can actually change the font size you guys can see we can make it really super big so I'm just going to put it at maybe uh you know 22 and right here we have the text color so maybe I want to change the text color so I want to put it to Black and also below that we have the text letter spacing so maybe you want to actually indent the letters see how it's getting bigger like that we can actually change the letter spacing but I'm probably going to leave it at uh you know just zero and also the text line height so we can change the text line height which actually um indents a margin above the text line height but um I'm not going to use that right now and the background color we're not going to use because we already have a background color and we're not going to use a background image because you know we already have a background image and next we have the Border section so you can actually design a border so you see how now I have this white border and you can change the Border color something like that you know maybe that does look pretty cool but um I'm probably not going to use it but uh I'm just letting you know that you can add borders around your text and right here is the custom margin so if you want to add like a custom margin you know right there you can see I had 10% so the text is actually indenting by 10% now we can actually add padding as well so for example we can add you know 10% of padding uh it really depends on you know where you want this text to actually be you know so if I put 45% right here you're going to see that it's creating an indent margin of around you know 45% of the page so that is how you can sort of uh get the text on where you want it to be uh by indenting the margin now remember for the right and the left this section will only go as far as the boxes are so remember uh if I click on this right here you see how the boxes right there this text will not go outside of this box so it the the farthest it could possibly go is like right here you know right close to the Box okay so um I've showed you how to use the text module now I actually want to create a divider okay so uh right here you guys can see that we have this divider right here and it really adds Decor you know it adds a you know it adds a flavor to our website so I'm going to add that into ours so right here all you need to do is click on this little plus icon and scroll down to our divider right there now I want to uh change this divider to Black and I actually want it to show just like that now what the divider actually does is it actually creates space below the bar so right here you know you can put like I want 10 pixels uh below the bar so right here you're going to have a a a 10 space right here maybe you want you know 300 you can add uh 300 pixels so right now it's basically saying we're going to create a space right here of 300 but I just want to use it for the design you know I just like the design of it so I'm just going to leave it as one and that's about it so I'm actually just going to go ahead now and click on the uh save changes now over here I want to create another text module okay so on this section right here we put a simple stunning website so let's just go ahead now and do that I'm going to click on this little uh module right here and we're going to scroll down to the text module and we are going to create a simple text module all right so I'm actually going to put centered and guys actually um you know at the end of this tutorial uh I do have another lesson another tutorial on every single module so um after this tutorial you guys can be sure to check that out because I'm not going to cover every single module in this tutorial because um there are a lot of reasons why I wouldn't use a lot of them but um there is a good purpose for every single one of them you know it's a it's a great theme and I want you guys to take full advantage of it so right here I'm going to put a simple stunning website just like that now I actually want to change this to a header so I want you to highlight this text and I want you to click on right here and click on heading one now the reason why we change it to header is because the header text is mobile responsive and tablet responsive so if you have a bigger text we want to make sure that it's optimized correctly for the tablet and the phone now you can actually edit this text so right here under the design you see the header font so this is now a header font so right here under the header font I want to change it to railway of course you can change it to you know whatever you would like to change it to uh I'm just going to leave it as a railway and we can change the font size so maybe maybe I want it to be 40 pixels just like that and you know you can change the text color Etc now I'm going to click on this checkbox now for your own uh you know uh education let's say you want to duplicate this row maybe you just want to copy it all you need to do is click on this little icon right here and click on duplicate so now the text is actually duplicated now you see right here how every section has a duplicate row we can actually duplicate every single section so this teal section maybe I want to duplicate everything that's inside of this box so all I need to do is click on duplicate and there you go the row is all duplicated and it's the same exact thing but um I'm not going to you know do that I'm just showing you about the um the uh the duplicate it's a really useful tool I mean I use it on a lot of websites it saves a ton of time so I'm actually going to click on this little uh trash icon and delete that now I want to actually take this right here and I want to actually um put it on this side right here just like that so you guys can see now we have a simple stunning website so that looks pretty cool now I want to actually delete this icon right here okay now um I want to actually show you uh the back end a little bit more so I'm actually going to uh click on this right here and click on Save now majority of the time when you're developing websites or making websites you really won't use the backend editor too much but I just want to show you uh just for your own purpose so I'm going to click on exit visual Builder and we're going to click on edit page now on this this page this is actually the entire website so you guys can see we have a text a divider a text a text and a divider so right here we have a text a text a text and a divider now we have this one box right here this text right here this is actually an empty box I didn't even see that and that's a really really good reason to check the backend editor so I want to delete this box now the dividers are a little strange guys so if you're uh if you add dividers onto your website you might need to use the backend Editor to move it around because it doesn't like to move around on the visual editor too much so I'm going to actually take this divider and simply drag it up just like that and click on update so that's a little quick tour of how you guys can you know use the backend editor and remember you can uh clone the row you can clone this row you can change any settings right here with these three little bars right here like this right here so that's how we got to that other page okay but for this tutorial we're probably going to use the front end editor because it is amazing uh so to go back you can actually click on view page right up here all right and I'm going to click on enable visual Builder all right so we actually follow along with this website we're going to create the same exact website now right off the back you guys can see that um this text right here is oops this text is way too close to this divider so I actually want to go ahead now and change the divider settings so I'll go ahead and do that one more time so right here you can see this little gear icon on the uh the module setting just go and click on the gear icon oh that's the uh the text right there so they're really close together see if I can grab it again there it is so right here I want you to actually put in maybe around 10 pixels you see how the divider is now creating space so that is the main purpose of the divider so I'm going to click on this uh you know this icon next we're going to go ahead and insert another text module it's very simple you know so uh you guys can basically start to learn it you know we a text module text module let's go ahead and add another text module so right here here I'm click on this plus icon and we are going to create another text module and I'm going to get my dummy text out I am I am so lazy I don't like to think of things to say but um I'm going to do this uh you know the text orientation to the center again and I'm going to click on uh you know or actually I'm going to get my dummy text so dummy text is basically that really weird language that you guys see on a lot of those other websites and it just basically fills in the page with text because you know we don't really know of things to say while we're making websites so I'm just going to you know go ahead and maybe just grab something like this right here and copy it and um right here I'm just going to actually paste it in there just like that now remember if you want to uh change the style all you need to do is go to the design settings and go down to the text right here and I'm going to basically change it again to railway so I'm going to scroll down right here and go to railway there we go and I'm actually going to change it uh maybe I want the font a little bit uh you know 15 and I want to actually change this to Black all right and right here I'm going to click on the checkbox now I want to actually introduce another feature that you might want to use uh we will use it later in the tutorial but I'll show you now so right here you see this box right here maybe you want this box spread out a little bit larger you know you don't you want this box you know across the entire row so in order to do that all you need to do is click on this gear icon and say you know what I want this row full width so now you guys can see that the row is now full width so this is another way how you can style it and let's just say you want this text all the way to the end right here all you need to do is uh use the custom gter so excuse me so right here uh go ahead and click on yes and just change this to one now you guys can see that it is really scratched apart all the way to the end everything's really really scrunched okay and there's a lot of reasons to do this uh I'll explain later why we want to use the custom gutter withd there's a lot of really cool things that we can create with gutter with but for now I'm just going to click on no and no and go ahead and just click on this little uh check box right here all right so we're we're making our homepage you know we're doing it congratulations you know so the next thing we had right here was another divider so I'm going to actually go over here and uh click on this gear icon now we can actually just duplicate this uh divider right here so the gear icon under the divider you guys can see right here I can just click on duplicate and now we have two dividers now I actually want to go ahead and do the uh the button module next because we can drag this down but when I drag it down sometimes you know it gets stuck down there so I'll explain a little bit a little bit why it does that so uh right now I'm going to actually um uh click on this right here oh actually no we're going to actually make a new row so right here you guys can see we have these two module settings right here and then the next row we have four with two buttons okay so let me explain we are going to actually save the setting right here just like that all right so it is saving now we're actually going to introduce a new row so right here click on this blue icon and click on regular and we're going to click on this four layer row right here okay now right here we want to go ahead and add in some buttons so uh right here you can click on uh the button module and you guys can see right here we have this button created now let's just go ahead and decorate it so right here I'm going to put the button aligned to the center and don't worry about this white section uh there's a reason why I'm doing it like this I'm going to teach you something in just a little bit so uh right here we have the button right here now let's just say you want to change the text color so right here you can put light or you can put dark uh whatever you'd like to put but we can actually design this uh verbatim we can actually really uh you know make it look how we want it to look so right here I'm going to put shop now and we're going to go to the design and we're going to select the custom styles for button and this will give us the ability to change the icon to make it look however we want it to look so the button text size right here we can change the button text size we can make it look however we want it to look but I'm just going to go ahead now and just do maybe uh you know we'll do 18 is that good 18 yeah 18 now the button text color so I want it black cuz the decor of my website I'm kind of having that you know that black approach to it and you guys can see over here if I hover over this you guys are going to see that it changes so now the text is white but the box is black so I'll show show you how you can manipulate these boxes and you only need to create one button and we can just clone it instead of you know creating a 100 different buttons like other themes it's really uh it'll save you tons of time it'll save you a lot of time so uh next right here we have the button border width so we can basically change the you know the the Border button WID if you'd like something like that but um I'm just going to go ahead and leave it as a you know a stock standard so uh really quickly I was uh yeah B button width now the button border color we can actually change the color of just the Border but I'm just going to go ahead and leave that now the button border radius so maybe you want to actually make it like a circle see how now it's a little circle so that is another way you can change the button border and radius and also the button letter spacing so maybe you want to change the uh the pixels between the letters to make it look bigger so that's another uh way you can actually do that but I'm going to go ahead and just leave this blank you know I kind of like that look right now now the button font I want it Railway now you're going to change it to whatever sort of uh font that you want it to be so I'm going to actually scroll down and change it to the railway font just like that okay so you guys can see it's starting to look a little bit closer now to the button right here you know so I'm going to go over here now and uh we're going to you can add a button icon right here so for example you can do um you know all these buttons so right here they have oops sorry about that they have all these different buttons you can add so if you hover over it you see that little button icon you can add in you know like a a Facebook like so you can see now it has that Facebook like you can add in a dollar sign whatever you'd like to add now I'm actually just going to go ahead and put uh you know I don't want to add a default icon so now you guys can see that the icon is gone now this section right here it says button hover text color so what that means is when you hover over it what do you want it to look like so I want to change this text to White and I want to have a black background so right here it says hover or button hover text color I want you to change this to White now you can actually change it to whatever you'd want but um this is what I want to uh decorate my button as and right here we have the button hover background color so I want to change that to Black okay now let's go ahead now and hover over the button and see what happens there it goes you see how the text is now White and the background is now black so that's the effect I want to have for my website and I think that's it you know I I don't don't want to change any other settings I don't want to change anything else I like the way that button looks so I'm going to click on check all right so now we have this section right here but really quickly remember how I told you earlier how we can just sort of duplicate rows so right here I'm going to click on duplicate module so now I have two buttons so I've done all the hard work already I've you know I've saved everything all I need to do is just change the um the text font so really quickly I'm just going to go ahead and take um take this right here and we can just drag it up here and put put it right there just like that so that is a a really quick shortcut on how you can do it but I actually want to incorporate the four rows so I'm actually going to go ahead now and just take this I'm say you know I'm going to borrow this again and I'm going to go ahead and put it right here and I'm going to duplicate this row all right now I'm going to take this this big row right here and just drag it onto this section so simple take this and just go ahead and drag it right there just like that now I don't really need this section anymore I can just go ahead and delete it you know I don't need it because I have the buttons I wanted uh I was just basically showing you guys how you can drag the teal rows as well you can drag anything anywhere you can be totally customizable so really quickly I want to actually change these buttons uh the position of these so right here I want this button a little bit closer to the left you know and this button I want it a little bit closer to the right I want them close together just like that so you guys can see the landing page is already starting to come together it looks really cool it looks really elegant and now I actually want to um change the text for this so This section right here I want to put maybe new arrivals new arrivals and there you go we have actually created the landing page now all we need to do to space it out is and now this is basically your preference you can space it out as much as you'd want if you like a slider that's you know this size you can have it this size if you want a little bit longer you can just take it like that and simply drag it down now I bet you're wondering you know I want this text to move up so all you need to do is go over here and simply take this and you can drag it down like that do you see how we're doing that so now we're creating that um we're we're pushing the text down so if you want to push the text down you do it from the top if not you can do it from the bottom so just like that and there you go we have successfully made our landing page it looks really good it looks professional and it looks identical to our page except you know I did use a little bit less fonts these fonts were a lot less so um you know that's why it looks a little different you know but you guys get the idea it is basically the uh the same picture right there so uh we have you know we've basically copied that so now let's go ahead now and save this section so I'm going to go ahead click on save oh also the um you know the dividers right here I probably should have put the divider uh below the buttons so I'm going to take this divider and put it right there just like that so there you go so now it's basically a little bit more you know it's it's copied almost so I'm going to click on this save now we want to introduce a new row so right here I hope you guys can start to learn how to use this so right here obviously uh this is a text module this is a text module with a call to action and this is going to be our shop module so it's it's very simple in fact the backend editor right here you guys can see we have a text a button an image a text and a shop so let's let's go ahead now and just follow these modules step by step to show you how this works so right now you guys can see that this is a little scooted you know we have uh these are much bigger than this section so over here we're going to create a new section and we're going to make it regular and now you guys can see over here that the uh this section is maybe like uh you know maybe 75% and this is 25% right so over here you can see that this is uh you know 75% and then 25% so we're going to use the same exact modules right here just like that so you guys can see how the row is uh is different and you know how it can you know you can really position everything how you want it to look so over here we're going to add in the text module all right so the text module and we're going to put this in the centered and I put over here let's see what did I put I put new arrivals and then I just put some dummy text no actually I didn't I put in um you know I put in something else I just put in like my own little fonts or my little text so new arrivals now I want to change this to header just like that and we can design this so maybe I'll change this to the header font of Railway again all right so Railway okay now maybe I don't want to create another text module remember I can write underneath this so I can just write enter and I can actually you know paste in some dummy text right here below that just like that so you guys can see that you know you can actually have like a a header you can have text below that you don't have to keep using you know uh a separate text modules you know you can you know I can make you know another space and add in more just like that and the changes are right there but I'm going to actually just go ahead and delete this and we're just going to you know leave it like that and remember this is the text font so if you want to change this you go to the design setting right here scroll down to text font and maybe I want to change it to railway you know let's go ahead and do that Railway all right the railway setting and I'm going to change the text fonts to maybe you know 14's good 14 is good yeah 14's good okay and then we'll use black so you guys can see right there it looks pretty cool and remember I can add in a divider below that you know I can add in a divider in between this by making two different text modules but I'm just going to leave it like that you know maybe add in another space something like that and we'll click on this little check boxo just like that and right here we're going to actually add in our shop module and we'll explain the the woocommerce plugin in just a little bit but I want to create a little bit more more of this page first I want to basically get up to here and then after this we will create the uh we'll start creating our own products where we can start you know creating variable products simple products and start selling them on our website but before I do that I want to you know introduce you a little bit more on the customizer to get you a little bit more comfortable on how to use this so right here we have this other uh button right here now the great part about the divy theme guys is that we can just duplicate one of these buttons right here and just simply drag it down over here we don't have to make a whole new button again we don't have to do any of that stuff so it's a truly remarkable theme it really truly is U right here now I actually want to Center this so I'm going to click on this gear icon and we are going to do button alignment to the center just like that now on this section right here we're going to add in our shop module but remember we don't have any products yet so for now we are just going to skip this shop module but you can see there we can add in the shop module a little bit later so you see right there where it says shop so we can you know add that and later uh once we install the woocommerce plugin now right off the back you guys can see that this section right here you know it's just the same section so how can we you know speed up the process with our website we can basically just duplicate this whole row just like that so we can just duplicate it and make it you know simple and now this section is for women and this section is for men so that's a really fast process on how you can you know speed your website up now let's just say um you want to add more space right here you can use the divider plugin and you can also add custom padding so right here under this little gear icon we can actually add some custom padding to the top or we can add like a you know um a custom margin so for example you know we can add 10% 10% well that's way too much maybe around 2% or let's just do 1% yeah so right there you guys can see we can create more space for our page so um maybe 2% so remember this section right here uh this gear will control the padding and the margin for this section so next I want to introduce you to that little bar that we had so how did I get that bar that was on this other website right here you see that bar I have so I want to introduce you to how I got that bar so over here we're actually going to click on this blue icon and this blue icon right here it actually gives you the ability to add background images you know we can actually add a background color we can add in all sorts of really cool stuff whatever you like to add and also a background image maybe you want those you know those big beautiful you know uh you know those mountain or the clouds or something like that but for this tutorial we're actually going to use a different um background we're going to use this one right here so you guys can see right here how this part is all white and then this part right here is gray now this was actually designed by a guy named Gino from uh it's called Monteray Premiere and he created these backgrounds so um you know full credit goes to him I did not make these he made these so I am just I'm just using them because they were included in a free layout so so I'm actually going to put this as my background so I want you guys to understand the logic here so this section is a literally white background but this is transparent so there's nothing here so I'm going to click on upload an image and you guys can see how this section right here is all white like we talked about and this section is basically blank it's transparent so the background color basically controls this so right here I'm going to put black and maybe you want to add in you know a more grayer color you know to sort of design and decor to our website and there's all sorts of other images guys there's four others so you know some go the other way some go to the left some go to the right uh you know it really depends on what you want for your website so I'm going to basically leave this as you know gray and I'm just going on check all right now the next section I want to make is this section right here and as you guys can see on our backend editor it's very simple it's a text module a blurb a blurb an image a text and a text so uh let's go ahead now and create that it's really easy to make so over here under this little plus sign I'm going to click on this plus and click on regular now it's just a one uh a one text format so I'm going to click on this uh this one right here and we're just going to click on text and this is basically a title for the next section all right so I clicked on the text and I'm going to click on centered and what do I want to say now in the text so I think I put like a we love our jeans and I want this text orientation actually to the left you know I kind of want to make it look a little bit more you know unique and the design I'm going to go to the design and change the uh oh it's not header this is basically just text right here so we're going to go to the text font and I'm going to change this to the railway font Railway now I'm going to make this font a little bigger maybe around you know 20 pixels you know I think it should be bigger what do you guys think I think I'm going to do 25 you know 25 and then I'm going to change this to uh black right there so now we have the font over there now I'm going to click on this little uh this the save changes now I want to add in that background image and that is actually included in the uh the images that I've given you so under the section management right here we're going to add in a background image so over here under background image just click on upload and simply put this one right here or you can put the one with the lady know there's two of them but um you know I'll put the one uh maybe the one with the lady would be cool you know we can add something with the one with the lady right there and um we actually added uh right here you guys can see on our modules we added a blurb so I'm going to introduce you to the next section where we will talk about blurbs so um I'm going to click on this little checkbox right here now I want to actually now create another row so I want to click on this teal row and I actually want to include three sections so remember we have the blurb the blurb and the image so right here go ahead and select on the three bars all right and on this side right here we had a blurb so I'm going to click on blurb and basically blurb is kind of like a uh it's a little icon where you can add you know like um you know our services or you can talk about bullet points or anything that you'd like to talk about so I want you to fully understand how to use blurs because they're really important and uh you can use icons and they're really uh decorative so right here I'm going to put um 30-day money back just like that and you know that lady is actually kind of ruining my font you know that she's actually kind of blocking the text font right what do you guys think so let's see here yeah she kind of is I might have to change this her background image okay I'm going to do that I'm going to go ahead and close that and I'm going to change the image I'm going to get rid of the girl so she's kind of she's kind of ruining the picture there so uh I'm going change this to this one right here and this one has no girl okay so uh right off the back I'm going to say um you know go over there now we want to go back to our our blur section right here so click on this little gray icon for the module setting now you're going to see this uh section right here it says use icon so if I click on use icon we can select any one of these icons to use you guys can see the icon right there uh we maybe you want to select this you know this uh whatever one you want to select uh you know it's up to you and now the icon color I want to actually change the icon color so remember you can change it to anything that you want and this bar right here this bar controls the strength of the color this bar controls the transparency of the color so let me show you an example if I go over here and I start going down you see it starts to disappear and Boop it's gone just like that so I'm going to put um uh go back over here to uh icon color and we're going to go to Red and now I'm going to make this go all the way up just like that so now there's two ways to have this uh blurb you can have it to the top or you can have it to the left and also the circle icon so if we click on Circle icon you can actually choose a circular color around that icon just like that so maybe you want the circle color to be black just like that so it you know it's uh it's adding that you know that effect of a circle around it and the icon is in the middle all right so I'm going to keep scrolling down now we can you know we can have that or not it's it's up to you now you see where it says the uh the image the icon placement we can have this to the top or we can have it to the left something that looks like that and over here I actually put it to the left right here you guys can see okay so I'm actually going to uh leave that there and over here under the uh the text right here now I actually added in a separate text module but I didn't have to you know I can probably just put it in the blurb content right here so I'm actually going to put some dummy text like that right there and there you go so now I have created that um know that effect of the uh you know the 30-day money back and we can add in you know more text something looks like that or maybe you know space it out something that looks like this you know I'm a I'm a perfectionist it's really terrible I got to stop doing that something that looks like that and we can go ahead and just click on the okay now remember um you can use the blurb and then you know not put anything in create a text module it's it's strictly up to you but um you guys can see over here we have this uh this other section right here remember we can just duplicate this so I'm I'm just going to clone this I'm just going to clone it and I'm just going to drag it over here and just simply put it over there we don't want to really waste time and create a whole another module right now the last section I have is the genes so we're going to use the image icon now so over here under add new module just go ahead and click on that and we're going to find an image so this will basically give us the ability to add in images all righty so image now the image URL now you can actually just use the URL from like a website or something and and the divy will actually detect it and it will actually use it on your website which is really cool but I don't recommend doing that because let's say those guys delete that image you know your website's going to look weird cuz it's going to disappear with it so uh I would just use the uh the upload and right here I put in jeans so I'm going to go ahead and click on upload an image and there you go we have our jeans so the website is starting to look really cool you know love our pants and it's very very similar to our uh our current um our uh our current um you know our page now there is one thing now this section right here on the top you guys can see that this right here is spaced out more to the left so you know I did actually show you guys so maybe this is like quiz time how would I get this text to the left over here you know so go and think about it okay the answer is you would make it a fullwidth row so over here under the icon just click on make this row full width and we can actually use the padding you know we can control the custom width so for example we can say you know I want it over here I want it right here just like that so I'm going to put it right there and click on check and then I'm going to save there you go congratulations now one more thing see how this uh bar right here is not the same color it doesn't have that blend now we need to make sure that this Blends in correctly because you know it it really adds de core and it makes it look really unique and looks like it's blending in on the website so over here we can click on this gear icon and you see where it says background color let's just go ahead now and slowly you know go up and down and see how we can make it blend see how it's sort of fading away see what color and it's about right it's about right there you know maybe it's a little darker let's see if I can get it okay good right there perfect now guys this is the main reason why I use the divy theme cuz if you were using something like uh another theme or another e-commerce premium theme you could not do this and it would be really hard to sort of find out that exact background color right so um you know using this theme it really really saves you a ton of time trust me I've been around the market for a long time and um this theme is just simply stunning it's simply incredible on what we can do with this so I'm going to click on check now in the next section we are going to I'm going to save this really quick we are start going to start uh you know creating products but I'm going to take a little break guys and I'll be back in one minute I'm going to get some water so I'll be right back all right so now we are going to start creating our products and we are going to install a plugin called woocommerce and this gives us the ability to sell products it gives us the ability to create all sorts of different really cool items so over here we're going to go to our dashboard and we're going to go down to plugins and we're going to go to add new all right now just go ahead and type in woo Commerce woo Commerce just like that and press an enter and now woocommerce guys it's the number one uh you know rated plugin for selling online it's really powerful so over here you're going to see it uh W Commerce go ahead and click on install now and it will actually install onto your WordPress website it does take a minute you know it does take a little while so um you know it is a premium uh plugin so just give it one second while it installs all right so it is installing it should be finished any second right now all right there it goes okay so now we want to click on activate so go ahead and click on activate all right and you'll be brought to this page and uh it's going to like a it's going to give you this small tutorial but uh let's go ahead and do it so right here it's going to say let's go now it's going to actually automatically create these Pages for us so it's going to create our shop page it's going to create our account it's going to create our checkout and our card page so go ahead and just click on continue and also um there is some rare circumstances where uh the pages don't create and I'll show you how to fix that you know there are some you know cases where that happens uh there are support forms for it but I'll show you how you can actually fix that in the new update uh so right here go ahead and put where your store is from so I am in California and I'm going to put uh dollars now which units do you want to be used for your product weight so you can have pounds ounces kilograms but you know the standard one is pounds and right here you can put Dimensions such as C centimeters millimeters inches or yards so I'm going to put it as inches and and click on continue all right and it says will you be shipping products you can put yes I'll be shipping physical uh products to Goods or uh yes I'll be charging sales tax but I will get more in detail on this a little bit later so for now you can just click on continue and right here it's going to ask you uh which account to uh accept payments with and we are going to use PayPal standard and you're going to have to create a PayPal account now the PayPal account is free to create so I'll show you how you can create one we're going to go over here to paypal.com all right and we're going to go ahead and go to sign up for free and going to go ahead and put in your um you know your information right here so go ahead and put in your email address so I'll put in uh I don't know let see right here I'll just put in some random email all right and click on next now really quickly guys uh you want to make sure that this is a business account so I'm actually going to go back right here I want to make sure that this is a business account um right here we're going to go to sign up and okay so we should have done that instead so we want to make sure that it is a business account they do change the PayPal website quite often so usually it prompts you and I'm kind of like why are they prompting me so you want to do a business account and then right here you're going to click on next now you have two options you have the PayPal standard and you have the pay PayPal Pro so make sure it is the PayPal standard right here so go ahead and click on select standard and it is free to create it so from this point you are going to actually create your email address and it's going to prompt you to put in your information all sorts of information and then it'll take you to your dashboard but once you're done creating it you're going to take that same email address the one that you sign up right here and we're actually going to put it right here so mine is going to be uh this one right here that is my current PayPal address so take the time to sign up for a free business account sorry about that I I the P the website does change uh quite often so um you know know I didn't mean to uh make you sign up for a personal account so make sure it is a free business account okay and once you're done we're going to go over here and you're going to put that email address right in here all right and this gives us the ability to uh you know accept payment so if somebody buys something it's going to go to your PayPal account and then from there you can transfer it to your bank account so I'm going to click on continue all right and it says you know uh congratulations your store is ready now if you want them to send D ostic you can allow that or no thanks it's strictly up to you but let's go ahead now and create our first product so right here I'm going to click on create your first product okay so go ahead and give your product a name now you're going to get prompt with all these little um these little boxes right here so there are a lot of them they do this a lot but uh I'll go ahead and explain what these are in detail so you fully understand how to create your own products and how you can edit them and categorize them so the first thing we're going to do is create a simple product so this is a very you know it's a simple product it's very uh simple there's no options it's straightforward so I'm going to go ahead and enter in watch and right here this is your long description so when you go to these other websites right here and I'm going to go ahead and uh click on this right here and I'm going to get some demit text for this so I'm going to copy this really fast now this bottom part is the long description so this part right here is for the bottom part right here now this part is actually for the bottom I know they should change that right and this should be on the top but that's just the way it is so I'm going to enter in some demit text right here and uh you know just leave it like that so this text remember is at the bottom right here for product description okay now the next part you see we have these different products so we have a simple a grouped an affiliate product and a variable product and that will teach you every single product so right now we're going to do a simple product and let's just say you want to set a price so how much for this watch well I'm going to say $200 okay now you can actually set a sale price so for example let's say for now I want to say I want to make this on sale for $100 and if you click on schedule you can actually schedule the date so maybe right here we can put you know from October 19th to the 25th this is on sale for $100 now if it goes after the 25th the sale will cancel and it will go back to its original price okay but I'm actually going to cancel this sale right now and I'm just going to put a regular price but that is how you can create a sale for your products next we have our inventory right here so if you are a retail business and you have a scoon number this is where you can enter it in now right here you have the option for manage stock so if I click on manage stock it's going to tell customers how many you have left so this is sort of a maybe marketing strategy where you can say we only have two left and the customer will see the stock quantity and if they you know they believe it's very valuable they might might buy it cuz they're saying you know there's only two left let's go ahead and buy it you know so that is a stock quantity and you can allow back orders so you can basically say if it is sold out we will allow back orders or we will not allow back orders now it's up to you uh generally I recommend if you don't have it you know don't allow it because you know uh it could give your store a bad reputation of long shipping times so uh you know that's totally your business though with your stock so that's just my opinion now in stock so is this in stock or is this out of stock well I'm going to put this in stock so if you ever run out of a product you can say that it is out of stock all right and next we have our shipping oh also for the inventory uh never checked this right here so this basically says you can only sell this item without any other items now this is good for digital downloads but uh for basic items uh no I would never check this box and if you're if you're selling anything like watches or phones uh do not check that box because that means this item can only be sold by itself and you cannot you know a customer cannot buy five items they' only be able to buy this item specifically only so next we have our shipping now guys we will get into shipping a little later but um for right now you can go ahead and put you know how much does this weigh how many pounds does this weigh maybe it weighs I don't know like one pound and then you can put the length of the inches so maybe around 10 in the width is 10 in and the height is maybe you know 5 in or whatever you want to put for your product so so that is how you would set the dimensions and remember in the woocommerce settings how we have weight is pounds right here and the dimensions is inches so that is what that was referring to earlier but don't worry we can actually change it um I will go over the woocommerce options a little later but for now we are going to just learn how to create the products and then later on we will talk about shipping and taxes and classes and all sorts of other cool stuff so you actually have a section right here for link product so an upsell so an upsell is basically when somebody clicks on your item do you want to recommend another product now we're not going to do it right now cuz we don't even have any other products to upsell now a cross sell I'm actually going to you know disagree with cross cells but a cross sell is basically it once the items are in the cart it will promote another product now that is good for add-ons so maybe you have something like a uh a phone right and then maybe you have something like a uh a headset for that phone that is a good cross cell but I personally don't recommend to uh compete with each other you know cuz if somebody's already out the door to buy something why confuse them by throwing more items at them you know just let them check out and let them buy it right but I will go over cross sells and upsells more as we go on the tutorial after we create more products so next we have our attributes and attributes is more for variable products so we are going to uh skip this section and advanced so maybe somebody bought this item do you want to send them a personal note about this you know do you want to tell them something specific about this product this is where you would enter it in now do you want to enable reviews right here so this is uh the checkbox if you want to enable reviews or if you do not want to enable reviews next we have our product short description so remember this short description is going to be right here okay so maybe I want to go ahead and put in you know this is the best watch ever come buy it right now okay so this text right here is going to show up right here okay just to make sure that you fully understand now we also need to set the uh product categories so remember earlier how we talked about categories how we have some for women how we have some for men so I have a watch so maybe I want to put this under accessories so I'm going to actually click right here under add a new product category and and just do uh accessories and I'm going to add this product category okay so you guys can see right there we now have actually created a product category next we have tags remember earlier how we talked about related you know related stuff like that where um you know if you they buy like a shirt it will recommend other shirts that are similar so right here I'm going to put you know watches okay so we want to you know basically include similar products by putting in product tags and of course and the most important is your product image so we need to give our watch an image now if you guys have downloaded those pictures from Dropbox you guys will be able to select some so I'm going to click on set product image right here and I'm going to select the watch just like that and click click on set product image now right below that is the product Gallery images so maybe you have different angles of this watch maybe you have different styles so I'm going to actually just include um you know these shoes just as an example so I'm going to click on uh this one right here oh yeah just this one I can't do more than one a time and let see if I can add another one and the boots can I add the boots okay so right here I have two product categories now you're going to actually use it for the same product guys uh don't do what I'm doing here I'm just showing you what the product category is okay so other than that guys I think that's it and now we can actually go ahead and publish our first item so I'm going to click on publish all right and now our simple product has created and if you want to view this product you can actually click right here on preview changes and you're going to get this new tab right here and there it is our watch so as you guys can see this is the the best watch ever come buy it right now and we have the title right here we have the price and remember how we enabled stock management so right here it's telling us that we have two in stock so that is what that's referring to and next we have the product category so remember how we talked about the uh the product category and how you want different angles maybe you have different angles of this Swatch and you want to sort of include that uh in your uh description so if I click on this it's going to give this a really cool picture of the item and you can actually rotate these you can you know check them out Mount so that's a really cool feature with the uh the product uh gallery and also right here under reviews people can go ahead and add a review because remember we enabled reviews for this product and also additional information such as the uh weight and the dimensions right here okay so we've created a simple product but now let's go ahead and maybe create uh maybe one or two more because we actually need to fill up our front page you know we don't have a lot of items to sell so uh in order to do that there's two ways you can do that you can go to plus new over here and go to product or you can go to your dashboard so if I go to my dashboard right here I can go to products and I go to add products so there's two ways you can do it now I'm going to close this tab and go to my original tab right here and I'm going to go to plus new right here and I'm going to add in another product all right so let's go ahead and make another simple product just to you know teach you how to create simple products so you you know fully understand this so I'm going to go ahead and just put maybe uh what should we create here I'm going to go to my my product image right here and see what we can make um maybe I'll go ahead and do the boot or no we need to actually do the front page for women so maybe we'll go ahead and make uh these three right here okay so I'm going to select this one right here and we're going to put that as our product image so we have this girl right here and I'm going to do something like a white shirt women's white shirt and then right here we're going to put in some description now the regular price I'm going to put it as $200 oops $200 I mean that'd be expensive shirt you know $299 I mean this these are just hypothetical prices guys don't copy me because that's a really expensive price for a shirt that's like Nordstrom prices or something so uh right here I'm going to just uh you know put in some demit Tex right here and maybe I'll just you know put in uh something like that make it look a little more decorative now for product category so we want to actually create a woman's section so if you guys have checked out my other uh page right here under my home you're going to see that I have three uh three of the um these three right here so our shop module is going to ask us which categories do you want to put on the front page so we want to basically create three products to sort of put right here on the front page so this right here is going to be three products it's going to be one category and we're just going to make it you know called women and then this section right here we'll do another category and we'll just call it men okay so I'm going to go back over here and we're going to create this uh product right here so um I'm actually going to go over here and go to woman's first page just like that and the reason why I name it woman's first page is because these specific products are going to be the attention getters they're going to be on the front page so this category is basically informing me that these products are supposed to go on the front page to get the most attention and get maybe you know a few few sales so right here I'm going to put women's uh women's uh woman's shirt and go to ad now guys when you create these product categories uh don't put woman's you know first page you know just do Woman shirt because remember people can see the products okay so they can see the categories the product categories so if they see something like women's first page they're going to be like what what is that you know so make sure it is something similar to what you were selling so maybe women's beautiful shirts or woman's fashion or something something similar to that okay so we're going to create another simple product and guys like I said everything is pretty much already done the same thing right here so if you have a sco number you go and put that in shipping linked products now we do have upsells and cross cells so I'm going to go ahead and put in an upsell right here so I believe the other shirt was called or the other product was called watch so there it is you can see the product right there of watch so I'm going to select watch and I'm going to select watch one more time to show you what an upsell and a cross cell is now this grouping right here this is actually for grouped products which we will talk about in just a little bit okay so we've entered in all of our information we've entered in the product tags the product image everything looks pretty good now I'm going to go ahead and just publish this item all righty so the product has created now I'm actually going to go back to my uh uh view the product now you see right here where it says you may also like so right here we're actually upselling it so we are upselling the watch so if you want to have a specific item You' want to put this as your upsell but now let's going to say I go ahead and add this to the carts all right so now I added it to the carts and I'm going to click on view cart now you see right here it says you may also be interested in and then we see the watch so this is what we call is a cross cell so it's recommending a additional items at checkout but remember um I really recommend you guys only adding accessories or something that is complimentary with the product because you don't want to put another woman's shirt right here because what happens is let's just say they visit the website and they go that's a nice shirt um you know I like that shirt too you know maybe I don't know maybe I'll just do this later I'm not sure yet you know maybe I rushed into it bam you just lost a sale because you added in too many features and you added in too many options so um if you go to Amazon actually they only recommend accessories as well so that is people's biggest mistake is where they recommend more expensive products like maybe a silk shirt and then the customer gets confused he's not sure and then they leave you know so you don't want that to happen Okay so uh that is a um an example of a simple product okay so now we're actually going to go on next and we're going to create a variable product all right so we're going to go over here and we're going to go to product all right so we're going to go ahead and give our product a name now I'm actually going to go over here to the product image and we're going to select uh something on the you know front page right here first so we added in this one let's go ahead and enter in oh no we had we added this one right here right so we're going to enter in this blue one now and we're going to click on set product image okay so we have our image right there and we want to go ahead and put maybe woman's blue shirt all right and then right here we're going to go ahead and enter in some you know some dummy text and we're going to change this product data to a variable product and if you're running a shoe store in fact the variable product is probably going to be the most common item that you're going to add um it basically is one of the only items to give additional features so right here I'm just going to enter some demit Tex you guys are familiar by now that the the product sh description uh is at the top and then this one here is at the bottom and I'm going to add this under women's first page okay so this is the second product that we are creating and for product Gallery images I'm not going to put anything because um you know I I we already entered in one so right here I'm going to put Woman shirt and click on ADD okay so we have our product tags there we have the uh the product image we're not going to put any product gallery now we need to go ahead and uh create some variations so right off the back um before we go to the variations we can go to the attributes tab we need to actually add in some attributes and we need to actually add in some variations so let's go ahead now and just publish this item right here all right so we're publishing it all right and if you guys notice right here you go to variations it says before you can add a variation you need to add some variations attributes in the attributes tab so we'll need to actually go over here to attributes now this is the long way to do it there's two ways to do it but I'm going to show you uh both ways on how to add attributes so right here let's go ahead and put size and then we'll put size again and then we're going to go ahead and click on ADD attribute and make sure to put nothing here don't put text uh that basically allows people to enter information and you don't want to do that where people can manually enter stuff in just go ahead and leave these two settings blank and we'll click on ADD attribute all right so next we're going to click on this and now we're going to say okay what size you know so maybe small small and small and click on add new now it does say description but um do not put anything there because we actually are already we're going to enter a description for our product again so there's really no need to enter in like a double description you know so uh I'm going to click on add new size all right so we have small now maybe we want medium okay I'm going click on add new size now maybe we want large and as you guys work with e-commerce you're going to come to see that creating products is probably the hardest part of e-commerce it really truly is because it is uh you know it is a lot lot of work so now we have the uh small medium and large now let's go ahead and go back to our products right here so I'm going to click on products and we have woman's blue shirt so I'm going to click on edit now okay so we're going to go down to the attributes tab right here and we're actually going to click right here and click on size because this was the attribute that we created remember and I'm going to click on add all right right now we're going to click on um select all so now we have the small the medium and the large and we're going to click on used for variations and click on Save attributes just like that okay you guys with me all right so the next thing we're going to do is actually add these into our product so to do that just go to variations go right here click on this click on create variations from all attributes and then go ahead and click on go it's going to say are you sure you want to do this just say yes all right so now it told us that three variations were added okay so now we have the large we have the medium and we have the small all right so we need to actually edit each specific one okay so right here I'm going to go ahead and click on this drop down menu now right here it's going to say okay do you want to upload an image say yeah so go ahead and click on upload an image and we have the same product right there remember because we're only doing the size we're not doing color yet so go ahead and click on set variation now how much does this cost I'm going to say $100 all right so uh you have the options to do you know the weight and everything else of the uh the large product and U right here you can enter Vari description but I wouldn't do that basically the variation description would do if somebody selected the large it will give them an additional description about only the large variation okay so maybe like uh this is a great Buy okay now um I think that's it we've added in the price and guys make sure you enter in the price if you do not enter in the price the product will not be able to sell whatsoever and in fact if you backspace this it's going to say that this is required so I've had a lot of people email me and they're saying my variation products don't work and I said did you put all the prices are you sure you put all the prices and then they email me back and they're like oh I forgot so uh it's it's a common mistake you know so next we're actually going to go ahead and click on this little arrow right here and close it all right now we're going to go to medium and we're going to do the same exact thing we're going to click on the upload an image select the shirt set variation image and then we'll put in the price $100 and then that's it we're going to go ahead and close this right here okay and one more so we're going to go ahead and do this right here click on upload an image select on that set the variation image put in the price and then we're going to click on Save changes all right so I think our product is ready to go now once we've done that um make sure to click on update because if you don't it's not going to save those changes and you're going to have to do that all over again so let's go ahead now and take a look at our variable product so we can click on preview changes right here and this will take us to our new product so there you go wom's blue shirt you guys can see we can add it to the carts and right here we can go ahead and click on this now we have large and now you see how it says this is a great buy so remember earlier how we added that in the variation description so if you want something like that you can add that in the variation description okay next we have medium and of course we didn't add anything right there and then we have small just like that so people can add this to the cart and then from there they can purchase it now maybe you want to add two variations you know I had a customer actually who wanted or a client who actually wanted four variations and I said that is that's just too much information for one person you know so uh we're actually going to create two variations because maybe you have a certain size and also you have a certain color right so um two variations is very common a lot of websites do two variations because you know maybe you have a specific product but you want to have a size and a uh color right right so now let's go ahead and create a third product and this time I'm going to show you the shortcut on how to create these products okay so right here under plus new we're going to go to product and if you guys you know don't want to do this you guys can just watch me and follow along maybe down the road you might want to you know add in two variables you know a lot of people do so right here I'm going to click on uh variable product now I'm going to scroll down over here and do set product image and I'm going to select let's select this one right here this is the final you know this one looks pretty good and we'll set this product image and we'll actually add this to women's first page just like that now I'm going to put uh women's cute see uh women's cute shirt and then right here I'm going to go ahead and just paste this in and same thing for the Bottom now I hope hopefully by now you guys know that the product short description is the most important cuz that's the first thing they see so I'm going to put paste right there and for the product tags we'll just put Woman shirt and we'll go ahead and just you know we'll add that just like that now we're going to go ahead and goes to uh variations now we're going to go to attributes so we actually need to go ahead and create some more attributes so we actually have size already there but we actually want to go ahead and maybe add some more so I'm going to click on size and we're going to go ahead and add this right here okay and we're going to go ahead and um we're going to go ahead and select all goes for use for all variations and go to save attributes all right so next we're going to go ahead and click on uh add again and now we're actually going to create a second one so right here you can see we have size so size is good now let's just say you want to add color so right here we're going to put color and right here we're going to put um you know just just for tutorial purposes obviously guys so I'm going to put pink and then you need to enter in that sign so I'm going to backspace this and you see how it says right here enter some text and or some attributes by the the asteris symbol separating value so this is above the enter sign and even if you're on a Mac or a keyboard it is above the enter sign so you need to hold shift and press the button so usually it's like that but if you hold shift it's going to look like that okay so remember it is above the enter sign and also I'm looking at my Mac keyboard right now it is above the uh enter sign as well okay so color now I'm going to put uh we'll put blue and then we'll this next one we're going to go ahead and put uh Pink and then right here we'll go ahead and put black and we're going to click on use for all variations and click on Save attributes all right so that looks pretty good now let's go ahead and add these variations to our product so over here under variations we're going to click on create variations from all attributes and we're going to click on go now it's going to say are you sure you want to do this I'm going to say yes all right so nine variations were added because remember 3 * 3 is nine so we have nine different variations so right here you guys can see we have a large Blue large pink large black now we need to actually set each product in each price for each product or for each uh for each section so you guys can follow me and um you know we'll do this step by step it looks like a lot but don't worry it's very simple and remember once you have created these you can actually duplicate these so it's it's really simple so the first thing I'm going to do is do large Blue all right let's do this let's start working this is work this is it so I'm going to click on the image I'm going to put this blue shirt all right so we've added that one in large Blue now we have large pink so I'm going to click right here add in $100 and we're going to put this right here and we're going to put in pink all right and we're going to close this and large black so open this up we're going to go ahead and put this in and we're going to put something black where is uh we got this is like a Raiders jersey I think it's like a Raiders jersey I don't I don't I don't know it looks like it so we're going to close that and then medium blue I'm going to open this raad's actually doing pretty good this year I I don't you know they're not a bad team but um okay I'm getting sidetracked I medium blue okay so we're on medium blue and I'm going to put uh you know this right here or this and we're going to add in $100 and I'm going to close this and medium pink I'm going to open this set the pink okay and we're working we're going all right yeah imagine doing like 80 of these products I have I have clients who are like oh I want like a a store and I want maybe 2,000 products I just look at that say I I don't know what to tell you you know I really don't uh so right here over right here we actually added in the wrong one so this right here we're going to enter in uh black okay so medium black and we're going to enter the price and remember guys each price must be on there if there is one price missing one price at all it will not show up whatsoever so really uh make sure that you enter it it all correctly so small blue I'm going to go ahead and put in uh this one and add in a price and I'm going to go ahead and close that small pink go and click on that just going to go and grab the pink one $100 we're almost done guys we're almost done and the black and I'm going to go ahead and find the Raiders jersey thing A variation and set the price as $100 and we're going click on Save changes now hopefully I did not miss any prices because I have done done that in the past and I actually that my last tutorial you know I made a mistake and I couldn't find it it was kind of embarrassing you know I'm supposed to be teaching you guys now also for the default form selected so when somebody visits the product where do you want it to be defaulted on maybe you want it be defaulted on medium blue or medium pink or medium black so usually people will just enter in no default size and no default color okay but let's just say they were to visit the page for the first time okay now do you want it on default Etc or default Etc so if you want that you can select it if not you can just go ahead and leave it as a default color so now that we've added that in I think we're ready to publish this product and we're going to click on publish all right all right so I think it published I'm going to click on that one more time I think it did something weird maybe I didn't enter in uh oh there it goes okay so there it goes and I'm going to click on preview changes you know where things in WordPress happen guys all the time you know so uh if you guys think you know you're you know it only doesn't happen to me it happens to me all the time I get the most random errors with WordPress so right here we have our size so we have a large now we want to select maybe blue see the picture it changes to Blue now we want to do pink large pink large black now let's see if I did all these correctly so large black pink blue and then for small we're going to do a small blue a small pink and a small black all right I did it guys congratulations that is how we do two variable products now I don't recommend doing more than two variable products because it's just too many options for the customer and they might get you know this is too much I'm just going to go to another website uh two variables is probably uh the best solution for your um you know for your business okay so now that I've showed you guys how to do simple products and uh variable products we're going to move to group products but before we do that I want to actually add these into our front page so let's go ahead and do that now I'm going to go ahead and close this and we're going to go ahead now and uh close this as well we're going to close all of our tabs that we have open and I'm going to go back to my visit sites all right so we have these three products that we've added now we can actually add them right here so I'm actually going to click on enable visual Builder and we're going to actually introduce you all to the shop module so right here we have our button we're going to click on this and then we're going to scroll down to the shop module and the shop module is really cool guys it's it's it's really customizable it's it's super easy so right off the back you see we have all of our products there but maybe we only want to add the products that we created for women you know because this is for uh our new arrivals but you know we can change the title to you know new woman's arrivals or whatever so over here uh we can actually scroll down to the um uh is it the the recent the types right here and then we'll go to the product categories now you're going to see the product categories come up so you have wom's first page and accessories so right here I'm going to click on women's first page and there you go so now we have the uh only the items for the um the products that we created for the front page and there's a lot to talk about in the shop module we will talk more about um you know different features like for example on the recent products we can have you know um you know sort by popularity by rating and also the column number so what that means is let's say you go to your shop page right how many products do you want across the page you know do you want one do you want two do you want three I mean this can go up to six products all across the page you guys can see right how the images get smaller and it's going to create more room for more images so maybe right here you can actually add in more products right here so maybe you can add in six products so that is just another um you know it's another way you can sort of decorate it by adding in more columns and we can actually go ahead and Design This so really quickly we have the sales badge color we can change the icon hover of color and the hover overlay color so for example we can put something like a blue but a very gentle blue so now you guys can see if I go over this it's a very gentle blue now the uh the icon hover color maybe want it to be black and we can actually set a image for that who and then we'll go ahead and go to an icon so we just go ahead and pick pick an icon oops let's see right here we'll go ahead and select uh the heart all right so you see how now we have the icon right there is the heart and we have the blue beautiful overlay and we can change the title font right here as well so remember I'm doing Railway so remember you want to basically keep it consistent with your products so I'm going to scroll down right here to go ahead and go to railway now you guys can see the text has changed to wear away now really quickly I'm going to change this back we're going to do three columns so you guys can get a better visual of that all right so I've changed it to railway now I'm going to go to design and maybe you want to change the title size font so right here we can actually go whoop and make it bigger just like that you can make it really really big you know but that's obviously way too big something that would basically look like this right here you know 25 pixels that looks really clean that looks really cool the title text color you can change the title text color of that so maybe you want it to be uh blue so you see how right now the text changes to Blue so I'm going to put as black and also the letter spacing and the letter height so remember the letter spacing is the pixels in between so if you want to spread those out you can do that uh but generally you should probably you know leave it on the uh you know the front one and the title line height that creates space in between the lines so for example right here we have this line you know this this pixels in between we can space it out but since you know we're only having three to two words we probably won't need to do that now also the price the price font so right here we can go ahead and select maybe bidder or you can select whatever font you would like for the price font so I'm going to select Railway and you're going to see the dollar sign change now we can also do price text color and we can change it to maybe black and we can also do the uh price letter spacing and also the price line height so we can change all that right here now I bet you're wondering you know hey darl how did you get this really cool effect and how did you get this right here I will go over this in more detail after we talk about the group products and also the affiliate products because I don't want to you know Venture off and start talking about this you know we got to be organized you know so uh I'm going to go ahead and click on this and I'm going to go ahead and click over here and click on save all right so it is saved and the next thing we're going to do is create some group products now I'm actually going to uh add this section right here so all the products I'm going to create are going to be uh for men so we're going to create a men's category to sort of you know add a section right here for us so over here under product we're going to click on product right there and now let's go ahead and create a grouped product all right so let's go ahead and put a title right here so I'm going to go ahead and put um you know uh men's shirt men's shirt and right here I'm just going to go ahead and enter in some dummy text and we're going to go ahead and just uh put some Dy text down here now right here we're going to change this to a grouped product and you're going to notice right away we cannot enter in a price and that is perfectly normal now go ahead and just give your product an image so I'm going to go ahead and put the uh you know I'll put a men shirt right here something looks like that and I'll click on set product image we can add a category right here or I'm sorry a product tag right there and right here I'm going to enter in a men shirt and add that into our category okay so we have our long description right here we have a group product and we have our product short description we have our product image and if you'd like you can enter in more pictures right here under the product Gallery okay so other than that the product is ready to go and we are going to click on let me actually make this little I told you guys I'm I'm a perfectionist so I like to you know make sure it looks good so I'm going to click on um uh publish now okay so in order to basically finish this product we need to create uh subproducts for this so go over here and click on ADD product all right now we're going to do you know men shirt silk and right here you can enter in uh something if you would like you don't have to for the group products but uh I'm just going to go ahead and put in some you know some more information right here now you you really shouldn't for the product short description and I'll show you why in a little bit now uh right here where it says uh product we're going to leave it as simple product okay now instead of uh doing all this other information we're going to go to linked products and you see where it says grouping we're going to enter in that one product that we created so I believe it was men's shirt so men's shirt now for the product image you might not want to enter anything and I'll explain why and um right here we can put it uh actually I wouldn't even put it in a category and I'll explain why as we show the product but one of the most important things need to do is right here where it says catalog visibility you want to actually click on edit and go to Hidden now the reason why we do this is because we do not want this product to show as a simple product this is a Sub Sub menu or sub product for our parent product okay so make sure you're entering a price so I'm entering maybe uh 300 okay and I'm actually going to go ahead now and just click on publish I know it's a little weird but you guys will see why why we you know we hide the image we hide the category and also hide this product now we're actually going to create one more so this was the silk one and it was for $300 now let's just create like a lower-end one you know let's just do men shirt cotton and let's just sell that for maybe $100 so men's shirt cotton and right here we're going to go ahead and put in a price of maybe $100 and for the linked products remember we want to enter in men's shirt right there and right here you don't have to put anything you don't have to put anything for the image nothing for the category but you want to make sure that it is hidden so right here under uh catalog search you can click on edit and click on hidden and then you're going to click on okay all right so I think our product is ready to go we put in a price let's go ahead now and click on publish all right so the product is now created now let's go ahead now and go over to products right here and we're going to view the first product that we created so right here men's shirt and right off the back you guys can see that this little arrow indicates that these are um you know sub products for this apparent product right here so I'm going to click on men's shirt and now we're going to click on preview changes we're going to see now what this looks like all right there you go so you see right here men's shirt and the price does fluctuate from $300 to $100 and that's just because we have our men's silk shirt right here here and they can select one they can select as many as they like and right here they have the other um the other uh product right here and this is the men's shirt cotton so like I said um you want to actually hide these from your catalog because if you don't you're going to have a bunch of random products like men's shirt silk somewhere around your store and it's not going to be a sub prodct a subproduct of this apparent product right here so this is a group product and guys this is very good for like I said memory so remember like 180 gig uh 120 gig 80 gig you know companies like fries and Best Buy do that all the time in fact the iMac I'm on right now they actually did that to me you know they had the the $1,600 iMac when it was like um you know uh was it like a terabyte and then the one up from that was like $1,800 it goes all the way up to like $3,000 so that is a perfect example of why you would want to use the group products okay so um you know you can add as many as you want you know you can add in you know five or just one so this is an example of a grouped product okay now the next we're going to do next product is going to be an affiliate product and this is a very easy product to create and a lot of people have asked me about affiliate products but I just don't think they knew about the affiliate option in W Commerce so over here we're going to go to product and we're going to now create an affiliate product so we're going to actually call this um men's gray shirt and right here we're going to go ahead and put this uh you know we're going to put paste right there and I'm going to put paste right here so the product short description obviously and the long description and also we want to change this product data to uh external affiliate product and you're going to see these options change right here but really quickly let's go ahead and add an a product image for this so right here I'm going click on this and we're going to go to this gray shirt select that and you can also you know do Gallery images and also you know you can add product tags as well like men shirt and uh you know add that in and I'm going to add this into men shirt right here now uh the product URL so this is where you put in your affiliate link so if you're an affiliate for a company you will be provided with an affiliate link if you don't have one email them and they will give them to you so I get affiliate links all the time from other companies okay so we're just going to go to Amazon right now and I'm just going to go ahead and just grab in some men's gray shirt to see what we can find let's see if we can find a good product here to put into our shop all right something like uh this one right here all right so I'm going to take this link right here and I'm going to copy it okay now we're going to go back to our website I'm going to close that now um this was the other one sorry about that so the product URL so this is where you're going to enter in the URL so wherever you want your customer to go this is where it's going to take them so remember it should be an affiliate link now now what do you want the button text to say because if you put buy now you know it's they might think that they're going to check out uh on the on the website so you can say maybe buy on Amazon and how much does this cost and you need to make sure you update this because you know uh we don't really know you know the changes fluctuate so if you put something like $100 you know and they go to Amazon it's cheaper they're going to say h this is kind of weird you know I I don't know I'm leaving you know when they leave the website so make sure you check the price but for now I'm just going to to put in maybe $20 now inventory obviously you're not going to enter anything because we don't really know you know what they have in inventory so woocommerce is actually taking away those options uh link products you guys can also have upsells and also crosses remember we talked about that earlier and the attributes uh you know usually for affiliate products you would not want that you would not want to add attributes and also Advanced notes now if you notice they take away the purchase note because they're going to purchase it on Amazon so they're not going to be purchasing on our website so we don't really want to give them a note saying oh you bought it congratulations okay so um other than that that's it now let's go ahead and just click on publish all right so the product created and now we're actually going to click on preview the changes so there it is so uh men's gray shirts you guys can see we have buy on Amazon because that is the product or I'm sorry that is the description that we put and if they click on this it's going to take them to Amazon and if you are an affiliate if they purchase this then they will receive you will receive a commission okay so that is how affiliate products work and affiliate products are actually really good to have on your landing page you know you don't really want to hide them in your shop maybe you want to put them on the front page so that's another really good idea on uh you know strategies on how to get affiliate commissions is by putting them on your front page maybe under you know featured or new arrivals or something like that so so I'm actually going to create one more product right now I'm just going to make a simple product just so we can add it on our front page so men's men's cool shirt all right and we're going to go ahead and click on paste oops that is not the dummy text sorry about that so I'm going to take this right here and we're going to put this under uh men's shirt I yeah men's schol shirt I should close this tab so paste it and we're going to paste it and we're going to go ahead and put an image right here of another shirt so we're going to enter in this one right here set this as $100 and Men shirt you don't have to follow me I I'm just doing this for the front page to create three products for our front page okay so uh I'm going to click on publish now all right and now we want to go to visit site okay so right here we have our new arrivals right here this can also be a men's section so uh really quickly before we keep going I'm going to close all these tabs I have open because I don't really need all these tabs all right so now let's go ahead and enable the visual Builder Okay so we're going to scroll down right here and we're going to add in the shop module right here and we're going to use the category for men so right here I'm going to click on this icon and we're going to go down to our shop module right here and we want to actually do product category and um you know we actually want to do men's shirt just like that you guys can see we have the men shirt right there and I'm going to go ahead and click on check so that is the same way you guys would basically enter in the um you know and we can actually customize this to um you know the same way under the design so if you guys want to have those other um you know we can change the title font just like up here we did we can change the same way so if you guys notice right here this text is or this image is a little um smaller than this one so you want to make sure that you're using the same amount of uh space for the images so on my other website right here I think I used the um I think I used the other one right here yeah so I used this Guai right here so you want to make sure that the images are the same and I'll go ahead and give you the sizes right now just to let you know which size I used in this tutorial so um well actually you guys have them actually on the um on your uh you guys actually have these images so just make sure that you are using the correct uh size for all your pictures because then it could come out something like this right here okay so next let's go ahead and create the next section so uh right here you guys can see we have these really cool designs right here and right here uh we're going to actually uh create these other products right here and then we're going to actually um create this next section right here which is the email optin form we're going to add in the blog and then the contact us page okay so really quickly I'm going to go ahead and click right here and click on this regular section and click on this regular box and we're going to add in a text module all right so the text module and let's see what I put over here so over here I put something like um you know sexy woman's clothes I'm just going to go ahead and put something like uh our weekly specials just like that and we're going to click on um well actually we want to make this a header font so over here we're going to do heading one now over here on the design we want to change this header fonts you know we can make it bigger so I'm going to put maybe 40 and then change this to railway okay just like that and now over here you guys can see we're going to add in a shop module right here okay so we can just basically add in one big shop module and we can actually uh do a four column row so explain how we do that so right here we'll click on this little arrow all right now go ahead and select just the one column row right here just like that and we're going to insert our shop module all right so our shop and right here you can see that all the products that we have right here are listed but maybe you want to sort of have it where you only want a certain amount of products listed so over here under our product category I'll go ahead and enter in um you know women's uh woman's first page and also accessories just like that now you guys can see or actually I'll added more I want to show you guys how this works so as you guys can see now we have six products listed but you're going to see this post number right here so maybe you only want four products listed so to do that all you need to do is just go over here and highlight four now it's going to make it so the maximum amount of products that show within this shop module is four and the reason why you do this is because maybe you have a specific section of product that you want people to see maybe your you know your hottest sellers or whatever and if you guys have noticed that no matter how many products I try to add it's just going to only put four okay so if you want to get this um you know U effect right here that is what the post number is for now let's just say you want to introduce different sections so maybe you want to add in the the woman's page as well so you can just maybe select menri for here and then remember we can actually just create another one below this another shop module and just simply add in women's so I'll go right here and I'll go to shop and then I'll add in you know the product category and we'll just select the women's front page right here so that's how you guys can sort of manipulate the shop module to get you know any which any products that you want on the specific part of your website so you can have a lot of control with the shop module here but um I'm actually going to go ahead and uh you know close this section or um yeah so we're actually going to have only four items that go across right here so I'm going to click on this right here and I'm going to put um uh let's see we'll do woman's first page and men's shirt and we'll do four and then this section right here we're just going to trash it just like that now let's just say you want to make this full width you want to make this a little bit bigger so people have a better visual of it all you need to do is go over here and click on make this row full width and there you go so now you see our products are much bigger they look really nice and also if you guys want to change the design of it you guys can go over here and change the design of it and um you know you can add in the same features that we added in uh up here okay but um I'm going to actually introduce different ways you can custom style it but we're going to talk about that right after we finish this page so I'm going to click this right here now over here you guys can see that we have the um oops sorry about that we have that bar that says connect with us so this section right here we want to have this connect with us section and also we want to add in our email optin form our social icons and our blog so I'll show you how to do that so over here just go a and click on this uh blue section click on regular and we want to just have a one row just like that and all we need to do is add in a text module so I'm going to scroll down right here and we are going to add in a text module and I'm going to put this Center and all I'm going to say is connect with us oops I spelled that wrong connect with us just like that and I probably want to make this a header text so I'm going to highlight all this this and change this to header now I want to actually add in a background this time but before I do that I actually want to make this row full width so right here I can actually click right here and make this row full width and make the custom gutter to one just like that okay now right here I can go ahead and select this icon right here and under the design right here we can add in a background color so maybe I want to add in something like this right here but I'm actually going to change this to Black just like that and I'm going to click on this little check box now I want to actually change the text right here I want to make it white so I'm going to click on this module setting go to design and for the header fonts I want to change that to maybe you know Railway CU that's kind of the it's kind of the the theme for our website right now we're using Railway so Railway and then I want to change that header text color to just white and remember we can make it bigger just like that okay so that is how we add that really cool effect of that bar that goes all across the page so the next thing we're going to do is we're going to actually add in the um email optin form and our blog so I'm going to go ahead and go to edit page and we'll show you all the backend editor as we do this so really quickly just so you understand how this all works so right here remember we added in our text and our shop module right here this was our text divider the next thing you want to do is add in another section right here with our blog our email optin form and our social media form okay so I'm going to click right here and we're going to go right here and add in a new section so right off the back you guys can see we're using a two column row you understand so this is one row and this is I'm sorry another column and this is another column so over here you want to click on regular and we're going to select the two column row right here just like that now right here we're going to go ahead and put in our blog just like that all right and I'll actually introduce you all to the blog right now so right here I'm going to click on uh check and I'm going to click on this uh this arrow and we're going to click on Save and we're actually going to create our first post so I will introduce you all to how you create post on your website so there's another shortcut to do this you can simply go up here under new and just click on post and there's a lot of uh layouts that DV has that have really cool layouts you know um but for now I'm just going to give you the basics and when we talk about predefined layouts I will introduce you to some really cool uh blog layout that you can use so right here I'm just going to put you know cute girly things right and then right here we'll go ahead and just um put in you know I think I have some demy text right there and um you know I'll put in another space or I'll just add in some more Demi text right there now this is basically the text that people are going to see and over here this featured image is very important because you know when you go to a website and you see that featured image of the blog that is what the featured image stands for and you can actually put categories for your blog as well well so maybe you want to have a specific section that talks only about women's clothes and have a special blog that talks only about men's clothes okay so I'll go ahead and put our featured image so I'm going to put the picture of Jessica Alba right here and click on us select featured image and under the add new category I'm going to put women's women's blog and add that as our category and I think we're all ready to go now you can actually use the divy Builder and create lay outs you can create all sorts of really cool stuff but I will talk more about that and predefined layouts when we get there so for now I'm going to click on publish and our uh blog is now uh it's it's now published now if you want to see your posts all you need to do is go over here and click on all posts and you're going to see all the posts that we have now this one right here hello world is actually default it just comes with WordPress so we can go ahead and just trash that we don't really need that all right now let's go ahead and take a look at our website and see what the blog section now looks like so I'm going to go ahead and scroll down and there you go so now we have cute girly things and if they go ahead and they click on this blog they will be able to read about your blog right here and the information and they can actually leave a comment so that's pretty cool so we're going to go ahead and go back now and we're actually now going to create an email optin form and we're going to use MailChimp because MailChimp gives you uh a free service for your first I think it's 1,000 or 2,000 subscribers which is a very very good value so over here we're going to go ahead and scroll down and uh right here we're going to click on the email optin form and it's actually integrated really well with this and in fact it even has as an option for it you can use a Weber you can use all sorts of cool ones so we're going to click on email optin right here and right here it says service provider so you can use MailChimp feed burner or Weber and we're going to use MailChimp for this but really quickly you can put um you know subscribe for coupons just like that and you can actually change the button right here so right here it says subscribe and if you want to change the uh the background color maybe you want it to have it as you know black and you can change all of the design settings uh in in the design right here now for text orientation maybe you want to put it in the center and right here you can add in some more text you know I'm going to put dummy text you guys can see we can add in some really cool text maybe some you know sales you have going on for your website so you can add all that in right there but now let's go ahead and create a mailchip account so the first thing you want to do is go to mailchimp.com and you can actually sign up for free right here and it's going to ask you guys a lot of questions you know it's going to ask you guys about your your address all that information and a lot of those are actually required by law because um if you send people book email campaigns they basically have to know you know where it's coming from and all the information they're going to ask you if you're business just go ahead and sign up and U once you get signed up and everything you're going to have to verify it with your email address so the email that you used to sign up they're going to send you a little uh letter they're going to say go ahead and uh validate this email you'll click on validate and then you'll be able to start your free account so I'm going to click on login here because I already have U an address right here and I actually created one from scratch for you guys so this is exactly what you're going to see you're going to see a basic dashboard that looks just like this right here so the first thing we basically need to do is go to your dashboard and I think you can get there by clicking on the little monkey right here and you want to basically create a list okay so right here we can click on create a list and it says you have no list so we need to create a list so go ahead and create a list and the list name so you know you can put something like uh you know uh was it ID darl's subs and the default from email address so the this is the email address that people will reply to so go ahead and put that correct email address in so I'm going to put um no PC ho right here and default from name now they do mention this they're saying sometimes it doesn't work you can just go ahead acknowledge this risk uh it has worked for me but um you know you can use you know any sort of email address like I use one for mail.com or all sorts of them but you know Gmail I have used it and it does work so I haven't had a problem yet but it doesn't work for everybody so you might want to use Yahoo or use your own personal email whatever email that you would like to use next we have our default from name so I'm going to put Daryl and how did people sign up to your list so you can say you know you receive this because you subscribe to our our website you receive this because you signed up to this amazing clothing store okay and then you can put in your contact information there you can just put in like a zip code you know or you can put in like a PO box if you would like so next we're going to go ahead and scroll down to notifications and you can get notifications you know daily notifications if people subscribed or one by one or you just will not get anything whatsoever it's up to you now I'm going to click on Save Okay cool so we have our list right here and we want to go ahead and create a signup form okay now we don't really need to create a signup form because we just want to basically um we're going to use the um the divy form but this is for like if you want to add it onto like a different part of your website and not use it but since Dy has created their own form we don't really need one so the only thing we need to do now is get the API key so to get that we're going to go over here and go to profile all righty now we're actually going to go to extras and go to API key okay so it says right here your API Keys we need to actually create an API key so you should see a screen that looks just like this right here go ahead and click on create a key and you're going to see an API key has been generated so all need to do is copy this and we're going to go back to our website and make sure this is saved so I'm going to go ahead and save all this information because we're going to leave the page and go on to the dvy options and enter in that uh API key okay so I'm going to ahead and exit the visual Builder and I'm going to go to my dashboard next you want to go to divy and you want to go to theme options and guys if I'm going too fast you know feel free to pause the video because I know uh I make it look really easy but I know you have to you know fill out forms and you know think about the email address you're using so uh like I said if I'm going too fast feel free to pause the video and just fill it out next you want to just go ahead and scroll down to this part where it says MailChimp API key and go ahead and just paste that in there just like that and scroll down and then go ahead and click on Save changes all right so it's loading and we will see a green little arrow looks just like this so it is it ex accepted our VPI key and now we're actually going to go back to our website and we're actually going to enable the visual Builder and then from there we are going to put that API key or actually select the list so over here go ahead and click on enable visual Builder all right it's loading all righty it's going it's going my internet is a little slow today my apologies all right so we're going to scroll down here and we're going to go down to the um the uh the the module right here and then from here all we need to do is click on this gear icon and right here it says mail list the list right here you're going to see that your new list comes up you see that so mine was Ider subs and if I click on that click on check and now anytime somebody signs up to their email it's going to end up in your list right here for your mailchip account so that's a really easy way and right here shows you the subscribers it shows you the clicks the opens and that's when you send campaigns and stuff like that and the campaigns are really easy to send you know so uh that is basically how you set up your um your email optin form it's really easy and it actually works right away it's I've used it before it's it's a really really good module so next we want to go ahead and add in the uh social icons right so right here under this uh this plus icon go ahead and click on that and we're going to scroll down to social icons social media follow all right now there's a lot of different ways we can style this so I'm going to click on add new item and we can select a network and of course they have almost every Network here and we'll just click on Facebook and now you need to enter the URL for your Facebook fan page do not use your private profile because if they go to that it's going to give them a like a private you cannot view this so make sure it's a fan page now also you can do it for Twitter or you can use it for Google and have all the icons already set up for us so right here I'm just going to go ahead and select that now I'm going to click on check and you can change the way this looks so right here we have this rounded rectangular we can actually make this a circle so it looks like that so that's pretty cool now you can actually add another cool feature which is a follow button so right here you can click on follow now you see how it says follow right there so that's a really cool indication on people saying hey come follow us you know so let's go ahead and add in maybe three more so add new item I'm going to select Twitter you know I don't use all these accounts but I mean people out there they have like all of them you know I know people who are like um active on all those social accounts but I look at them I'm like I don't have time to do all that that's a lot of time to invest in uh you know social media right there so I'm going to add Pinterest and then I'll add in maybe uh you know uh YouTube and then I'll add in something like um I don't know Myspace I mean that was so big back in the day I don't know if you guys remember Myspace but like every body had a MySpace and if you want to actually take off these follow icons you can just go ahead scroll down here and click on this follow off so then you have them like that and you can make them all across the page you know but uh you know we can go ahead and leave it on just like that and we'll click on check I'm going click right here and click on save all right it's saving okay so the next thing we want to do is we're actually going to start doing pre-made layout and you are going to love this I can guarantee that you are going to love um pre-made layouts because it does all the hard work for us your website will be made in a split second so right off the back you guys can see over here that um if I scroll down um right here you're going to see this get in touch with us and you're going to see all this stuff right here now guys this is a pre-made layout that divy has created so in order to get these layouts you guys can actually click on the link in the description under the divvy layouts library now I'm actually going to go to it so um divy footer layout I'll include this in the description so you guys won't need to go over here but um there's different ways you guys can design this you know or style it so they have one right here so I see how it says get in touch and the maps under it and they also have another one so they have 10 of these and they've given all these for free so this is number two this right here is number three number four and so on and so forth so number five number six number six is pretty good too I like that style they have right there but I chose for this tutorial I actually chose number eight so I'm actually going to download these so in order to uh upload these to your website all you need to do is click on download the layout pack and you're going to get this download form right here now I'm actually going to uh click on it right here oops sorry about that and right here you're going to see the uh the DV footer layout pack right here you see that so um I'm actually going to go over here and we're going to go uh upload this onto our website so uh I'm going to save this right here I just saved it huh I saved it like twice okay now we're actually going to edit this visual Builder and we are going to upload this to our DV library and there's a lot of ways to upload it but I recommend doing the Dy library because um you know usually when I try it from the visual Builder it doesn't work sometimes so over here under divy we have divy Library all right now we want to go ahead and click on Import and Export and I'm going to click on import and go to choose file now I'm actually going to find the um the form right here or the uh the layouts so it was divy something right divy divy layouts let's see it was divy layouts and remember guys it must be a Json file so inside of the folder you're going to see that it has like a the uh all the Footers so it's going to have the footer one the footer 2 the footer three the footer 4 and so on and so forth and you need to make sure that you extract it and then you can upload it as a Json file so right here I think it is the DV layout pack yeah the contact us right here so they have all the contact us pages and I'll talk about that a little bit later so let me see if I can find this really quick I did the footer and there you go so I have these Footers and I'm just going to go ahead and grab one I'm just going to go ahead and grab number uh I don't know number two whatever whatever one so just go ahead and click on open and click on import DV Builder layouts and remember it must be a Json file okay so you get a zip and inside the zip is the Json files okay so once you're there click on import DV Builder layouts all right so it is uploading all right and guys if it gets stuck sometimes in rare instances it'll just say 1% and it'll just get stuck and nothing will happen if that ever happens just close the box and reopen it okay so excuse me I actually have the uh the footer right here and now all we need to do is just add this into our uh homepage so over here we're going to go ahead and click on visit the website and we're actually going to click on enable visual Builder and we're just going to import this to our site so I'm going to scroll down just keep scrolling just keep scrolling all right and right here I'm going to click on this arrow and we're going to click on ADD from library all right it's not there oh I'm sorry we need to click on this section right here the purple section so sorry the purple section and we're going to click on this section right here and click on ADD from library and make sure this is not checked you know we don't want to replace any existing content and we're just going to click on footer and there you go our footer is there guys congratulations that is super easy so now we have this whole section setion that is already made okay so we're going to click on save all right so it is saving now let's go ahead and sort of see what we've created as well so we have this this right here is actually called a specialty section now this right here is a blurb module and if you want to see the modules they used just click on this the setting right here now this was actually a image and it looks like they added in a text right below that they could have used a blurb but um they decided to add in an image and a text module and the same thing right here here so they added an image and a text module now for your page you might get these like links right here or these um you know the these little um you know like a page or all your pages all you need to do is basically change your page uh under the white text and then just put a link so let me give you another example I'm going to go ahead and upload one more to show you guys uh what you should do for those because I I have gotten a lot of questions about those about those other layouts so let me find the exact one so this one right here number three I'm going to use number three and if you notice right here you see these uh these links but they're not links they're an illusion of a link they look like a link but they're not you can make them a link so if you want to use something like this right here number three I'll go ahead and show you how to do that so I'm going to go to my dashboard right here and we're going to go to divvy and go to divy library and we're actually going to import the other footer so we're going to import number three instead so footer number three open and go to import DV Builder layouts all right so it's uploading and the DV layouts guys are really cool in fact um I'm actually giving you all a discount on my website I have pre-made layouts and I will provide you with a coupon code that will give you all 50% off and it's only available to people who watch this tutorial so congratulations so I'll talk about that in just a little bit so now let's go ahead and go back to our website so I have footer 3 right here and uh this is just another Style on how you can um add it to your website all right so I'm going to scroll down here and now I'm actually going to delete this section I don't want to use this one because this one's it's too uh I guess you want to say it's too easy so here I'm going to click on this click on this icon click on ADD from library and we're going to add number three and make sure this is not checked and click on footer three all right so we have this really cool section right here you know do you like this and right here you guys can see that it has these these textes right here and if we click on it it doesn't do anything they're not links so we need to actually make these links okay and there's a lot of ways we can do that so go ahead and click on this right here and right here you're going to see there's nothing there but there actually is something there it's just invisible because it's white you see that how it says uh you know about maker right here about maker so remember this is a blank it's a it's a gray background and these are all white so right here it looks white but they actually are you know um real pages so over here under the contact us you can just go ahead and type in your own page and all you need to do is click on this little link icon right here and put in the URL so you can put in something like um you know whatever your url is so I'm just going to put this for example um let's see I think this is the right one right I Wilson Biz Dash I think that's the right one so I'll click on okay okay I'm going to CL cancel now in order to find the link just to make sure that we're on the same page all you need to do is just go ahead and click on this link so I'm going to click on shift and click on this now you see this right here this is the U the link right here so we'll just need to copy this and we're going to go back to our website all right now all you need to do is go back over there and insert that link onto that page now this is a little Advanced but um you know I I don't want to leave a lot of stuff out this does look a little confusing but um it's really not so under the module settings now this is only if you want this kind of footer so over here you can see the contact us so all you need to do is click on highlight the contact us put in the link and then put in the URL just like that click on Okay click click on check and now remember if somebody actually clicks on this link they are actually going to be brought to the contact us page so we're basically creating text with link so they're not really you know they're not really buttons or anything like that we're just making our own custom links to navigate to any part of our website so this is the footer section it really is you know it's it's a a little Advanced but um it's really beautiful it's really nice looking and we should really take advantage of these pre-made LS because it's going to save us tons of time right so the next thing I want to do is actually upload the other footer and I want to show you um if you want to upload the Google Maps I'll show you how to do that so over here I'm just going to go ahead and click on ADD from library and we're going to add in the other footer now I'm actually going to delete this section because I've showed you how to add the links onto this section right here and click on this right here I'm going close that close that one more time and this section so I'm going to introduce you all to this section and I'm also going to create a mod right here of a map okay so this is the contact form for divy and it's really good it really works and it it's really really good so all you need to do is click on the module settings now this is the name you know you can you decorate the name if You' want but you should leave everything standard you know they have basically created a custom layout for you so I'm going to click on X right here and we're actually going to put in our email address so all you need to do is right here where it says email simply enter in your email address like uh mine is pc.com at gmail like that and go ahead and click on check and that's it it's done whenever somebody enters in anything right here it will be brought to your personal email wherever um you know whatever email that you put it it will go to that uh email address so that's a really cool way to sort of have this pre-made layout and um you know messages that go right to your email address so that's really cool now let's go ahead and just enter in a map module so recently Google sort of change their rules um you know I was talking to some clients of mine and now you have to have an API key to use uh Google Maps and a lot of people were saying oh man like I never had to do this before and they panicked I said dude it's easy you know it's so easy I'll show you how to do it you can get it for free okay so the first thing you want to do is click on this right here and we're going to go ahead and scroll to map so we're going to go ahead and do the uh did I pass it let's find the map right there all right so right off the back it's asking for a Google API key now we can't continue here we need to get an API key so over here here we're just going to go to Google and just type in Google API key just like that now you have to have a Gmail account in order to uh get the API key so go ahead and click on the first one that comes up which is developers.google.com and if you don't want a map you know you don't have to put this in I'm just showing you uh various ways how to you know add use all the modules and stuff like that so remember I have my Gmail account right here and you will need a Gmail account to get to the screen so if you don't have one it will prompt you to get an API key key okay so right here I'm going to click on get a key now all you need to do is create a project you know like I have a lot of other clients so I'm just going to put create a new project and then I'll put Dy tutorial and go to create and enable API key and it's going to generate an API key and it's funny you know this actually happened like three months ago I started a tutorial and as I was teaching the map module tutorial they invented this API key and I looked like a total like clown like I was like I don't know why this is happening you know it was it was kind of a bad you know situation for me but uh luckily I found out later on that they just required an API key recently so uh Google right now is generating an API key so this is the API key right here and you need to make sure that you don't grab any other content you want to just make sure you only have the API key okay so right here we're actually going to cop we're actually going to close this right here and I'm just going to click on um you know we can actually close this whole section and we're just going to click on Save because we need to actually go to the theme editor and put that Google API key so the theme knows that we have it so over here we can go to our dashboard and we're going to go down to divy and go to theme options and we're just going to go ahead and scroll down just keep scrolling all right there we go and we're going to go to Google API key so this is where we're going to enter in that code now guys remember this is only if you want the maps if you don't want the maps just uh sit back and relax and uh you know just be patient all right so uh we're going to go back to our website now we're going to go to visit site because we entered in the Google Maps API key and I'm going to scroll down all the way down here and we're going to add in a map module so I'm going to enable the visual Builder if you guys have noticed you know I don't really use the back end editor too much you know with this theme I I I rarely use it I only check it for discrepancies if I see something strange I say why does this look strange you know then I'll I'll check it so right here I'm just going to go ahead and put in um you know I'll just add in I can add it in right here you anywhere you want so I'll click right here and we'll click on map and sometimes guys it does not work properly and you'll have to exit the visual Builder and then just view it from a different angle it it does that sometimes it's it's it's really weird so the map Center address I'm going to put Pasadena California and click on find all right so it is found that area now we need to actually set a new item so title we're going to put our business our business and then the map pin address so where do you want the PIN to go so I'm going to enter in Pasadena California again just like that and click on find and you guys can see it found it on the map right there just like that if I scroll back okay so uh it closed that really quick that's strange I'm G to open that up again okay so remember how I said it was kind of messing up before yeah it does that sometimes so if you want to just go ahead and close it and then maybe just reopen it and try that again so uh we see that it has found that address now it doesn't show up guys on the visual Builder but it does show up when you close the visual Builder and check it out so all you need to do is just make sure that the dot is there and just go ahead and scroll down and you can put something there like uh come check out come check out our business oops one more s just like that and I want to make sure it found that so it's correctly found that and I'm going click on this check click on this check again just like that now this option right here so the mouse wheel Zoom so if somebody Scrolls over it and they and they scroll over that's what that is doing but if you want to disable that you can take that off and they will not be able to scroll uh whatsoever okay so I'm going to click on this check click right here and click on Save and there you go you guys can see that our pin is there and it looks pretty good now you can use the other feathers to make it more decorative so for examp example uh this other section right here had a really nice map so this right here is a full width map and guys I do have other tutorials on every single module on the divy theme so after we talk about you know this and the woocommerce settings and the shipping and the tax feel free to check out my other tutorials on all of the modules and different styles that you can do with the divy theme so right here I'm just going to go ahead and click on X or save it and then we're going to actually go over here now the next thing we're going to do we're going to have some fun we are going going to design these items right here so these items right here you guys have noticed on my other sister websites where I have these really cool overlay effects so I'm actually going to show you all how to create that really beautiful design uh right now so the first thing we need to do is actually get some script from divy and I actually included that in the description so it's going to be five different ways you can style your shop so right here I'm going to go to it to see how it looks on your end and you're going to be brought to something that looks like this so this page right here and divvy has actually introduced custom CSS on different ways you can style your shop so for example we have this style which I Incorporated that over here so we scroll down to the bottom right here you can see I have Incorporated that same exact design the other one they have is the uh the material cards which adds this uh piece of script right here so you need to be able to basically take this script right here just like that and we're going to take a right click and we're going to copy the script and all we need to do is is paste this into our product section so over here we're going to go uh click right here on this bar and we're going to go to custom CSS and we're going to go ahead and scroll down to the product section right there and we're just going to paste this code in there just like that so now you guys can see that we have this really beautiful modern looking design and let's just say also you wants to may maybe you know uh Center this dollar sign you know just like we had it on our other page maybe you want to to go ahead and Center that so over here they've actually included another piece of code to do that I believe it's up here and right here you're going to put the text align and you're going to put this on the title and the price section so over here we're going to go back and now on the the the title and the price we're going to put that on the custom CSS so scroll down to the uh was it the title right there now the uh title is centered and then we're going to put the same thing for the price just like that so that's another way you guys can decorate your shop so let's go ahead and do the same thing over here so I actually need to go over here and copy that same piece of script and I'm going to take this and all you need to do is just put this in your product section you don't need to be a web designer they've actually done all the hard work for us so right here I'm going to click on this again go to custom CSS and we're going to put it in the product section just like that there you go so if you want these effects right here that's all you need to do it's so simple to use it and you guys can get creative you know maybe you can put it on like the um the other ones like the uh the title let me see if I can do it the title if I paste it in there you guys can see it has a double overlay effect so you can actually you know get a little bit more creative with this but um you know for now I'm just going to leave it like that you can also put it on the price so we can put on the price you guys can see it has a a bigger overlay effect near the price but I'm going to actually take that off so if you want to get you know creative you can do that but um that is how you have these beautiful Arc designs and how you can Center it and all you need to do guys is just follow the steps you know it's very simple to do and they have a bunch of different ways you can style it if you want it like this right here or you can actually scroll down and they have this closed grid effect where all the products are closed together and they show you exactly how to do it it's very simple to do it you don't have to have any sort of knowledge of coding or any of that stuff you just need to follow their directions and the lastly one they have is is they're a regular grid so if you want a style that looks like this right here where they have like three large ones and maybe five small ones like this all you need to do is simply just um follow these steps now all they've really done here is they've just disabled the price and disabled the title that's all they really did so they basically just saying visibility to none so just basically saying we don't want to show the price or the um the title so that is how you can do that but let's go ahead now and create the first one we saw right here which is the um uh this section right here which is called the flat card okay so we're going to go over here and we're going to scroll down and now we're going to about to this section right here so simply guys all it says it says you know go to your pages use the DV Builder insert the column Etc now all we need to do is scroll down right here and you know check which category you want to display you know put the post numbers they're basically just telling you step by step on um you know what to do but all we really need to do is just put this right here in our product box so copy and remember guys you can just go through there instructions so um you know it's all here it's it's all right here so we're going to go back over here and uh click on this and we're going to go to custom CSS and we're going to put this in the product box just like that okay now you can actually contact them to get any sort of color that you want um they provide you with the color coding so um you know all you need to do is just you know contact their for and say hey look I'm looking for a black color and they will be able to give you a black color and so on and so forth maybe we can use this code right here what's this color let's let's try this one let's get a little bit more creative see right here we can go ahead and put something like this all right so that is a red color so you guys can see it's red and maybe you guys want a specific black color or if you're like an SEO company maybe you want a blue color so you can actually just actually maybe even you know try to try to guess you know but um yeah just go ahead and contact them guys for these colors and they will give you a specific color for that now also let's just say you want to go ahead and align this remember before how we did the text align all you need to do is put this for the title and the price section so simple so for uh the title you're going to go and scroll down just go ahead and put paste and then for the price go ahead and put paste now also if you made these on sale right here they have the on sale tab you can put the on sale remember how early we talked about uh sales and how you can schedule it you're you're going to get a little sale icon that's going to pop up right here and you can change the color you can change where you want it to be so you can have it really fully customizable now really quickly on the design maybe I kind of want to change this you know text to White right here so right here under the uh the text color maybe I want to change it to White something like that you know that really stands out and we can actually you know make the text font a little bit bigger just like that and we can change you know the price font as well and the price color so maybe want it white it' probably go better with the right so this is another way you can sort of design it just really you know think about it and be creative you know there's no limitations on really what you can do cuz like I said there's all sorts of different layouts you can have you know I like the material cards I love this effect right here now I did actually use this earlier but um it does look it's it's it's good you know it just depends on your preference really it really depends on your Niche it will work for certain websites but um you know for some it might not look good on so feel free to um you know go ahead and check this out there's five different styles and I will put this in the description so you can check it out and take the time to look at it all right so next let's go ahead and move on I'm going to go ahead now and click on this and we're going to save this so it looks like we have created our first page congratulations this was the hardest part on the tutorial now we actually need to add in those uh those boxes up there for our menu such as the accounts the cart our shop and I will also show you how we can add our own shop page so so really quickly we're going to go ahead and edit this visual Builder and we actually going to um we're going to add in those other items right here on our menu so to do that we're going to go down to uh dashboard all right and we're going to go to the um the uh the appearance and we're going to go to menus all right and now right here you click on view all now it's going to list all the pages guys so remember whatever Pages you want to add on your you know your bar just go ahead and just put them out so right here I want the cart the checkout and then we already have the contact us we already have the home we want to put my account and we want to add the shop page all right and we're going to go ahead and add this to the menu now also really quickly so we mentioned earlier in the tutorial how you can add the uh product categories so right here under product categories we can click maybe men's shirt add this to the menu just like that and we can actually make this a drop down menu so right here we can just drag it right there under shop so now if I hover over shop men's shirt is going to come up as a product category but let's go ahead and rearrange this you know this is really messy doesn't look good you know usually want the contact us page at the bottom the fax page here the shop a little bit closer over here just like that the cart over here and uh I think that looks good you know we have the home the shop the C and remember you can actually just make this like for example uh woman's first page you know we'll just go and click on add to menu now of course this is for tutorial purposes you shouldn't you know label your categories like that it should be you know woman's clothing but maybe you just want it just add it to your menu and not a drop down so we'll just basically put it somewhere right uh you know we can put it right here just like that now I'm going to save the menu and now I'm going to show you what our shop menu looks like and then I'm also going to show you how you can create your own custom shop menu instead of using the default one that um that divvy gives you or I'm sorry that woocommerce gives you okay so I've saved the menu right here and it looks like it is loading all righty it's going yeah make sure it's a primary menu guys make sure it's a primary menu as well okay so I'm going to go ahead and click on visit sites and we're actually going to see how the website looks right now so now you can see we have our home we have our shop with the category that drops down we have the cards and the woman's first page category so if I click on that it's it's actually going to take them to these categories right here that we created so that is another way how you can design it now uh for the shop module right here you're going to see that this is the standard woocommerce shop so in the beginning of the tutorial I told you guys that we can actually customize it but before I do that I want to introduce you all to the widgets in the sidebar section right here so you can have things like filter by Price you can have top rated products you can have all sorts of really cool stuff on your shop menu so I'm going to show you now how to do that so over here on our dashboard we can just go ahead and go to widgets and click on widgets and right here on sidebar you're going to see we have you know uh search recent post and guys there's so many things you can add in there's like a Facebook like box you can add in an Instagram feed you can add in all sorts of really cool stuff by just going to plugins and going to add new and finding whatever you want now this is kind of the part where people would venture off and find their own plugins cuz there are millions of plugins out there and it would be really hard for me to tell you you know like this is the best plugin you know cuz there are a lot of plugins out there but for now we're going to go ahead and delete all these we're going to go ahead and just delete all these right here all righty so I'm going to delete this I'm delete this I'll leave the categories and I'll delete this right here now on the top right here maybe we want to add like a a woocommerce products we can have a filter by price we can have an average rating filter and we can also show people what's inside of their cart right now so maybe right here I'm going to go ahead and just you know take this out and we'll put in the woocommerce categories so we'll do uh woocommerce products on the top and right here it says the number of products to show we want five products to show over here maybe we want to do woocommerce filter by price and maybe over here we want to add the you know woocommerce top rated products and uh you know maybe right here we want to add a cute little calendar so we'll go ahead and add in a calendar at the way bottom and we can also add in something like um uh uh I don't know woocommerce tags We'll add in the tags right there okay now we'll just go and click on Save now we're actually going to go ahead and visit that shop page right there so we're going to go over here to our shop and we're going to see what has happened so now you guys can see we have our top red products we have just our basic products we have a filter by price right here and we have that cute little calendar as long as we have product tags so those are what widgets are it basically gives extra features to to your website especially when you're on your shop page but the only limitation to this page guys is that you cannot edit it if you want to go ahead and edit it right here you're going to notice that the page is gone so I'm going to show you all how you can actually create your own custom uh page and actually have your sidebar uh along like we created earlier in the tutorial so over here you notice on my other page I have shop and I have Shop 2 now shop two is basically another page where we created our own shop page so over here I'm going to click on this and click on P page right here just like that and right really quick you guys are going to notice over here that we have this beautiful full with page we have our products right here we have our sidebar right here so everything is really cool remember we can actually style this a shop page as well so if you notice right here I have the text in the middle I've created that really beautiful overlay effect and I'll show you guys the backend Eder for this so I'm going to go to edit page right now and actually show you the backend editor for the shop page so it's very simple all I did was just basically add in a divider which pushes the sidebar down I add in a text module right here I add in a shop module and a full slider so let's go ahead and do the same exact thing for our other page so over here I'm going to put in shop two now guys this is just in case you want to use your own shop page you don't have to do this but if you want to decorate it and get customizable and make really elegant shop pages that look like this uh you'll have to do this now you can use the regular shop page you know but I'm just going to show you both ways just in case you know I cover every basis here so I'm going to enable the visual Builder all right now right off the back I'm probably going to um I'm going to delete this section right here and I'm going to do um actually I'm going to click on this and we're going to click on full width and we're going to do the full width slider I believe right here we added in the full wi slider so we're going to added the full slider just like that and I'm going to click on add a new item and I believe over here I I put I put like uh let me see here I think I put like a really cute like sweaters or something I put very soft sweaters okay so my heading is very soft sweaters and if you guys have noticed the button text I took it out I didn't put anything in because there's no reason for us to add in another button here because they're already on the shop page right I mean where else would they go so right here you don't need to enter in anything for the button text or anything for the URL and right here I'm just going to go ahead and leave all this standard now I will add a background image so in the the the Dropbox I gave you guys you guys can just go ahead click on upload and you guys can use that image I gave you which is right here now the size of it is 248 by 666 all right so I'm going to click on upload an image and there you go so um next I'm going to scroll down right here and I'm just going to keep scrolling now you can also add video Sliders in the back you know like you can have really big beautiful video sliders but um I'm not going to do that and video sliders they don't work well with mobile you know I have a tutorial on that as well if you guys want to check that out so right here I'm just going to go ahead and maybe just copy this text just like that and I'm going to go ahead and uh make sure that this is uh so past it in there right there just like that so our shter or our you know blah blah blah blah blah you guys can see that it's um you know it's aligned pretty well just like that and um I'm going to actually close this now and close that again and I'm actually going to delete this uh top box up here there is a there is another icon so I'm going to actually just take this and I'm going to actually delete there it is delete that and there you go so now we have this page right here now we actually need to create our shop page so right here I'm going click on this and add in the regular if you guys have noticed I have a three style layout now you can actually have maybe like you know two and three or however you want to style it but for this I just did a three style so uh small big and then small small so over here I'm going to go to regular now remember we have the um small the big and the small so we're going to use this module right here and right here I'm going to go ahead and put in the text module just like that we're going to scroll down to the text and we're going to put maybe something like um you know I'm just going to put our specialty items our specialty oh it's kind of in caps our special shop and I'm going to take this and add it in a uh a header now we can actually decorate this remember we can always decorate stuff so I'm going to go to design and go to the header font and I'm going to go ahead and find Railway that's the font that we've been using so far and then I'm going to go ahead maybe you know increase the size we can make it like 35 just like that and over here you guys have noticed I have added in a divider and the reason why I added a divider is because the sidebar is way too high it'll be right on the top right here so I kind of want to push it down a little bit so over here I'm going to do uh add a module and we're going to add a divider and um I'm just going to do maybe 10 10 height just like that so you guys can see right now now it's it's pushed down a little bit and then right here I'm just going to go ahead and enter in another module so I just need to go ahead and find the module there it is click on this and we're going to insert the sidebar so go ahead and just scroll down till we find a sidebar see the sidebar there it is just like that and remember you you guys can change the orientation to the left or to the right you know you guys can see we have all of our all of our wits that we had right there earlier so um I'm going to go ahead and just click on uh you know save right there now I actually want to make this full width you know I want to make it a little bit you know stretch the part so remember how to do that we need to just click on this Row setting right here and just go to make this row full width just like that so now you guys can see that our sidebar is over here remember you can put this on the other side if you would like you can put it on you know you can put this wherever you would like but I'm actually just going to leave it there and remember we can change the custom gutter width we can make it you know really close to the page or we can make it closer like that however you want to design your site so other than that I'm going to go ahead and just click on this little check and now we're going to insert the shop module right here so I'm going to click on add a new module go ahead and scroll down till we find the shop module all right the shop module and you guys are going to see that our products will start to show so right here we have our products right here um you know uh we can actually you know change to however we want maybe we want a three column row just like that or you can even have maybe a four column row whatever your preference is you know so like I said it's very customizable as to how you can make it look so right here I'm just going to say you know what I just wanted a three column row something very simple just like that now now we actually can change the design right here so just like we did on the front page we can do the same exact thing on this page so to do that all need to do is go to the custom CSS and just like we had over here right here all we need to do is change those uh Styles so right here I'm going to go ahead and grab this code this piece of script and we're going to put it on the product section okay so right here I'm going to go ahead and scroll down to the custom CSS and just insert that on the product section just just like that boom you get to see all the products now are designed properly they look really good now maybe I want to Center the text and also you know make it bigger you know so let's go ahead now and get the code to make it centered so I'm scroll down just keep scrolling I think it's up I think I missed it yeah it's up it's way at the top sorry about that so right here we have text align and remember we can also add in a background color just like we did before so I'm going to copy this piece of code now I'm going to scroll down to the um the title and the price so right here I'm going to scroll down to the title just paste it in there and then I'm going to put the same thing for the price just like that perfect beautiful modern elegant looks amazing all right so now I want to change the design a little bit you know we want to actually you know change this uh text font so for the title font remember you probably want to stick with the same font all the way so I'm going to change this to railway just like that and we can make this font a little bit bigger maybe you know 18 what do you guys think 20 is good 20 is good okay so 20 is good 20 looks pretty good and I'm going to keep scrolling right here and um you know we can actually change the title uh the title text color as well and also I want to change the price font so the price font right here I want to change that to railway and I also want to make it dark and you guys can change it to you know blue or you know pink or or whatever uh Niche you're in so I'm going to scroll down to Railway and I'm going to actually change this price text color to Black just like that I'm going click on check click right here and go ahead and click on publish now it says publish guys because you know we didn't actually create the page yet if you've already created the page it's going to say something different now there is one more thing I want to show you and this is another great thing about the divy theme so I'm going to actually uh close this I'm going to exit the visual Builder and we're actually going to uh go to our cart now so you guys can see we have a very elegant and professional looking design and remember you can add in a background image here you can add in colors you can add in whatever you would like to do to your shop you can really go all out and be super decorative so right here I'm going to click on this guy I'm going to click on this men's shirt and right here you guys have seeing that you know this text is not the same font now the Dy theme will allow us to change all of this however it will actually change it on the entire website so that's why I'm saying you might want to stick to maybe one or two fonts because for this section right here we can change the fonts and everything but it's going to apply it to different parts of the website so over here we're going to click on theme customizer now there also is another way you can do this you can actually contact them and they will give you a custom CSS code so that specific section will stay to whatever sort of design you want so over here under general settings we're going to click on topography does that pronounce it topography I I don't know so for the header font we want to change that to R raway right here to railway just like this let me see we're almost there there it is Railway you guys can see the font has changed and we also want to change the body font to railway all right we're going to change the body font to railway just like that you guys are going to see the font has changed it has changed right here as well so now it really looks like our you know looks like the rest of our website it looks really cool and we can also change the text color as well and you can go through all of these other features so I'm going to click on Save and publish and that's another way how you can fully customize your shop and you know be decorative and all that cool stuff so the next thing I want to introduce is the logo we've had this logo up here for the entire time and it really hasn't changed so I'll show you how you can get a logo and also show you where to put it so I'm going to click on close and I'm going to go to home now I recommend going to the website called fiverr.com and the reason why I recommend you go to Fiverr is because because you can go to like you know logo maker like a lot of other people tell you to go to and other tutorials but those logos look like crap and you would never realistically use those I mean logo maker is a free service and it just creates these small ugly little uh images now all you need to do is just type in logo and these guys are professional and they can create really elegant and really nice looking logos in fact my logo was actually made on this website so right off the back you guys can see we can click right here and maybe get a really nice looking logo so and you can only pay $5 and these guys will you know create really beautiful looking logos that look like this so I highly recommend to get your logo here don't get a free logo you know if you've actually paid for the divvy theme you know just spend the extra $5 to get a brand because your brand is the most important part of your website so never ever ever ever get a free logo okay use fiverr.com you can go through all their sellers maybe they're high rated sellers you guys can see right here and go ahead and just order one I am not an affiliate for these guys but I have used them before so I know that their um their logos do work now to upload the logo all you need to do is go over here to our dashboard and we're actually going to go ahead and put that on our um on our uh our divy options so once you're here you're going to go to divvy and go to theme options and right here it's going to say logo all you need to do is just click on upload and simply upload your logo now I don't have a logo right here I think I have one in my folder so I'm going to go upload see if I can find one we'll probably use something like this right here we'll use something I have a this is a small logo but it'll do you know it's it's a pretty it's actually the divy logo you guys can see it's a pretty small one so I will set this as the logo it's a very small one 300 X300 and you might want to contact Dy to get the exact size for the logo but anywhere around like maybe you know 500 x 500 might work so I'm going to click on Save changes right now and we're going to go ahead and click on visit sites and you're going to see that the logo is now there now it is a little small and remember you can actually change the size of this logo in the theme customizer so you can change the um you know the menu style so over here under menu we're going to actually introduce you to the menu so over here under header navigation we can actually change this menu bar so right here under header formats we can have a beautiful you know uh a vertical navigation we can have this to the right so there's a lot of really modern and professional ways you can you know style your menu now I'm just going to you know click on that and I'm going to do maybe we want it centered so this is another way you can uh style it or you can have it as you know Center logo in line where you have your uh logo in line with the menu or you can have it slide in you know and this is actually for like those really big picture websites where you don't want any text anywhere you just want the picture with maybe three words uh the slide in and also the full screen it's a very good option to use so you know feel free to go to the um you know this setting right here to change your menu I'm actually going to do Center in line with logo I think this one's the best for us right because our logo is a little small so um I'm going to probably just use that one so I'm going to click on uh save and publish all righty and the next thing we're going to do is we're actually going to do the fact page and then we're going to do the contact us page and then I'm actually going to show you guys how to Market this websites and lastly I will introduce you all to the woocommerce options so really quickly we're going to go to the um the fax page and guys remember we're I'm lazy so I'm going to use a a divy layout you know we're going to use a professional divy layout and I've actually included that in the description and the same way we added in the footer we're going to use it for the fax page in fact you can just Google it I'm going to go over here and go to Google and just type in divy layouts fax pages right here and the first one that comes up you can just go ahe and click on it now I'm also including this in the description so you guys can go through and browse all these beautiful facts page they've created so you guys can see right here they have created quite a few and I'm going to go ahead and scroll right here now you guys can see you know we have this one right here and they give you an example of how it looks and it saves you a ton of time instead of creating a page because these guys are professional web designers so we really want to you know if they've made something for us for free we want to go ahead and use that like this right here is a really cool elegant looking you know page so in order to use these all you need to do is go over here I'm going to go ahead and scroll up and click on download the layout pack and just go ahead head and click on this zip folder and once you get here you're going to double click on this and uh you know just go ahead and grab one you know or you can grab all of them you know you can use all of them so let's just go ahead for this tutorial and we'll just grab all all right so it's on my desktop I'm going to open this up now I'm going to go back over here and we're going to go to our theme customizer I'm sorry our dashboard and we are going to import those layouts the same way we did it the other way okay so I'm going to go ahead and close this because I've already you know got those layouts in fact I'm gonna close this close this close this I'll leave these two open just for just for good luck all right so over here under divy we're going to go to divy library now we want to go ahead and go to um uh Import and Export now we want to go ahead click on import and go ahead and choose the file and mine was on the desktop and it was the all. Json file and remember guys it must be a Json file do not use the zip or else it will not work all right so I'm going click on open now this is a big file it's around 1 Meg so it might take some time now also remember that um these are free layouts so you can use them on any sort of page you want and I will actually link a page with all sorts of different layouts for your blog as well maybe you want to have those really custom beautiful blogs um they have created layouts for blogs and it's a really cool feature with divvy they saved us so much time so I use them on a lot of websites you know I'm not going to to lie I'm kind of guilty for that so right here we have Fact one fax page two and fax page 3 so let's go ahead now and introduce that to our page so I'm going go over here to visit sites go to our fax page and I'm simply just going to enable the visual Builder and all I'm going to do is just add it to the library all righty so right here I'm going to click on this add to the library and we're going to see our page so which one do you want to do you know three was my soccer number so I'm just going to go ahead and do three I played soccer for like 15 years so I was I was pretty good I was a Ford you know not bad so now you guys can see that the page is already created it is simply stunning so that is our new facts page and all you need to do is just go ahead and um you know click on this module right here and you can just go ahead and edit it the design and all sorts of stuff so I don't want to get in too much of all the other modules right here so um you know you can change anything you want but by this point you sort of know what to do so I'm not going to get too much into you know changing everything because this is a layout and like I said you can change all sorts of really cool stuff oops it looks like I accidentally closed that that was really weird so I'm go to add library and go to fax page or fax 3 okay there you go so I'm going click on save all right it is saving so now our fax page is complete congratulations you have made a fax page in about about 1 second pretty amazing so I'm going to edit the visual Builder and now this is how it looks on our websites Elegance professional beautiful already done for us now let's go ahead and do the same thing for the contact us page and the reason why I introduce you all to the DV layouts is because a lot of people don't use dvy layouts and they should be using them because they're very simple and they're made by professionals so I've actually included the contact us um layout in the description as well and if you guys just can't find it or you just want to search for it yourself you can just go to Google and go to divy layouts contact us page and go to the first one that you see and right here you're going to be brought to a page with all sorts of different custom Pages for you guys so there's this one right here I like number one the best you know here's number two and then here's number three and number four and so on and so forth so these all are really cool really unique now I'm probably just going to add number um probably going to add number I'll add number three again we're going for lucky number three all right so I'm going to go ahead and download this and we're going to import it the same way we did it before so I I downloaded this I'm going to click right here I'm going to double click and I'm going to take contact page three all right so you see it right here on my desktop I'm going to go over here and same thing guys we're going to go over to our our uh our dashboard and all we're going to do is add this to the library and simply just upload it to the website and everything will be done so divy and go to divy library and uh right here we're going to go to Import and Export and go to import and choose the file and remember guys you can make your own website and save that layout and maybe give it to somebody you know that's also maybe you can start your own business or something you know because people do s sell the layouts including me so you know a lot of companies actually have a full-time business of just creating divy layouts and just you know selling them to people because you know why not you're creating a whole website for what like maybe 100 bucks that's a lot of time and money you're going to save than hiring someone like me or developer right you can just use a divy layout so right here we have the contact page three and I'm going to go to back to visit site and we're going to go to contact us and same
Original Description
Get SSD Hosting: http://www.darrelwilson.com/tmdhosting
20% OFF DIVI THEME (http://darrelwilson.com/divi
GET LOGO: http://darrelwilson.com/fiverr
Intro 00:00:00
Hosting 00:12:34
Install WordPress 00:16:00
Buy ElegantTheme 00:19:00
Add Divi Theme 00:21:35
Create First Page 00:24:35
Create Menu 00:25:40
Enable Visual Builder 00:28:09
Section Header 00:29:19
Section New Arrival 00:51:40
Section We Love Our Jeans 00:58:00
Install WooCommerce 01:06:22
Create PayPal Account 01:08:55
First Product 01:11:05
Create a Simple Product 01:20:20
Section Category for Front Page 01:21:59
Variable Products 01:25:20
Add Products to Front Page 01:41:00
Create Group Product 01:46:02
Affiliate Product 01:51:31
Add Simple Product to Front Page 01:55:28
Section Our Weekly Specials 01:58:27
Section Connect With Us 02:02:23
Section Blog 02:02:25
Section Email Optim 02:07:13
Create MailChimp Account 02:08:24
Section Social Icons 02:14:15
Premade Layout 02:16:15
Section Get in Touch 02:20:20
Add Google Map 02:27:10
Overlay Effect 02:33:00
The Flat Card Effect 02:36:50
Shop Menu 02:40:16
Widgets 02:43:20
Custom Shop Page 02:46:10
The Logo 02:56:30
The F.A.Q. Page 03:00:12
The Contact Us Page 03:04:29
Marketing 03:07:20
WooCommerce 03:11:26
General Options 03:12:06
Products 03:14:11
Taxes 03:16:39
Shipping 03:22:50
Checkout 03:26:10
Accounts 03:28:10
Emails 03:28:52
Orders 03:30:56
Cupons 03:34:00
PayPal Advanced 03:40:25
In this tutorial, i will show you how to create an ecommerce website with wordpress (also known as an online shop) for complete beginners! I will go step by step and show you all of the divi theme modules to help you learn how to use the divi theme properly. You can be a complete beginner and make your own ecommerce website. Its really simple. Below, I have included links to help you get started on building and creating your website.
To receive a discount on my layouts, use code darrel99 on my website to save 50% off ALL La
Watch on YouTube ↗
(saves to browser)
Sign in to unlock AI tutor explanation · ⚡30
Playlist
Uploads from Darrel Wilson · Darrel Wilson · 41 of 60
1
 2
2
 3
3
 4
4
 5
5
 6
6
 7
7
 8
8
 9
9
 10
10
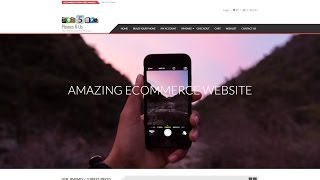 11
11
 12
12
 13
13
 14
14
 15
15
 16
16
 17
17
 18
18
 19
19
 20
20
 21
21
 22
22
 23
23
 24
24
 25
25
 26
26
 27
27
 28
28
 29
29
 30
30
 31
31
 32
32
 33
33
 34
34
 35
35
 36
36
 37
37
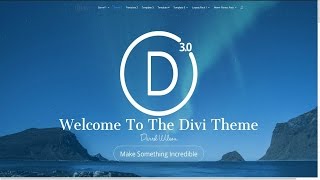 38
38
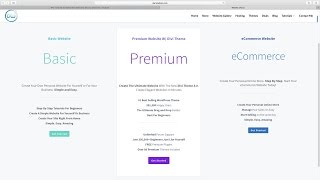 39
39
 40
40
 ▶
▶
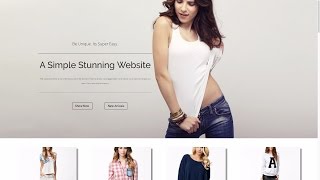 42
42
 43
43
 44
44
 45
45
 46
46
 47
47
 48
48
 49
49
 50
50
 51
51
 52
52
 53
53
 54
54
 55
55
 56
56
 57
57
 58
58
 59
59
 60
60

How To Add Google Analytics To Your Wordpress Website 2016!
Darrel Wilson
How To Embed A Youtube Video On Your Wordpress Website in 60 Seconds
Darrel Wilson
How To Make A Wordpress Website | For Business | 2016
Darrel Wilson
How to make a Free Wordpress Website for Music or Fanpages - Beginners Tutorial 2016
Darrel Wilson
How To Create An Amazing eCommerce Website with Wordpress - 2017 | FREE Theme
Darrel Wilson
How To Make A Wordpress Website 2016 | Beginners Tutorial
Darrel Wilson
How To Make A Blog With Wordpress - 2016 | Beginners Tutorial
Darrel Wilson
How To Create A Beautiful and Free eCommerce Website with Wordpress 2017 (Online Store!)
Darrel Wilson
How To Make A WordPress Website 2017 - Step By Step Wordpress Tutorial
Darrel Wilson
How To Create A Stunning and Free eCommerce Website With Wordpress 2017 | Online Store Tutorial
Darrel Wilson
How To Setup Subscriptions and Recurring Payments For Your Website | Paypal Tutorial 2016
Darrel Wilson
How To Make A PREMIUM eCommerce Website with WordPress | Online Store Tutorial 2016!
Darrel Wilson
How To Create Amazing Landing Pages For Your WordPress Website! | Divi Theme Tutorial
Darrel Wilson
Yoast Seo Tutorial 2016 - How To Setup Yoast SEO Plugin - Wordpress SEO By Yoast
Darrel Wilson
How To Create a Coming Soon(Under Construction) Page in Wordpress 2016!
Darrel Wilson
Onlywire: Promote Your Wordpress Website to +50 Social Networks With Social Media SEO
Darrel Wilson
How To Create A Professional and Free eCommerce Website with Wordpress 2017 (Online Store)
Darrel Wilson
How To Add Intergeo Maps Plugin For Your Wordpress Website
Darrel Wilson
Top 11 Best Wordpress Plugins 2018 | Must Have Plugins For Wordpress!
Darrel Wilson
How to Create a Free eCommerce Website with Wordpress 2017
Darrel Wilson
How To Make Beautiful Web Pages For Your WordPress Website! | Divi Theme Tutorial
Darrel Wilson
How To Reset Your Wordpress Website | Reset Wordpress Back To Original Settings
Darrel Wilson
Top 10 Free and Responsive Wordpress Themes 2017
Darrel Wilson
How To Add Amazing Resume Layout Packs For Your Wordpress Website | Divi Theme tutorial
Darrel Wilson
20 Best Websites To Sell Your Products! The Best Websites To Sell Online !
Darrel Wilson
SEO Tutorial For Beginners 2016 | What Is SEO and How Does It Work?
Darrel Wilson
Best Web Hosting 2016! FREE DOMAINS! Top 5 Wordpress Web Hosting!
Darrel Wilson
How To Use Facebook Ads For Beginners 2017 | Complete Facebook Ads Tutorial
Darrel Wilson
NEW Divi Theme 3.0 Visual Editor for Wordpress | Divi Theme Review!
Darrel Wilson
How To Update The Divi Theme to 3.0 | Update Divi Theme From 2.7 to 3.0! Elegant Themes!
Darrel Wilson
NEW Divi Theme 3.0 Layout Packs! | Divi Theme Review For Wordpress
Darrel Wilson
Divi Theme 3.0 Tutorials for Wordpress. Coming Soon.
Darrel Wilson
How To Make a Wordpress Website 2017 | NEW Divi Theme 3.0 Tutorial For Beginners!
Darrel Wilson
How To Make A Wordpress Website 2017 | NEW Divi Theme 3.0 Tutorial - AMAZING!
Darrel Wilson
How To Use The Bloom Plugin By Elegant Themes | Add An Email opt-in Form To Your Wordpress Website
Darrel Wilson
How To Advertise Your Website On Reddit 2016 | MARKET Your Website and Get Traffic!
Darrel Wilson
Divi Theme 3.0 Customization | Tips and Tricks For Divi 3.0 for Wordpress!
Darrel Wilson
Divi Theme 3.0 Customization and Review | Tips on Divi 3.0 for Wordpress! MUST WATCH!
Darrel Wilson
Flippa.com Review: Buy And Sell Websites + Domains With Flippa Auctions
Darrel Wilson
Udemy Course: How To Make A Wordpress Website With The Divi Theme 2016! EVERY MODULE COVERED!
Darrel Wilson
How To Create An eCommerce Website With Wordpress 2017 | ONLINE STORE | NEW 3.0 Divi Theme -AMAZING!
Darrel Wilson
FREE and NEW 3.0 Divi Theme Layouts For Wordpress - Review, Tutorial, And Customization!
Darrel Wilson
NEW 3.0 Divi Theme Customization For Wordpress | Create Amazing Animations! -Must WATCH!
Darrel Wilson
How To Add Live Chat In Wordpress For FREE! - Best Live Chat Plugin For Your Website
Darrel Wilson
Yoast Seo Tutorial 2017 - How To Setup Yoast SEO Plugin - Wordpress SEO By Yoast
Darrel Wilson
10k Subscribers. Thank You All!
Darrel Wilson
How To Install and Setup Google Analytics To Your Wordpress Website - 2016! EASY!
Darrel Wilson
How To Advertise and Promote on Youtube For Beginners | Youtube Advertising Tutorial 2017
Darrel Wilson
How To Make A Wordpress Blog - Create A Blog With Wordpress - EXTRA THEME
Darrel Wilson
NEW DIVI THEME 3.0 Layout Packs | Importing Divi Theme Layouts For Wordpress
Darrel Wilson
How To Make A Parallax Wordpress Website 2017 -NEW!!
Darrel Wilson
How To Make The Divi Slider Fullscreen | Divi Theme 3.0 Customization
Darrel Wilson
Elementor Page Builder Tutorial - How To Create A Wordpress Website 2017
Darrel Wilson
SEO For Beginners 2017 | How To Rank High In Google | Freelancer.com Tutorial
Darrel Wilson
Yoast Seo Premium Tutorial 2017 | Wordpress SEO By Yoast
Darrel Wilson
How To Install Wordpress With TMDhosting - MAXIMUM TMDHOSTING COUPON CODE!!
Darrel Wilson
How To Make A Wordpress Website 2019 | Divi Theme Tutorial
Darrel Wilson
Divi Theme Customization: How to Create Diagonal Lines Between Sections in Divi Theme
Darrel Wilson
NEW Divi Theme Tutorial On Udemy And Skillshare! 😀
Darrel Wilson
Unsplash.com: Best Free Photography Pictures and Images From Around The World | Unsplash Tribute
Darrel Wilson
More on: UI Design
View skill →


🎓
Tutor Explanation
