How To Make A Parallax Wordpress Website 2017 -NEW!!
Skills:
UI Design60%
Key Takeaways
This video teaches how to create a Parallax WordPress website using the Access Press Parallax theme, covering steps from installation to customization, including adding a logo, changing colors, and integrating social media and e-commerce functionality.
Full Transcript
[Music] all right welcome to this WordPress tutorial guys my name is Daryl and today I'm going to show you all how to build an amazing Parallax WordPress website that is fully mobile responsive SEO friendly and also very modern the great part about this tutorial is that you don't need to have any sort of experience or any knowledge of coding whatsoever I am going to show you how to build this website today from start to finish step by step now let me give you all a quick tour of this website and show you all what we're going to be building today so this right here is our slider section with our title and we have a call to action and we also have our social icons right here to the left side so going into our featur section this is our featur section and notice how we have that really cool graphics effect where these kind of just hover in like that so today I'll show you how to do that next we have our portfolio section right here and we have our Parallax effect in the back behind that next we have our team section now that is a super clean presentation on your team section and if you guys have noticed right here these are actually The Avengers now of course this is just for tutorial purposes and you're going to go ahead and probably put your teammates give a title for it and also a description about your teammate next we have our testimonial section with The Parallax effect behind it and these are always good to have because it really brings confidence to your visitors and of course we have our blog section so right here we have The Parallax effect behind it we have taking a break from work best speeches is in California and the beauty of traveling and if someone clicks on one of these blog posts they can read all about it and they can also share it to all of their favorite social media websites so today I'll show you how you can do this and they can also leave a comment put their name their email and post a comment so going back to our website now if you have a video I'm going to show you today how you can incorporate videos on your website so this is a yo tutorial for a WordPress plug-in now if you have a video today I'll show you how you can put videos onto your WordPress website and this theme is fully e-commerce compatible so if you want to sell something on your website today I'm going to show you how to do that and this is a free theme it's not going to cost us anything to install this theme next we have our contact us section now this is actually a contact form and this will go straight to your inbox and again we have that beautiful Parallax effect behind it and right here we have this little map section right here and if you click on it this will actually show your location so if you want to show your location today I will show you how to embed Google maps onto your WordPress website and right here we have our widget section so here we have all of our social media icons and if you're one of those crazy Twitter people out there who like to tweet all day I'll show you how you can incorporate your Twitter feed onto your WordPress website here we have our top rated products and also about us so scrolling back over here now let me refresh the page and show you what exactly this is going to look like from a visitor's first point of view so scrolling down right here you guys are going to see everything just kind of pops into place super professional really clean website and the great part about this is that this is the number one rated theme on WordPress and it's free on top of that these guys will actually give you support for your website for free so this is the theme that we're going to be using today it's called access press Parallax as you guys can see it has a overwhelmingly amount of positive reviews now this company will give you unlimited form support for your website so if you ever have a problem with your website these guys will actually help you out so that is a win-win it's a free theme and you also get free support now this is another example of what a complete beginner has created with this website now this is a vit Min website and I believe they're selling nuts like yeah nuts right here and a complete beginner design this and it's just a super clean website so if you're brand new to Wordpress and you really want to learn how to make a website this tutorial is for you and on top of that we're going to be using The Parallax effect which is a very modern effect that a lot of people are starting to introduce onto their websites because it just looks really cool and really modern all right so let's go ahead and get started now guys if you guys have liked what you've seen so far go ahead and give me a like and a subscribe and let's go ahead now and create this amazing Parallax WordPress website step by step all right guys so the first thing I'm going to do is get out my notepad and we are going to follow these simple steps in order the first thing we're going to do is get hosting in a domain and I'll provide you all with a coupon code that will save you a bundle of money after that we are going to install WordPress then we are going to install our free theme which is called the access press parallax theme and then we are going to create an amazing Parallax WordPress website so go ahead and click on the link in the description it will take you to a website called hostgator.com you'll be about to a page that looks just like this right here so once you're here go ahead and click on get started now now there's three plans there's the hatching plan the baby plan and the business plan I always recommend the baby plan because with the baby plan you get unlimited domains rather than just a single domain so maybe later you want to make another website with the baby plan you can do that so go and click on sign up now all righty now go ahead and enter in a domain name so I'm going to enter in the one I always enter in which is I love kylo rn.com and it is available you know hopefully that new Star Wars that's coming out is good I am a Star Wars fan so I'm excited to see it well it looks like somebody actually purchased one of my domains I love karen. Biz I'll be gosh darn okay so anyways right here is the domain privacy protection so this protects your identity if someone tries to who is you but I'm actually going to uncheck this box next we have our billing cycle now I just recommend 6 months you'll save more money with 6 months in the long run now for a username I'm going to enter in Han Solo 55 oh I spelled that wrong Han Solo 55 and ENT turn a security pin so four five 6 7 8 and make sure you jot this down because if you have a question regarding your Hosting account HostGator will need your security pin to verify that it's that's you calling okay so make sure to jot all this information down next you have your billing information so right here go ahead and enter in your email confirm your email and make sure you have access to this email because we will need the um the information that HostGator sends to access our St panel so make sure to remember your email and you have access to it next enter in all this good information right here your credit card you can pay with PayPal Etc after you're done filling out this section we're going to scroll down to additional Services now I don't really recommend any of these a lot of these can be done with WordPress itself so I'm just going to go ahead and uncheck these boxes right here okay and now we have a coupon code now I have a better coupon code than this you enter in the coupon code darl wp25 and click on validate you're going to see the price drop dramatically from $80 to around 66 now really quickly when you enter that coupon code sometimes right here this will auto check so make sure to check that off and then scroll down and you're going to get six months of hosting and a domain for $66 okay so this is all you will need to pay in this tutorial now once you're done with this you can click on I have read Etc and click on check out now and once you do this you'll be brought to a page that looks just like this right here it's going to say get ready we're setting up your account and this might take I don't know three to five minutes so just hang tight you know go get a drink go get a granola bar whatever whatever is you eat or Deuce you know whatever so once you're done with this or once this is done propagating you'll be brought to a page that looks just like this right here and this is your HostGator customer portal okay but we don't really need to enter in anything here we don't need to do anything further here what we need to do is actually go to your email and you're going to get an important letter from HostGator so you'll get a letter that looks just like this right here you'll get a no reply and it's going to give you your control panel link your username and your password right here so go ahead and click on this link right here the control panel and you'll brought to a page that looks just like this right here okay and all you need to do is just take your username paste it right here and your password and go ahead and paste it right here okay and once you've done that just click on log in and you'll be able to log into your C panel so be about to aage that looks just like this right here and I know there's a lot of options but don't worry the only thing we need to do is install WordPress and then we're just going to design our website it's very simple so right here go ahead and scroll down just keep scrolling right here to software and this right here quick install click on quick install and right here you're going to see three options just click on WordPress for free right here it says select your domain go ahead and select the domain that you have purchased so I have a lot of domains you guys can tell I have I have quite a few domains maybe too many so go ahead and give your blog title a name you can change this later don't worry so I'm just going to put Parallax admin user I'm going to put um I'll just put my name Daryl first name last name and then an admin email so maybe just put in whatever email you would like I'm going to put in something like uh put in my standard email and I'm going to click on term of service agreement and then I'm going to click on install now so WordPress is installing so this might take some time guys might take around I don't know oh that was less than 5 Seconds okay so right now what I want you to do is I want you to actually take this information right here and save this so go on over to something like a like a notepad and go ahead and just jot this information down so the username Was Daryl and then right here is my password just in case we need this information okay now going back over here so right here install to Etc all right so all we need to do is click on this link but before you do that if you're brought to an empty page where there's like nothing there you can't log in Don't Panic sometimes a lot of the times WordPress does take time to propagate it can take anywhere between a second to an hour to two hours I know on it what is it like uh was that St Patrick's Day it took me around 3 3 hours to propagate so if it doesn't do it right away Don't Panic it's a totally common error or not not an error but it's just a totally common thing if it takes longer than an hour go ahead and give HostGator a call and they can Pro probably manually propagate it for you okay but right now I'm going to take the Gamble and I'm going to go ahead and click on this link right here let's see if it works all right it worked so right here click on admin login and go ahead and enter in that username that you have and the password so right here is the password and just enter in that bad boy right there and click on login all right guys congratulations we are in our WordPress dashboard this is where all the magic happens this is where we create our website so we have done all the technical stuff all the hard stuff we have done now it's time for the easy stuff such as designing our website so right here I'm just going to go ahead and set these options you can go like I don't need help they just give you a bunch of advertisements you know like you need help Etc right here I'm going to do no thanks your site is currently displaying a coming soon page I'm just going to go ahead and click there and launch it so my website is now live this website is now live on the internet so going over here I can click on visit the website and there it is very ugly right it's very very ugly don't worry we're going to make it look really really really good so really quickly I'm going to go ahead and drag this over here I'm going to delete all of these things right here because we don't need those anymore and now we're going to install our websites oh I meant theme so we're going to install our theme right now but the first thing I want to do is go on over here to our dashboard and we're going to change some settings first so right here under settings go to permal Links now this is very important so we want to change it to post name now the reason why we do this is because these are how your links are displayed now when you go to a website doesn't say like your website.com dhab or- Conta right not this 1206 234 blah blah blah blah blah so make sure it's on post name and click on Save changes and then let's say you want to change your password so right here under users click on all users go ahead and select your username right there and go ahead and scroll down right here under new password go ahead and click on generate password and right here you can just delete that and enter in whatever you would like and then once you're done with that you can click on update now that will change your password okay so that being said let's go ahead now and install our WordPress theme so right here under appearance go to themes all righty and they have a bunch of themes you know uh right here just click on wordpress.org themes we are going to be using the number one rated Parallax theme on WordPress so over here in our popular go ahead and just type in Access press access press and we're going to see that we have access press Parallax right here now this is a very big company they're very reputable they have a lot of other themes but we're going to be using this one right here for this tutorial so right here you can click on details and preview to check it out really quick and right off the back you guys are going to see it's super highly rated you know 81 positive review ratings so all you need to do is click on install it's installing and then click on activate all right so our theme is activated and if you want to look at your websites all you need to do is go on div visit websites and there we go this is your website congratulations now now it does have a pre-made template so we will be deleting most of this and putting in our own contents but I mean look at that it's it looks great it already looks great right so now let's go ahead and get started the first thing I want to do is maybe change this slider image and this text right here but before we do that let me introduce you to the theme customizer okay so right here under dashboard now I am going to open up a second website right here just so I can show you exactly what I'm referring to so going back over here we're going to go to appearance and go to theme options and this is basically the page builder this is where we create Parallax sections we create the slider settings our Social Links all sorts of stuff it's really easy to use so Parallax sections so each page is a section so this is a section this is a section this is a section and this is a section and all we're going to do is just make each section one by one and just knock off the website in about I don't know let's say let's give it an hour and right here is our slider so if we want to make changes to our slider or our options this is where we would mess with the slider so let's go ahead now and create a slider the first thing we're going to do is going over here to posts and we're going to click on add new all right so the first thing we're going to do is just give your slider a name so right here put uh welcome to par and I'm going to get some dummy content really quick some dummy text this is my favorite website to get some dummy text you don't have to follow me I'm just grabbing this just for tutorial purposes just to fill in some space so right here I'm going to put in paste now where it says set featured image this is where you're going to put your image slide now if you need some uh images right here go ahead and go to unsplash.com and you can get some really nice beautiful images in fact these are the ones I actually grabed gra for this tutorial and this is one I grabbed right here I am caught red-handed so that is one I use so you can you you know go through all these pictures and check these out now when you download these pictures they're not going to be the correct size you you sometimes will get lucky and it will just fill up automatically like I got lucky with one of them but the correct size is 1,900 by 800 so if you download one of these they're actually going to be a little bit bigger so in order to change that once you download one of these images you'll need to go to picmonkey.com and this is like the alternative to photoshop it's a super easy uh way to to edit all your photos for future reference simply go to edit right here and then just grab the image that you downloaded so let's say this one right here the dimension is really really big this might not fit in my slider so I click on open and this is actually good because this will actually drastically reduce the size resulting in much faster loading time so right here just click on resize change it to or actually right here take this off and just go to 1900 by 800 there you go click on apply save and you want maybe the best quality right here and save to your computer and that is it if you save it there you go you can now use this for your slider so that is how you resize images for your slider okay instead of doing Photoshop this is like the super easy way to go all right so going back over here I'm going to click on set featured image I'm going to click on select files and I'm just going to go ahead and grab one of these images that I have personally uh used before so the slider image this is 1900 by 800 you guys can see so this is the correct size now this one actually works too this is 5,615 by 290 it's a very large picture but it also still works so sometimes you'll just get lucky it'll just fit you know so if you want to do trial on air you can do that but the correct size is 1,00 by 800 I'm going to go to open and it's going to load this image onto our slider so set featured image now the most important thing you must do is go to add a new category and select slider so this is the slider category so for now on all these posts we make these will be the slider category all right now we also need to add a call to action button so right here you're going to go ahead and double space and you're actually going to enter in this little piece of weird little code and don't worry I will have this in the description for you all and I'm just going to go ahead and paste that and make sure it's under the text tab not the visual okay so there's a text and the visual you want it under the text so it looks something like this right here all right and it's very simple guys all you need to do is backspace this little number sign and enter in your website or enter in wherever you want them to go so I'm going to put HT ATP and then I'll put visit right here I'll put visit website or visit and that's it the slider is ready to go so I'm going to click on publish now all righty so we created this slide so we've successfully created this slide now we need to put it on the website so going back over here to appearance go to theme options and guys this is basically how each section works so once you learn one section you learn them all it's pretty simple there are some exceptions but we will talk about that a little bit later when we get there so click on slider settings select the category which was slider right now there's some options right here I want to actually remove those little black dots you guys see right here we have these black dots I don't want these black dots there so I'm going to go ahead and say Yes remove the black dots I do not want the overlay scrolling down so the slider transition do you want it to fade do you want it to slide horizontally or slide vertically I like fade so I'm going to leave fade now the transition speed so this is actually Ms so this is 5 Seconds this right here is 8 seconds so I'm going to do 5,000 and I'm going to leave the slider pause duration at 5,000 as well you you're more than welcome to you know uh change it to however you would like but I think 5 seconds is good now I'm going to click on Save options and that's it our slider is live so going back over here I'm going to refresh this page and there we go our beautiful slider is all set and ready to go congratulations and right here I'm going to click on shift and open this in a new window if I click on this it's going to go to my website so darl wilson.com because that's where I told them to take me okay so that is how we create a slider now let's just create one more just for tutorial purposes okay now another quick shortcut instead of going over here we can just go over here to post just like that and right here I'll put cool Parallax website I'll go ahead and put in some um actually I'm going to put in this call to action right here because I already have it copied do I oh no I don't okay so I'm going to copy this dummy text right here put it in right here and I'm going to get the button which is this right here and not to worry guys I will put that in the description and simply just go ahead and paste that again and make sure that the slider is checked you must make sure the slider is checked and set a featured image so I'm going to go ahead and go to upload files select files and I'm just going to go ahead and grab any image this time I it's probably not going to look good because I haven't resized it but let's just go ahead and gamble I like to gamble so let's just use this one all right so the image is uploading so remember when you have the slider category checked that means anytime you make a post it's going to be on your slider because you have the slider category checked okay set featured image and publish and guys the slider is probably the hardest thing everything else is like a breeze I mean this was pretty easy but everything else is even easier so don't worry so going back over here let's go ahead now and check the site voila we have a beautiful picture and it actually fit perfectly so like I said uh if you don't want to resize it just go ahead and just upload it see if it works and if it doesn't work you know resize it if it does work then go ahead and just you know change it check it out and if I click you see the fade and goes to the other slide so that is how we make slides super easy super easy let's go on to the next section okay so I'm going to close these right here yeah leave leave leave but make sure to go to unsplash you know it's a very very good resource to get some free images so the next thing we're going to do is do our featur section so really quickly uh going back over here to our dashboard all we need to do is create a page for it so right here under Pages click on add new okay so go ahead and just name it whatever you'd like so I'm going to put features and all I'm going to do is just click on public this time all righty just like that now we're going to go over here to post and go to add new so basically this is what the page does let me explain it a little bit more in detail so right here we created this page now the featured section so now we're creating this section right here all right so the page basically creates this section and the posts create each little section in the in the page so we've made the featured section now we're going to make each little icon for it so I'm going to put best or uh I'm going to pretend we're an SEO company or something or SEO or 100% money back something like that you know 100% money back and I'm going to go over here again and go to Google and get some dummy text actually you know I'll just grab their dummy text let's just do it like this I'm I'm lazy I'm we're grabbing their dummy text we're stealing it all right so I'm going to go ahead and just paste this in just like that now I'm going to create a new section and this is going to be features all right so remember this features is for the features page okay so next scrolling down we want to get those cool icons that I had earlier right now there is a very cool website called icon archive that you can get those icons archive and these are free images images so you guys can uh you know check these out and uh you know download any of these click on it and just you know download it and then right here save image as and then just go ahead and save it now generally these images will automatically resize in the theme so the theme does all the resizing for you so thank you so much so that's how you get the icons feel free to check all these out right here there are a lot that's is where I got my images my icons I mean so uh you know go ahead and check these out there's a lot of good ones they're very modern they're cute they look nice you know they're they're good they're good ones all right so once you have downloaded your icons go over here simply go to set featured image upload files select files and go ahead and just upload the icon so this is one I grabbed and it's same size 512 x 512 I'm going to click on upload set featured image and I'm going to click on publish now I'm going to create one more let's just do one more okay so add new what's another good one what's another good what's another good thing to say to customers and money back guarantee and then something like um uh I don't know best Services best services and then we'll go ahead and just put them some Demi text and then select features and then select the featured image upload files select files and simply just go ahead and grab in an icon okay set featured image now publish so remember the posts are within the page all right so now we have made the page and we made the posts now we just need to assign it okay so right here under appearance go to theme options it took me a while how to learn this page builder but I kind of I kind of like it now you know I kind of like it so right here in The Parallax sections we need to actually create our first section and this is actually going to destroy all the pre-made layout so this is all going to be gone so rest in peace but over here under add new section just click on add a new section and select page now they actually have page templates for us okay so we have features right here and then right here under the layout so this section right here is the services section this is the portfolio section so they have actually created pre-made layouts for us to keep it even easier so this is the service section now select a category remember it is the features okay so this is the features page the features category which are the posts and this is the layout all right so all I'm going to do is click on Save options and you're going to see our website start to change so I'm going to refresh there it is features features and then there are our cool little icons so I'm going to go ahead and add two more okay just to teach you all how to do this so posts add new amazing websites simply just go ahead and drag this now I'm going to select features under the posts because this right here are posts okay now going back over here I'm going to click on set featured image upload files select the files and I'm just going to go ahead and grab this one right here I addit blue red and then I got to do blue again yeah to give it that cool look I already did that one okay all right set featured image and click on publish now all right and now I'm going to do one more add new cool web site simply just paste this in click on the features section because that's the section that we are putting these icons in set featured image and I'm gonna grab one more let's do the red one this time all right set featured image and click on publish all right now we're going to go back over here to our other website or it's the same one and just refresh it and you're going to see that there's going to be two more icons so that is how we have this beautiful section right here and you can add as many as you want guys and it's just going to make that beautiful animation everything is automatic so that's really really really cool okay so I'm going to go ahead and do the next section now so we know how to do our slider and we know how to do our features but really quickly I'm going to get the demo right here it'll help guide us so access press Parallax demo and it is right right here okay so this is going to be our little uh navigation so this is the featur section next let's go ahead and do the portfolio section okay so going back over here we we need to actually create a page for it so go to add new Under pages and just enter in portfolio or whatever you would like you know I'm going to enter in portfolio and all we need to do is just click on publish okay now we want to actually create some posts in here so right here we kind of want to add these right here we want to add products in our post so over here we're going to go to posts and go to add new and just give it a name you know um amazing China and I'm just going to enter in some demit text now right here we're going to do portfolio Okay I like to keep it the same name as the page just to reduce confusion so now this section is only going to show up in portfolio Okay so setting a featured image click on set featured image upload files select files and we're going to grab this one with China there's like a little uh they have like a Great Wall of China One let's see here uh um you know I just saw earlier let's see here or I can just do this one right here yeah we'll just go ahead and grab that one maybe I didn't put it in correctly oh there it is okay so there it is right there okay so that is uploading and I'm going to click on set feature image now I'm going to click on publish okay so remember we made the page and we made the post within the page now we have to assign it okay so going over here to appearance we're going to go to theme options and we're actually going to enter in our first Parallax section so right here we're going to go ahead and enter in a really cool Parallax effect so going back over here The Parallax sections click on add a new section select the page which was portfolio select the layout which was also portfolio this is the portfolio layout and you can change the font color the background color Etc and then for category remember we made one for a portfolio Okay so that's very important that you use that now let's create The Parallax effect now guys there also is a Dropbox in the description and that is with every single image I have in this tutorial so feel free to just download that if you guys would like or you guys can use your own pictures whatever you would like now right here under the background image I'm going to click on upload upload files select files and I'm going to select bubbles so these are my little bubbles that I have and I'm going to click on open now the size for this is 1,229 by 7 by 768 so I'm going click on open okay so there it goes it's going I believe the correct size is 2,000 by 1,30 1,333 and I'll put that in the description as well and you guys can also check my blog for every single image size but I believe it's um 2,000 by 1,333 but a lot of these images will work just fine so I want to set the Parallax effect I want to have it have that really really cool animation where if it Scrolls down it looks like you know it's it's sitting there and it it follows you know so in order to get that effect right here I'm going to go ahead and do middle center now right here fix in place actually gives it The Parallax effect okay now for background setting I want it to cover so that means I want it to cover the entire section okay you can choose to have an overlay or not all right now also you can have a background color over this Parallax effect so let me show you what I mean I'm going to click on Save options now let's go ahead and refresh this page we should see at least one little post and there it is so there is the the the chiny and right here if we scroll we can already see The Parallax effect come into play really cool see that so the parallx effect is there and remember you can have this for each section guys you can make your entire website Parallax so right here let's say I want to add in that blue overlay around it or any overlay we can add in any overlay Under The Parallax effect to give it whatever look you want for your website right here or is it yeah right here going back to Parallax sections so the portfolio section which is the one we're doing click on this background color select purple let's do like a purple right here and then click on Save options okay now let's go ahead and refresh the page and check this out all right now we have that really cool beautiful purple look to it so that is a super cool look and our website is already starting to look good I mean this already looks like a beautiful landing page they have these cool icons and we have The Parallax effect right here now since you guys have been watching this so far this section right here I want to just make a quick note you can change this section they do have this little note that says you can only change it in their pro version but don't worry guys I'll help you out with that we will make this any size you want it to look but I will talk about that towards a little bit later in the tutorial okay don't worry I got your back we will talk about how you can change everything all right so let's go ahead and make one more let's get a little bit more comfortable and make another portfolio post all right so right here under posts I'm going to click on add new now I'm going to do something like amazing building and I'm going give this some description I want to set it under the portfolio Okay okay make sure you don't get these mixed up so portfolio all right I'm going to set the featured image and what should we do which which one should we grab huh let's let's find a good one I know I have some good ones we'll just grab this thing right here yeah we'll grab that so this is our second portfolio product or our our our second I I guess picture portfol I don't know what you want to call it's our SEC it's our second portfolio so so there is the image I'm going to set the featured image and click on publish and remember guys this theme will automatically assign all these into the correct category and it actually gives us that really cool effect so if I refresh this you're going to see a second picture come up right here in portfolio I'm going to refresh the page voila and it has that really cool animation that's why I love this theme it those animations are just I mean that's money people buy that stuff they look at that they're like oh that's a really cool look this website's amazing I'm going to buy something on it that's how people are on the internet trust me so I've showed you how to do the portfolio section we made two portfolios and if I click on it you're going to see that it has the um the text right here and whatever you want to talk about it people can go right here comment on it Etc and I know I talked about the social shares but we will talk about that a little bit later when we talk about widgets okay so just hang tight all right so congratulations our website is basically halfway done so so now let's do the portfolio section so right here you guys are going to see we have team so I'm going to show you how to put in these images with this little title this subtitle and the description okay so it's basically the same way guys you know this is a repetitive process but it's very easy we're going to go to pages and go to add new and really quickly guys I want to remind everybody please stay till the end of the tutorial to watch everything there are some sections that that are a little bit different so please uh what happens is usually people watch a little bit they I know how to do this and they leave and then I see their comments a little bit later saying oh how do I do this and I says it's in the tutorial you didn't watch it so please make sure till you stay till the end to watch everything okay so now let's go ahead and do the team so I'm going to put team right here and simply just go to publish so we're just creating a section all right now we're going to go to post right here and go to add new so here I'm going to put Loki and then right here I'm going to go ahead and put I'm going to change that to visual make sure this is under Visual and also right here I'm sorry right here under the the the toolbar toggle go and click on that I'm going to put evil evil guy and I'm going to change this right here to a bigger font so I'm going to put heading to scrolling down here I'm going to enter some dummy text so I'm going go going to just um I'll just grabb this dummy text right here okay so under that title I'm going to put some description and then right here under add new category we're going to want to go ahead and do team okay so team now he needs a picture so right here under set featured image go ahead and click on that upload files select files and I'm going to grab the picture of Loki there he is so this is 590 by 590 I believe the theme resizes them for you I'm not 100% sure but uh I think the recommended size is like 500 by 500 a little bit bigger a little bit less you won't see that big of a deal so set featured image and go to publish all right so we made the we made the the page for team we made the post in the page now we need to assign it just like before so right here under appearance we're going to go to theme options we're going to go to Parallax sections we're going to go to add a new section select a page we did the team so we're we're grabbing the team and right here under layout we want to do team section now you see how the category comes up right there go ahead and select the team category all right now click on Save options and you can you know you can add a parallax effect to this guys so under this section right here if you want to add in The Parallax effect all you need to do is upload an image you can change the font color Etc okay so remember every single section you can have a parallax effect just want to remind everybody that this is the ultimate Parallax tutorial okay so right here I'm going to click on Save options now we're going to go back over here and refresh the page scrolling down there he is and if I hover over him you see how it says Loki evil guy and the description so let's make one more okay right here I'm going to go to posts and go to add new now I'm going to do uh what's his brother's name again I totally forgot Thor duh okay so Thor hero and I'm going to change this right here and then we will add in some description a little bit more and I want to select the team okay because that is the category we are working on set featured image I'm going to upload the file select the file and now we're going to select Thor that's Hawkeye we don't want to grab Hawkeye I think he's like the weakest Avenger I I don't know he's he's uh he's kind of yeah so there's Iron Man Scarlet Johansson but we're going to look for Thor there he is so Thor and guys this is around 500 so 421 by 9 by 594 okay set featured image and just publish that and now this is going to show up on our team section so right here I'm going to refresh the page voila there he is Thor awesome so we have Thor right there and we have evil guy right there so right here this actually I accidentally centered that so that was a mistake so right here I want to change this to basically heading to right there just like that and click on update and you guys can also fix these right here like for example if I if I highlight all of this I can align Center I can align to the right I can align to the left Etc so that is another way you can you know edit this so I'll leave it centered and we'll click on update we'll see how that looks I I haven't done the centered look yet let's see let's see what it let's see what it adds it'll probably look a little strange yeah because this right here is now it's all that you know that doesn't really look good so we probably want to line that to the left right here to the left and click on update all right now if I refresh the page it should look good there it is so Thor hero Etc okay yeah so make sure line to the left you know um and make sure to use heading to okay so same thing Loki and his brother so that is how you add in the team very simple right very very easy now let's go ahead and do the testimonials so right here we're going to do the testimonial section and we're going to add in a parallax effect on this section right here so over here we're going to create the section so Pages at add new and we're going to do testimonials and just simply publish the page okay now we need to make the post in the page remember so right here under post go to add new and I'm going to put Thor again and Thor is going to talk very good about the company but I'm going to go ahead and just grab this right here thank you very much you guys are going to see that I grab dumy textt a lot because I am just so lazy so there is the text for the testimonial now right here under add new category click on that and add in testimonial add the category and now right here we want to go ahead and select this little head so right here under set featured image I'm going to grab Thor again and set that as my featured image and we are going to publish this now okay so we made the page we made the section and we made the post within the the page so now we need to assign it go down to appearance and go down to theme options all right so Parallax sections we're going to go ahead and click on add a new section select the page which was testimonials right here under layout this is the testimonial section remember they've created the pre-made layouts for us the category is testimonial and under the background image I'm going to go ahead and upload this and select the bubbles and and right here I'm going to click on this fix in place this right here I'm going to do cover okay and this I'll probably just do like middle Center and you can also add an overlay if you would like you can have the dots the black dots Etc but I'm going to do no overlay and click on Save options all right so now it's go ahead and take a look at our website right here I'm going to refresh the page we're going to scroll down and now we have testimonials right there and again we have The Parallax effect with the bubbles so that's a pretty cool design it looks really neat let's go ahead and create one more so going back over here going to posts going to add new and I'm going to put Daryl this time and I'm going to go ahead and talk good about the company and remember testimonials under the categories now I'm going to go to set featured image upload files select files and I'm going to go ahead and grab an image of me so it is right right right if I didn't upload it I will go ahead and just use another one okay I'm just going to go ahead and use Captain America I guess probably didn't put it in the images let's see here yeah okay so we're just going to use this one all right so Captain America we'll go ahead and change the name set featured image Captain America and guys really quickly so you notice how I created the page you can actually just delete this page just start all over again or we can change this right here to edit and we'll do Captain America to change the peral link that is a little quick tutorial on how to change peral links so it looks like we're all ready to go I'm going to click on publish now okay so right here I'm going to refresh the page and you're going to see two of them show up now so Captain America and if I scroll we are now going to see Thor so that's it guys that is our testimonial sections now let's go ahead and do the blog section so right here I'm going to go ahead and go to Pages go to add new and now we're just going to create a section for the blog so I'm going to put in blog and go to publish okay now posts add new so go ahead and give it a name so best places to go or best beaches in California and right here I'm just going to go ahead and shoot in some dummy text you know I'm getting really lazy there I'm I'm just going to get some real good ones I yeah I can't use that for everything you know I want to make it look a little bit more cleaner so I'm going to go ahead and copy this and I'm going to go ahead and delete this and paste that right there all right now right here I'm going to go ahead and put blog so this is our blog category now let's so let just give it an image right let's make it look good images are everything on a website I cannot stress that enough people truly buy images more than the product itself so I'm going to go ahead and just put in something like um this right here and I grabbed all these images guys from unsplash so unsplash is a very good resource to go to to check images out they're a great resource all right so there's the beach I'm going to click on set featured image and we're ready to go so I'm going to click on publish now now I'm going to make two more really quick all right right so right here I'm going to do uh nice building and then simply grab this paste that do the blog set the featured image and I'm going go ahead and grab another one right here so I'm basically just creating more blog posts that's all I'm doing right now just because I don't I don't want to you know introduce it just with one blog post I kind of want three to show up because it adds that really nice effect with the graphics you know you you'll see you'll see what I'm talking about so I'm creating my second blog post right now okay it is almost done all right set the featured image and remember it's under categories under blog okay so I'm going click on publish here and I'm going to go ahead and make one more I'm just going to do the one with China so China's best spots and right here I'm going to paste that dummy text click on blog because that's the category I'm in go to set featured image because I want to put the picture set the picture and publish so now I have made three blog posts now let's assign it to our website and we can also add in an additional Parallax section so right here under appearance we're going to go to theme options okay so parallx sections right here here and add a new section and we're just going to use the blog this time so select page the blog page we're going to go ahead and click on the layout which is the blog section and the category which was the blog we made and here I'm going to select another image so I'm going to click on upload and I'm going to click on upload files select files now I believe the correct size for this is 2,000 by 133 okay I will put it in in the description for you all just to make sure that you understand every single image size so right here I'm sorry this is, 1900 by 800 this is the image size I use for the blog okay so 1900 by 800 for the blog click on open all right and I'm going click on select and right here fix in place and do cover and I'll just do uh middle Center and I can add an overlay to this maybe I should do the the light black and I'll do save options now so now we've created our blog section all right so sections features portfolio team testimonial and blog so going back over here now I'm going to refresh the page and you're going to see our blog now so scrolling down beautiful beautiful beautiful beautiful blog I like how they just come in there now notice how this is a dark overlay do you see that that is what the overlay actually does so if you want to add this effect you can do that or you can actually add in the color like I said but it's like a double Parallax effect right here so this section right here is Parallax and then it introduces more Parallax right here so the more you scroll the more of the background image that you see so that is how we create our blog so the next section we're going to do is the video section and then after that we're going to do the call to action and those sections work a little bit differently than these other ones they're a little bit easier but I just want to make sure that you understand how to use it so right here under dashboard I'm going to go right here actually let's do this one right here so we have two tabs open I'm going to refresh both of these and use this one right here okay so right here I'm going to go to dashboard and I'm going to go to pages and go to add new and right here I'm going to put video and this actually is the section where you're going to talk about your video so I'm going to go to YouTube right here and go to one of my videos you need a website you know I see that ad all the time it's so annoying it really is so right here under share you want to click on this and you see where it says embed go and click on embed and just take this code I'm going to copy that all right now let's go back to our page now under the text section I'm going to hit enter twice and just put that right there that's it so the video will appear right there and then right here you can talk about your video so um learn learn all about the Y plug-in in this WordPress in this sorry in this YouTube video it's very helpful and that's it guys so this is the video section so I'm going to click on publish and then going over to appearance here we need to actually insert this into our theme so right here go to theme options Parallax sections we're going to go to add a new section and we're just going to add the page so right here I'm going to put in video now if I go to layout and go to the video section I'm sorry we're going to leave it under default so for the video you have to leave under default and you're going to notice that you don't get a category this time that's because we're making it on the page okay and you can change the font color for this section and also the background or you can actually just go ahead and add in another Parallax effect by uploading an image but I just want to leave it stock I don't want to add anything else so I'm going to click on Save options all right now I'm going to go back over here and refresh the page and scroll down keep scrolling and there we go so we have learned all about the Yos in this video and they can play it right here on our website so pretty cool right now also this text right here is not cerly aligned so in order to do that we have to go back over here to our pages and we just need to align it properly so video page and this section right here I'm going put this under visual I'm going to grab this and go to Center align and go to update all right so that's it for the video section that's a pretty easy section to put in you're going to have to use the default section now let's go ahead and do learn more all right so I'm going to go right here to pages and go to add new and we're actually going to create this section right here so this section right here it says you know for news Etc we're going to create this section right here so going back over here I'm going to do something like uh learn more and right here I'm going to go ahead and just put in some dummy text we're going to write on the page again oh no that's not correct so I'm going to enter some dummy text right here now for this section the learn more section remember you're going to write on the page you will not going to create a post for it okay so right there that is it and all I need to do is go back over to that little notepad thing and take this button right here so this is the button and don't worry guys I will put this in the description for you all so you can understand how to use it so the text scroll down here and now I'm just going to go ahead and insert it okay and remember when you ever enter in like this coding stuff it must be in text do not use the visual or it will not work okay so I'm going to click on publish here all right now I'm going to go to appearance and go to theme options and we're going to add in this section section so click on Parallax sections add a new section and right here in our page we're going to do learn more and under the layout it's just going to be a call to action that's it and you can change the font you can change the background color now if you notice again there is no category right here so that is how you know that it's only the page so there is no category for the call to action section so we do not need to make any post for it so right here I'm going to click on save an option and now we're going to check out how it looks you know maybe let's give it a color let's give it a color you know we're we're too bland so background color let's give it like a a green or let's give it a color like this there we go that looks much better so going back over here I'm going to refresh the page and if we scroll down we now see a call to action section so that is how we would create the call to action section very easy very simple now we're actually going to create the woo Commerce section we are going to make this eCommerce friendly all right so the first thing we need to do is actually install the woocommerce plug-in so going over here we're going to go to plugins and go to add new and if you guys have no idea what plugins are plugins are basically like apps think about your website like an iPhone and these are all apps so giving you a little description about it all these things do different features like this is a cont tech form this speeds up your website this makes it SEO friendly this gives it a capture this right here is woocommerce and we are going to install this one and you guys can see it has over 1 million active installs it's the best it is the best uh e-commerce plugin for your website hands down trust me I've used a lot and W Commerce is by far the best so go ahead and click on install now all right and activate all right and you'll get a page that looks like this just go ahead and say let's go all right so it's going to automatically create these Pages for us it's going to create the shop the cart the checkout and the my account for us okay so I'm going to click on continue Now where's your store based so I'm going to go ahead and do California I want it in USD and I'm going to go to continue and right here you're going to put yes I'm shipping Goods or no so I'll just put yes and I'll just ignore the sales tax for now and you will need a PayPal account for this so right here I'm going to do PayPal standard and I'm going to enter in my PayPal email address right here and I'm going to go to continue and don't worry if you're new to this I have another tutorial for you do not worry I cover this very extensively but for now we're just going to cover the basics so I'm going to go create your first product and go ahead and give your product a name so what are you selling well I'm going to go ahead and just put watch or Gucci watch and right here I'm going to enter some dummy text so this right here is going to show up below your product and just bear with me I will show you exactly what this looks like once we're done so is this a virtual or downloadable product well it's a physical product how much does this cost well I'm going to say $199 inventory so do you want to show people how many you have say sure I only have five left do you want to allow back orders you could put yes or you could put no stock status is this in stock probably yeah so let's leave it in stock shipping you can go ahead and give it how much it weighs and then Dimensions right here like the length the width the height link products we will cover this in another tutorial attributes we will also cover this in another tutorial and the advance this is basically the note they receive once they make a sale so purchase note I'm going to put thanks for buying and right here under product image we need to give this product an image so I'm going to click on set product image go to upload files select files and we're going to go ahead and just grab in this Gucci watch right here okay so I'm going to grab that watch so we have the description for it now we we need a short description and this description is going to show up right next to the product so the best Gucci watch Ever okay and I'm GNA give it a tag maybe watch and I'mma add a product category for this okay so right here I'm going to click on this and put in Gucci don't worry uh I will talk a little bit more about all the settings in just a little bit okay I know I'm going through this product a little bit fast but I have many many many many other tutorials that go in depth about woocommerce so I basically set everything ready to go right here I'm going to click on publish okay now if you want to see the product just click on preview changes right here okay there is our product really super cool so the best Gucci watch Ever we have five in stock and here's our product description and people can actually leave reviews they can leave a rating Etc whatever they would like this is the Gucci category and this is our watch section okay now I want to actually add this to our homepage okay so in order to do that we're going to go over here to pages and we're going to go to all pages all right so scrolling down right here this is our page this was the page that woocommerce created automatically now the problem is there is no short code here so if I add this to the theme customizer it's not going to show anything so let me give you an example we want to add the shop page right here to the front page of our website so let's do that let's go on over to appearance and go to theme options okay and Parallax section we're going to go ahead and add in a new section okay so we're going to leave it as the page we're going to put it as shop because that is the shop page now we're going to leave it as a default section right here and you can choose to add in a parallax effect same thing font color Etc so I'm going to click on Save options right now so we're basically just adding this shop page to our website okay now if I go over here going back to home and if I refresh the page and now I'm going to scroll down right here now I'm going to keep scrolling just keep scrolling just keep scrolling right here so you're going to notice that we have the shop page but we do not have any products now the reason why that is is because we need to put in a small short code that W Commerce will give us so I'm going to go to Google right here this is also in the description I'm just showing you guys a little bit more just in case you guys you know start to Branch off by yourself I'm going to show you a resource where you can start to learn this stuff from so woocommerce short codes and don't worry all you need to do is enter in one so woocommerce short codes I'm just going to click on one of these right here or you can go to the the wo Commerce page don't worry I will put all these in the description okay so really quickly I need to enter in products so I need to put in the woocommerce products right here you know these are not I think these are not the correct short codes so products okay you know let me get a better resource for you all we're going to go to woocommerce itself and the reason why people actually enter in these short codes sometimes when you actually create the pages sometimes the pages don't create so that's why woocommerce actually created the products right here so going down right here so I'm going to keep scrolling just keep scrolling all righty I'm almost there so this all products to sale so let's keep going down I just want to do all products there it is products just like that okay so products we'll list all of our products okay so going back over here I want to go to our pages and go to all pages now I want to go to the shop page okay and I want to put in that short code there so I'm going to go to text and I'm just simply just going to paste this and now I'm going to go to update all right now let's go ahead and take a look at our shop now this is only if you want a shop on your website so I refresh the page and I'm going to scroll down on our beautiful website and voila we have the watch there so anytime you enter in a product it's going to show on your front page okay so all these short codes right here for example if you want featured products recent products on sale products however you categorize them now I do have another tutorial on this right here so this is my channel right here I'm going to go to videos and this right here is how to make an e-commerce website now this tutorial will cover everything in depth it will cover all the products all the settings everything so I will link in the description and I believe it is around you know I'll put the time for you guys in the the description so you guys can fully understand everything there is to know about woocommerce okay but in this tutorial guys I honestly didn't want to cover it because it's just so much to cover and maybe some people don't even want a shop page on this website right so that is basically how you would put in products onto the shop page but remember I will put in the video for the um woocommerce tutorial because it's it's just so much to cover guys and I it'll be like another 2hour video and I know you guys don't want to sit here that long so uh that is basically how you use the shop okay so remember I will put everything in the description also be sure to check my website because I will actually have a blog post about just the shop module okay so now let's go ahead and move on I'm going to go ahead and close all these right here close all these right here and I'm going to actually refresh this page refes both Pages just make sure I don't overlap each other basically like one website will save over another that's happened to me a lot so that's what I did not want it to happen now let's go ahead and do the contact us section all right so the first thing we're going to do is actually install some plugins and we are going to use that as our contact form so going back over here to the dashboard we're going to go down to plugins and just go and click on plugins and it's actually going to recommend all these plugins so we'll install the uh the ultimate form Builder lights the Twitter feed the social share and the social icons okay so go to begin installing plugins and click on all these and click on install and remember uh plugins are basically just like apps for your websites they just give it an extra extra stuff you know it makes it look good and it does things that the website normally could not do by itself so right here I'm going to go to uh return to required plug-in installer now we need to activate these so I'm going to click on this and I'm going to click on activate all right cool so we activated all the plugins now I'm going to refresh the page oops I get error sometimes okay so I'm actually going to reog in I think I timed out so I'm going to have to relog in okay so there we go now you guys have noticed that we have all these new gadgets on the left side right here all these cool little things right here and also we have this forms and this is what we're going to use in order to have the contact us page so let's go ahead and create a new form so right here go and click on new form and go ahead and just give your you know form a title so we're going to do contact form add a form all righty now right here we're going to do a single line text field so this is going to be like for their name okay so settings we're going to put your name right here your name now do you want this to be a required field if you do go ahead and check that if not uncheck it all right so all I need to do is just click on Save the form all right so we have your name right here now maybe you want to do subject right maybe you know your subject Etc so right here I'm going to go ahead and enter another one and right here I'm going to go ahead and put subject so settings subject and I'm going click on Save form and then right here I'm going to do email address so email address go to settings your email and we'll make this required okay and I'm going click on Save form and next we can do something like uh single line field and we'll basically want to do settings and right here we can put your message just like that and if you want to make this required you can do that we'll put Max characters at maybe 200 and go to save form okay and then we need to add in a button so right here we'll do submit button and we can go to settings and you can change you know the submit label if you would like but I'm just going to go ahead and leave it blank and go to save form okay so pretty easy so your name subject email your message and then submit so display settings you can choose how you want this to be displayed they have templates so you can go ahead and go through some of these figure out what you would like something like this or like that and either have template five that's a cool looking one but I'm just going to go ahead and leave it as default click on Save form now the email settings same things so where do you want this email to go so right here I'm going to put my email address and then from email right here I'm gonna put Daryl Bolson new form from we go ahead and put in that right there okay and then we'll click on Save form okay and also this right here is more read more WordPress resources so you guys can go here if you guys want to you know learn more about that so let's go ahead and take this piece of little code and just like we did for the shop we're going to do this for the contact us section all right so going over here to Pages click on add new and we're going to do contact us and right here under the text all you need to do is just go ahead and paste in that code and go ahead and click on publish okay so now let's go ahead and add this to our website right here under under appearance we're going to go down to theme options all right and then we're going to go to parall sections and I'm going to add a new section and right here I'm going to do page which is our contact us page and under the layout we can go ahead and just leave it as default you can choose to have a background image so I'm going to put a parallax bubbles on this right here and uh we're going to do fix in place we're going to do cover because this gives it The Parallax effect and I'm just going to save options all righty so I'm also going to go ahead and visit the website now and we're going to see how this looks I'm also going to refresh this one just to keep them both updated so scrolling down we're going to scroll down just keep scrolling just keep scrolling and voila we have a beautiful contact form on our website and we also have The Parallax effect behind it you guys can see that it has that really cool bubble animation but I want to actually show you guys how to be a little bit more decorative with your contact form this is a good contact form with the contact us but maybe we can make it look a little bit better kind of like how they did it in their demo so I'm going to show you right now how to do that so I'm going to go to my other website right here and I'm going to show you what it looks like so we have our basic contact us page but this is my other demo that I created and if I scroll down right here to the contact us page you're going to notice that this looks really neat and they have this text it looks really professional so I'm going to show you how to do that so let's go back over here to our website and I'm going to go to our dashboard and we're going to go to the contact us page so right here contact us now there is a in the description there is some text that you will need to enter and make sure that this is under text so right here I'm going to click on paste now you're going to see all this weird stuff come up right here now all you need to do is make sure that this section right here I'm going to copy this I'm going to go ahead and cut it actually is right here right here and I'm going to paste it in there okay now I'm going to click on back right here and all you need to do now guys is just go ahead and fill in your information so go ahead and put in your email address address uh your address right here your city your state if you have a Skype you can go ahead and enter whatever you would like and it's actually going to appear on the other side of the page so I'm going to click on update and I'm going to show you all right so I'm going back over here I'm going to refresh the page oops that's my blog post going back scrolling down here keep scrolling just keep scrolling just keep scrolling and there you go so now we have this text on this side and if you guys try it by yourself it will not work like this you need to enter some brackets and a little bit of script to get it to look just like that okay and another thing I want to mention is that we activated those plugins earlier and if you go to your blog and you click on one of these right here you're going to notice that now we have those social icons that's because we activated all of those plugins and if I just click on one of these you're going to see that they can share this right to their website or right to dig and all their favorite social media websites so that was done with the social share plug-in it's all automatic it's really really really cool okay so now let's go ahead and do the map so going back over here I'm going to visit the site on both of these all righty so I'm going to scroll down right here and now I actually want to put in the map right here so the map is very very simple guys so over here we're going to go ahead and go down to dashboard and right here under page we're going to go to add new all right and then we're going to put our location and right here we're going to put in some some script so simply just go to Google Maps and just go ahead and put in whatever address you would like so I'm going to put in Avalon Avalon Hollywood it's a it's a it's a club in Hollywood and we're going to click on share right here and under embed map we're just going to copy this code that's it so go ahead and enter in whatever address you would like and then go ahead and just paste it over here make sure it's in the text right here so text and go ahead and paste it just like that all right and I'm going click on publish all righty so that looks good now let's go ahead and add this to our page or to our website so going back over here to appearance going down to theme options we're going to click on Parallax sections add a new section this right here is our location and the layout is going to be Google Maps section and click on Save options okay now if I go back to this website right here and I refresh it you're going to see that there's a little tag now where people can actually click so this is our website very very very beautiful and right here you're going to see a little map icon come up if they click on that it's going to actually show them the location right here is the address there it is so there is our map guys so that is basically a majority of the page now we need to actually talk a little bit more about the plugins we need to talk about our widgets at the bottom how to change the text and also a logo so I know a lot of you need a logo don't worry I'll I'll show you a website where you can get it for just five bucks and they do an amazing job they truly truly do so going back over here to our dashboard so let's go ahead now and introduce you all to the theme customizer so right here under customize you can go ahead and click on that and we have these options right here and these are basically additional features I don't recommend a lot of these because a lot of these can be done within the page itself and there's no really reason to do this but for side identity right here is parallax and we can do like our we our store or our our website so right here you can see website our website and Parallax that will be right there now a site icon so you see right here how the Google Maps has an icon we can actually add it on our own so click on select image I'm just going to go ahead and grab any random one you know you might want to put in your logo and I'll tell you where to get one so that's how it's going to look right here they give us a little preview of how it's going to look right there okay so I'm going to click on Save and publish going back right here these are some colors we can give it a header color or a background color if you want to change the background color or the header text color you can go ahead and do that but I'm going to go ahead and leave it as default going back here is the header image now the header image is actually very outdated and I don't recommend it basically gives an image up here but I don't really recommend doing that so I don't recommend header images they're very oldfashioned and I just don't think they're they look good a background image we don't need this because each of these Pages have their own ability to have a background image and menus so the theme actually creates the menu for us so we have the home features all of our pages so in other tutorials I would recommend creating a menu but for this theme it has all the hard work for us so we don't need to create a menu going back here we have widgets so this is what I really want to talk about so on the way way bottom of the page we need to actually put in some widgets so for footer one right here let's go ahead and add in a widget so under footer one I'm going to go ahead and click on add a widget and let's just do a basic arbitrary text let's just do like a quick about us so right here I'm going to go to arbitrary text and just do like about us you know just do about us and maybe add in some content right here oh that's that's that is not the content we need but uh I'm going to get some dummy text right here my favorite website you guys can tell I visited a lot it's it's a very good resource to get some dummy text and going back here I'm just going to go ahead and paste this in right there now I'm going to click on Save and publish and now you're going to see that we have a widget now so we have this About Us section and we have the text now the reason why it spreads across the entire page is because we only have one widget so this is section one this is section two Section 3 and section 4 okay so going going back over here now let's go to footer 2 so this is the second area now let's go ahead and add in another widget so right here we can add in you know different widgets know whatever we would like we can add in like a a custom menu a category the calendar there's all sorts of really cool stuff so scrolling down here we can add in something like um know W Commerce products so if you have products on your website all the products will list right here so you see how it says Gucci watch we can go ahead and do that if not we can go ahead and add in a different one so right here in order to get rid of this we'll click on delete and the reason why it spreads across the page guys is because there's only two right here so one and two okay so I'm going to go ahead and delete that and just add another widget maybe I want to do something like a calendar let's just do a simple calendar right here this is our calendar so today's date or calendar all right now let's click on Save and publish now what I want to teach you all now is how to do the Twitter feed and also the social icons so let's go ahead and do that I'm going to click on this right here and we're going to first do the Twitter feed so going to dashboard I'm going to go down to our um access press Twitter feed right here and go a and click on this so we need to get some settings first we need to get the Twitter consumer key the secret key the token Etc now this is actually very easy compared to Facebook Facebook's a lot more harder you have to create an app all sorts of really difficult stuff so over here I'm just going to go ahead and go to Google and go to Twitter Twitter consumer key just like that and there's a lot of tutorials on how to find it you know like right here you can just go ahead and you know click on it it'll basically there's a lot of people that tells you where to get it at so right here by register an application on this little link right here I will put this in the description for you all so you basically need to create an app now I have already created one so simply go to create a new app and just go ahead and put in your information guys and then just create your application that's it and it'll give you all that information I will put this also in the description so if you guys cannot find it but I have already created one so once you do this you will get a little box looks just like this so patac is my dog so I just made this for tutorial purposes so going right here I'm gonna click on this now we see all we have all these you know settings right here don't worry about it all need to do is go to keys and access tokens so right here is our API key it's our secret key so going back over here Twitter consumer key so back over here so consumer key let's go ahead and put that in it looks like I have all this stuff already done so right right here is the API secret right here all you need to do is put that in right there right here is the Twitter access token so if you don't have it just go ahead and regenerate one it'll create one for you so this is the access token simply just put that in right there and the other one the access token secret go ahead and put that in right there so I'm going to go ahead and just fill these in it's kind of cool it saves I didn't know that so go ahead and enter in your Twitter name so this is my Twitter name your Twitter account name right here and you can do cash period but I'm just going to go ahead and leave that blank and how many do you want to show I'm just going to go ahead and put five maximum and right here they have different templates you can choose a different template I kind of like this one I think it looks good so going back here I'm going to scroll down I want to display the username display the the retweets Etc and I'm going to click on save settings all right now let's go ahead and add this to our widgets now we can actually go to the theme customizer but we can also access the widgets by going to appearance and going to widgets and this is a little bit more easier so footer one remember we have the text footer two we have the calendar now under footer three right here we want to add in the Twitter feed so all need to do is drag and drop so let's go ahead now and find the Twitter feed uh did I miss it Twitter feeds there it is Twitter feed feeds and just go ahead and drag it over here and then uh our tweets and you can select the template here as well but I'm going to leave it as default and you can also display the follow button so if you want people to follow you you can display it if not just go ahead and uh you know leave it unchecked whatever you would like now let's go ahead and actually visit the website and see the change that we've made so I'm going to refresh it and I'm going to scroll down right here way down to the bottom all right so our tweets so this right here is from a day ago so it connects right with your Twitter so all of your tweets will show up right here that is super cool now the next thing we're going to do is add in some social icons so right here we're going to add in our social icons and these social icons guys are beautiful they look great they are actually I actually have another tutorial about plugins and I actually recommend these as like top five plugins you should get so right here we're going to go down to uh access press social icons and just go ahead and click on that okay so access press social icons all right so here let's go ahead and create some icons so right here we're going to click on add new all right now go ahead and scroll down a little bit and right here it's going to say choose icons individually or choose from available themes we want to go ahead and choose from available themes now go ahead and just select which one you want I I like this one this one's good I like the shadow right here so for example we need to connect these with these right here so for Facebook if you want your Facebook to show go ahead and click this right here put in Facebook now the average size is around 35 by 35 and then just go ahead and put in your URL for your Facebook fan page that's it then right here you can put follow us for the tool tip Okay so we've done Facebook you know that's that's it it's done now let's go ahead and do Twitter you know enough Twitter we we've already we've already done Twitter let's do YouTube or something let's go ahead right here and we're going to go ahead and scroll down to YouTube and I'm going to put in YouTube do 35 by 35 and then right here you're going to put in your YouTube channel and then I'll put in again like follow me and then I'll do one more we'll do LinkedIn so right here is LinkedIn did I miss it oh right here LinkedIn and we're going to put in LinkedIn and 35 by 35 you can make these really big guys you can make them super big but I think 35x 35 is just an average size and go ahead and put in your LinkedIn URL right here and then you'll put uh follow me all right so we've we've made three icons so we've made the Facebook the YouTube and we've made the LinkedIn now let's go ahead and save this and add it into our widget you can also make this vertical you know you can actually go through some of these settings right here I don't want to go over too much of them actually they do have a cool animation yeah yeah we got to do that I like that so if you hover over them it has a really cool animation we also need to give this a set name so we're going to do social one and scroll down and go to save the icon set all right now let's go to our widgets and let's just go ahead and put it in so appearance and going to widgets all right so we need to find the social icons right here I found it and we're just going to drag it to fotter four we're going to put follow us and choose the icon set so it's called social one so I'm going to go ahead and add that in and go to save now it's go ahead and visit our website I'm going to go ahead and refresh this page and you're going to see the social icons now appear at the bottom right there so whoop there it is and if they click on it it's going to open up a new window and it's going to take them to wherever you want them to go so I just put a little you know uh a number sign it just counts as like a dead link but you know uh you know put in your your uh your social profile right there okay so that is how you would enter in your widgets very simple very easy to do now let's talk about the logo we we need to get it a really cool logo so in the description there is a website you can go to called fiverr.com you can click on that link and it'll take you to fiverr.com so right here I'm going to go a and put in logo now these guys actually make really good logos I mean I got my logo from them these guys do some pretty good pretty good work so let's click on one of these just to give you an example of what they can make for us now these guy this guy actually charges too much no no no he's greedy we're going to do $5 so right here I'm going to click on this one and she'll make you these logos for just five bucks and she has a lot of logos you can check out so be sure to check out fiverr.com it is really really cool tons of cool logos you guys can get I I can be on here all day I I love Fiverr I I buy a lot of stuff from fiverr.com because it's really really cheap and a lot of these people are based overseas so it's it's uh you're basically Outsourcing your logo for you know $5 it's really cheap it's very very high quality I got my logo from fiverr.com okay so now let me show you how to put the logo in so over here we're going to go down to our appearance and going down to our theme options all right now right here it says upload logo okay now if you click on this right here it's it's going to open up a new window and they recommend the image size of 250 by 170 but this is not true this is not true this is the logo they recommend but I found that that is actually the incorrect size so going back over here to my other website the access press Parallax website this image right here is around 250 by 40 so I'm going to inspect the element and show you all so right here you guys can see it is 250 by 40 and this will actually align perfectly on your menu if this is bigger it's actually going to push the menu down and create space so you want to make make sure that when you get the logo it's 250X 40 and they can send you all sorts of types of sizes and remember if you get the logo of different size and they they disappear on you which happens sometimes just go to Pik monkey and just make it yourself you know go do 250 by 40 because now that I've shown you how to resize the background images you can do the same exact thing for your logo so right here I'm going to click on um or actually is it right here I'm going to go to choose file and let's see right here I'm going to go ahead and find the logo right here let's see right here I think I entered it in um oh there it is okay so there's my logo you know sorry guys I am a little unprepared in this tutorial you know feel free to give me a down like so so that is it we put it in now we're going to click on upload and right here it wants you to basically you know grab it and crop it so we'll do crop and publish and there you go so our logo is there it will align perfectly let's go ahead and show you all voila so it aligns perfectly it looks good and if it's bigger than that like I said it's going to push the page down so you really want to make sure that it is correct size because if it's bigger it will go ahead and push the menu down now there are some other options I want to introduce you to so right here is the select header layout so this will basically change the way your menu looks so if I do something like this right here and go to save options I'm going to close all these windows right here now if I refresh the page you're going to see that the logo comes on top so you can have something that looks like that instead if you would like that is just another option right here that you can add in right there so going over here to parallx sections we have added all of our locations we've added all of our sections we have the social icons the social shares the post settings uh you guys can go through these These are basically like if you don't want to show the author if you don't want to show the dates Etc the slider images these are pretty self-explanatory you guys have basically seen most of these right here and the Social Links if you guys want to actually incorporate Social Links on the left side of your website you're going to go ahead and put in all these right here so make sure to go through most of these right here okay and go to save options so if I refresh the page right here you're going to see that the social icons are now right here to the left of the website so that looks really really really cool and going back over here to Social Links now we have tools now this is where we're going to enter some custom CSS so if you're happy with your website and you love the way it looks congratulations you've done it see you later but for those of you who want a little bit more customization such as bigger header images and also changing the color stick around because I'm going to go ahead and talk about that now all right so let's go ahead now and first talk about how to change this size right here so in their pro version they talk about or they say that the only way to do is through their pro version but you got Daddy here I'll I'll do everything so what we're going to do is we're going to go down to appearance and we're going to go down to editor now they recommend you know don't touch this section you know don't text it because this can actually really ruin your theme if you make mistakes here guys uh I'm sorry but just make sure to be very very very careful in this section because a few little wrong clicks can ruin your theme okay so I'm going to go to proceed now we're going to scroll down to the stylesheet all right so we want to go ahead and make sure that it is under stylesheet and go to proceed all right now we need to find the slider section and I'm on a Mac and I forgot how to actually search so I'm going to scroll down right here till we find the main slider so this right here is the main slider and I believe we actually need to change the text right here so looking at this right here we are going to actually change this right here so the slider caption title right here you see the font size how it's 42 pixels we can make it very very large just like I did for my tutorial so I can do 250 I can do whatever you know whatever size I want for the caption description as well which is the description below that I can change that as well so if I click on update file now this theme is a little strange guys I I have actually updated this but sometimes it takes a long delay for it to actually show up so let's see if this actually worked so it did not work now the one the way you can do it is actually refreshing the cache on your website and that will basically fix that problem because I was actually working this with my developer and I says dude why isn't it working and he's like it should be working and after we refresh the cache it worked so it is basically just a delay so right here is the slider caption that is basically where you want to go to fix it and you can also do the caption description as well and these are the font sizes so that is how you would change the size to make it look something like this right here so let me actually show you all what this part looks like I'll show you uh this section right here is the same way so appearance and editor and I'm going to go to proceed and let's see right here so it is probably in the middle of the page so scrolling down right here we're going to find the section where it has slider so right here here where it says slider caption you see I have 200 pixels right there so right here same thing oh I did caption title okay yes slider caption that's right so slider caption so right here slider caption I did 200 pixels so you basically just have to refresh the cach and make sure that um you know it works out because it should work and it just takes time just refresh the cash on your browser it's there trust me it is there it took me it took me a while my developer like dude it be working I says bro it's not working and he's like it is from my end so it is a small delay but nonetheless it will change the font on your website because that's how I got the font looking just like this right here so I edited around 250 so this is much much bigger than what it was before now let's talk about changing this color so I actually have a custom CSS for you all so if you guys have stayed this long I will actually reward you all by giving you all the custom CSS to change the color now they're actually going to recommend that you have to buy the projan for this but you know yeah I know how to do that too so let's go ahead and show you how to do that so you're going to go down to your theme options and right here under Tools you're going to enter this custom CSS in now I'm actually putting this in the description so you guys can check that out it's going to be under change color so over here I'm going to go to my other website and go to theme options and we're going to go to tools so so this is the code you need to enter in so if I copy this code and take it to my other website just like this you're going to see that now this section is green this section is green if you want to change the color go ahead and put whatever color you would like that is how you change the color so I'm going to click on Save options now and I'm going to refresh this page and now you're going to see that this turns green just like that and you can make it any color you want oh look it changed so you see the text now it's super big so that is uh that is basically how you do that you know uh it looks monstrously big so you know it's just uh like I said it's just a delay guys it works it does just give it time don't keep changing it just you know change it come back in maybe 10 minutes 30 minutes whatever it will work I promise you okay so other than that guys that is basically how you would change the color I will put that in the description so this is basically saying they have to have a pro version for it but you know I know how to change it so I am giving you this text or this script it will you know help you change the color okay so other than that guys I hope you guys enjoyed this tutorial if there was something else that I wasn't clear about or there's something I missed feel free to let me know in the comments I can always make another video about updating this but it's a very beautiful theme it's a EXT I mean this is a definitely premium theme it's just absolutely gorgeous the graphics look really good it's just ultimately a beautiful website and you guys should be really proud of yourself if you guys have made it this far uh P yourself on the back it's it's a lot of work making a website it's it's easy it's just a lot of work you know that's really all it is so also lastly for those of you who want to know about the blog post you know we act we added in the plug-in so if you click on this you know we have our social shares right there so I think I covered everything guys I think that's it there's something I wasn't you know sure about let me look at my little notebook here let me look let me look widgets social share contact map yeah that's it guys so I hope you guys enjoy this tutorial uh I hope you guys enjoy your Parallax WordPress website stay tuned guys because I'm going to have a lot of e-commerce plugin tutorials coming soon so thanks for watching and I'll see you all [Music] later he
Original Description
Get Hosting: http://www.darrelwilson.com/hostgator Learn How To Make and Create A Parallax Wordpress Website Step By Step for beginners 2016 and 2017!
USE CODE DARRELWP25 at checkout for HUGE Discount!
DEMO: http://www.accesspressparallax.com
GET LOGO: http://www.darrelwilson.com/fiverr
The accesspress parallax wordpress theme is free! This wordpress theme is the highest rated them on wordpress.org and is one of the best parallax themes! This is a complete wordpress website tutorial for beginners and i will show you step by step on how to use the accresspress parallax wordress them for your wordpress website!
If you wanted to create a website and make your very own website, than this tutorial is for you. The theme is free so with hosting, this is a free website! Lets Create A Website!
Here are some things that you will need in this wordpress tutorial to help get you started:
Images:
https://www.dropbox.com/sh/vbip579klbi6pfm/AAC0eMe0xTeSsjygtMDc_ObUa?dl=0
Call To Action Script:
VISIT WEBSITE FOR SCRIPT: http://darrelwilson.com/create-parallax-wordpress-website/
VISIT WEBSITE FOR SCRIPT: http://darrelwilson.com/create-parallax-wordpress-website/
IMAGE SIZES FOR SLIDER: 1900x800
WooCommerce Shortcodes, Check Documentation for more details
https://docs.woocommerce.com/document/woocommerce-shortcodes/
Twitter Apps Link:
http://www.apps.twitter.com
HOW TO CHANGE COLOR ON THEME:
VISIT MY BLOG FOR COLOR CHANGING:
http://darrelwilson.com/create-parallax-wordpress-website/
eCommerce tutorial: 1:06:52 (Start There) https://www.youtube.com/watch?v=ioWWxeIxo5w&t=4014s
For more wordpress tutorial and to leann how to make your own website, feel free to visit my website at http://www.darrelwilson.com
Watch on YouTube ↗
(saves to browser)
Sign in to unlock AI tutor explanation · ⚡30
Playlist
Uploads from Darrel Wilson · Darrel Wilson · 51 of 60
1
 2
2
 3
3
 4
4
 5
5
 6
6
 7
7
 8
8
 9
9
 10
10
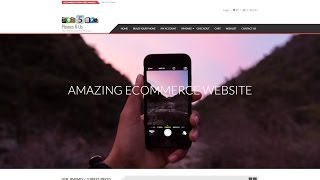 11
11
 12
12
 13
13
 14
14
 15
15
 16
16
 17
17
 18
18
 19
19
 20
20
 21
21
 22
22
 23
23
 24
24
 25
25
 26
26
 27
27
 28
28
 29
29
 30
30
 31
31
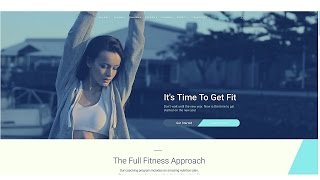 32
32
 33
33
 34
34
 35
35
 36
36
 37
37
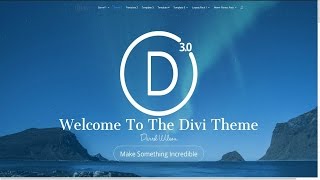 38
38
 39
39
 40
40
 41
41
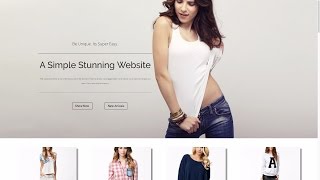 42
42
 43
43
 44
44
 45
45
 46
46
 47
47
 48
48
 49
49
 50
50
 ▶
▶
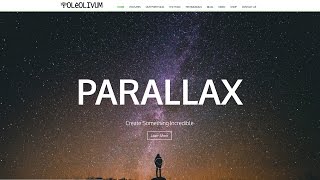 52
52
 53
53
 54
54
 55
55
 56
56
 57
57
 58
58
 59
59
 60
60

How To Add Google Analytics To Your Wordpress Website 2016!
Darrel Wilson
How To Embed A Youtube Video On Your Wordpress Website in 60 Seconds
Darrel Wilson
How To Make A Wordpress Website | For Business | 2016
Darrel Wilson
How to make a Free Wordpress Website for Music or Fanpages - Beginners Tutorial 2016
Darrel Wilson
How To Create An Amazing eCommerce Website with Wordpress - 2017 | FREE Theme
Darrel Wilson
How To Make A Wordpress Website 2016 | Beginners Tutorial
Darrel Wilson
How To Make A Blog With Wordpress - 2016 | Beginners Tutorial
Darrel Wilson
How To Create A Beautiful and Free eCommerce Website with Wordpress 2017 (Online Store!)
Darrel Wilson
How To Make A WordPress Website 2017 - Step By Step Wordpress Tutorial
Darrel Wilson
How To Create A Stunning and Free eCommerce Website With Wordpress 2017 | Online Store Tutorial
Darrel Wilson
How To Setup Subscriptions and Recurring Payments For Your Website | Paypal Tutorial 2016
Darrel Wilson
How To Make A PREMIUM eCommerce Website with WordPress | Online Store Tutorial 2016!
Darrel Wilson
How To Create Amazing Landing Pages For Your WordPress Website! | Divi Theme Tutorial
Darrel Wilson
Yoast Seo Tutorial 2016 - How To Setup Yoast SEO Plugin - Wordpress SEO By Yoast
Darrel Wilson
How To Create a Coming Soon(Under Construction) Page in Wordpress 2016!
Darrel Wilson
Onlywire: Promote Your Wordpress Website to +50 Social Networks With Social Media SEO
Darrel Wilson
How To Create A Professional and Free eCommerce Website with Wordpress 2017 (Online Store)
Darrel Wilson
How To Add Intergeo Maps Plugin For Your Wordpress Website
Darrel Wilson
Top 11 Best Wordpress Plugins 2018 | Must Have Plugins For Wordpress!
Darrel Wilson
How to Create a Free eCommerce Website with Wordpress 2017
Darrel Wilson
How To Make Beautiful Web Pages For Your WordPress Website! | Divi Theme Tutorial
Darrel Wilson
How To Reset Your Wordpress Website | Reset Wordpress Back To Original Settings
Darrel Wilson
Top 10 Free and Responsive Wordpress Themes 2017
Darrel Wilson
How To Add Amazing Resume Layout Packs For Your Wordpress Website | Divi Theme tutorial
Darrel Wilson
20 Best Websites To Sell Your Products! The Best Websites To Sell Online !
Darrel Wilson
SEO Tutorial For Beginners 2016 | What Is SEO and How Does It Work?
Darrel Wilson
Best Web Hosting 2016! FREE DOMAINS! Top 5 Wordpress Web Hosting!
Darrel Wilson
How To Use Facebook Ads For Beginners 2017 | Complete Facebook Ads Tutorial
Darrel Wilson
NEW Divi Theme 3.0 Visual Editor for Wordpress | Divi Theme Review!
Darrel Wilson
How To Update The Divi Theme to 3.0 | Update Divi Theme From 2.7 to 3.0! Elegant Themes!
Darrel Wilson
NEW Divi Theme 3.0 Layout Packs! | Divi Theme Review For Wordpress
Darrel Wilson
Divi Theme 3.0 Tutorials for Wordpress. Coming Soon.
Darrel Wilson
How To Make a Wordpress Website 2017 | NEW Divi Theme 3.0 Tutorial For Beginners!
Darrel Wilson
How To Make A Wordpress Website 2017 | NEW Divi Theme 3.0 Tutorial - AMAZING!
Darrel Wilson
How To Use The Bloom Plugin By Elegant Themes | Add An Email opt-in Form To Your Wordpress Website
Darrel Wilson
How To Advertise Your Website On Reddit 2016 | MARKET Your Website and Get Traffic!
Darrel Wilson
Divi Theme 3.0 Customization | Tips and Tricks For Divi 3.0 for Wordpress!
Darrel Wilson
Divi Theme 3.0 Customization and Review | Tips on Divi 3.0 for Wordpress! MUST WATCH!
Darrel Wilson
Flippa.com Review: Buy And Sell Websites + Domains With Flippa Auctions
Darrel Wilson
Udemy Course: How To Make A Wordpress Website With The Divi Theme 2016! EVERY MODULE COVERED!
Darrel Wilson
How To Create An eCommerce Website With Wordpress 2017 | ONLINE STORE | NEW 3.0 Divi Theme -AMAZING!
Darrel Wilson
FREE and NEW 3.0 Divi Theme Layouts For Wordpress - Review, Tutorial, And Customization!
Darrel Wilson
NEW 3.0 Divi Theme Customization For Wordpress | Create Amazing Animations! -Must WATCH!
Darrel Wilson
How To Add Live Chat In Wordpress For FREE! - Best Live Chat Plugin For Your Website
Darrel Wilson
Yoast Seo Tutorial 2017 - How To Setup Yoast SEO Plugin - Wordpress SEO By Yoast
Darrel Wilson
10k Subscribers. Thank You All!
Darrel Wilson
How To Install and Setup Google Analytics To Your Wordpress Website - 2016! EASY!
Darrel Wilson
How To Advertise and Promote on Youtube For Beginners | Youtube Advertising Tutorial 2017
Darrel Wilson
How To Make A Wordpress Blog - Create A Blog With Wordpress - EXTRA THEME
Darrel Wilson
NEW DIVI THEME 3.0 Layout Packs | Importing Divi Theme Layouts For Wordpress
Darrel Wilson
How To Make A Parallax Wordpress Website 2017 -NEW!!
Darrel Wilson
How To Make The Divi Slider Fullscreen | Divi Theme 3.0 Customization
Darrel Wilson
Elementor Page Builder Tutorial - How To Create A Wordpress Website 2017
Darrel Wilson
SEO For Beginners 2017 | How To Rank High In Google | Freelancer.com Tutorial
Darrel Wilson
Yoast Seo Premium Tutorial 2017 | Wordpress SEO By Yoast
Darrel Wilson
How To Install Wordpress With TMDhosting - MAXIMUM TMDHOSTING COUPON CODE!!
Darrel Wilson
How To Make A Wordpress Website 2019 | Divi Theme Tutorial
Darrel Wilson
Divi Theme Customization: How to Create Diagonal Lines Between Sections in Divi Theme
Darrel Wilson
NEW Divi Theme Tutorial On Udemy And Skillshare! 😀
Darrel Wilson
Unsplash.com: Best Free Photography Pictures and Images From Around The World | Unsplash Tribute
Darrel Wilson
More on: UI Design
View skill →


Related AI Lessons
⚡
⚡
⚡
⚡
X now offers an MCP server to make its platform easier for AI tools to use
TechCrunch AI
n8n Automation Repurpose Video Content: The 2025 Production Guide
Dev.to AI
You’re Still Paying $200/Month for AI Tools You Could Replace With a Free Local Setup Tonight
Medium · Data Science
Top 10 AI Tools Every College Student Should Know in 2026
Medium · AI
🎓
Tutor Explanation
