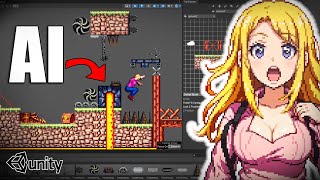
PIXEL ART with StableDiffusion + Tileset workflows??
Skills:
Prompt Craft90%Multimodal LLMs80%Prompt Systems Engineering80%CV Basics70%Modern CV Models70%
Key Takeaways
The video demonstrates how to create pixel art using StableDiffusion with tileset workflows, leveraging tools like Pixel Art Extension, LURAS, Control Net, and Regional Prompter for specialized results.
Full Transcript
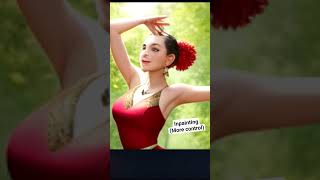
the first thing you will need is to download a checkpoint or aura that specializes in pixel art like this one but when you generate an image with it you will see that it has artifacts and that the pixels are not straight to fix this we will install this pixel art extension and inside settings go to post processing and add pixel art this has some other cool options we will see later but for now just enable it and generate again now you can see that our image is properly pixelated and that's basically all you need however I really wanted to show you how I use this to make the art for this game as well as some other cool workflows that could help you even if you're not interested in pixel art important things to know aside from the fact that the extension creates to Windows instead of one first one is that you need to use the checkpoint keywords in your prompt I'll be using pixel mix by azip which has the keywords pixel art and pixel world I will use both and aside from one more detail you can use this checkpoint as you would any other meaning that you can combine it with luras like this one to create assets or this wak environments one to make more isometric views like this one you can also use control net with your own models and then Regional prompter for more specific results like even though that will be more of a focus when we go to image to image where the actual fun begins for now I will use text to image for two things a repeatable background and character animations as based by parameters let's pick DPM Plus+ sde 10 sampling steps and a CFG scale of five in this case and make sure to use clip skip 2 as well for the background I will activate tile X on my asymmetric tiling extension so that it is able to repeat seamlessly like this one then just prompt regularly with a 3:1 aspect ratio making sure that the canvas size is actually divisible by eight usually I'd upscale the result with highr fix but and this is the other detail I was talking about for this model we will not use high rests as it may lead to results that don't maintain pixel size or just no noticeable change at all if you need to use it scale always with integer numbers and use more than 0.7 the noising strength how much more will depend on each case instead if you want to have more detail in your Generations you can accomplish this using a larger image canvas like 512 instead of 280 and this will be enough to get the results I wanted in this case you using the pixel art extension you could also lock the amount of colors used in the image enabling color and adjusting the palet size slider this will give you results with more or less color variation if you do the same but in the Grays scale tab it will that's right make you a chromatopia and with the black and white tab you can make it perfect for the average Twitter user the mode I like the most though is the custom color palette it will let you import an image and extract the colors from it you can limit how many colors it takes as well this allows us to maintain a sense of style and atmosphere or just pick the colors that we want to be used on our generation here I'm using color palettes from a site called lospec it's better not to use a detailed twiger Laura when using this option for the character animation I used control net sheets with multiple poses representing different frames of an animation made this with pose my art by exporting different animation poses and combining them in Photoshop to create a starting character I will use an open POS model and a depth model fairly high on weight like 0.85 or so then prompt for what I want in this case a blonde woman wearing a pink shirt blue pants and long hair for the size I'm going to use 1024 x 1024 I will use a few more steps and I will also decrease the CFG scale now generate a bunch of images and choose the one that you like the most I needed different animations though like instead of the character walking I wanted it running so I will import the new depth and open post maps and I will also use a third control n model with the original character sheet using reference only add in plus attention and I will start this one at 0. 15% of steps with a weight of 0.5 this new reference controled model should help us maintain the character a little bit more and remember to import the image as a custom color palette making it easier to get the right colors then it's just a matter of dividing the frames to make the animation I will do this in Photoshop manually until I have something like this this is pretty cool when I show it on the video however it comes with bad news for one the chances that the image follows your prompt are super small and grow even smaller the more complex your prompt is and even if it does follow it the results will need tons of manual fixing most of the time we also need to use very high depth control values so that the character doesn't step twice with the same leg this kind of forces us into very humanoid and simple characters good news are that I haven't really experimented much with this so you can go for it if you want I'll leave the control and references in the description I guess you could always try your luck by imp painting individual frames trying to correct them which by the way it's probably better if you always use whole picture when in painting with this model to not mess up the pixel size or other stuff and talking about imp painting the real fun starts with image to image so not yet you need to pay the thanks to darkstorm TXS first who made this video possible by providing a on his method on how to make pixel art he also had the patience to explain stuff to me and helped a lot while we experimented for this video not the first time I say this on this channel but thank you very much I will leave his Twitter in the description he makes very cool stuff and knows a lot of things we will use a vase image like a rough drawing as an input and then we pass it through image to image to get a more detailed version as a first example I'll use dark Storm's drawing cuz I think it's cool for the basic parameters I will use the same ones as in text to image we will use a pretty big canvas size and then prompt for what you want before we generate though you need to know how much of the original image you want to keep if you don't really mind losing most of it then just generate with an noising strength from 0.55 to one the more you want to keep from the original image while adding details to it the harder it gets but that's why we have different workflows and tips starting with the simpler version we will use one the noising strength and activate cont onet tile with balanced mode this is way better at keeping the original image and if you don't want to keep as much of it just lower its weight this is where things like a detail tweak or Laura start having more of a role another cool trick you can use is playing with the CFG scale as you use higher values the image will change more but it will also have more colors saturation and contrast for now we should fix the fact that the colors are changing too much from the original input you will go to settings show all settings and scroll down to the Quick Settings list here add image to image color correction now apply the changes and restart the UI when you're going to generate check this box right here and now all your generation should be more similar in color to your original image and if not you can try to also use the image as a colored palette and with this you get the base idea all of the next approaches follow the principle of having an input and then using a combination of control net models the noising strength CFG and prompting to get the desired result there are unlimited possible combinations of this so I'm sure you will find one that works best for you for example in the tile controlled model you could put the weight at one and then use my prompt as more important as the mode now lower the the noising strength to 0.65 or so and that's it we will just show you the ones that we found to be the most reliable and that we likeed best but it is not a strict rule to follow applying this idea we could generate stuff like single assets based on a quick sketch here I'm just just using in paint sketch directly but you could also work on a drawing more precisely like darkstorm is doing here by going back and forth and fixing minor stuff or even multiple assets At Once by drawing a bunch of shapes in one single image however if you do this you need to be aware of some things a very important key is to keep all the assets that share a material in the same image or at the very least pack them together if you have spikes and chainsaws put them together if you want to create wooden assets put those together too you do this to avoid having your prompt affect assets it shouldn't like the coin turning into fire here if you want you can use Regional prompter but I'd just rather make more images once you have sketched your assets input the image I drew this on a 52 x 512 canvas but I will generate an image of 1024 x 1024 now prompt for what you want in the image plus some keywords like pixel art assets saw and all of that adding the details Laura will help too I personally keep the negative prompt very simple mainly using it to avoid characters this is the part that I have explored less so you do you here and next the other important part control net and XYZ I will use two control net models the first one will be a tile model set to balanced with 0.7 weight and 0.4 ending step and the other model will actually be a tile model again this time set to 0.4 weight 0.2 starting step and 0.6 ending step this is a setup that while not the best it should work with mostly anything just play around a bit with the parameters and that's it other and better methods were just good for one type of images with one style of prompts that's why I tell you to experiment on your own because there are better methods out there this just could work well for everyone which is what you want in a video now I will create an XYZ plot for two purposes the first is to show you how certain parameters affect the image and the second one will be to have a lot of different Generations so I can pick the best parts of each one one of the axes will be for CFG scale and the other one for the noising strength you could also take out the apply color correction here to test new colors once it's done generating we will have a lot of different options if you find one that you like but think it needs a little bit more juice you can repport it as an input and generate again I would suggest maybe taking one of the controll models out and then leaving the other one at something like 0.6 w weight and 0.6 ending step there you go dods of variation with cool spiky things works for wooden assets too and it even works for environment Sprites like this the only thing you would need to do here is to plan well how and where you paint your sketch in a way that it matches the size for your tiles it's easier if you do this directly in a small canvas and then resize it for stable diffusion also remember not to add a lot of different stuff into one drawing maximum I'd recommend is to add some back ground colors a big ground plane with every possible corner and maybe some platforms and decorations and now we just do the same we did with our assets prompt for what you want and generate with a blot or not I guess if you need more contrast you can rein put again and generate but keep in mind that as you do this the color will get more and more messed up after you mix the results you want just erase the background clean stuff up and maybe make things style a little better with this you're free to input the image as a spreite sheet on Unity to create your game worlds to be honest I haven't tried isometric or other styles much but I think this workflow should work for that too or at the very least give a good base to start from both for text to image with a character sheet or other stuff and image to image with your own inputs remember that all of this is just one of infinite possible workflows even though all of them will require some manual tweaking and fixing thanks to Dark Storm again join our Discord I hope this was helpful see you
Original Description
Creating pixel art with stable diffusion can be very simple.
That's why we explored ways to use it for games, or other general purposes. Like backgrounds, characters, assets and tilesets.
Finding workflows that serve as a base for you to make your own, more specialized ones.
Join our discrod server: https://discord.gg/VYHU3bxMnP to learn about this and more!
Darkstoorm's twitter: https://twitter.com/DarkStoorM_
Darkstoorm's og guide: https://gist.github.com/DarkStoorM/4e8d939f8edf907638430ae04df17ec1
Character Sheet Controlnet references: https://ko-fi.com/s/65ed598d96
+video on how I make them
------------- Links used in the VIDEO ----------
Pose the characters as you like: https://app.posemy.art
Checkpoint SD 1.5 (if it doesnt exist anymore, ask on discord): https://civitai.com/models/195730/aziibpixelmix
LORA for SDXL:
https://civitai.com/models/120096/pixel-art-xl
Extensions used in the video:
Pixel Art: https://github.com/mrreplicart/sd-webui-pixelart.git
(you could also use: https://github.com/AUTOMATIC1111/stable-diffusion-webui-pixelization)
Regional Prompter: https://github.com/yankooliveira/sd-webui-photopea-embed
Controlnet: https://github.com/Mikubill/sd-webui-controlnet
Asymmetric Tiling: https://github.com/tjm35/asymmetric-tiling-sd-webui.git
Fixing the duplicate window issue (by darkstoorm):
"Since this is an old extension, it might appear twice in your webui. To get rid of this, you have to remove the rendering function:
file: sd-webui-pixelart/scripts/pixelart.py
def show(self, is_img2img):
return scripts.AlwaysVisible
After enabling it in Postprocessing and restarting webui, the duplicated tab should go away"
------------- Useful stuff for this ----------
Settings and workflows may very depeding on what you are looking to do. As well as which model you are using.
If you just want to use SDXL, controlnet tile might act differently.
https://lospec.com/palette-list
Vae by thomaseding that can help with artif
Watch on YouTube ↗
(saves to browser)
Sign in to unlock AI tutor explanation · ⚡30
Playlist
Playlist UU81KZMuh7RWo21Kk0CaS7eA · Not4Talent · 26 of 33
1
 2
2
 3
3
 4
4
 5
5
 6
6
 7
7
 8
8
 9
9
 10
10
 11
11
 12
12
 13
13
 14
14
 15
15
 16
16
 17
17
 18
18
 19
19
 20
20
 21
21
 22
22
 23
23
 24
24
 25
25
 ▶
▶
 27
27
 28
28
 29
29
 30
30
 31
31
 32
32
 33
33

Why your AI art prompts are FAILING and how to FIX them #shorts #part1 #ai #stablediffusion
Not4Talent
The ONE WAY to beat Concept Bleeding #shorts #part2 #aiairt #ai
Not4Talent
The better AI art generator? #shorts #ai #aiairt #stablediffusion #midjourney
Not4Talent
This are some must have models for stable diffusion 1.5! #shorts #ai
Not4Talent
STOP making BORING AI art
Not4Talent
Get FULL creative control over Stable Diffusion | Install + all models
Not4Talent
Easiest sketch to AI concept 🤯 #shorts #ai #aiarchitecture #controlnet #aiairt
Not4Talent
Prompting HACKS no-one talks about
Not4Talent
Next level AI art Control | My workflow
Not4Talent
Best Tools and extensions for STABLE DIFFUSION AI art
Not4Talent
sketch to final "time-lapse" #ai #aiairt #stablediffusion
Not4Talent
This ControlNet model is INSANELY useful!
Not4Talent
fix bad faces, super easy #stablediffusion #face #aiairt
Not4Talent
Create consistent characters with Stable diffusion!!
Not4Talent
LORA training EXPLAINED for beginners
Not4Talent
MONEY with AI art | ft. DupDub
Not4Talent
This prompting technique is so fun! #aiairt #ai
Not4Talent
Ultimate Guide to HANDS with Stable Diffusion! (Any pose you imagine)
Not4Talent
Complex INTERACTIONS with MULTIPLE characters | Stable Diffusion
Not4Talent
No one uses this CN model and they should! #controlnet #stablediffusion #aiairt
Not4Talent
I spent 3800$ on a new PC to use AI... Do I regret it?
Not4Talent
Full FACIAL EXPRESSION control for Stable Diffusion (+Lora Pack)
Not4Talent
Unlimited CONTROL with SLIDERS! (SPECIAL loras changed the game)
Not4Talent
Create CONSISTENT ENVIRONMENTS with AI (from multiple angles)
Not4Talent
Add characters to ANY environment with Stable Diffusion
Not4Talent
PIXEL ART with StableDiffusion + Tileset workflows??
Not4Talent
BREAK Posing Limitations with Stable Diffusion!
Not4Talent
Extreme perspectives with Stable Diffusion and Photoshop / Full workflow
Not4Talent
Why I am learning to DRAW as an "AI BRO"...
Not4Talent
Get instant-feedback on your art! (and learn faster) #digitalart #art #learningtodraw #ai
Not4Talent
Practice composition and storytelling, the fun way #art #ai #aiairt
Not4Talent
Can AI be a TOOL for ARTISTS? My workflow + Pros & Cons
Not4Talent
UPSCALE any image for FREE with AI | Stable Diffusion
Not4Talent
More on: Prompt Craft
View skill →


Related AI Lessons
⚡
⚡
⚡
⚡
FREE AI Sin City Photo Generator — Turn Any Photo Into High-Contrast Noir Art (2026)
Dev.to AI
Google makes Gemini’s personalized image generation free for all US users
The Next Web AI
Gemini’s personalized AI image generation is now free for U.S. users
TechCrunch AI
WebP's Compression Secret: How a 1MB PNG Becomes a 200KB WebP
Dev.to · swift king
🎓
Tutor Explanation