Deep Learning in Medical Science
Key Takeaways
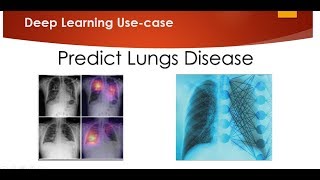
This video demonstrates the application of Deep Learning in Medical Science, specifically predicting whether a person has pneumonia or not, using techniques such as Convolutional Neural Networks (CNNs) and transfer learning with datasets from Kaggle.
Full Transcript
hello all today we will be discussing how we can apply deep learning and medical science so here I am going to take our data set which is from gaggle where I need to determine based on the chest x-rays whether the person is having a disease called as pneumonia or not so in order to download that if the data set I will be providing you the link in the description box in the YouTube channel my youtube video so from there you can download this particular data set and here when I go and see the data set first of all I have something called as X just underscore x-ray and inside the test and train I have something called as normal and pneumonia categories so pneumonia basically has all the images of the chest x-rays of the people who are suffering from pneumonia and this is how first of all what you have to do is that first you go ahead and crease down this dataset from here now once you download it I will just show you some of the images how this particular dataset looks like so to begin with I'm going to implement I'm going to implement a deep learning model by using an architecture which is called as vgg 16 vgz 16 is basically a transfer learning application altogether so in here you can go ahead and see this in chaos you basically have different kind of transfer learning techniques like vgg 16 HD 19 resonate resonate v2 inception mobile enhancement nazarite from all these things I am either using VG 16 you can also use a GG 90 and try by using the same same generate code template with respect to other deep learning techniques over here with respect to the pons for learning so to begin with guys I am going to take this and first of all I'm just going to go through the data set and show it to you how the data set looks like so here is my folder of the data set you can see that I'm having the taste and test and train data set which is divided into two different categories that is normal and pneumonia now in order to show you some of the images let's see the images how it looks like so to begin with I'm just going to click on the first image and the first image basically looks like like this so this is a person who's actually suffering this is the x-ray of the chest of the person who was actually suffering from pneumonia similarly I have different kind of images which you can see it from here and all the images can be downloaded from goggle itself to begin with case I am going to use a PG 16 model which is available in chaos from the Kira's I will be using dis libraries like lambda dense flatten or these are the libraries which is used to create the dense layers apart from that I'm going to import the VG 16 because I'm since I am using transfer learning I'll be downloading all the weights that are present in VG is 16 and I'll be using those so initially I will be download importing all this libraries or the code will be available in my github link repository which is where I'll be providing the link in my description of this particular video so to begin with I will be importing all this libraries so first of all let me just execute this library so all the important has happened properly now then to begin with what we have to do is that you have to first of all take the image size of 224 comma 224 that is what the image size that I'm trying to take and then I have given my training part which is inside data sets and train and similarly the test path or the valid path which is inside data set and test ok this 2-part I've actually given it and the way of importing the VGC 16 libraries from cara's it is very simple you just have to size this particularly gene 16 library you have to give the image input shape as image size the image size is nothing but 24 points and always remember that all the images will be in RGB Channel when you are applying transfer learning so I have taken image size plus 3 3 is basically for my RGB Channel and the weights that I am basically using is of imagenet imagenet of basically competitions where people come up with this kind of transfer learning technique so where they have a very good ratio or it is basically called as the state of art algorithms after inputting this let us just go ahead and import this you can see that it will get executed perfectly once it gets executed what we have to do is that we have to first of all make our layers training as false because we don't want all layers to get trained again because we are you the weights from this imagenet so all these weights are basically used for classifying thousand different category of images so we'll be using those same weights only the output layer I'll be changing because based on my output layer I just have two different categories that is normal and ammonia so what I do is that I'll just run this for loop and I'll just keep my trainable parameter as false so here it is I'm going to execute this you can see that each and every layers now is becoming false then what I'm going to do is that I'm going to find how many number of classes are there and for that I'm using this glob function so this globe what it will do after take it I've given the parameter of my train data set that is dataset slash three inside my train you can see two folders over here in the right-hand side and based on this particular two folders what I am doing is that I am trying to find out the number of classes so here it is I will execute this to what executed now you can if you go to the variable folders you can see that in the folders I have two two folders itself one is normal and pneumonia so this is perfectly done after that what I'm going to do is that since I while initializing VG 16 this include let's go top is set as false I'm just removing the last layer which I don't require it you know because the last layer I am going to put the number of categories that I have that is normal and pneumonia so basically two categories so what I am going to do is that first of all whatever output of vgg I have got are going to flatten it so I have executed this flattening thing then after that you can see that final layer I'm adding the length of folders length of folders over here is nothing but you can see that in folder I basically have two different folders inside this so the length is basically two so this is basically an output layer which I am adding at the last layer of this particular transfer zone so instead of thousand and using this tool so here I am using the activation function and ampere and and I am appending to this particular X layers itself so here it is so once I execute this you will be able to see that my prediction layer is tough finally I will wrap it inside a model where my input will be my eg g dot input and the output will be the prediction one so here it is this once my model is created we can also see the summary of the model now see the summary of the model the the main interesting thing of this model is that this model also has 16 layers of vgg basically which is called as vgg 16 and then after that you can see that the number the final layer which is my tense Larry just having two parented two layers to two nodes basically who nodes is because of the two different categories that I have here is more models Emily and this is just a concept of transfer learning that I've just used which is 16 I have just changed the last layer and made it has two layers two different categories output after that I will just compile it by using cat little cat a little under scope cross-entropy and then I'm using the optimizer as Adam and the metrics as accuracy so here it is are just executed after this the next thing is that I need I should be able to you know retrieve my images from this particular folders right in my test folder so that I will be able to train my model before and that can be done by using this particular library which is called as image data generator in the image data generator I'll also be doing some other kind of operation in the images very securely share range in brains and horizontal flips so basically I'm changing the images and be scaling the images again this will help us to create more additional images with respect to the same training data set whereas in the test data Jen I don't have to do anything I just have to do the rescaling works so here it is for the train and test I'm doing it now after that I'll set the path image that is data set slash train my target sizes 2-24 common to 24 and a bath size is 32 and whatever what type of cross mode I'm using basically it's categorical because I just have two categories over here so I'll be using this I can also use binary since I have only two classes but this long after executing this you can see that what this statement will do is that it will retrieve all the data from the training data set that I have in normal and ammonia folders and it show us the total number of counts with respect to the number of classes that I have so here you can see that after I executed this I found 5 - 1 6 images the total number of images from both the folder which was belonging classes similarly I will do it for test set and test set let us see how many number of images are there so you can see that for testing I have 625 modules that are belonging to classes finally I'll start running my box and over here the number of reports that I am running is 5 and the steps for epoch I've taken the number of the training dataset length whereas the test set and have taken as validation steps and here it is and I'm going to execute this as soon as I execute this the epochs running will actually start it will take around 15 minutes and my system which is like a GPU over here so what I'm going to do is that I'm going to just pause this particular video for some time so that the running happens and after the running happens I will continue the video and I'll show you what was the accuracy that I got from this particular values as we are going ahead there is wait for some time let us just see the first epoch value that how it is funny and based on that I will just pause the video for some time and I will show you how this particular video accuracy looks like my the overall I have run the program my 5 epochs has actually completed now you can see that this is my model summary and you can see that for epoch one I was about to get the training at Gracie to 92% and my validation accuracy was a tell 81% and then it got increased to 91% and 87% decrease a slight but till about 5 I was able to get very good validation accuracy of around 80 to 85% with half with some fluctuation activities over here you can also see that the loss is actually reduced to a very lower value but the training accuracy that I have got is around 1996 person and the validation accuracy I've got somewhere around 83% so this is how my whole you know the I've got a better accuracy for that or now the next thing is that once my model is created now you can see that I have named my model into something like model under Scooby Gigi 19 dot H 5 okay so I have stored this model into the same location over here now what I will do is that fine my model is got trained properly I have got a better accuracy now let me give a new image okay I have a validation folder over here let me give a new image from here which is from normal or pneumonia categories and try to see whether I am able to get the correct output or not so when I actually use the same model way I should be able to get correct output so that is where I am going to see that how we are going to get this particular output or not and for that I have written on another type of code which will actually help you to do the predictions for now so let me just first of all zoom in a little bit I'm going to restart the whole kernel over here since I haven't executed the previous code over here so the first thing what we have to do is that since my model is actually drained I've actually created a h5 file which is like model under Scooby Gigi 19.4 h5 you can see that in my previous code there is something called as model dot save here what I can do is that I can in this code I will just replace this name over here so when my training happens I will keep the file name like this model which is g19 dot x5 so as soon as the training happens this finally gets saved in this particular name right so again I will be providing this particular whole code and in my github the link will be given in the description in the YouTube video in this particular utility so let me just go ahead and you know pass a particular image from this particular validation data set and then from this validation data set what it will do is that will go and hit our model and what will be the prediction that will be the given by our model we will check it out okay so first of all I what I do is that I just take this particular image that is a normal image so this normal image is basically a person who is not having pneumonia so I'm just going to give this particular image to my model and see what my model will be doing the prediction so to begin with what I have to do these days so I import this libraries from k-rod models has load model image processor on the screen input numpy and I'll load the model first of all that I have present in the same location so you can see that over here I have model VGC 19 dot H 5 this will get loaded and it will take some time to load ok it has loaded Felina now the next thing is that I'm going to load this particular image that is present inside my validation normal and this particular file right so I'll load this particular image and then I'll convert it into an array now you see this step-by-step of how we do it both this file will be put in the github link so you can see it from there so once I load this if I go to the variable Explorer you can see that this is my new array of the image that I get in the RGB for heart right that what I'll do is that I'll convert that into an array and then I'll expand a dimension because this particular critic statement will require four different dimensions so for that what I'll do is that I'll also do pre-processing from the square input so here you can see that it is pre-processed now then after that I will be doing something called as model dot predict and whatever the image data have done after the pre-processing basically the image this one which I have given that I have actually followed the steps first of all I loaded the image converted into an array expand the dimension and reprocess that particular image so let us go and see after that what will give me the predictions so here it is my code has got executed correctly now let us observe the class you can see that the class output modeled or credit is giving us two values that is either from zero zero and one basically indicates that my file explorer if you see that I have two folders right in my training and test dataset one is normal and one is pneumonia this zero basically indicates for normal and one basically indicates for the label value for the pneumonia so for the zero I am getting the probability as one that basically indicates that whatever image I have actually given from the normal it is basically a normal image and the potion is not having that particular pneumonia disease for this particular a chest tray just x-ray scan so similarly what I didn't do is that you can see for the one it is a very negative or very smaller value like point zero zero zero ten to the power of minus seventeen times zero point two so this is a very lower value so we can actually see that for this pipe type of particular image it is giving us a value like it is normal now let us go ahead and see it for pneumonia so for pneumonia what I am going to do is that I'm going to take one more image and remember guys this is the validation data set so I don't have to Woori and check it once again because this is the data setup retrieved it forms up here instead of normal I will change the path to pneumonia so let me just copy this again oh here it is I'll just save this over here okay now this you can see that pneumonia is there now let me execute all these lines of code again let us go and see the output so again means to go to the variable explorer and see the classes you can see now my second variable which actually indicates the second label which actually indicates the pneumonia folder is basically having the value as 1 so this basically indicates that whatever for it means that I have given over here that is post and this basically has a pneumonia problem so this is how you can actually implement this now the next thing that most of you are a specially asking the question like how do we deploy this particular model that I'll do it in my next video I'll come up with my next video where I will be actually deploying this particular model in Azure or AWS and converting into a way of API which you can integrate with your front-end application so that was it guys for this particular video I hope you like this particular video make sure you subscribe this channel if you have not and happy learning I'll see you all in the next video thank you one and all
Original Description
Here is a video which provides the detailed explanation how we can apply the Deep Learning in Medical Science where we will be predicting whether the person has pneumonia or not.
#DeepLearningInMedicalScience
Github url: https://github.com/krishnaik06/Deep-Learning-in-Medical-Science
Kaggle dataset: https://www.kaggle.com/paultimothymooney/chest-xray-pneumonia
You can buy my book on finance with ML and DL from the below link.
Amazon url: https://www.amazon.in/Hands-Python-Finance-implementing-strategies-ebook/dp/B07Q5W7GB1/ref=sr_1_1?keywords=Krish+naik&qid=1554385165&s=gateway&sr=8-1-spell
Playlist
Uploads from Krish Naik · Krish Naik · 38 of 60
1
 2
2
 3
3
 4
4
 5
5
 6
6
 7
7
 8
8
 9
9
 10
10
 11
11
 12
12
 13
13
 14
14
 15
15
 16
16
 17
17
 18
18
 19
19
 20
20
 21
21
 22
22
 23
23
 24
24
 25
25
 26
26
 27
27
 28
28
 29
29
 30
30
 31
31
 32
32
 33
33
 34
34
 35
35
 36
36
 37
37
 ▶
▶
 39
39
 40
40
 41
41
 42
42
 43
43
 44
44
 45
45
 46
46
 47
47
 48
48
 49
49
 50
50
 51
51
 52
52
 53
53
 54
54
 55
55
 56
56
 57
57
 58
58
 59
59
 60
60

Natural Language Processing|Stemming
Krish Naik
Natural Language Processing|BagofWords
Krish Naik
Gaussian distribution or Normal Distribution in statisctics
Krish Naik
Natural Language Processing|TF-IDF for Machine Learning| Text Prerocessing
Krish Naik
Log Normal Distribution in Statistics
Krish Naik
Covariance in Statistics
Krish Naik
Confusion matrix, Precision, Recall| Data Science Interview questions
Krish Naik
Tutorial 44-Balanced vs Imbalanced Dataset and how to handle Imbalanced Dataset
Krish Naik
Implementing a Spam classifier in python| Natural Language Processing
Krish Naik
Tutorial 11-Exploratory Data Analysis(EDA) of Titanic dataset
Krish Naik
Face Recognition using open CV and VGG 16 Transfer Learning
Krish Naik
Pedestrian Detection using OpenCV from Videos
Krish Naik
Face and Eye Detection from Videos using HAAR Cascade Classifier
Krish Naik
Reading, Writing and Displaying images with Opencv| OpenCV Tutorial
Krish Naik
OpenCV Installation | OpenCV tutorial
Krish Naik
Face and Eye Detection from Images using HAAR Cascade Classifier
Krish Naik
Car Detection using HAAR Cascade and Opencv from Videos.
Krish Naik
Using OpenFace for Face recognition in Keras
Krish Naik
OpenPose Tutorial with Tensorflow
Krish Naik
Multiple Linear Regression using python and sklearn
Krish Naik
Dimensional Reduction| Principal Component Analysis
Krish Naik
Movie Recommender System using Python
Krish Naik
TPR,FPR,FNR,TNR, Confusion Matrix
Krish Naik
Precision, Recall and F1-Score
Krish Naik
Artificial Neural Network for Customer's Exit Prediction from Bank
Krish Naik
GridSearchCV- Select the best hyperparameter for any Classification Model
Krish Naik
RandomizedSearchCV- Select the best hyperparameter for any Classification Model
Krish Naik
K Nearest Neighbor classification with Intuition and practical solution
Krish Naik
K Means Clustering Intuition
Krish Naik
Create custom Alexa Skill- Lambda function- Part2
Krish Naik
Hierarchical Clustering intuition
Krish Naik
Implement Transfer Learning with a generic Code Template
Krish Naik
Gender Classifier and Age Estimator using Resnet Convolution Neural Network
Krish Naik
Unlock Your Application With Your Face using OpenCV
Krish Naik
Draw rectangle from webcam and sketch process it on a live feed
Krish Naik
Complete Life Cycle of a Data Science Project
Krish Naik
How we can apply Machine Learning in Finance
Krish Naik
Deep Learning in Medical Science
Krish Naik
How to switch your career to Data Science.
Krish Naik
Linear Regression Mathematical Intuition
Krish Naik
Handle Categorical features using Python
Krish Naik
Machine Learning Algorithm- Which one to choose for your Problem?
Krish Naik
DBSCAN Clustering Easily Explained with Implementation
Krish Naik
Curse of Dimensionality Easily explained| Machine Learning
Krish Naik
Feature Selection Techniques Easily Explained | Machine Learning
Krish Naik
Tutorial 29-R square and Adjusted R square Clearly Explained| Machine Learning
Krish Naik
Cross Validation using sklearn and python | Machine Learning
Krish Naik
Handling Missing Data Easily Explained| Machine Learning
Krish Naik
Deploy Machine Learning Model using Flask
Krish Naik
Deployment of Deep Learning Model using Flask
Krish Naik
How to Visualize Multiple Linear Regression in python
Krish Naik
K Nearest Neighbour Easily Explained with Implementation
Krish Naik
Predicting Heart Disease using Machine Learning
Krish Naik
Predicting Lungs Disease using Deep Learning
Krish Naik
Stock Sentiment Analysis using News Headlines
Krish Naik
Random Forest(Bootstrap Aggregation) Easily Explained
Krish Naik
Voting Classifier(Hard Voting and Soft Voting Classifier)
Krish Naik
Credit Card Fraud Detection using Machine Learning from Kaggle
Krish Naik
Hyperparameter Optimization for Xgboost
Krish Naik
Tutorial 45-Handling imbalanced Dataset using python- Part 1
Krish Naik
More on: CV Basics
View skill →




Related Reads
📰
📰
📰
📰
I regret reviewing for AAAI [D]
Reddit r/MachineLearning
GenTrace: Automating Telecom Network Fault Diagnosis from Raw Packet Traces
Medium · Machine Learning
Preparación para Machine Learning: el puente entre la estadística y el aprendizaje automático
Medium · Machine Learning
GPU Rental Guide: H100 vs A100 vs L40S vs RTX4090
Dev.to · YingSuan AI
🎓
Tutor Explanation
 DeepCamp AI