Deploy YOLOv5 to Jetson Xavier NX at 30 FPS
Key Takeaways
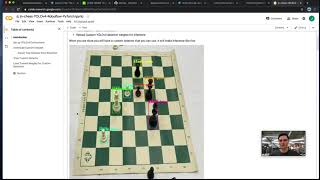
This video demonstrates how to deploy a custom YOLOv5 model to the Jetson Xavier NX and run inference in real-time at 30 FPS using the Nvidia Jetpack 4.4 PyTorch container and the detect.py script.
Full Transcript
hey guys this is jacob from roboflow here live from minnesota to give you a video about how to deploy yolo v5 to a jetson xavier nx at 30 fps this is really a huge capability to be able to run state-of-the-art object detection at this speed which is very important for edge ai devices to be able to run in real time so you can design systems that are making inference very quickly and and and essentially acting as if they're actually seeing things in front of them in real time at the same frame rate that the human eye can can process things in front of it um so now kind of talking a little bit about our setup here we're going to train a custom yolo v5s model and we're going to train that model and then we're going to take it and we're going to deploy it all the way to a jetson xavier nx um so here's a little bit of a picture of the setup here that i have uh upstairs uh you can see here i have my uh jetson xavier nx and i have a display connected into it um and so there this is where we're going to be uh doing our inference now a quick note on training your custom model we have a lot of great content at rebel flow on how to train yolo v5 i've linked it here in the blog post and i'll also put a link below in the video but the first step is to gather your images of what you want your computer to be seeing and then you're going to load these images into roboflow after annotation so you'll draw bounding boxes around the objects in the images that you want to detect and then after you've prepared a data set you can augment it and then you can send those images through training and then training will basically give you a model that will do inference afterwards and you can kind of smooth that all out beforehand i'm gonna kind of uh run forward with this video assuming that you've already done the training process and you're ready to simply deploy your model to an edge ai device um and so that's that's kind of where we're starting here so once you're done with training you'll have a dot pt model that pt model you're going to take and you want to put it somewhere on the cloud where you can access her on a usb stick and then once you have it on the usb stick you'll be able to transfer it onto your jetson nano or your jetson xavier nx device um so here's a picture of the jetson nx so uh it has various inputs and outputs that you can kind of be sending inputs and outputs through it so it kind of is the basic setup here for a computer that that you would be setting up but you want to be able to input in your mouse and keyboard you want to input in your ethernet for internet connection uh and although i don't think you actually need the ethernet it can connect to a wi-fi automatically and then also your hdmi display is important so you can uh visualize things and then you can also uh put a webcam port in there if you want to set up the device to be kind of inferencing uh live so there's uh the input input ports um for your jetson uh device and then the one important thing that you'll need to get it started is a microsd card this is what you're going to actually put the image on to be able to boot up install ubuntu and then um download the jetpack 4.4 um to actually get started with the underlying software to run your your jetson so in order to do that we'll uh go ahead and go over to uh the uh nvidia getting started with the jetson xavier nx website and then once you get over to that website um you can download the jetpack image put it on the sd card and then plug it into the uh jetson nx device and then this will boot up and you'll be able to log in there see ubuntu is there you'll have your terminal this is all very seamless process of india makes this a very easy process for us to to get started with now the next thing we're going to use is the nvidia jetpack 4.4 pi torch container and this this is a really important thing to be able to run yolo v5 because basically we could imagine a world in which we want to run yellow v5 by building pi torch from scratch on our on our nvidia and our nvidia jetson device that's going to be a really big problem because there's all sorts of different versions of pi torch and there's all sorts of other dependencies that you need to be building underneath here that you're going to have just a massive headache going through all these installs so thankfully there is the nvidia jetpoi jetpack 4.4 pi touch container that has already been installed and this is something that you can download from nvidia and um you just simply dock or pull this image down if you're not familiar with docker i do do remote i do recommend uh learning a little bit about it you can download this image then you have the image and you can um kind of start building on top of it so you can pull the image down and then do some installs on top of it you can um you can just kind of exec into that image and then start running your training jobs um and so uh so yeah so that's the pi torch container you go ahead and docker pull that down and then we'll be building from there um go ahead and get clone the yellow v5 repo and then once you have the yellow v5 repo uh you can install opencv and all the other requirements in the repo and then you can build that repository up and then once you have that you're pretty much ready for inference so now uh here's a little a bit of a peek into running inference on the nvidia jetson nx so once you have all of those environment installs setup you're going to be able to leverage the detect.pi script to get an idea and get a sense that basically you've successfully started running inference on your jetson nx so here i have a little bit of code where um you're invoking the python detector pi script and you're loading in your custom weights in place of the usual yellow v5s weights once you have those custom weights in there and then they're inferencing on video images or webcam whatever you choose to to expose to them and here i've have some printouts of the speed that i'm getting on the json nx with this kind of pristine pie torch build and it is roughly 30 fps so that's pretty exciting to see um and i would show you a video here but uh of a live screen but um unfortunately that that's pretty difficult to do on the device so i just have the the printouts here and you'll you'll have to just take my word for it and then i i have a little bit of some thoughts about making it run even faster so of course i'm not going to give away all of the keys to the kingdom here but i have a few suggestions if you really want to be working to make this run on the edge on the jetson even faster so one thought is you can actually shrink the model smaller than the olivia 5s is to even to even make the model even tinier than it is kind of in its pre-trained setting the second idea is to use tensor rt so there's some tensor rt implementations of yellow v3 and yolo v4 but these are all things that we can certainly um speak about with roboflow if you are working to kind of get your uh devices out there on the edge you just go ahead and reach out and so that's all for our video today hope you enjoyed um now you know how to deploy yolo v5 all the way to an edge device and then run it on a jetson xavier nx this is a very powerful skill to have especially given how customizable these models are to detect any object in the world so that's all for today thanks so much for watching watching go ahead and feel free to like and subscribe on the bottom and as always happy detecting
Original Description
Edge AI has never been hotter. In this video, we show how one can deploy a custom YOLO v5 model to the Jetson Xavier NX, and run inference in realtime at 30 FPS.
Corresponding Blog:
https://blog.roboflow.com/deploy-yolov5-to-jetson-nx-at-30fps/
Corresponding Training Guide:
https://blog.roboflow.com/how-to-train-yolov5-on-a-custom-dataset/
As always, happy detecting.
Watch on YouTube ↗
(saves to browser)
Sign in to unlock AI tutor explanation · ⚡30
Playlist
Uploads from Roboflow · Roboflow · 23 of 60
1
 2
2
 3
3
 4
4
 5
5
 6
6
 7
7
 8
8
 9
9
 10
10
 11
11
 12
12
 13
13
 14
14
 15
15
 16
16
 17
17
 18
18
 19
19
 20
20
 21
21
 22
22
 ▶
▶
 24
24
 25
25
 26
26
 27
27
 28
28
 29
29
 30
30
 31
31
 32
32
 33
33
 34
34
 35
35
 36
36
 37
37
 38
38
 39
39
 40
40
 41
41
 42
42
 43
43
 44
44
 45
45
 46
46
 47
47
 48
48
 49
49
 50
50
 51
51
 52
52
 53
53
 54
54
 55
55
 56
56
 57
57
 58
58
 59
59
 60
60

YOLOv3 PyTorch Notebook Tutorial
Roboflow
How to Train YOLOv4 on a Custom Dataset (PyTorch)
Roboflow
How to Train YOLOv5 on a Custom Dataset
Roboflow
How to Use the Roboflow Dataset Health Check
Roboflow
What is Mean Average Precision (mAP)?
Roboflow
How to Use the Roboflow Model Library
Roboflow
How to Train EfficientDet in TensorFlow 2 Object Detection
Roboflow
How to Train YOLO v4 Tiny (Darknet) on a Custom Dataset
Roboflow
Ask the Roboflow Team Anything - Episode 1
Roboflow
Exploring The COCO Dataset
Roboflow
Community Spotlight: Improving Uno with Computer Vision
Roboflow
Mosaic Data Augmentation - Deep Dive
Roboflow
Hands on with the OAK-1
Roboflow
Glenn Jocher: What is New in YOLO v5?
Roboflow
How to Use Amazon Rekognition Custom Labels and Roboflow to Build an Object Detection Model
Roboflow
An Interview with Brandon Gilles, Luxonis Founder and OAK Chief Architect
Roboflow
How to Train a Custom Mobile Object Detection Model (with YOLOv4 Tiny and TensorFlow Lite)
Roboflow
Tackling the Small Object Problem in Object Detection
Roboflow
Fast.ai v2 Released - What's New?
Roboflow
Teaser: Roboflow Train (1-Click Computer Vision AutoML)
Roboflow
How to Train a Custom Resnet34 Image Classification Model
Roboflow
How to Label Images for Object Detection with CVAT
Roboflow
Deploy YOLOv5 to Jetson Xavier NX at 30 FPS
Roboflow
Elisha Odemakinde Hosts Roboflow ML Engineer, Jacob Solawetz
Roboflow
Getting Started with VoTT - Computer Vision Annotation
Roboflow
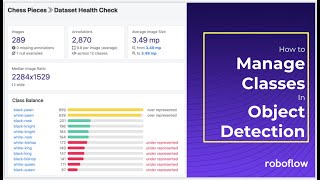
How to Manage Classes in Object Detection (Rename, Combine, Balance)
Roboflow
How to Train YOLOv4 on a Custom Dataset in Darknet
Roboflow
Is Grayscale a Preprocessing or Augmentation Step in Computer Vision?
Roboflow
Getting Started with Image Data Augmentation
Roboflow
Glenn Jocher: Image Augmentation in YOLO v5 and Beyond
Roboflow
GA Hosts Roboflow - Healthcare and AI
Roboflow
How do self driving cars know when to stop?
Roboflow
What is PASCAL VOC XML?
Roboflow
AutoML Showdown: Google vs Amazon vs Microsoft
Roboflow
How is computer vision changing manufacturing?
Roboflow
The Alphabet in American Sign Language
Roboflow
Luxonis OAK-D: Computer Vision on Device
Roboflow
How to Train a Custom Faster R-CNN Model with Facebook AI's Detectron2 | Use Your Own Dataset
Roboflow
TensorFlow vs PyTorch: Fireside
Roboflow
Occlusion Techniques in Computer Vision
Roboflow
A Customizable Web Application for Your Computer Vision Model
Roboflow
Model Tradeoffs and the Future of Computer Vision
Roboflow
Designing an Augmented Reality Board Game App
Roboflow
YOLOv4 - Advanced Tactics
Roboflow
How to Use CreateML and Build a Computer Vision iPhone App | AR Object Detection
Roboflow
Fireside Chat: Computer Vision in Agriculture
Roboflow
Scaled-YOLOv4 Tops EfficientDet: Research Rundown
Roboflow
What is Image Preprocessing?
Roboflow
Building a Community of Creators with BlkArthouse and Von Deon
Roboflow
How to Train Scaled-YOLOv4 to Detect Custom Objects
Roboflow
Intro to Computer Vision: Fireside
Roboflow
The Best Way to Annotate Images for Object Detection
Roboflow
The Computer Vision Process: Fireside
Roboflow
How to Annotate Images with Your Team Using Roboflow
Roboflow
Introducing the Roboflow Object Count Histogram
Roboflow
How Fast is the M1 at Machine Learning? Benchmarking Apple's M1 and Intel's Chips
Roboflow
CLIP: OpenAI's amazing new zero-shot image classifier
Roboflow
How I hacked my Nest camera to run custom models
Roboflow
Getting Started with the Roboflow Inference API
Roboflow
Transfer Learning in Computer Vision | What, How, Why
Roboflow
More on: CV Basics
View skill →


Related AI Lessons
⚡
⚡
⚡
⚡
When the Camera Becomes an Exam Proctor: Building an AI-Powered Exam Monitoring System with…
Medium · Python
When the Camera Becomes an Exam Proctor: Building an AI-Powered Exam Monitoring System with…
Medium · Deep Learning
When the Camera Becomes an Exam Proctor: Building an AI-Powered Exam Monitoring System with…
Medium · Cybersecurity
Your Face Is About to Become Your Phone Number
Dev.to AI
🎓
Tutor Explanation