Getting Started with VoTT - Computer Vision Annotation
Key Takeaways
The video demonstrates how to use Microsoft VoTT for computer vision annotation, including installing the tool, uploading images, making annotations, exporting, and converting labeled datasets to various formats using Roboflow.
Full Transcript
hey guys this is jacob from roboflow here today to show you a tutorial on how to use microsoft vot to label images for computer vision microsoft vod is a great tool to quickly and efficiently label your images before training and today we're going to go through a few steps on how to use it the first step is how to install microsoft vot then we'll show you how to load in images via via a local connection into microsoft bot then we'll show you how to make annotations and use some of the shortcuts that are available for image annotation in microsoft and then we're going to export our data set and after export i'll show you how to convert your data set into any format so you can use it with any of your models in any destination that you are desiring to take your data set so now diving in in order to install microsoft bot there are a few options first of all you can log on to the website and use it completely on their web server but the disadvantage there is that you will be unable to load in images via your local file system instead you'll have to have your images in an azure cloud bucket so if you're already in azure and you're already in the microsoft ecosystem it makes sense to just use their web interface annotation tool now if you don't have your data on microsoft azure like most of us and you have it on a local file store you'll want to download microsoft on local and install it on your local computer in order to do this bot does not make it extremely straightforward but you can go ahead and find the installs here on their github github repo so here is uh microsoft vot repo and i'll post this link below in the video but here you can see if you look at the latest releases there are a few downloads here you can download it for windows here with the dot exe for linux with the dot snap or for your mac with the dot dmg and uh so i've went ahead and downloaded this and i've installed it on my computer already i'm running on a mac and uh so i've already uh installed the vot file and um go ahead and launch the application and then and then you're into the platform on your local computer where you can use your local file store so once you have bot installed and you've found a place to use it uh you can go ahead and load your images into microsoft vot so in order to do that first we need to start a new project so projects are vots way of organizing data and kind of getting you thinking about the way that you want to organize the way you're organizing your labeling jobs so in order to start a project here i'll go ahead and just call this one bot tutorial and you can generate a new security token that's that's an advanced feature um for keeping your data secure if you want to and then the next thing is to add a connection so this um seems like a little bit over the top but if you're connecting into an azure cloud bucket that's what you do but we just want to use our local file drive so we'll go ahead in here and say connection for our connection name and we can select the provider so if you use the website you're only going to see azure blob storage or big image search but we're going to want to use a local file system once you select local file system you can select the folder where your data is so this kind of assumes you've already collected the data that you want to use in your in your project but we do have some advice on that you want to narrow domain down to something that's going to be easy enough for your model to to actually model um you don't want to just kind of be a very general field but once you've kind of picked the data set now you can go ahead and load it in here for for labeling so here we go i've got um basically some daisies and some dandelions here in my train folder so i'll go ahead and choose this folder to load in we'll just go ahead and load in the daisies for now and there you go that links the local file storage system and that should load up into microsoft so now we've uh selected this new we've made this new connection um but now we actually need to select it so we'll select connection here and then for target connection this is where the data is going to be exported to after you've labeled inside of microsoft bot so here i'm just going to put it back into the same folder so i kind of know everything's in the same spot but you could imagine uh some time where you might have a base folder but you want to be exporting into uh separate folders out of microsoft lot so um that's uh our target connection is selected there um we're not using video but you can annotate video in microsoft and we'll add tags here so i'm just going to be annotating daisies so i'll just have one tag daisy but you'll have a tag there for every single object in your data set after that you can go ahead and save project and you'll see that your data is loading into the platform here um so uh i'm going to pick one of these images where there's a few daisies and we can kind of go through and uh experience a little bit what it's like to use the ui inside of hot um so that is primarily designed for object detection labeling which is what we're going to be doing today this is where you're just drawing a bounding box around the object that you want your model to be detecting so here i'm going to draw a bounding box you can just simply click and drag and then you've highlighted the object of interest there and after you've highlighted the object you want to label it so we put one tag in here which was daisy which i don't believe it showed up but i'll go ahead and add it in here and after you've selected the box you can use the number keys i'm just going to start over on this one you can use the number keys to assign the class label to the box that you've drawn so there you go you can see that it selected daisy but let's say we maybe had a few other classes here i'll go ahead and add another one let's just say we had dandelions in here and we also wanted to label those those will show up with red boxes so after we have drawn the box and we can move it around there and we label it we can label it as dandelions so as you can see here you can kind of be going through quickly and annotating different objects in your data set and acquiring object detection data at a very fast rate compared to other labeling tools and you can do this quickly just dragging and dropping and hitting the number keys to be uh labeling your class labels so now you can imagine we've gone through our data set and we've done a lot of labels the nice thing that pot does for you is over here on the left it um will show you which ones you've looked at and it will show you which ones uh you've actually labeled so you can kind of have a sense for how much you've passed through your data set and how much you've done but once you're done labeling you can you're going to want to do something with your data and so that's where export comes in so another important thing to do as you're working through is to actually save your progress you can't lose that and if you lose a lot of labeling work that can be quite frustrating but the export button is up here and before we export we actually want to go over here to the left and choose our export settings actually that's this little arrow here so export settings um you can export to a few different formats here i am going to show you how to do more after um in a minute but you could choose tensorflow otf records um you could do the pascal lot format or the vote json which is kind of their internal format we'll just do vat json for now that's kind of the most basic vanilla format to be exporting your data from and we'll do only visited assets so you know i saw a few of those and then i labeled one but it will only export the ones that we've actually visited um so that's uh kind of nice but you could also choose to do the whole data set or just a few um and you can also choose include your images in the export or maybe you just want the annotation file itself but we'll include the images here so then you save export settings and you go ahead and go up here and you click export so now we we have exported successfully we've gone we've taken our data into microsoft bot we've labeled it and then we've exported it out of microsoft now i'm going to show you how to use robofloat to convert microsoft into any format any format for any destination that you might be wanting to take your data after you've labeled it and bought so um this is just one example of an annotation uh conversion but um it is a pretty easy tool um in order to do it you just log into roboflow and if you don't have an account yet you can go ahead and create one you'll also see here that i already have um a few data sets of my own up but i'll go and create data set this one will be called just flat tutorial and selecting object detection and here we'll just call it the annotation group flower since we've annotated flowers in microsoft so now we'll go ahead and create that data set and in order to ingest the files that we've gotten from bot um we'll go ahead and navigate here to the folder where we told it to export which was daisy and you'll see here that um there are the original images but then it's also um on top of that it's exported the json export um where we told it to export the images and the annotations so that's the thing that we want we'll go ahead and drag that in uh here you can see it loaded in a few images including the one that i labeled um and after that you can go ahead and click finish upload and we'll just only have a few images here so we'll just put them all in the trading set but yeah now your data is here and after you've labeled it now you can do a bunch of um fancy things on top of labeling where you can use augmentation you can use pre-processing and you can export any destination so here i just have a simple resize to 416 on i'm an auto orient just to make sure my images are oriented in the correct direction now you go ahead and click generate we'll just call this v1 and we'll go ahead and move through here this will send images to the back end and create a dataset version um so this is something you can do to be creating data set versions so you can spend less time labeling um data set after data set after data set um and more more time kind of honing in using um using more of an automatic approach so you can spend less time labeling and more time building the best model possible after you've exited vod so now you can see here that um it's asking me what format i want to export to um so here's all the things that you can go to you can use various yellow formats yellow dark net yolocare osteo pi torch you can also go to tensorflow tf records you can go to coco json um create a ml kind of really any destination you're gonna need to go in computer vision this uh will get you there if the original va export didn't already get you there um so there we have it that's a kind of a full tour of using microsoft vot for data set annotation and then using rebelflow for conversion to any destination so this has been a quick tutorial on how to use microsoft mod effectively we hope you enjoyed again there'll be some links of a corresponding blog post and how to install vod um below but go ahead and like and subscribe and as always uh thank you for watching
Original Description
Annotate your images with Microsoft VoTT.
In this video we walk through how to install VoTT, upload images from your local file system to VoTT, make annotations, export, and convert your labeled dataset to any destination.
VoTT install link:
https://github.com/Microsoft/VoTT/releases
Corresponding blog:
https://blog.roboflow.com/getting-started-with-vott/
✅ Subscribe: https://bit.ly/rf-yt-sub
Watch on YouTube ↗
(saves to browser)
Sign in to unlock AI tutor explanation · ⚡30
Playlist
Uploads from Roboflow · Roboflow · 25 of 60
1
 2
2
 3
3
 4
4
 5
5
 6
6
 7
7
 8
8
 9
9
 10
10
 11
11
 12
12
 13
13
 14
14
 15
15
 16
16
 17
17
 18
18
 19
19
 20
20
 21
21
 22
22
 23
23
 24
24
 ▶
▶
 26
26
 27
27
 28
28
 29
29
 30
30
 31
31
 32
32
 33
33
 34
34
 35
35
 36
36
 37
37
 38
38
 39
39
 40
40
 41
41
 42
42
 43
43
 44
44
 45
45
 46
46
 47
47
 48
48
 49
49
 50
50
 51
51
 52
52
 53
53
 54
54
 55
55
 56
56
 57
57
 58
58
 59
59
 60
60

YOLOv3 PyTorch Notebook Tutorial
Roboflow
How to Train YOLOv4 on a Custom Dataset (PyTorch)
Roboflow
How to Train YOLOv5 on a Custom Dataset
Roboflow
How to Use the Roboflow Dataset Health Check
Roboflow
What is Mean Average Precision (mAP)?
Roboflow
How to Use the Roboflow Model Library
Roboflow
How to Train EfficientDet in TensorFlow 2 Object Detection
Roboflow
How to Train YOLO v4 Tiny (Darknet) on a Custom Dataset
Roboflow
Ask the Roboflow Team Anything - Episode 1
Roboflow
Exploring The COCO Dataset
Roboflow
Community Spotlight: Improving Uno with Computer Vision
Roboflow
Mosaic Data Augmentation - Deep Dive
Roboflow
Hands on with the OAK-1
Roboflow
Glenn Jocher: What is New in YOLO v5?
Roboflow
How to Use Amazon Rekognition Custom Labels and Roboflow to Build an Object Detection Model
Roboflow
An Interview with Brandon Gilles, Luxonis Founder and OAK Chief Architect
Roboflow
How to Train a Custom Mobile Object Detection Model (with YOLOv4 Tiny and TensorFlow Lite)
Roboflow
Tackling the Small Object Problem in Object Detection
Roboflow
Fast.ai v2 Released - What's New?
Roboflow
Teaser: Roboflow Train (1-Click Computer Vision AutoML)
Roboflow
How to Train a Custom Resnet34 Image Classification Model
Roboflow
How to Label Images for Object Detection with CVAT
Roboflow
Deploy YOLOv5 to Jetson Xavier NX at 30 FPS
Roboflow
Elisha Odemakinde Hosts Roboflow ML Engineer, Jacob Solawetz
Roboflow
Getting Started with VoTT - Computer Vision Annotation
Roboflow
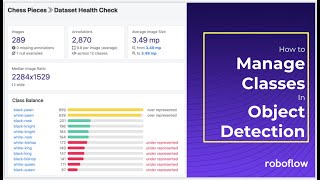
How to Manage Classes in Object Detection (Rename, Combine, Balance)
Roboflow
How to Train YOLOv4 on a Custom Dataset in Darknet
Roboflow
Is Grayscale a Preprocessing or Augmentation Step in Computer Vision?
Roboflow
Getting Started with Image Data Augmentation
Roboflow
Glenn Jocher: Image Augmentation in YOLO v5 and Beyond
Roboflow
GA Hosts Roboflow - Healthcare and AI
Roboflow
How do self driving cars know when to stop?
Roboflow
What is PASCAL VOC XML?
Roboflow
AutoML Showdown: Google vs Amazon vs Microsoft
Roboflow
How is computer vision changing manufacturing?
Roboflow
The Alphabet in American Sign Language
Roboflow
Luxonis OAK-D: Computer Vision on Device
Roboflow
How to Train a Custom Faster R-CNN Model with Facebook AI's Detectron2 | Use Your Own Dataset
Roboflow
TensorFlow vs PyTorch: Fireside
Roboflow
Occlusion Techniques in Computer Vision
Roboflow
A Customizable Web Application for Your Computer Vision Model
Roboflow
Model Tradeoffs and the Future of Computer Vision
Roboflow
Designing an Augmented Reality Board Game App
Roboflow
YOLOv4 - Advanced Tactics
Roboflow
How to Use CreateML and Build a Computer Vision iPhone App | AR Object Detection
Roboflow
Fireside Chat: Computer Vision in Agriculture
Roboflow
Scaled-YOLOv4 Tops EfficientDet: Research Rundown
Roboflow
What is Image Preprocessing?
Roboflow
Building a Community of Creators with BlkArthouse and Von Deon
Roboflow
How to Train Scaled-YOLOv4 to Detect Custom Objects
Roboflow
Intro to Computer Vision: Fireside
Roboflow
The Best Way to Annotate Images for Object Detection
Roboflow
The Computer Vision Process: Fireside
Roboflow
How to Annotate Images with Your Team Using Roboflow
Roboflow
Introducing the Roboflow Object Count Histogram
Roboflow
How Fast is the M1 at Machine Learning? Benchmarking Apple's M1 and Intel's Chips
Roboflow
CLIP: OpenAI's amazing new zero-shot image classifier
Roboflow
How I hacked my Nest camera to run custom models
Roboflow
Getting Started with the Roboflow Inference API
Roboflow
Transfer Learning in Computer Vision | What, How, Why
Roboflow
More on: CV Basics
View skill →


Related Reads
📰
📰
📰
📰
Building Anime Lip Sync in ComfyUI: A Detection-Guided Diffusion Pipeline
Dev.to AI
Membangun MataBakti: Ketika Computer Vision Belajar Menemukan Cacat pada PCB
Medium · Deep Learning
The Role of 3D Cuboid Annotation in Autonomous Vehicle Perception
Dev.to AI
Vision AI: Transforming Business Operations with Computer Vision AI
Medium · AI
🎓
Tutor Explanation