Face Matching Application Using Deep Learning End to End Implementation
Skills:
Neural Network Basics80%
Key Takeaways
Implements a face matching application using deep learning, including data preparation and model training
Full Transcript
hello all my name is krishnak and welcome to my youtube channel so guys today in this particular video we are going to see the entire deep learning project implementation from line to line you will be seeing this entire implementation this video has been made by one of my subscriber and student of eineron his name is bappy and all his information will be given in the description of this particular video the most amazing thing about this particular deep learning project is that this project name is called as face match project that basically means it will try to compare your face with some celebrity and it will try to show it to you now what is the most amazing thing about this particular project this project will be completely implemented line by line from scratch so this entire session will be somewhere around three hour session uh and remember in the description also i've actually given with respect to all the time stamps what all steps are basically included and remember one thing guys many people ask me about lot of end-to-end projects so you can definitely take this as an example of an end-to-end project and implement in a similar way because this is the implementation is completely in an object oriented programming manner okay where we will be focusing on reusability of code and all that is the main motto of i neuron like how we teach our students and subscribers right so i hope you enjoy this entire video please make sure that whenever you get time watch this entire video you will definitely love it and you'll see how the implementation will actually be done so let's go ahead and let's see this entire project and i hope you will enjoy this particular video hello guys my name is bhapi hamid and today in this particular video i'm going to implement an amazing project uh which should be based on deep learning so in this video uh i'm going to implement an end-to-end projects okay by using deep learning uh so you can say uh it would be a deep learning project okay and uh and in this video uh i'm going to show you uh the live implementation so that like you can go ahead with that and you can get the idea like how we can implement that projects okay so we will use some uh different technique here okay for implementing that project uh i think you are going to like that okay uh so first of all uh i will show you the demo of these projects okay so after seeing the demo so we'll be implementing that project okay so let me share my screen so guys uh the name of the project is uh to whom does your face match okay so uh i think you have uh i think you have already probably seen some of the uh application okay uh i think uh i mean uh from your smartphone or from the website itself okay so you have seen some of the application uh like if you put your image okay so it will tell you like to whom your face is masked okay so yes we are going to create a similar kind of application here okay but in a different way and uh i think you are going and you are going to like it and uh you are you will also know like how you can also implement that projects okay so after seeing the implementation you will realize uh how easy it is okay so uh whenever we are using that kinds of application okay so uh you don't have to like uh confuse like how they have implemented okay so uh here you can see this is the homepage of our projects okay and uh you can see i have uh implemented this ui using this streamlit so if you don't know what is streamlit streamplate is a you can say python package okay so by uh so by using streamlit you can create amazing like you can say uh ui okay and this live server also okay so that like you can create any kinds of web application here okay you can also use the flask but in this video i'm not going to use last okay but if you are interested in plus you can also implement it using the flask one okay uh so first of all i will i will show you some of the demo or demonstration of this project so uh see if i uh browse here okay and uh if i select some of the images uh so suppose i have some of the images okay uh like i have some of the duplicate images okay so i'm going to upload that and let's see how it is work okay uh so first of all uh i will uh uh i will put one pic okay so you can see this is a girl okay she looks like a almost priyanka chopra okay so i have given to my model okay now let's see uh what what it is predicted okay um it is predicting see uh it is telling uh she is a priyanka chopra she seems like priyanka chopra okay uh so it is amazing right but uh she's not actually priyanka chopra but uh she's she but her face uh is messed with uh you can say this priyanka chopra okay then if i put another image so let's say uh i will put a duplicate sharp khan here okay so let's see uh so see uh it is predicting uh his look and he's looking like sharkkan okay and let's say i'm going to give another peek let's say i'm going to give a duplicate salman khan so see uh it is uh predicting uh he is looking like salman khan okay and uh one of the challenging picture i'm going to uh give now okay so you can say i think you have seen uh this image okay so there is a movie i don't remember but in that movie uh amitabh bachchan like uh you can say that kinds of makeup like uh he has taken okay and see it is uh also predicting uh his amitabh bachchan here okay so i think you were understanding how strong this model is okay so here and uh let's see i'm going to keep my peak here okay so then see what it will predict uh so see uh i am looking like rita's dashboard okay uh it's fine i don't know i i look like or not uh let's say i will uh give uh a krishna picture here so let's see what it predicts so let me give so i'm giving uh krishna xrp okay so let's see so uh uh you can see he's already looking like amir khan here okay uh just uh do comment below okay he's looking like amir cannot not okay but guys i think uh you are going to enjoy that project okay uh it would be an amazing project okay so i have shown you the demo okay now let's implement that project uh so guys uh first of all uh we will uh download some images okay uh from the kaggle actually in this project we are going to use this data set okay for building our model uh so here you can see this is the data set of bollywood celebrity okay uh so if you see that so you can see the name of this data set is bollywood celebrity localized phase data set okay so if you open up this data set uh so you can see uh there are almost i think 8000 images okay you will get and almost 100 bollywood celebrities i mean images you can find okay and those images like you can say those image sizes like uh you can save this 64 into 64 pixel okay like uh it is a very small but here like if you open up this data set okay so if i open up this data set so you will see uh this is just a face okay so so that this image pixel is very low okay so here uh we are you uh here we are going to use this uh you can say face recognization technique okay face detection technique so uh if our images is like low resolution okay i mean low pixel i mean less pixel so it doesn't matter okay uh it will perform good at the time uh so yes we are going to use that images okay uh in our model and uh you can see here this is almost 27 mb okay the size of this data so here you will find a here you will find 100 celebrities picture so first of all i will download this data in my local so guys you can see it is downloading so i will wait uh so guys you can see i've downloaded this data okay uh in my local so if i uh go to my download section so you will see uh this is the data i have downloaded uh now what i will do i will just uh you can say create um my project directory okay so where i am going to implement this project okay so for that uh suppose i'm going to create a you can say directory here okay so i'm going to name it like uh you can say face you can say match okay so you can give any name okay it doesn't matter so i have given face match okay so if i go to this folder and here what i will do i will just copy my image okay so here i will copy my image so this is the data for this image so from that this folder i'm going to uh move that here okay then i'm going to like unzip this file after unzipping this file i'm going to delete that folder this is not required so you can get rid of that and so yes this is the you can save my data okay so you see this is the data i have uh so if you uh go to this folder so you will see there are three folders okay you're presented so if you click on that so you will see uh all the you can say probably celebrity names here okay so if you uh click on that okay so you will see all the picture okay uh of this uh celebrity face okay so you can see this is uh amir khan okay and uh if i open this picture so you can see uh this is a very small picture because uh this resolution is like 64 into 64. okay so that's why but uh that is fine because we are we will be using this face you can say recognization technique here okay so the resolution is fine as of now uh so yes uh like that there are you can say almost a 1000 selected you can see there are almost 100 celebrities picture there okay so so now what i'm do i'm going to do i'm going to create another folder okay so i'm going to name it like data okay after creating this data folder uh i will just go to i'll just go to this folder and i will copy uh you can say i will move all the folders okay all this celebrity folder in one folder okay so like i have moved that okay i have uh you can say selected and i have pasted it here okay so yeah you can say this uh first folder like i have moved all the file then like that i will just go to this second folder and i will cut all the file and i will go to my data folder and i will paste it over there okay like i think you are getting like i'm i'm just trying to uh you can bringing all the data okay in one place so that like uh i can read it very easily okay so that is what i am doing here then uh similarly i will uh go this tart folder then i will move all the file [Music] and i will paste it over there okay so guys you can see i have moved all the file here okay so you can see there are almost 100 value celebrate this data i have and now what i'm going to do i'm going to just get rid of this file okay that is not required and this is my uh you can save this actual data i'm going to use in my model okay uh so yes uh how we have done our you can say the first step okay of our projects uh now what i'm going to do i'm going to just briefly tell you what would be our architecture okay so how we are going to implement that project okay and so for that i'm going to open up my whiteboard okay so here you will see uh it's a vcc phase architecture okay so uh if you don't know vgc face uh is a model okay so we can use that for extracting feature okay and you can also use that you can say this algorithm uh you can say for detecting a gender then hair color get an age then facial and also this facial hair style then age okay so you can you can you can say detect okay by using that algorithm so here uh we are going to use uh you can say this algorithm okay in our uh you can say projects okay but why we're going to use this vcg face okay because uh first of all like uh here we have our images okay like we have the face uh of all the celebrities okay i mean if i talk about in my folder okay so what i'm going to do i'm going to extract some of the feature from that you can say images okay so i think you have uh you already know about the cnn okay so in cnn what we do we just try to you can say extract the feature okay so by using this kind of you can say cnn architecture or you can say this uh various model okay we can use that but in this uh projects okay so because we are you can say we are we are working with the face okay so that's why we're uh using uh this architecture because uh it has all already been trained on you can say this phase data set okay so that's why we're going to use this which is 16 okay so if i talk about briefly okay so you can see there are two parts okay so if i uh you can say make a border okay so you can see uh it's a you can see flattened and dense layer okay so uh i think you know that and if i talk about this is the pure cnn part okay so we can uh use this part okay by extracting the feature from our images okay and we can get rid of this part because this is not required because uh we are not going to you can say identify this gender or hair color okay all the thing uh so we can uh we can say we get rid of that and we can keep this against architecture for extracting the feature from the image itself okay so i think you got the idea now what i'm going to do okay so that's why i'm going to use this uh you can say conventional network okay so that name is which is the face okay uh so there are uh there are also some of you can save faster extractor okay you can see over the internet so you can also use that but in this project i'm going to use that one and so that was like our uh you can say model architecture okay so we're going to use now i'm going to tell you now i'm going to briefly tell you about our architecture okay so how we can uh we are going to implement that projects okay so if i talk about the architecture of this projects okay so first of all like uh uh first of all like uh we are uh using here this you can say this uh vgz okay pgc means like a visual geometric group okay like it is from oxford uh you can say university okay so there there is a group called vcc geometry group okay so they have developed this you can say algorithm okay so this vgc okay so the the meaning of this which is visual geometric group okay so we are using that algorithm in our uh we can say projects uh okay then the architecture wise like we will be like create our own architecture okay so uh like that we'll write all the code okay so um so here uh i think you have already seen we have downloaded uh you can say um hundred bollywood celebrity images okay and i guess uh there are almost 8 000 data okay 8 000 images uh in your folder okay we're going to utilize so from this 8 000 you can see images okay we are going to uh first of all resize the images because you have already seen this is a 64 uh into 64. okay 64 into 64. uh but uh if you have already learned this you can say this vgz okay you can say which is the algorithm so you will see it will take the image size like two to four okay two to four sorry for my bad handwriting actually i'm using my mouse so let me clean [Music] okay so it takes 2 to 4 times 2 to 4 okay it will take uh your image resolution like two to four uh times two to four okay so that's why we have already uh this 64 uh into 64 okay resolution images okay then from the 64 into 64 we will convert it to two to four uh into two to four okay so so so our architecture would be like suppose i'm getting the images okay from my you can see directory and you can say from my folder then i will uh just resize it in two to four times two to four then i will pass this uh images to my model okay so suppose i'm passing this images to my model and after passing uh this model will return okay this model will return an array okay that would be so if i pass this images into my model so that will give me a uh you can say a 2d array okay so in this 2d array you can say here we know we have 8000 images okay so so each images there will be and one day array okay so one there it means like there would be uh you can say uh two zero two zero four eight item okay two zero four eight item in each area okay so i think you get the idea okay suppose uh we are using this vgd face here okay so uh if you already know so if you use this vg uh you can say face uh we can say cnn uh you can say conversion neural network here okay so so it will uh give you uh the feature a list as a two zero four eight you can say number of uh array okay so in uh so each of each array will contain uh two zero four four eight items okay like that we have you can say 8 000 images so we will get okay we'll get eight thousand array okay eight thousand array in this feature list okay two zero four eight and each area will contain uh two zero four eight number of you can say items okay so i think you've got the idea okay uh so this is a 2d array now we have a 2d array and this in this 2d array we have you can say 8 000 uh eight thousand uh number of uh you can say images okay and this image has been converted to a uh you can say one day array and each array will contain two zero four eight items okay so i think you've got the intuition what i'm trying to say okay and you can also uh call it as a vector okay it's a vector okay it's a vector uh now uh what i'm going to do so i got you can say this uh so i got the vector okay so now i have so now i have the vectors okay so from this uh vector now i i will do the prediction okay so for the prediction part what i will do so so this is the prediction part prediction uh so in this prediction part we will create and we'll create and we'll create a web app okay we'll create a web app uh then uh here would be a you can say patent okay so by using that button we can upload an image okay and this image we will save in our local okay so we will save in our local and this image will convert it to two to four times two to four okay because we have already uh you can see taken this uh images into two two four into two to four okay so that's why uh whenever user will upload one image okay at the time we will also apply the similar task over there okay then uh from that i will pass this images to my model to buy vgc fest model so it will return and one day array you can say it will return in one day array it will contain two zero four eight number of items okay so now we have uh the now we have another vector okay so this is our new vector okay we have got from the user so and we also have our previous all the vector okay like all the images okay we have converted to the vector uh now what i'm going to do for the prediction itself uh so now what we will do we will uh just measure the cosine similarity between this uh you can say vectors okay so uh so so by applying this cosine similarity we will get to know like uh from which vector okay uh this a new vector uh i mean this uh similarities uh i mean uh you can say more high okay by that we will get to know yes this is the vector okay this new vector is you can say uh similarity similarity is high then we will select those vector as a uh we can say recommended you can say images okay uh so what i'm trying to say i will just draw that okay so for that like uh see we have uh two zero four eight okay uh you can say items okay in a vector so if we create uh two zero four eight dimension here okay so if we create two zero four eight dimension suppose this is a two zero four eight dimension and we have all the point okay so these are the point you can say two zero four eight point in this dimension okay uh we have uh suppose uh this is the new data okay this is the new vector uh user has a user you can say user user has given uh so suppose this vector is here okay this is here now what we will do we'll just measure the distance okay measure the distance uh from all the data points okay so see we'll uh measure the distance from all the data points are presented in this uh you can say axis okay like that here we'll find the distance between this uh you can see vectors and like that we'll get to know what is the less distance here okay so whatever uh we are getting the less distance okay so we will uh like you can say so we will consider okay so this data point is belong to this you can say this category of the vectors okay this category of the images okay like that uh we will select uh you can say those uh images okay which is uh similar and which is like less distance okay with this you can say all the data points we have okay now i think you've got the idea like how we are going to implement that okay so whatever i have covered till now okay i will give a short summary okay so uh if i explain it uh so first of all so we will use this uh vg of which is the face okay uh for extracting the feature and this which is the face okay like uh and uh and we have you can say a and 100 uh bollywood celebrity images okay and almost we have you can say 8 000 images okay and so from this 8 000 images first of all we will take one by one and we will convert it to two to four into two to four because uh this vg takes you you can say uh input size as a two to four into two to four okay then i will pass uh these images to my model okay then this model will give give me and to the array okay to the array um so to draw means like it will contains 8000 images okay uh with this 1d array okay you can say and this 2d array will contain this you can say a 1d array okay so each arrow will contain two zero four eight values okay so you can say also you can also call it vector and uh if we have the vector then we will just save it okay in applicable format so that we can use it later okay uh then uh during the prediction we will use this vector okay for measuring the cosine similarity between the new new vector with this old one okay so for the prediction itself like we will create on web app and whenever user will uh you can say uh put an images okay then we'll also convert it to two to four into two to four then we will pass it to the model and this model will give me another array which would be a one d array uh which will contain two zero four eight number of features okay and this uh we have these new features and we have this you can say uh feature list here okay so then what we will do uh we'll just uh calculate the cosine similarity okay we'll just calculate this i can say cosine okay cosine similarity similarity will calculate and whatever like similarity would be like you can say high okay we will select this you can see images as our recommended images okay so this is the workflow of our uh you can see entire projects okay i think you have got the idea now let's uh implement now let's implement that project so guys now we are going to start the coding part okay so first of all like like we have already clear created our project directory here okay and we have like you can say moved our data set in our project directory okay now let me open up my vs code here uh so in this projects i'm using a vs code okay so you can also use python okay so it's up to you but uh i've so but i prefer this vs code so that's why i'm going to use this vs code okay so yes uh i have opened this vs code here okay now let me open up my terminal okay so first of all uh let me tell you actually i'm using the batch terminal here okay so you can also use uh uh this uh you can say anagon so you can also use so you can say powershell or anaconda terminal here okay so you can change the terminal from here itself but uh as of now i'm using the bash you can save terminal here uh yes i have open up my terminal so first of all i'm going to create an environment here so i'm going to create a virtual uh environment here okay so um for that you can also create this virtual environment in your you can say c drive okay uh but i have seen uh one problem okay so whenever you are creating the virtual environment in your c drive okay so it is getting full so that's why like we will uh use different technique for creating the virtual environment okay so we will create this version environment in our project directory itself okay so there is a command for that so you can use so i will write conda uh create contact create hype and ipin you can say prefix um i have an app and prefix then uh we'll name our environment okay so it would be env uh after giving enb we we have to define our python uh version okay so we are going to use this python equal to 3.7 here okay 3.7 is fine then we will give hype and y so why we're giving this minus y because uh we're uh we're allowing to create this uh we can say um conda environment in a one time okay so if i uh hit enter so you will see uh it will create um a virtual environment in our project directory itself okay so yeah it will take some time to create okay so we will wait uh so guys uh you can see how this environment has been created okay so you can see this is the folder has been generated so this is the same okay so whenever you uh create any kinds of virtual environment in your you can say c drive okay so you will see uh all the necessary files would be there okay but we are created in our project directory itself okay so that like it will uh not take your you can see space of your c drive okay uh so yes we have created our uh virtual environment now we will activate the environment for that like you can write conda activate uh contact favorite activate dot and this forward slash okay then you will write e then if you press tab here okay so it will get auto complete then if you hit enter okay so you will see this uh environment has been activated okay so if i clear my terminal so you can see here you will see uh this is it yeah here you will see uh it has activated this env uh i mean you can say this environment okay but for you uh it will it might be a big name okay like in uh it might be a folder location here okay so that is fine because uh i have configured it with a small name okay so for you uh for you it might be different okay so it doesn't matter uh so yes we have configured our you can say environment okay now what we will do we will create some of unnecessary file okay uh like uh this file we are going to utilize in our projects okay so first of all uh we will create uh a file uh which would be our requirement.txt file okay so in this required the requirement.txt file will mention all the packages okay which are whatever we are going to use in the in this projects okay so for that like uh i'm going to i'm going to create a one file okay so which is regardment txt okay so for that i'm going to like write touch okay touch then i will just write require uh men's dot txt okay so touch is a you can say bash command okay so because i'm using this bash terminal here so that's why i'm using this touch command otherwise like you can also create any kinds of file or folder by using this you can say button here okay so you can easily create otherwise like you can create it manually okay so it's up to you but i'm using the patch terminal here so that's why i'm using that command okay so if i now hit enter so you will see there would be a file called requirement.txt so i will open that file and then i will mention all the necessary uh packages whatever we are going to use okay so first of all i am going to use this empty cnn okay so so why i'm using this empty cnn first of all let me tell you what is mtcnn okay so if i talk about this empty cnn mtcn is nothing but it's a phase detection and alignment you can say algorithm okay so uh we can use that okay so uh the full uh name of this empty cnn is multitask uh you can say cascade conventional neural network okay uh by using this empty cnn we can you can say detect the face okay you can say from an images or you can say from uh video you can say frame okay so we can uh detect our face okay so you can see face recognition is the problem of identification of verifying the people in a photograph okay by their faces but we can do that by using this empty cnn okay it's an uh you can say algorithm and here uh just the paper link also okay so we can also read this you can also read about this empty cnn so i will uh give the link in the description okay so that like you can go through that go through that paper okay so how it is working how it is detecting the face okay and there is also a blog okay so like how uh does a face detection program work okay so you can also read out that okay because uh i'm not going to explain uh how the face recognization work in this video okay so if you want to learn more so you can like refer these two links okay i'm going to give these two links in the description okay so if i show you some of the demo so yes see this is the demo as if you give any picture okay so it will detect the face okay actually i have forgot uh to save one thing okay in this architecture itself okay so if i um tell you that so see whenever we are you can see taking an images from the user okay so it might be a full images uh also okay of the user suppose it might not a face okay so at the time we have to detect the face from the images okay so like for that so uh first of all whenever we are taking the images from the user okay and first of all whenever we are saving that okay so uh what we will do we'll just you can say take this image okay then we'll just apply this empty cnn on top of this okay empty uh cnn on top of that so mtcnn will pass the face okay the face of the images okay suppose this is the images okay there is a person uh and this is the face okay so suppose it has detected and it will just give me this coordinate okay this uh bounding box coordinate here so we will get the face of this images at the time okay then we will take this image okay we'll take just uh we'll take this uh just of the face uh we'll just take this face okay instead of the whole body we'll just take this face and we'll pass it uh to my next you can say uh step okay where we will just you can say resize the images to uh you can save this 2424 that uh 224 to 24 then we'll just pass it to our model then it will extract the feature okay then it will generate the vector okay so this is uh the architecture we're going to use okay so so for that like we are going to use this mtcnn okay so i think now you have the idea why we're uh going to use this mtcnn okay so for that i'm going to use this empty cnn version wise i'm going to use this so you can say 0.0.1 0.1.0 then i'm also going to use tensorflow uh tensorflow although this mtcnn uses okay tensorflow in the back end but we're also we can say i install our you can say our tensorflow version 2 okay here we are going to use so that like i'm going to use this 2.3 point you can say one and also like we're going to use keras you can say uh keras buzz like we will use a 2.4 point um we can say three and uh sorry there would be double equal and we are also going to use this uh keras pcc phase okay so this vcc face is in the keras okay so you can use that directly uh keras you can say hi pin then vgc face okay so this is the you can say algorithm we're going to use for extracting the feature so so the version itself i'm going to use the 0.6 and also we are going to use this keras application uh keras then underscore application app location uh version wise i'm going to use 1.0.8 okay then also i'm going to use this uh pi ml because i'm going to use the ml file here so that's why by ml but then i don't need any version for that and also i'm going to use tqdm dqdm why i'm using this dq dm i will tell you uh tqdm then i'm going to use uh sorry i'm going to use sklearn here also scikit-learn s ci scikit-learn then uh i'm going to use this you can say streamlit here okay uh streamlit i have already told what is streamlit okay so by using stream latest package by using you can create uh and you can say web ui or web app okay so i'm going to use this streamlit okay then also i will install another you can say package which is a bing bing you can say image downloader okay so we will use that image downloader okay being in image downloader and yes these are the you can say packages okay we'll use and let me create another file okay so which is setup.py because we'll create some of the you can see local packages here okay so that we can utilize uh you can see in our projects okay uh so i'm not going to publish it as a package but uh i'm going to create some local packages okay for these projects okay so so that like i uh so i can like you can say create some of the folder and i can keep some of the utility file um in the folder then i can use that okay so for that i'm going to create a setup file okay so i'm going to write just touch then setup dot pi okay so if i write that then i will just open it up then whatever necessary i will just write it so here i'm going to use this setup tool okay so from setup to setup choose import setup okay uh then setup wise like setup setup echo setup then first of all the name of the package would be um src okay src because uh whatever folder i'm going to create okay so the folder name would be src then this is the name of my package then i will uh define the version of the you can say package okay so version wise like i will mention it suppose let's say 0.0.1 okay then also like i will define author okay so here you can mention your name because uh i'm going to use my name here because i'm implementing right now so papi hamid okay so you can mention the author and okay let me define in a double quotation that would be good [Applause] then i i'm going to take a different description of this you can say package so i'm i can write you can save a small package for so i'm going to like defend our project name here like our project name is to whom um your to him does you uh face match okay so this is the description okay so you can write long description here okay it doesn't matter then also you can define url here okay so suppose uh if you have any url of these projects okay so you can also define here but i'm not going to use the url here then i will uh define the author email okay so author email author email wise i will define my email here you can also use your email uh 73 then what is our package directory so we have to mention that so package wise like uh packages uh equal to like uh there would be a folder called src okay so yes uh this would be my package folder and the python requires python requires up to 3.7 okay so you can use up to 3.7 and the install package okay install request you can mention okay so whatever the install requires you can mention here so whatever you have written here okay all the things just copy that and just you can say paste it over there okay then just define it in a you can say quotation so yes uh i have written all the you can say require packages here okay now what i'm going to do okay so there should be setup not setup tools okay there should be setup now what i'm going to do in this requirement.txt file i'm going to just write you can say i mean just one line so this for local package okay local package so hypen e then dot okay so what it will do okay so whatever uh we have like written here okay so our local package okay so it will create a local package for for us okay suppose here we are going to create an src file okay and in that src file we will keep all the utility tools okay and uh yeah and whenever i'm mentioning the minus e over there okay so it will install whatever we have written here okay automatically install that so now what i'm going to do from the terminal itself i'm going to just install all our requirement.txt okay so first of all let me create uh this src folder okay then i will just install all the packages okay so for that like i will just write touch dot not touch okay because we are going to create a folder so that's why i'm going to use mkdir okay mkdir then we're going to name it src okay src if i hit enter so you will see there would be a folder called src and so src is a package okay so for that like we have to create another file okay which would be underscore underscore uh init underscore underscore dot pi okay so i think you already know about the package okay so if you open up any package okay so you will see yeah one file uh that would be underscore under screen it underscore underscore dot pi okay so it's a you can say package you can say file okay initialization file okay if you open up any package so i will just uh create that so for that like i will just write touch uh then uh where i'm going to create that file into src then i'm going to name it like underscore underscore init underscore underscore dot pi okay dot py and if i hit enter so if you open up this src so you will see that file and this src uh and in this src folder i'm going to create another you can save um folder uh which would be utils okay because all the utility uh i'm going to like uh create in this utili util you can say folder okay and all these steps we are going to perform we are going to keep this that in our src folder okay so like that i'm going to create um another file which is uh mkdr and get here where i'm going to create it in our src okay src uh folder then i'm going to name it um utils okay u utils okay this is the name of the folder i'm going to create so if you open up this src okay so let me show it manually so if i open up this src folder so you will see another uh there is a file called underscore underscore in it and there is also a folder called utils okay and in this utils because utils also should be a package okay so in this utils we are also going to create another uh init you can say dot pi because uh it would be another package okay so for that like i'm going to just write touch then into src uh then into utils i'm going to create underscore underscore uh init underscore if i hit enter so if i open up that so you will see there would be another uh you can say python uh file which is underscored screen it that underscore underscore that pi okay so yes so we have done or you can say this you can say package folder okay we have already created now what i'm going to do now uh i have already told you i have i will keep all the utility okay utility files in our details folder okay utility files means whatever function uh we will be using okay uh you can say repetitively so we'll make a function okay in this utility we can say folder okay um okay then we will use those utility function okay uh use the necessary function in our project okay so that's why we will we have created this utility folder here okay so like um i will create another file python file here okay that would be name of all utilities okay all details okay because this all in all utils of uh python file will be uh creating all the function necessary function okay so for that i will write touch src then into utils we will create another file which is all underscore utils okay utils dot pi okay so if i hit enter so if you see uh you already see you can see all the utility you can um okay so this all utility folder has been created okay now we can open that file and we can write all the necessary function here okay so i will show you what i am trying to say as of now you might get some kind of confuse but after getting all this so you can say uh process okay so you will get to know why i'm doing that okay now uh let me install uh this uh you can say packages in our local in our local environment so for that i will use one command it's a pip install okay hype in r then i will just write requirement.txt okay requirement.txt so if you hit enter so you will see all the necessary packages packages will be installing okay so guys uh you can see it is installing but first of all i got an error because uh here i have mentioned one comma in this tensorflow i can say name now i have fixed that okay so now we can see all the necessary package is being installed okay so we'll wait uh until it has been installed okay so guys uh as you have already seen i have installed all the necessary packages okay so yeah you can also do that so now what i'm going to do um i'm going to create uh you can say some of the necessary file okay uh which we will be utilizing here so first of all i'm going to create uh one file here so okay so which would be like uh you can say uh parameter.yml okay so why we're creating this parameter.yml file okay so i will uh tell you whenever we will be creating our model okay so for that like i will uh give a command so we should it should be touch dot um you can attach the parameters so i will write params p r a params.yaml okay so yeah as you can see i have already created this params.url so let me clear my terminal and i will also create another folder here which would uh the folder would be like config folder okay so let me create mkdir config so if i hit enter so you will see there would be a folder called uh config okay so in this config folder i will create another uh you can see ml file i i'm going to name it file you can say config.pml so for that like i will write touch then in the config file folder i will create another file called config dot yaml uh so guys so you can see i have created this ml file here okay uh so yes we have done our you can say all that you can say we can say this necessary folder i have created uh now what i'm going to do i'm going to this open up this all utils you can say folder here okay and in this all details folder i'm going to like write all the necessary you can say repetitive function which would be like uh we are going to utilize in our uh you can see entire projects okay um so for that like i'm going to import some of the package so import os not always first of all i will import yaml then next i will import wes sorry operating system model then also i'm going to import the logging because i'm going to save all the logs okay whatever we are generating then here like we'll create a first function which would be like it will read our eml file okay so uh in this eml file okay we will uh we'll be giving all the you can say necessary uh folder path or file location okay so by using that we can read all the file location and folder path okay and we can easily like you can say navigate through our entire projects okay so that's why we're creating this config that eml file here okay so i will tell you uh whatever uh whatever i'm doing just just just stay with me okay just let me write so for that i'm going to define a function okay so in this function i'm going to name it rdml okay ledml it will read the ml file so here i will define the path path to our ima ml file okay i'm going uh we are going to give and that should be a string okay so that's why where uh we'll just mention it it is a string okay and uh for after that it will return uh you can say our dictionary here okay so like that's why like we will mention it a dictionary uh whatever i have written i think you you are getting like uh this function will take an you can say path location okay it would be a string and it will return uh a dictionary format output okay so that's why we have different this uh dict okay otherwise you can also get rid of that okay it is not necessary but i have like you can say mention it over there okay now we're going to open our yaml file with this open you can say function now i'm going to define the path okay so in the you can say path so this is not necessary but it's fine and then you can save as ml file then content yaml dot load we are going to use this against the safe load here safe load safe underscore node okay so yeah for reading this ml file we will we use this safe you can say uh safe safe underscore load okay then we'll pass the email here then uh for that like i will return the content return this content it is showing some error okay so i don't have to define that uh clone here okay now yeah i have written this function okay so by using this function we can you can say read any kinds of email file okay then i will create another function which will create uh our directory okay so suppose uh i need a directory here okay so i need to create it so by using that function uh we can create any kinds of directory here okay so for that like i will i'm going to name it um create uh directory okay uh create directory and it will take uh addiction you can say you can it will take uh you can say directory you can say name okay whatever name you are going to create so it will take this name and it would be a list because uh you why i'm going why i'm giving the list here because if you want to create you can save uh a multiple directory in a one shot okay so you can also uh create that okay so that's why you have to pass the list of the name okay so that's why we're taking the list here okay and uh then we'll just uh iterate through this list okay so for dir uh underscore path uh in the irs then we'll just create the directory waste dot make dirs then our di path and then we'll also define a parameter here that is uh exist okay is equal to true okay so if it is exist so it will not create that otherwise it will create okay uh then uh i will just log the information here okay so logging and then dot info okay so i'm going to uh log in the information like you can see the log here so i will just uh you can say name it i will use this app string here okay then directory directory is created at okay so at our location dir path d ir underscore path okay so yes i have done our second function then uh yes these are the function uh as of now we need to like uh create now what we will do we will be creating our how you can say main you can say stays okay so whatever uh we have explained uh in our architecture okay so we'll we'll be creating all the you can save uh function and all the files okay so let me um do that so guys now i'm going to create our uh you can say first stage okay so of our projects okay so for that like i'm going to create uh a python file in our src folder okay so if you minimize that uh so you can see in the ssc folder there is just one file which is underscoring the screen dot pi okay and in this src file we will create our first distance okay so like that like we'll just write touch okay touch then we'll just this is our fastest so that's why we'll be like name it zero one then we'll uh give the name like a generate uh generate image pickle okay uh pickle so i uh i have named it okay so you can name it any name but uh okay sorry actually uh i have created it here okay uh outside of the folder let me move it uh to this you can say src okay so for that there is a command mp otherwise like you can manually you can manually move that okay you can manually just cut that and just paste it over the ssc but i'm going to use this terminal same b this you can say 0 1 okay then i'm going to move it in the src folder okay src mb this zero one so i have moved it to the src okay so if you open up that so you can see i've moved it in the src folder so why uh i have created this file okay so let me tell it about okay so i have already told okay what would be our architecture okay so if i show you uh first of all like uh because uh we have the 8000 images okay we have eight thousand images uh okay so 8000 images and we can say we have a hundred hundred volume celebrities you can say photos okay uh so we have in our data folder okay so what we need to do first of all we need to like read all the images okay all the images suppose this is amir khan okay this is amir khan so if i open up my folder so this is the data folder suppose if i open this folder so suppose this is american and in that amir khan okay so you will see all the picture of american okay so what i'm going to do i'm going to read all the path okay all the path of these images okay suppose uh what would be my part suppose uh data then slash amir khan then slash this amir uh dot uh 40 jpg okay then i made 41 jpg okay that's how like there is a path okay so i'm going to read this path and i'm going to save it in a pixel format so that like i can utilize that in the later stages okay because i don't want to like you can say because i if i read it one time okay so if i save it the location okay so i don't need the data because uh why because i have already that you can save you can say part of the images okay so i don't need the data and i don't need to read the data data again and again okay so that's why i'm going to use this you can say uh pickle format i'm going to save it pickle format okay otherwise like you can keep it raw okay it is fine but here i'm going to save it in a pickle format okay so that like i can read and write more quickly okay so i think you got the idea what i'm going to do so first of all like i'm going to open up my this generate pickle file then after that like uh before that i will just configure my configuration the tml okay so whatever uh the necessary path okay whatever necessary directory i'm going to use in this project okay i will mention each and everything here okay so here this is a yaml file so if you know how to write ml file so that's fine otherwise like you can like get the idea from here so first of all i'm going to define a key uh that is uh artifacts um artifacts you can give any name but here uh i'm using the artifacts because uh every uh project you can see there they'll be using this artifacts okay it's a common name artifacts means like whatever you are generating okay so uh it would be inside there okay so that's why i'm just name it artifacts okay so inside the artifacts uh i will create a artifacts directory okay start effects underscore dire then i'm going to name its artifacts then our pickle format data pickle uh underscore format then underscore uh you can say data dr the folder name would be same okay we can pickle format data okay so you can give any folder name okay it's fine so i'm going to use that then image pickle file name okay so image pickle file you can say name uh i'm going to name it image underscore equal underscore file format i'm going to use sorry uh sorry that should be pickle uh image file picker name pkle okay that should be pickle uh why i have created this uh you can save uh file here because uh in this artifacts folder okay so if i run that so in uh so it will generate an artifacts folder here okay so in this artifacts folder it will uh create another folder named pickle uh format data okay in this pickle format data uh there will be like uh saving our all the file location okay all the image location i
Original Description
Code link: https://github.com/entbappy/Which-Bollywood-Celebrity-You-look-like
Data link: https://www.kaggle.com/sushilyadav1998/bollywood-celeb-localized-face-dataset
Bappy Linkedin :https://www.linkedin.com/in/boktiarahmed73
MTCNN refer link: https://github.com/entbappy/Face-Detection-using-MTCNN
▬▬▬▬▬ Contents of this video ▬▬▬▬▬
00:00:00 - Intronduction of project
00:00:47 - Demo of project
00:04:57 - Data Collection
00:10:50 - Project Architecture & Implementation steps
00:24:46 - Preparing environment
00:28:42 - Making setup
00:56:40 - Implementing stage 01
01:46:10 - Implementing stage 02
02:18:18 - Implementing web app
03:13:58 - conclutions
Watch on YouTube ↗
(saves to browser)
Sign in to unlock AI tutor explanation · ⚡30
Playlist
Uploads from Krish Naik · Krish Naik · 0 of 60
← Previous
Next →
1
 2
2
 3
3
 4
4
 5
5
 6
6
 7
7
 8
8
 9
9
 10
10
 11
11
 12
12
 13
13
 14
14
 15
15
 16
16
 17
17
 18
18
 19
19
 20
20
 21
21
 22
22
 23
23
 24
24
 25
25
 26
26
 27
27
 28
28
 29
29
 30
30
 31
31
 32
32
 33
33
 34
34
 35
35
 36
36
 37
37
 38
38
 39
39
 40
40
 41
41
 42
42
 43
43
 44
44
 45
45
 46
46
 47
47
 48
48
 49
49
 50
50
 51
51
 52
52
 53
53
 54
54
 55
55
 56
56
 57
57
 58
58
 59
59
 60
60

Natural Language Processing|Stemming
Krish Naik
Natural Language Processing|BagofWords
Krish Naik
Gaussian distribution or Normal Distribution in statisctics
Krish Naik
Natural Language Processing|TF-IDF for Machine Learning| Text Prerocessing
Krish Naik
Log Normal Distribution in Statistics
Krish Naik
Covariance in Statistics
Krish Naik
Confusion matrix, Precision, Recall| Data Science Interview questions
Krish Naik
Tutorial 44-Balanced vs Imbalanced Dataset and how to handle Imbalanced Dataset
Krish Naik
Implementing a Spam classifier in python| Natural Language Processing
Krish Naik
Tutorial 11-Exploratory Data Analysis(EDA) of Titanic dataset
Krish Naik
Face Recognition using open CV and VGG 16 Transfer Learning
Krish Naik
Pedestrian Detection using OpenCV from Videos
Krish Naik
Face and Eye Detection from Videos using HAAR Cascade Classifier
Krish Naik
Reading, Writing and Displaying images with Opencv| OpenCV Tutorial
Krish Naik
OpenCV Installation | OpenCV tutorial
Krish Naik
Face and Eye Detection from Images using HAAR Cascade Classifier
Krish Naik
Car Detection using HAAR Cascade and Opencv from Videos.
Krish Naik
Using OpenFace for Face recognition in Keras
Krish Naik
OpenPose Tutorial with Tensorflow
Krish Naik
Multiple Linear Regression using python and sklearn
Krish Naik
Dimensional Reduction| Principal Component Analysis
Krish Naik
Movie Recommender System using Python
Krish Naik
TPR,FPR,FNR,TNR, Confusion Matrix
Krish Naik
Precision, Recall and F1-Score
Krish Naik
Artificial Neural Network for Customer's Exit Prediction from Bank
Krish Naik
GridSearchCV- Select the best hyperparameter for any Classification Model
Krish Naik
RandomizedSearchCV- Select the best hyperparameter for any Classification Model
Krish Naik
K Nearest Neighbor classification with Intuition and practical solution
Krish Naik
K Means Clustering Intuition
Krish Naik
Create custom Alexa Skill- Lambda function- Part2
Krish Naik
Hierarchical Clustering intuition
Krish Naik
Implement Transfer Learning with a generic Code Template
Krish Naik
Gender Classifier and Age Estimator using Resnet Convolution Neural Network
Krish Naik
Unlock Your Application With Your Face using OpenCV
Krish Naik
Draw rectangle from webcam and sketch process it on a live feed
Krish Naik
Complete Life Cycle of a Data Science Project
Krish Naik
How we can apply Machine Learning in Finance
Krish Naik
Deep Learning in Medical Science
Krish Naik
How to switch your career to Data Science.
Krish Naik
Linear Regression Mathematical Intuition
Krish Naik
Handle Categorical features using Python
Krish Naik
Machine Learning Algorithm- Which one to choose for your Problem?
Krish Naik
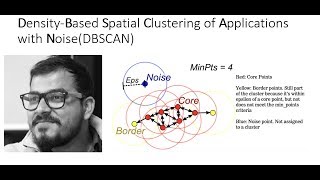
DBSCAN Clustering Easily Explained with Implementation
Krish Naik
Curse of Dimensionality Easily explained| Machine Learning
Krish Naik
Feature Selection Techniques Easily Explained | Machine Learning
Krish Naik
Tutorial 29-R square and Adjusted R square Clearly Explained| Machine Learning
Krish Naik
Cross Validation using sklearn and python | Machine Learning
Krish Naik
Handling Missing Data Easily Explained| Machine Learning
Krish Naik
Deploy Machine Learning Model using Flask
Krish Naik
Deployment of Deep Learning Model using Flask
Krish Naik
How to Visualize Multiple Linear Regression in python
Krish Naik
K Nearest Neighbour Easily Explained with Implementation
Krish Naik
Predicting Heart Disease using Machine Learning
Krish Naik
Predicting Lungs Disease using Deep Learning
Krish Naik
Stock Sentiment Analysis using News Headlines
Krish Naik
Random Forest(Bootstrap Aggregation) Easily Explained
Krish Naik
Voting Classifier(Hard Voting and Soft Voting Classifier)
Krish Naik
Credit Card Fraud Detection using Machine Learning from Kaggle
Krish Naik
Hyperparameter Optimization for Xgboost
Krish Naik
Tutorial 45-Handling imbalanced Dataset using python- Part 1
Krish Naik
More on: Neural Network Basics
View skill →


Related Reads
📰
📰
📰
📰
Deep Dive: Why Post-LayerNorm Crashes Big Models (And the Bare-Metal Math of Pre-LN Identity Highways)
Reddit r/deeplearning
The Model Context Protocol in Python
Dev.to · Puneet Gupta
Experiment tracking is a dashboard problem. Until it isn't.
Dev.to · Renato Marinho
We Gave Our Engineering Team a Memory — Here’s How PRECOG Uses Cognee
Medium · Machine Learning
Chapters (10)
Intronduction of project
0:47
Demo of project
4:57
Data Collection
10:50
Project Architecture & Implementation steps
24:46
Preparing environment
28:42
Making setup
56:40
Implementing stage 01
1:46:10
Implementing stage 02
2:18:18
Implementing web app
3:13:58
conclutions
🎓
Tutor Explanation
