Day 1- Python Environment Setup, Industry Project Configuration And Package Management
Skills:
ML Pipelines70%
Key Takeaways
Sets up Python environment, configures industry projects, and manages packages
Full Transcript
[Music] [Music] hello guys am I audible am I visible can you let me know if I'm audible [Music] quickly hello everyone how are you all welcome to this amazing crash course on python where we are just going to learn many things which I have specifically found out in many many people uh whenever they specifically want to work in the industries right again uh for all those people who are expert in Python please do not join this session and waste your time for all those people who want to probably start from Basics and get to a level where you can develop industry ready projects I will be there to help you out clear everyone yeah everybody just give me a quick yes if you're able to understand what I'm saying okay what will be offered in this python course uh we'll discuss about it see I have seen many many people whenever we talk about python they probably go ahead and uh you know just open a Jupiter notebook and start coding right I don't want that specific thing even in some of my batches and that I'm taking I'm telling that prerequisits of python but people still do not know about modular coding they do not know specifically about um you know how to go ahead with the python packages what are the different what are the different ways of Crea python packages how to install libraries uh in Industries how do we specifically work each and everything we'll be discussing so please go ahead and give a like okay and uh first of all I hope everybody's fine okay there lot of many things Crush glad to see you waiting for Big Data engineering course on Udi just one week time guys uh there are some modules that I left my I'm recording even my SQL I'm trying to put my SQL over there okay so everything will be available okay uh many people are saying what about udmi courses are I by let me complete the recording right see udmi courses are something which will take time with respect to recordings right and our team has working daily hard first of all we'll be coming up with the big data coures and then later on and everything will be in like 399 rupees you know I'll be sharing the coupon and all okay perfect yeah weu Chan uh see uh object detection and object segmentation recording is left in computer vision so along with that everything is recorded I've uploaded even in the udmi course you tell let me know like if you want that particular course to be launched and you can wait for another one month for the object detection and all I will be happy to launch it but I really want to finish up that recording you know monal is also recording that stuff okay perfect uh now let me do one thing quickly so what are we going to discuss in this session everyone H what are we going to discuss come on let me know so let me share my screen okay and and I'll talk about the agenda how specific things we are going to learn just let me know if my screen is visible okay so is my screen visible everyone yeah can I get a quick yes if my screen is specifically visible yeah okay so uh we will first of all go with the most common things since this is the first session I'll just give you an idea what all things we are going to specifically discuss um there are lot many things that we are going to discuss step by step we'll be discussing first of all let me hide the current comment okay so first of all I want your complete support see unless and until I don't get your complete support it will like these all sessions will be not useful you can let me know Krish you don't like I don't like this session we don't want to unless and until you don't practice you know I'll probably go ahead and see that how is the support in this specific session and then I will be making frequently things you know I'm I'm probably coming up with a lot of Crash Course uh in a modular way where we can specifically discuss all these things okay I'm also planning to come up with object detection small small small small modules Vector database generative ai agentic ai agentic ai already we have done now I be uploading more videos related to langra and all okay so let's talk about the agenda of this session uh first of all uh let me just go ahead and write it down okay so since this is the day one okay this is the day one the agenda will be very sweet and simple okay today first of all we will see installation installation okay installation with with respect to Anaconda uh vs code okay along with the vs code uh whenever we talk about installation I will also talk about vs code extensions like which are the at least libraries or at least extensions that you basically require in order to develop any kind of projects okay so first of all we will go ahead and discuss about this second thing I will be talking about the importance of importance of environments okay environments and how we can specifically create environments in Anaconda now you may be thinking chrish why Anaconda why not python can I not do it with the help of python okay yes we can definitely do so we can definitely do with the help of python also just give me a second guys I'm getting a urgent call just a second e okay so I'm talking about the importance of environments and whenever we talk about a real world industry right so in Industry level projects how the environments are specifically created uh I will be talking about this you know and it is super important till now from 2014 you know how we used to initially create environments but after Anaconda basically came what exactly became how easy it became to probably create the environments we'll be discussing about that okay then uh uh uh then the next thing is that after this uh we will also be discussing about python packages now when I say python packages right this package is basically through two ways okay one is the setup.py file and one is project. TL right so we will be discussing about both of them okay so this project. TL I have never discussed in my channel so today uh we will be teaching this okay and again I'm not going to show you how to code in Jupiter notebook again okay no Google collab nothing it will be completely in vs code or py Charm it will be model coding right model coding how things are basically there and all okay uh after completing this particular packages uh we will be specifically talking about one more additional thing that is with respect to file okay since uh in day four and day five you'll be seeing we'll be talking about llm models okay so we should know regarding Keys configuration files you know how things are basically done the reason why I'm teaching you this because tomorrow in day two we will be talking about objectoriented programming completely it'll be related to object-oriented programming and in day three uh I will be showing you entire one end to end ml project and how you should design an end to end ml project with respect to coding right so that specific thing also I'll be discussing uh but this is the day one overall agenda I hope everybody's clear can you give me a quick confirmation if you are uh if you are able to understand the agenda that we going to discuss in this particular video just give me a quick confirmation that will be more than sufficient okay so super excited everyone yes okay perfect now let's do one thing first of all uh whenever we talk about discussing about the installation okay and because this is the problem even in my Udi courses maximum number of people faces problem in installing Anaconda okay Anaconda so if I just go ahead and just write Anaconda download it's okay Whoever has basically created the end to end or installed this Anaconda it is good for you but this is basically for all those people who are not able to do it okay so first of all just go to the Anaconda downloads okay you can just do go ahead and do it in Google or whatever things you want probably if you're using any kind of browser and then what you do is that after this you can go ahead and Skip registration and based on your based on your operating system you can select any of them like if you want to go ahead with Windows you want to go ahead with Mac you want to go ahead with Linux okay it is up to you okay so let's say that I want to probably go ahead with uh windows so I have a window Windows if you have mac go ahead with this I think installation with mac and Linux is quite more simple when compared to Windows okay one of the problem like many people will face with respect to Windows I will be talking about it right now okay so let's say that uh after you install in the windows so first of all let's go ahead and just click on download so this particular file is basically getting downloaded but if I just go ahead and open this so this will how my exe file will look like okay so this will how my exe file will look look like okay so I will just double click this uh with respect to the installation then what I will do is that I will go ahead and click on next okay and then I will go ahead and click on agree I'll say hey install just for me okay so I will just go ahead and click on next already I have done the Anaconda installation let's say the by default path it will take your C drive okay and it'll just give a path like a Anaconda 3 okay since I've already done the installation what I'm actually going to do is that I'll just go ahead and write an anonda 4 Once I write Anaconda 4 I'm just writing Anaconda 4 because Anaconda 3 folder is already created okay then we go ahead and click on next here please make sure to click on this particular option add Anaconda 3 to my path environment variable if you don't add this what will happen is that you'll get an error whenever you write any cond command in the terminal right that like cond command is not recognizable so that kind of issues you will specifically be getting it okay so this is really really important if you don't check this up then again there is another way you need to probably go ahead and manually insert the environment variable path okay so if all those people who have specifically installed Anaconda without adding this particular checkbox okay then what will basically happen is that that path the default path will not be added in the environment variable so that is my suggestion please everyone whenever you install Anaconda please make sure to have this particular checkbox added okay so today we are going to do a lot of coding that is the coding related to setup.py file and all okay so I will be showing you how to do that and all but first of all this is important because if you don't do this correctly then there will be an issue with respect to the installation of the uh libraries with the help of cond command Okay so once you do this make sure to have a checkbox and then click on install once you click on install the installation will basically happen Okay so is the everyone clear about this whenever you're doing the installation please make sure to add this particular checkbox so if this is clear I did not select the check box while installing how can I Rectify now I will show you if by mistake you have not checked the checkbox then how do you Rectify this specific mistake okay so for this what I will do is that I will just go ahead and cancel this let's say that you have not checked it and you have done the installation I will just go ahead and open my environment variables okay this is important guys trust me me this is important I know many people want to do a huge they want to create an end to end ml project they want to use mlops they want to use GitHub each and everything they want to use but this basic thing you don't know and you'll not be able to manage even your packages this is the fundamental concept this says that how good a developer you are okay now I will just go ahead and open my environment variable in order to open my environment variable just search for edit the system environment variables so if you have not if you have not now one person and again I have to hide this user on this channel because you just want to disturb all the people out there okay no worries so I will just go ahead and click on environment variable now inside this environment variable there is something like system variable and there is something like user variable if I install Anaconda for my purpose I will go to this user variable and here there will be something called as path okay here there will be something called as path now with respect to this particular path here you'll be seeing if you have done the checkbox correctly if you have checked that specific checkbox then there will be five different paths that will be added one is Anaconda 3 scripts one is Anaconda 3 Library bin one is Anaconda 3 Library user bin and one is this Ming W w64 bin and the other one is Anaconda 3 so these all parts this five different parts will be added in your in your environment variable okay this is really important for you all to understand okay if you have not done Che if you have not added the checkbox if you have not done the checkbox and you have installed Anaconda this path will not be available okay so what you have to do is that you have to add manually all the specific path does that make sense everyone yes yes yes yes does this make sense everybody so this path you have to manually add it and this should be based on the path that you have specifically installed okay this is the most important fundamental problem that many people is there will be missing out okay we have to go to that folder yes Anaconda 3 where it is specifically installed you have to go to that particular folder and you have to find this particular path like library library user bin Library bin and scripts okay because I've seen many people they'll say hey I'm working as a data scientist I'm doing that I'm doing this but they're not able to do the simple thing right so that is the main problem and that is why I'm starting the specific crash course I'm not going to teach how to use data structures on the first day I'm not going to open a Google collab and say hey start the coding I will first of all say that what should be the basic configuration okay what should be the basic configuration with respect to package management with respect to environment variable that shows how classic developer you are okay this is really much important does this make sense everyone can I get a quick yes if you are able to understand if you're able to understand please do hit like let's make this thousand likes all this session I promise you every week some of the other thing we will be coming up with where we will try to bring up something where many people face that specific problem okay I will be taking control of all those kind of sessions yeah perfect so once you add the environment variable make sure to add the path okay all these paths should be here uh this recording will be available you can go ahead and check this path and map along with that particular folder okay perfect now now what I will do I will go ahead and click on okay okay apply done okay now in order to check whether my installation has happened perfectly or not so what I will do I will just go to my command prompt and just write cond once I write cond you'll be able to see that I will be getting this particular uh commands Okay so here you'll be able to see some commands that basically means your installation has happened correctly okay now till now now I have completed this with respect to the installation installation of the Anaconda is done now the next thing is that we will try to install VSS code this is also important see you may ask me chish should we use vs code should we use py Cham whichever you comfortable with I love vs code see with respect to vs code whenever I get right so this is this is my uh vs code okay let's say this is my vs code okay now I love vs code the reason I love vs code is that because uh I like this D screen I like how things are over here you know and it actually helps me to write my code in a efficient way okay here you have sufficient extensions and all okay you can use pycharm see I have used both of them I've used py charm I've used spider Ive used jupyter notebook I have used our studio for our programming language I have used different different IDs but out of all this since I'm also a net developer I like Visual Studio code okay I started my career as a net developer okay so step by step we'll try to see that how things will basically happen now in order to install the visual uh vs code okay what you need to do just go ahead and search for vs code so here you'll be seeing vs code download okay just search in the Google okay how to probably uh go to this particular vs code over here just search for vs code download yes all the classes will be recorded it will be available in all your dashboard along with this it will also be available in the YouTube it is for everyone completely for free Okay so here I will just go ahead and click on this okay I will just go ahead and download for Windows if you have different operating system then you will be getting a different operating system over here okay you'll be getting a different operating system over here so download from windows again once you download it here you will be getting one exe file that is basically getting downloaded okay very simple very easy uh very very much simpler all you have to do is that once you install Anaconda go ahead and download vs code and double click on that and start doing the installation okay that's it okay now let me show you one more very important thing you know so once you go ahead and download this exe file once you double click and install it your vs code will install and also make sure that in vs code whatever check boxes are basically coming up right go ahead and click that particular check boxes and do the installation okay now let's go ahead and see our Anaconda Navigator see this is also important okay once you installed Anaconda once you install Anaconda you will be getting something called as Anaconda Navigator okay now this Anaconda Navigator is super important because this Navigator actually helps you to show it shows you how many different environments you have actually created uh in your system it entirely manages each and every projects till now that you have actually developed do you have any idea how many projects I have specifically developed in my career right many many projects in this particular system if you just go ahead and see how many projects I've developed you you will just be able to understand from this particular environment let me show you see over here if I just go ahead and click on environment see how many environments I've created V andv V and V V andv V and V see over here v andv v andv you know that how many how many videos I have uploaded in my in my uh YouTube channel it is around 2,000 more than 2,000 okay so here you'll be able to see how many different types of libraries I have installed in every V andv you'll be able to see that how many installed packages are there each and everything okay yes uh that is the reason I've invested a lot in this particular platform right in sorry in this particular system I have a desktop which is quite heavy it has 128 GB of RAM it is basically having Nvidia Titan RTX GPU it has huge hard disk and all right I don't have to probably worry about anything right so this is important so I can go ahead and probably use this see this is where I the most important part is that I can select any environment that I want to use and I can open anything that I really want okay so everything over here I'll be able to see it and almost everything I've used over here with respect to packages with respect to environments with even I've seen dusk I have seen Sky kit Lear vs code spider every kind of IDs I've actually used isn't it interesting right and I also want you all to be like that if see guys I'll tell you many people will still say that hey AI is not important AI is not important by AI python all these are important you can see how the career is Shifting you can see how countries are fighting with each other to create the best llm model companies are fighting between each other to create the best llm model right and still there will be some people who will say that hey not important okay now it is up to you try to understand what is important what is not important you are smart enough to take that specific decision so I everyone I at least want everybody to be very much good at Python programming language because with the help of Python programming language you can become a python developer you can become a AI developer you can become a data analyst you can become a data scientist you can become an mlops engineer you can become a web developer you can learn Frameworks like Django flask whatever things you want okay now this is very much simple for you to understand okay now everybody got the idea with respect to the Anaconda Navigator shall we move next yes shall we go towards vs code how to launch vs code how to create environments and all yeah if you like this particular video hit like yes start sharing from today I want everybody to share in LinkedIn share your learning this is for freshers this is for starters and this is not for experienced professionals if experienced professional are there you can just come and watch say hi to me if you want but here I have found out this major problem there is some major problem over here with many many people I I probably whenever I discuss with any person they don't know where is environment they don't know where is vs code what is vs code how to probably create an environment how to create a file anything as such okay perfect now let's go ahead and close this anakonda Navigator I'll not use it okay right now now let me do one thing okay quickly I will just go ahead and open my uh e Drive okay and let me create a folder okay I I will write python crash course here python crash course so everything that I'm actually discussing with respect to my coding right I will be discussing it from here okay now inside the specific folder let's go ahead and start creating with respect to the end to end projects how to probably set it up each and everything okay now first of all I want to open this particular folder as a project okay I can open it with vs code so what what I will do since I have already installed the vs code from here I will go over here and I'll open my command prompt so here is my command prompt I'm inside this particular folder e python crash course okay and from here I will just go ahead and write code dot okay so with the help of code dot my vs code is just going to open okay so that basically means it's it's a very easy way to probably open a project right so this particular folder will be my project folder okay now here I can go ahead and create any number of files and I can start my coding clear now once first of all if you're installing python okay if you're installing sorry if you're installing vs code for the first time I would suggest go ahead and install some extensions okay so here I will go ahead and search for some extension I will go ahead and search for python okay so once I search for python okay once I search for python uh let me see there will be something called as this Python language supported from Microsoft so this extension I have to install because see if you're installing VSS code for the first time python will not be installed in this right so I will just go ahead and search for Python and I will click on install over here so this extension is specifically required because this will be providing me the kernel to execute my code as we go ahead okay so Microsoft has already provided this particular extension and with this with this installation there will also be some more extension that will get installed as we go right so this will actually give you the features like autoc complet so here you can see python extension for visual studio code what all things it basically gives pyland will get uh installed python debugger will get installed there are python formatters linters install the supported version all these things nice features you'll be able to get because of this particular extension so this is the first step go ahead and install this particular extension now whenever we talk about this extension it should be belong in to this particular Microsoft company clear everybody clear with this now the next step let's go ahead and open my scribble notebook now many people are asking Kish which is this particular uh writing notebook how many of you have asked this writing notebook this writing notebook name is scribble Inc again it is given by Microsoft 300 rupees for Lifetime subscription you can go ahead and use this clear very good notebook if you want to also become a teacher how many of you do you want some kind of guid guidance so that you can also probably become a teacher someday if you're interested I can help you with that okay how to go probably start as a teacher what mic you should specifically take what writing pad you should specifically take how you should go ahead and practice just let me know okay I'll be happy to help you out and I will also try to create a different Community for that so that you can also start your journey like this if you're good at teaching okay everybody can teach yeah everybody can teach completely for free you can open your YouTube channel I will be helping you out to with this vs SP setup right now I'm doing this in streamyard I will be helping you out in over here right so teaching is the best profession what I feel there's still less number of people uh how like less number of people and there are many people who wants to specifically learn right so definitely I definitely promote lot of free teachings lot of videos in YouTube I specifically share most of the videos in YouTube Not only mine other creators also with my students with respect to different things right okay now let's go ahead and talk about the second thing which is called as environment now tell me what is the importance of environment okay when I say environment let's say in a company okay if your package is 50 lakhs per an obviously you will be playing a role of like architect okay do you think you'll just be working with one project only one project there may be scenario that you have to work in multiple projects project one project two project 3 okay there will be multiple projects right let's say project one is specifically using python python 3.7 okay project 2 is using python 3.10 project 3 is basically using and this is a very new project so here we are using python 3.12 okay along with this let's say there are some other packages that we are going to use over here let's say this is this is a machine learning projects here we are going to use some mlops tools here we are going to use some Eda libraries like napai pandas and all and uh here we'll also be using some more other things okay let's say project 2 is a kind of NLP project right so with respect to NLP project here I have to install Transformers let's say with respect to deep learning I want to install other libraries which is available over here clear everybody yes yes yes or no everybody clear yes so all these libraries are there now similarly project three let's consider that this is an agentic AI project now in this agentic AI project there is a library that I want to use let's say over here I have Lang graph Lang graph Lang graph okay I want to use Lang chain over here okay and I want to probably use Lang chin Cloud over here so for this I have to probably go ahead and install some other libraries right so everything is separate over here now tell me this person who is an architect if you wants to make a setup in his local do you think we just need to create one specific environment and uh go ahead and start all these particular projects in my local machine tell me should we have to do that yeah no right so obviously it will not be possible because this environment will become cluttered right it will definitely become cluttered how many learning what you really want to do if I keep on inserting or if I keep on installing every libraries in this specific environment I'll say hey what the hell what what what what are you doing right what do you really want to develop yes I hope everybody's understanding right so this is not possible at all so what I will do I will go ahead and create okay let's go ahead and create one environment one over here this will be my environment two over here this will be one environment three over here now with respect to this environment I will install this packages in this environment yeah I will go ahead and install this particular environments okay now this way what will happen is that that I will be able to manage this packages very much easily right manage this packages very easily right I know if I want to install this I will activate this environment I will install all these packages and tomorrow I may require some more new libraries whenever a new change request come right so here I will specifically Loosely coupled all these particular environments and I will start my project so this way I'm able to efficiently manage projects and all right I hope you able to understand over here how many of you are getting and this same environments the best part is that I'm able to also manage it I'm also able to see in my anaconda Navigator clear yes let me know if this is clear or not hit like hit share your love if you are liking this particular teaching because this upcoming five days the session that I'm actually going to keep will be amazing okay I promise that it will be amazing you will learn something new okay and I have always tried to keep videos in my YouTube channel in such a way that you will definitely learn more and more okay clear yes you can also consider it as workspace fine this is my workspace one this is my workspace 2 this is my workspace 3 okay I use poetry lock form project configuration perfect I'll show you at project T tal also okay so that part also I'll show so shall I open my vs code now fine now this is my vs code now let's go ahead and create an environment okay yeah so different environment will be and it's a good practice that we should create a different environment for different projects okay now in order to create an environment let's go ahead and do this open a terminal okay so terminal is just like your command prompt okay here you have options how to open a terminal so you can go ahead and select over here there is also a shortcut control shift uh there's a symbol over here you can open your terminal directly you can also split terminal you can run task and all because at the end of the day any code that I really want to execute I'll execute it in this particular terminal okay now let's go ahead and open my command prompt perfect now with respect to this command prompt okay now see everybody please see how to create a terminal okay uh sorry how to create an environment and here I will just go ahead and write some example.txt okay now see this in order to create a command prompt sorry ter uh environment with the help of cond I'll write a very simple command which is nothing but cond create minus P okay VNV python dou equal to whatever version that you specifically want to use there is also one more way first of all let me write both the command and then I will try to show you cond create minus n VNV python equal to 3.12 okay so there's two ways now let's let's discuss about this way this Conta create basically saying hey we want to create an environment okay we want to basically create an environment what is minus P can anybody guess what is minus P what is minus p and what is minus n for all those people who know already you can also answer that in your comment section okay what is the difference between minus p and minus a let me go ahead and discuss this okay now minus P basically means that whichever is my working location whichever is my working space my environment the environment name V andv will be created over here that basically means this minus p is nothing but the present working directory clear whatever is the present working directory this is my environment name it will get created now the question is that Krish do we need to write V and V only can I not write Kish yes you can write whatever the environment you like you go ahead and write okay but V andv we specifically right because it's a good practice in most of the uh most of the githubsign your brother name whatever things okay then Python and your version name like which version of python you want to install over here right so that version of python will get created in your virtual environment okay now the question Rises what is this n n is nothing but wherever by default we have installed our Anaconda there they will be creating multiple packages that basically means all the virtual environment will be created inside that specific folder clear clear it's just like your new directory you can probably say okay so here minus n is nothing but it is basically creating in that specific directory where your anaconda has been installed again here you can use any kind of version that you specifically want based on the requirement okay and this is your virtual name okay the environment name everybody clear yes can I get a quick yes can I get 200 likes more come on can we do it then that's way how my energy will increase okay and I will teach you in a much more funner way uh where you'll be learning multiple things so let's go ahead and create our Command Pro uh our environment okay so for this I will go ahead and write cond create let's go ahead and write this cond create now see nothing is over here in this particular folder location okay so I will just go ahead and write cond create minus P VNV python double equal to whatever the version is right and I'll go ahead and press enter now it will ask me Hey whenever you are installing or creating a new environment okay then we will start with some of the basic packages which is provided by K yeah sidhant we are learning completely from scratch okay so here you'll be able to see that we I will just go ahead and write why so it is saying that hey by default I'm going to install this particular libraries like setup this this this that I'll talk about this why this setup tools is required and all because this will be important for you to create packages okay now here I'll just go ahead and write Y and I'll press enter now see all the installation starts taking place right now here you'll be able to see this virtual environment has got created okay now this virtual environment in the same working space directory okay that is the best part about this clear everybody yeah are you liking this session good enough so let's wait till the installation basically happens okay will this comment work in pyam also yes everywhere it will work because you have installed Anaconda okay perfect now once we install the library what is the next step let me clear the screen let me clear the screen okay now once we go ahead and install the uh uh we create a environment we need to activate that environment right now in order to activate that specific environment how do we go ahead and activate it okay anyone how do we go ahead and activate it it's very simple I will go ahead and write cond activate whatever your environment is VNV slash I'm just giving this specific PA path I'm saying that hey go ahead and activate this particular environment that's it okay and then I'll just go ahead and press enter now this my virtual environment is activated now why we need to activate in this kind of virtual environment because any packages that I specifically install we have to install inside this okay we have to install so if we do not activate this virtual environment then it will be of no use unless and until I don't activate it I will not be able to install any libraries clear yes yes yes yes everyone yes okay perfect now how do I install the packages there are multiple ways to create the packages and install it okay one is directly from pip install and one is directly by creating a requirement. txt okay so let me just go ahead and create a file and let me write requirements.txt now my question is Krish do we need to probably always write requirement. txt do I need to write always requirement. txt because in every GitHub solutions that you have probably seen everybody will go ahead and write requirement. txt and requirement. txt they will start writing the packages let's say that I want to install Lang chain I want to install numpy I want to install numpy right but do I always need to rename this particular file as requirement. THD that is my question tell me tell me what is mean by forward slash I'm just trying to move towards that particular virtual environment tell me guys do I always need to write all my packages inside a requirement. txt file can I not write chris. txt file can I not write chris. txt file can I not write uh let's say Frank .txt file right but we are following some industry standards right everybody writes requirement. txt file so we are going ahead with that okay now in order to install this how do we install it okay one way is that I can just go ahead and write directly my command pip install whatever Library name is let's say I want to go ahead and install numpy okay I can directly write pip install numai okay I can directly write pip install numai so numai will start getting inst insted but why still we are specifically using our requirement. txt file and why all the packages are written in requirement. txd because tomorrow any developers who basically come if he knows hey how many packages needs to be installed he will just go ahead and see requirement. txt file and that is how the installation will take place right so here instead of all the time installing pip install pip install we can completely list down all the libraries I mean take all the LI uh packages which is inside requirement. txt and we can go ahead and the installation now how do I do this okay I will write pip install minus r requirement. dxt okay so once I go ahead and write all this installation will start taking place yeah we have to write the version two with the library right yes that is also a very good thing you need to write it but I will be talking about that in the later stages when we talk about pip freeze because once we complete our entire Working Solutions we can go ahead and freeze those particular library and after freezing we will be able to get which version we are there okay what is minus r can can anybody tell me what is PIP install minus r come on anybody tell me tell me guys quickly what is minus r recursive perfect see minus r is more like a read mode okay okay clear everyone some are saying recursive some are saying read okay so go ahead and find it out okay I've given you an idea there are two options one is read and one is recursive okay which one it is you just go ahead and find it out okay perfect uh is this clear I've activated my environment I know like how to install all the packages inside my environment perfect now let's try one more thing okay let's open a jupyter notebook file okay here I will say example do iynb file okay and never never create this kind of files in inside your virtual environment okay because if you're creating inside virtual environment it'll be of no use because your entire project will be developed inside this particular workspace and this virtual environment is separate clear now once I come up with this example. iynb file I will go ahead and select a kernel my kernel will be my virtual environment okay now let me just go ahead and write one code 1+ one now see guys is it saying my running cells with V and V requires the IP kernel me package okay so whenever we specifically want to work with ipynb there is a another package that we really need to install that is IPI kernel now tell me do I need to write IPI kernel in requirement. txt or can I just manually go ahead and write pip install IPI Kern quickly tell me yes yes tell me should I do that it's always a good idea I should not write IPI kernel over here because when we write all the packages this goes into the production and in production it is better that only those libraries that we specifically require we only write that okay so for this what I will do I will open my terminal I will open my terminal I will open my command prompt and here I will go ahead and write pip install IPI kernel and always make sure that whenever you try to install all this kind of libraries please make sure to install it inside your virtual inment okay so now quickly uh our installation will specifically happen clear yes how is the session guys are you liking the session everyone yeah so I by colel once this installation will take place then we are good to go one last question we will learn everything like ml onwards or directly we'll jump to J no first of all we'll go ahead and see a basic architecture of ml projects and then we'll also see that how it is specifically different for a generative AI project okay so let's go ahead and do this okay so give some kind of Expressions if you're liking this session because tomorrow still we are going to learn many things not tomorrow we'll learn on Sunday the next session will be on Sunday okay perfect so now I have done the installation Now quickly I will clear the screen okay now if I go ahead and just execute this particular code it should be able to run see my jupyter notebook is running okay so this is really much important which many people misses and they don't know why what is the error it is really important you see the error the best part of the Python kernel will be that you get to see the error in a much more efficient way okay much more efficient way and with the help of that you able to probably execute anything right if you're becoming a good debugger even chat GPT code even if it is not working you'll be able to understand why it is not working otherwise it'll take another how much time I don't know okay perfect so I will uh uh let's go to the next step okay now my requirement. txt is there now quickly if I open my browser okay let's say I will go to this py page okay the python package index see how you're able to do the PIP install right because here if I go ahead and search for any packages let's say numpy okay so here you'll be able to see hey nump packages over there I just need to use this particular command okay what if you also want your packages to be put up inside this ppie package pipy website okay so can you not do this and for doing this how do we probably go ahead and put it inside this particular website for that we need to create our setup.py file the setup of Pi file will be responsible in creating the entire uh package configuration of our file along with the package management clear clear everyone yes yes or no yes yes yes yes or or no everyone so let's go ahead and see how do we go ahead and work with the setup.py file okay um I will just go ahead and use one code directly from my from my I I just want to copy and paste some code directly from I've already taught this all everything okay so first of all what I will do I will go ahead and write setup.py okay now initially the setup.py why it is important you need to understand okay so let me go ahead and search for what is setup.py file setup.py okay oh set up P file okay python setup and usage let me see python setup.py uh what is python setup.py huh packaging and distribution projects okay so here you'll be able to see that this section covers additional details on configuring packaging and distributing python projects with setup tools that aren't covered okay so here you'll be able to see that we will be able to convert our entire project into a package and we can move it from one place to the other place that basically means we can provide it and we can give it we can distribute it even in this pii website and all okay so let's go ahead and see that how do we go ahead and write our setup.py code okay now the first thing is that for setup.py I will go ahead and import two important libraries okay so first of all over here you'll be able to see from setup tools find packages and setup okay I will talk about it each and everything as we go ahead okay first of all what this find packages will basically do it will try to find out all the packages that are available over here okay now I'll talk about this what all packages it'll try to find out and all each and everything right now don't worry about it then I have this setup then from typing I'm going to import the list okay now the one function that I'm actually going to create is something called as requirements get requirements now see this everybody I will give this code please make sure that you have the dashboard access which is given in description of this particular video now this get requirement is a kind of function which will basically read the requir di. txt file in the read mode and it will read all the packages that is available over here like Lang chain and nump clear clear yes yes everybody so what I'm actually saying is that in this function get requirement. txt what we are basically going to do is that we are going to read the requirement. txt file and then we are going to read this particular file line by line basically all the packages then we are basically going to I'll talk about this minus E dot also okay and then I'm going to pend it inside my requirement underscore list okay so this is the basic code that we are uh writing again I'm not going to write the code line by line because here our main aim is basically understand the best practices and move towards building generative AI applications okay so this is my get requirement. txt uh setup.py file then the next step what we do is that we create the setup of our package okay so finally I will call this set up I will say hey what is my project name so I'll say right this is my sample project okay let's say the version is 0.0.1 author is krishn or author email krishn gmail.gmail.com packages will be find packages I will talk about this find packages just give me a minute and then here you have installcore requires which is nothing but get requirements this get requirements is nothing but whatever requirements I have inside my requirement. like Lang chain numai it will try to put it over here so inside this particular packages uh installed require basically means that once we are creating this entire package we need to install this particular requirements okay we want to we we have to probably go ahead and install these particular requirements clear everyone right now this is the basic fundamental now let me talk about what are these find packages okay so here whenever we go ahead and create our end to end project okay first of all we will go ahead and create some folder structure let's say my folder structure is Source inside this Source I will go ahead and write init.py can anybody tell me what is the importance of undor init.py Edon I will try to share all the code inside my dashboard which is given in the description of this particular video okay now tell me what is the importance of uncore uncore init.py so this folder Source will now become a package okay and from this I will be able to import anything anywhere okay so this init.py is going to make this folder as a package okay now see this see see this most amazing thing now what I will do um in requirement. txt I will go ahead and add one more package minus E dot okay now see okay so I will open my terminal and I will write pip install minus r requirement. now see what will happen if I do the installation of requirement. txt so once I probably do the installation so here do you see my entire package has got created see this dependency linkage package info see metadata version sample project Krishna email required uh libraries is Lang chain numai Dynamic author email required this one then here you can see in requirement. txt I have my Lang chain numai then sources unor text here you can probably see and see one folder location is given as Source slore pinit init.py are you able to see this so this is the entire package that has just got created okay and now you may be thinking chrish why have you added this minus E dot because this minus E dot is responsible in triggering the setup.py file in executing the setup.py file yeah so I hope everybody's able to understand what is the importance of unders undor init.py if I create a folder a file uncore init.py inside a source folder then this basically becomes a package while we are executing the setup. VII does this make sense everyone yes yes yes everybody can I get a quick confirmation hit like something happy faces or sad faces something right and this minus E do in the requirement. txt is just just going to trigger that entire setup.py file right and because of this I have this entire package okay clear so this is how one way you can basically create a package right so here in the setup.py filec I have one function get requirement. txt and then I have this setup entire file where I'm having all this specific information okay perfect now let me introduce you to one more way which is called as project. TL okay and for this I've written it somewhere the entire code let me just go ahead and write it okay so there is something called as Pi Project so Pi Project dotl okay writing your P project. TL it is nothing but it is a configuration file used by packaging tool as well as other tools such as in lters type Checkers there are three possible term tables and all right and here also we have three important thing one is by hatchling one is setup tools one is PDM and all okay s
Original Description
Enroll in the free course:
https://learn.krishnaikacademy.com/web/checkout/67a4561bfcf8221b5a6c06b4
Start Your AI Journey from Scratch!
Join our Ultimate Data Science & Generative AI Batch and learn everything from scratch – no prerequisites required! Whether you're a beginner or looking to strengthen your foundations, this course covers all essential topics:
✅ Python Programming
✅ Machine Learning
✅ Deep Learning
✅ Computer Vision
✅ Natural Language Processing (NLP)
✅ Generative AI Basics
📌 Gain hands-on experience with projects and expert mentorship!
📌 Admission Link: https://learn.krishnaikacademy.com/web/checkout/679c745722adf1b511e179c7
10% flat discount for 1st 50 user, use discount code FIRST50
🔍 Course Overview:
✅ Expert Mentors: Mayank Agarwal, Monal Singh, Saurangshu Paul, Sunny Savita, Krish Naik, Darius Bengali
⏰ Live Sessions Timing: 8:00 PM – 12:00 AM IST (Saturday & Sunday)
Start Date : 22nd March 2025
📅 Duration: 8 months
📊 Dashboard Validity: 2 years
💰 Fees: Check admission link
🎯 Hurry! Limited Slots Available – Enroll Before It's Too Late!
Gear up to learn upcoming AI world !
Feel free to reach out to us at +91-9111533440 / +91 8484837781 via WhatsApp or call for any doubts or assistance
Watch on YouTube ↗
(saves to browser)
Sign in to unlock AI tutor explanation · ⚡30
Playlist
Uploads from Krish Naik · Krish Naik · 0 of 60
← Previous
Next →
1
 2
2
 3
3
 4
4
 5
5
 6
6
 7
7
 8
8
 9
9
 10
10
 11
11
 12
12
 13
13
 14
14
 15
15
 16
16
 17
17
 18
18
 19
19
 20
20
 21
21
 22
22
 23
23
 24
24
 25
25
 26
26
 27
27
 28
28
 29
29
 30
30
 31
31
 32
32
 33
33
 34
34
 35
35
 36
36
 37
37
 38
38
 39
39
 40
40
 41
41
 42
42
 43
43
 44
44
 45
45
 46
46
 47
47
 48
48
 49
49
 50
50
 51
51
 52
52
 53
53
 54
54
 55
55
 56
56
 57
57
 58
58
 59
59
 60
60

Natural Language Processing|Stemming
Krish Naik
Natural Language Processing|BagofWords
Krish Naik
Gaussian distribution or Normal Distribution in statisctics
Krish Naik
Natural Language Processing|TF-IDF for Machine Learning| Text Prerocessing
Krish Naik
Log Normal Distribution in Statistics
Krish Naik
Covariance in Statistics
Krish Naik
Confusion matrix, Precision, Recall| Data Science Interview questions
Krish Naik
Tutorial 44-Balanced vs Imbalanced Dataset and how to handle Imbalanced Dataset
Krish Naik
Implementing a Spam classifier in python| Natural Language Processing
Krish Naik
Tutorial 11-Exploratory Data Analysis(EDA) of Titanic dataset
Krish Naik
Face Recognition using open CV and VGG 16 Transfer Learning
Krish Naik
Pedestrian Detection using OpenCV from Videos
Krish Naik
Face and Eye Detection from Videos using HAAR Cascade Classifier
Krish Naik
Reading, Writing and Displaying images with Opencv| OpenCV Tutorial
Krish Naik
OpenCV Installation | OpenCV tutorial
Krish Naik
Face and Eye Detection from Images using HAAR Cascade Classifier
Krish Naik
Car Detection using HAAR Cascade and Opencv from Videos.
Krish Naik
Using OpenFace for Face recognition in Keras
Krish Naik
OpenPose Tutorial with Tensorflow
Krish Naik
Multiple Linear Regression using python and sklearn
Krish Naik
Dimensional Reduction| Principal Component Analysis
Krish Naik
Movie Recommender System using Python
Krish Naik
TPR,FPR,FNR,TNR, Confusion Matrix
Krish Naik
Precision, Recall and F1-Score
Krish Naik
Artificial Neural Network for Customer's Exit Prediction from Bank
Krish Naik
GridSearchCV- Select the best hyperparameter for any Classification Model
Krish Naik
RandomizedSearchCV- Select the best hyperparameter for any Classification Model
Krish Naik
K Nearest Neighbor classification with Intuition and practical solution
Krish Naik
K Means Clustering Intuition
Krish Naik
Create custom Alexa Skill- Lambda function- Part2
Krish Naik
Hierarchical Clustering intuition
Krish Naik
Implement Transfer Learning with a generic Code Template
Krish Naik
Gender Classifier and Age Estimator using Resnet Convolution Neural Network
Krish Naik
Unlock Your Application With Your Face using OpenCV
Krish Naik
Draw rectangle from webcam and sketch process it on a live feed
Krish Naik
Complete Life Cycle of a Data Science Project
Krish Naik
How we can apply Machine Learning in Finance
Krish Naik
Deep Learning in Medical Science
Krish Naik
How to switch your career to Data Science.
Krish Naik
Linear Regression Mathematical Intuition
Krish Naik
Handle Categorical features using Python
Krish Naik
Machine Learning Algorithm- Which one to choose for your Problem?
Krish Naik
DBSCAN Clustering Easily Explained with Implementation
Krish Naik
Curse of Dimensionality Easily explained| Machine Learning
Krish Naik
Feature Selection Techniques Easily Explained | Machine Learning
Krish Naik
Tutorial 29-R square and Adjusted R square Clearly Explained| Machine Learning
Krish Naik
Cross Validation using sklearn and python | Machine Learning
Krish Naik
Handling Missing Data Easily Explained| Machine Learning
Krish Naik
Deploy Machine Learning Model using Flask
Krish Naik
Deployment of Deep Learning Model using Flask
Krish Naik
How to Visualize Multiple Linear Regression in python
Krish Naik
K Nearest Neighbour Easily Explained with Implementation
Krish Naik
Predicting Heart Disease using Machine Learning
Krish Naik
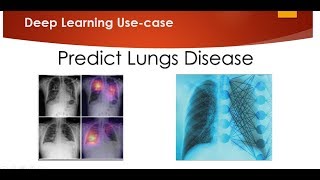
Predicting Lungs Disease using Deep Learning
Krish Naik
Stock Sentiment Analysis using News Headlines
Krish Naik
Random Forest(Bootstrap Aggregation) Easily Explained
Krish Naik
Voting Classifier(Hard Voting and Soft Voting Classifier)
Krish Naik
Credit Card Fraud Detection using Machine Learning from Kaggle
Krish Naik
Hyperparameter Optimization for Xgboost
Krish Naik
Tutorial 45-Handling imbalanced Dataset using python- Part 1
Krish Naik
More on: ML Pipelines
View skill →






Related Reads
📰
📰
📰
📰
Independence you can't prove — so price it
Dev.to · Colin Easton
Asyncio for I/O-Heavy Pipelines: aiohttp, asyncpg, Rate Limiting, Backpressure
Dev.to · Gowtham Potureddi
I Switched to a New Python Library — Here’s Why I’m Not Going Back
Medium · Data Science
What is a neural network, and how does backpropagation work?
Medium · Machine Learning
🎓
Tutor Explanation
 DeepCamp AI