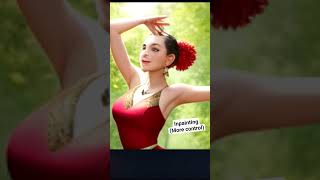
Complex INTERACTIONS with MULTIPLE characters | Stable Diffusion
Skills:
Multimodal LLMs80%Prompt Craft70%Prompt Systems Engineering70%Agent Foundations60%Tool Use & Function Calling60%
Key Takeaways
The video demonstrates how to create complex interactions between multiple characters using Stable Diffusion, a text-to-image model, and various tools such as latent couple, composable Lora, and control net reference. It covers techniques for separating characters, controlling backgrounds, and fine-tuning model parameters for better results.
Full Transcript
from fight scenes to Friendship being able to make different characters interact with each other is a must for storytelling luckily the steps to do this are pretty simple so let's go over how to do it and some of the problems you might encounter along the way before we start this is a list of extensions you might want or you must have some of them you probably already have installed like control n and I'll talk about original prompter versus latent couple in just a moment but I'll be using latent couple for this tutorial all of them should be easy to install just look for them in the extensions available Tab and after hitting load from and finding them click install once they are installed just apply and restart I will leave their Link in the description just in case all right so let's say we wanted to make a man and a woman walking through the street just with prompting we can get a pretty decent result the problem is when we need specifics like a man wearing a blue hat and a woman wearing a red dress the colors get mixed up and now both of them are wearing hats and of course we can get Generations where there is only one person that is an easy fix though we just add controled model for open post and we will get the right amount but the problem with colors Still Remains and if I prompt for let's say Goos and Tye working together the luras also get mixed up when we should expect something like this instead so let's see how to get it right yes I am going to use animal oras for this as examples because they are easier to identify but this process works for both realistic and Anime as well as sdxl and SD 1.5 you will also be able to use this for environments and complex scenes to start you will need to choose your main extension Regional prompter or latent couple both of these extensions will let you create masks and prompt for what you want to go inside them letting you prompt for a character description in one side and a different description in the other side like in this high five example this way you have absolute control over what goes in each part of the image latent couple is a bit more precise since you will be combining it with composable Laura for better results and it is also very simple to understand Regional prompter is slightly faster when generating and easier for linear compositions even if masking is annoying as hell for what we want to do latent couple is a little bit better in my experience so I will explain that extension in more detail but both are perfectly fine to use so I will also give some tricks for regional prompter users too whichever one you choose this method will remain the same so let's continue with this easy example to get the overall method down and then we'll move on to the harder ones ideally you always want to have a control net reference ready even if you don't use it for an exact pose it will help with creating the correct number of specified characters in case of using latent couple The Next Step will be to create a separate mask for each character for latent couple I will take the control net reference to photopia and paint over it creating a new layer use different colors for different masks and remember to use a harsh brush and then fill the background layer with white this will serve surface or background prompt try to always have some wide space for this prompt import this mask into latent couple and click I've finished my sketch this will automatically separate all the masks for you you could also create a white canvas and guas paint if you don't care about nothing for original prompter Enthusiast I would import the reference inside the spot right here then adjust the canvas size and visualize now you can adjust the mask to match the position of your characters properly here you don't need a background mask continuing with latent couple though now now that you have the separated masks let's prompt for each one under the general prompt you want to add the context of the image as well as the enhancers and the background so in this case we want an anime illustration of a couple walking through a busy street 4K daylight wallpaper next we prompt for what the character on the right will be in this case T to add theora I'll first look for it and add it to our regular prompt then just copy paste it into latent couple add the keyword for the Laura in this case Tye one girl woman and we we will also add some of the context of our background prompt walking through a busy street couple and now we repeat for genos adding theora and prompting for the character with some context the alpha blend and weight can be referred to as the segregation sliders they represent how much each prompt will stay inside its mask the lower the alpha value the more the general prompt will affect that mask I usually keep the mask sliders at one and the alpha blend will be a little more situational the reason we add context to our prompts is to avoid losing the background completely while maintaining the characters another way to get more of the background is by using a higher Alpha blend since it makes it affect all the masks more if you push it too high it will mix up with our characters forcing us to in paint later on if you wanted to prioritize the background this is a good way to do it though for now I'll keep it at 0.2 and use a higher value if I don't like how it turns out all set for now let's click on prompt info update this will save the information on what prompt goes where as well as creating our final prompt by separating in the prompts of each mask with the keyword and if we click generate now you will see how the image is still not good that's because for latent couple we need to use composable Laura an extension that you should have let's just enable it and hit generate again cool looks like the image is generating nicely now but we can see that there are still a few issues with it ignoring the faces for now the main problem is that having two luras at the same time creates this flat colors and artifacts and this one is kind of tame some luras maybe way worse some things that might help with this issue are lowering the CFG scale a bit lowering the controlate weights and lowering the weight for each Laura however all of this sacrifice either the prompt comprehension a pro purpose and maybe even losing the character sometimes changing this will be enough on its own but most of the time they are just parameters to keep in mind that can help as we do this next step if we don't want to compromise all of that we need to step up our Lura usage game you see this issue happens at the end of the generation where the Lura weight is too strong and and instead of letting the model add details it keeps baking the character even if it is already well done that's because luras affect the image using always the same weight our ideal scenario would be something like this where the Laura starts strong until the character is already well defined and then slowly starts disappearing letting the model take over well typing this thing when using composable Laura we can control just that the first number controls the base variable weight of the Laura what we type next determines the weight the weight will evolve over time time being the number of steps and finally this number right here controls at what percentage of steps the variation will start 0.5 being 50% of the total steps we can actually control way more than this like the opposite of cool down would be warm up or using words like increment or decrease I will leave a video in the description that talks about all the possibilities this extension offers it's a lot for this to work we will go in stable diffusion activate composable Laura with step and plot the Laura weight in all steps then on our prompts for latent couple we will add the following and yes I will leave this type down in the description so you can just copy paste just copy the same format for the other Laura important that you keep in mind that some Laura have stronger overfitting than others so if you see one acting up make sure that one stops earlier than the others and maybe lower its weight a little bit too now just update the prompt info and click generate maybe 0.5 is a little too late so I tried 0.35 and it was better remember that all these values are always a base for you to work with each Lura checkpoint and each image will require different values as you can see on these examples if you see your character getting lost then go higher and if it is overfitting go lower for regional prompter you won't be using composable Aura cuz there's no need for it and it will just make your Generations slower you will just use latent instead of attention this means that you can't control theur at every step like we were doing right now what what you will do is come down here to Laura's stop step and fully stop using the Laura at a step you think fits I'm using 30 steps so about 14 or 16 should do this will give you very similar results as latent couple with composable Laura to finish with our text to image setup and before moving to a more complex composition let's fix the faces with after detailer a regular after detailer prompt won't work because we have two very different faces we are going to go under settings after the tailor change this from nonone to left to right and now we will prompt for the faces regularly from left to right so the first phase will be genos then separate this prompt by typing open square bracket sep and close square bracket that will make it so the phase on the left is genos and the next step on the line will be the one after step so in this case Tye if we had more faces we would keep going like I did in this image right here for example since the faces are pretty bad I will use a higher than noising strength and I like to use 512 x 512 to save some time treat this extension like you would regular in painting for only masked by the way big thanks to keyboard Alchemist since I learned about this option when Kronos recommended me there after the tailor video on Discord I will leave it in the description so you can learn more about this super useful extension and on that note also thanks to another content creator laterality who told me about it a little bit later both are very good channels that will be in the description you can also fix Faces by generating with high rest which will make them automatically pretty good but it will take a long time if you don't have a good GPU to actually upscale this I would recommend just going to image to image and use the same setup with latent couple and its mask here you can use a higher Alpha value and there's no need for the composable Laura fancy stuff this time just lower the Laura's weight also control net tile can be pretty nice for this just use a strength of 0.4 to 0.5 or whatever you want to be honest and play with it add after the tailer to this and you are pretty much done knowing this you can repeat this process to create what you're looking for for example controlling the background with a segmentation model and then then working with a nice base image and of course in painting if you think something could be better you can add more characters if you need them pretty much as many Lord as as you want Even though past five at a time I couldn't get them all to work okay we are done with the base method at least for simple compositions like this one where each character is separated and not interacting from now on we will have three levels of difficulty one compositional this is where the main problem resides in the type of shot we are looking for they can be easy to get or pretty hard it's kind of hit or miss two divided interaction images where each action happens on a part of the screen but they touch at the center like a handshake these aren't too hard but require fixing and finally overlapping images where one mask needs to overlap a different one splitting the character in Two some are simple others not so much from here on out you will be needing control n references most of the time mainly open pose and death Maps I will leave this video in the description where I go over easy ways to make them okay for compositional images like a cowboy shot or and over the shoulder shot the main issue will be the depth and overlapping of the Mask well actually the worst issue will be to make the characters face the right way the process itself doesn't actually change much mask the parts prompt accordingly and use the luras you'll need the most important part in these cases is fine-tuning your control Net's modal weight and ending step as well as prompting for the type of shot you're looking for it is very likely that you'll have trouble with characters that are facing backwards like in the over theh shoulder shot where AI tries it's hardest to put them facing the camera or has a tough time making just the back of the head also with just using a cropped part of a character like the legs on a cowboy shot that could either get fully destroyed or make you lose the rest of the image cuz you need a very high depth weight some of these you can easily fix with in paint sketch like in the case of the back of the head you just take a different color paint over it use a medium the noising strength and you're pretty much done if you have trouble with a specific composition like not getting proper legs on the cowboy shot in my case you can prioritize the composition to in paint later for example I used a higher death map weight the lowest possible while still maintaining an okay background that way I could get the leg shape right after that I just went and inpainted them so they looked mechanical if in image to image it has trouble maintaining the shape just use a cany model and play with the control net values a bit in cases where there's a part of control net that isn't working properly but another one is like here with the legs messing up but the character not so much and I'm still not sure if this works or not what I've been trying is to divide the death map in two parts one for the leg which I'll put at a higher value and ending step and then the character which I will use at a lower value that way we can focus on the leg without destroying our character we will still need to impt but we have a nicer background now since compositions can change too much and I can't cover them all let's look at the divided interaction images these are very similar to the first images we made usually the only difference is that you will need a good control net reference or a high loock St and that nothing will save you from fixing stuff later up until now we only used open post references to count the number of characters and choose their position in the image there was no need for them to follow the post fully but now we need to ensure that at least the touching parts are post and have a high weight make sure that the masks also stop at the right angle and don't go over the other character side the rest is just using the first method normally until you find an image that you like after that we should fix the hands I'm going to use the methods I explained in this video right here but since this video is not about that I'll just quickly do something that kind of looks like a handshake use the reference made a line art and then imp painted you can of course dedicate a little more time to this if you care this is fine by me at the moment and finally we have over Laing interactions which are probably the hardest ones to get right and will usually need in painting and cleanup the hardest part for these images is playing with controlled models so that you get a decent result that follows what you want most of the time stuff will get mixed mied up and distorted and you might lose your character in the parts that are overlapped the more Crossing Parts you have the more cleanup and better pring skills you will need I tried to make the punch image with this much overlap and I ended up using the only thing League of Legends ever taught me I surrendered decided to try again but with the poses being a little further away this time it was way easier on these Generations controlate open pose and death play a huge role in the results good settings on a death map can make or break your image I will give you some guidelines but every image will be different the open pose model you can keep it pretty high and not touch anything else for poses like this I left it at one or even higher and did not touch the controled starting or ending Step at all but for death you want to be very careful mainly with the ending step def is focused on the first steps of the generation and its goal is to ensure that things are at the correct distance relative to the camera and your goal is to experiment until you find out exactly at which Step it has achieved that and then take it out for example in our Punch Generation the death map is important so that Hinata's leg goes behind Jinx and not in front like what could happen if we stop the death map too soon or we use too low of a weight but if we use a high weight and don't stop the map soon enough the image turns out flat and the characters might get lost I usually start with a 0.35 weight and 0.3 ending step if it works like that then I'm happy and we all chill but if it doesn't I will slowly increase the values in cases where you can't find unit enough and need to use a very high depth weight do as we did for compositions prioritize shape and then in paint for the correct characters add think their trademark details with in paint sketch for example it will take more time but it will make pretty much anything possible if you have the patience for it there are also some images that will give a mistake in one place or the other for example this shot with three luras closely interacting with each other with more hands than my dude cdri in this there are a lot of masks touching on the same spot and it is likely that AI doesn't use the Lura as much in that part missing some tattoos for example forcing you to clean that up one way to do this is to make a lot of variations and mix the best parts of each one together things like a Haw or dancing are way simpler to accomplish if you make the mask properly the only thing that might mess up or tiny part of the Mask or as always the hands but I haven't found a way to really get those right other than just correcting them with inpaint and Photoshop if you have any problems when generating make sure to join our Discord and ask your issues away there are a lot of amazing people in there that are willing to help thank you so much for supporting the channel and see you
Original Description
Create interactions between multiple trained characters in text to image. Multiple characters with regional prompter/latent couple + composable lora.
Including creating fight scenes for your coming creation, and improving your Story Telling with Stable Diffusion!
Join our discrod server: https://discord.gg/VYHU3bxMnP to learn about this and more!
[ ______lora______ #cmd\(cooldown\(0.5\)\)]
------------- Links used in the VIDEO ----------
Videos you should check out:
-After Detailer by @KeyboardAlchemist: https://www.youtube.com/watch?v=6EraysHdhHE&lc=UgyUrO1d1T3RkAZJ2OZ4AaABAg.9vhRvY3rmO49vhat4LwgyU
+Latent Liminality Channel: https://www.youtube.com/channel/UC930w2DYJAZrdDNZXcwkx-w
-Composable LORA: https://www.youtube.com/watch?v=QS9yjSMySuY
-Fix Hands: https://youtu.be/oPcQzhhwsGU
-Create Easy Controlnet References: https://youtu.be/SvGIkWFh-eo
Extensions used in the video:
Composable LORA: https://github.com/ashen-sensored/stable-diffusion-webui-two-shot
Latent Couple: https://github.com/ashen-sensored/stable-diffusion-webui-two-shot
Regional Prompter: https://github.com/hako-mikan/sd-webui-regional-prompter.git
Photopea Embed: https://github.com/yankooliveira/sd-webui-photopea-embed
After Detailer: https://github.com/Bing-su/adetailer
Controlnet: https://github.com/Mikubill/sd-webui-controlnet
------------- Useful stuff for this ----------
Keep in mind that some checkpoints might have a better time than others when using things like Regional Prompter or Latent Couple!
Recommended are:
ANYLORA by Lykon for anime generations
SDXL or Deliberate for others
------------- Social Media ----------
-Instagram: https://www.instagram.com/not4talent_ai/
-Twitter: https://twitter.com/not4talent
Make sure to subscribe if you want to learn about AI and grow with the community as we surf the AI wave :3
#aiairt #digitalart #automatic1111#stablediffusion #ai #free #tutorial #betterart #goodimages #sd #digitalart #artificialintelligence #l
Watch on YouTube ↗
(saves to browser)
Sign in to unlock AI tutor explanation · ⚡30
Playlist
Playlist UU81KZMuh7RWo21Kk0CaS7eA · Not4Talent · 19 of 33
1
 2
2
 3
3
 4
4
 5
5
 6
6
 7
7
 8
8
 9
9
 10
10
 11
11
 12
12
 13
13
 14
14
 15
15
 16
16
 17
17
 18
18
 ▶
▶
 20
20
 21
21
 22
22
 23
23
 24
24
 25
25
 26
26
 27
27
 28
28
 29
29
 30
30
 31
31
 32
32
 33
33

Why your AI art prompts are FAILING and how to FIX them #shorts #part1 #ai #stablediffusion
Not4Talent
The ONE WAY to beat Concept Bleeding #shorts #part2 #aiairt #ai
Not4Talent
The better AI art generator? #shorts #ai #aiairt #stablediffusion #midjourney
Not4Talent
This are some must have models for stable diffusion 1.5! #shorts #ai
Not4Talent
STOP making BORING AI art
Not4Talent
Get FULL creative control over Stable Diffusion | Install + all models
Not4Talent
Easiest sketch to AI concept 🤯 #shorts #ai #aiarchitecture #controlnet #aiairt
Not4Talent
Prompting HACKS no-one talks about
Not4Talent
Next level AI art Control | My workflow
Not4Talent
Best Tools and extensions for STABLE DIFFUSION AI art
Not4Talent
sketch to final "time-lapse" #ai #aiairt #stablediffusion
Not4Talent
This ControlNet model is INSANELY useful!
Not4Talent
fix bad faces, super easy #stablediffusion #face #aiairt
Not4Talent
Create consistent characters with Stable diffusion!!
Not4Talent
LORA training EXPLAINED for beginners
Not4Talent
MONEY with AI art | ft. DupDub
Not4Talent
This prompting technique is so fun! #aiairt #ai
Not4Talent
Ultimate Guide to HANDS with Stable Diffusion! (Any pose you imagine)
Not4Talent
Complex INTERACTIONS with MULTIPLE characters | Stable Diffusion
Not4Talent
No one uses this CN model and they should! #controlnet #stablediffusion #aiairt
Not4Talent
I spent 3800$ on a new PC to use AI... Do I regret it?
Not4Talent
Full FACIAL EXPRESSION control for Stable Diffusion (+Lora Pack)
Not4Talent
Unlimited CONTROL with SLIDERS! (SPECIAL loras changed the game)
Not4Talent
Create CONSISTENT ENVIRONMENTS with AI (from multiple angles)
Not4Talent
Add characters to ANY environment with Stable Diffusion
Not4Talent
PIXEL ART with StableDiffusion + Tileset workflows??
Not4Talent
BREAK Posing Limitations with Stable Diffusion!
Not4Talent
Extreme perspectives with Stable Diffusion and Photoshop / Full workflow
Not4Talent
Why I am learning to DRAW as an "AI BRO"...
Not4Talent
Get instant-feedback on your art! (and learn faster) #digitalart #art #learningtodraw #ai
Not4Talent
Practice composition and storytelling, the fun way #art #ai #aiairt
Not4Talent
Can AI be a TOOL for ARTISTS? My workflow + Pros & Cons
Not4Talent
UPSCALE any image for FREE with AI | Stable Diffusion
Not4Talent
More on: Multimodal LLMs
View skill →


Related AI Lessons
⚡
⚡
⚡
⚡
FREE AI Sin City Photo Generator — Turn Any Photo Into High-Contrast Noir Art (2026)
Dev.to AI
Google makes Gemini’s personalized image generation free for all US users
The Next Web AI
Gemini’s personalized AI image generation is now free for U.S. users
TechCrunch AI
WebP's Compression Secret: How a 1MB PNG Becomes a 200KB WebP
Dev.to · swift king
🎓
Tutor Explanation