Pull A Heroku Rails App and Database
Key Takeaways
Deploys a Heroku Rails application and database using Git and Heroku CLI
Full Transcript
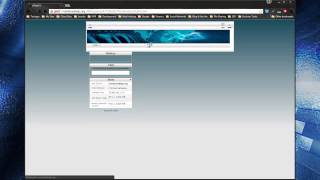
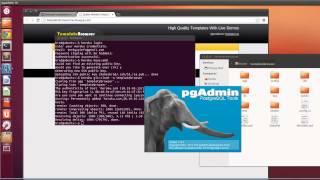
hey guys in this tutorial I'm going to be showing you how to um pull a a Heroku repository or your your app off Ruby on reals app off Heroku um and this the one I'm going to be dealing with isn't finished uh it's it's in development still it's called template browser and it's it's a really it's going to be a really simple app that just displays different um website templates for people to choose from uh if if you're running a a web design company and you want to offer pre-made templates um then that's what this is for um nothing special I'm just using this as an example to show you how to actually get it off Heroku onto a new computer you and we're in Ubuntu we're in Linux Ubuntu uh 1210 so if you go to Heroku docomo that you you know what Heroku is and uh maybe you're looking for a tutorial to actually do what what I'm going to do grab the app um and I'm also assuming that you have rails installed and everything's already set up um this particular app uses a postgresql database um so I'm just going to log in here and you see I have three apps here in my account uh this is the one we're going to be dealing with template browser and we can go to settings and I actually have a a URL I mean uh uh top level domain pointing to this which is um template browser. net um but I'm going to open up the Heroku the subdomain you can use either okay so you'll see uh there's not much to this it's pretty much just a a shell um I do have a database with category Fields as well as um templates so each template can have a category uh they'll be able to click on General and see all the general templates and then maybe um technology templates so it's really a work in progress uh this isn't really about the app though it's about how to get it onto your um local machine so what we want to do is open up a shell prompt now you don't want to create the actual folder um if we just go and see what's in my home directory uh I don't have the folder here um because Heroku will actually pull the entire thing and put it in our home directory so the first thing we want to do is we want to install um the hoko gem now I'm assuming you have ruby gems and and everything all set up on your on your computer so let's install the gem all right so the gem is installed uh now what I want to do is just run bundle install uh actually no we don't want to run bundle install so now we want to get uh Heroku 2 belt which is an a a great application that will give us um git functionality uh as well as some other stuff that that is required for us to do this so we want to do a a w get and a we want to do q and O uh yeah q and capital O tags um and then we want the URL for um the TU belt which is tt. Heroku dcom um slash install Ubuntu um um sh sh so that should get it for us this just take a minute and you can also download tool belt for Windows if you want to use Windows um but I really suggest a Linux based um OS if you're going to be developing rails apps now now that we have the tool belt we can actually log in so we do Hoku login all right so looks like we logged in okay um now you're going to want you need some SSH keys to to talk to the app the the remote app so let's do Heroku Keys colon ad and yes we want one generated all right so that's all set um now what we want to do is actually clone the app um so we want to do Heroku get clone um I'm sorry get colon clone and use the a tag and now we need to do the the name of the app obviously yours will be different mine is template browser okay are you sure you want to continue yes I am okay looks good all right um so let's go into our home folder see what's going on here you can see we have the template browser folder and we have all the the correct files um now what I want to do is I want to get the database as well uh we're using a p I use PG admin to um admin the tables and the database so I'm going to open that up and we're going to make sure we have the correct credentials and all that and we can find that in the config folder and in the database yml file and I actually changed the password I I actually hit it for this tutorial um so what I'm going to do is just take this out of the view and put now let's just look at it first um the app that I have on Heroku is using the post SQL uh adapter they they actually offer it as an add-on so um and we the host is Local Host and then we have the database name um the the user the password um we actually have a separate test database but we are using the same development and production databased um because we're using Heroku so I'm going to bring that out of the view and just change that to what it was one second all right so now what I need to do is create a new server here and I'm just going to call it server one and psql is very easy to install um you can just app get the package um and install it and obviously you'll need to create uh use um you don't even need to create a database just you need to create the user in the command line and then you can actually use PG admin to create the database so that's what we're doing now now this here are the admin and the password are the same that I have in that file that I just showed you so okay and now if we go here databases I actually already had this created I'm just going to drop it and I'm going to recreate it so we remember we have the temp browse database and the temp browse test database so that's what we're going to create here and the owner should be the one that was specified in that database configuration file and that's really all we need I'm going create the test one now all right so now we have our database and our test database so now what we need to do is pull it from Heroku to do that we have to install the um Taps gem in the SQL gem so we just got to go back to a command line and go into our directory our app directory now what we want to do is Gem install um pgts in SQL all right so let's do that so after this we should be able to actually pull database into our our new empty database and once that's done we'll have an exact um copy of the Heroku app all right so that's all set now we can actually try actually first of all let's Rundle let's Rundle let's run bundle install this will just update all our gems okay let's go all right so now we can try Heroku DB Paul and cross our fingers oh yeah it's it this is a destructive action um and what that means is is just whatever we have in the database now will be overwritten and and gone so and we just have an empty database so that's fine so it just it's just a asking you to actually type right here you can see to proceed type template browser all right so it looks like it's connecting and it's it's getting the schema the indexes all right looks good all right so that looks like it was successful now we can just go over here to our PG admin and if we click on schema public tables you can see there's five tables so everything looks good now all we need to do is um run our server our local server with rails s all right so that looks good now if we go to now this is our remote app so let's get out of that and let's go to our local local host Port 3000 and everything looks good um you can see this General is one of our categories that we have in the database so that's how how you would get an app from Heroku pull it and pull a database and now all you would have to do um we just start a new terminal all you would have to do now if you wanted to push back to Heroku say you did some changes uh you would just add it and commit and then you would just do get push to Roku master and it says everything up to date but if you had made changes that would update as well and as far as the data database you would do all your local work um your local models and so forth and then you would run Heroku um I think it's run rake DB migrate and this would actually um do your migrations on the on the remote server as well so um that's it for this tutorial I hope I helped some of you guys out and I'll be doing some more reals tutorials probably on the same application um so be sure to to subscribe and check out those as well thanks
Original Description
Tutorial on grabbing an application from your Heroku account along with the database
Watch on YouTube ↗
(saves to browser)
Sign in to unlock AI tutor explanation · ⚡30
Playlist
Uploads from Traversy Media · Traversy Media · 12 of 60
1
 2
2
 3
3
 4
4
 5
5
 6
6
 7
7
 8
8
 9
9
 10
10
 11
11
 ▶
▶
 13
13
 14
14
 15
15
 16
16
 17
17
 18
18
 19
19
 20
20
 21
21
 22
22
 23
23
 24
24
 25
25
 26
26
 27
27
 28
28
 29
29
 30
30
 31
31
 32
32
 33
33
 34
34
 35
35
 36
36
 37
37
 38
38
 39
39
 40
40
 41
41
 42
42
 43
43
 44
44
 45
45
 46
46
 47
47
 48
48
 49
49
 50
50
 51
51
 52
52
 53
53
 54
54
 55
55
 56
56
 57
57
 58
58
 59
59
 60
60

Changing Your DNS/Nameservers
Traversy Media
Create a MySQL database in cPanel
Traversy Media
Install & Uninstall Joomla Extensions
Traversy Media
Adding and linking an article in Joomla
Traversy Media
Create a Joomla Blog
Traversy Media
Import & Export A MySQL Database
Traversy Media
Use A Custom Font On Your Website Using CSS
Traversy Media
Connect Joomla Site With Dreamweaver
Traversy Media
Remove Phoca Gallery 3.2.3 Footer Text
Traversy Media
Drupal 7 Security Update 7.19 to 7.20
Traversy Media
Add An Addon Domain In Cpanel
Traversy Media
Pull A Heroku Rails App and Database
Traversy Media
Create a Custom Joomla 2.5 Module - Part 1
Traversy Media
Create a Custom Joomla 2.5 Module - Part 2
Traversy Media
Create a Custom Joomla 2.5 Module - Part 3
Traversy Media
Joomla SEO Tutorial - sh404sef Configuration
Traversy Media
Font Dragr
Traversy Media
Convert an HTML Template to Joomla 2.5/3.0 - Part One
Traversy Media
Convert an HTML Template to Joomla 2.5/3.0 - Part Two
Traversy Media
Rockettheme Rocketlauncher Joomla Site in Under 10 Minutes
Traversy Media
JQuery FAQ Slider Tutorial
Traversy Media
301 Redirect With htaccess File
Traversy Media
Convert HTML to Wordpress Theme - Part 1
Traversy Media
Convert HTML to Wordpress Theme - Part 2
Traversy Media
Easy JQuery Widgets
Traversy Media
Codeigniter App Part 1 - Creating the Database
Traversy Media
Codeigniter App Part 2 - Installation and Configuration
Traversy Media
Codeigniter App Part 6 - Login/Register System
Traversy Media
Codeigniter App Part 7 - Models List CRUD
Traversy Media
Codeigniter App Part 8 - Models Task CRUD
Traversy Media
Node.js Part 1 - Install NodeJS on Windows
Traversy Media
Node.js Part 3 - Building a Static Page Server
Traversy Media
Node.js Part 4 - NPM
Traversy Media
Node.js Part 2 - Install MongoDB in Windows
Traversy Media
Create a Joomla Quickstart with Custom Sample Data
Traversy Media
Install MongoDB in Ubuntu
Traversy Media
HTML5 Web Storage
Traversy Media
Create a Joomla Bootstrap Template From Scratch
Traversy Media
Ubuntu Server 14.04 Setup Part 1 - Installation
Traversy Media
Ubuntu Server 14.04 Setup Part 3 - Set Static IP
Traversy Media
Create A Wordpress Widget - Part 1
Traversy Media
Create A Wordpress Widget - Part 2
Traversy Media
Create A Wordpress Widget - Part 3
Traversy Media
Create A Wordpress Widget - Part 4
Traversy Media
Get Started With Sass on Windows
Traversy Media
Build An HTML5 Template With Bootstrap and SASS - Part 1
Traversy Media
Build An HTML5 Template With Bootstrap and SASS - Part 6
Traversy Media
Build An HTML5 Template With Bootstrap and SASS - Part 4
Traversy Media
Build An HTML5 Template With Bootstrap and SASS - Part 5
Traversy Media
Build An HTML5 Template With Bootstrap and SASS - Part 3
Traversy Media
Build An HTML5 Template With Bootstrap and SASS - Part 2
Traversy Media
Build An HTML5 Template With Bootstrap and SASS - Part 7
Traversy Media
Build An HTML5 Template With Bootstrap and SASS - Part 10
Traversy Media
Build An HTML5 Template With Bootstrap and SASS - Part 8
Traversy Media
Build An HTML5 Template With Bootstrap and SASS - Part 11
Traversy Media
Build An HTML5 Template With Bootstrap and SASS - Part 9
Traversy Media
Build An Audio Player Using HTML5 & jQuery - Part 1
Traversy Media
Build An Audio Player Using HTML5 & jQuery - Part 2
Traversy Media
Youtube Data API v3 & jQuery To List Channel Videos
Traversy Media
Using Bootstrap With Ruby on Rails
Traversy Media
Related Reads
🎓
Tutor Explanation

 DeepCamp AI