K-Means Clustering from Scratch - Machine Learning Python
Key Takeaways
The video demonstrates the implementation of the K-means clustering algorithm from scratch in Python, using libraries such as numpy, matplotlib, and sklearn. It covers the key steps of initializing random centroids, creating clusters, calculating new centroids, and predicting cluster labels.
Full Transcript
[Music] how's it going guys hope you're doing awesome so in this video we're gonna code the k-means clustering algorithm from scratch and yeah if you want the theory aspect of this algorithm I'm gonna link a good resource for you in the description below and you could come back to this video for the implementation part but with that said let's let's start coding it so we're gonna first start with doing a class let's do it k-means clustering and yeah so I guess let's do the skeleton code first we're gonna have in it and we're gonna have another function which is gonna initialize random centroids so yeah as I said I'm assuming you know the k-means so we're going to first of all just randomly assign the centroids and and we're gonna have K of them and then after having our centroids we're gonna create clusters meaning we're gonna go through each point and check which is the which is the closest centroid and assign that point to to that I guess color of the closest centroid and that in that way we're gonna create the clusters so this is gonna take X and also the centroids that we have then after the clusters we're gonna calculate new centroids so and we do this by you know taking the average of that cluster and that's the new centroid point and sort of that that's the algorithm right and then we're gonna predict cluster let's see I don't predict clusters perhaps a bad name yeah so we're going to go through each point and we're gonna assign it sort of we're gonna obtain the class label from this so yeah pretty cluster is gonna return the the label of the group the point belongs to or according to the algorithm so then we're gonna have another one we're gonna plot figure and it's going to be nice for the visualization and yeah then we're gonna have define the fit function which is just gonna use I guess all of these functions that we've implemented above and the iteratively improve on the centroids and the clusters and then we're just gonna call the algorithm from if name equals main okay so that's the the skeleton code so you get a overview let's now start with the inner function so we're gonna send in X and also the number of clusters so number of closure is gonna be how many clusters do we do we want to have and and the K here is gonna be the number of clusters then so yes k-means would run until there's no change but we could also set a max iterations so that it doesn't run for an infinite amount of time I guess that that would never I haven't came across examples where that happens but I guess it's a good thing just to have so we're gonna have my constrains to a hundred and then we can do self that num examples and self that norm features is gonna be X dot shape so we're gonna have the training examples on the rows and the features on the columns yeah sorry actually we need to do the the imports as well I forgot about that so we're gonna import numpy SMP we're gonna import matplotlib popeye plot as PLT and then from SK learn that assets' import make blobs so we're gonna use this for the plot numpy for the linear algebra and then SK learn and make blobs for the data set and we're gonna have another one here as well except the plot figure and gonna have true just to get a nice visualization and yeah so that's in it let's now do the random centroids so we're gonna set the central is to be MP zeroes of self dot K comma self-taught num features and essentially we're gonna have K of them right and for each centroid you need to have and then the values of the dimensions that it that it's a centered at so I guess in this case we're since we're gonna plot it's gonna be in 2d so the number of features is gonna be two and let's say the K is 3 so this is gonna be something like 3 3 by 2 matrix then we're just gonna for K in range set that K we're just gonna choose a random centroid so we're gonna use X and we're gonna do MP random choice range Serfdom examples so what this means is if we look so it's gonna be range Nome example so let's say we have 50 or something it's gonna be 0 up to 49 and then it's gonna take just a random choice let's say it becomes 1 or something and then we're gonna do X of 1 so we're gonna choose the first I guess the second since Python is 0 indexed so the first didn't sorry the second point of our data set and that would take all of the the features as well so so this would just be a random point essentially and then we're gonna do centroids of K is equal to centroid so now that we have all of these centroids we're just gonna return centroids so then we're ready to create our clusters and what we're gonna do is we're gonna do clusters equals a large array of of arrays for underscore in range of self dot K and what we're gonna do is that each array inside this large array is going to be associated to a specific cluster so for example let's do we have an array and inside this we have two arrays and this first array is going to be associated to the first cluster is gonna be associated to the second cluster so here we're assuming K is 2 and what we're gonna do is let's say that a point is closest to the first centroid point which is this array then we're gonna add that that example that training point so let's say we have 50 points and let's say that we're looking at the third training example so we might append 3 to this one and and then and then let's say that we're looking at training example point number 50 in our data set and let's say that it's it's it's closest to the second cluster then we're gonna add it to this array instead and so it would be appended to this one just a small example it's gonna make more sense I think when we go to it now with the loop so we're gonna do four point index comma point in enumerate X okay so we're going through each point in our data set and then we're gonna do which is the closest centroid to to this point okay rather we're looking at a point and we want to know which is the closest centroid to the point we're looking at and we're going to use the Euclidean distance so we're gonna do MP square root of MP sum of let's see point minus centroids squared and one thing here is that we're utilizing numpy Broadcasting this is a single point and these are multiple points so yeah I guess you're familiar with numpy broadcasting if you're not I guess just google it but it's gonna subtract so this is gonna be let's say it's I don't know 3 by 2 and this is gonna be 1 by 2 then the outcome of this is gonna be a 3 by 2 where this point or central has been subtracted for every across every row from this this point and and then we're just going to do element y squared so I guess in the end this is just this is gonna be a a 3 by 2 8 a 3 by 2 matrix and and then we would take the sum across the features so we have to be specific about that axis is one and then we take the square root but then we also want to know so which is the minimum of those right now we have the distance distances to all of the centroids but we want the closest one to be the closest centroid it makes sense right so we want to do MP argument of that which would give us the index of the closest centroid and then what we can do is we can do clusters of that closest centroid right now we're looking at this specific one of these sub arrays in this larger array and we're gonna append our point index and then what we would do we would return clusters all right and then so after we have this cluster now we're ready for the next iteration of k-means which is we're gonna take the average of our of our cluster and that's gonna be our new centroid and then we can repeat the process all over again am i recording by the way yeah okay good so calculate new centroid we can do centroid is gonna be NP zeros of self dot k comma self that number features so let's see this is gonna be I guess the same as what we did here right when we initialize the random centroids and then we're just gonna go through each cluster so finders come a cluster in enumerate clusters we're gonna compute the new centroid new centroid is gonna be NP mean of X of cluster comma X's equals zero yeah so we're the cluster here remember is just an array of all the indexes of the points that are associated with that cluster so we can directly just index with X to get all of the points that are associated with that cluster and then we can just take the mean very easily and we get the new centroid location and then we can just do centroids of index it's just going to be the new centroid so we're updating the center in the centroid location and then we're just going to do returned centroids and let's see so what we want to do now with the predict cluster let's say we've run k-means and in the end we want to know well what are the class labels that we predict these points to be in then we're just gonna do y predict is going to be MP zeroes of self that number of examples so for each point we're gonna we're gonna guess the label for it so we're gonna do four cluster index comma cluster in enumerate clusters we're gonna go through each cluster and then we're gonna do four sample index in cluster I'm going to Y prediction of sample index is equal to cluster index so right we're first checking okay which are the points go through all of the the the training exam the points that are associated with the first cluster and then we're just going through each point in that cluster so each training example and doing Y prediction of that specific index to be associated with with the cluster index which for the first cluster is going to be 0 second culture is gonna be 1 etc and yeah that's all we have to do and then we can just return my prediction and to get sort of a nice figure we can do plot that scatter X altering examples all points of the first dimension and then X all of the second dimension so x and y and then we're gonna use the color is going to be from from y in that y here is gonna be the the class labels so that map table matplotlib knows which which colors each point should be and then we're just going to do some extra arguments for the the color and the size so yeah this is not that important and then plot that show alright so now we've done all of the necessary functions that we need to actually train k-means so the fifth function is gonna train it so we're gonna do centroids is going to be self dot initialized random centroids and we're gonna send in our data set X and then we can do for iteration in range of self dot max iterations we're gonna do clusters is gonna be self dot create clusters and we're going to send an X and as well as our centroid and then we can do we can you just do previous centroids we can just do so that it copies the centroids and then we can calculate our new centroids to be self-taught calculate new centroids and it's gonna put medicine in the clusters I mean you're sending the X and then we could do difference to be centroid - previous centroid and this is useful because if there's no difference then it's converged so we can do if not DIF dot any and any will check if there's any one that that's sort of if there's any that's not zero so if if there's not any that's different from the previous then we're gonna print termination criterion satisfied K means as converged something like that and then we're just going to break from the for loop and then we could do Y prediction to be self dot predict cluster and we're gonna send in clusters and X and sort of these cluster shares is going to be after the the algorithm has converged or reached a maximum number of iterations and then we could do a self tough plot figure we could do self dot plot fig of X&Y prediction and we could also return by prediction and yes there's something wrong here yeah sorry so this should be indented like this yeah yeah so that should be the the k-means clustering let's let's see that it actually works and I'm gonna do first MP random dot C to be 10 and just for the so you produce ability and then number of cluster let's say 3 and we can do X and let's not take normally with x and y but this is unsupervised we're not gonna have the Y ones we're going to make blobs number of sample say we have a thousand number of features it's going to be two so we can visualize it and then centers is gonna be number of clusters clusters and then we can do k-means to be k-means clustering just initialize the class and we can do y prediction to the k-means dot fit of x and that should also plot the figure for us so let's see now if that works all right so we need to do plots and yeah so we can I guess you can make this larger so we can sort of see that all we sent into the algorithm was the points right we didn't send any any class values but this is what the algorithm classifies so it classifies this the the red ones to be one group the purple ones to be one group and in the yellow ones to be another group and and this is very I mean this seems to be very correct this looks this looks right I guess if you would change the random seed here you would get new examples and yeah we can do that we would get something like this and you can see here that they I mean make sense what it's doing but it could also be the other way around right this could also be separated into two clusters I guess not really sure but yeah so but so that's the implementation of k-means clustering hopefully you were able to follow all our steps and if you didn't then please leave a question in the comment section below yeah so thank you so much for watching video and see you in the next one [Music]
Original Description
In this video we code the K-means clustering algorithm from scratch in the Python programming language. Below I link a few resources to learn more about K means clustering as well as to the Machine Learning Github repository where you can also find the code!
Resources to learn more about K means:
https://youtu.be/Ev8YbxPu_bQ (Watch the following lectures 13.2, 13.3, 13.4, 13.5 also)
http://cs229.stanford.edu/notes/cs229-notes7a.pdf
❤️ Support the channel ❤️
https://www.youtube.com/channel/UCkzW5JSFwvKRjXABI-UTAkQ/join
Paid Courses I recommend for learning (affiliate links, no extra cost for you):
⭐ Machine Learning Specialization https://bit.ly/3hjTBBt
⭐ Deep Learning Specialization https://bit.ly/3YcUkoI
📘 MLOps Specialization http://bit.ly/3wibaWy
📘 GAN Specialization https://bit.ly/3FmnZDl
📘 NLP Specialization http://bit.ly/3GXoQuP
✨ Free Resources that are great:
NLP: https://web.stanford.edu/class/cs224n/
CV: http://cs231n.stanford.edu/
Deployment: https://fullstackdeeplearning.com/
FastAI: https://www.fast.ai/
💻 My Deep Learning Setup and Recording Setup:
https://www.amazon.com/shop/aladdinpersson
GitHub Repository:
https://github.com/aladdinpersson/Machine-Learning-Collection
✅ One-Time Donations:
Paypal: https://bit.ly/3buoRYH
▶️ You Can Connect with me on:
Twitter - https://twitter.com/aladdinpersson
LinkedIn - https://www.linkedin.com/in/aladdin-persson-a95384153/
Github - https://github.com/aladdinpersson
Watch on YouTube ↗
(saves to browser)
Sign in to unlock AI tutor explanation · ⚡30
Playlist
Uploads from Aladdin Persson · Aladdin Persson · 54 of 60
1
 2
2
 3
3
 4
4
 5
5
 6
6
 7
7
 8
8
 9
9
 10
10
 11
11
 12
12
 13
13
 14
14
 15
15
 16
16
 17
17
 18
18
 19
19
 20
20
 21
21
 22
22
 23
23
 24
24
 25
25
 26
26
 27
27
 28
28
 29
29
 30
30
 31
31
 32
32
 33
33
 34
34
 35
35
 36
36
 37
37
 38
38
 39
39
 40
40
 41
41
 42
42
 43
43
 44
44
 45
45
 46
46
 47
47
 48
48
 49
49
 50
50
 51
51
 52
52
 53
53
 ▶
▶
 55
55
 56
56
 57
57
 58
58
 59
59
 60
60

computeCost.m Linear Regression Cost Function - Machine Learning
Aladdin Persson
gradientDescent.m Gradient Descent Implementation - Machine Learning
Aladdin Persson
Neural Network from scratch - Part 1 (Standard Notation)
Aladdin Persson
Neural Network from scratch - Part 2 (Forward Propagation)
Aladdin Persson
Neural Network from scratch - Part 3 (Backward Propagation)
Aladdin Persson
Neural Network from scratch - Part 4 (With Python)
Aladdin Persson
sigmoid.m - Programming Assignment 2 Machine Learning
Aladdin Persson
costFunction.m - Programming Assignment 2 Machine Learning
Aladdin Persson
predict.m - Programming Assignment 2 Machine Learning
Aladdin Persson
costFunctionReg.m - Programming Assignment 2 Machine Learning
Aladdin Persson
lrCostFunction.m - Programming Assignment 3 Machine Learning
Aladdin Persson
oneVsAll.m - Programming Assignment 3 Machine Learning
Aladdin Persson
predictOneVsAll.m - Programming Assignment 3 Machine Learning
Aladdin Persson
predict.m - Programming Assignment 3 Machine Learning
Aladdin Persson
Caesar Cipher Encryption and Decryption with example
Aladdin Persson
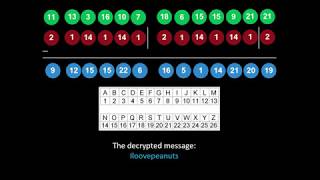
Cryptography: Caesar Cipher Python
Aladdin Persson
Vigenere Cipher Explained (with Example)
Aladdin Persson
Cryptography: Vigenere Cipher Python
Aladdin Persson
Hill Cipher Explained (with Example)
Aladdin Persson
Cryptography: Hill Cipher Python
Aladdin Persson
Interval Scheduling Greedy Algorithm: Python
Aladdin Persson
Weighted Interval Scheduling Algorithm Explained
Aladdin Persson
Weighted Interval Scheduling Python Code
Aladdin Persson
Sequence Alignment | Needleman Wunsch Algorithm
Aladdin Persson
Sequence Alignment | Needleman Wunsch in Python
Aladdin Persson
Codility BinaryGap Python
Aladdin Persson
Codility CyclicRotation Python
Aladdin Persson
Derivation Linear Regression with Gradient Descent
Aladdin Persson
Linear Regression Gradient Descent From Scratch in Python
Aladdin Persson
Pytorch Neural Network example
Aladdin Persson
Pytorch CNN example (Convolutional Neural Network)
Aladdin Persson
Pytorch LeNet implementation from scratch
Aladdin Persson
Pytorch VGG implementation from scratch
Aladdin Persson
Pytorch GoogLeNet / InceptionNet implementation from scratch
Aladdin Persson
How to save and load models in Pytorch
Aladdin Persson
How to build custom Datasets for Images in Pytorch
Aladdin Persson
Pytorch Transfer Learning and Fine Tuning Tutorial
Aladdin Persson
Pytorch Data Augmentation using Torchvision
Aladdin Persson
Pytorch Quick Tip: Weight Initialization
Aladdin Persson
Pytorch Quick Tip: Using a Learning Rate Scheduler
Aladdin Persson
Pytorch ResNet implementation from Scratch
Aladdin Persson
Pytorch TensorBoard Tutorial
Aladdin Persson
Pytorch DCGAN Tutorial (See description for updated video)
Aladdin Persson
Naive Bayes from Scratch - Machine Learning Python
Aladdin Persson
Spam Classifier using Naive Bayes in Python
Aladdin Persson
K-Nearest Neighbor from scratch - Machine Learning Python
Aladdin Persson
Linear Regression Normal Equation Python
Aladdin Persson
SVM from Scratch - Machine Learning Python (Support Vector Machine)
Aladdin Persson
Neural Network from Scratch - Machine Learning Python
Aladdin Persson
Pytorch RNN example (Recurrent Neural Network)
Aladdin Persson
Pytorch Bidirectional LSTM example
Aladdin Persson
Pytorch Text Generator with character level LSTM
Aladdin Persson
Logistic Regression from Scratch - Machine Learning Python
Aladdin Persson
K-Means Clustering from Scratch - Machine Learning Python
Aladdin Persson
Pytorch Torchtext Tutorial 1: Custom Datasets and loading JSON/CSV/TSV files
Aladdin Persson
Pytorch Torchtext Tutorial 2: Built in Datasets with Example
Aladdin Persson
Pytorch Torchtext Tutorial 3: From Textfiles to Dataset
Aladdin Persson
Paper Review: Sequence to Sequence Learning with Neural Networks
Aladdin Persson
Pytorch Seq2Seq Tutorial for Machine Translation
Aladdin Persson
Pytorch Seq2Seq with Attention for Machine Translation
Aladdin Persson
More on: Unsupervised Learning
View skill →


Related AI Lessons
⚡
⚡
⚡
⚡
Beyond the Elephant: On Manifolds, Projections, and the Hidden Assumptions of Neural Geometry
Medium · AI
Beyond the Elephant: On Manifolds, Projections, and the Hidden Assumptions of Neural Geometry
Medium · Data Science
Beyond the Elephant: On Manifolds, Projections, and the Hidden Assumptions of Neural Geometry
Medium · Deep Learning
Beyond the Elephant: On Manifolds, Projections, and the Hidden Assumptions of Neural Geometry
Medium · LLM
🎓
Tutor Explanation