How To Make A Wordpress Website 2019 - Divi Theme Tutorial
Skills:
Tool Use & Function Calling70%
Key Takeaways
This video tutorial covers how to create a WordPress website using the Divi theme, including setting up the theme, creating pages, customizing the design, and adding features like contact forms and Google Maps.
Full Transcript
what's up guys my name is Darrell and today is the day you are going to learn how to make a wordpress website step-by-step with no experience required now in this WordPress tutorial you're not just going to learn how to create WordPress websites from scratch but you're gonna learn how to create professional modern mobile responsive websites that fit for 2018 in fact this website was designed by a world-class designer to help my viewers get some inspiration and ideas for your website because let's be honest you know nobody likes an ugly website you know how many times have you left a website because you don't like the way it looked so in this video I'm gonna show you how you can master WordPress and also create professional websites that look amazing now let me give you all a quick tour this website and show you how this page builder works in this WordPress tutorial so today we are going to be using the number one rated WordPress theme in the world we're going to be using the Divi theme and guys making websites today has never been easier so for example let's just say I want to take this box and drag it right there take this box and drag it right there maybe you want to change this text so I'm going to type in something like great design click on save and guys that is it the changes are alive so it has never been easier to make a website today with the Divi theme now let me give you guys a quick tour of the rest of the websites so this right here is our about Us page and you guys can always change the color you can add in your own images you can change the font you can be as customizable as you want with your websites so today I'm gonna be showing you how you can incorporate these same designs on your website and guys it's really easy you know making websites with the Divi theme is so simple so this right here is our about Us page and next is our services page so I'll be showing you guys how you guys can create this services page for your websites so maybe you want a website for your business or you're just like the regular person in kind of you know poking around saying hey I want our website today in this tutorial I'm going to show you how you can do that simply and easily guys it's so easy so this is our services page and next is our blog page so maybe you want to add a blog to your websites so right here we have these blog and I'm gonna click on this one and I'm gonna show you guys how you can incorporate a blog on your website along with something like a Facebook like box or a Twitter feed or Instagram or whatever platform you use there's tons of them out through today it's kind of hard to keep up with them and here people can comment on its you know they can you can reply to the comments and say hey man thanks for commenting and all that good stuff and lastly I'll be show you guys how to create this contact form and again guys you can change the color you can change the font and I will also be providing you guys with free images in this tutorial and templates to help get you started with design and decor for your websites and lastly let's say you're a small business owner and you kind of want to tell people where you are so I'll show you how you can incorporate Google Maps on your websites so you can actually show people where you are located so if you guys are ready to create an amazing website from scratch and you really want to learn how to use WordPress and make some really amazing designs keep watching guys because in this tutorial I'm going to show you how to do it today step-by-step so the first thing we're going to do is get our domain and hosting and my link will provide you all with a 60% discount off your hosting after that we are going to purchase the Divi theme then we are going to install WordPress and lastly we are going to create our amazing wordpress website now there is a link in the description of this video it will take you to a page that looks just like this right here so this is sycron calm and I use psycho calm because I compared them against nine other competitors and these guys came up as number one as the most fastest yet also the most reliable so you have to worry about your website kind of like crashing your going down because you guys have some incredible of time they also have a 24 hour customer support line and a 30-day money-back guarantee so that alone wins in my book and that's me right there saying hey yeah you know these guys were amazing I personally use these guys on my websites as well so right here is our hosting plans now I want to talk about each one but I'm gonna recommend only one so I recommend the grow big because with the grow big you get unlimited websites hosted rather than just a single one so for example let's say you're making websites and later you want to make like two or three websites you can do that with the grow big or the NGO geek option so for those of you who have been around wordpress for a while and you kind of want to upgrade I recommend the go geek as well so right here I'm gonna go ahead and click on order and right here you'd put in your domain so you can put in something like I love Star Wars and then you know 6 or I love Star Wars 6 and then procede and then right now it would tell you if that domain is available so this domain is available and right here you would put in your account information you know your email your password and then your client information etc and give them your social security number I'm just kidding don't don't put in your social I'm just it's just a joke right here you would put in your card number and then you know etc and you know your billing address whatever and you guys remember these guys have a 30-day money-back guarantee so i recommend the 12-month period because you know 2-3 weeks will give you enough time to decide if this hosting company is for you or not but trust me I am almost guaranteed that it this is because I use it I've been around tons of hosting companies guys I've had some nightmares like where I wake up but my sight is gone I'm like oh my god you know but these guys are really reliable and really fast now also for the extra services I recommend actually everything now usually on other services I don't but I'll just tell you what they do so the main privacy basically protects your personal information if someone tries to look you up on the Internet so if you would want that you would click on domain privacy and also the cycroid scanner this will basically check your website every single day to see if a website has been hacked or any malicious code has been injected and this personally happened to me guys I've been in web design for a while so I know that sometimes there's crazy people out there who want to like you know spam your website with Viagra or something this right here would be a great option for you so after you're done putting all that information you would click on Terms of Service ok that's enough and then you click on Pay Now so I will go ahead and paint you on the next page alright it's congratulations you guys made it so this section right here is the customer so after you guys check out we brought to this page right here and this is the page or area where you can you know manage all your stuff such as like if you have a question about something you can go to support or you can like you know look at their facts you guys can also update your billing information right here you guys can also add additional services so maybe you want to add like a dedicated server or a cloud hosting or upgrade you can do that all right here as well you can also add like you know all this stuff right here so tons of cool stuff but you'll need to go to my accounts and we are going to install WordPress so right here is your hosting account and these are the domains so I have tons of domains that I use so right here I go to manage accounts and then you can go to go to cPanel you might get a little box that pops up just press ok and just keep going always press ok never read the warning signs okay so right here you're gonna go down and you're gonna go to WordPress because we are going to install WordPress onto our domain so right here WordPress and go ahead and scroll down now right here click on install now alright so right here you're gonna go ahead and find your domain so the domain that you purchased should be right here somewhere so you know just go ahead and click it so I'm just gonna select this one right here and right here make sure there is nothing there okay right here you're gonna put your site name because you can always change this later so don't worry but so you can unlike you know I'm just gonna change this to like a patty which is my dog and then the best dog right here you can add your username so you can put in like patty or whatever you'd want and then you can put in your password and remember you will need this password to login to WordPress so I'll make mine the same and then right here make sure you put your email right here I'll just leave it standard and then once we're doing that you can select you know your your language those of you who speak a different language you might want to put it right here but I'm going to select English because I speak English and right here you can add in something like these are plugins so you don't really need this I'll talk more about plugins a little bit later in this tutorial they're basically like added features for your websites okay so once you're done you click on install and it is installing WordPress on to our domain it says it's gonna take like four minutes guys but it probably takes like maybe 15-20 seconds at most all right it's a hundred one percent done awesome okay congratulations guys we have installed the WordPress now to access WordPress you click on this you are all right here alright so it's taking us to our websites and congratulations guys this is your website so if you want to visit your website really quickly you're kind of excited and click on visit sites and this is your site so this is live and right here we have patty the best dog and we have all this resources so we have successfully installed WordPress onto our domain and hosting so before we go any further I want to kind of change to settings in WordPress that are very essential so right here I want to go to dashboard and again guys this is like where all the magic happens so when you want to like make pages or posts you'll do everything back here but not to worry I'll run you through everything so you'll know what to do so right here under users go to your profile now this is just for your purposes so if you ever want to change your password in the future for WordPress you would do it right here so scrolling down here so right here under generate password you click on this and type in whatever password you would want for your website and also if you ever want to change the email the free website this is where you would do it as well okay so I'm not gonna change my password because I'm you know I don't want to go and click on cancel now one more setting I wants to go through before we go any further is permalinks so right here go to settings and go to permalinks now right here we have our permanent settings now usually it's under a day and name but you always want to do post name so for example when you go to a website like you see it's like your website com - about us right not your website - 2:08 you know all this crazy moment jumbo and also post name is the best for SEO purposes so scroll down here I'm gonna go to Save Changes alright so the next thing we're to do guys is install the Divi theme but before we do that let's take a look at our progress so first we got our domain and hosting congratulations then we installed WordPress the next we're going to do is purchase and install the Divi theme now there is a link in the description of this video it will take you to a page that looks just like this right here and also congratulations you guys get a 10% off now this company is providing you all with the Divi theme and also unlimited support for your website so basically if you guys ever have a problem with your website or somebody's not working these guys will provide unlimited support for your websites which is pretty incredible you get a team of developers to help you out with your website and also they provide you all with a 30 day money back guarantee now in this industry if you are the websites they don't offer that many websites do not offer money-back guarantees but elegant themes is so confident that you will love the theme they will provide you all with a 30 day money back guarantee and I personally use this guys on my own website so I'm not just trying to tell you that oh yeah go and buy no I use it on my website and all of my clients websites as well because it's number one for a reason so right here I'm gonna go to sign up today and then right here you can do your username your email your password confirm it and then right here you put in your information and then complete registration and guys they have so many tutorials on like you know they provide you all the free layouts like tutorials to help you get better with design this company truly is amazing so right here you go to complete registration and I have an account guys so I'm gonna go ahead and log in to my website and I get so many people on my youtube channel who always balanced around between tutorials and then they always come to mind and they're kind of like man I should have just listened from the beginning instead of wasting weeks of my time trying to find like other themes I was like guys trust me I've been around WordPress for a long time I know it's good and I know it's bad and this is good you know so right here is your account guy so this is like your your downloads and like support if you have a question thing you can also check out their blog and comments you know you can blog you know check on their blog and troll them like hey this is crazy but no I'm just kidding they provide some really cool stuff so I'm gonna go back right here and right here is Divi so right here and click on download and this is going to download the Divi theme alright so we downloaded the Divi theme now let's go ahead and upload it to our WordPress website so I'm gonna go to appearance right here and go to themes now right here I'll click on add new and go to upload theme right here we go to choose a file now I'm going to look for the Downloads so you're gonna look for your Divi theme so right here I have Divi - I'm gonna go to open and then go to install now alright so it is installing the Divi theme alright here it tells me it has installed successfully right here I click on activate and voila we have successfully installed the Divi theme congratulations now if you guys want to look at your website right now to see how it looks again you guys can go right here to visit sites and of course it looks nothing like our website but I'm not too worried we're gonna make a few changes and then we are going to start designing our websites so let's go ahead now and create some pages so we want to make the home the about the services and all that stuff so you can actually go right here to + do and go to page or you can go to your dashboard it produces the same result so right here pages add new so let's go ahead now and create some pages so right here I'm gonna do my homepage and go to publish and then let's say I want to make another page so right here add new and then I want this to be our about Us page and then we'll go ahead and create the services and the blog and the contact so here services oh yeah let me know what you guys thought of Star Wars by the way I I didn't like it I I don't know I was I'm a devout Star Wars fan but the last hours I was truly disappointed I just didn't understand most of it I felt like they were just in a hurry to make the movie and they just really didn't like have the like the quality writing content I was hoping for so I was kind of torn cuz I'm a huge Star Wars fan so anyways so guys I made those pages now we need to actually add this to our menu so let's go ahead and go over here to appearance and go to menus and let's go ahead and create a menu so I always just do menu one menu one go to create menu now all right here on our pages I'm going to view all so I'm just going to select both homes the blog contact all this stuff right here and go to add to menu so right here we have custom link now we don't want this right here but I'm explain to you what custom links are so right here you can also see custom links you can make your own links let's say for example you want to link them to like a PayPal donation or to another website you would just put in like you know whatever website you want and then right here I put like they're all sites and then whenever they click on that link they'll be redirected to whatever URL you put there and this URL will show or this will basically show them so that's if you want a custom link and it could be like you know you can have it for all different type of reasons but I'll just give you an example of what a custom link is but for now I'm going to remove it and I want to go ahead and decorate this menu so I want the about Us right there the home about us we're gonna put the services right there the blog and the contact I'll make this a primary menu and go to save now one thing I also want to point out that if you guys want a drop-down menu where you like hover over something and it displays something else you would just take this and simply drag it under and go to save so now if I go over to our website you're going to see the home services blog in contact and the about Us will be a submenu so right here we have the home services blog in contact and if I hover over the home this is now a subcategory so you can put like services and then maybe like you know like you're a contractor like Plumbing roofing whatever else you want to offer you can add that under so now we need to actually set our home page so we do that through the theme customizer and guys every single theme out there has a theme customizer Divi has a very well design theme customizer kit has tons of options you can really change a lot of stuff such as your logo and everything else and also for those of you who have a logo and you want one don't worry about it because I'm going to provide you all with a website that will create a really cool logo for just 5 bucks in fact I use that website for my logo now right here you have some options but not to worry we need to use most of these right now the only thing I want you guys to do is go to homepage go to a static page and your home page you want to select as home so what that means is when someone visits your website they'll be redirected to whatever page you put here so I want to put home right there and go to publish and then right here I'm click on X alright so these are our pages you guys can see the services the blog the contact of course they're all empty because we haven't even started to decorate any of them so let's go ahead now and do that let's go ahead now and create this websites and make it look amazing so let's get started so right here click on enable visual builder and basically this is what we use to kind of design our website from a visual standpoint so we can basically see what we're doing so right here we have this box now I'm just going to delete this box and delete this and just kind of start over from scratch so we have one column row right here I click on this plus and I want to add a single row right now what do you want in this row well I want some text so right here I'm gonna select text now guys there's a bunch of different modules you know there's like a button you know call to action in the contact form pictures they have tons of modules so you know I'm just letting you guys know basically what Divi offers but for right now I just want to select a text module because I just want to enter a simple text and right here I'm gonna type in elegance alright so right here I'm going to click on this and I want us like this as a heading text now later in this tutorial you'll understand why I'm doing that but for right now I just want to select this right here as a heading text now I want to design this so right here I click on the design tab and click on heading text because we selected a header text and I want to select a different font you know I want to change this up you know so right here I'm gonna click on open sans you guys can also search for whatever fonts you want they have tons of founds you know so I mean they have just so many and you can also upload them like if you're like a developer or whatever and you you want like download them from like google google fonts or something they have of fonts but I don't think he needs to because they have so many right here but I'm just like open sans right here and then for the fonts we can have it as lights so right here you can see it's getting lights or we're gonna have it something like ultra bold now you can also italicize it you can make it all caps you can you know you can kind of mess around with its to you know fit whatever you're trying to accomplish but right here I don't want to leave it as that I don't want to tell us I did nothing like that now I want to align this to the center so right here we click on center alignment so now you can see that it's Center aligned and I want to make this text bigger I want to make it really big so right here I'm just gonna go ahead and select it now a really cool trick that I'm going to show you guys right now let's say you want something bigger than a hundred pixels well you have to manually type it in and then it'll basically show bigger like that so that's a kind of little trick if you want it to be a little bit bigger so right here we'll put like 120 pixels okay and then what color do you want this well I kinda want it like a pitch black alright so there is my letter and letter spacing so if you guys want to space out the words you guys can do it like that you know you can kind of you know understand how you can get creative I've seen a lot of photographers kind of use that strategy but right now I'm just gonna say no I don't wanna use it also line-height we'll talk more about that a little bit later because we don't have anything above or below it's too much also shadow so this is a really cool option you guys can add a shadow behind it see how we're having this little cool shadow behind it so you can kind of emphasize what you're doing right here also for this box right here you guys can actually move it right there you can put it here you can kind of you know be customizable and do whatever you want I like to kind of have it like this right here do you just you know I just kind of like to move it really quick or you know I just kind of like it like that also right here you can control the length of the shadow so if you guys want to have this cool effect where it's kind of like you know how's this you know this effect you can have that as well and of course you can also change it vertically as well so there's a lot of cool ways you can use to design this as well alright so but I don't really want a shadow but I'm just kind of basically explaining with a shadow is and also you can control the blur strength like how much you know blur do you wants you can change the actual color of the shadow so instead of having that's great you can have something like a red so you can see now we have a red etc so that's basically what a shadow is now guys all these options basically are the same for all the modules so once you learn the options for one module you basically learn for all the modules so you really only have to learn this once and then once you use other modules it's the same thing but right here I'm just going on no I don't want a shadow all right so I have made my font or my letter right there my word now let's just say you want to add something else so let's just say you know I want some more writing you know I want some another text module below this now there's two ways you can do it you can either click right here and just add in you know I guess ENTER and just add in some more text you know and it's going to show up like right there and then of course you have to send our line etc or we can just make another one so let's just make another one so right here I'm click on this plus I want another text module and right here I'm like here I'm like welcome to the Divi theme all right and same thing guys so right here I'm just gonna leave this as paragraph which means it is just a basic text so right here I'm gonna go to design click on text and right here I want to change the color so the light in the dark is sort of like a quick feature so if you're like in a hurry just want to do it really quick you can just change it to light or dark but you can always change the color right here later so right here I'm gonna do my text fonts open sans right here I'm gonna do semi bold actually I kind of want it a little bit yeah that's okay I guess we'll just do bold and then for the text I'm gonna leave it as regular and we can change the text size so maybe you'll want to keep it's a little bit bigger like that's and for this text color I want it pure black again and for the letter spacing we can kind of space it out now also for the line height we talked about lion Heights so lion height basically is creating space between or above so right here you can see it's kind of pushing space reducing it so there's a lot of other ways you guys can use line height and we'll talk more about line height in different ways you can use it in this tutorial now let's just say you want to send our line this text well we're just gonna click on center line and you know that's basically it so we basically made our first section right here so we have elegance welcome to the Divi theme etc now let's just say you want to go ahead and add a button so maybe you want to add a button to this right here just like we have on that other one and a buttons good guys because it can link to other parts of your website so for example you can link it to your contact page if you want someone to fill out a contact form or you can bring them anywhere you want so it's basically directing your audience and that's probably the best thing to do it's all about like they like squeeze pages you know where they kind of control where people go so you kind of want that on your website so right here I'm gonna go to I can't we see it right there too well so right here I'm gonna click on this plus we can always move these modules later so not to worry and click on button alright and then right here I'm gonna do get started alright and link so where do you want this button to go so if you want this button to go to a different part of your website you would get the the link URL and Link it or you know you want to link it to another website you would just put it in like that but in our case let's say for example we want to take this to our Contact Us page we would take our domain right here and simply just go ahead paste it right there and then it's - contact so if they click on this button it'll take them to our contact page okay so that's basically what the link is and then for the design let's go ahead and design it so I want this Center aligned and for the button over the text effects is fine because we can decorate that a little bit later for the button I want to use custom size for this button and guys we're basically going to create one button and design it and then we're going to save it and we can now use that button on different parts of our website without having to remake it all the time because basically once you make it once you can save it in a library and then use it on different parts of your website so right here I'm gonna say yes I want to get this started so right here we have our button button text size I want to say while around 15 button text colors so for this button text I can't want to change it to something like a gradient feature you know kind of want that's gradient look but just right now for the actual text color I want that to be white now it disappeared but don't worry about it because remember we just made the text white so it's a white background we can't see it so right here under the background color I want to go ahead and select this feature right here so we have background color now this right here is the gradient feature so if we want a gradient feature we can have it or one color or we can even have an image but that would it make sense right so just frigid all purposes I'll select a background color and then select maybe that color or blue but if you want a gradient feature you can click on this right here and click on check now I want to select the kind of purple cloth I used so right here under select color I'm click on this and I'm gonna go ahead and just type in the color code that it is instead of trying to find it manually you can always like you know click on it and kind of drag it around to kind of see how it looks but so the Clerc code I use in particular was 9 a16 e8 and then right here I used this other color 3 4 0 9 96 so I basically used this color right here now also we can change like the linear or radial so basically radial means it starts from the center and then linear means it kind of starts from the outside you can kind of control the degrees so for example where here can be like 100 degrees it's kind of really hard to see on a button I'll show you more about this on another section but I actually use like 130 degree angle for my button and then I had like a 0 you know start position and you know just to give you guys an example you can kind of you can kind of see how it's kind of starting at a different point but I'll talk more about this in just a little bit's I don't really want a border width so for example a border width would give it like a border and you know you guys can see it now so if I hover over you guys gonna see the border but I don't really want a border right here and of course you guys can change the border color as well but for now I'm just gonna go ahead and just leave that we can have a border radius so the higher the radius goes more circular it gets now you guys can see the button is circular but I kind of want it squared like that and we can choose the letter spacing just like we had the other you know we have the spacing with the text we can do the same thing with our button but times you can leave it as I'm like too a default button you guys can also change the font of this so I might want open ten since we've been using that for a while and then right here you tell me like lights or maybe that's too small so regular maybe and then also we can like italicize it or whatever we want to do we can also add a button to it so for example right here and I click on a button all right now the button doesn't show yet because we need to actually activate it so right here it says a show icon only on hover so if I hover over it it'll show it but if I take this off it's always going to show it so I kind of want that instead now we can also change the icon to the left of the right side so kind of want to like tell them hey you click right here you know and then right here we can actually change the icon color but I prefer it to be white so I'm just going to leave it like that because I think it looks good now also if someone hovers over the button you can actually change the button how many times you've been to a website where you kind of hover over it and it kind of like comes out at you were the color changes so for example right here like the hover background color so these options are only for hover so it's the same exact thing but if I hover over it now you see how it kind of turns green so you can kind of change the hover features as well so you can change the text color only when someone hovers over its to kind of emphasize like hey you click me or you know whatever you want your audience to do so I'm not going to go through the hover off options too much guys because you know they're basically the same thing all over again you know it's just for hovering over the button so the background color it see right here I kind of I'll just leave it at this right here so it'll kind of you know it'll fade it in and out we need to control the transparency there so now if someone fades over or hovers over it turns that color so I'm just giving you guys an idea of the hover over options it's it's just so customizable what you guys can do with this theme so i'ma click on this right here now let's just say I want to take this button and drag it I want to take the and drag it below this little white section or these lines right here so now I have that section that looks just like this very similar to our website right here you know so you can see get started and then here virtually the same thing except our button right here is just a little bit more thinner than the other button as well so we've basically made our front page right here now I'm gonna introduce you guys to backgrounds so let's say you want to add a background to this so right here this blue section right here controls this entire area and you can control the padding right here and you can also change like the margin but so right here I'm click on this and go to background now first let's just do a regular pitch color so let's just do a one color alright so we have this a regular blank color okay and right here let's get rid of that so here is the gradient feature again as we talked about so here we can do a gradient feature just like we did for the button guys we can do the same exact thing for our background you can have it radial let me give you guys a little better idea of some of these gradient features because now it's a little bit more easier to see so I'm gonna go ahead and this like that so here I'm gonna go ahead and drag this down so I'll click on this really quick and I'm gonna go ahead and make this a little bit longer same thing right here we're gonna go ahead and make this a little bit longer like that so you guys can see it a little bit more easier now right here I'll go back over here and go to my background and now we can kind of mess around these option a little more to give you a better idea of what these are so radial direction you can change like you know how you want it to look linear leaner is actually a little bit better guys because you can kind of get a better idea of gradient and you can also create some really creative split-screen effects so right here we have the start position and then we have like the the end position as well so you can totally create some really cool a gradient or I'm sorry split-screen effects with this so I mean you guys can get really customizable with this stuff and it's our position you can kind of you know put it like that so I'm just giving you guys an idea of how you guys can use these to basically be really creative and I've seen some really cool sites were they really take advantage over this stuff but let's just say if you want to go ahead and add an a background image so I've shown you guys little bit about gradients on delete this and right here we have images so I'm going to click right here now there is some images in the description of this video if you guys choose to use them you're more than welcome to if you guys want to use your own images or you want to see some really cool ones go to unsplash.com so unsplash.com these you guys have some amazing pictures or and look at these pictures you guys can you know find some really cool pictures see right here I'll do like night sky alright sky it's a really famous one and then I'm here to have some beautiful pictures just really good really amazing so you can go ahead and grab them and these are free guys so you can use these on any websites or totally copyrighted the image that I used the one with the ink right here this actually is owned by a website so I'm not allowed to redistribute it however if you want to purchase that same exact one I'll leave a link in the description but I think most of you might want to use your own or you might want to use a demo so right here I click on select files and I'm actually going to go ahead and select the images that I have made for this tutorial so I'm going to select all of them right here and I'm go to open okay so I'm going to go ahead and wait for these to upload so my images have finished uploading and I'm going to just select an image right here so I'm going to select this one right here so this is 1950 by 1300 and click on upload an image and there you go so now we have this background image on our website and we can also have the parallax effect so right now it took it off but if you want to add the parallax effect that means when someone Scrolls up and down the screen kind of follows so that's a pretty cool thing you can add to your websites if you want to add the parallax effect now I'm gonna turn this off now I'm gonna go and delete this really quick and add in another one and I'm gonna show you actually how to add an overlay to your background so right here I'm gonna select this one right here now you guys all have to follow me if you guys do not want to but I'm just showing you an additional feature so I have this background right here and I'm gonna click on this and click on this check and now you guys can see that we have this overlay of this gradient overlay past our above our image now if you want to reduce the transparency we can do that so you see how now I'm kind of reducing the transparency to kind of give it that look right there so you guys can have a lot of fun with this as well if you guys wants to change like the or you know get really customizable guys it's just incredible what you guys can do with this theme I mean your imagination is the limit you know so you guys can have fun with you know this and and mess around with it and see what color gradient features work for you on your website okay and again you know if you want to control the transparency that's where you would do it okay so that's basically in a nutshell guys of this front page right here so right here we click on safe and again remember we linked this part to our contact page okay now really quickly I want to click on this section right here and click on button so basically I'm saving this button for later so instead of redoing another button we should just use the same button again right because we might want to use a button somewhere else on our website right so right here and click on save to library and now we can load that button to another part of our library so let's go ahead now and continue let's go ahead now and make the next section which we're gonna make a split screen section so right here I'm gonna click on this plus click on regular and you guys can see there's different rows so basically you can add a module to each specific row so right here you can have like a call to action a contact form etc so I'm go click on this right here now this section right here I want to add a text module and then I can put something like you know over here you guys can see I've kind of put this right here what we do you will love it now I'm going to give you an example of how to add different fonts to the same text box so what we do you will love it's and then right here I just added some basic text you know something similar like that and I can just go ahead and just I can just throw it right there okay so for this one right here I want to do heading one for this one right to or this one right here I want to do a heading two and then this one right here I'll go and leave it's okay so heading one heading two and then regular text so let's go on over to our design heading text so now we have a heading one and we can go ahead and mess around with this so you guys can see now how this is only changing this one right here because heading one controls heading one text okay and this was a new feature that Divi introduced that really helped clarifying like situations on because it was before you had to like make each text row and then you have to like make a lot of text modules but now you can just kind of add everything within the same one to make it much easier so on this top one right here I'm gonna do heavy and right here I want to add something like I'll just leave it as open sans or Roboto it doesn't really matter and then the alignments of course we can move the alignment whoever we want but I'm gonna go ahead and just leave it to the left font size I wanna make it just tad bigger let's do 55 and you know for now that's good so let's going down select the next one so h2 which is this one right here it's right here we can select like open sans or we can change it to something like Roboto and instead we can make it really thin you know we can make it really thin it also make it a little bit bigger like that okay and then for lines for letter spacing you can kind of like you know be creative so yeah it's kind of adding style to your website so you guys are getting the idea of why you'd want to use some of these features but also the line height you might want to increase it to add some margin and then of course you can add like that if you want I guess shadow we these options you guys are the same for everything so you know I'm not gonna cover all these all over again because you guys kind of get the idea of it but there are some other options that we might want to talk about such as like spacing which we'll talk about in just a little bit spacing guys is probably one of the most important parts of text and and positioning because it basically tells you where you want to position stuff but it's up for now I'm just going to go ahead and click on this now the last part is just text so if you want to just change the text right here we would click on this text section right here okay so text then right here we can kind of change this to something we want able or open sans' and then right here we can change the color it's right here we can make it a little bit smaller or bigger however you want to do it text color black so basically guys in short what we've done is categorize the text so I kind of want to control each and every one so I want each one to have a different font in color etc okay and another thing that we can do right here is click on this now let's just say you want to add in a link but you don't want to use the button so right here I'm gonna click on something like click me I'm going to highlight this I'm going to scroll up and click on this insert link so right here where do you want your visitors to go when they click on that so right here I put Darrell Wilson calm or you have yeah you have the HTTP I really pick you up at a TPS and then okay then click on check so now if someone clicks on this click me right here they'll be redirected to whatever you all you put right there and you might want to kind of underline it or something you know I don't know you can underline it or you know italicize it to let people know that it's a link I think right here I underlined it so that's that's if you want like you know you can add that right there so underline you can add that or of course you can go through the options and decorate it's whatever you choose okay so I'd hear him click on check now right here under this one right here we can have different stuff guys like you know like a button you can add like a call to action you can like a like hey and then what's up then right here you know you can add in like other text so just give you an example of what that is we will do a call to action a little bit later in fact a call to action is basically what we have right here or on the second page just to give you guys a quick example this right here is a call to action so when you're telling people to click on something that right there is a call to action here they're pretty pretty pretty well known you know but um right here I'm gonna click on plus and we're gonna go ahead and add an eight image and this export guys is pretty simple but I'm going to show you a trick on how to add a split screen and later in this tutorial we'll get a little bit more advanced a little bit towards the end of this tutorial when you guys are you know getting more come with this so right here I want to select an image I'm gonna select this one right here and go to upload an image all right so now you have your image pretty cool right so we have this text right here but we maybe want this text aligned you know somewhere in the middle right it's kind of a little bit too far or too too table we want it kind of like in the middle with this picture so under the design right here we have sizing and we also have spacing so margin basically controls where it starts from padding makes space so for example if I add padding right here it's gonna create space on the top so let me give you an example 50 pixels you can see how it's creating space and if I add more it's gonna create more space on the top and of course you can add in tons of space where it just doesn't look good so that's just an idea of what padding is maybe you want to add like 75 pixels so now you guys can see that it's aligned with this right here to make it look really cool okay now let's just say you want to kind of make this a split screen so we want this image to cover everything and we want this to cover everything so this blue section right here I'm gonna click on check and go to design and go to spacing and I want to change all this to zero so basically padding means I don't want any space anywhere oops I put nine whoopsies so zero zero zero zero now for this other section right here we can actually either you know destroy the padding like just like we did or we can drag it you could do the same thing guys this produces the same result you know you can take out the padding on either side to kind of you know take out the padding or you know whatever you can type it in or you can just manually do it just like I did it before so this right here is like creating padding and then this right here destroys it so that's just an idea of a second way of how to you know manipulate padding so right here on the row settings I want to go to design and I want to make this a full width so under the spacing right here I'm sorry under the sizing I want to go to make a full width and the custom gutter right here will actually squeeze everything to get really close so you guys can see that we have that and I want to equalize these columns okay so right here and click on check so now we have this really cool split screen effect but our text right here is kind of acting weird we want to move this so let's add some margin to it so module settings design spacing and margin so it's really simple guys so how much margin you want on the top well I want 30 and on the right you can add 30 on the left I want maybe 80 and then maybe some more on the top you guys see what I'm doing right here I'm kind of controlling where I want it to be so that's basically how you would use margin with text in a block like that later in the tutorial we'll talk about another way how you can do this that is a little bit more difficult but at the same time it may be more responsive so we'll talk about that a little bit later but that is basically how we accomplished the split screen effect to our website so this next section I'm going to show you all how I accomplished this section right here now this pattern you see right here will do this a little bit later in the end of this tutorial when we get a little bit more advanced it just requires some small CSS but for this section right here I'm going to show you how I accomplish this section right here along with these patterns right here these these icons with this background effect I added right here okay so right here I'll click on over here and let's go and add a new section guys so we're here we click on add a new section regular now I'm click on this right here and I'm go to text and right here I'm gonna go to our features spell it right our features and design well we can change this to a heading text if we'd like we can do we can leave it or you know it doesn't really matter at that point so heading text and right here I want to change this to just something like open sans I'll make this ultra bolt and then I want to send our line it right there now for the text size I want to make it maybe like 50 or 50 and then we'll go ahead and leave everything else right here I don't want to add any anything else to it so just going to leave that right there now also really quickly I want to show you guys a really cool feature so this blue box right here see how this white is it's the others why right here is it's too much you know it's much white and we're not really telling our visitors like how we're directing them so let's go ahead and click on this blue section right here and let's create a box shadow to sort of categorize the sections to help people navigate the website better so right here under the design I'm gonna go to box shadow and right here click on this box and you see now how we have that little box shadow to kind of tell people that we're starting a new section so that's a good idea on how you can kind of use the Box shadow as well so I'm gonna go ahead and just leave that box shadow right there I want to add too much and click on check all right so we basically created a box shadow around that it's to kind of you know tell people where we're starting from you know so all right so I basically made that section now right here but click on plus and go to text and right here I'm just gonna type in features and I'm just gonna click on design text I'm going to change this to changes to it doesn't matter we leave it like that right here as you play fair it's alright play fair display ok so then right here shouldn't leave it as we'll do bold and then I want this text really big maybe like 200 pixels okay and then 200 pixels and then right here I'm gonna click on orientation right there and right here I want to make some space guy so I want I can't want to push this page down a little bit before I continue so right here I'm gonna go ahead and just drag this and push this down more come on I make a little bit more space to you know just give me some working room you know so right here I have this features so we have designs and everything now what I want to do actually is I want to take this and I kind of want to put it behind and I also wanted to produce the transparency so right here I'm gonna take this and drag it above it now you guys can see it's overlapping now and the reason why it's overlapping is because this text is too big so I actually want to make it transparent to kind of have that really cool neat design look that I had before so going to my text I'm going to go to the text color and I'm going to reduce the transparency of this see how now it's really kind of fading away like that right there so now it actually looks better right it looks like it's a you know it's creative at the same time so and then maybe we can you know change the text size but you guys can see right here we did the same exact thing right here so I did features and then right here we did the same exact thing except I just capitalized the F right here sorry here so then we can you know that's basically how we accomplish this section right here okay and you know you can reduce the transparency more to you know have it like that but I think that looks great you know I think that's really creative and it's it's I think that's really appealing for your visitors now let's go ahead and add a background image to this section so right here under this section remember the blue section controls the background so I just want to show you why I'm using the blue section sorry here background image select and I want to select well it's like this one right here alright now I know that looks really ugly but not to worry so right here under a background image position I want to do Center left and I want to do like maybe fit so now you guys can see that it's fitting Center life is fitting and it's kind of actually follow so basically it's going to basically say look no matter how big this gets it's going to stay in the center left that's basically what those options kind of mean now let's go ahead make some blurbs let's make something different besides text you know Texas Texas boring I want to make something fun so if you ever click on this add a new row click on 3 now we can do something like a blurb or we can use like a call to action you can like a circle counter there's tons of stuff like for example like number and then like 1000 or something you know so I'm just giving you guys an idea of what modules are they're just basically different tools to design your website but I want to add in something cooler I want to add in a blurb right here blurbs and blurbs are great for like our services page you know where it's like you talked about like whatever and you just kind of like talk about stuff and then you just put like a little you know text that talks about nothing no to impress visitors about your website but I'm gonna add some dummy text right here I'll actually I'll just grab this right here if you guys need dummy text just go to dummy text and then right here I mean I use a site all the time we just just grab dummy target it doesn't mean anything it's like I mean maybe it's something in like another language or something but we just we just use it you know we just use it just to fill up space to kind of give us an idea of you know what it would look like so also you can link it somewhere so if you want when they click on the icon or this text you can link it to a specific URL you can add an image in the background or an icon I want to use an icon so I want to use like a phone or something yes I'm time on mobile responsive we gotta have a phone there you know to kind of talk about you know what we're talking about so and then background right here you can add a background so you guys these are all the same options again so remember I'm just kind of giving you guys an idea of that so that's basically what that is now I want to add a gradient right here I want had a gradient and I want to use those same exact colors that I had before so I'm click on this you know it's kind of annoying I wish I wish I can like leave it like you know the way it was you know or have like a stock option to always select the gradient I've was using so that color right there no eat there goes well that's cool then right here I'm gonna head select the other one of three four zero okay 996 okay and then the gradient type it's a linear and then right here you can change the gradient direction to something whatever you want start position you can even make like a split screen on this little thing you know you can even add like a start and position like on this right here you know I'm telling you guys you guys can get really customizable with this stuff so um that's basically the option that I wanted now I'm going to go to the design right here and I want to actually decorate the text and everything because this is just so ugly you know we have to change that immediately so the icon color I want to as white we can also change like the icon placement we can have it to the left we can use a circle icon I'm a last tutorial I believe I used this feature on the left but for this tutorial or leave it on the top for the text I want to Center a line and I kind of want it light now you can change it in my whatever you'd want like you can you can you know change the color font to whatever but like I said remember how we talked about like quickly doing it that's exactly why we have it so quickly and then you can add a text shadow to this if you want but I don't think it really matters too much all right text shadow color no so title text we don't need any this stuff because we you know you don't need that much border now what a border is is if you want to have rounded corners so right here I'm gonna put like ten pixels now you see how the box now has rounded corners and I think you can kind of like keep going but I kind of just like it like that so you can add something like you know 50 pixels but I think it's going to just like you know I add this that's too much so I just want to add ten and scroll down here now also we can change the border width and also the border color but I don't want to border width because that would just not look good I mean there's ways you can you know manipulate it to look good but I'm not going to use that I don't want to use the box shadows the filters are just like different ways you can like Photoshop stuff but these are actually much better on images and we'll talk more about filters and stuff like that a little bit later and again you guys can add animation to this stuff so if you want it to like animate so for example if someone Scrolls down then it can like flip or fold or roll and there's a lot of cool ways you guys can you know maybe late this when someone's on your website and then these right here are just controls for it so for example the duration see how it kind of takes longer you can even have a delay so if someone Scrolls down it's gonna take four seconds and it's going to delay you can also do the intensity the starting capacity which means it's going to be faded when it enters in and then it kind of gets more darker as it goes so you guys can kind of have fun with these options you guys can just mess around these options who basically understand what they do but I don't want that and I'm gonna go over here to sizing so sizing I think is good we can always change the content width we can change all this stuff but I choose not to spacing I want to mess with this stuff so I want to make this stuff a little bit bigger you know it's it's too close to everything so I want to add some padding within it so let me just show you what I'm going to be doing so 45 pixels you can see now we're creating space right they're here I want to add 30 pixels and then 45 pixels and then again 30 pixels so we've kind of made it a little bit more unique you know we've made it's really nice and it looks good so I'm gonna go ahead and click on this right now now we can also duplicate this instead of doing all that hard work all over again so duplicate it drag it duplicate it and then also drag it simple right and then of course you guys can go ahead and change the options like for example you might not want a gradient background here I think for my demo I actually change this to whites so I can go ahead and just go to like my design and then go to like image I would have to change this to something like purple so change the the contents to purple and also the text to purple it's right here I can do not the text shadow color but the title text you guys get it so I can basically change it to all white again but that you know that's a little redundant you guys kind of understand the point of all that so that's basically how we can create this section right here again I just made it a little bit smaller you guys can always reduce the size of this but you know these are just basically settings where you would just kind of like have to just kind of mess around with and stuff like that and right here I the gradient is a little bit different just because I positioned it a little bit differently but you guys understand the main point so you guys can just duplicate this whole row again to get 6 and then you would be good from there okay so really quickly um my background image right here I kind of want to change this option right here for our background image so for our background right here I kind of want it to either you know cover or actually do the actual size so that looks a little bit more professional so if you guys use cover it's going to kind of like you know it's it's gonna it's gonna be a little bit bigger if it's gonna be a little bit bigger so I prefer using the actual size that we made for this tutorial and center-left again if you make this bigger it's going to like adjust to wherever that is okay so that's basically guys how we created this section and again to just you know create the entire section I'll just duplicate it and you can add in whatever features or blurbs you want to this action okay so I'm gonna go ahead and leet this and click on safe and we're going to go ahead and do the next section so it's pretty simple right pretty easy you know hope you guys are with me so let's go ahead now and make our next section so this next section is going to be a little bit more advanced I guess you can say but we're going to go ahead and make this section right here so basically this is a two column row so text a divider module text text button and an image and then I just reduced all the padding and then right here I did the same exact thing except I just inverted it so we can basically just make one right here and then just duplicate the row and just switch the positions around so let me just show you how we did that it's pretty simple so right here I'm click on plus regular to column now before we added an image right here but I'm going to show you an alternative way to do that but all right here I'm just gonna go enter in text and then see what do I put over here I put in who who we are and then here I made it's like this change its heading and then heading text it'll just change this to something like open sans and then we'll do like ultra bold and then right here I'll just you know I'll just click on OK now I also want to add in a divider so right here we click on add a module and we're going for the divider module so with the divider module does is that it actually creates that line but it actually makes space as well so right here I want to show the divider you can add like a background to it or whatever but I don't want to do that so color well just like this as this purple and then we have styles so here we can have like that you know dotted or - or however you wants to kind of mess around with that but we can have it vertically centered the bottom or the top sizing right here we can control the weight which is how long you want it and then the height of its and then also the width of it as well so right here I'm gonna go ahead and select it like that and then right here you can choose it to like have it to the left whatever so I wanna put it right there so just like we have it right here I'm going to put it right below its okay so I also want to see here yeah that's okay hi guys is basically how space it's dividing so the more you have it's gonna go more the less the less you're gonna have spacing now I kind of want to mess around this a little bit so I kind of want to create that messy little kind of look I have going on I don't want to make it look like that I want to kind of you know so right here I kind of want to add something like maybe 15 pixels and then also here I'm gonna do minus 20 pixels as well now the reason why it's not moving is because under the sizing we have this module alignments now this rule over seeds it's by by taking this off now you can see that's we kind of have that messy look now on our website all right so let's go now and add in a new module so I'm adding a text module and I'm gonna go over here and kind of just grab this text and go ahead and paste it in there now I cannot show you guys another feature really quickly so right here if I hide all this and click on this quotations tab we now have this little like quotation bar so if you can go to your design under the text and you click on this little section now you can go ahead and kind of design like the the actual like quotation itself so the text size the block alignments you can you know kind of like mess around with a little bit so that's just an additional feature that you can you know use you know you can change like the specific block quote text color you can also change like the block quote text size and all this stuff so this it's basically the same thing guys except it's just adding that little bar in there and giving you a little bit more customization but that's just you know just for you so I'm not going to add that in so I'm gonna go ahead and take that out and really quickly right here well want to move this drag it up alright and maybe this section right here I want to go ahead and change this to something like bold I'm gonna make it a little bit more darker okay and then I'm gonna go ahead and add in some more text so again right here we can add in like either more text below it or we can add in another text module it's really up to you at that point but I'm going to click this and just I'm just gonna insert more text below that okay and this the text is kind of kind of kind of I don't like that you know we should make it a little bit more regular maybe even thin and maybe a little bit more darker or let's use open sans and maybe we can change it to something like dark like pure black looks a little bit more professional-looking and now let's talk about the button so I want to add a button but I don't want to make another one from scratch you know let's go ahead and use the same button that we've been using right so right here under plus we have add from library and now we have that button that we saved from earlier so by clicking on mats now we have the button right there and right here we can go ahead and align the button to wherever we want so for example design alignments we can go ahead and push it to the left right there so that's that's gonna save us guys a lot of time you know instead of having to manually remake it all over again we just basically made a really cool section right here now instead of adding an image right here I want to show you guys another way you can kind of manipulate this theme so right here under the settings we have background now you can also add pictures and everything else to each column so right here we have column 1 background and then right here we have column 2 background so right here I'm click on image click on this now I'm gonna go ahead and select this one right here so click on upload an image now you guys can see that we have that image there now I want to go ahead and manipulate this because I want to actually make this kind of like a split screen effect but not through the entire screen so this is where some skills comes in as I'm also another really cool thing about this right here you guys can actually add stuff over it so you can add like a text module over it so instead of using Photoshop and doing all that typical stuff you guys can actually use the theme to kind of manipulate it to basically say I want to add text over this instead of having to like go to Photoshop adding text over something because that's a nightmare you know Photoshop and image sizing is probably some of the most annoying things about web design so really quickly let's go ahead and fix this section now I don't want any space up here so I'm gonna go and drag this and drag that over here I'm gonna go ahead and go to the design spacing now right here want to add 0 pixels and everything so zero zero zero now this is where things can get a little confused but I kind of want to open you up to this because I want you guys to understand what I'm doing so right here under the column one padding I'm actually adding 100 pixels and same thing right here so you guys can see now it's kind of I'm basically controlling the image and also you guys can use percents so like you know for example you guys want to push something else you guys can use like a percentage so I'm like that's if you guys choose to sorry here I'm using 9% just to give you guys a brief idea of what I'm doing so I basically did that whole section right there but guys I'm lazy I don't want to have to do everything all over again you know I want something quick quick it easy right so let's just go ahead and duplicate this row and we'll switch everything on the opposite side so I'm gonna go ahead and make sure all our things are correct so for the design for the spacing I'm the sizing want to make sure it's custom gutter with one equalize column row etc okay make sure that you have the gutter with to set one now right here I'm just gonna click on duplicate now guys this stuff is pretty advanced so if you're not understanding this 100% don't worry about it because this is pretty advanced but I just kind of want to open you guys up so if you guys want to make something that looks like this on another website you guys will know how to accomplish it so right here I'm gonna say you know watch for the background I want to add the background image alright I'm gonna take this one out we're gonna take this one out and we're gonna add this under the first one instead so background image right here I'm gonna switch them so all I'm doing right now guys is switching everything so here I'm gonna add this right here now right here I'm gonna take this and simply just start dragging everything over dragging everything over all right and push this one over let's you get it below it there we go we got it and then the last section right here we're gonna add that again to the bottom right here okay so I do need to change some settings because we have everything basically towards thee like the the other side so instead of having column 1 padding we need to change column 2 padding so right here click on row setting design spacing and instead of row want one we're gonna use row two so 100 pixels right here hundred pixels right here and then we're gonna add 9% to there and then we're gonna go and delete that top part right there so we've just basically produced these same exact results to this other section now another really cool stylish thing is let's say you want to add like a circle in the middle or something like that you want to add something really cool and really really unique to your website so we're here and click on save alright and over here under this setting I'm gonna go to backgrounds and I'm gonna add a background right here or a background image and I'm added this one right here and I want to actually put this right here in the I want to put this in the center and I want to do the actual size so now we can actually have that really cool effect right there so that's another way you guys can use actual size and you know centering and stuff like that because now guys that looks beautiful you know that's a really beautiful section that we created so now you know how to accomplish that I know that was kind of confusing but I'm just trying to open your you know open you guys up to different revenues instead of you know just adding like a blur blur blur image image image you know so that part was probably the hardest part of this tutorial so if you guys manage to do that part congratulations because that was probably one of the most confusing parts but it is also you know it produces amazing results so let's go ahead now and do the next section so I'm gonna go and say this one time and we're just going to add some quick testimonials to our front page now I don't want to have to make every header section all over again so what we're going to do right here is we're gonna take this section right here and we're gonna add this to the library because what we can do is basically copy and paste this on to different parts of our website and instead of having to you know redo everything all over again so right here I'm gonna go save Road to library put a header section and save it to library okay now I'm gonna go ahead and scroll down right here now right here I'm click on this icon there there's plus new regular and just add a single row now really quickly I'm going to close this and I want to add that other section to this part so right here under this teal line right here I'm gonna click on this add from library and click on header section so now we have that section we have right here we'd only need this box right here so we can just delete it right now so we have this section right here but I wanted to say testimonials so I'm gonna do test and moan meals but you guys can see there's a problem so this box is this text is too large for this box so we can either make the font smaller or we can make the row longer so right here under the row settings I'm gonna click on this and go to design sizing and I want to make this a full width the row so now we have this text kind of it looks much better now right so it's not in the it's it's not like clot cladding over each other and then this section right here our features I want to make that just a little bit bigger so right here it's a heading 1 text so that means you have to go to design heading text and I want to make this just a little bigger maybe 70 pixels and go to okay now also I want to add in a background image to this so right here I'll click on the section setting go to background image add an image and let's just go ahead and find a background image so I'm added this one in right here okay so that's also looking pretty cool it looks like this part right here I forgot to save it so all right here I'm gonna do testimonials no I didn't save it I just forgot to I forgot to add it in you know I was being distracted and I want to add some space to here you know so right here let's kind of let's make some space you know let's let's push it down a little bit you know so we've got some space going on right here now I also want to add in some testimonials obviously so right here I'm gonna click on this and go to a three column row now guys you can add like poor portfolio you can add in basically anything you can you know you can want right here so you can add in like an image etc you know whatever you want but just to help you offer to toll purposes I wants to go ahead and use the the testimonial right here so author name so I'm gonna put Darrell Wilson job will do WordPress helper company name I'll put my website and then contents we can put it like a little bit about you know the person or you know you can talk about yourself or you know whatever you want to put so I'll paste that right there so we've added in that information now for the design we can do icon quote we can change the icon color so we can put it like purple or something else so you guys can see right there it's purple and then you can also have a background color as well for the text again you can also change the text so maybe you want to have it as like a dark or something else but right here I'm going to put it as light and for the image we can have our portrait with everything else we can go ahead and and you know decorate the image but we need to upload the image first so let's go ahead and do that so let's go ahead and go back to I believe is our content right here and go to image and I'm just like just like this guy right here alright so cool we got that guy right there now if you want to design the image we can go ahead and you know change this and we can change the portrait height I mean you can get totally customizable with this section right here so I'm gonna add in like a lot of like a box shadow right there and you know this stuff right here I kind of don't want to you know I'm I don't want to have to spend too much time with the blur and everything because you guys by now understand the point of all that so I'm not going to go too far into that just going down here we have the image border color I can change that to you know any color you want but you know I don't want to use the image border color right now because we'd have to add a border width and I just choose not to have one right now so I'm gonna go ahead and nor that section you guys can also like do like like a little bit of Photoshop so you see right here the image with the image saturation the image hue and all this stuff you guys can get really you know the image brightness so you guys can kind of like go through each one and kind of even control the photo so if you guys want to you know edit the photo you can do it right here instead of using Photoshop because you know who likes Photoshop you know Photoshop is pretty annoying and they have tons of different cool like you know color burn or like exclusion or whatever you want to add you know they have tons of them so you guys can have a really cool fun time going through some of these and messing with some of them now for the body text right here we can change the font so maybe open sans and I want it to do this in the center and then we can even include the text size becoming a little bit bigger scrolling down here again we can change the body text color and everything else but I might want to make this background purple so if I wait a little bit I can kind of you know decorate the background and also for sizing again you guys control the width of its you can make it a tiny testimonial or a very large testimonial you can even make it very big and for spacing again you guys understand margin and padding so again I can add in some margin or we can you know add some padding like you know 50 to kind of get you guys an idea of of how that works so okay and then also for border you know same thing guys so I don't want to go through these options again just because we've gone through them some time and you guys probably understand this would be pretty cool though maybe like a fold to our section right here and right here you guys can control the options as well okay so also let's go ahead and go to our we'll go to our content and right here we can go to elements as well we can choose to show the icon and I want to show the icon for a background right here I kind of want to change this to a specific purple color so right here I'm gonna click on this and maybe change this to something like purple so you guys can get a better understanding of it so guys instead of actually having to redo you know this all over again we've basically made our settings so instead we're just gonna go ahead and duplicate it and so we just drag and drop duplicate it and drag and drop okay now what quick thing I want to do is maybe you want to add in like another like a text right here like another text module and then maybe put some more stuff about it because it looks a little clumped you know some like this right here and you add a little bit of a you know padding which is space between these sections right here so here if I go to pace now it looks like that because the row right here is full width so if you want to do that we'll have to either reduce the width of the text or we can just add it in a new section so what I'm going to do is I'm probably just gonna add this in a new section because I don't want to have to do that all over again so right here I click on plus one column row and now here I can add the text so one column see right here there we go one and then right here we'll add the text because there's no right or wrong way to do it you know it's basically what I'm saying so you can add it you know you can add it in this right here and reduce the width of the text or you can just make a whole new row so right here I'm gonna go ahead and go to design and go to sizing now I can reduce the width right here to kind of control where I want it and I can put it in the center like that to give it that thick to give it that kind of look you know and then I can type whatever I want about its etc now also for this section you want to add some padding right these are too close to our text so maybe right here under the design spacing we can add some bottom padding to it we've got maybe a hundred pixels so you see how it's now creating space all right and also right here maybe you want to add in that whole purple background that we have so right here under background I'm gonna go to my gradient and put in a color so right here I'm gonna head and put in these colors that I've been using right here so it's let's see right here it's nine eight oh it's already saved for us cool and then also this color right here okay now the reason why it's not showing is because we need to set the option for gradient over image so going over here we have placed gradient above background image if I click on yes now you can see that the gradient will also go above the image but we can't see the image because we might want to reduce the transparency here right so right here I kind of want to reduce the transparency a little bit and also for this color produced a transparency but kind of give it that that color you know that hint of the color that we want to kind of accommodate the rest of our websites okay so I'm a click on X now I kind of want to show you guys how to add a little bit more design I kind of want to kind of want to do a little bit more of I guess you want to say advanced work because we can actually add designs behind these columns so right here under the row settings we have background so right here we have background column 1 background column 2 and background column 3 so right here under background column 1 I'm gonna click on this right here and I'm going to add something here so I can go ahead and make like a linear or you know yeah linear and then right here we can kind of change the direction etc and then you know I'm not going to place gradient above background so basically I have this section right here now how do I see it so I want to be able to see what I'm doing right here so under the design tab right here under spacing I want to go ahead and add in some padding right here maybe 25 just to give us some room and now right here I want to enter something like 30 pixels and then 30 pixels 30 pixels and then 30 pixels so basically what I'm doing guys is I'm shrinking this section right here so now if you guys want this is totally optional but that this is just another way how you guys can get more into corn design is if you go to your background section and now you can kind of start fiddling with these options to see how this would look you know how how decorated you can get with your website so we can kind of like mess around like this then right here maybe we can add on this like purple but also kind of like reduce it or you can kind of have like that split screen you know there is just so many ways you can design this and I'm just trying to help you guys out by understanding that there's totally no option or there's it's limitless what you can do guys it's it's a it's it's truly amazing so right here I'll enter in something like all into our code will answer like a single entering or go ahead and go to my code here on trend okay and then maybe right here I can just like reduce the transparency like that and then maybe even change the direction of this to kind of match like that and voila so we can go ahead and just do this for the next ones if you guys choose to have it but I'm just trying to make you understand that there's there's so many different ways you guys can customize this and become better designers because this is a really clean look and you guys it's very easy to accomplish so that is an example of how you can accomplish that section right here where we added these backgrounds to it now I'm not gonna do it for the next two because you guys already know how to do these next two so I'm just going to go ahead and move on to the next section so this next section right here is our footer now there is two ways you can do this guys you guys can make a custom footer which is the one you saw or you can actually make a footer that is basically standard with Divi so I'll go ahead and give you guys an example so right here I'm just gonna go ahead and exit the visual builder right here we go to my theme customizer now looks like my front pages appear I'll have to fix that so right here I'm gonna go ahead and scroll down and right here we have widgets so widgets are basically our footer sections so footer area one we can add a widget and what do you want to add down there well maybe you want to add like a text so maybe like about us or you know about us and then you know you can talk about your company like we are an amazing company that helps people so you guys understand what a footer is right so right here I'm basically creating a bottom section and this is kind of where plugins might come into play so I'm gonna go ahead and close this right now and I'm going to go back to our dashboard and right here I'm gonna go to plugins and go to add new so guys if you guys don't know what plugins are they're basically added features for your website so for example let's say you want a facebook like box you would just type in Facebook like and then they give you a list of free plugins that you can use now some of these have Pro versions which means you have to pay for an additional feature but generally most of the ones on wordpress.org are free and they work pretty well so right here I'm gonna go ahead and select this one right here Facebook like box widget like box and go to activate now you can also use this on your footer and you can also use it on your blog page so we added in the widgets so let's go ahead and go back to our website and I'm gonna scroll down now right here I'm gonna go to our theme customizer okay so I'm gonna go ahead and scroll down again now what happen to my home page think I've deleted it accident all right so I'm gonna go and scroll down and go to widgets and go to footer area go to add a widgets and now if we scroll down right here we can see our Facebook like box widget and here you can do like follow us and here you would go ahead and enter in your Facebook ID so I'm gonna go to my Facebook really quick I'm gonna go to my fanpage and I'm gonna take this link right here so copy this and go over here and simply paste it in there and of course you guys can control like the width the height so for example you can make this a little bit bigger and then right here you can even you know adjust the height or some like that to kind of a you know give you more decoration you can you know you can hide the the photo the faces of it you can you know add additional stuff to it etc so that's basically an example of a plug-in and the features it can do for your website now they also have Twitter feeds they have Instagram and guys it's just a matter of kind of branching off and kind of understanding or to go so for the dashboard right here under your plugins you can go to add new and you simply type it in you know Instagram and this is basically where kind of like where I kind of stop because there's so many widgets out there guys I haven't tried these but your bet is to just install the one with the most liked reviews and active installs because generally that's usually what works and is probably the most successful and whenever you install plug-in they have like a little option right here and you need to put in like your user ID and then you know just just go ahead and answer the questions like for instance right here I can log in and get my access token ID so you can just log in and then display your feed and you would just display that shortcode so you would copy and paste this shortcode in fact I'll go ahead and do it just this one time so I can't even go ahead and log in and get my access token so I got my access token now I'm going to click on Save Changes alright I'm going to use this token now all right and Save Changes again I'm gonna go to customize and then here you can kind of customize it but I'm gonna go ahead and go to my widget section or I think customizer section and then scroll down right here and then under our widgets we have a footer area three you can add a widgets and until we go ahead and find the where is it it's here somewhere the Instagram feed oh you know it's an arbitrary text so I have to add a text and then I here over like follow us on Instagram and then text and then you would simply go ahead and paste that short code in the text section right here so right here I'm going to paste that in and then when you put the you put your page it would go ahead and show up right there sorry here we go ahead and close it now I'm going to scroll down and voila there you go so all myself is authenticated now I might want to reduce the size of this Facebook box because it's kind of breaking in the way so we're here to go to my theme customizer and I'll just do that right now live in front of you guys sorry here I'm gonna go ahead and go to my widgets 3002 right here and I want adjust the width to maybe 200 pixels so it's not colliding with that section okay so that's an idea guys of how you can make a footer with the Divi theme now we're gonna make a custom footer in just a little bit but for right now I don't want to make it as of right now because you guys kind of already understand the concept of the footer I do want to actually fix my homepage here so I'm actually gonna do something really quick I'm just gonna go ahead and load this up right here and maybe just add a button really quick and then voila that's my new homepage alright so you guys were witnesses first I maybe I changed something I didn't really see it so you know that happens to me all the time and then right here I'm gonna go ahead and take this button and maybe drag it below there and voila there's a homepage guys so it's that easy to make home pages you know so that mistake totally my fault but you guys just witness how fast you can make a landing page with the Divi theme this next section I want you guys take a break you know you guys are working hard for about an hour and a half so I kind of wanna show you guys some websites and give you guys some additional free resources to help you guys out now if you guys need a logo so something like this up here and of course you don't to use that one you guys should definitely go to fiverr.com there is a link in the description of this video and you guys can simply just type in like logo service or some like that and these guys will make you like a logo for just five bucks so they really help you out and if you guys are on a budget I would recommend this service mainly for for logo services let me see we're here logo does it's making me a liar you know it's like the sides down it's not working no it works guys but like I said these guys make some really nice logos I got my logo from these guys and they're pretty amazing so if you guys need a logo I recommend five or four it's again there's a link in the description you guys do buy it I get like 50 cents or something like that but anyways also let's go ahead and talk about the Divi theme options so we haven't really discussed the Divi theme options at all so I'm just gonna kind of run you guys through on the options over here I'm gonna go ahead exit the visual Builder you guys don't have to follow me here I'm just gonna go ahead and give you guys an example of it so here I go to my dashboard and go to Divi and go to theme options so here is where you can upload your logo now also you can upload a favicon so what a favicon is is that little thing up there so for example if I click on upload and just select just like this you guys are gonna see that on the top of the website once I save it it will appear up there also my logo I'm gonna go ahead and just upload a logo so do set as logo a fixed navigation bar we'll talk about this little bits all these option guys I don't really personally use too much Google API key you will need this actually if you decide to have a Google Maps but that's only if you decide to have it these right here are for the footer so on the bottom of the page there's a little tiny little Facebook icons everything else these are all enabled but if you want to take those off you can just say you know I don't want it if you do want them you can leave them enabled and then right here you'd put in your URLs for your websites these right here are for WooCommerce so that's not for this tutorial and like I said a lot of these guys are just redundant and this is custom CSS will do custom CSS guys towards the end of the tutorial because custom CSS is a little bit more advanced it's not needed but if you want to add like extra stuff to your websites it may be you know it may be nice to have but you don't need to know it's navigation I don't use any of this stuff so I said you don't really need to you know you can actually exclude things from the navigation bar but I don't know why you would do that because then you can just delete it from your menu right but there's still other options in here that you might want to use so be sure just to check some of these outs again I don't really you know use these too much just because they're not really needed except for something like the updates you know that would be needed so if you want updates you'd put your name an API key there and then you can go ahead and kind of mess around also it's going to talk about the theme customizer so you guys can just sit back relax you know get your favorite beer you know I don't know why the test was that it's it's their summer I gotta go and delete it right here is like your general settings like your site identity now a lot of the stuff guys isn't really needed because this stuff right here can be overridden by like the actual Divi builder really quickly I'm gonna go ahead believe that testimonials that is really bothering me so I'm gonna go ahead and go to visit site and enable this visual builder oh also I didn't really talk about this other sitting so let's say for example we can't find a testimonial section it disappeared maybe the text is white or something like that so right here over this section right here I can click right there now I have this row right here so that row actually actually be where the testimonial section is coming from so right here I'm gonna go ahead and click on delete and you can actually check all the modules right here so we can kind of find out where that is coming from so here can't really find it's okay and then butts in same thing so that's basically what that option is it's pretty cool they also have like additional settings you know total like the I guess I guys this is a little bit more advanced you guys kind of don't need to use this stuff too much so but if you guys you know would like to you know mess with it and you're more than welcome to also guys if you want to see how your site looks on mobile and you guys would go ahead and check those settings so I'm clicking here and go click on this right here or go back to our our main you and then right here we're gonna add easily again really quick okay so right here this is how it looks like on a desktop I'm sorry on the tablets and of course we have not optimized yet for mobile and we'll get to mobile optimization and just a little bit but mobile often guys is really simple so I know it looks like oh my gosh it looks all clumped up but literally I can change this in a few seconds so right here under our features for the design for spacing I'm sorry the text size this is a paragraph so text so right here whenever you make changes guys for your text size you click on this little icon right here and go to tablets and then simply just change how it looks on tablet and then also do the same thing for smartphone you just reduce the size so it's that easy to optimize your website for mobile and guys it's very important optimize it for mobile because that's like half the traffic now I think so it's pretty important and let's say for example this part right here you know this picture right here it's it's beautiful right but we don't really need need it for mobile you know we don't really need to show people this for mobile so right here under this gear icon I can go ahead and scroll down and go to leave it is the background or the admin panel see right here for the design we have our alignment I can scroll down and I'm gonna go to or not scroll down I'm gonna go to advanced and go to visibility now I don't want to show up on phones or tablets because it's just not needed you know I don't really need to show this huge image for mobile users right so if I click on check and that is basically it's that image will not show up on mobile so it's a little bit more optimized and also the same thing right here again so guys mobile optimization is really simple you know it's just a matter of doing it so all right here you click on that design you would go to the text and then again when you click on the font this little foam right here you just go ahead and say okay I want to size for the tablets and then for the smartphone I want it this size because it's way too big and also guys you can even go to advanced and just visibility and just get rid of it if you don't want it so that's just a quick little rundown of mobile optimization well optimize this whole site but I'm just kind of giving you guys a small brief overview of everything okay so I'm gonna go ahead and exit out of this or I'm back to the visual builder there we go now another thing I want to show you guys is my channel because there's tons of great tutorials that I have that can be covered a lot of people ask me questions regarding stuff like different plugins or other things like for example the newest one I had was here was a Google Adsense so if you guys want to learn how to add Google Adsense I have it's a total for that you guys want to learn how to use a site a revolution with Toro for that I have tons of tutorials for everything but this is a comprehensive Divi theme tutorial so I'm gonna go ahead and go back here guys and let's go ahead and go through the theme customizer just a little bit more just to give you guys an idea of what a theme customizer is so like we have buttons right here now you guys can change everything globally I personally don't like to do that because I rather just change it here and not have to do it again or do it over here because this will apply to the entire theme also for better navigation you guys can go ahead and choose to change like your your menu up here so we have the primary menu bar and here you can like you know totally customize the menu so you can make bigger you can change the max logo height so maybe I want it really big then right here we can change the font and everything else now I pretty much showed you guys these options but I want to show you one in particular which is the background color so you want that transparent look you just reduce the transparency and then right here we have a transparent menu and then up here you guys can change like the drop-down menu text color you can change the fonts you can change the text size for your menu so yeah it's getting bigger so these are basically the options to control the menu and again you guys can hide the logo image and even make this full width like that's to make it look a little bit more elegant but again guys font and you know people truly buy your website just base off position of color and images you know it's it's really true you know people don't really care about your product but if they come to a website that looks like this where they feel elegant just to shop on it you know you're kind of just like man like you know people go to Apple and they go to the buy an iPhone and they feel classy because the website is so well designed they feel like a high-class customer I guess you can say by saying hey man this is really nice I'm gonna buy something from this site and that's really the human brain when it comes to buying stuff online if it looks beautiful and amazing they'll buy it's if it looks like crap they're just going to lead guys you have about five seconds to convince someone to stay on your websites now this is the secondary menu bar so again you guys can go ahead and change the secondary menu bar as well again I don't want to get too much into the secondary menu bar but I'm gonna go ahead and keep showing you guys some of these options like header formats here you can change the logo you can make it centered you can even add a vertical navigation you can put it also on the right side and we can do like center line with logo see that looks pretty neat you know and then here we have like a slide in we have a full screen so you know you guys get the idea so the secondary menu again guys it would control or I'm sorry the slide in full screen you would control that right here so the option comes up right there as well okay but I think maybe we should leave its I don't know it looks good no I think I think the center kind of looks good you know that really does look good but again it would probably push your stuff down a little bit so just keep that in mind and going over here we have header elements you can choose to show social icons and then add in like a phone and email so you can add that right there it'll appear up there a little bit later going back here fixed obligation you can hide the logo image you know but that's when you scroll down so you can hide it you scroll down see that so the fixed navigation set these guys is when people scroll down I'm sure you've seen on some websites where you scroll down the menu will do something different so that's basically what that is so head our navigation we have blog or a buttons we have a footer I ran you guys through the footer you guys can also change the layouts of the footer by going to layout and then you guys can add different columns you can change the color right here just something that you would like going back here you know bottom bar mobile you guys are basically already know that diddy has their own mobile optimization so we don't need to if they're just basically showing you what you can do you know but you know I would rather optimize it by each module because you have more control over its menus we already created our menu if you want to add a menu you would do it right here widgets you guys understand of widgets homepage settings you guys totally understand home page settings CSS we'll do a little bit later but in a nutshell guys that is basically the theme customizer settings for DB now I actually want to show you guys okay you see how we have that little bar up there that's like the secondary menu where we added the phone number and everything else so remember I told you guys I was gonna appear so there it is it kind of takes time for that one to a beer you have till I close it and open it again now I want you guys to go to my website right here and I specifically made a Divi footer just for this tutorial and it's for free so I don't charge for anything so right here elegance that is the Divi footer so I'm not gonna make you guys build this from scratch right here I'm actually just going to give it to you guys away for free so going down here you guys will go to my website you guys would add this to the carts alright and then right here I gotta fix that so you to Cart I gotta kind of yeah see I need website help too so I view the cart and then here you go to proceed to checkout it's free and then once you guys are done putting in your name and email it will you can place the order and then from there you can go ahead and download it so there is the footer right there so you don't need to download that and unzip it now let's go ahead and go back to this tutorial now guys we're going to go ahead and do the home page we're going to do the about Us page I'm going to show you the blog I'm actually going to give you a free layout for the services page to kind of help you do some homework so I'm going to actually give you the services page to kind of help you understand how I did the services page and you guys some kind of messed around with it kind of look at like you know some of the settings I've done to sort of help you guys understand but once you guys do like the home the about in the contact I think you guys will be on your way but one thing I want to point out is make sure to keep watching this tutorial all the way to the end because I've been doing this for a few years and I know people jump ahead and then they have questions they're saying hey this isn't working for me or hey this doesn't work and I says it's in this tutorial you just got to watch it you know so I make sure to please say till the end to watch that now I want to go ahead and upload that footer that I downloaded so once you download it you guys can go to your dashboard and go to Divi and go to Divi library guys DB library is amazing you can import and export layouts so right here we go to imports choose the file I'm gonna go to my desktop and I'm go to footer right here and I'm going to import this right here so I'm basically just going to import that's layout now guys whenever you save a page you can actually export that layout and throw it on to a different part of your websites so like we did earlier with you know adding to the library you can actually export entire pages and import them to different parts of your pages so I'll have more information about that when we talk about templates and Divi library and all that stuff because I have tons of free goodies for you guys a little bit later so I'm gonna go over here to my site now I'm going to enable the visual builder okay I'm gonna go ahead and scroll down right here and I'll right here I'm gonna go ahead and click on this plus I believe it's ad from library and then there it is we have footer and voila so now we have this footer now I kinda want you guys to understand what's here so this right here is just a text module right we don't need to show you that again this right here is a text module and instead I just created buttons and then I just made text and I basically just made those linked to those specific pages just like we did earlier where we linked this parts right here to the website we're gonna do that on our footer so it's just a more creative way to do a footer so for example you can have this standard one which is less customizable or you can have this one right here now this section right here is an email opt-in setting so basically you can actually connect your email subscription to this plug-in I'm sorry this module and then from there you can actually you know get people's emails and you know all that good stuff so right here you would just type in like you know but syntax we have subscribed you can add in your media and then your email account right here you would select your provider so I'm you know I'm MailChimp you know I use MailChimp and then from there you would select the list once you connect it okay so they have tons of service providers and then right there you'd go to add and then you would have to add in your API key to your to your to your provider okay now I really can't go in-depth into that because I don't know your provider so it'd be hard for me to do I mean I have a MailChimp tutorial but there's so many providers out there it's very difficult for me to kind of go on for example fields you know you guys can you choose to have feels like a first name last name but I think just the email is fine and then a success action so once they subscribe what do you want to say well I want to say success so you guys can kind of understand it then right here result message button and you can change like the the fonts the the color everything about when it says success so there's just tons of ways you guys can customize all these settings okay so I'm giving you this footer for free just because I want to help you guys out and you know I don't want to you know have to do text module because you guys totally get it by now with text and heading tags and everything else so it's all about being creative guys so again you know we made this from you know just for my viewers and I think that this will really help you guys out in the longer because it's a really clean footer it looks really nice so that is basically a quick rundown of how to import products and also how to add a customizable footer now again we can go to the footer section and our theme customizer and disable this lets I'll just leave it up just for you know too-tall purposes okay so let's go ahead now and do our about Us page so stay with me guys because we're gonna do the about Us page and I'm going to talk about the blog and the contact which are gonna be really fast and then I'm going to actually give you guys a copy of the services page okay so let's go ahead and get started with our about Us page now guys this this X is to actually me really quick because we actually have a lot of the stuff that we already need so we don't need to really redesign a lot of stuff now right here I want to click on this and I want to click on this little icon right here so I want to have two sections now I'm gonna leave it up to you guys to decide which section you guys want it's because I kind of want you guys to understand what we're doing here so add a new row add from library and I want to do header section so now you guys can see right here here I'll give you guys a better look of its right here we have this section right here now I can go ahead and drag the stuff up here so for example let's go ahead and use this section to kind of help you guys understand how to use this builder so right here I'm gonna delete this I want to take this text and I want to drag it up there and I want to take this text and I also want to drag it up there as well and I don't really need this row anymore so you guys see what I did there I basically made a two column row but I exported the one and I just used the content from its now let's go ahead and see what it looks like right here so right here you guys can see we have the text now and you guys can add it to the left side or the right side now I want to make this full width so design spacing or sizing sorry sorry spaceman same thing make this row full width now this right here is a little bit too big so we need to kind of reduce it so I'm gonna go ahead and go to my text and I'm going to actually just reduce this a little bit so it's not kind of like you know it's not crashing onto everything let me do that one more time design text now go ahead and just reduce it like this okay and in this section right here I just want to put like features so I'm just going to put features and I'm going to make this just a little bit bigger so this right here was our heading one heading text and then I'm gonna go scroll down and I'm gonna go ahead and Pat it in like that and again I can also add in a little bit of margin to kind of push it up to kind of give it that effect so I hope you guys know how to do that by now so I'm going to close this go to spacing and then we can go ahead and add some margin I believe it's ten pixels I'm sorry we're gonna add it let's see this is Oh other way guys so sorry so it's gonna be negative so negative maybe like 50 or maybe 25 maybe 40 okay and then I'll right here I can also add in a background and I'm just gonna go ahead and select something like that and then I kinda want to add that a gradient overlay as well so I kind of want to select those colors that have kind of been using you want to be consistent and guys we can actually save this part so we can use this forward the services the blog and the contacts who don't have to recreate that section anymore so the library guys is really cool and it's gonna save you a ton of time so 91 6 e 8 and then right here you can kind of control the transparency of its then right here we're gonna go ahead and do the other one now it's not showing because we have to set that on the option to show so here I want to kind of reduce the transparency a bit so we're gonna go ahead and go to scrolling down here and then right here place gradient above background so we have that beautiful look right there so you guys can kind of you know you guys can change it to probably white so I would probably a little bit better so maybe we want to kind of make this a little bit more darker and then change the text to something like white ok so then here let's change the text to white and we know we have to be you know very I guess you want to say accurate because we're going to actually use this on different parts of our other pages so let me see right here what text it was it was a heading text so heading text and then I just want to change this color to white and then we can change that one or you can leave it you know it's really to you if you wants to have that look or you can kind of go for you know it's all about your design and style you know if you like that look you can keep it or you can add that a white section to it okay so let's go ahead now and make this section right here and again we already have what we need so right here imma click on plus regular single row and I think we have to go to section right there no I'm sorry that's the wrong one so we're gonna go to this teal icon add from library and go to header section and I'm gonna delete this so you have to kind of like load that other one because that's the only way to kind of make it work and I want to make some padding here let's push this down a little bit so we have features but instead you can do like a team and I put let's introduce right here one put team and then right here I'm changes to let's introduce let's intro duce and then right here again we can go ahead and add a three column row and we're going to add profiles so you can either do it right here or we can make a whole new section so I hope you guys know that you know understand so if I add this part this part controls it still and we kind of want to do that because I'm gonna add a background to it sorry here three and it's go and look for a profile so now we're gonna look for profile we have a bunch of them or we can do person I think person's the one we look for yep person is the right one then right here I'll put 0 Wilson then right here we'll put something like owner at zero Wilson calm and then right here I could put my social links I'm just putting little signs just because I don't wants to you know put a lot of in don't want to like give you guys you know alright not that I just want to put a lot of it I don't want to overdo it you know there's no reason to to go manually do everything you know so paste that all right and then for the image I'm going to select uh you'll be Daryl today this guy over here do you not like that haircut though and then for background we can go ahead and just leave it for now for the design right here for the icon again you can change the icons color so we can add purple because that's kind of like our scheme right now that image you guys can kind of decorate the image you guys want it's kind of cool because my last tutorial I had to actually manually enter CSS but with the new Divi theme you don't need to do that no more it's all included inside of it so it's pretty cool so title text we can change this to something like open tans and then we just like semi bold and then we can align it in the center which is cool because before you would need CSS and again guys these options are a little redundant so again text you know text size is gonna make it bigger etc so you guys can kind of understand this because we've gone over this a few times so I'm not gonna go over that again body text I do want to align it in the center like that or we can have it like justified or you know however you guys wants to align it and then right here we can kind of yeah that's too big I think that's good really quickly let's go ahead and do a design again and body text we leave that sliding spaces you know to border to it so if you guys want to add a border you know like a four pixel border around it and then we have to give it like a color like that's so over here I basically just added a box shadow with a small purple shadow around that so that's basically how I accomplish that section so Dan right here under border I can actually go ahead and just delete that you know but that just give me an example so right here I'm gonna go ahead and take that outs because I want to add a box shadow I want to make it look a little bit more elegant box shadow again we can go ahead and add that and you know we can you know change the way this looks you can kind of give it some emphasis see that and then vertical position change that the shadow color I put it like a purple color so you guys can see now it has that purple color and then we can change like the inner position or outer shadow something like that right there so kind of like that is what we're going for right there so basically you know the only thing that we need to do here is just maybe just add some padding so for the spacing right here you can add some top padding and then some bottom padding maybe even some right patty you know it's a ten each okay now again guys I'm lazy so I'm just going to go ahead and copy these because you know there's no reason to to make to do this all over again because we've done all the settings for already all you need to do now is just go ahead and change the images and you are all set for this section so that's the person module so it's going down here now we also have a background so right here let me go to our background and I'm gonna go ahead and insert a background image the so right here I use this one right here and I want to actually do the middle section so Center right and then I want to do to actual size it's like that so you guys gonna see it really adds the core just little things like that just really make your site look stunning you know it truly does and right here we have the let's introduce or the partners section so right here I'm just going to go ahead and add that add from library and do header section again so pretty simple and then let's go ahead and add some padding to this right here so we can actually you know add padding by just dragging this so right here I just saw it there we go you can just go ahead and push it down like that instead of having to actually you know adding it in you know typing it in manually so we can do it like that and right here we just have a bunch of images so I just basically made an image module so we have three image modules it's all right here click on this and I'm gonna select the images so image click on that select this you know images are always good guys you know like our you know our team or features you know it's half the websites that have them are just are totally fake but it's that's just what people do in the industry you know they're like oh yeah this you know these are my partners or these are people we work with and I was like no you don't you don't work with these people you just saying that but it's also right here we're gonna do image and right here I'm gonna select this last one right here so now we need to add the images below that so we can do that by just making a new row or we can add it below here inside the row you know we can add another two right there but I'm just gonna go ahead and make a new row right here so right here I'm gonna click on this plus icon and click on this and I'm gonna go ahead and select an image model or image select it and then we have this one right here now right here we can kind of a manipulate it a little bit so right here I'll click on this image and we can actually click on these for now we don't have to use all four but we can just drag it in there like that so we don't have to you know we don't have to use it the way it's designed I'm just giving you guys examples on how you can kind of manipulate it to do what you want so here I'm gonna add a note image and simply go ahead and select this one right here like that so as a result we have that look right there okay and scrolling down we're gonna go ahead and do this next section which this is actually a slider now guys you can actually use this for your landing page so all of you really did here was just make a slider and we just made a transparent background we added a gradient button and then we just added some slides to it so let's get started with that one so right here I'm gonna click on plus regular click on that and add a slider module slider let's see I think I pass it you know if you guys can't find it you know this happens to me all the time just just type it in you know make life way easier slider and then right here we can make our slide so welcome to Divi and the butt syntax would be like learn more and then right here you can go ahead and add in some text right here so I'm just gonna go ahead and just copy and paste as dummy text I don't want to take that though you guys can see we have the slider already right there and then we would put the link so if you want to add its link you would add it there for background I kind of want to make this background transparent so I'm gonna go ahead and click on that and I'm going to give it a white color but I'm just going to reduce the transparency there okay so right now you guys can kind of see it's alright for the design we can add an overlay to it so you guys can add like a background overlay you guys can kind of decorate the overlay as well and again you would need to reduce the transparency here to kind of you know get an understanding of its also you can even add a text overlay so if you want to add a text overlay you guys can do that as well so by going over here let's say you want like a purple text overlay and then you can kind of reduce it like that as well to kind of give it that effect right there so that looks really ugly but I'm just giving you guys an example of how you can add text overlays and also background overlays so right here we have navigation you can choose to have arrows for your slides now if you don't have if you only have one slide it's not going to show up so you need to have more than one slide so I'll show you how to add an additional slide in fact we're just going to duplicate it so if the alignment right here we can have it Center or we can have it bottom so slide an image oh yeah we have two an image for it so image we need to go ahead and have an image for you guys to see what that looks like so right here under contents we're gonna go to image a slide image and I'll just put this phone right here just to give you guys an example of it so right here we have this phone now guys this is just for toll purposes so I know it doesn't look that good but I'm just basically explaining to you what the options are so you can have this image on the bottom or we can even have it like on the on the the center and you guys might want to use a bigger image than that one that one is probably a very bad example so let me just go ahead and give you guys an example of something a little bit bigger to help you guys understand what I'm talking about something like that you know now the text is a little bit too big so you might want to make the text a little bit smaller but that's just give you an idea of something you guys can use for that so if you want to like you know present something or make it look good you know that's basically how you do it image right here you guys can actually change the image on how it looks so you guys can get really customizable it's kind of hard because it actually refreshes so you have to kind of it's really not the best to do that so you might want to edit this image like outside of the spider module and then once you know your settings you can kind of drag it but you can you know add I think it's called sepia so you kind of change the way it looks etc or the opacity of it and there's tons of other tutorials that algorithms have introduced to get the most out of your slider now right here we have title text so here I might want to make this bold or let's do this let's do this light and then we can go ahead and you know move the text alignments to make it look a little bit better we can just use the regular text this section right here would just control the regular text inside the content so it would control this section right here but this section right here we might need to change to just a regular paragraph okay like that so that's basically how the slider could look so welcome to deviate cetera now I'm gonna go ahead and add in a background over this entire section right here to help you guys understand what I'm trying to achieve so here I'm gonna go ahead and click on this background you can add a background image such as this one right here and then right here we can go ahead and even add in a we can add an overlay to it so I'm gonna go ahead and add in a background to this and again I'm gonna add an enter in my I'll just enter in these ones I'll just I'll just grab these really quick I'll just take a gamble we'll pick okay and then from there we can kind of do that now remember to get this to work you must click on this option right here and that will basically give you that transparent slider and again guys you can you know totally angle these directions again you can even make a split screen effect with this as well so there's a lot of options that you guys can kind of manipulate and do with this now that object right there or that's it looks really ugly now so let's just go ahead and delete the image I personally don't like images on my sweater not unless like I have to really you know really change them up and make them you know special for the slider because by default I just don't like it and as a result right here we have this transparent slider like this and let's say you want to add in another slider you can just duplicate it and now you guys can see we have the arrows and we also have this so if you want to edit that slide you can go ahead and go to design and have fun with this right here now guys a lot of these settings are redundant so here for the button choosing the custom style we're basically going to decorate the button again so this is where you would decorate the button and then again we can add and that's you know that gradient effect you know to it or if you don't want the gradient you don't have to going back over here I'm going to go ahead and click on that spacing again we can add some spacing to it but again I think that's I think the the regular options are probably the best and again you guys can add in some of the other stuff right here so that's basically an example of how you can add a transparent slider so we have this slide right here I reduce the transparency of this slider and I just basically added a gradient background and again you know you can do the same thing here it's just different colors and that's basically it so it's just virtually different colors and different gradient because I just I chose a really aggressive towards our style you guys can see that you know let's see if we can change that up let's see so here again we can change it so even radial you know or centered top left you guys get the idea you know so it's just really all about creativity at this point so you know we can kind of that's a pretty cool lighting page like that you know we'll leave it like that you know that's that's it but I'm just giving you guys an idea of how you guys can design the slider and then you know the other options are all the same okay so that's basically how you guys create a slider and also create a transparent slider so next we have just a simple call to action so call to actions guys are probably one of the most important parts of your websites for example if you go to my website up here and you go to my home page I have tons of call to actions because we want to direct people to go to certain parts so a call to action right here scrolling down I have another call to action right here testimonials and I have another call to action right here okay so having call to actions on your website is very important and I highly recommend it because you really want to tell your audience where to go on your website so I'm going to go ahead and add a new section and I'm going to add a regular section and just a simple section now our here I'm add a call to action so right here like ready ha and then we do like some might call us and then right here I'm gonna go to my secret web sites and just simply grab some dummy text right here so over here if you're gonna put some dummy text and then link so right here it would be the website or the page you want them to go to now if you guys don't know how to link people to different parts of your website I'm gonna show you really quickly so here we go to save so we have call us right and let's say for example you want to take this to your contact page well I'm gonna click on my contact page right here I'm going to copy this I'm gonna go back to our about Us page and simply just go ahead and insert that link right there so that's basically how you guys can you know all you got to do is just copy and paste the link from whatever page and then just add it in right there the URL so for example link you're just going to go ahead and copy and paste that so if they click on that now they're going to our Contact Us page for the background I kind of don't want anything there so I'm not going to use the background color and then also for our design for our text we kind of need to change it to dark because we really can't see what we're doing without it and right here we can kind of you know be a little bit more decorative you know we can change like the shadow again and all that stuff so you guys basically know the title text we can go ahead and change this to something like open sans or I think Leto is a good one so here let's write Leto Latos a good one and then you know you guys can you know send our line the text or wherever you want its title text color you can go ahead and change that as well or we can add in like a box shadow to it or a title text shadow etc so I'm not going to go too far in these options so right here for body text again we can change this to something like Leto and center line right align justify its center etc going down we can change these options now for the button we can choose to have custom like a button text color so maybe you want the text color to be something like whites and then the button background color you can change that to whatever color you'd want so I was using like that gradient color so right here I was using like that purple color and then for my secondary color I choose like a bluish color so I'll just do that just because it's you know it's quick and easy quick and easy so I'm gonna go ahead and I think that's about it for this section for border width we can you know change the bottom width we can change the radius to make it circular etc but I'm not going to go too far into the button because we've already designed a button before and we can add a border around this so maybe like I don't know 10 pixel and like a border to its etc and then right here you can go ahead and give this border like a color or something but I'm not really gonna do that I'm actually gonna do something else and a little bit that's gonna be a little bit more creative then that's a box shadow you might want to add a box shadow to this to kind of emphasize it and then you know we can kind of go through these and you know take a look but they have so many animations but or options but I'm just going to go ahead and just keep going so here I'm just gonna enter that so now I kind of want to change the actual size of this whole module you know it's it's too long it's too big I want it to be just a little bit smaller so right here in the row settings I'm gonna click on Matt's and I'm go to design and we're gonna go to sizing now under custom width right here I want to turn that on and basically enable this to how big I want it so right here I would say this is right here a a comfortable you know comfortable size so I'm click on check now guys I want to be a little bit more creative I want to kind of add just a little bit more to this I don't want to leave it it looks a little naked so I'm gonna go ahead and click on this right here and add a divider alright now look we cannot see what we're doing we can't see the divider that's where this option comes in so over here we're gonna click on this and now we're gonna kind of work right here because guys the divider is so small it's very hard for the theme to kind of control it so right here I'm gonna take the divider and drag it above the call-to-action I'm gonna click on this I'm gonna add a background we're gonna add a set of purple background color you can add like a gradient you know or some like that but you know it's up to you but I'm just giving you guys like an idea so right there we added a color to it now for the design under the sizing I want to make it really small I want to make the height really small but just enough so people can kind of barely see it and I'm gonna show you what happens when we do all this so I added a divider I gave it a purple color and a very small height and when I go back to our website right here you guys can now see that's it's kind of it basically acts as like as a top border color so it's just a creative way to kind of create a call to action just like we have right here the only difference here is just the text and the color but the actual modules are the same exact modules that I use for that layout okay so you know I'm just trying to help you guys with inspiration and ideas to kind of really help you guys get creative with your websites so here I'm gonna go ahead and save it and guys we're done we are done with the about Us page now we're gonna go ahead and move on to the blog section now let's just take a look at our website it is really professional it looks really good and you know for a beginner that makes this I gotta be honest you guys are light years ahead of people who are trying to do it themselves because my first website was so terrible it was so ugly now really quickly before we move on to the blog section I want to go ahead and actually go to our about section and I want to copy this top part right here because I want to bring this to different parts of our website sorry here I me go ahead and enable the visual builder and I'm gonna go ahead and click on this right here and save this section and do like header or pages so now we can use this part for different parts of our website and I'm gonna go and save it I don't know if you need to save it when you export it but I just do it just in case I'm not really sure I don't want to like you know they have to do it all over again so right here I'm gonna go ahead and go to enable the visual Builder and guys blog pages are really easy really really quick so we're gonna go ahead and click on this plus right here and go to add from library and go to header for pages so now you guys can see we have our header already done and ready and I can simply drag it up or we can just go ahead and delete the other section and voila now we have the section ready for our next part and right here we just have been blog you know or and then right here we can type in something like you know blog something simple right and then right here I'm click on plus click on regular click on this icon and we're gonna enter April module now the blog is going to be empty because we don't have any blog posts so guys making blog post is really really simple so let's say you want to be a blogger you know we're gonna go to plus new and go to posts so just like you create pages or whatever this is where you're gonna put your article in so over here I have my blog page and I'm just gonna go ahead and just copy everything so I'm just gonna just give you guys an idea of what you guys can do now guys there's two ways you can make blog pages you can make it with the Divi Builder or you can make it without the Divi builder so for example the best shaver or Christmas and then right here I can just paste this and then right here you can create a category for it so maybe you want to have like things to buy and then I want to set a featured image for it and if each of these guys is important because this is the thing people are going to see when they look at your posts and then I think that's about it so right here we can click on publish all right so we made one blog post now let's just go ahead made one more but I'm just going to show you how you can use the Divi Builder 4 instead so right here but it's um the best iPhone to get that's pretty easy it's probably the newest one but I've heard that they were kind of messing with our older phones or whatever so here we are going to use the Divi Builder instead so load from library and they have like some templates that you guys can use but I'm just going to go ahead and just do like something simple like I'm just gonna add the the text one I think so here I'm just gonna do a page full with a page full with so it has some modules right here already sets and I'm going to publish this sorry I'm just gonna click on publish I'll make a new category so the coolest things out of new category and I'll set a featured image for it now guys for other themes you really can't decorate your blog post so it's kind of frustrating but with the Divi theme you can basically use the Divi builder and all of its modules to actually add on your blog post so let's say you want to view this post I'm gonna go to view posts and there you go so there's the blog post and this is one of the models that we use and here this is just like a template guy so it's pretty self-explanatory so let's go back to our blog and then right here we have an image and then we have the product so guys this is a little bit too big so let's go ahead and edit the actual blog module itself to basically show what we wanted to because quite honestly that's pretty ugly so right here we have like the post number so how many post numbers do you want it to display you can also make it set certain categories only so let's say for example this blog post or this blog page you only want to show the coolest things then you would go ahead and select it okay and again you can show excerpt meaning like you can show like the the actual like the content from it so excerpt would be like that stuff right there and you can show a certain amount of excerpts or like 200 words of the article or whatever you want to add okay let me go ahead and go back must be a little glitchy there but that's okay so for the design we have a layouts now we have full width and we have grid now I am a fan of grid I think grid is much more nicer and much more cleaner than the standard way so also for overlay you can add at like an image overlay a featured image overlay you can add an overlay icon color and also you can add a hover color over when they hover over it you can go ahead and give that color right there so you can see it's that color so you guys can you know get maybe kind of match its to your scheme of your website so here we have like a purple scheme going you can go ahead and add it as well right there okay so there's other you know things you guys can do with it a lot of these are redundant so again like you know for the title text do you want to you know change the font for the title text you can change the font for each specific one and again you can like align it and it's really helpful because before you used to have used to put a lot of CSS for this section but they've actually improved their blog section so now you can basically add all these features to this section right here or to your blog post as well maybe out a box shout out to it there we go so that looks pretty clean already so it's really just small things guys that can make your blog look truly amazing so I'm going to click on this and click on save all right and now exit the visual Builder so now if you just go ahead and look at it we can do like the best iphone to get and if they click on its you know they'll be taken to that page and then also right here we have this section right here now if you guys want to monetize your blog there is a link in the description of this video it will show you how to monetize your blog for free and also for those of you who want to add like the Facebook widgets right here and handle all this stuff let's go and do that right now so right here under widgets we have the sidebar so basically you can add different stuff so you can add a search bar recent posts you can add recent comments but I'm gonna go ahead and lead all this stuff you know who needs archives who needs me who needs meta what is all this you know we're gonna delete all those junk this is all junk right here now right here we can go ahead and add I like the Facebook like box that we had before and then right here you would enter in your page you can enter in like advertisement and image there's also it's a really cool stuff you can add a lot of these you can add like plugins like so it's like a for Instagram or for Twitter and you can actually show it on your on your post so I'm gonna go ahead and go to my Facebook again clear my messages or my page so embarrassing people message me during my tutorials it happened last time some guys like hey bro like I'm dating this girl and all like dude like I'm doing a tutorial like you know follow us save I'm gonna go ahead and close the Hat before for someone really messages me so I done right there and let's go ahead and take a look at it now so let's go ahead and visit the website go to our blog and click on any of these posts it doesn't matter which post because it's all going to show up and then right there you have the you'd have the widget right there so again we can modify it remember we can change like the height and the width and everything so on your free time you might want to do that but basically that's a quick nutshell of the blog section pretty simple right it was pretty easy you know and this right here is your your sample one so right here you can go to your dashboard and you go to your posts right here and these are all your posts so let's say I don't want hello world I'm gonna try that one so now that's not going to show up on my blog post anymore it's right here blog and then voila it is gone alright so that was the blog page guys pretty simple let's go ahead and move on to the contact section now alright so let's go ahead now and make our contact page so right here I'm gonna click on enable visual builder and right here I'm actually going to click on this and we're going to add from library because we already have the header for our website so right here I'm gonna take this and we can just drag this on top and then just go ahead and we can just delete this section so right here you might want to change this to something like about or our contact right so contact yeah that's ugly love you there we go and then right here we're gonna go ahead and move that so features now you guys can also put this on the other side so it really depends on what side you want it on so if you want it on this other side you can go ahead and just drag it and then also you can just go ahead and drag that over there as well to give it that effect so if you guys want to have it on that side you can do that but I'm just giving you an example of how you just drag and drop so next let's go ahead and click on this section we're gonna click regular and we're gonna add three blurbs we're gonna add this section right here okay so going over here I want to select this and I want to select a blurb now for the title I'm not gonna put a title oh and I'll explain it to you guys why so here I'm gonna go ahead and copy this information and paste it right there now for the design tab or scrolling down here for the image and icon I want to actually use my own image so I'm going to click on upload and then right here I'll put in an image right there and then for the design image an icon we can change the placement to the left or to the top but I can't leave at the top you know what kind of like the way it looks you know and then we can change like the you know the border width we can change all sorts of stuff about it you can change you know the color of this but I don't wanna get too much into that so we'll talk more about the image filter after this contact page so right here under the title text actually having teletext we're just going to use the regular text I want to send our line Nats and you know we can add then like you know get a little bit customizable it's right here I'm gonna go any close Nats for the body text we can go ahead and change this to something like light maybe lado but we want to make it just a little bit bigger you know just a little bit bigger like that now eventually wondering you know it's all scrunched up this is where you would probably enter in some body line Heights something like that's kind of decorate it and then maybe reduce this just just a tad you know like something like that right there that's perfect and then you can increase the line height as well you can also increase the line spacing something that looks just like that okay and then right here we can do the same exact thing so over here I've shown you how to do one and I basically just did the same thing for this one right here so again we add the blurb module so I'll show you guys how to do one so if you don't want to add those other ones you can just go ahead and do that but you guys kind of get it so I'm just gonna go ahead and copy and paste this and just kind of you know put it right there I might want to add like a different image for it because you know kind of a perfectionist so kind of want to just use different stuff you know just just the small images and text fonts really truly makes a difference and it makes your site look so much better and so much difference then I did so right here image an icon upload and then I'm just going to put that one right there okay next we have our contact form so right here we have a two column row we have some information right here and then we have a contact form so right here we click on this section right here now we can also add it inside of this section and maybe even add I'll do a bonus we'll add in like that other little area so I'll just know that I'm going to do right now so right here I'm gonna click on this click on a two column row and then on this section right here I want to add a contact form and then right here we have our contact form right here I'm going to enter in a call to action and I'm explain to you guys why I add a call to action I did this before and people were like why did you do that so here I'm gonna do like ready two and then I can go ahead and put some dummy text okay now I'm not gonna put a link so if I put a link it's gonna create a button right I don't want to have a button so I'm just gonna go ahead and say no no button because if I add a button text right here and I add a link text to it it's going to generate the button no I don't want a button I just want I just like that position you know I like the you see how the the call-to-action kind of is already designed for you it's already made for you so I really don't want to you know have to do that with a text module because a text module I'm gonna have to you know send our line it's change the Martian and batting you know so I'm kind of just stealing the ideas from other modules and kind of implementing it on my website so that's kind of why I'm using that section right there now for the title text I want to change this to something like black and then maybe right here you know we can change the line or we can you know kind of mess around with it's over here I want to do light and then lado and then maybe make it a little bit bigger and then right here for the title tor for the just for the basic body text we can just change that to something else like a lado or something and we'll just give it a black color because we're actually going to take out the image I'm sorry the background and then right here you know we can add a box shadow or whatever else around it so here I want to go ahead and just get rid of this get rid this background and the background is really ugly so we don't really need the background here so here I'm gonna go ahead and take out the background no I forget it does that you know it does that sometimes so I basically just added a section right here and we added a contact form now I'm going to go ahead and click on the Settings and we're gonna actually kind of go through some of these settings so for the for the text right here we have like a title a success message so you guys can also read this but a success message is basically saying like you know success once they you know once it properly goes to your email okay and then right here we have the submit button text such as submits now right here for email we're gonna go ahead and put in the email now if you guys ever have a question on it again you guys can read this so I want to go ahead and put in my email address and then for the message pattern again you guys can always read this you guys can define it however you want to receive it but for right now I'm not going to do that also for redirect this is a really cool feature so if somebody decides to fill out your contact form you want them to go to another page now this is perfect for landing pages so let's say it's like hey you want free access to this you want to make a million dollars sign up for our newsletter and you and we'll send it to you and I'm gonna try to sell you something you know that's how those guys make money you know so right here we can put like you know a TPS Sarah Wilson comm and then you know background you can always design it right here like the form field text so right here you can kind of design it and choose to however you want it to look title text again you know you can change all these settings or if you guys can you guys can go through these you know these are all redundant and the same so you guys kind of understand what these are so also for like the email you can you know customize the email you can give it like conditional logic now the conditional logic is pretty it's it could be a little complicated at times so I'm going to link the description for elegant themes contact form because they've actually made a really good one and I don't want to go over the conditional logic and everything else because Elgon themes has made a separate tutorial for it it's basically like if somebody does something what do you want them to do and guys this can be really customizable like there's tons of stuff that you can do here so most of you guys won't need to use this this is probably for like people who are doing big stuff like like you want to take like an order for contracting like how many pounds of Steel do you have if you have that many pounds of Steel you know what kind of lumber do you have and it just goes all over the place so I'm not gonna go into the conditional logic they're also for field options you might want to add like you know is this required I'm gonna put yes for background you guys contains the background for text etc so you guys kind of you know get the points of the contact form so I'm going to go ahead and close that field options required yes so if you guys want to you know etc conditional logic background and again you guys can always you know decorate this or you know you can get customizable with the backgrounds for each of all these things so let's go ahead and send myself an email and also use the redirect option because those are probably the most important parts of the email contact form you know you want to make sure you get the emails right so I'm gonna make sure that my email is correct and then also for the redirects I want to make sure that it's Darrell Wilson comm so here click on check on this and click on save so let's go ahead and send myself an email so I'm exiting the visual builder now guys if it doesn't send it to your contact or your email and it's just not working it's most likely your hosting company if you did not choose psych round and you chose some sort of like you know the like free hosting companies work like your websites up and down every five minutes it's probably not gonna work so you want to make sure that you get it from a reliable hosting company so here I'm gonna put my email and then here I'm gonna hey what's up man great tutorial and then right here I'm entering twelve and then click on submit now it should redirect me to my website Darrell Wilson comm and there you go voila so now let's go ahead and go to my email so I have Gmail so right here I'm gonna go over here and go to Gmail and voila so we have new message from Pattie cuz that's we named the website and click on it we can see that hey what's up man great tutorial and it comes from our domain so it's all about your hosting company at that point so again it's pretty simple and then you know we got redirected as well so we know the contact forms working pretty well so let's go ahead and go back to that's domain so Divi theme org okay and go back to our contact now lastly I'm going to show you guys how to add in a Google Maps now before you actually I had to enter like an API and stuff like that and a little bit confusing I'm sorry you didn't have to enter an API but now you have to so people can be somewhat confused I have that backwards so right here I'm gonna go to add a new section a full-width and I want to enter a full width map so before we actually do this guys we need to get a Google API key and it's pretty simple so I'm gonna show you how to get one right now in case you want to add Google Maps to your website so here I'm gonna enter Google API key and right here I'm gonna click on this the first one that comes up developers out Google and you have to have a gmail account and guys it's pretty simple so just click on get a key and then you can create a project or select yours so I'm just gonna you know click on this one right here and if you guys don't have anything it'll it'll prompt you to create one so here we click on next it's generating an API key and wallah so there we go it's gonna go and copy and paste that alright so now we need to go back to our option right here now we need to actually I'm gonna go ahead and say this we need to take the API key and insert it into the Divi theme options so over here I'm gonna go to dashboard go down to Divi and go to theme options so remember earlier how I said we have to go back to Google API well now we're going back there now also make sure that it's just like that if you have the other information mobile jumbo it's not going to work out properly okay so scrolling down here I'm gonna go ahead and save these changes now let's go ahead and go back to our website's contact and let's go ahead and finish this right here so I'm going to enable the video builder you guys can see it's kind of grayed out you know it's kind of great so now guys also there's a lot of modules I didn't cover in this tutorial so just like the full width like image a header you know it's kind of off to you guys to kind of venture off and kind of do your own thing because now you guys have the basic understanding of a lot of the modules so a lot of these are very very similar you know they might have different options but in general it's all the same thing so right here I'm a click on plus our business or a company or our company and then right here this is our company and then right over here you might want to put like an and like your phone number and everything else and now for the map pin I'm gonna put Hollywood Hollywood click on find there you go it found Hollywood so that is for the pin so now that we've done that we can go ahead and click on check and now we want to go to the map right here so the map address you would type in your address generally it's gonna be the same thing as the pin so right here find and then voila so if I click on check you can see that's if they click on it our company this is our company and then maybe right there you can add in your address now there's a lot of other you guys can really you know design this for the map you guys can change like the the color of everything I mean it's it's just so so much you guys can do with this so I'll leave it up to you guys to kind of mess around with like if you guys wants to do you like the image filters and stuff like that there's tons of other tutorials in fact I'll be linking a tutorial on the maps to kind of give you guys a better understanding of it but in general that's all you need you just need the map and the background and you know that's pretty much it you can always add like a background to it but yeah so yeah I'm not gonna do that so in general guys like I said you're just gonna need the map in the pin you only need a background you know not unless you're adding an overlay to it you want to get customizable etc so in fact the overlay won't even show unless you prompt it to okay so right here I'm click on this and click on save so right now you guys can see we've done the contact form now really quickly before we talk about this contact form and some other CSS I want to actually show you guys how to import layouts just like we kind of did before so I'm going to actually give you all now these services page I'm going to give it to you okay so there is a link in the description that is called a services page now I'm giving this to you guys because you know you guys watch this tutorial and I'm really you know glad that you guys made it this far so I'm gonna go ahead and enable the visual builder now there's a few ways you guys can upload layouts now I'm going to enable the visual builder now this sometimes works so this is kind of where things can get a little weird with hosting and also DV so right here I'm gonna click on this portability right here and go to import I'm gonna choose the file go to my desktop and the it's called elegant services so I will click on that and go to import now if it doesn't work see how it says this to not be imported by this you know etc you guys can just go to the DV library now I hope they fix that because that's the reason why it's there but sometimes it just does not work so right here I'm gonna go to add new I'm sorry import and export go to import and choose the file and then simply go ahead and find the elegant services and then import that layout right there so right now it is importing now the Divi library is probably the best way to import stuff so it's called elegant services alright and sometimes it will timeout like this and just be great that happens sometimes I'm going to happen because people always tell me amen you never get errors in your and your your tutorial let's say yes I do I get them all the time and have to kind of edit them out you know it's it sucks but it's just how WordPress is so services and right here I'm a go to to enable the visual builder and I can even go in the back way and go to edit page in fact let's just do it the back way so right here I can go to edit page so if you like working on the backend you know I really wouldn't recommend it you can do that so right here we can do a load from library add from library and we have elegant services right here and go to load ok and then right here you click on preview changes now one thing I want to mention before that is right here you might wanna click on updates because if it's uh that's not the case then you know it might not save so here I'm going to view the page alright now this section right here you guys probably a lot of fixes already but I'm going to talk a little bit more about some other stuff now this is the services page and again it has tons of really cool stuff so if you guys wants to kind of do your homework and see how I accomplished some of these changes you are more than welcome to but there is one thing that I want to mention about this my little bar Winkley gee that's weird so it's going down here so I want to mention the image filter now guys there's tons of ways you can you know modify the image filtering so for example we have this picture right here now by default guys this is just a question mark that's all it is but we chose the image and we basically inverted the background with the question mark so let me give you an example so right here under this setting under background we can see column 1 now column and by default is just this background so if I delete this and add in a different background to something looks like this right here you can see it's basically picking up the exact background but uh the other one was a much better result so basically how did we accomplish this well we accomplished this with the inverse setting on the filter options so for the design under the filters we have these settings right here now the invert is probably the most underlooked but in theory it's supposed to look like this right here but with the invert option you can actually put in a image on the first section and then invert it and it will actually take that background and apply it to inside of your object which is pretty incredible so the invert option again is really amazing and if you guys want to see some examples of it I'm gonna go ahead and give you guys this page right here so this is an example of some stuff that you can do with the image filtering so right here they basically blurred out these other parts right here there's three columns they just blurt them out right here you can see that they've actually reduced the text to kind of be absorbed in the background right here you can see this animation right here how it kind of just disappears and comes in like that and also right here that's basically the same thing that we did right here and again you can have some it looks like this so you can have like a text text text and then an image and then just invert everything on your page as well and right here same thing and again here are some other examples of things you can do with the Google Maps and also you know you can actually you know inverse like the colors and everything else so these are just some examples that you guys can do with the Divi theme it's incredible and again right here so I'll also be linking some toriel's on the image filtering because um elegant beams has provided tutorials for them and I don't want to cover everything too much in detail because I can probably spend another 30 minutes giving you guys examples on the image filtering but the things that they have just created and the accessibility with this WordPress theme is just it's I mean I've been around all the themes and no other themes no other WordPress themes even come close to what this theme can do for you and your website's okay so that's basically a nutshell and really quickly this section right here if you guys don't know how to change this you guys can actually you guys can reduce this or you guys can you know put it on the other side or you guys can even add some CSS so the CSS that I'm talking about is something called watermark now I'm not going to be showing you guys CSS in this tutorial but I'm going to make a video and I'm going to link it in the description this video so you guys want to really improve your skills and you guys want to kind of make something that looks like this right here and even on the home page how we talked about this section right here I'm going to be creating a second tutorial and it's gonna be targeted a little bit more for advanced users because this is a toros designed for beginners and if you want to kind of you know if you have for the challenge and you want to improve your skills the tutorial is there for you and also I'm going to be providing you guys all with since you guys have been here watching this tutorial I'm going to actually give you this entire layout for free so you're going to receive the home the about the services the blog and the contact page for this layout right here so this layout was designed by a best davey child and i've also included several other templates in my websites just for my viewers it's going to be password protected and the password is patty so if you guys go to my website you guys will actually have access to let me give you these websites so guys this is a big bonus for all of my viewers i've actually invited five other wordpress designers and they've actually designed templates for my viewers and you guys will have access to these templates and these were created by a world-class designers now this one was created by Mark Hendrickson now if you guys do want to visit their websites the link is in the description but if you guys want access to this layout it's on my website so you guys can download it totally free and this is just one of the many websites that you can get it's just amazing so I've showed you guys how to basically use the layout system so that's basically what these are so these are layouts and they're also child themes and I invited these guys to teach on my arm sorry too you know I wanted to lay off from them for my viewers and these guys created just some of the most amazing work so again this one is from Mark Hendrickson and this is the layout that we use for this tutorial you know and these guys I chose their layout for this tutorial now there were some things in this tour and their layouts I mean that was a little bit too advanced such as this section and also this section right here but in my next video where we talk about CSS and advanced features I'm going to show you how we incorporated those designs guys because for a beginner this could be somewhat confusing but you know if you guys want to have access to this entire layout you guys can go ahead and download all this for free so this was created by best Divi child and again these are available on my websites and this is just a way to say thank you guys for watching this tutorial all the way and again this is smart agency so this is another design from another website and guys these all use the Divi theme so all you need to do is simply download it upload the layouts and you're good to go now some of these layouts guys they do require some custom CSS so what that means is you're gonna have to copy and paste some stuff onto these layouts to get them to work properly because sometimes in WordPress there's some limitations and with the power of CSS you can basically do anything and this is a really cool feature they have right here you know where everyone's kind of falling and then right here you can have this so you guys can have all these layouts totally free they are listed on my websites I've given you guys the password so you guys just you know you can just go ahead and enter in the password and then you guys will have access to them I might make them available for free to the public a little bit later but for I kind of want to give you guys a special access to all these layouts because this can really help you and your career of WordPress or even help you guys get ideas for some of your web design jobs this one right here was also created by a be super fine this one right here was created by a website in Germany he's actually a really good designer this one was created by DB theme store and again I'll mention them in the comments so you know hats off to all these guys for making these for my viewers because these are nothing short of amazing guys and you guys want these layouts again they are available for download for free on my website there are some instructions however if you guys need to you know to download them so this right here is like a black and white he basically made two home pages which is pretty cool of him to do and the service is and then the contact so again these will be available for free on my websites they'll be password-protected just for you guys so again thank you guys for watching now guys I hope this tutorial was really helpful and I really invite you guys all to go to my youtube channel and kind of just you know take a look at my youtube channel and really you know see my content I'm probably the top-rated professor on udemy calm for teaching WordPress and you know I really hope that you guys you know succeed because I know people and they're trying to learn how to make you know websites it can be very difficult at times and that's why I'm here you know so I mean I used to go to websites and just get screwed I would pay like four or five grand and they'd give me some template and I was like this looks like crap so that's why I'm here and I hope you guys enjoy this tutorial you know I really it inspires me a lot to create these tutorials because people email me and I just like bro I've started my own business because of you or whatever so in the end guys I really hope this helps you guys out so again thank you guys for watching this tutorial those layouts are available for free on my website all for my viewers so good luck guys and I'll see you guys in the next WordPress tutorial
Original Description
Get 60% OFF Hosting Here: https://www.siteground.com/go/darreloffer
Get 10% OFF The Divi Theme Here: https://www.darrelwilson.com/divi
Join Our Wordpress Social Platform! Register NOW: https://www.wpfriends.com
Watch the newest divi theme tutorial here: https://www.youtube.com/watch?v=e1RkMMyjkOM&t=251s
Welcome! In This Wordpress tutorial you will how to make a wordpress step by step! In this wordpress tutorial, we are going to use the divi theme to make our wordpress website. The wordpress theme allows you to drag and drop modules and makes making a website very easy! This is a wordpress tutorial for beginners so after you watch this wordpress tutorial, you will be able to make your own website from scratch!
Get 60% Off Hosting Here:
https://www.siteground.com/go/darreloffer
If you need a logo, you can get one here for just $5: https://www.darrelwilson.com/fiverr
NEW Divi Marketplace! https://badenza.com/
You can download the images here:https://s3-us-west-1.amazonaws.com/darrel/Images.zip
Here are some timestamps to help you following along in this wordpress tutorial
3:32 - Get Hosting
7:24 - Install Wordpress
11:32 - Divi Theme Download
18:34 - Creating A HomePage
36:47 - Creating A Split Screen
45:16 - Text Overlapping
57:55 - Double Split Screen
1:08:26 - Testimonials and Divi Library
1:18:30 - Advanced Design Settings
1:20:30 - Footer
1:27:30 - Additional Resources
1:32:10 - Mobile Optimization
1:35:10 - Theme Customization
1:41:15 - Divi Library
1:45:06 - About Us Page
1:56:56 - Slider
2:10:25 - Blog
2:18:06 - Contact Page
2:33:00 - Services Layout
New CSS Tutorial is available here:
https://www.youtube.com/watch?v=m6_sO3PTJvg&t=106s
You can view a demo of the website here:
https://wpdarrel.com/
You can download the services page here: https://s3-us-west-1.amazonaws.com/darrel/Services+Page.zip
You can learn more about the image filtering and conditional logic here: https://www.youtube.com/watch?v=8XSs08VJ_CY
You can learn more about the con
Watch on YouTube ↗
(saves to browser)
Sign in to unlock AI tutor explanation · ⚡30
Playlist
Uploads from Darrel Wilson · Darrel Wilson · 0 of 60
← Previous
Next →
1
 2
2
 3
3
 4
4
 5
5
 6
6
 7
7
 8
8
 9
9
 10
10
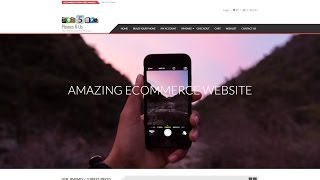 11
11
 12
12
 13
13
 14
14
 15
15
 16
16
 17
17
 18
18
 19
19
 20
20
 21
21
 22
22
 23
23
 24
24
 25
25
 26
26
 27
27
 28
28
 29
29
 30
30
 31
31
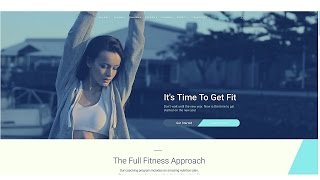 32
32
 33
33
 34
34
 35
35
 36
36
 37
37
 38
38
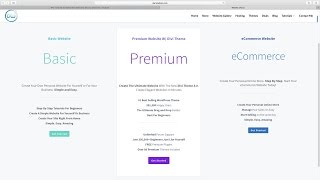 39
39
 40
40
 41
41
 42
42
 43
43
 44
44
 45
45
 46
46
 47
47
 48
48
 49
49
 50
50
 51
51
 52
52
 53
53
 54
54
 55
55
 56
56
 57
57
 58
58
 59
59
 60
60

How To Add Google Analytics To Your Wordpress Website 2016!
Darrel Wilson
How To Embed A Youtube Video On Your Wordpress Website in 60 Seconds
Darrel Wilson
How To Make A Wordpress Website | For Business | 2016
Darrel Wilson
How to make a Free Wordpress Website for Music or Fanpages - Beginners Tutorial 2016
Darrel Wilson
How To Create An Amazing eCommerce Website with Wordpress - 2017 | FREE Theme
Darrel Wilson
How To Make A Wordpress Website 2016 | Beginners Tutorial
Darrel Wilson
How To Make A Blog With Wordpress - 2016 | Beginners Tutorial
Darrel Wilson
How To Create A Beautiful and Free eCommerce Website with Wordpress 2017 (Online Store!)
Darrel Wilson
How To Make A WordPress Website 2017 - Step By Step Wordpress Tutorial
Darrel Wilson
How To Create A Stunning and Free eCommerce Website With Wordpress 2017 | Online Store Tutorial
Darrel Wilson
How To Setup Subscriptions and Recurring Payments For Your Website | Paypal Tutorial 2016
Darrel Wilson
How To Make A PREMIUM eCommerce Website with WordPress | Online Store Tutorial 2016!
Darrel Wilson
How To Create Amazing Landing Pages For Your WordPress Website! | Divi Theme Tutorial
Darrel Wilson
Yoast Seo Tutorial 2016 - How To Setup Yoast SEO Plugin - Wordpress SEO By Yoast
Darrel Wilson
How To Create a Coming Soon(Under Construction) Page in Wordpress 2016!
Darrel Wilson
Onlywire: Promote Your Wordpress Website to +50 Social Networks With Social Media SEO
Darrel Wilson
How To Create A Professional and Free eCommerce Website with Wordpress 2017 (Online Store)
Darrel Wilson
How To Add Intergeo Maps Plugin For Your Wordpress Website
Darrel Wilson
Top 11 Best Wordpress Plugins 2018 | Must Have Plugins For Wordpress!
Darrel Wilson
How to Create a Free eCommerce Website with Wordpress 2017
Darrel Wilson
How To Make Beautiful Web Pages For Your WordPress Website! | Divi Theme Tutorial
Darrel Wilson
How To Reset Your Wordpress Website | Reset Wordpress Back To Original Settings
Darrel Wilson
Top 10 Free and Responsive Wordpress Themes 2017
Darrel Wilson
How To Add Amazing Resume Layout Packs For Your Wordpress Website | Divi Theme tutorial
Darrel Wilson
20 Best Websites To Sell Your Products! The Best Websites To Sell Online !
Darrel Wilson
SEO Tutorial For Beginners 2016 | What Is SEO and How Does It Work?
Darrel Wilson
Best Web Hosting 2016! FREE DOMAINS! Top 5 Wordpress Web Hosting!
Darrel Wilson
How To Use Facebook Ads For Beginners 2017 | Complete Facebook Ads Tutorial
Darrel Wilson
NEW Divi Theme 3.0 Visual Editor for Wordpress | Divi Theme Review!
Darrel Wilson
How To Update The Divi Theme to 3.0 | Update Divi Theme From 2.7 to 3.0! Elegant Themes!
Darrel Wilson
NEW Divi Theme 3.0 Layout Packs! | Divi Theme Review For Wordpress
Darrel Wilson
Divi Theme 3.0 Tutorials for Wordpress. Coming Soon.
Darrel Wilson
How To Make a Wordpress Website 2017 | NEW Divi Theme 3.0 Tutorial For Beginners!
Darrel Wilson
How To Make A Wordpress Website 2017 | NEW Divi Theme 3.0 Tutorial - AMAZING!
Darrel Wilson
How To Use The Bloom Plugin By Elegant Themes | Add An Email opt-in Form To Your Wordpress Website
Darrel Wilson
How To Advertise Your Website On Reddit 2016 | MARKET Your Website and Get Traffic!
Darrel Wilson
Divi Theme 3.0 Customization | Tips and Tricks For Divi 3.0 for Wordpress!
Darrel Wilson
Divi Theme 3.0 Customization and Review | Tips on Divi 3.0 for Wordpress! MUST WATCH!
Darrel Wilson
Flippa.com Review: Buy And Sell Websites + Domains With Flippa Auctions
Darrel Wilson
Udemy Course: How To Make A Wordpress Website With The Divi Theme 2016! EVERY MODULE COVERED!
Darrel Wilson
How To Create An eCommerce Website With Wordpress 2017 | ONLINE STORE | NEW 3.0 Divi Theme -AMAZING!
Darrel Wilson
FREE and NEW 3.0 Divi Theme Layouts For Wordpress - Review, Tutorial, And Customization!
Darrel Wilson
NEW 3.0 Divi Theme Customization For Wordpress | Create Amazing Animations! -Must WATCH!
Darrel Wilson
How To Add Live Chat In Wordpress For FREE! - Best Live Chat Plugin For Your Website
Darrel Wilson
Yoast Seo Tutorial 2017 - How To Setup Yoast SEO Plugin - Wordpress SEO By Yoast
Darrel Wilson
10k Subscribers. Thank You All!
Darrel Wilson
How To Install and Setup Google Analytics To Your Wordpress Website - 2016! EASY!
Darrel Wilson
How To Advertise and Promote on Youtube For Beginners | Youtube Advertising Tutorial 2017
Darrel Wilson
How To Make A Wordpress Blog - Create A Blog With Wordpress - EXTRA THEME
Darrel Wilson
NEW DIVI THEME 3.0 Layout Packs | Importing Divi Theme Layouts For Wordpress
Darrel Wilson
How To Make A Parallax Wordpress Website 2017 -NEW!!
Darrel Wilson
How To Make The Divi Slider Fullscreen | Divi Theme 3.0 Customization
Darrel Wilson
Elementor Page Builder Tutorial - How To Create A Wordpress Website 2017
Darrel Wilson
SEO For Beginners 2017 | How To Rank High In Google | Freelancer.com Tutorial
Darrel Wilson
Yoast Seo Premium Tutorial 2017 | Wordpress SEO By Yoast
Darrel Wilson
How To Install Wordpress With TMDhosting - MAXIMUM TMDHOSTING COUPON CODE!!
Darrel Wilson
How To Make A Wordpress Website 2019 | Divi Theme Tutorial
Darrel Wilson
Divi Theme Customization: How to Create Diagonal Lines Between Sections in Divi Theme
Darrel Wilson
NEW Divi Theme Tutorial On Udemy And Skillshare! 😀
Darrel Wilson
Unsplash.com: Best Free Photography Pictures and Images From Around The World | Unsplash Tribute
Darrel Wilson
More on: Tool Use & Function Calling
View skill →









Related Reads
📰
📰
📰
📰
I Stopped Paying a Website Builder and Started Building With Claude Instead
Medium · AI
CS-NRRM™: A Practical Implementation of AI-Readable Longitudinal Data Infrastructure
Medium · AI
How Audio-Reactive Visuals Work: A Technical Guide for Musicians and Visual Artists
Dev.to AI
At 50, AI Didn’t Just Change How I Work. It Gave Me a New Hobby With My Granddaughter.
Medium · AI
Chapters (19)
3:32
Get Hosting
7:24
Install Wordpress
11:32
Divi Theme Download
18:34
Creating A HomePage
36:47
Creating A Split Screen
45:16
Text Overlapping
57:55
Double Split Screen
1:08:26
Testimonials and Divi Library
1:18:30
Advanced Design Settings
1:20:30
Footer
1:27:30
Additional Resources
1:32:10
Mobile Optimization
1:35:10
Theme Customization
1:41:15
Divi Library
1:45:06
About Us Page
1:56:56
Slider
2:10:25
Blog
2:18:06
Contact Page
2:33:00
Services Layout
🎓
Tutor Explanation

 DeepCamp AI