How I Built an AI Agent to Automate my Emails in n8n (Step by Step, No Code)
Key Takeaways
The video demonstrates how to build an AI agent in n8n to automate email responses, utilizing tools such as Gmail, Slack, Telegram, and Pine Cone Vector Store, and techniques like conversational AI and vector stores.
Full Transcript
hey guys today we're going to be going over this framework that's going to help you create different AI agents in order to automate your inbox in this workflow that we're going to be walking through step byep today it starts by watching for your emails and then it evaluates them to see if they're customer support related or not if they are it's going to hit the customer support agent that has access to your internal policies your FAQ stuff like that so that it can craft you an accurate draft in that same thread of the original email and then you can go in there and approve it before you send it off and finally it's going to notify you on slack or telegram whatever you want it to be and it's just going to say hey we got this email this is what it's talking about we created a draft if you want to go in there check it out and then send it let's do a quick demo see this thing in action we'll hit test workflow we will see that the Gmail trigger pulls in an email we're now checking if it's customer support it is so it's hitting the agent the agent's looking in our Vector database for information on the policies um it's creating an email right now it just hit it the Gmail tool it made a draft and as you can see we just got a message back in telegram so we got a little summary about what just happened and then if we go into our email we can see that we got this email and then we also have a draft which was you know replying to this email and it has information about what the customer asked about so um that's how this workflow works and you know let's not waste any time and hop straight into the step-by-step tutorial okay here we are within NN as always the first step when you're creating a workflow is to set up the trigger so in here we have the options of we can trigger this this workflow manually we can do it on an app event we can schedule it but here what we're going to do is actually none of these we're going to do a trigger of Gmail so what we want to do is when a email comes through that's when this workflow is going to execute and the agent's going to look at the EML and understand if it's for customer support or not customer support So as always the first thing you need to do is set up your credentials so I already have mine connected here but you need to create a new credential you need to sign in with Google and if you don't understand how to set up your o consent screen and all that you can go into the N end docs super simple or I also made a video about it which I will tag right up here so anyways once we have that connected we need to set up how this is going to work so as you can see our event is on message received that's what's going to trigger this workflow and then we also have a couple other options here which we can simplify or not simplify the um email coming back so let me show you what the difference is there I'm going to come up here and hit fetch test event this is going to pull the most recent email that we got and as you can see we got a snippet which is hey I was wondering how I can track my order also what is your refund policy Thanks James and in this case it's fine as you can see we didn't get a ton of information back this information just got simplified um and like I said in this case it's fine but we're going to turn it off because if you had a longer email the email would get cut off short so now you can see we have a lot more information coming back um it may be a little more confusing to look at but it's important so the agent is going to be able to get full context of the email that is coming through also one quick tip we just trigger this this um email trigger and we want to be able to play with this data for the rest of the workflow while we're testing so if you come up to the top right and hit pin data this data is now pinned once we refresh everything we don't have to reload this trigger we're just going to have this email to play with for the rest of our workflow so fun tip from here we just want to grab a set field so we can clean up some of the data that's coming through through make it easier to look at and also make it easier to reference so I'm going to grab a set field we can just call this um set content that's going to be good enough for us to understand what we're looking at and the first thing that we want to set is the email body so we will have that be the subject and then we're going to scroll down to try to find the actual content that's coming through in the email right here we have um HTML we have textas HTML but we're looking for the actual text which is right here so we're going to grab this field drag that into the value section and now we have json. text but what's actually coming through as json. text is the email so hey I was wondering how I can track my order also what's your refund policy Thanks James so now we have the email coming through you could also go through here and if you wanted to you can set other fields like the subject um like the ID like um you know the the the who it's from that kind of thing but actually what I'm going to do is I want to set the thread ID so we're going to grab the thread ID and this is going to be important so later when we want to create that draft and we want to associate it with this email that's coming through we can plug in this thread ID so that it knows what to respond to so in thread ID we're just going to drag in right there thread ID and this isn't necessary we could always reference it later from the Gmail trigger but sometimes it's easier just to have some information set and that way you know where it is so we'll actually just go ahead and test the step real quick so we can see that what comes through is the email body as well as the thread ID real quick I wanted to introduce you guys to a super cool platform called Mind Studio it's an integrated development environment to develop AI features and workflows without coding making it accessible to developers and non-technical users alike with mind Studio Studio you can access over 50 AI models across text image audio generation and soon even video it's not just about having access to models it's about flexibility that mind Studio can autogenerate workflows using AI train on your data sources scrape the web and execute JavaScript or python code you can mix and match these models to find the perfect balance between cost and performance and you can even deploy AI workers as apps or apis and integrate them with tools like zapier make or virtually any platform that supports HTTP requests if you're intrigued join the free introduct webinar to learn how mind Studio can bring your ideas to life sign up now at the link below in the description got the email we've got the content set now what we want to do is we want to add a large language model to be able to look at the email content and determine if it's customer support related or not so we're going to come into here we're going to add a open AI node we're going to grab a message model node which is oh I passed it right here and now from here you need to just obviously connect your credential we need to choose the type of model so I'm going to go with a 40 mini in this case and then we're going to set the system prompts right here which is going to be let me pull this up in expression mode we're saying prompt analyze the content of the email and determine whether it's related to customer support if the email pertains to any of the following topics Mark customer support is true otherwise Mark is false so we wanted to Output a field called customer support with either true or false and then we just gave it some topics that would be customer support like order status um issues with with damag products returns refunds subscriptions all that kind of stuff and then we just told it to Output the following following um in a Json format Json format with a field called customer support and said it is true or false so we've got that um that's our system prompt this is telling this node how to act now we want to add a user which is just going to be um we're dragging in the email body but first before we do that we want to say here is the incoming email add a little colon in the space and then we'll drag in the incoming email so now it's going to be looking at that email we're going to Output the content as Json so it actually comes out in a field called customer support and we'll hit test step see if it worked so in this case customer support came back true um why we wanted to Output it as Json because if we didn't do this I will just show you real quick it's going to Output as content and then customer support true so it's doing what we want it to but we want the field to actually be called customer support so that we can call it in later so that's why we want to Output it as is Json I'm just going to come in here and call this customer support eval um so now this node is just evaluating if um this this email is customer support related or not all right now that we have that saying true or false what we're going to do in here is grab a switch node so we want two different things to take place if customer support is true then it's going to go off and it's going to create that draft for us in response to that email and if it's false then we want it to go down a different path which will either notify us that we got an email that's not customer support related or you know any other logic so first let's just set up this switch so we're just going to say oops customer support that's what's going on within this node um the first value is going to be um we're saying is customer support right here is this and this is a Boolean as you can see it's not a string so over here the letter a means that this field is a string um this block means that content is an object this little hashtag or what's it called a pound sign shows that index is a digit field or a number field and then finally this check mark just shows that um customer support is a Boolean so we're going to go to Boolean and we're going to say it's true so if this is true um we're going to rename this output and call it Customer Support I'm going to type that a lot in this video and then anyways we're going to we're going to dve drag another one it's going to be Boolean is false and this output is going to be not customer support okay so we'll hit test step we can see because customer support is true it's going to come out the branch of customer support so that's what's going on right here so let's continue down the path of assuming that this is a customer support email we'll drag some logic out this way and in this case what we want to do is now we're going to add our AI agent so in here we are going to call this guy the customer support agent okay so we have a customer support agent this is going to be a we could do a conversational because we want it to um you know respond with very human-like ANW so actually we'll try conversational we're not going to take from previous note automatically we're going to Define below and the text that we're getting is going to be we're feeding it in the original customer support email that's coming through so we're going to go back to the set content node and we're going to drag in the email body this is what we want this customer support agent to look at evaluate grab our information in order to respond to it accurately and then respond to it accurately so um from here we will need to add a system prompt so we'll add this in for now but we will obviously change this up what we want to do next is we want to obviously give the agent a brain so I'm going to come in here and give it for mini um we're going to leave the memory as blank for now but what we want to do is add a tool so we need to give the agent understanding of customer support policies and guidelines for our company so I'm going to grab a vector store tool we're going to call this one customer support docs we're saying that this tool retrieves data about our or no not data we'll do retrieves information about our customer support policies um and faq's okay so Vector store tool we need to connect our model to this as well we'll leave this one as for mini we need to add the vector store which is going to be pine cone um we're adding our index which is sample our name space which will be called customer support and we haven't done this we'll do this in a sec but that's what we're going to be loading it into and then finally we need to choose the actual embedding for our agent or for our Factor store which we're going to do embedding three small so we have this configured um now what we're going to do next is actually add our document to our Pine con Vector store so here's the customer support document that I have right here um customer support policies and FAQs we've got policies FAQs of course this was just generated for me by chat gbt so anyways we have this document we're going to load it into um our pine cone so I have this one already in here as pulling customer support policies and FAQs we'll hit test workflow um we're downloading the file here as binary we're uploading it to Pine Cone we have everything set up in here so that it should be splitting out correctly so now we have all this information within that document embedded up into four different um vectors and then put into our uh what's it called our pine cone and as you can see we're loading it into a namespace called customer support So now back in this agent tool that's why we referenced right here it's look not right here right here it's looking for a namespace called customer support so it should be able to grab accurate information for us real quick guys I just wanted to say if you want to download these templates that are shown in this video go to my fre School Community Linked In the description you'll go to YouTube resources click on the post associated with this video and then you'll have the workflow right here to download also if you're looking to take your nadn and your a automation skills a little deeper check out my paid Community we've got a great classroom that goes over Deep dive topics real project insights with client builds we've got a great community and we've also got um live calls we're doing about five a week right now so hop in here I'd love to see you guys finally if you're looking for me to help you build out this sort of stuff within your business or you're looking for some AI Consulting then book in a call using the link from my website down below and let's talk so in here what we're doing is um the resource is going to be a draft the operation is obviously that we're creating a draft um and now we just need to set up the subject the the text of the email the message and then any other properties which we want to do a thread ID so um first things first we need to configure this node we're going to call this one create draft and we need to set up the subject and the message so what we're going to do is use that super cool from AI expression so we're going to change the subject to an expression we're going to come in here grab two curly braces and we're going to type in dollar sign from we'll grab from Ai and then in the key in quotes we're going to say subject and so this is going to um the agent's going to understand okay I have this email that I just got I'm going to hit the vector database to get information to answer the email and then I'm going to make an email and then I know that here needs to go a subject and then down here needs to go a message so it's just a really cool way to give your agents so was much quicker if you want to see a video about it I made one I'll tag it up here but I kind of go in depth a little more on how these functions work and the value in them anyways down here in quotes we're going to put actually we're going to put email body Okay so we've got that and then finally we need to reference the thread ID so this is also going to be an expression and we need to pull this dynamically from the email that we got in the first place so if you remember we set that earlier with set content so we're going to grab set content we're going to type a do item Json and then finally thread ID so now this is dynamically pulling in the thread ID that's associated with the email that triggered this workflow in the first place and I think we should be good to go here with um this node so we've got our Vector store tool we have our create draft tool and now we just need to make sure that this agent has a prompt so I went ahead and grabbed one already we're going to change this to an expression we're going to open this up and we're going to delete this and paste in this prompt so basically what I said in here was you're highly skilled and empathetic customer support agent specializing in drafting professional and helpful response to incoming emails your tasks are to take the email use the customer support docs tool to look up relevant policies create a draft using the create draft tool and then after drafting the email provide a concise summary of the email content as the output and then I went through specifics context some examples and all that boring stuff um but anyways let's see how see what happens so we're going to test this step we obviously are hoping that um the selected tools are not supported by conversational agent okay well anyways we'll change this to a tools agent and see what happens let me just copy again this prompt because when you change this it's going to um get ready your prompt so we'll grab that in there and let's see did that okay now we'll test the step so it's reading the email it's going to understand to hit the vector store tool to get that policy information now it is going to go back it's going to hit the create draft tool and then create that draft for us so all that finished up let's just see the output that we got which was uh a quick summary of the email which is perfect in the draft we can see that the um subject was order tracking and refund policy the message was dear James thank you for reaching out to track your order you can log in blah blah blah regarding our refund policy digital products are non-refundable blah blah blah and then best regards Kelly customer support ABC Corp so if we were to check in here we would see that um it answered correctly I don't really want to actually yeah sure let's go through it okay what was the first thing we asked um it said to track your order you can lo into the account so let's look at how you track your order track order you can log in your account and visit the order history section or you can use a tracking link okay perfect um and then for refund policy digital products are non-refundable let's look at digital digital products are non-refundable unless there's a technical issue okay so it got the information right perfect and we can go into our Gmail and see if it actually created a draft for us right here we created a draft and it's in response to that earlier email that we sent so now if we like it we can hit send please specify at least one recipient okay so we would have to configure the two which is interesting um is that not something that ah two email okay interesting so what we're going to do is now we're going to grab the two email so that's actually something that you know you learn something new every day so for two email we want to grab that from the Gmail trigger um we're going to be looking at item. Json Dot from Dot value um this is me pretty much just guessing okay actually let's let's do this the easier way okay what we're going to do instead is we're going to set the content over here the two email as well so this is just going to be who it's from and then what we want to do is we want to go all the way down to see who the EML is from right here it's from NK 88 and now we've got that information we'll test this step we have that going through we're going to do this whole process again customer support it is indeed customer support and then right here we want to fill in who this is actually going back to we want to grab um from the set content we're grabbing item. json. from okay so sorry about that now we have the two and the thread ID and all this information so let's try that one more time it's going to do the same exact thing it's going to answer pretty much the same exact way it's going to create that draft for us um so it just created the draft now we got the output and now if we come into here we'll go back into our drafts we can see we have um actually where is it there we go so there's the new one dear James and then it actually has the email which we could send off so you would pretty much just be able to check if you like the way that it looks if not you can make a quick change and then you can send it off so um that's that now what's next so two other things that we want to do here first one is we want to add an option out here which is going to be um let's just do telegram so what we're going to do is we want to just basically be notified that okay we got this email and then we were able to to respond to it automatically so in telegram what we want to do is send a text message I can never find it there it is and um we to connect to your account and then we want to be sending a message obviously we're going to have to configure our text ID and our sorry our chat ID and our text so real quick let me show off a how you get your chat ID in telegram so if you go to the trigger we'll do on message okay so I'll hit test step in telegram I will bring in my telegram trigger and just say hi and now we can come through in here and we can see the chat ID so we got our chat ID right here I'm now going to paste that into our chat ID field and now we're good to go with this um we can get rid of this trigger and then finally what we need is we need the response from our agent so this is going to be an expression it's going to be json. output because that's what's coming out from the agent and then finally we're just going to turn off the append andent attribution we'll just call this response okay so now once that happens and the agent responds to a customer support email it's going to let us know that that happened and we can configure that later and say like okay we got an email from blank and it said blank and we sent it at this time but for now we'll keep it simple okay now to set up what happens if we get an email that's not Customer Support I'm going to copy this telegram we're going to paste it down here and we're going to configure this so the chat ID is going to be the same the text is not we're going to say you received an email at um we can do ass sign now. format so we've got the that information we can do um minute minute okay so at 429 um on you know we can change this too so let's say we just wanted to do um actually no we'll just do time so you just received an email at 4:30 um saying and then we can grab the actual content of the email so we'll do the same thing set content. item do Json dot I don't know it just hasn't been executed so what do we set that as um email body is that what it was uh let's see emo body okay so that should work now um go ahead and save that and so this is pretty much where we're at so let's real quick let me send off an email that's not customer support related and we'll see what the response is okay so yeah thank you for meeting last week discussing our quarter for marketing strategy I'm pretty sure this should be evaluated as not customer support so we'll run this through we'll see there we go not customer support and then if we hit this we got the telegram notification of we received an email at 432 saying dear Alex blah blah blah so this obviously needs to be formatted differently um we would just come in here and we would change the way that this is coming through but this is just to show you you know what you can do as far as how you can set up different logic so maybe we'd set it up like that put a colon right here and then we get this answer instead um so that's you know if it's not customer support it'll go this way if it is customer support it'll go this way create a draft and then it will actually send you response so what we should do real quick is let's make this workflow active got it and let me fire off an email and then we will see um you know the live execution of this happening without us having to test anything okay so I pretty much just sent off an email um I've got my telegram pulled up the workflow is active we will be watching to see when this happens as far as when the draft gets created and when telegram message comes back okay so I just got that telegram message back it said that it drafted an email response addressing David's concerns about a defected product um the response includes instructions on how to report the defect it gives us a summary where David informs about blah blah blah and wants to speak to a live rep so we got that message and now we can go into our email if we go to the thread we will see that there's a draft created right here for us it has a two field already and it pretty much tells him how to handle talking to a live rep and what what he should do with his defective product so we can prove that we like it we'll send it off and um yeah that's going to be how that works if we go into here we can see this was the live execution that just took place because the workflow was active now and it went through the branch of customer support it went through the agent it hit the vector database it hit the draft and then it finally sent us that telegram message so that's going to be it for this one I know that it was a a pretty simple walkthrough of a build it uses some conditional logic it uses an agent and um aspects of rag as well as creating a draft using an email tool and if you guys guys appreciated this one I would really appreciate if you could drop a like it really helps me out subscribe for more NAD and AI agent tutorials and I will see you guys in the next one thanks
Original Description
📌 Join my free Skool community for access to the workflows seen in this video! 👇
https://www.skool.com/ai-automation-society/about
🌟 Join my paid Skool community if you want to go deeper with n8n and AI Automations👇
https://www.skool.com/ai-automation-society-plus/about
🚧 Start Building with n8n! (I get kickback if you sign up here - thank you!)
https://n8n.partnerlinks.io/22crlu8afq5r
In this video, I walk through step-by-step how to build out an AI Agent workflow that identifies if emails are customer support related, and if they are, the agent will draft a response for you in the email thread so all you have to do is review it and send it off. The agent accesses your policies and FAQs, so you know you can trust its response. As always, I built this one in n8n using no code! This is a good foundation to expand off of this workflow to integrate more AI Agents to even further automate your inbox and emails.
If you're passionate about no-code AI automations, don’t forget to like, comment, and subscribe for more content like this! Your support helps me keep bringing you valuable tutorials and tips. 🚀
Business Inquiries:
📧 nateherk@uppitai.com
WATCH NEXT:
https://youtu.be/u2Tuu02r7QI
TIMESTAMPS
00:00 Demo
01:11 Gmail Trigger
02:56 Setting Fields
05:05 Checking if Customer Support Email
08:26 Customer Support Agent
09:35 Vector Database for Knowledge
12:02 Create Draft Tool
13:38 Customer Support Agent Prompt/Testing
17:43 Telegram Responses
21:08 Active Workflow Test
Gear I Used:
Camera: Razer Kiyo Pro
Microphone: HyperX SoloCast
Background Music: https://www.youtube.com/watch?v=Q7HjxOAU5Kc&t=0s
Don't forget to like, subscribe, and hit the notification bell to stay updated with my latest videos on AI agents and automations!
Playlist
Uploads from Nate Herk | AI Automation · Nate Herk | AI Automation · 39 of 60
1
 2
2
 3
3
 4
4
 5
5
 6
6
 7
7
 8
8
 9
9
 10
10
 11
11
 12
12
 13
13
 14
14
 15
15
 16
16
 17
17
 18
18
 19
19
 20
20
 21
21
 22
22
 23
23
 24
24
 25
25
 26
26
 27
27
 28
28
 29
29
 30
30
 31
31
 32
32
 33
33
 34
34
 35
35
 36
36
 37
37
 38
38
 ▶
▶
 40
40
 41
41
 42
42
 43
43
 44
44
 45
45
 46
46
 47
47
 48
48
 49
49
 50
50
 51
51
 52
52
 53
53
 54
54
 55
55
 56
56
 57
57
 58
58
 59
59
 60
60

How I Wish Someone Explained AI Agents To Me (as a beginner)
Nate Herk | AI Automation
How to Create an AI Email Agent with n8n (No Code, Step-by-Step Tutorial)
Nate Herk | AI Automation
How to Create an RAG Chatbot AI Agent with n8n (No Code, Step-by-Step Tutorial)
Nate Herk | AI Automation
Build your first NO CODE AI Agent in n8n (for beginners)
Nate Herk | AI Automation
*LIVE BUILD* Personalized Outreach AI Agent in n8n (No Code)
Nate Herk | AI Automation
*LIVE BUILD* Inbox Management AI Agent with n8n (NO CODE, Step-by-Step Tutorial)
Nate Herk | AI Automation
How to Build a Google Scraping AI Agent with n8n (Step By Step Tutorial)
Nate Herk | AI Automation
How to Build a Client Onboarding AI Agent with n8n (Step-by-Step Tutorial, No Code)
Nate Herk | AI Automation
I Built a Personal Assistant AI Agent with No Code in n8n
Nate Herk | AI Automation
Build a No-Code AI Chatbot (Step-by-Step Tutorial)
Nate Herk | AI Automation
I Built an AI Agent that Automated my Inbox with n8n (No Code)
Nate Herk | AI Automation
Step-By-Step: Add 100+ Files to Pinecone for RAG AI Agent with n8n
Nate Herk | AI Automation
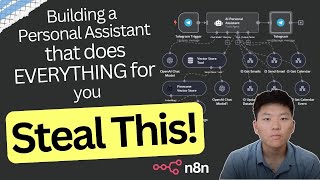
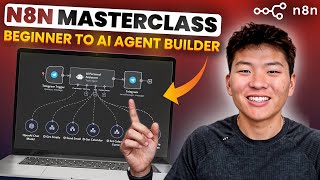
n8n Masterclass: Build AI Agents & Automate Workflows (Beginner to Pro)
Nate Herk | AI Automation
Scrape Google for LinkedIn Profiles in Seconds with n8n
Nate Herk | AI Automation
Step By Step: Automating Lead Nurturing with No Code in n8n
Nate Herk | AI Automation
n8n AI Agent Masterclass | AI Nodes Made Simple
Nate Herk | AI Automation
AI Personal Assistant 2.0 | This Agent Calls Other Agents (No Code) in n8n
Nate Herk | AI Automation
The Best Way to Give AI Agents Tools in n8n
Nate Herk | AI Automation
I Scraped, Researched, and Created Outreach for 16,846 Leads using Godmode HQ
Nate Herk | AI Automation
AI Agent Prompting Masterclass: Beginner to Advanced
Nate Herk | AI Automation
How to Build an AI Slack Assistant in 5 Minutes (Chatbase)
Nate Herk | AI Automation
Step by Step: Scrape UNLIMITED Emails for FREE with n8n
Nate Herk | AI Automation
Chains vs AI Agents in n8n #artificialintelligence #shorts
Nate Herk | AI Automation
Step by Step: RAG AI Agents Got Even Better
Nate Herk | AI Automation
n8n vs Make.com #artificialintelligence #coding #agentgpt #techtok
Nate Herk | AI Automation
How to Build a Personal Assistant AI Agent in n8n (Step-by-Step, No Code)
Nate Herk | AI Automation
Personal Assistant AI Agent in n8n #n8n #coding #agentgpt #artificialintelligence
Nate Herk | AI Automation
Set up Google Credentials in n8n in 5 minutes (2025)
Nate Herk | AI Automation
5 n8n Tips You NEED to Know
Nate Herk | AI Automation
Build this Multi AI Agent System for Research and Content Creation in n8n
Nate Herk | AI Automation
Vector Database Optimization with n8n: Metadata, Text Splitting, & Embeddings
Nate Herk | AI Automation
Are you doing these things to optimize your Vector Database? #artificialintelligence #n8n
Nate Herk | AI Automation
This AI Agent Extracts Text From Images in n8n
Nate Herk | AI Automation
This Invoice Agent Analyzes Images in n8n #techtok #agentgpt #artificialintelligence #n8n
Nate Herk | AI Automation
The Best RAG System On YouTube (Steal This!)
Nate Herk | AI Automation
RAG System 2.0 | Effortless RAG in n8n #artificialintelligence #n8n #aiagent #RAG
Nate Herk | AI Automation
Understanding APIs in n8n (as a beginner)
Nate Herk | AI Automation
Understanding APIs in n8n #n8n #artificialintelligence #api
Nate Herk | AI Automation
How I Built an AI Agent to Automate my Emails in n8n (Step by Step, No Code)
Nate Herk | AI Automation
This AI Agent automates my customer support emails. #n8n #aiagent #artificialintelligence
Nate Herk | AI Automation
Everything I Learned About AI Agents in 2024 in 19 Minutes
Nate Herk | AI Automation
Build AI Agents for $0.014 with DeepSeek V3 in n8n
Nate Herk | AI Automation
Having an Actual Conversation with Data Using an ElevenLabs Voice Agent and n8n
Nate Herk | AI Automation
Having an ACTUAL conversation with my data using ElevenLabs Voice Agent #aiagent #elevenlabs
Nate Herk | AI Automation
ElevenLabs Voice Agents Are So Easy to Build (No Code!)
Nate Herk | AI Automation
How I'd Teach a 10 Year Old to Build AI Agents (No Code, n8n)
Nate Herk | AI Automation
How I Built A Technical Analyst AI Agent in n8n With No Code
Nate Herk | AI Automation
This AI Agent Analyzes Stock Indicators! #n8n #artificialintelligence #coding #agentgpt #techtok
Nate Herk | AI Automation
I Built a Team of Research Agents for Newsletter Automation in n8n (No Code)
Nate Herk | AI Automation
This Team of AI Research Agents Automated My Newsletters! #n8n #artificialintelligence #aiagent
Nate Herk | AI Automation
The Ultimate n8n Starter Kit (2025) (Free)
Nate Herk | AI Automation
Two Ways to Save 96% of Your Money Using DeepSeek R1 in n8n
Nate Herk | AI Automation
How to Actually Build Agents with DeepSeek R1 in n8n (Without OpenRouter)
Nate Herk | AI Automation
This Voice Agent Sends Emails for You #artificialintelligence #n8n #aiagent #coding #agentgpt
Nate Herk | AI Automation
Best Model for RAG? GPT-4o vs Claude 3.5 vs Gemini Flash 2.0 (n8n Experiment Results)
Nate Herk | AI Automation
How to Locally Host DeepSeek R1 for FREE in Under 10 Minutes in n8n
Nate Herk | AI Automation
OpenAI Fires Back at DeepSeek With a New Reasoning Model: o3-mini (n8n AI Agent)
Nate Herk | AI Automation
Run DeepSeek R1 Locally in Under a Minute #coding #artificialintelligence #n8n #deepseek
Nate Herk | AI Automation
I Built the Ultimate Team of AI Agents in n8n With No Code (Free Template)
Nate Herk | AI Automation
I Built the Ultimate Team of Agents in n8n #artificialintelligence #n8n #agentgpt #techtok #coding
Nate Herk | AI Automation
More on: Tool Use & Function Calling
View skill →









Related Reads
📰
📰
📰
📰
How to Use AI Without Losing Your Writing Voice
Medium · ChatGPT
10 Free AI Tools That Are Actually Useful in 2026
By TechSimple |
Medium · Startup
We Changed How Work Software Works
Medium · Startup
Yazılımcı Arkadaşlarınızı Engellemeden Önce: Yapay Zekâyla Ücretsiz Web Sitenizi Yapın
Medium · ChatGPT
Chapters (10)
Demo
1:11
Gmail Trigger
2:56
Setting Fields
5:05
Checking if Customer Support Email
8:26
Customer Support Agent
9:35
Vector Database for Knowledge
12:02
Create Draft Tool
13:38
Customer Support Agent Prompt/Testing
17:43
Telegram Responses
21:08
Active Workflow Test
🎓
Tutor Explanation

 DeepCamp AI