Using VS Code with Python for Data Science / Data Analysis - P.5
Key Takeaways
The video demonstrates how to set up and use Visual Studio Code (VS Code) with Python for data science and data analysis, covering topics such as creating a new project, enabling linting and debugging, and using Jupyter Notebooks.
Full Transcript
what up data nerds i'm luke and welcome to my channel where i make data visualization easy in this video today we're gonna be focusing on how to get up and running with vs code using python so we're gonna be focusing on many of the high topic areas um not getting into the deep uh details with vs code but actually looking at things that you'll be using on a daily basis if you're running python inside of vs code we're gonna be covering three main points today so the first thing is going to be what you need to know to get up and running and get started so it's going to be going in creating a project creating a new python notebook enabling linting enabling formatting and get everything set up for you to go and code second thing we're going to be looking at the sidebar and the bottom ribbon and some of the other features that python and vs code have within it that you should be taking advantage of and then the third thing sort of a bonus we're going to be looking at jupiter notebooks and how to run jupyter notebooks inside of vs code one quick note this video assumes that you have vs code installed on your computer and then you also have python installed on your computer i have a link up above that i'll include on how to install vs code and also i'll include a link as far as how to install python onto your computer so with that let's jump right in so here i am on a mac machine with the vs code open one thing to note we'll be covering the difference between windows and mac specifically the only main differences are the shortcuts for shortcuts if i'm calling them out they probably are something that i would commit to memory because they're going to make your work life so much more easier whenever you're going to actually go through and make these projects so let's say we want to start a new project we come into vs code we click up at the top of this explorer right here and then from there we would want to open the folder where we're going to be having our project and i'll click open folder and from here i could select a project that i had already so i have projects that i keep organized like this but we'll go ahead and just start a new folder and we'll call this project example here we are with project example open and if we come and actually hover over project example we can see we have a few different options the two main that i'm going to call out so we can create a file if we want so we'll be creating a hello world.py file and you can see that as i'm typing uh vs code picked up the the python and the um what type of file it is um no python interpreter is selected i'll get to that in a second and then you can also do something like add a folder so if i had some sort of sub directory um i could create a folder for that and put files inside of it so now acknowledging this warning it's saying hey no python interpreter is selected we need to select a python interpreter so we can do things like linting and debugging it also has this down here so you could select either one of these two i'm just going to select down at the bottom left now if i select it it's going to go through and it's going to tell me okay i have python 2.7 installed on my computer and i have some other versions of python installed on my computer that i have virtual environments already set up for within anaconda because this is a new project i highly encourage anytime you're starting a new project to create a new virtual environment and if you're unsure on how to do that i have a video that i'll include a link at the top of the screen but i'm going to go ahead and create a virtual environment for this project real quick i'll escape out of here and escape out of this as well and then i want to launch the terminal so i'll i can come up here to terminal and select new terminal or i can just commit to memory control tilde and it will pop open a terminal and for this we'll be using anaconda like i said so i'll create a new environment so the new environment is created and as it says hey we can activate it so i can come here and if i wanted to i can uh kind of activate the uh project virtual environment that i just created and it will say right here in the terminal hey it's activated but we still need to with nvs code select this python interpreter and if i come into here and try to look for it you're not going to find it because we need to actually reload vs code and this is just specific to anaconda itself but if we wanted to uh another shortcut that you need to have to that you should have to memory is pressing command shift p and that's specific to mac on a windows it would be ctrl shift p and this is going to open the command palette and so anytime you need anything you want to be opening up the command palette and you can easily search for a lot of different features within vs code so for this i want to basically restart or reload vs code so i'll come in and type reload window and this is what i want and if i'm not going to memorize this one but it's command r for that and then so i reloaded the window and it says prompts me again hey we need to select a python interpreter so i'll come down here say select python interpreter and now whenever i scroll through i'll find that the project virtual environment is there so i'll select this and so now it is selected i'll close out of this pop-up right here and then remember we want our terminal to also be inside of that virtual environment so let's just go ahead and trash can this and then press ctrl tilde and whenever we relaunch the terminal it will relaunch within the project virtual environment which is really neat so anytime we relaunch this folder or directory it's going to relaunch into the virtual environment for the terminal so i'm going to go ahead and clear the terminal real quick so now we're almost there to having the vs code set up we still need to enable a few more features so let's just enter some code in here so we'll do a simple print hello world example and so i'll just put it in here and we can see i can select run from up at this gui icon or i can come up to the top and click run without debugging or start debugging so i'll run without debugging and it runs it within our terminal and as we can see it prints out the uh hello world so i'll go ahead and clear okay so the one thing is if we have we need to enable linting and we need to understand what linting is first if you don't so say we had python2 syntax in here on accident so this is not an acceptable way to write a print statement in python uh python 3 3 version and but i'm not getting any prompt that this is incorrect and there's nothing like we should have some something like a spell check or some sort of way to show us is the user that we've written this code incorrectly because if i want to run this it would give us an error but let's let's enable linting to help us as a user to see this easier so from here i will uh command shift p to open the palette and then i'll type in linting and we want to enable linting and we want to turn it on okay so linting is enabled but you can see that it's still not picking up that there's an error with this code and that's because we don't have a linter installed sometimes whenever you launch vs code it will prompt you to install a linter such as pylint i would encourage you to just do it then whenever it does prompt you to do it but in this case it didn't prompt us to do it so we're going to have to actually install it so you can either use pip i'll be using conda for this and i will conda install pilot so we have enabled linting and then we've installed pylon into our virtual environment but we need now need to reset the window to make sure that it's working properly so again we'll go to command shift p and we'll reload the window and then now we're getting this squiggly lines right here and it's telling us hey we're you're missing parentheses in a call to print did you mean print hello world and so that's pretty neat and also you can see it uh down at the bottom here in the bottom ribbon they have uh the errors appearing as well so you can see the problems and errors as you go and the last thing to note is i think it's pretty neat feature right here but this you can't really see it because we don't have a lot of code but it will actually highlight on your script where you have errors so if i had a lot of different code it will call out the red on where the errors or conditions are that we want to look at so let's go ahead and fix this then and save it the last thing i want to call out is this folder that was now created this dot vs code dot in front means that it's going to be hidden if you were to look in the directory but hey why was this created and it was created because it updated our settings and remember we went in and enabled linting we put it to true and so this just creates a settings file within vs code so don't be uh don't worry about this too much just know that it's going to be there and if you wanted to add additional settings this will get updated um just i wouldn't delete it the next thing to look into is the formatting and for python itself you go to python.org we can look at they have a uh pep manual so python enhancement proposals and it has different guidelines for how you should be using python and the one thing that you'll hear people talk about a lot is pep 8 and that's the style guide for python code and there's a specific amount of white space you should be using in certain expressions how you should be using string quotes naming conventions that you should be using so there's a lot of information on how you actually should be formatting your code we can enable formatting within vs code so that way it adheres this guidelines and if it's ever not adhering to this it will auto correct it to understand formatting better let's look at a simple if statement because that requires certain formatting and we'll look at this and see how this can help us out so coming down i'm going to create a simple if statement i'll type in if and another great feature of vs code is it provides code state us code snippets and you can see it automatically fills in the formatting and what it expects the structure of a if statement to be so i'm going to go ahead and fill this out for a if statement real quick okay so we have our simple example here i'll go ahead and press command s and then just to show it it's hey we assigned x equal to zero if it's less in this if statement we said hey if x is less than one we expect it to print x is less than one and else it's going to print x is greater than one so i'll run this and as expected hey x is less than one so let's go ahead and clear this so per the pep manual if i bring this back over here for code layout they expect the indentation is to use four spaces per indentation level and uh using vs codes uh code snippet it automatically did these four but let's say you're just going through and doing uh tab and let's say you also do some things like you don't have spaces in between the uh um the equal sign here um it's correct syntax actually puts space in between here to make it more readable as well but if i ran it it would still run properly but this is not necessarily best practice for the formatting that it's in currently so let's enable formatting we can come and press command shift p or control shift p and then we'll do a format document so we'll come here and select format document and it says hey formatter auto paper auto pep 8 is not installed do you want to install yes and you can also use black or uh ypf i recommend just using auto pep 8 and we want to install in our case we're using condes so we'll install using condom and we'll go ahead and type in the command for us install the packages and i'll go ahead and clear this so now if i wanted to format this file i'd go back to the command palette and do format document and you could memorize the shortcut as well i'm going to show you an easier method but i can select format document and as you can see hey it removed the spaces so just uh show the example of messing this code all up and so now there's extraneous spaces in between here we'll put a space here and we'll now we'll format it go to format document and it puts it back to how it needs to be formatted properly but that's a little bit of work i recommend like linting linting does it whenever we save we should also format when we save so a quick way to do this is we will pop open the settings and i'll put this down and then we'll just type in uh format and what i want is to format on save so i will click this right here and it will format on save now and then from here i can close out of settings and just to show the example again if i put some weird spaces in here and then click command s it will format the code correctly upon save the last optional feature that i'm going to recommend that you do is to go in and install install and an extension so i want to open up extensions um i'll pop it open right here it's a little square looking icon and one thing to note is we do have python installed already um the one that i'm going to recommend that we install is code runner and it's going to make running code a lot easier and it's going to make it to where you can just use a shortcut to run your code so i'll click install this extension one of the key features of this is you can run the code and you can just see it in the output pane which will show and you're not just limited to just do it inside of the terminal itself and that's what it's saying right here view output and output window and to run the code it's really simple we would just remember that we have a shortcut of control alt n so let's go ahead and show this in action so if i press ctrl alt n it will go ahead and run the code and it's going to be putting it in the output pane now and we're not doing it through the command prompt but so it's really easy to actually troubleshoot and you can actually see what the time it took to run your code and it's a lot quicker i feel from a work perspective to run code this way so that covers the features that you need to know to get up and started and running let's move into other features within python that sure or other features within vs code that you should be taking advantage of so i'm going to go ahead and close out of this and this as well one thing to note i can press command plus or command minus to make the screen size bigger and smaller so let's start looking at this sidebar right here we already covered the explore menu of how to get into the different the project itself the next key thing to look at is search and search is i mean like you would expect if you type in some sort of thing it will say hey print uh it will i want to search for print it would find all the different values of print within all the different files and show you it there now let's say we wanted to do a search and replace um this if it's not appearing you would just click this arrow right here so let's say we don't want to use x anymore for our variable we want to use y so i could take x replace it with y and then from here i'd click this button off to the side that says replace all and it has has hey replace four occurrences yep replace it and now y is in our code instead of x so moving on is source control and i highly recommend if you're doing like a major project to initialize a repository using git and so we'll just show a quick example here on the usefulness of it so i'll click initial repository and don't worry too much if you're not familiar with git and source control that's a whole other topic but this is going to be a brief introduction and so we can see hey we're on this master branch of the setting and we have changes so if we wanted to we could add these changes right now we have two of the hello world.py and the settings.json so i can go ahead and commit or add these changes itself and from here let's say go back to this example where let's take y and replace with z and do a replace all and replace now if i come over i have my source control telling us i have these four different things happening but i have this icon up here here and what i can do is i can actually compare the differences between the two files itself it'll highlight in red from the original file green or the original file on the left and the new file on the right and highlight what these changes are but gets a whole another subject that gets uh really more in depth but i just wanted to show a quick overview of this so let's go ahead and escape out of this i'll uh close it the next thing to look at in the ribbon is the debug function itself and in order to run and debug properly we need to create a launch.json file so the first thing you need to actually do is is click this to create one and it's a we're using python so we'll click python file and this will just have the launch.json pop up and we don't really need this open for our uses but now we get into the actual view that we would expect to see for debug so if i open this up a little bit so let's just add to this code slightly to show this example better i'm going to just make this message equal to and then here outside of the if statement itself i'll click uh we'll do the print and for the run and debug if we say we just ran this code itself um hey we expected to say hey z is less than one let's say we want to stop at a certain portion so let's say we just want to stop up at the the top line and then step our way through the code and that means just go line by line and if we wanted to start running we would want to press f5 on on a mac you're going to it will be the same windows f5 as well and what it's going to do is it's going to pop up something so first all it so we're inside of the code um and we have this yellow arrow right here and it's showing hey you're right here on this line and you have these few features located up at the top we can continue to run the rest of the code we can do a step over uh step into step out and restart the code if we want and then if we want to just completely stop we can press stop itself and so what's really neat is you can actually see things as they go along so our local and global variables so let's say we go to the next line so we're at uh the next line is the line two it now notices that hey we have the z variable and it has z equals to zero and if i go to the next one and now it's doing the if statement itself and we would expect now that the special variables message would appear next and so yeah it does it pops so now message z is less than one is appearing it doesn't it skips the else statement because z was less than one and now we're at print message and we can go over this and then we finish it if we wanted to we could also add expressions to watch so say i wanted to watch a message and we hit this breakpoint as well and we do f5 we step into it message there's so right now name message is not defined but as i go along i can see that after we get through that hey now it gets updated and this is a good way to track and understand what's going on inside of your code and maybe watch certain variables and see how they change as they go through but let's go ahead and go all the way through and finish this out okay so that's enough on debug so closing out of the debug and closing out of the terminal now we can remove this breakpoint for the last portion let's look how we can use jupyter notebooks inside of vs code so we don't need this hello world anymore and i opened up or the explorer and we can either create a new file and it will automatically pick up that there's a jupiter notebook um now that i have started this python notebook i need to use ipy kernel to be installed so i'll click install so it is now installed if you can't remember the nomenclature for a jupyter notebook another easy way is just open the command palette and type in jupiter and from here we can say hey create new blank jupiter notebook and it will create this new notebook for us and then we'd have to actually save it into this directory but i'm going to go ahead and close it so i'm going to go ahead and put some code inside of here and one thing that really is great about the using a jupyter notebook inside of vs code is it's using intellisense and so we're getting these auto suggestions already and so i can get a lot of different suggestions that i should be on what i should be typing this normally isn't available especially if you're using jupyter notebooks inside of your web browser it's not going to be available so for this i'm just going to be using a pandas library don't worry if you don't understand too much about this this is just to show the example of using jupyter notebook to the to more of a maximum extent and this is just one uh cell right here so for this one i want to just note that hey we imported uh pandas and if i wanted to execute it i'd press ctrl enter or if i wanted to execute it i could also click this run cell right here and it's saying hey pandas is not installed so you're getting this troubleshooting right here inside of the jupyter notebook itself i need to install pandas so i'll just come in control tilde conda install pandas so pandas install i'll close out of the terminal and then i'll run this again by pressing ctrl enter and not no longer getting a warning message and right here it has that uh the green asterisk um so it was slowly loading and get the statement of pandas is imported now i'm going to just go ahead and insert some other code uh below this and if i wanted to even add another cell i would click that plus icon right here and then if i wanted to so i have all these different cells like i go through line by line and clicking this run button or i can come up here to the top and just click this run all and what it will do is it will go through and it will run all and obviously i have an error right here so we talked about already you can run all cells you can have a cell selected in this case so we have this one selected if i want to run this one again above it i would just click uh this button right here to run the cell above it if i was selected on this cell i could run the cell below it and then if i wanted to i could restart the iphone kernel or interrupt the kernel if it's taking say you're you accidentally get into a loop that you need to stop this would be a great little feature to use right here if i wanted to i could clear all the output and just get the code again and then but i want the output so i'll run all these cells again a great feature that i really like is this show variables active in the jupiter kernel and it will actually show you all the different variables that you have so in our case i have a d for a dictionary a df for the data frame and you don't have to use python code to actually look at this you can just press this right here to explore your different variables and when i'm done with this i can just close out of it and it'll close down the server previously you'd have to use your terminal to launch a jupyter notebook and then you'd have to remember that you had a server running and shut down the server so there's a lot of benefits and the it's very the process is very much streamlined when you're using vs code bam so there you have it that's how you get up and running with vs code for python as a quick recap we covered three main things so the first thing was getting started with a project how to set up things such as formatting and linting and installing extensions such as code runner the second thing we moved into additional features so understanding how to use git control the debugger and all the features that are encompassed with that and then finally we moved into using jupyter notebooks within vs code which is my personally my favorite way to run python code quickly and experiment with different things as a quick shout out this video is part of a series where we go through to understand the basics to get up and running with python on your computer we don't really focus on coding itself but we more focus on the tools necessary to be installed on your computer to run python for the next portion of the series i'm going to be shifting to just basic python and understanding the language itself and what's inherent to the core python language so be sure to check that out so if either of those series seems interesting consider subscribing also be awesome if you smash that like button and comment down below on your favorite features in vs code and what you'd like to learn in python hope to see you again
Original Description
Python Fundamentals Course (DataCamp) 👉🏼 https://lukeb.co/PythonBasicsDataCamp
Data Analyst Track w/ Python (DataCamp) 👉🏼 https://lukeb.co/PythonAnalystDataCamp
(My recommended courses that I took to learn Python!)
For this video we cover how data analysts and data scientists set up and use Visual Studio Code (VS Code) with Python. For this we cover the basics of controls and other important features you should be using during development. Finally, we wrap things up with covering how to use Jupyter Notebooks inside VS Code.
My playlist for starting Python 👉🏼 https://www.youtube.com/playlist?list=PL_CkpxkuPiT9udgCeqZpS4HKF6uIzra3r
Download Python w/ Anaconda here 👉🏼 https://www.anaconda.com/products/individual
Download VS Code here 👉🏼 https://code.visualstudio.com/download
Certificates & Courses
==================================
Coursera Courses:
📜 Google Data Analytics Certificate (START HERE) 👉🏼 https://lukeb.co/GoogleCert
💿 SQL for Data Science 👉🏼 https://lukeb.co/SQLdataScience
🧾 Excel Skills for Business 👉🏼 https://lukeb.co/ExcelBusinessAnalyst
🐍 Python for Everybody 👉🏼 https://lukeb.co/PythonForEverybody
📊 Data Visualization with Tableau 👉🏼 https://lukeb.co/Tableau_UCDavis
🏴☠️ Data Science: Foundations using R 👉🏼 https://lukeb.co/RforDataScienceJH
Coursera Plus Subscription (7-day free trial) 👉🏼 https://lukeb.co/CourseraPlus
DataCamp Courses:
🐍 Python 👉🏼 https://lukeb.co/PythonBasicsDataCamp
📈 Power BI 👉🏼 https://lukeb.co/PowerBIDataCamp
📊 Tableau 👉🏼 https://lukeb.co/TableauDataCamp
🏴☠️ R 👉🏼 https://lukeb.co/RDataCamp
🐍 Data Analyst w/ Python 👉🏼 https://lukeb.co/PythonAnalystDataCamp
DataCamp Subscription (Monthly $25USD) 👉🏼 https://lukeb.co/DataCampSub
👨🏼🏫 All courses 👉🏼 https://kit.co/lukebarousse/data-analytics-courses
My Tech for Data Science
(Includes Amazon Affiliate Links)
==================================
💻 Dell New XPS 13 (PC of choice) 👉🏼 https://geni.us/DellNewXPS13
💻 Dell New X
Watch on YouTube ↗
(saves to browser)
Sign in to unlock AI tutor explanation · ⚡30
Playlist
Uploads from Luke Barousse · Luke Barousse · 15 of 60
1
 2
2
 3
3
 4
4
 5
5
 6
6
 7
7
 8
8
 9
9
 10
10
 11
11
 12
12
 13
13
 14
14
 ▶
▶
 16
16
 17
17
 18
18
 19
19
 20
20
 21
21
 22
22
 23
23
 24
24
 25
25
 26
26
 27
27
 28
28
 29
29
 30
30
 31
31
 32
32
 33
33
 34
34
 35
35
 36
36
 37
37
 38
38
 39
39
 40
40
 41
41
 42
42
 43
43
 44
44
 45
45
 46
46
 47
47
 48
48
 49
49
 50
50
 51
51
 52
52
 53
53
 54
54
 55
55
 56
56
 57
57
 58
58
 59
59
 60
60

Connect Google Sheets to Tableau & Joining Data - Tableau Tutorial P.1
Luke Barousse
How To Use Tableau Desktop Controls - Tableau Tutorial P.2
Luke Barousse
Dimensions Vs Measures (Blue Vs Green Data) - Tableau Tutorial P.3
Luke Barousse
Create Stacked Bar Chart (and any other visuals EASILY!) w/ Show Me! - Tableau Tutorial P.4
Luke Barousse
Conditional Format Tables in Tableau (Like Excel!) - Tableau Tutorial P.5
Luke Barousse
Calculated Fields in Tableau (Formulas & IF Statements) - Tableau Tutorial P.6
Luke Barousse
Parameters (Create & Use in Calculated Fields and/or Visuals) - Tableau Tutorial P.7
Luke Barousse
Totals, Average Lines, & Trend Lines (Analytics Pane) - Tableau Tutorial P.8
Luke Barousse
How To Create a Dashboard - Tableau Tutorial P.9
Luke Barousse
Upload your dashboard to Tableau Public - Tableau Tutorial P.10
Luke Barousse
Install Python for Data Science on Mac & Windows (PC) with Anaconda - P.1
Luke Barousse
How to run Python for Data Science - Editors vs IDEs - P.2
Luke Barousse
Install VS Code with Python for Data Science / Data Analysis - P.3
Luke Barousse
Understanding Virtual Environments for Data Science / Data Analysis - P.4
Luke Barousse
Using VS Code with Python for Data Science / Data Analysis - P.5
Luke Barousse
Python for Data Science / Analysis ft. 'The Office' Dataset - P.0
Luke Barousse
Python Objects frequently used in Data Science / Data Analysis - P.1
Luke Barousse
Python If Statements for Data Science / Data Analysis - P.2
Luke Barousse
Python For & While Loops for Data Science / Data Analysis - P.3
Luke Barousse
Python List Comprehension for Data Science / Data Analysis - P.4
Luke Barousse
Python Functions for Data Science / Data Analysis - P.5
Luke Barousse
Lambda Functions for Data Science / Data Analysis - Python P.6
Luke Barousse
How NOT to learn Python for Data Science
Luke Barousse
What is Business Intelligence (BI)? 📊😅
Luke Barousse
Top 3️⃣ Technical Skills for Business Intelligence 📚📊
Luke Barousse
Top Non-technical Skills for Business Intelligence 📊👨🏼💻
Luke Barousse
M1 vs Intel Mac for Data Science
Luke Barousse
M1 vs Intel Mac for Excel 📈👨🏼💻
Luke Barousse
M1 vs Intel Mac for Python 🐍👨🏼💻
Luke Barousse
M1 vs Intel Mac for Business Intelligence Tools 💻📊
Luke Barousse
M1 Macbook Air vs Pro (8 vs 16 GB) for Data Science
Luke Barousse
Python for M1 Mac vs Intel (SPOILER: M1 is 2x faster)
Luke Barousse
Data Analyst's WFH Setup & Upgrades
Luke Barousse
Windows on the M1 Mac - What are your options?
Luke Barousse
Install your favorite Windows app on M1 Mac - ft. Parallels
Luke Barousse
Data Science shortcuts for Mac
Luke Barousse
Day in the life of a data analyst
Luke Barousse
Power BI vs Tableau - Best BI Tool
Luke Barousse
Mac Vs PC - BEST for Data Science
Luke Barousse
Data Scientist vs Data Analyst (funny!)
Luke Barousse
Become a DATA ANALYST with NO degree?!? The Google Data Analytics Professional Certificate
Luke Barousse
Certificates vs Degree for Data Analysts (ft. Google Data Analytics Professional Certificate)
Luke Barousse
Google vs IBM Data Analyst Certificate - BEST Certificate for Data Analysts
Luke Barousse
Python Vs R (funny!)
Luke Barousse
THIS got me my job as a Data Analyst - My portfolio tip
Luke Barousse
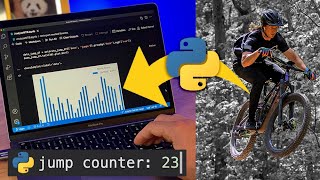
I used Python to Count my Bike Jumps!
Luke Barousse
Standout as a Data Analyst with THIS TOOL
Luke Barousse
STOP using Spreadsheets for Everything!
Luke Barousse
Transition into Data Science - My Tips & Story
Luke Barousse
Get a JOB w/ Google Data Analytics Certificate?!? (ft. Certificate Holders)
Luke Barousse
Staying Motivated in Data Science
Luke Barousse
Data Science - Expectation vs Reality (funny!) - ft. @KenJee_ds
Luke Barousse
Get NOTICED in Data Science!!! (3 types of GREAT projects)
Luke Barousse
Use THIS to showcase EXPERIENCE in Data Science
Luke Barousse
How to show EXPERIENCE... when you have NONE?!?
Luke Barousse
Learn PYTHON to be a DATA ANALYST?!? (or is R enough...)
Luke Barousse
The BIGGEST MISTAKE when starting a data project!
Luke Barousse
Top Jobs in Data Science
Luke Barousse
How to get Data Analytics side jobs - NEW LinkedIn Feature
Luke Barousse
Building a bot to scrape job data… How NOT to collect data
Luke Barousse
More on: Data Literacy
View skill →


Related Reads
📰
📰
📰
📰
From Promise to Reliability: Semantic Mapping and SQL Validation as Dual Drivers for Enterprise…
Medium · Data Science
From Promise to Reliability: Semantic Mapping and SQL Validation as Dual Drivers for Enterprise…
Medium · LLM
Europe's brain drain: the biggest loser flips when you normalize per 1,000 residents
Dev.to · Maria-Luise Volkmar
Do you have the right data foundation? A data strategy and governance reflection of the AI era
Medium · AI
🎓
Tutor Explanation
