Tableau Full Course 2026 [FREE] | Tableau Data Visualization Course | Tableau Tutorial | Simplilearn
Skills:
Data Literacy80%
Key Takeaways
Creates data visualizations using Tableau
Full Transcript
What if you could take a plain spreadsheet full of numbers and turn it into powerful dashboards that insanely shows trends, performance, and business insights? Now, that is exactly what Tableau helps you do. Hey everyone, welcome to this Tableau training course by Simply Learn. Today, data is everywhere, but raw data on its own does not help much unless you know how to read it, analyze it, and present it very clearly. Now that is where Tableau becomes such a powerful tool. It helps you turn complex data into simple visual interactive report that are much easier to understand and act on. So in this course you will learn how to work with Tableau from the ground up. We will start with the basics like understanding the Tableau workspace creating charts using drag and drop feature work with dashboards and then move into joins relationship data modeling and advanced chart types. You will also learn how to do business style analysis using real reporting scenarios. So this course is not just about making charts. It's about learning how to tell a story with data. Let's look at the agenda for this video. First, we will understand what Tableau is and why it is used. Next, we will explore the Tableau workspace and basic chart creation. Then we'll learn how to build dashboards and use key Tableau cards. After that, we will understand joins, relationships, and data modeling. And finally, we will explore advanced charts and business analysis technique. So without any further ado, let's get started. Here's a quick quiz question before we get started. What is the main purpose of Tableau? To edit videos, to create data visualizations and dashboard, to write programming code, or to design websites? Let me know your answers in the comment section below. Also, if you are interested in building a strong career in data analytics, I highly recommend you to check out the data analyst certification course by simply learn. This course gives you an industry recognized master certificate from Simply along with individual certificates from Microsoft that you can showcase to potential employers. A real boost for your resume. You will master key tools like Excel, SQL, Python, Tableau and PowerBI. Work on real world projects and build practical skills and learn how to turn raw data into insights that drive better business decisions. So what are you waiting for? Hurry pen and enroll now. The course link is mentioned below. >> Okay. So here we are. So let's understand why Tableau and what are we going to cover within Tableau. So first thing that we have to learn here is uh principles of data visualization. Why we need to do that before we even go ahead with that we have to understand what is data and uh why do we need to learn Tableau when all other things are all other products are all in the market. Of course, we'll go ahead and also learn within Tableau, we'll also learn at the end that how to go ahead and create visualization, what are storytelling, how to create dashboards, what are worksheets and so before we go ahead and uh learn what is what here let's have a quick set of agenda. As soon as I receive the results from TSR, I will share the introduction with you also and the uh introduction with you also that how many people are there and more. And uh after that first thing that we discuss is about what is data. We will uh go ahead and learn about some terminologies that we have to be clear uh before we go ahead and begin and start creating the visualizations data and few terminologies. We will revisit them for just once it will not take much time here. Then we'll understand about what Tableau is and why it is needed. What is the need there? And then we go ahead and we simply install Tableau. And uh while installing Tableau we have to understand that Tableau comes from the Salesforce that's a company and that company not only provides you Tableau it does provide multiple things. So we have to learn about that and after that we will go ahead and learn about Tableau interface. After learning about the Tableau interface we will import data. We'll create some charts. Limp import data and then we go ahead and we create some charts. All right. Great. So this is our today's agenda. This is what we are going to do today. Now let's begin. Information raw information display in particular order. Collection of raw information. Written text of information. Oh, very good. Raw information. Set of information. Yes. Structure and structure. Very good. It's the source of many. That's good. But what it is? Collection of raw facts and figures. Right. That's how we usually define data. Right. Right. That's how we usually define it. Collection of raw facts and figures. All right. So since you're saying that is a collection of some facts and figures here. Okay. Fine. I agree. It is just collection of facts and figures. Absolutely true. Now tell me here is this data everyone? Is this data? Yes, this is data. Absolutely right. But you said data is information. Is it giving you any information right now? No. Right. What happens once I go ahead and put this in a structure? So maybe I can go ahead and put this in a tabular structure. So it's a rows and column structure. And then I will tell you that uh this here is the product ID and uh this is the MRP and this is the MRP. Now does this give out any information? Right? So either I can go ahead and put it inside a table like this. Right? Or we can simply go ahead and uh create a CSV file. Meaning we can simply go ahead and put a comma here. We can put a comma here and we can say that uh this is product ID. This is MRP. Basically it is in some kind of a structure. Right? Basically it will be in some kind of a structure. So what is data here? Data is not only the collection of facts and figures. This should always be in a structured format. That a structured format can be a text format, a CSV format, a tableau format, JSON format, any format. It has to be in some format and saved uh and that collection has to be saved with some objective meaning one organization, one department's data will should be at the one place. It should mean something. So that is data in a very simple language. And that data here can have text, it can have numbers, it can have dates, it can be binary. Okay, it can be binary too. And data is usually save and it can be saved in bits and bes. So these are the data types that can be handled within these BI tools. These are the data types that can be handled within these VI tools. So this is data. Very good. So if that's data here why visualization why visualization is required visualization comes what see uh how does things work in real time okay when the visualization will actually be there so first here is there are three environments that uh the intelligence tools work in taboo is one of the intelligent tools everyone business intelligence tools I will write that here business intelligence tools or BI tools. We all heard about that these BI tools are majorly made up of three environments. What are the three environments here? First environment here is the data warehouse. First environment is the data warehouse. Second environment is business analytics. This is where the business analysis is. This is your business plannings. And the third here comes your BPM that is business process managers. Your decision makers. Okay. This this is the decision makers. BPMs. Business process managers. Now within the data warehouse, what comes in data warehouse everyone? What's a data warehouse? Let's clear out some terminology so that it is easy for us to learn technically. What's a data warehouse? If you haven't heard about that, good. If you haven't heard about that, it's fine. What's a data warehouse? It has nothing to be uh me decision making yet. I'm simply asking about the first terminology here. Data warehouse. Have you ever heard about this word? Right. where data is stored. Very good. Right. Right. How many of you use uh Gmail? How many of you use Gmail? You all have Google Drive, right? You save a lot of things in your Google Drive. What is that? So what are data warehouse? These can be your clouds. These can be your servers. Now we when we talk about servers here. Okay, we are talking about huge RAMs, mainframe computers. And these servers can be onremise or these can be third party services too, right? So what is Google drive there, one drive there? These are just hosted on clouds and servers, right? So uh these are data warehouses. These data warehouses consider them as a large container. What are data warehouse? Data warehouses are a large container. These are hardwares guys. Okay? These are hardes. So they require hardware. So there's a huge container. Inside that huge container, this entire container is your data warehouse. All right? Now inside this data warehouse, what are they doing? They have multiple RAMs inside it. Huge RAMs. Okay. memory storage devices and inside each RAM inside each RAM they are holding multiple tables they're holding multiple tables and these tables are connected with each other these tables are connected with each other inside each RAM huge databases are there so the uh these databases that you're looking at here okay this collection of tables this collection of tables is called as databases and these collections of tables these collections of tables here are hold inside a cloud. So what are databases everyone? Databases are collection of collection of multiple multiple tables which are connected to each other. multiple tables connected to each other that is databases. Okay, a data warehouse is just a huge container inside that you have multiple ramps or a huge warehouse actual warehouse. Okay, made up of concrete inside that you'll have RAM and uh you will have inside RAM you will have all to all databases there. Clear? What's a data warehouse now? Yes, data warehouse requires a software. Okay, I can see that uh we have not uh requires a software because see it has to be secured, right? This container or machine here has to be secured. I'll give you a very simple example. Very simple example. All right, you own laptops, right? All of you own laptops. You have laptops. In your laptops, have you saved uh uh multiple files and folders in your drives inside your laptop? Right? You also have a 1TB hard drive with you and outside memory. Yes. Now, what happens here is if you want to go ahead now that is your hard drive. That is your hard drive. 1TB hard drive. That's an outside memory. It contains your data. How do you access that? Do you uh do you uh just open it like this like a book and you read your data inside it? No, we connect it to the laptop and with the help of an application that is our Windows uh here right Windows operating system on the operating system we can see that correct. So we need the operating system the software to access that hardware. It is the same thing here. So instead of having the Windows OS here we have DBMS. Okay. So the software that we use here is called as RDBMS. This RDBMS this software application here will help us to access this data warehouse and clouds. All right, we clear. So that we can interact with the data warehouse and cloud. This software helps us in that. Do we understand it now? How it works? Yes. All clear. All right. You're having network issues, Priy? Okay. So I simply said okay have you heard about that example hard drive example Priy that if you want to access your hard drive you have to connect it on your computer and if your computer has that Windows operating system any operating system then only you can read that hard drive here in the similar manner what software is required here RDBMS is required to read this database okay that's what I was telling so this becomes your hardware all Right? Data warehouse here will be a huge warehouse with lots of RAMs inside it. In inside each RAM you will have databases. Right? And how this entire thing is read with the help of RDS. Now what is business analysis? Business analysis here first thing that we do here is this person will be given an objective. For example, what kind of objective this person will be given? D we give an objective like go ahead and tell us I want to launch a new product in which city on which date on which month we should uh be able to launch it or they will ask that we are having too many defects on the product line. Go ahead and find out uh why are we having so many defects and how we can control them. or you work in the insurance sector and they tell you that I we want to increase the sales by 10% next quarter. So go please tell us here how to please tell us here how to increase by 10%. Okay. So these are the objectives given to them who business analyst. All right. Now this business analyst what is the first step they will take? Database management system relational database management system RDBMS that's a different part of a study okay once the objective is set everyone all right thank you how they do the market research Okay, if I want to increase sales of my own organization or within my factory, I want to find out how much uh defects are going to have here. Why would I go out and do the research? First thing that we have to first what this person will do is they will go ahead and they'll figure out what data they need. What data they need, okay? and from where they need it. From where they need it meaning which particular department is uh from department they have to contact with to get the data. Okay. So they have to figure out that particular department and the person who holds that data. So first they have to decide that for example if I want to go ahead and increase the sales by 10% next month I need sales data for last one year and also for the last year that last year and quarter two what happened so that in this quarter two I can make sure that I have more uh sales can be done and then we need customers data. We need all policy sold data. We need to see which employees are there, which employees we can rely on to increase the data, which employee has, how much customer base in this particular area. So all these decisions that and all these decisions how do they take it? They have to know what data they need and from where do they need it? Once they decide that based on objective this now what they will do what they will do here now they will go ahead and first thing they do is they will figure out the way to clean the data. clean the data and load the data to the software any BI software any BI software data visualization software right so data analysis and data visualization go hand in hand and who helps this person because this person's job is to ask a correct question with the data this is the person who will decide what why and where and How to implement then any decision that is taken. So this person decides the question and what reports need to be created. What reports need to be created? This is the person who guide everything. So this is the person who is guiding everything. Who is cleaning the data, loading the data and creating reports, creating visualization. So that is done by the data analyst. This is the data analyst. These are the beginners in the field or beginners uh there. Okay. who join as a data analyst. These people have uh technical expertise. These people have a technical expertise here. And you must be thinking what business analyst will do. This business analyst person who uh this person should have domain knowledge and experience. Domain knowledge and experience with technical knowhow. I will say technical knowhow not the expertise but they should have technical knowhow. This is this person is a business analyst and who is a data analyst who has technical expertise and there is still new in the market. They don't know how market works, how pharmaceutical works inside. They have no idea how this production uh house runs at the inside how things are sold. They don't have that much experience in the market but they do have a technical expertise and they're gaining on experience. These are the people who will go ahead and help us in creating reports first. Once they create the reports here, okay, in the guidance they will create the data visualizations because only creating the chart is not the key. You have to learn how if this chart is correct or not. Charts are not always correct. Reports and calculations are not always correct. So we need to go ahead and learn reports and these reports are converted into visualization. We never created direct visualization. We created the report first then we convert that into visualization. And this is the job of business analyst and data analyst together. However, if you go to a small or medium enterprise, both the jobs will be done by one person. And why we were doing all of that? Why we were doing this analysis everyone? We bought the data from here. Okay? We bought data into the data analysis software. We cleaned the data. We made the reports. Why? Because we have to make the decisions. But we are not the ones making decision. The decision will be taken by the decision makers, business process managers. Right? So we have to submit the report there. And not only we have to submit it, we might have to go ahead and present it too. So now we will be converting all of that into a presentation. Basically we have to have a story board. They are because decisions are not made not made on data. Decisions are made on a story. You hear a story, you take a decision. You don't see data. You don't take decision only based on data. Okay. So you should have a story that is supported by the data and that story is presented to BPMs, business process managers. Who are these people? Your CEOs, CEOs who are going to take the glass decision here. Okay. So that's how this works in real time and uh honestly telling you 8 uh 70 to 80% of your time will be spent in data gathering and cleaning. Yes, that's true. You will spend 80% of your time right here. That's it. Okay. So this is how the uh actual in reality it works. Okay. Within now within the data warehouse uh you might have heard about Oracle. Have has anybody heard about Oracle or SQL servers AWS Azour? Have you heard about these names a lot? Right? These are all your servers and clouds. from these P from these from these okay we go ahead and we fetch the data of course uh most of the industry still runs on Excel okay it's still it still runs on Excel so you can have data from Excel you can have data from CSV too so all of this is your wherever you get the data from are we clear are we good any questions any questions from Would you like to take a screenshot? All right. Should I clear this up then? Wonderful. Thank you. Here we go. Now, let's go through uh now what is data visualization? When everything's said and done, last thing is visualization and presentation. So what is a visualization everyone? We cannot read data like this. But if we go ahead and present it in a picture, a nice picture, uh it's a pictorial representation we usually see. And we say that if I create it in a pictorial manner, it will be easy to interpret and it helps us to make datadriven decisions. Completely agreed. Yes. It can help you to identify trends, patterns, outliers and get more insight rather than just looking at numbers. Now why that happens? Because your human brain is percept uh you percept the details in that way because of that. So for example, okay, you might you have been on road right? Whether you're driving, you're commuting in any way we have all seen traffic lights, correct? So what do you think is better that uh turning uh those traffic lights turning blue green blue sorry green red and yellow that is better or they should write properly stop go and wait which is more perceptive colors or text written text colors Right? We go up and down these stairs. Okay? Are you ever counting and measuring your stairs or you just go up and down? Because you can percept the height. You can see that once you can see it and it is perceptible, you're good to go. So that's how the human brain works. So that is why we need to go ahead and change and represent a complex data into a visualization. Now let's see uh what I defi how I define visualization here. Okay. So to understand uh that here let's say we have a data set. Let's say we have a data set here. So for example uh this is your student here. Okay. This is the student ids and here we have their average attendance. Okay. Here we have their average attendance. So here are the students. All right. This is their average attendance. So this is a data entry. Uh so from this data you do have some information correct. It is an informative data set. Now this is how the reports are created. This is how reports are created. Let's convert this into uh let's convert this into a graph. How do we convert this into a graph? Every graph is created between x and y axis. We have all studied coordinates in our sixth and I think six between sixth to 8th standards. So we have x and y coordinates. So this is yaxis. This is x-axis everyone. Right? And uh yaxis here it starts with zero. We are I hope we all remember that too. Now tell me here what we keep at x-axis usually what we'll keep at x-axis here. How do we plot this report here? How do we plot this report here? What should I keep here? Attendance or a student ID on the x-axis? Student ID. And we keep attendance here on Y-axis. We keep attendance on Y-axis. Now if we are keeping attendance on Yaxis and here this is how it will look like. So let's say this is where I'm keeping A. This is we are keeping B and this is the C person and this if this is zero. If this is zero everyone then we are keeping here let's say five 10 15 20 that's how we create right now how now it comes down know it all comes down to creating the chart to create the chart here let's figure out the data points where the data points will be there this is a is on 10 so this is a this is a right what we do here We match this is a. We go till 10 here, right? We go till 10 here and we will point the data point right there. Done. B is 15. So this is B. We will go here. This is 15. We match it and we place it here. C is 9. So somewhere here it will be below 10. This is C. Somewhere it will be here. So now these are the three data points everyone. We plotted the graph. Now it depends on us. Now it depends on us. What do we want to do with it? What do I mean by that? Now how would you like to represent these numbers, these data points on the chart? Do you want to represent them as bars? Do would you like to give them a shape of a bar? If not a bar, would you like to go uh simply leave them here as a circle as more a circle as per the magnitude of the value? Will you go ahead and leave them as a circle only? Or maybe you would like to go ahead and represent this as a line. You simply go ahead and connect them with a line. So how would you want to uh go ahead and represent this? So basically what visualization is? Visualization here is representing representing a number or number by a visual indicator. Why are visual indicators? What are visual indicators? Visual indicators are shape, size of the shape, color of the shape, position of the shape. It can be a images and icons too. And you can also go ahead and place them where place them, color them and size them. So no matter what kind of chart you create, ultimately you're doing the same thing. So technically you're representing numbers via shapes, size of the shape, color of the shape, position of the shape or instead of shape you're using images and icons. So that is data visualization. And when we represent a data like this, it does give us much more insight than just looking at numbers. One of the best examples of this visual indicator definition is the moving chart animated chart created by professor Hans Rosnik. This chart here look very clo closely everyone look at this here observe that here we have lots of circles right here the x-axis is income yaxis is life expectancy. Now on this x-axis income here income increases from left to right and expectancy life here increases from uh up here increases. Each of these circles represent one country one one country each. The size of the circle represents population. Position is defining here how much is the income, how much is the expectancy. Size is defining the population here and the color of bubble is representing which continent they belong to. So there's a lot of information that is going on here. a lot of information but all and other than that okay other than these uh parameters now here at the back do you see 2019 go to YouTube and type professor Hans Ross link chart and you will see this demographic chart and this demographic chart moves from I think somewhere uh data they have found from 1800s or something from there till 2019 it moves it moves every country will move. So this is one of the fantastic examples here. There are more examples. Okay, this data visualization is not new. It goes back to 1700s when the first time the maps were created. Okay, all the geographical maps that you see here, they are all example of data visualization. So what are the tools available here? In market, they are these tools and more. Do you know any other tools that are used for data visualization? These are some most used tools like Excel, Mattplot Lib, we you click view also, Zoho also is very popular. We are learning Tableau. We know about PowerBI. Looker is also very popular. I'm sure you must have heard about other data visualization tools other than what are mentioned here or you might be using uh right now or you have seen somebody else using it. No, go ahead and find out. It is a quite an interesting read. Okay, a quick Google will tell you that. And yes, these are uh that is Yash is u the Python. It's a Python package, right? All right. Very good. So, here we go. These are the most famous three that is for flowcharts not data visualization. Okay. Flowcharts are not data visualization. Aa flowchart picturesization of processes and that is AI tool not a software. Huge difference. Okay everyone. So here we are. So these are the three popular ones here by BI, Tableau and click view. Most of the time you will either find a combination of BI and Tableau and either you will find a combination of Tableau and click view. Why? Because PowerBI is uh majorly used for production houses when they want to go ahead and share that with vast number of employees. So when you want to share any software with vast number of employees, they use PowerBI. And why? Because transition is easier. Now you have Tableau. Tableau is majorly used for corporate offices. Okay. Very few people will have access to that and for us because it is quite expensive right and it is a very sophisticated software to be using. Now it's a very sophisticated software everyone not everyone is very comfortable with Tableau to use but it is very easy to learn and it is only used in corporates. uh basically whenever we are looking for any kind of a strategic dashboards or we are looking for a real time dashboard okay taboo is known for creating real-time dashboards and storyboards it is good with that I'll answer that give me a moment click view is same as powerbi right but it is uh more into programming okay you have to program a lot so it requires a lot of programming language and it is not that easy to create but it is uh too much technicality is there. It is not that easy to create or study as compared to PowerBI and Tableau. So let's go ahead and now look at Tableau. But before we go ahead and understand about Tableau and what we should be doing there. Can you answer me this question please? It's okay. We'll try to tell you the difference. But before I go ahead I have the charts here. All right. So let's see here what describes this batch best. So here okay. So if you have experience with Tableau, okay, most of you do not have experience with Tableau. So we are going with the basics first. That's great. Now do you have any relevant experience here? So you can create simple visualization. That's very good. 88% again have absolutely no experience. Few there is one person here with who has used Stardo before. That's very good. You have to wait a little bit, okay, to get to the relevant portion where you will be actually learning something. Now what is your primary goal? So acquiring knowledge, getting certificate. All right. Okay. That's what we here for. If we acquire knowledge, we need the certificate and that's pretty clear. That's fine. All right. So here for career growth too. Obviously coming to which function you are here from. So mostly are fresh. We are freshers here. Mostly are from health care professionals and IT. Oh very good. Good to see that. We do have product managers here. So we have a quite a diverse persona in this patch. Glad to see that we get to learn from each other and oh how would you like to learn here? Hands-on practice theory and concept. Uh there is no coding here and walkthroughs. Right? We are going to apply all the three. All right. We going to apply all the three. So thank you very much everyone of for sharing this with us. It gives us a new insight into the batch. And now we know most of us are here uh with very basic uh details here. Right? That's good to know. Now we can go ahead and learn about Tableau a little bit more. So uh this thank you for the responses here and uh as you can see we have diverse persona. Those who have a little bit of experience wait this is how we are going to learn. Okay. The few things that you need to understand here. One thing here is we will go through the concept first. Tableau is entirely based on the concept. So first we have to go through the concept. All right. After we have covered the concept after that only we will go ahead and I will show you the example. First I will show you what to do. Once you you will show see the example here then you will go ahead and get to do the hands-on practice. And the best part about the hands-on practice here let me show you about your hands-on practice. Everyone you have LMS portal? Everyone do you have LMS portal? In this LMS portal you have reference materials. In the reference materials you have instructor slides. Okay. These are the slides that I'm using right now. Go to your LMS portal right now and if you haven't downloaded yet these reference material, please go ahead and download that. Let me tell you why these uh all the materials here will provide you with a lots of hands-on practice. Which materials are there which are going to provide you hands-on practice? Practice project, guided practice and demos and all the data sets used in these practices are here. What are what do these uh folders have? These folders have all the PDF and word files with the guided practice with the screenshots. So once you're done with the session sessions, hands-on practice, you go back and you practice more. For each lesson, you will find minimum 3 to five extra practices for each topic. Okay. So that's what we are. So that much hands-on practice you have given here. So we will practice during the session. You will also practice after the session that to guided practice here with the solution and the questions everything is given there. So go ahead go ahead download these folders unzip these folders and explore after the session today. Okay. So is everyone able to see the difference material? May I have a quick confirmation? Do you have the access? Everyone please confirm. If anyone is not able to see reference materials, they can contact to Alison. All right. Now, next here is are we aware about session materials here? Reference materials are fixed. These are here. Okay. These are fixed. These are here. Session materials are session wise materials. Okay. This will be updated in after every session. After before and after every session. So whatever we use in the live session right uh the session materials will be updated for that date. So go into the my classes in the my classes go to that block click on the block you'll find the session material in the session material okay you have link you cannot click on the link everyone you have to go ahead uh so here you will have installation you will have installation payroll databases sample supertore you can download all the Okay, you can see there for okay uh right now this is for today on 11 12 13 whatever is required it's uploaded and whatever I will solve in the session that will also be uploaded there once you are done let me know is everyone able to find session materials under the live class my class as I've told you Salesforce or Tableau provides the entire BI environment. So first thing that it provides you here okay is your Tableau servers okay it provides servers if you need uh in-house server onremise server it will provide you with that there is an online cloud that has been provided and then you have a fantastic thing that they offer us that it's a public server anyone can use that server for free by simply creating their login ID and they can use their data set and their own Tableau workbooks too so it's a fantastic option to learn everyone so They provide us with these servers and clouds. After the servers and clouds here, now they will provide us with Tableau prep builder. What is a Tableau prep builder? It's an absolutely separate set of software. This Tableau prep builder help us to do uh it will extract data from any cloud or server. Okay, it will transform mean cleans the data. Okay, transform and cleans the data here. And then from here we can load the data to any Tableau desktop software. Okay. So from here we can load the data into the Tableau desktop here. So these are developer tools. What are we developing here? We're developing the dashboards. Now to develop the dashboards here, they provide us again with two um two applications. First one here is the Tableau desktop. This Tableau desktop is the professional version. All right. Since it's a professional version, it requires a license, meaning we have to buy it. We have to buy it. It is usually given by the organization you're working for, right? And other is Tableau public desktop. Tableau public desktop is always free. It is it is kept free and updated. It is always kept free and updated. Why? So that everyone can learn that. Okay. For learning purposes, for learning purposes, for learning purposes, the Tableau desktop uh free version is there. That's why it's called as public desktop. Anyone can use that. And uh what is the difference between the two? There is uh 95% okay 95% similarity is there in the features. Whatever features you will see there 95% similar. What changes here? This Tableau desktop can connect with Tableau Prep Builder. If you have a professional paid version, professional paid version, let me write paid here. If you have a professional paid version everyone, all right, of course you're paying for a bookie of services, not buying license for one service. So you can get prep builder, you can get data from prep builder. Prep builder is getting data from the server and you're also going ahead and publishing your data. Whatever you have created the dashboard, you also go ahead and you publish that to server. Once you publish that to server, what happens after that? You share it across multiple uh employees and your teammates so that they can view that particular dashboard. If they want to share it across, they can share across two. You want to collab with them, you collab with them. So Tableau server is just like your online cloud or a Google drive where you can share the file with others and uh they can share the file with you. So Tableau server and Tableau online cloud here whatever you use right whatever you use here it will help us to share the files with others this is in the paid version only this is the paid version all right this is the paid version and how people will view these people will view these with the help of Tableau reader and mobile apps so these are all the uh right part that's your now that is bought I so it's a repository it's a kind of a warehouse and server right you can call it that it's a uh you can host there you can control versions there so yes that's a server we clear right so here what are we going to work with so this is reader and mobile application they can only view the data there what What are we going to work with everyone? What are we going to work with? Tap to public desktop because it's free and is meant uh it is free so that we can learn about that the free version public desktop. Very good. Now before we go ahead and I provide you link for the installation here which I've already did. Okay. Let me tell you about the sub features of Tableau public and the difference between public and desktop. We do have a free license and it will always be updated. There are a few limitations to it. This is older. All right, I'm back. Okay, so we go ahead and get files only from our system. We cannot connect with any server with Tableau Professional. Here you can have uh you have nearly more than 70 plus connectors and data sources you can connect and whatever data we get from our files like Excel, CSV, we can only have uh 1 million rows not more than that. So these are the few limitations that we are going to have. So let's go ahead and see. Uh first let's install it. Once we install it, first we will go through the interface and we import the data. Now I will go ahead and provide you with the link to install. Uh you do have the installation document. If you want to do it by yourself, you can do that. >> Go to this link everyone that I have pasted here. In this link here you will find an option. Okay. You can have your first name, last name, any email will do. Doesn't matter. Any email you can write here any personal email. Uh talking about role here you can say that you're a student. Okay that's it. And wherever you are currently and download the app. Once you go to download the app, okay, let me know because once you click on download the app, you will be provided with two options, Mac OS and Windows, right? It usually uh automatically understands which OS you're using. And tablet is only available for either Mac OS or Windows and the Windows should be 10 and above, right? And with Mac OS, it works with selected versions only. So either it will work I think uh with Intel and one is another I think silicon but in that also not all the versions will work. So you have to find it out. So let me know how many of you are using Mac. If you're using Mac can you just type plus one in the chat? Anyone using MacOSS, can you please go ahead and type plus one in the chat because Tableau has a specific issues when we use it in Mac. All right, I will ask the question again. Anyone using Mac OS? If you're using Mac OS, let me know. Mac OS uh doesn't support PowerBI at all. Microsoft has not made any version of PowerBI for Mac OS. People have found illegal ways to get PowerBI there, but it violates the warranty and guarantee of Apple product also. And Microsoft doesn't support that version of PowerBI. It's an illegal version. All right. So, I get that no one is using Mac OS then. Wonderful. Okay. So, here we go. So, since we are all using Windows, everyone once anyone clicks on download the app, uh would you like to share your screen? Because I already this is my company laptop. I already have Tableau installed here. Right. But after filling up the details, have you filled up the details? Right. So that no one can see your personal email ids and everything. Right. Wonderful. Okay. Can you share the screen right now, please? I giving you all the access. Yes, I can see that. I can see your screen. Let's go. Yes. Very good. Thank you very much. Uh so now wait, wait, wait, wait, wait. Please wait. All right, everyone. Let's look at that. Do you are you looking at this green color pop-up? How many of you can see this green color pop-up? Quickly use the reaction button. Give me quick emojis of your choice. Give me quick emojis or messages. How many of you can see this green colored uh dialog box? Yes. Very good. Now, if the download has not started yet, you can find the download uh near here. Go ahead and click on Windows. Right. Click on Windows. It's okay. I'll help you out here. Unverified download blocked. Uh can you uh open the popup here? Can you allow the popup there? You are you working on um what we say office laptop by any chance? No. Then go back. We will activate that. Uh do you see your URL is written? Yeah, I see. Yes. Yes. Go there and can you allow pop-up there just for this site? Right. Click done and click on Windows again. Now click go to the downloads. Click on that downloads please. Let's see. Download. Download and verified file. Click on that. Now it will start download uh Melissa. Uh now that depends on your organization. All right. If they if they have given you the admin uh rights on your laptop, you can install it. All right. Otherwise you will be blocked from the admin and mostly laptops will block the admin rights mostly work laptops. So you have to find it out. Go ahead download it and try to see if you are able to download it there and after download installation will be blocked. All right. So say let this downloaded. Let me help Wanda here. So Wanda why are you saying you're not able to see that green colored one? Maybe in your case the download has automatically started. Is that the case? done. Oh, that's wonderful. Okay, so once uh everything is downloaded, everyone let me know. Okay, I I will go back here. Once everything's downloaded, let me know because download will take a little bit of time. Very good. Thank you for informing. Once your download is done, let me know please. All right. Four to five learners here. What about others? Yes. You want to share the screen? Go ahead. Share the screen. Very good. Very good. It's fine when it's okay. It will take some time. Your download hasn't started yet pretty. Oh, it is there. Oh, wonderful. Here we are. Also, check on don't send product usage data. Check on that one also. Now, please wait. Please wait. So, everyone, once the download is done, as soon as you click on it, it is the easiest installation you will ever see. Just check on both the boxes. Check on both the boxes and click on install. Click on install. And sometimes in between it might go ahead and ask you to download some extra visual uh C++ supporting files. Right? So it will if it gives you a pop-up box saying that uh you need to download this just click accept it. Okay. Accept the terms and agreement and uh install it. It is required to run the Tableau public. Okay. Yes, this redistributed mutable license, right? If it is not there, it will ask you to download separately. So, it gives you a popup. You accept the terms and condition and you move forward. So, this is what I'm going to help you with. I will give you the online Tableau public. All right. But this online Tableau public is going to be very different about uh very very different what I'm about to work with. Okay. So I will provide you the link. You need to create your login ID, password then Malaysia as you sign up on any other website. Okay. Sign up here and uh figure it out. That's what I can uh give you here. All right. So this is here uh you can go ahead and create an web author here. If you go to web authoring here you will be able it will ask you to create a sign in and with this sign in you can uh use the online tableau public. Online Tableau public will have very few features there very few features. Okay. Are we good now? Uh however Melissa I will suggest that uh do focus on the screen too. Wonderful. Thank you very much. All right everyone. So let's uh go ahead with interface. But before I start with the interface and technicality, there are few things that I will now establish. Since we are moving into the technical part of it, now I will be slower. when I am slower. Uh okay. And if you have any doubt in between, for example, you have a doubt, you want me to uh repeat any topic there, right? Or repeat any step there, go ahead, write that in the chat box. You can also go ahead and raise your hand. All right? And once my topic or subtopic or once I stop speaking about some topic here, I will go ahead and look in the chat. However, I will try to go and read the chats as uh frequently as possible. So, in every 5 to 10 minutes, I will be checking the chat messages too. Okay? So, in case any message is missed, it is not deliberate by mistake. I might have missed it. You can copy and paste the same message again, I will make sure that your query is or your doubt is answered. And I still remember two questions asked before that should how many BI tools we should know and what is difference between PowerBI and Tableau. remember those questions. Those questions will be answered once I conclude the today's learnings. Okay? Because that is not about Tableau uh specifically about Tableau. I All right. I hope we are good with the expectation settings here. All right. Wonderful. Thank you very much. Now I want everybody's attention on my screen here. May I have your attention please everyone? Right here. Now within your Tableau public within your Tableau public you uh this is the first interface. In this interface here we have file data here. This is the menu bar here. And then here we have connect pane. This is called as pane. You can call it panner. Usually it is called as connect pane. After connect pane here uh this is the blank screen. Okay. Where it says open and open from Tableau public. In this blank screen here uh once we start working on Tableau file you will see files are saved here in tiles. So basically this is the recent files that you have visited. This is the recent files that you have visited or edited. Those files will be shown here. And on the right hand side here on the right hand side here this is called as discover panel. This is called as discover panel. Okay. In this discover panel here you will find all the links all the links to Tableau public Tableau public website blogs and articles and all the articles about learning and other uh web authors out there. So whatever they are doing currently all the updates you will get here. Okay. So these are all outside links to public website that is the discover panel. Oh thank you. Yes. Yes. Yes. I got it. I changed it. Thank you for letting me know quickly. All right. Thank you very much everyone for letting me know quickly. All right. Okay. It's okay. So let's see it again. So this is here we have uh menus everyone. Then we have connect pane. What is this is called as pane here. P at the center here we will go ahead and see recent files as in when we start working this is here is your discover section. This is here here is your discover section or discover panel what do you want to call it. What do we get here? You will go ahead and get all the website links. You will go ahead all the website links. Okay. or the public links available there you'll get link you'll get blogs about it and articles about it and more so whatever updates they're having it will be shown here in the discover section so these are the three panels or three sections here first let's talk about the connect section here in this connect panel here as we all can see right now we are in Tableau public since we are in Tableau public we have access only to the files from our system. Now if you're working in Excel, you can get a text file, any database file. All right? Or any other JSON file also can be added. These are spatial and different type of files and formats can be imported right from here. It is giving us the option to get it from a server. What is the server option here? This server option only includes Google Drive, online data or any website data connector. Depreciated means that uh they provide the connector. Okay. But they don't update it anymore. So now we have these two working the connectors. So if you have any online data you want to connect with, you can use these connectors here. What is a connector? Connector is like a bridge between the Tableau application and your server. It acts like a bridge between the two. It's a small application software. So these are the only options that have we have available here in the Tableau public. Now let's go ahead and connect with the data set. So you all have been provided with a payroll dot CSV. Do you have that file with you everyone? Payroll docsv. Do you know where it is saved? uh say the session materials that has been provided. All right, give me a moment. Uh I will uh share it here also. You have to give me a minute. Okay, I have to attach it here. Uh no part you cannot do that. Wait I have to stop the screen to do that. Okay I have to uh give me a moment everyone. Let me share the data here because there are few learners saying no right now. So give me a moment please. You cannot connect MongoDB here. Okay. Uh for that you need a professional version. Are we good? All right. All right. So the file name is payroll database everyone. Is that the file name? Is this the same file? Uh please confirm that yes this is the same file we all have access to. Okay. Now we are all on the same page. All right. So everyone go ahead and download that those who do not have that file before. Now I'm going to work here. That's why I first provide that session material. Okay. So let's connect everyone. So just remember where it is saved. All right. So now you can see my screen here and uh what is CSV? Dot CSV is comma separated values. Okay. So this is a text file here. So go ahead and click on text file everyone. Go ahead and click on text file. Once you're in the text file, go ahead and find go ahead and find your database. Once you found your database, go ahead and click open. Select that database CSV. You might see only payroll database written there based on the settings. What are the text files we can connect with? We can connect with txt.tab csv.tsv. So all the text file will be visible. And now click on open. Once you click on open, try to explain in words what are you looking at. It is a very very important quality or a skill set that we should have because when you're presenting something, you should be able to explain in words what is happening in front of you. Okay? So once you click open, try to write in words what are you looking at right now. Observe and write. Okay? I'll be looking forward for your responses. Do you understand the task here? After clicking on open, observe and tell me what are you looking at? What do you see on the screen after you click open? A table with data. What else? Very good. connection. Okay. Table information with data type. Yes. Very good. Descriptions are there. Summarized view of table with headers. It's not a dashboard at all. Swati, where do you find the word dashboard? See again, observe again. Whatever you see, just explain that data table containing employee information, country wise, employee salary, column and rows. Okay, so we are not okay. Description and table with data. It is not a desktop either. All right. So let's click on open here. Let let's explain. As soon as you click on open here, the first thing that uh we all have observed is payroll database is written here and the bottom here you can see the preview right the what you see here everyone that is looking at this is your data preview. Okay, this is just the preview of the data which is saved inside the CSV. And if you find this payroll CSV here, it means currently this data is read by Tableau. Now Tableau is reading your data. This is the first thing that you saw. Right? Now I would like your attention here currently. Where are you? Once you click on open, observe that everyone you are in data source. You are in Tableau data source window. See that here. So which tab we are at? We have a data source tab here. In this data source tab here, the first thing that we have here is our menu cards again. Then there is an option to refresh your data. You have undo and redo options also there. Now below this after left and upper corner of quick access toolbars and menu bars. Now pay attention what is happening here. This part here is your connections. What this connections is saving here? This connection is simply saving our file path. This is only saving the file path. Nothing else. It is simply saving that from where this particular name of text file is saved. It is simply saving the file path. So it is going inside that file path and now here it is giving us a list of text files. There is a list of text files here. Okay. that inside this folder how many text files are there? So tell me uh uh now please tell me here how many of you can see more file names here. How many of you can see more file names below that you're looking at more file names here right? Why? Because inside this file path whatever folder folder you are into it they have more CV files here. However it is reading only payroll database here because you have selected payroll out of that folder but it will list everything in front of you. Okay. So inside that folder it is picking up payroll database and currently Tableau is reading it. So this is the uh this is all this is here is the connection section here. After the connection here when Tableau is reading this, all right, can you tell me how many rows and columns we have in this data set? 12 fields and 20 rows. You found it. Very good. So just above the data preview here we can see 12 fields and 20 rows. What are fields everyone? Sometimes uh fields are called as columns. All right. And we have rows. Sometimes rows are called as record. Okay. You will also find columns are also called as attributes. Okay. So these are few terminologies that is used often attribute columns fields rows and records. Okay. So there are 12 columns and 20 rows. Fine. Now below where the 12 fields and 20 rows is written everyone. What is below here? Here we know we have a data preview. What do we have here? After you see the preview here on the left hand side this area is called as metadata. What's a metadata everyone? Information about data. Meta means information. Information about data. What type of information about data here? What is the name of your file? Then uh it is telling you here what is the remote field name. What's a remote field name? A remote field name was written in caps. Do you see that? Written in upper case. Remote field name. what uh what was the name of the columns written in the original file. Okay. And field name meaning that how it has cleaned and updated the name here. So if you see the see the original file the original CSV contains names in caps and with the underscore sign in between. However, it has now changed the field names here updated them cleaned them. So this is your metadata everyone. In this this metadata will change as according to what type of file you are getting in. And then you have your preview but we are not able to see the entire preview here. To see the entire preview all the 12 columns here you have a small collapse and expand button. Can you collapse and expand it? See are you able to collapse and expand it? Right. Okay. Wonderful. Now once we uh collapse this here, here we have a data. Right. In this data here we can see you we have employee ID some employee data here. We have got employee ID, their names, we have got uh gender, their roles around uh what is their job roles, uh which department they work in, how much experience they have, which country they currently posted in, the location details are here, their salary details, employee details, who is their manager, all the details are right here. And we have data of about 20 employees. Very good. And when you're looking at this data here, observe observe everyone. When it is name of something, when it is name of something, it's written ABC. When there are numbers defined here, it is a pound sign here. If it's any um data which is location based data, geographical data set, okay, you will see here a globe icon. So go ahead and click on uh click on uh this uh icon everyone. any icon here. When you click there, you'll realize it is about data types that which data type can table Tableau recognize and work with. So you will realize that it can work with numbers whether it's a decimal number or a whole number. We can have date and time together or only date. We can also work with a string. A string means text or character. And then we have here boolean 0 and one. Here it is general everyone. This is a general type. And uh Tableau is known for the geographical roles. Okay. It can recognize airport. It can also recognize a street name and a district name also. Right? And uh even an airport code which airport you're talking about. And if this is also not working, if this is also not working here, okay, you can go ahead and create your own from any existing column. So for detailed geographical and demographic analysis the Google is known uh this tableau is known for that. Now once you have this here so this is all about this data source window. Now this is where we prep the data. This is where we prep the data. A high fasil. What exactly would you like me to repeat? Data type. Data type geographical role that was the last part the geographical role here Tableau is known for geographical and demographic data analysis. So the construction companies they those who need to use uh bridges or something else any construction part there okay and they want to do a demographic analysis or geographical analysis Tableau is preferred for that because it's map accurate and they can actually recognize individual streets and buildings too. So that's what I was settling you here. All right. Very good. Now everyone we want to create charts here right? So what we do we will go ahead and uh on the left hand bottom corner do you see uh uh go to worksheet is written a orange colored sheet one is there go ahead and click on that please go ahead and click on orange colored sheet Huh? All right. I hope everyone is able to find it. Observe. Observe. Okay. What are we looking at? Another new interface. Yes, this is the interface where we are going to go ahead and design multiple charts and sheets. But before we do any of that, okay, first uh before we any of that, we have to understand the interface here. Now observe left hand upper corner of your screen. We have now menu items. Now here we have too many menu items here. Okay, these are called as menu drop-downs. These are called as menu drop-downs. So you have worksheet, dashboard, story, analysis, map, format and more. Below that here, below that here we have frequently used commands. These are frequently used commands. So this is your quick access toolbar. This is your quick access toolbar. In this quick access toolbar, okay, we have basics like redo, undo options here, okay, add uh new sheets and dashboards here, duplicate them, sort them and more. Now, below this here, below this here again we will see this is your data section or data panel. Yes, observe this data panel clearly. Here you have payroll database. It is telling you that this is the data that you have imported within this Tableau workbook. Now below this payroll database, you will find all the columns listed out here. Do you see all the columns listed out here? Also observe here when you are ho uh when you're hovering the cursor over these column names, all are all of these are in alphabetical order. First thing. Second thing is when you hover the cursor over there, what color do you see right now? Just hover the cursor over there over the names of columns here. It's a blue color. Right now observe that there's a very faint gray colored line here. Do you see that? There's a very faint gray colored line here. Below this line, below this line, if you go, it turns green. Below this line here, it is turning green. Right? So, let's understand why is this happening? Because Tableau is an intelligent software. It understands that these here are categorical variable or text values. Since they categorical variables or name of something, date, geographical value, okay? Or name of anything that exist. This is here called as dimensions. This is here called as dimensions. Dimensions are our categorical values. Dimensions are our categorical values. And these categorical values here across tableau will always be shown in blue color. will always be shown in blue color. Okay. Now below these dimensions, below these dimensions we have seen green color everyone right? Why these are green? Because these are numerical values. These numerical values here are called as measures called as measures. Why? Because these are numerical variables. These are numerical variables and numerical values. Okay? And these numerical values entire tableau will be shown in green curve. Will be shown in green curve always. Now after you have seen that observe. Okay. Do you see this uh the latitude, longitude, payroll, database count? Are these part of your data source? Have you seen these columns in the data preview? No, these here are autogenerated. These are autogenerated measures. These are autogenerated measures everyone. Okay. These measures will be generated based on what type of data you have. The moment they see any country, continent, city, state, any uh column like that, they will go ahead and figure out what latitude, longitude is required. By default, every time it is going to give you the uh number of rows in your uh data. Okay. So these are self-generated autogenerated measures. So blue are dimensions, green are always measures. So this was all about the data panel here. Now other than this data panel here, where are we going to keep these? So now uh do you see there are many blocks here? There are many different blocks here. These blocks are called as shelves. These are called as shell. So this is column shelf. This is row shelf. Column shelf and row shell. Okay. Similarly, this is pages shelf. Filters shelf. And this here is your cards. This here is your card marks card everyone. Okay. So this is filter shelf. You can call it filters card also if you want. And this this pages shelf. Now by keeping your uh dimensions and measures whether in card, shelf, pages of column and rows, we go ahead and we visualize our data in this area. This white area, this white area here is called as canvas. This canvas is present in every sheet. And in this canvas, we can only create one chart per sheet. One chart per sheet. If you have ever worked in Excel or if you have ever worked in PowerBI or any other VA tool, usually in one single place we create a lot many charts at once right there. But in Tableau it doesn't happen like that. In one sheet we add only one chart that in this place say and this place here it is it works same. This is y-axis. This is x-axis. This is secondary yaxis. This is secondary x-axis. So it works like that. simple X and Y axis. That's how it works. So this is your canvas everyone. One chart per sheet. Now if you're wondering why there is only one chart per sheet here, then how do we create a dashboard? So that's why Tableau is called as a sophisticated software. Okay. So I would like to uh show you here. Can you do you observe here all these three icons are different with a plus sign? Do you see can you see that here? Just see that. Do nothing. to see that. Can you observe these three icons everyone? Do you see all the three are different? Yes. What does this mean here? It means a very simple thing. Okay. Go ahead and find this uh square with a plus sign. Go ahead find this square with a plus sign and click on the drop down everyone. So now you will realize that uh tab to here provides us individual worksheet. Individual worksheet is going to have one chart only. Then we get to add a dashboard. In that dashboard we can use all these worksheets. Then it also gives us a story board. Okay. In that storyboard we can add worksheet and dashboard both. So Tableau here provides us different uh screens here to work. So right now let's go ahead and work with this particular canvas everyone. And the most important part for you is show me dropdown. You all have a show me dropdown opened up on the right hand side. Yes. And now remember that I have a 2025 version right? I have a 2025 version here. It's not updated yet. And you all are working on the latest 2026 version or I think the version 3 or 2025. So you all have the latest version. So uh show me is going to look a little bit different. Okay. However, the number of charts and types of charts are similar. So in your show me here. Okay. Are you able to select any chart and create it here? Are you able to do that? Try to click on any chart. Are you able to click and create a chart here? >> Yes. >> So this is how it works. Okay. Uh uh if you go to any other tool, I will tell you I'm telling the difference now. All right. What happens here? Switch off your show me for now. Okay. Uh why switch off show me here? So that we have enough space to work in. Show me uh grabs almost 80% of your sheet. So it's better you switch it off when required. We can open that up. This is why Tableau is called as an intellence or sophisticated software because in real time first you should create a report then convert that report into a chart. So unless you're not selecting dimensions and measures it will not let you select the chart at all. And it guides you that which chart is good for this type of report. It will guide you with that too. So this guidance here okay these are your visual analytical principles. These are visual analytical visual analytical principles and these principles are embedded these principles are embedded in ty software. So let's go ahead and see what happens. So this is what we are going to do here. Everyone go ahead and double click on department. Go ahead and double click on department. Tell me where do you see the department? What changes that you see? Once you double click on department, what changes you see? Write in chat box. Observe and then write. I'll wait for uh I'll wait for you here. Department added into rose shelf. Very good. under control Z works just control Z it is added into rows you can see the department names very good very good everyone so here we go ahead into data pane everyone and double click now when I double click here it goes into automatically. So when you double click everyone now listen to me very carefully when you doubleclick here right it will go to it default it's default right so we can say list of departments very good so when you doubleclick dimension what happen when you double click the dimension here it's default places rose shell it's default places rose shell This now when the department is in rows, it is all written in row wise. Correct? It is row wise here. Now go ahead and drag and drop this department into columns and see what happens. Go ahead and do that. Drag and drop this department into columns everyone. like this. Drag and drop like this. What happened? Now, now your list is not written row wise. Now, it is not row-wise written, right? It was written in every row. Department names were written in every row. When you move department to columns, what is happening here? Now your column names are written in each column. Okay, that's the difference. That's the difference. Uh bring your department back to rows. Everyone go ahead. Bring your department back to rows. Bring it back to rows. This bring it back. Are we here? Yes, it is exactly like the tables in Excel. Very good. Once you're here, quickly let me know because uh I'm going a little bit slower so that we can follow along with the technical steps. Everyone drag it back here. Drag the department back here. through the doors. Are they here? Once you're here, please let me know. Once you uh bring the department back. Yes. All right. Now once we are done here go ahead and everyone double click on experience. Go ahead and double click on experience and tell me where does it go. Go ahead double click on experience and tell me where does it go. What's the default place for measure? Mark's card in which card does it go under the marks sh in which card does it go? There are multiple cards, size, text, detail tool. It's like no which card it is. Text cards. So when you double click here it automatically goes to text card. You can also see the numbers calculated here by each department. And how is it calculated? Observe that this was just experience. But as soon as it came here now it is sum of experience. Meaning when we go ahead and we double click everyone we go ahead and we doubleclick on a measured on a measured. Okay. It will go to text card. It will go to the text and plus by default by default by default it will be it will sum up any measure that is there by default it will go ahead and aggregate that as sum hi ar hi all right uh so let's have a quick check on audio everyone am I properly audible Am I properly audible? I can do it. How about now? How about now? Now it is better. All right. All right. So if it breaks in between now let me know. Okay. Okay. If you are saying this one was better. This one is better. Let me check it on my end. Let me check it on my end. Okay. All right. Hello. On my end I can hear it properly. So uh let me know when it breaks out again. All right. Right. I'll repeat that one now. It is better now. All right. Okay. Great. Thank you very much everyone. Okay. Moving forward here. So what is sum of sales here? Whenever we go ahead and we add any measure inside the chart everyone by default it will add it up. For example we have 20 employees here right? Uh each employee uh employee is working in multiple in one department different departments. So now when we want to go ahead and add up the experience from all the departments this is what the experience we have. So how this experience is coming up here by summing it up. So whenever we add any numerical column here it will create an aggregated report here. It will add the experience by the each department or any kind of categorical variable we place here. So that's how it is simply going ahead and counting uh summing up the experience. Do we understand this part here? How this plus is coming up? Why it is summing it up? That's how Excel reports are created. Right? Very good. So on the same principle here also it will give you a report. Very good. Now once we have a report here we want to create a chart out of it. Now ch uh now here I would like to tell you something about tap to all right go to your show me here and under show me I just want we will under show me we will select a chart right but before we select a chart here I want you to track where this sum of experience will go where does this measure go okay so go to show me everyone and click on this bar chart go ahead and click on bar chart and observe the observe where does these two are getting replaced. Okay, go ahead and do that. Go to show me and click here. experience goes in columns and department in rows. Right? You for uh found out the x and y axis. Very good. Now this is what has happened here. The moment you click on the bar chart here, department will remain in rows. But experience simply uh from the labels card, text card here, it simply moved to columns. It simply moved to columns, right? What does that tell us here about Tableau? So in Tableau, let me uh Okay, I let me clarify this to you here. In Tableau, this marks card that you see here. Okay, this marks card is heart of Tableau. Even show me, even show me here utilizes this marks card and nothing else to create all these different type of charts. Only this marks card is used. That is why we will use show me whenever it is required. We will go ahead and we try to master this marks card because if we can do this we can create whatever we want in Tableau because in Tableau these charts are highly custom. Uh these are highly custom charts here that we can create. Okay, major customization can happen and it looks very beautiful and informative too. Okay, so this is where we are going to work with. So we've noticed that it has simply moved from here to here right and once it is here you all have identified it correctly that sum which is added in columns you we can see that sum currently is placed in x uh x-axis everyone this is the x-axis here right and since department is in rows currently department is placed in y-axis here Meaning if you want to place anything in y-axis you will place that in rows. If you want to place anything in columns you place that. If you want anything to be placed on x-axis you place it in columns. Very clear. This is how column and rows work. They recognize x and y axis. All right. Very good. Now answer me one thing here. Voice is low for you. Now it is okay. So voice is low for few. Now why is this happening here? Oh, all right. Okay. Thank you very much Sushir. Thank you very much for confirming that. Okay. Now I am properly audible, right? Okay. Fine. Yeah. What would you wanted me to repeat here? Hi Asa. As the last part was if you will go ahead and put anything in columns right it will be added in the x-axis. If you'll go ahead and put anything in rows it will be added in yaxis. So rows adds in y-axis, columns adds in x-axis. That's it. All right. Are we good now? All right. Wonderful. Now I have a question for you. Look at this chart here. Why do we convert report to a chart everyone? To gain better insights to uh see uh more patterns here. Right? So just look at this chart here and tell me one thing. Which particular department has the lowest experience? Which particular department has the lowest experience? Finance. And very good. Yes. Can you tell me how much what's the number? What's the number for finance? Quite difficult, right? We will try to match it here. Maybe 29 or 30, right? Or we hover the hover the cursor over here in 29. Right? Correct. Now I have a qu one more question for you. Will let's say you have created this chart. You have created this report. You will send it across to your manager and would you like to add a note here to your manager that if you want to know the number, hover over each bar. Would you like to add that note that if you want to know the number go ahead and hover over each bar and look at the number? Do you think they are going to like that? No. Absolutely not. So we uh the objective is to make things easier, right? So we will go ahead and add we we add the numbers here. The numbers that we add on a chart are called as data labels. Since it is Star Tau and another company we here call it mark labels. We here call it mark labels everyone. Okay. So here we call it mark labels. That's it. So these are here mark labels. Where are the mark labels available here? So go to the menu drop-down and switch on this T. Everyone, do you see this T inside the square box? Go ahead and switch on this T. Now when you switch on this T here, you are able to see the numbers. However, few of you might not be able to see alternate numbers. Is that the case? Few of you are not able to see alternate numbers. Yes. Now, let me tell you one more thing here. Do you see that uh this space is also unused right now? We know that we can only have one chart per sheet. So, why to not use this space? And of course we want to see the numbers properly. So now we go ahead uh where we have switched on the label right just on the right hand side here. Do you see standard drop-down? Go to the standard drop-down and click on entire view. So basically now we are saying that go ahead and show that chart in entire view. So go ahead and click on entire view. looking better. Yes. Very good. Uh it all depends on the size of your laptop screen. and the resolution that we have set. All right. Now, another question for you. Uh can you tell me uh which one is the second highest in experience? Which one of the department is the second highest in experience? deceptive huh I'll tell you why the first first answer were was healthcare okay let's understand human brain how human percept anything when I asked you second highest first you went off to figure out which one is the highest so you went here and immediately when you were coming up to find doubt you saw healthcare which was lower than this. So the first answer was healthcare but if you scan all the bars then you will be able to see that this is automative. It is automotive right? So rather than this uh search find and rescue how about we sort them out. If we sort them out sort the bar out it will be easier. We can immediately within a second tell us which is the highest and the lowest or the second highest or lowest. Right? So go ahead and sort it out. Where is the sorting option everyone? Sorting option is towards the left hand side right here. Go ahead and sort this is your sort ascending. This is your sort descending and here we are. Yes. Go ahead and sort it and let me know that yes you have found it. Uh hi Bhavna. Uh is it possible for you to share the screenshot? We will reach there also Ardam. We will learn everything. Okay, we'll learn everything. Uh it's uh Bhna will you be able to share the screenshot so I can see what you have added uh there. So take a screenshot, print a screen, right? Take a screenshot and then you attach go to the chat box and there is a file attachment icon here with the uh page with a dog ear. There is a icon with that. Click on that icon and attach your picture. I'll see into that. wire retail is 18. I have to see that. Okay. Have you added uh employee rating maybe by mistake? That is also 20. It's all right. Fine. Okay. Share the screenshot. All right. Okay everyone. So right now what we have a chart now in this chart here. Do you see the sheet one? This is the lowest value. Anisha, this is the lowest value. Anisha, uh after you go ahead and sort this here whether ascending or descending and you are viewing this in the entire view, right? If you're viewing your chart in entire view, this value will be visible. These are the lowest values here. So if you click on ascending, lowest value will be up. If you click on descending, lowest value will be down. Go ahead and uh check it out again. I have chosen descending order. Okay. Yes. Thank you, Fzil. Okay. Do we have a chart there here? Do we are we on the same page? Do we have first chart in Tableau? Everyone, how many of you have the first chart? Hi Anvesa, as I are trying to tell you here, you have skipped one step anvesa. Okay, can you please go ahead and change this drop-down from a standard to entire view, please? Yes. Yes. No worries. No worries. All right. Hey. Hi, Baba. Same goes to you. Same goes to you. You have added continent also, Pavna. I have never asked you to add continent in the rows. If you add continent, it will go ahead and sum up continent and department. Continent and department. So, of course, the numbers will be different. So, can you remove continent from the rows and view it in the entire view, please? End rows keep only department and please uh go ahead and change the standard drop-down into entire view. Once you have matched the uh example let me know. So what you have done is also correct. Okay. All right. Wonderful. So thank you. All right. So we are moving forward everyone. Stay with me. We are going to learn each and everything in here. I know it seems very basic right now and very slow but uh we are building the foundation on day one. From tomorrow we will be seeing a lot more into it. But first learn how things work. Okay. Now do you see the sheet one? Have patience. We will see and learn everything. Okay. Now uh pay attention on the screen again please. May I have your attention please? Now in this screen here, I want you all to go ahead and look at sheet one. Okay, this sheet one here is our chart title. So if you want to go ahead and give a title to the chart here, we have got a chart title here. And what do we have here? What do we have here? Sheet one. Remember that no matter where you work, you work in Excel, you work in click view, PowerBI, always name your sheet. So I want you to go to sheet one, right click on sheet one and rename it. So what we are looking at here, this is experience by department, right? So go ahead, go to sheet one, rename the sheet one. Here we will say we go ahead and rename it. You can rightclick and rename or you can double click here. It's okay pri you can right click and delete also you can right click and delete also it's fine for now everyone we are going to rename it all right so right click and rename or double click and rename I'm renaming this as department department by experience As soon as you rename this here, do you see any changes on your screen everyone? Once you have doubleclicked or right clicked here, what changes do you see on your screen? Once you rename this, how many of you have noticed that title has got title got updated automatically? Very good. Now let's understand why is it happening? How did that happen? Yes, it changed automatically. Then how did that happen here? To figure that out everyone, let's go ahead and double click on it. Go ahead and double click on it. As soon as you double click here, you will find a dialogue box will open up called as edit title. See the name of the dialog box is edit title and under this edit title here sheet name is written here. However, if you see closely, the sheet name is written between uh angular brackets, right? In Tableau, whenever uh we want to go ahead and give reference to any object, whenever we want to go ahead and give reference to any object, right? Object can be sheet, uh column, dimension, measures, and anything else. Any object that we create here or exist here when we give the reference it is always given inside the angular bracket. So if sheet name is written here within the angular bracket meaning whatever sheet name will be written it will automatically reflect here too. So if you want to go ahead and if you want you can go ahead and uh write on your own also. So you can say that this is a bar chart. Okay. So you can go ahead and write on your own also. If you want you can delete the sheet name reference and write only your own name. You can do whatever you want here. So right now if you click on sheet name if you want to write something of your own here you can write that too. Now it uh now here also observe we have font uh styling right we have some styles and formatting that we can do here. If you want to do the formatting, step one is to select everything. Yes, step one is select the entire part here. When you will how to select it, you can click it inside it. You can drag and drop and select it or you can click inside and control A here. Ultimately once you select it, whatever highlights in blue will get changed. So you can change the font style, you can change the font uh size if you want. You can bold it. If you want, you can change the color for it. You if you want, you can uh place it in the middle. Go ahead, format it. Try the formatting everyone. Make sure it is selected. Once you format this, you will have options like apply and okay. Apply option shows you the preview and okay will save it. So go ahead and click on apply everyone. Once you click on apply, you see this here. If you like it, very good. If you don't like it, make more changes and click okay. So, once you have uh clicked okay, everyone let me know. Once you're satisfied with the title, let me know, please. I'm waiting for responses. If anyone needs help, ask. Where are others? It's all right. We are towards the end of the session now. 10 minutes more. I hope you're liking the tableau. It's easy, very easy to u work with. Let's go ahead and click okay everyone. Let's go ahead and click okay. So, our one chart is ready. Yes. Let's go ahead and add another sheet. To create another chart, how do we add a sheet everyone? We simply click on the plus sign here. So go ahead and click on the plus sign right now. Go ahead click on the plus sign, the first plus sign here. You can also click on the this drop-down here and add worksheet. From here you can see the shortcut is CtrlM. Do you have a new sheet? Very good. Now work along with me here. Let's go ahead and drag and drop. This time we will drag and drop country into the columns. So go ahead, drag and drop country into the columns. Do that. Drag and drop everyone into the columns. Now we are why we are dragging and dropping because we want to choose where I want to keep this column right. So right now you might not understand where to keep it but I right now just follow the guidance. Pick a country put that into columns. I hope you are able to do that. And put salary into the rows and tell me what do you see on your screen when you bring salary into the rows. Which chart? Which graph is that? Vertical or horizontal. Very good. It's a vertical bar chart. So when I keep the salary into the rows here, we have a vertical bar chart here, right? We have a vertical bar chart here. Have you selected a vertical bar chart anywhere? Have you selected it anywhere? No. This is called as visual analytical principles. Tableau understands that if you have one dimension, one measure, the ideal type of chart is a bar chart. That's why it is giving you a bar chart. Now let's go ahead and do a quick formatting. What's a quick formatting here? First off, we will go ahead and sort it out. So go ahead and sort this everyone. You know where to find the sorting, right? After sorting, after you have sorted, go ahead and put uh go ahead and switch on the labels here. Now we can see all the labels here. Now what you're looking in front of you is your a simple vertical bar chart. First do the simple formatting and let me know that yes you're able to do it. You can use reactions, emojis, messages, whatever you want. All right. Very good. Now I would like your attention here. Here just before the sort everyone just before the sort here do you see an icon here? Just before the sort okay towards the left of the sort do you see an icon here? This is called a swap access. Go ahead and click on that icon please. Just towards the left of the sorting option, there is a swap access. When you click on it, what do you see? A horizontal bar chart. So what actually happened here? Yes, it has interchanged columns and rows. So to just to change how much which chart we need to create just to change that part we can simply swap the excess. So once we click here okay nothing happened. Salary moved from rows to columns and country moved from column to rows. Yes. Yes. It is exactly as transpose in Excel. Absolutely correct. Priy go ahead and click on it again. Get our bar chart back. Get our vertical bar chart back everyone. Swap it. Get the Get the vertical bar chart again. And you're right. Now we go ahead and we rename the sheet. So this is country. Uh okay, we are looking at salary by country. So let's go ahead and rename the sheet. Everyone go ahead and rename the sheet. How we can rename the sheet here? We go to the sheet one. You can either doubleclick here or you can right click and rename the sheet. Okay. Once your sheet is renamed, let me know. uh you can give me emojis also everyone emojis and reactions when you have renamed the sheet if you don't want to type that's perfectly fine here just let me know by any means Wonderful. Thank you very much. Now, we are not creating these charts here to just uh uh leave them right here. Okay. Oh, wonderful. Thank you very much for the reactions and messages everyone. Now, let's go ahead and save our work in our own system. To save the work here everyone go to file menu drop-down on left hand upper corner of your sheet on the left and upper corner of your sheet go to the file dropdown and click on save as. Go ahead and click on save as. Now I want you to listen also very carefully while you're saving your workbook. Go to file click on save as. So you will see a familiar dialogue box here. In this dialog box here, go ahead and save wherever you want to save here. Okay. So you can have your own folder or you can name it uh as per your convenience. I'm going to name this file as day one. Okay. I'm also writing today's date here. Now rem see here by which extension your file should be saved. So Tableau will give you two options. One is Tableau workbook. Another is Tableau packaged workbook. All right. Since we are working in Tableau public. Always save your Tableau workbooks as packaged workbook. I will explain you the reason when we reach to this particular topic. But do remember save that as Tableau packaged workbook. This packaged workbook will not only save your charts, it also saves a small copy of your data. So no matter whether you have professional version or not, this file will open up in public version easily and it will also open easily in professional version two. Okay. So it's better that and even if you have misplaced your original file from that particular file path this will still work. Okay. So always go ahead go to the drop-down and save as Tableau package workbook that is DWPX. Okay. Save as that always and click on save. Have you saved your workbook everyone? All right. Very good. So let's go ahead and click I will also go ahead and click on save here. After clicking on save here uh so let's conclude the session for today everyone. Okay what we have seen today what we have learned today. So let's go ahead and see some learnings about Tableau. So you can close the workbook. You can simply go ahead and close it from here. Okay you can simply go ahead and close it from here. So Tableau will be closed. And let's go ahead and uh have a quick recap about what we have learned so far everyone. Okay. So we started with what is data databases uh data warehouse business intelligence analytics data analysis and more. We understood about the background concept of it. Then we installed the Tableau desktop here and within the Tableau desktop we have uh understood about the different interfaces here. First we have seen connect, open and discover. Then we went ahead and we after these three sections here we understood connect section is for to connect it with the data sources here and multiple different files right. Uh so would you like to answer this question here about the interface? Which sections are present on Tableau welcome screen. Right. Very good. It means I have your attention now. All right. So, let's have a quick revision. So, what we Thank you very much for the responses everyone for the quick responses there. Wonderful. Thank you. So, of course, the answer is all of the above, right? We have seen these uh sections just now. What else we have learned about here? We have seen that we can go ahead and connect with limited number of connectors here. Other than files and formats, other than different files and formats, it only gives us four options here to connect within online data. Then we have understood here that this is the data source and in this data source here we get to see the preview uh how many files are there Tableau is reading the file or not and all right and we have then seen that these are the data types that Tableau can handle. What were the data types here? text which are called as a string here. Date, date and time, numerical and more. After the data types here, today we have connected with a text file. Tomorrow we'll connect with an Excel file and we will explore Tableau more. Now while exploring Tableau, we will also go ahead and we will understand the interface much better. What we have seen today, we have understood what are what are dimensions and measures. Those dimensions and measures in tableau are called as blue pills and green pills. So that that's what pills are. Green pills and blue pills are dimensions and measures. Then today we have seen what are max card and what are labels. These are the three basic fundamental elements that we can see on the tableau sheet screen. When we I will see you tomorrow. Okay. We will learn about legends and all. Today we have seen these three major part and we have learned about with the help of column and row shell we can add the things into x and yaxis. Now please tell me one thing if the segment right now is added in columns which access will it go? Which excis this is going to go? If we add something in columns everyone column will go to which axis xaxis everyone columns. And now the answer is obvious. If you add something in rows, where does it go? Y-axis. Yes, very good. So now we understood here that if we add this dimension and measure pills, right? Because it looks like a tablet. So it uh we can go ahead and create any chart that we want by simply adding it into X and Yaxis by using column and row shelf. And which one is the green pill everyone? Which one is the green pill? What we call green pills here? What green pills are for? Numbers. So what do we call these green pills? Measures. Very good. So measures are green pills everyone. Very good. And what are blue pills here? Dimensions. And dimensions are categorical variables. Very good. So green versus blue pill. So we have understood what are dimensions and measures. Now when I will see you tomorrow, we are going to learn uh we are going to deep dive into the concept of measures and dimensions. Basically measures are simple numerical fields. They are also called as quantitative data or continuous numerical data. Dimensions statistically are also called as categorical data or qualitative data. These numerical values generally represent the values where we can do any kind of mathematical calculation on them. Dimensions are the dimension will simply add details in of uh details into the reports which is called as either granularity or level of detail inside the visualization and uh measures here are basically used for any kind of quantitative analysis or mathematical analysis. Right? The examples of measures can be sales with height, profit, revenue. Example of dimension is name of anything. Name of a person, a country, a department, anything. So these are measures and dimensions. We are going to connect with an Excel. Yesterday we connected with CSV. Today we connect with Excel. After connecting with Excel, we will move forward and create multiple charts. While creating multiple charts here exploring that we are going to go through the fundamental concept how Tableau actually work at the back. So the fundamental concept we have to clear. So be ready for that. There is going to be little concept and discussion and a lot of hands-on practice. So first we'll create multiple charts and then we'll create a dashboard out of that. After creating and designing that dashboard we will move on and we create a storyboard too. So this is going to be today's agenda. Maybe by the end of the day today we will have a story board a presentation ready with us. Now while doing so I would like to remind you here I will be going through a step by step taking technical steps and the theoretical discussions and then we will in between if you want me to repeat something or you want me uh to revisit any u topic or you have a doubt on something immediately ask that in the chat. Now I can see most of the participants are here. So yesterday two questions were asked. So first I will answer them and then we will move forward. I hope those two learners are here. I sorry I don't remember the name. I just remember the questions. First question asked yesterday was which BI tools we should know about. Right. Should we know all of them? Who has asked this question yesterday? Is that person here? Is that learner here that which BI tool we should study? Should we know all of them? You. All right. Hi. Thank you. So let me answer this to you here. Are you a fresher wand or you are you do have a working experience? I will answer from that perspective. You have just started working right. So I will take this from the perspective of a fresher who is trying to break up break into uh any job in whichever sector you prefer. So first decide your domain okay in which domain you want to work. It can be marketing, it can be HR, it can be firm, it can be anything. Why? Because no matter where you go, that's your domain knowledge. That's your domain knowledge. You want to go into finance, you want to go into marketing, wherever you want, that's domain knowledge, right? Now, business analysis is what business you want to go into. Can you analyze farmer industry or can you analyze cash flows or outflows? So, then you work in finance, right? Great. So, that is finance. Business analysis is not a domain. Finance is the domain, right? So since you're in finance, I'm already okay, you already know Excel, but you have to learn Excel on the expert level because now Excel works on array formulas and they've introduced a ton of new array formulas that you should know and work on the expert level because finance and Excel is entirely different than simple Excel. Learn that this goes out to everyone. Okay? And you should know SQL. I'm talking about how to type SQL queries. You should know that. After that, know any one BI tool and master that tool. Know any one BI tool and master that. You can choose whether you want to learn PowerBI or you want to learn Tableau or you want to go ahead with Salesforce. There is entire uh cloud system there. You want to learn that or Snowflake. So go ahead and fix one one BI2. It can be Looker, it can be any one of that. This is only for data analysis purposes even if you're a pressure or you are looking for a vertical uh placement or a horizontal placement. So these three are the must and after that I will also suggest if you are little bit into programming go ahead with Python learn Python at least learn in Python how to uh clean data data cleaning data cleaning and basic visualization ADA basic visualization exploratory data analysis at least know this much of Python this is uh for data analysis. A randep R is R is only useful if you know about machine learning mA applied mathematics and um statistics then only R is useful. If you have no idea about uh about anything right for example you are not from a statistical background and you have no idea about machine learning mathematics behind it is or advanced statistics behind it okay then there is no use of learning R that's why R is preferred by the machine learning or machine learning people if they are into that applied mathematics then go with R E is exploratory data analysis basic Data analysis when you ask uh here when you ask what is happening so this is statistical basic analysis okay so it in involves univariate analysis biariate analysis multivariate analysis so if you know a little bit of statistics you will know about that and while I'm into that learn basic stats very very important it start from probability Okay, go to uh the central tendency measures and all that. Go through that from probability to hypothesis testing to hypothesis testings and from there till the regression model at least regression model if nothing else. If you know this much you're good to go pre the all are that's the problem. All the VI tools that you see here all are used. Let me tell you a very clear scenario. Okay, very clear scenario. A company makes a software. Okay, their marketing team sell that software to small, medium and big enterprises to whomsoever they can go ahead and target. Once that BI tool is in use, they want the people to know that BI tool so that they can be hired. Okay. SA I have read your message and visual it nothing is popular. It is all about who is buying what. Let me give you a very clear scenario. All the big enterprises that you will see they will always use two to three BI tools. Two to three BI tools. No one is using only just one and they use combination of two to three BI tools. Why? Because there are different departments and there are different needs. there are different requirements for that and every BI tool will go ahead and uh cover some different requirements. So none of the tool is uh very popular. If you want the popularity right now currently snowflake is on boom. It is mixture of everything. It is mixture of data warehousing. It is mixture of visualization. It is mixture of SQL. It is mix of everything. That is what is popular right now. Okay. So uh for example let's take an example uh big companies like okay big companies here will use a combination of it for example okay that I have seen people doing here powerbi is given to production and factories so whoever is working on production plants and factories they are using powerbi okay and everyone working on in the major corporate office uh there corporate office where all the CEOs are sitting and process managers are sitting there okay managing the HR and all that corporate office is using tablet that is the major combination that you'll see major combination if not power they're using clicksense and they're using both if there's a digital marketing or something right this is what it goes like so always remember always Remember, pick out your domain, figure out in finance domain, in marketing domain, in digital marketing, which particular BI tools are they preferring and you will see that automatically. Go ahead, search it out. Uh read the 10 to 20 30 job descriptions on in that domain. You will figure out that okay, this is what they're asking. This is what they're asking. And immediately you'll get the answer. Okay, that was the first question. Now come a bit. I'll give the answer there. Now yes thank you mana sayupta and everyone and yesi now the second question asked here what is the difference between powerbi and tableau right so since uh most of you don't know powerbi here then it is uh what is the difference between them so powerbi acts exactly like extension of excel the interface is similar to any other Microsoft application and powerbi is much more complex to work with as compared to Tableau Tableau makes things easier and sophisticated. Uh Tableau has visual uh analytical principles built in into that. PowerBI has nothing like that. You have to know the principles to create something out of that and few things which are very easy in Tableau. All right. In PowerBI uses using uses DAX expressions and those DAX expressions are more like programming. So if you're not into programming, you might find PowerBI a little bit difficult to adapt with. All right. So this is what PowerBI is. And PowerBI works on multiple licenses on multiple levels. Tableau also work on multiple levels but uh it is much costlier than PowerBI. So this is the basic difference but as in when we move forward if I see something which I should point out about the differences I will definitely tell you about that. Okay, great. Hi Arcade. Now uh in my introduction uh yesterday I have told you that I do teach uh any Microsoft Office tool starting from word, PowerPoint, SharePoint and all the office tools here right PowerPoint and all that and with that yesterday as I told you I do take Tableau and PowerBI and SQL. I do work with Python and R but only on the machine learning side and on the consultancy basis I don't teach that. All right. Thank you Arpep. Are we good now? Shall we begin with today's agenda? Is there any question that I missed yesterday? I don't remember who asked this question the difference between them but that was the answer and as in when you move forward I will keep sharing that with you. Okay. All right. Now are we good? Shall we move forward? You can use reactions. All right. So, I've shared the sample supertore file with you. This file here uh has already been uploaded in the session materials and this is the Excel workbook that we are going to connect with today. So, let's go ahead and click on Microsoft Excel. So, open up your Tableau public. Here we click on Microsoft Excel and here we will see a familiar dialog box. In this van dialog box, go ahead and find your sample super store wherever you have saved it. Select that and open that. And I have uh now once you click on open again, tell me what do you see on the screen. Try to explain in words. Observe and explain. Okay, just click on open and first observe and explain what do you see on the screen. uh presant because you need to click on Microsoft Excel. If you click on text file and try to uh get Excel, it you might have an error and plus also share uh the what do we say a screenshot here. If you share the screenshot, it will be easier for me to understand what is the error. Okay. So the usual error that we get is by mistake we click on text file. That is the usual mistake I usually uh that I see here. If it is not that let share the screenshot and I help you with that. Okay Brasad will you be able to share the screenshot? All right. So you're looking at a connection box. Okay. Display is different. You see a sheet. Are you a data source? Baba, are you at data source? Why are you not a data source? You click on sheet. So you have to connect with Excel. Select sample super store and click open. That's it. You don't have to click anywhere after you click open. Yes in I understand that you are here you are at the correct place but try to explain that in words. Hi Prasan, you want to share the screen? Okay, that early in the session quickly share the screen let me know what is the issue and Baba go back please and I am sure you're connected with Excel right? Uh you should not be in the sheet. I can see your screen. Prasan, please go to the tableau. Yes. Click on Excel. Get your data. It is not able to create the extract. Uh can you restart uh uh Tableau? Close this. Close Tableau. Close Tableau. and uh go back and restart Tableau. I see here I what I see here is your data blocker is working here. You have to stop the data blocker. It is blocking that you have a data blocker. You have to uh uh disable that then only it will work because because every time you're trying to connect this is blocking it right calling it is blocking Tableau saying it is an untrusted program. Okay. Okay. So you have to first work on that. Are you listening to me Brasant? That data blocker is working. It will not let you work on Tableau. So I cannot help you with that. You have to go ahead and stop that. So I will stop your screen Prasant. I will tag LSM here. If LSM knows anything about it, okay, they can help you. Okay. So we are moving forward everyone. Thank you very much for your patience. I know you have been uh patient here and clicked on open and is still waiting for the explanation. So thank you very much everyone for your patience. Now we begin here right we yes so you are not in the shade bub now you're at the correct place let's understand here we are all here now let's observe and see what do we remember from yesterday we remember that on the left hand side we can see connection file path inside this connection file path what do we have here we have total five objects what it is telling us that inside this particular excel workbook we these five objects with us. Okay. Now what we and for the first time here yesterday we had a data here right today we do not have a data remember that and unless your data you can see the preview here it means Tableau can read your data. If there is no data, it means Tableau cannot read your data because this part this left hand side here is just the information just the information about your file that what does your file contains it is just the information. Okay. So if you want to go ahead and let Tableau read the data set we will bring orders into the whites space. So either you can drag and drop or you can simply go ahead and doubleclick on orders. Go ahead double click on orders everyone. We can see clearly here it says right now that Yazi Zena and Krishna here everyone who is saying 100 listen now let's understand this is the information that we have here that there are 21 columns and more than 10,000 rows correct these are more than 10,000 rows then what is this 100 rows here so we are confused with that what is this 100 rows here 100 rows is say it's a way of saying that I'm going to show you Preview of 100 rows. I'm going to sh show you preview of preview of first 100 rows. First 100 rows. That's it. So by default it will go ahead and show us the preview of first 100 rows. Now the catch here is catch here is you can go ahead and decide you want to see here five rows, 10 rows, you can choose that. So it doesn't matter here how many. No, it it doesn't matter. It's not that case you know it let's understand the difference it's about learning we are looking at it for the first time nobody worries on that okay Krishna so here we are this you can choose how many rows you want to see in the preview right and this is the total number of rows good now here now here let's understand what kind of data it is remember that without understanding your data you cannot simply drag drop and create any Z. So let's understand our data set. I'm going to keep it back it to 100. Let's understand our data set here. So as you can see we can resize it. And if you remember from yesterday we can expand and collapse this. Yes, we can do that. Very good. Now let's understand this data everyone. As we can see it is showing us row ID. Here we have order ID, order date, ship date, shipping mode. So here we have order details. So some kind of orders has been placed and uh these orders has been placed by customer. So second we see customer details here. What who is a customer uh name from? Where do they belong to? Now we have their location details coming up here. These are the location details. After location details here, these are location details. After location details here now we have product details that what they have actually bought him and at the end here now we have fact details. What are fact details? The number details. Okay. What is the sales quantity discount profit happened in that particular transaction. So if we see it very closely here we will get to see that we have data for each and every transaction on which date it was placed when it was shipped out what was the shipping mode who has ordered it where it has been shipped out to the address and everything with the event name of the product name. So this is called as a transactional data set. This is a transactional data set. There's data that tells about each and every transaction. in this transactional data set. Let's learn a little bit more about it. So let's look at the first row ID. What's a row ID here? Row ID is a number which will go ahead and recognize each and every transaction separately. It is to recognize that each row is unique. That's why row ID will be a primary key. primary key it will be uh not null and unique in nature meaning you cannot leave it null or blank and it will be unique in nature. Now comes to the order ID. Now look at the order ID and tell me is order ID unique in nature. Is order ID unique or repetitive? Unique or repetitive? Give one answer. Have you looked into the data? First five rows. Just look at first five rows. Observe. The first basic skill set you need is observation. Observe. Read and observe. Right? Look at this here. Here you will see this is order ID. Right? But you can see the order ID is repeated again. You see few unique ones but again order ID is repeated here. Order is repeated here. Do why? Why order ID is repeating here? is a uh entire data duplicate. No. Very good answer there, Zena. Now see what is happening here. Let's pick up these three rows. Okay? Right? Let's pick up these three rows. Okay? If you see till here, till the location detail, everything is same. Same customer, same location, everything is same. All right? Postaler code, region, obviously everything same. The moment you reach to product ID, you realize that within each order, within this order number, this person has actually ordered three separate products. Three separate products and because of that order ID is repeated thrice. Don't we also do the same thing? When you order anything under one basket, you order multiple product. So that's how your data is going to be saved. Yes. Very good. So that is why since we have product details here, this is why we are looking at multiple order ids here. Very good. So ideally if we go ahead and we count the rows, we will be looking at how many products have been ordered. It means that there are total 10,194 pro uh 194 products have been ordered. That's what we have been counting. This is this count here. Simply means that this many number of products have been ordered. So now we understand our data set. Okay. Okay. So this data set is about an organ uh is about a retail store called a super store and this is the sales of the supertore from uh we will see for how many years of data we have. So let's explore this data set everyone to explore the data set here. Let's go ahead and click on sheet one. Let's go ahead and click on sheet one. Where is sheet one? On the left hand bottom corner it will be highlighted in orange color. It will also show you go to sheet one. Once you're at sheet one, may I have a quick yes that yes, we are at sheet one. Yes. All right. Now I want you to go ahead and can you go ahead and create sales by category report? Anand we are not continuing from yesterday. We have connected a we are now connected with an Excel workbook and we have opened up absolutely new workbook. We have only one data sample super I have stated that clearly when we be when we started today if you're continuing yesterday you might have sheet three okay your choice all right so can you go ahead it's fine an just make sure you stay at the same dimensions and measures okay you can still move forward no worries right can you go ahead and create sales by category Okay, you decide. Create a report for sales by category everyone. Category is the first uh column and sales is somewhere here in the measures created by yourself. We remember from yesterday, right? Oh, you are not there. We zero. Then wait, please just give me 2 minutes. Okay, let them give a chance. So Zena say since you were not there yesterday I would like to remind you that uh uh observe Zena do you see these all are blue in color when you hover the cursor over that right these here are called as dimensions what we call them here in here we call them dimensions all the categorical values date location details are called as dimensions and all the now if you hover downward zena and you hover over The numerical values they all turn green suddenly. Okay. Blue, green, blue, green. The green ones here are called as measures. So I will be going ahead and directing you like that. That that pick up a dimension, pick up a measure. Okay. Prasant category sales by category. So you did correctly but bring category not subcategory. Category is the first dimension. Okay. But you did correctly. Very good. All right. So now let's uh those who were here uh those who were there yesterday, okay, you will be able to create it now. Those who were not uh here yesterday, let's create it with me. I'm sure you all have done that. So before I go ahead and explain what to do, how many of you have done that? Quickly share emojis. How many of you have created sales by category? Quickly share emojis. Very good. All right. Now, tell me which category has the highest sales. Yes. Very good. Very good. Thank you very much. All right. So this is how we do it. Okay. So either you drag and drop or you double click. Double click will take you to the default place. So right now double click on category. Simple double click on category and it will take you to rows. Here once we have added category we will scroll down find sales and this time we drag and drop sales into the columns. This time we drag and drop sales into the columns. Yes. Now after we drag sales into the columns here, we will do the basic formatting that we have learned yesterday. We will sort the data. We will switch on the data labels and we view into the entire view. Okay, I'm sure few of you might have forgotten that. So if you have forgotten that to apply sort your sort your chart everyone always switch on the labels and view this in the entire view. We good? Now what we have here is sales by category. Now this sales by category everyone go ahead and switch on show me this time. Go ahead and switch on show me there please. And now tell me uh other than bar chart which other chart uh can represent these three categories and their sales. Other than bar chart which other chart can do that if you agree with anvesa can you uh leave emoji replies on that message. It is category by sales percent. Think logically. No line chart is only created when we have one time series at least. Even if you hover over the line chart, Tableau will tell you the same that get at least a date column because you cannot create a line chart when there is no date series or there is no time series. Tree map is not the correct way to view it because we do not have multiple categories. Histogram is created only on one column and its frequency. You cannot create histogram on one dimension and one measure. So there are a lot of things there. A pie chart is the correct way to go. Okay. So let's go ahead and click on the pie chart. So open up show me and click on the pie chart please. Every charting that you're taking right you have to decide on that that which chart we should create here. Every chart has an underlying principle and how human mind percepted. So go ahead and click on the pie chart. Why do we create a pie chart? Pie chart can be created when you have three to five slices to be shown. So click on the pie chart. Is this the output you were expecting out of Tableau? Absolutely not. Right? It looks like a sticker. So let's correct it. Okay. Okay. So let's learn something about the pie chart. Pie chart here uh I'm going to switch off show me here so that we have a little bit of space right now. Remember that everyone pie chart is created only to show percentage distribution always percentage distribution because what is a pie chart? Think technically. Okay. What is a pie chart? Pie chart is a circle inside that circle. What is the area of circle everyone? What is the area of circle every time? Do I consider consider it one? That's degrees. You know, I'm talking about area of circle. So area of circle I will say it's one because what pie chart will do here? Pie chart will go ahead and break it up into multiple slices. Into multiple slices. So we are breaking up the entire area of the uh circle here into multiple slices. And as a human being we are trying to see which area is larger. Which area is larger. So pie chart is considered as 100%. So this is a circle. Circle is a complete circle. It we will consider this as 100%. And each area will only go ahead and show us a percentage distribution out of that. So whatever is inside the pie chart should always be equals to 100%. You cannot show simple amounts on that. Okay. Statistically is this absolutely incorrect? Statistically it is not a correct representation within the pie chart. So and another part here. Okay. If you have uh you should have only three to five slices of different colors of different colors. If you have more than that then it becomes completely indecipherable for the end user. Okay, I'll show you the example later. So this is the pie chart. Remember that you uh cannot show anything else and percentage distribution here. So let's go ahead and first format it a little bit to make it look better and give some kind of information here. So go ahead standard drop-down click on the entire view by note area. What do you mean by bottom please? Go ahead click on the entire view. because it's an area chart. Bhna area chart and line chart are similar. You can create line chart and area chart only when you want to show data across the timeline, across the years, across the months. Then only we use the line chart. pie chart. We want to show which category has done the highest sales. All right, everyone. Uh, click on the entire view. Click on the entire view here and switch off show me dropdown. Switch off show me dropdown and do these two tasks. Everyone, have you seen something new that we haven't seen yet? Once you switch off show me, you will find a box. What is the use of this box? What is the use of this box? Very good. What about others? What do you think? What is the use of this box? Yes, it indicates what is what it by with the help of the color. And what do we call this? Very good. This is called as legend everyone. This is called as legend. Legend will always appear. Legend will tell you that what color indicates what, what shape indicates what. So it will tell you the details about what indicates what. Very simple. Very good. So let just look at this particular pie chart and tell me. Okay, just look at the pie chart and tell me which category has the lowest sales. Can you look at this pie chart and tell me which category has lowest sales? And how much percentage is that? Are you sure it's furnitureures? Now let's understand here if you go ahead and hover over this here hover over here then only you will you will be able to see the difference between these two areas correct right why because as a human being it is quite difficult to see the difference between areas like this is why we need to label it absolutely right so first let's label it properly to properly label Everyone, we will go ahead and bring sales again and bring sales into the label card. Go ahead and bring sales into the label card. Another way to label it. Go ahead and do that, please. Yes. Office supplies. So, let's uh let's figure it out. Let's see it out here. So, everyone pick up sales again. Put sales into the labels card. Do that. And when you will do that suddenly you will realize that uh how show me has created this pie chart. Show me has created the pie chart by simply using the marks card. Have you observed that within the marks card it has selected pi. Okay. It has added category into the color card here and added sales into multiple different types of cards and created a pie chart. So if you know how to use this okay we don't need help now do we see the sales here sales amount everyone do you see the sales amount yes now we have to convert the sales amount into percentage. How do we convert this into percentage? Go to sales do a drop-down go to this t sum of sales. Remember that if you will go ahead and bring it to labels, it will show you by the icon. Okay. So the sum of sales which has t in the square in front of it, right click on that. Right click on that. Go to quick table calculation and uh calculate percent of total. Those who know Excel and pivot tables, it is exactly like that. So right click go to quick table calculation and click on percent of total. Now tell me uh which category and how much percentage lowest Yes. Very good. You're still matching the colors, huh? You're still matching the colors, right? You saw that this 31%, this is lowest. Which one is this? All right. Oh, this is the highest. Which one is this? Oh, this is this. You're still matching the colors, everyone. Uh, yes. Absolutely right. Your answer is correct. Yes. So why not write these names also here? Why to match the colors? Let's write names also here. How do we write names here? Any guesses? How do we write names with the number? You're very close. We are trying to label the pie chart with category names. Very good. Yes. Label. So bring category into label everyone. It's okay. Anand then go to the do you have sum of sales in the uh labels card? Do you have that Anand? You right click there. You go to quick table calculation and you click on percent of total. Okay. I hope you got that. All right. Thank you, Anand. Yes, we got it right. We go ahead. And now Anand, do you have percentage? Very good. Thank you. Now go ahead bring category also into labels card. Now do you see everyone? We are category into the labels card. But don't we usually write name first and percentage below it? How do we do that? We want to keep the names uh first and then the percentage. How do we do that? Any guesses? Ah, we don't need to remove it. Yes. So, the concept is clear. Okay. But we don't need to remove it. We can simply drag and drop. Remember that entire table works on drag and drop. Yes. So, go ahead and uh pick up your category and drag it above the sales. See what I'm doing here? Pick up your category and drag it above the sales. That's it. Do it. See? Drag, drop, drag, drop. Hi, Fzil. Uh, pick up category, put category into labels. Pick up sales, put sales also into labels. So, pick up category, put category into labels. Sales also into the labels. Okay. F are we good? Once you're able to do it, let me know. Got it. Wonderful. Thank you. So, this is the pie chart everyone. Okay. Simple pie chart here. Do everyone. Do you have a pie chart? Any all clear? If you have doubts, you want me to repeat something, please ask. All right. I don't see any doubts here. If you have doubts, you can raise your hand or you can write in the chat box. I will attend to that. Okay. Okay. Now, let's go ahead and add another chart. Everyone go ahead and click on sheet. Add sheet here. We know how to add sheet. We can click on plus here or we can go ahead click on plus here in the quick access toolbar. We can go here drop down and add a new worksheet from here too. Add a new worksheet. Everyone. Now once we have added a worksheet uh categories and pie chart is not showing same categories and pie chart. Uh what is not same here? Uh will you please share a screenshot quickly? Take a screenshot. Save it in your system. Attach it as a file. Okay. Share the screenshot. Okay, so we are in the sheet two everyone. Now in the sheet two here we know now how a simple dimension and measure works. For the first time let's go ahead and see how does a date works in Tableau. Go ahead uh see order date here. Bring order date into the columns. When you bring order date into the columns, tell me what do you see on the screen. Again, observe. Try to write your observation. Type by yourself. So, how many years of data we have? Four. So when we bring order date into the columns everyone we can see that we have four years of data set and it shows us all the four years. But let me remind you did order date column had only years in the column or it was the entire date. It was the entire date but what is happening here is it is giving us only years right now. And also observe also observe we had we have a plus sign here. So go ahead and click on plus sign. Go ahead click on plus sign here. When you click on plus sign here, you're getting quarters for each year. Very good. So what is happening here? Let's understand this part here. Date, one date is made up of multiple date parts. What are date parts everyone? Each date has day. Okay, that is uh you have day as a part and then you have got weeks, months or okay. So week, months, quarters and years. In a similar manner, the time also has time parts which is hours, minutes and seconds. Okay. So you this date here is date and time both are natural hierarchies. Since both are natural hierarchies, BI tools can easily identify them and separate them into multiple distinct levels of hierarchy. Okay. So since it is automatically there and it understands that it's a hierarchy, we are good to go. Okay. This is why it is bifurcating the date. It is picking up extracting year, quarter, month out of the date itself. This kind of picking up of date is called as now currently this is acting as discrete date here. Why discrete? Because every part of the date, every part of the date is considered as is considered and used as separate dimension. Separate dimension. Why do I say that that it's a separate dimension? Everyone do you see it is blue in color and there are two separate blue pills. Meaning you can use both of them as two separate dimensions. You can keep one at column, one at rows, one at filter. You can use them as separate dimensions altogether. This is called as discrete. This is called as discrete dimension. All right. Go ahead and click on click on plus here again. Yes. Yes. Click on plus here again. Another date part is revealed. Now each quarter is separated into uh months here. Now we click on plus again. And we see day till day. Now each month and each day is also shown here of all the four years. Yes. So this is the hierarchy. This is the natural hierarchy of the data. And currently these four are these are four separate dimensions. You can use them wherever you want. How do we remove it? How do we remove it? Simply go ahead click on minus sign of the month. If you will click on minus sign of the month, it will go away. Baba, I'm looking at it. Priy, I'm looking at it. Give me a moment. Okay. And then go ahead and click on minus here. on the quarter it will be gone. You click on minus here it will be gone. So step by step it will be gone. Okay. If you want it uh to remove all together just click once on minus all will be gone. Just click once on minus and all will be gone. Like this. Okay. So right now we have here hi Pri right Priy about your pie chart all right about your pie chart Priy uh you have simply added sum of sale twice into the labels okay so since you have added sum of sales twice into the labels you're looking at amount also that's the only difference you have okay there is no other difference you have added sum of sales twice into the labels scar. So you're looking at percentage also and amount also. There is no other difference. Okay. Now about repeating it here uh we have quarter and month here pretty and day. If you click on minus it will go away. And how to add this year? Simply drag and drop order date into the columns. It automatically gives you only year. Okay. Go ahead and do that. All right everyone stay till everyone go ahead and expand till month year quarter and month go and expand till month. Now what if we don't want quarter we only want to see the reports for year and month. How we can get rid of quarter here. Absolutely correct. We can go ahead and remove the quarters from here. We can simply go ahead right click or drop down and remove it from here. Or if once you get habitual with the interface you can simply drag and drop it out. You can simply drag and drop it out. That is also removal. So whichever you comfortable with you can for the beginners. Okay. Go ahead right click and remove. Right click and remove everyone. So we don't have to always use in the sequence. We can simply go ahead and remove it. Right click and remove. I'll wait for the few confirmations here because this is something we are doing for the very first time. All right. Very good. Now go ahead and bring sales in uh go ahead and bring sales everyone into the rows. When you bring sales into the rows, what do you see? A line chart. A line chart. Yes. Did you uh ask it to create a line chart? No. Now what do we learn from this? That if you have one line, if you have a number a numerical value and you have date or any date part there, all right, or any kind of date or time series value there, you should always create a line chart. This is the correct way to represent it that over the time what is happening. This will help you to look at trend and seasonality patterns here. So tell me here what kind of trend there is uptrend or downtrend. Is it going upwards? Say sales is going upwards or downwards or is going up. If you have a smaller screen like I have here, you have to drag and drop and see all the four charts, right? You have a smaller screen, you have to drag and drop upwards on monthly basis. Correct? It is going up. Very good. And every month it is going up. We can see that. Very good. So let's format it a little bit in the formatting of a line chart. Listen to me very carefully. View. Okay. We never sort it. We never add the labels. There's a uh there's a simple reason behind it. We want the end user to look into pattern of the sales. We don't want them to look into the this is was the number that it has achieved. We want their attention towards the trend of the sales. Second part is we why we don't sort it because we want to be sorted in the natural order of the month, quarter or date. So we never sort it by any numerical variable. It will always be sorted in the timeline. So these are so we in the formatting we only view this in the entire view. Now look at this chart here and can you give me two insights everyone? Give me any two insights about this chart. Give me any two insights about this chart. Look at this. Try to analyze it. Visually analyze it and give me any two points. One point we have here December 2024 sales is going down. All right. Give me two insights as you would write in a PowerPoint slide. That's what we are looking. That's what we are looking at yearly and monthly basis trend. So what is happening here? November sales at its peak. Yes, very good. Yes, very good observation there. Last quarter sales are up in all the years. Yes, absolutely correct. Sales are happening every month. Yearly sales goes up. Okay. So we can see here yearly sales is going up, going up, going up all over the year also sales has went up. Okay. We have seen that too. And absolutely right. By the end of each year, okay, last quarter here, last calendar quarter here, sales is always up here. Sales is always up in the last calendar quarter. And whenever the calendar year starts here, it always starts on a low note. Okay. Now, was it easy to compare side by side and another problem we have here is that Tableau could have attached these line together is still this chart should will be correct. If the lines were were attached with each other, this chart will have been correct then also because that's what the pattern is going on. This is December. In continuity, we have January. But right now that doesn't happen. It takes each year as a separate it takes each year as a separate entity. Why separate entity? Because currently it's a discrete dimension and it is not easy to compare side by side. Most of you were not able to figure out uh the seasonality or what is happening every month at the end. So what we do here? How about how about we overlap these charts one above the other? Will it be easier to see if the pattern is same or is there any seasonality inside it? What if what if we go ahead and uh overlap with each other? If you overlap with each other and let's say the sales is same for both the years on a particular month we can see that two then we will know that month on month also the the how much sales increase is there. So let's go ahead and follow along with me everyone. Pick up your ear from the columns. Pick up your ear from the columns and put that into the color card. Be precise. Be precise. Pick up your ear column from the columns here and put that into the color card. Put that into the color card. Now what are we looking at here is now see how easy it is to figure out. Do you see here? It looks like there is an uptrend here. However, if you go ahead and look at the first first three four months here, there is actually not much increase in sales every year. Is there month is there any increase that looks like a very good increase in last four years in sales? If you look at the first four calendar months here, is there an exponential increase in sales over 4 years? 2024 is the highest. No doubt we can see lines are very close to each other here. Okay. And uh there is a seasonal pattern going on. What is the seasonal pattern going on here? Look at this part. Look at this part here. And look at this part also. Every year, every year, okay? During the last quarter here, our sales are increasing. And in January, February and March, it follows the exact same pattern every year. Here also, it is following the exact same pattern every year. Why this pattern is called seasonal pattern here? Because it appears every season in the same months. What can be the reason of increasing sales during these months? Just general common sense question. Festivities. Yes. Very good. Yes. It's the festival season. So many season. Yes. Very good, Priy. Now why is that? And now very good. Correct. So we have festivals going on. People are buying uh stuff there and in January why the sales goes down because now they have already spent out. Now they're only buying what is necessary and for the other entire year they're saving up again so that they can buy during the festivities here. Yes. Every every organization. That's true. So now we can see the trend here easily. Now we are able to understand it that oh because of the festivals it is happening here because we can see it clearly because yes because people they know that people want to buy stuff and to attract them that buy from our company they offer discounts. They still have a markup on that. Okay. So what we are looking here is a trend. So what we are looking at here we looked at a trend everyone when we are looking for a trend we are creating a line chart but when we creating a line chart we have understood few things about it that right now date here as used as discrete dimension. It is used as discrete dimension. So date is a dimension technically but here date is used as a discrete dimension meaning each date part each date part is considered as separate as a separate dimension. Okay, separate column or dimension. This is a very important concept everyone. Very very important concept. Okay, please remember this and understand this. Go ahead, rename your sheet as trend. If you want to copy paste this, I have shared it in the chat box. You can go ahead and copy paste the message from there. Keep that this as your notes. Once you're ready and you have added a new sheet, let me know. Add a new sheet. Once you're ready, let me know. You can share emojis. There is a reaction button also. There are many emojis in that reaction button also. Share your favorite emoji out of that. once you're done. Ah, who likes coffee there? Ah, I think that's a coffee mug. I like that. Oh, yes. This one is nice, too. Okay, those who are done, let me know by any means you like. Wonderful. Okay. So, I hope most of you are ready. I don't see many emojis here. But yes, that was fun. So, let's move forward here. Now, let's understand if date was uh used as a discrete here, how do we get a continuous line? How do we get a continuous line here? Okay. So let's go ahead and see that. Uh so let's go ahead and bring order date again. Let's figure out how do I get a continuous line not a broken line like we saw in the month. Thank you very much everyone for participating and interacting here. Okay. Now let's bring order date into the columns. Okay. We will have again year. Fine with that. Now once you have the year this time go ahead and bring profit into the rows. So first bring order date. It will show us only years. And now bring profit into the rows. Everyone after bringing rows and columns always view it in the entire view. Yes. Very good. Now we are aware about this. If we click on the plus sign here, we will have a broken line, right? But we don't want a broken line. We want a continuous chart because even if we go ahead and connect these charts together, okay, it is still giving us the same trend but much more perceptible and easy to read. So how do we get a continuous start here? To get a continuous start here, work along with me everyone. You we have right now year and profit, right? So go to year, right click on here. Go to right click on year. Once you right click on year, find the option. Find the option year, quarter, month. Do you see these options here? Right? Yes, listen to me carefully. While you're looking at the options here, when you right click, you will see year, quarter, month. But once you move below more, you will realize that year and quarter are written again. So when you see the second occurrence of quarter, you will realize that what is happening here. You can clearly see the first occurrence of quarter is only quarter two. Discrete quarter is recognized. But once you go through and you see the second occurrence of quarter now you will realize that here it is actually recognizing that quarter comes with the year. It will be quarter 2 2015 quarter 2 2016 and likewise that quarter should be recognized with the year. So this is your continuous quarter everyone. So go ahead and select the second occurrence of quarter continuous quarter everyone. Go ahead and click on that please. Once you click on this uh tell me what do you see? Do you see any changes on the screen? What is the color of uh what is the color that you see in columns? for the pill. It's a green pill or a blue pill. Very good. Now here we have a blue. Um now this is say this says quarter and now this is green in color. Right? This says quarter. It is green in color. And if you will go to the right click again you'll realize it is actually selecting the continuous. So what is this here? This says date as continuous value. All right. So now here date as continuous dimension. So here it understands very clearly that uh the date should be a continuous dimension. So it will give you a continuous line too. So here we are taking date as continuous dimension and and now it is showing everything. Okay. See this is quarter 1, this is quarter two, this is quarter 3. Now the question is yes we have a quarter wise trend. We can see the trend is going up. Also see here on the x-axis why we don't have all the quarter one quarter two two written here cuz it doesn't have a space. It doesn't have enough space to type that in. That's why everything is not written around here. But we can go ahead and switch on the markers here. What are markers? Do you see when we hover over it, a circle appears on each data point. And you can see we have quarter 1 and quarter 3 in the chart. This small dot that is appearing on each data point, it is called as a marker. Everyone, what do we call this? It is called as a marker or mark. I hope you are all able to see that. So, let's go ahead and make it visible prominently here. So, go to the color card. Go to the color card everyone. And here are the markers. Uh switch on the second one. Go to the color card. There will be markers. Select the second marker. You will see these circles appearing there. The small dots. Yes. Now uh since we are in a line chart it is not customary to uh now in this line chart you cannot simply go ahead and tell them that there is an uptrend. Whatever you say it has to be backed up by data and research. So we will go ahead and create a trend line. A trend line is statistically calculated regression line that will predict that that every time sales is has been increasing. It will prove for us. So let's go ahead and add a trend line to prove that yes there is an uptrend quarter on quarter. We prove that here everyone. Do you see? We also have an analytics pane here on the left and upper corner just beside the data pane. We want to add a trend line. We just want don't want to say it without any uh statistical backup that there is an uptrend. To prove the uptrend here, we have to add a trend line. So everyone find analytics pane here. Left hand upper corner in this analytics pane here. Go ahead and double click on trend line. You'll find it here. Double click on trend line. Once you double click on trend line and you can see that let me know. Choose your interaction option and let me know. I'm looking at reaction and messages both. So, how is the business doing? How is the business doing everyone? Is it doing good? There is an upward trend. Okay, there is an upward trend. All right, so go back to data everyone. Remember to go back to data. Very good. Thank you for the responses here everyone. Let's go back to data here. Now in this data okay we can clearly see uh the line is going up here this is the minimum this is the maximum we are good with that and since we want to show the obtained here it is customary that we should not be showing the numbers because if we go ahead and show the labels everyone all right the end user is completely distracted and looking at the numbers and they simply forget that line is just to show the trend so what if we only Show the minimum start number and the end number that we can show. We will not show every number but we can show this was the starting value. Now this is the end value. Okay. So how to do that? To do that here go ahead and switch on the label everyone. Switch on the label. Switch on the label here. You'll see number it is quite uh cluttered a chart. Okay. So let's clean this chart here. To clean the chart here now you come back and you click on labels here. Go ahead and click on labels here. When you click on label you will find the option called as alignment. You'll find the option called as alignment. Do you see alignment? It says automatic. Now go to the automatic drop-down. Okay. So this is the automatic. You can see these are up and down. This is automatically aligned here. Fine. Below the alignment it says marks to label. Currently it is showing all the labels here. What we want is not minimum and maximum. We want wherever the line starts and ends. So below the alignment here find all and below all you will find line ends. So go ahead and select line ends. Click on that. The moment you click on that here you will see the uh number at the end and at the start of the line. Go ahead and find this please. Once you have found this option let me know. If anyone is having difficulty finding this option, you can let me know that too. I'll help you out. Okay, I have less than 10 responses here including reactions. Thank you for the quick responses everyone. What about others? Are we on the same path? Now Zena, go to the labels here. Below the alignment all minimum, maximum and line ends. Select line ends here. Very good. Thank you very much for the responses everyone. So now our chart is complete. We can see minimum and maximum number. We can definitely prove that there is a trend line upwards trend line here. So now here we have seen uh quarter wise trend. So this is quarter- wise profit everyone. Okay. So we have seen quarter trend for profit. So let's rename our sheet here. Uh that will come later Zena that will come later. We will can also see difference between the quarters but all will come when we learn about more into calculations. Right? Today we will be simply going with fundamentals and little bit of designing of the chart. How do we remember these steps? Looks like we have to take minute to minute screenshot and that you don't have to do that. Okay. Uh we don't have to do that. Uh what happens here is right now we are learning something new. I am showing you around that see these many features are there. All right. And we are going to use these features in uh in upcoming 9 days. Today's the 10th day then 981. So uh in these 10 days you'll be using these small features that you see here multiple times because these are very basic things. So when you practice something a lot of times okay it will automatically register in your brain it is exactly like using your mobile every day you can use that your mobile and call people message people even if you're half asleep why because you have practice that a lot that's your muscle memory so we will practice these smaller small things by uh a lot okay this is the basics we create so you don't have to remember anything deliberately it will be registered in your mind with the help of practice Okay. And and this answer goes to everyone. Don't worry. Ardep go to analytics pane. All right. Go to analytics pane ar it is uh towards the left of the data. Find trend line and double click on that. Find trend line and double click on that. It's a trend line. It is proving statistically that there is an uptrend. We good? Oh, those time. Oh, for that. Okay. Markers. All right. Go to color card and switch on markers. These are called as markers. Correct. So, go to color card and switch on markers. All right. Thank you. So, we are moving forward everyone. Thank you very much and practice uh will make you remember everything. Don't worry about remembering something. Just enjoy it. It is quite interactive. Okay. Don't worry about remembering something. So click on plus again. We add one more sheet here. And what we are interested in now we have seen by category over the timeline sales over the timeline profit. So let's go ahead and look at sales by state because we do have uh country and continent. A lot of data here, right? So let's go ahead and let's look at sales by state. And for that we will use show me this time. So work along with me everyone. All right. Go ahead and find a state and double click on a state. Go ahead and double click on a state because you want to see sales by state. Once you double click on a state, what do you see again? Explain in words. a world map. A very good observation. Yes, we have lads and longs also added here into rows and columns. Where did the state go? If rows and columns are added with the autogenerated uh values longitude and latitude, where is the state everyone? We added the state. Where is it? It is in the max card detail. It is in the details card. Look at that. It is in the marks card here. But you you're looking at the entire world map, right? You're looking at the entire world map. How many of you are looking at the same output as uh you can see on my screen? Yes. All right. So also go ahead and look at one thing here. So go ahead and look at show me here. Indie. Show me. You have two type of maps here. In show me. We have two type of maps here. So let's go ahead and select the second type of map. Let's go ahead and select second type of map. When you select second type of map, does that make any difference here? No. Meaning show me is not of any help anymore. So go ahead and switch off show me then. Switch off show me. Go ahead. Switch off show me. The moment you will switch off show me you will realize it is actually saying 59 unknown. What is that 59 unknown here? If you hover the cursor over that you will re you will see it is writing that there are 59 values that have unknown geographic locations meaning it cannot identify and that's fine you know it can be 10 59 something unknown right? Yes. So currently it is not able to recognize those estate locations here. So go ahead if it is 10 or 59 because you are on a different location. Okay. So let's go ahead and click on 59 everyone or 10 unknown whatever unknown you have here because we at different geographic locations you will realize it now. So click on edit locations unknown locations. Edit locations. When you click on edit locations, you'll realize it is actually picking up your um system location. Whatever your system location is, my system location is India. It is picking up India. Your system location is US. It will pick up US. But we still have unrecognized places here. Why? Because a data is not necessarily going to have only one single country or region. It can have multiple country or region. So what do we do here? We'll ask it that do not pick up the country name from the system. Go ahead and pick up the name from the field. So go to the drop-down and ask it to pick up from the column country or region because there can be multiple countries not just one. So go to the drop-down, click on from field. Now you will see that uh uh we have uh two countries here and now everything is matching. No errors here. Once you have selected this country or region, click okay. And do you have a full chart now? Do you have a full map now? Where is country? Where is country added? Very good. Where is country added? Same as a state into the details card. So what did it do? It simply picked up the country and dropped that into the details card. That's it. Details card everyone. Okay. Be specific. Be specific. Remember the specific details. Read them properly. It is in the details card. Right? It marks card is fine but it's general. It is in the details card. That's the correct answer. All right. Very good. Now go ahead and what is the which visual indicator we can use here? Which visual indicator we can use here to indicate sales? We need a visual indicator to show sales value. Everyone to sh show sales value. Which visual indicator we can use here? What are visual indicators? Shapes, colors, size of the shape, position of the shape. Which visual indicator is present with this map? Uh there will be a 15 minutes. There will be a 10 minutes break. Ina now in next 1 minute California very good so everyone we will go ahead and break uh we will go now we are near to the half way through the session here now we'll go on a break but before we go on a break go ahead and save your work first so that we don't lose it go ahead and save as we all remember control S also works you can go to file you can click on save as also okay do not uh Use control s it will ask you to create the account. Instead of that you can simply go ahead and pile and save as. Now in the map here when I asked that tell me which state has the highest sales. What did you do? Instinctively you knew that wherever the darker color is that is the good number. If the color is lighter in shade or gradient it is a bad number. Right? That's the human instinct. That's the perspective. We learn from the uh we see it and we know that. So, uh you can see the legend also tells us the same thing that there is a gradient of color going. If it's a darker shade, it's a good number. And the moment you saw that you looked here and not everyone is going to remember in the map what lies where. So, you have to hover the cursor over here to figure out which state it is. So let's go ahead and bring data labels onto this map everyone. So in this map here we will go ahead and bring both the data labels. We'll go ahead and bring a state into the labels and sales into the labels too. So let's go ahead and drag and drop. So first we'll bring a state and then we will bring sales. Now we can easily see the name of the state and the numbers. There is one problem. It is not showing name and number for all these states. Why do you think it is not doing so? Why do you think Why do you think it is not doing so? Because if it will go ahead and write the name for each and every uh name here, it will be overlap. There is no space. So most of the time when you are not able to see labels or xx uh excess labels there or mark labels there it means that there is not enough space to write. Yes. So by default by default if you go into the labels card everyone you click into that you'll realize that by default it does not allow the labels to overlap other marks. So that whatever are visible okay you can see them clearly and anyways if you want to see something else here other than what is visible you can simply hover the cursor over that. So now let's go ahead and uh what else we can do here? We can go to the font dropdown here. So go ahead and click on the labels card now. Click on the labels card now. Find font dropdown here. Font dropdown here. It's a drop-down. You can go to the drop-down and you can set a smallest uh font. Okay. You can find a smaller font size and a smaller font details. It will help you to see a little bit more estate names and the sales. Go ahead and edit the font everyone. Very good. Now here you will be one uh if you are saying that okay I can still not see the names here don't worry okay when it goes to the presentation mode we will be able to see that. Where is the presentation mode? Do you see a TV icon here? Do you see a TV icon here? Go ahead and click on this. This is the presentation mode everyone. So, uh you can present it directly from the tableau. You don't have to actually go ahead and create a PPD out of it if you don't want to. You can simply present it from here. Go ahead and click on this TV icon. Once you click on it, are you able to see all the names of a state and numbers clearly? Yes, very good. But uh now we can see it clearly. Meaning if you go into presentation mode, we don't have to worry about the labels anymore. If we have added the labels, it will be there. Now we need to add one more sheet and create another chart. How do we go back? To go back here, you can go ahead and press escape key from your keyboard. Or you can go ahead and click on the function key F7 on your keyboard. or on the right and bottom corner. Click again on that icon here. Okay, anything will do. I'm pressing the escape key. Press the escape key everyone on your keyboard left and upper corner. Are we back now? All right. I hope others are back too. Add one more sheet. Add one more sheet everyone. We want to now see here sales and profit. Sales and profit by city. Now we want to see sales and profit by city. Add a sheet. Everyone add a sheet. Now we will not take help of show me here. All right. Now we understand that what whatever we did uh to create this map here ultimately it was using the marks card. In the marks card, show me has went ahead and added a state and country simply into the details card and the map appeared. Correct? So when we trying to create the state sales and profit by the city, of course, it cannot recognize the city name without having country and state details inside it. So this is what we are going to do everyone. Here we will go ahead and bring one by one. First bring country into the details card. First bring country into the details card and observe what changes happen on your sheet. What do you see? Can you explain what are you looking at and what this map is showing you? observe. It is not showing cities yet. It is showing you. Do you see these two bubbles? Do you see these two circles everyone? Yes, it is showing us that it is showing us US and Canada. So it is showing us that these are the two countries that are available in this data set. That's what it is showing with the circle. So the position of circle position of circle is showing you that there are two cities are two countries are pointed out that these two countries you have in this data set. Position of the circles is showing you that. Now in the similar lines go ahead and bring a state into the details card. bring a state into the details card. Now we clearly uh see here that uh position of all these states are visible now. Position of all these states are visible. Now let's bring city. Bring city into the details card. Leads and longs are already there. Now each city is here. By looking at this map, can you tell me are uh how what about the market that we this supertore is capturing? Are we good at that? Are we able to sell across US and Canada? Are we able to capture market and create a market base? These are the cities. All right. Right. So we are looking at a map right now. Each circle is representing a city position. Right? Okay. So now we have a circle. Circle has two qualities. Okay. In circle has two qualities. We can use two visual indicators out of that. We can use size of the circle and color of the circle. We can use size of the circle and color of the circle. Okay. So uh we also want to see sales and profit. Okay. So please tell me with which visual property or visual indicator we should go ahead and represent sales numbers size or color. How we can represent sales number by size of a circle or color of a circle? Uh Bhabna can you share the uh when you're sharing a screenshot share the entire screenshot so that I can see what you have selected here. So oh I have both the answers here. Color and size both. All right. So if you say that put color in size uh color in sales here if you're saying that put sales in color it means the profit has to be uh represented by size of the circle. Now profit here can be either positive or negative. Have you ever seen a circle with a negative radius? Can you create a circle with a negative radius? negative diameter. No. So this is what happens here everyone. Okay. Uh since profit can be positive and negative both we will go ahead and represent the profit via color. We'll go ahead and we represent the profit by color and we represent the sales with size. Okay. Why? Because sales is always positive. It is always going to be positive. So it will with the uh size of the circle it will show the magnitude of sales value and profit here will be it can be positive and negative both. So we will show it by the color. All right. So you did selected something else. Okay. So everyone go ahead pick up sales bhna. You go ahead and go to show me and please click on the first map. Okay, this step is only for Bhaga. Bhna go to show me and click on map here. And everyone else go ahead and pick up your sales. Put that into size card. Pick up the sales. Put that into size card. The moment you do that, have you observed something? Dha follow along. Put sales into the size card. Have you observed something here? Once you put the sails into the size card, your bubbles have vanished. Your circle have vanished from the view. Yes. What does this uh here write? Size of the circle has changed based on the magnitude of sales. So you can realize here. Okay, read this properly. The legend is out there. It is telling you the smallest circle means only one order has been placed from uh one order has been placed in last four years because this data is consolidated of all the four years. So this smallest dot means that only one order has been placed. So we were thinking that it was able to capture the market. In reality it was not. So go to the size here increase the size a little bit more. Go to the size car increase size a little bit more. But that doesn't that doesn't help much. We can still see lot many small circles like a dot. Meaning only one order has been placed from those cities. So increase the size a little bit. After that bring profit into the color card. Now bring profit into the color card. Is this a profitable business? Is it proving profitable everyone? What happened? N more than 80% of the circles have are now vanished from your site. Now there are no circles at all. Let me tell you the reason for that. Okay, let me tell you the reason for that. Look at the legend of some of propheter. Okay, you can clearly see anything less than zero is the shade of lighter orange here. Anything positive is shade of blue. But when it comes to the center value here near zero, near zero, it is gray in color. And the background of the map is also gray in color. That is why most of the circle currently are vanished from your view. But they are there. Okay. So how do we make them visible? To make them visible everyone go to the color card. Go to the color card in the color card go to border. Okay. So there are two options border and halo. Halo is the uh ring uh around the circles. So we don't want any kind of ring around the circles here. It makes it blurry. We don't want blurred circles. So we switch off halo. So go to the halo drop-down and select none. After selecting halo as none, we go to border automatic drop-down and select a little bit darker border. Select a little bit darker border. It will make the circles appear. Okay. So, go ahead to the borders drop down. Make the darker uh border and you will see circles will appear. Very good. Now here, now here, let's go ahead and look at the pattern also here. The orange shade that we see is too light to even figure out whether it is larger loss or a smaller loss. So we go to the color card again. Go ahead, go to the color card again and click on edit colors. When you will click on edit colors, you your screen and my screen is going to look different. Okay, I'll update my tablet. Okay, I have to get it done by the IT team. So it's all right. So you click on the edit colors. Okay. Your interface and my interface is going to be different. So once you click on edit colors, a dialog box will open up. All right. In your dialogue box, go ahead and find out the same option called as palette. It will be the first automatic drop-down. Okay. You can easily find that. Once you find this automatic palette here, I want you to go below your uh go below exactly to the left and bottom corner. Ignore everything. Go exactly below and find a check box called as use full color range. It will be at the bottom left corner of your dialog box. Check on that use full color range and click okay. We don't have a okay. you will immediately see it getting applied. you don't have okay the moment you check on that immediately you will see some circles are now darker in color I have only three responses including reaction so I hope you are all able to find it even though the interface is step friend the options are same right all right wonderful so in your case there is no okay button so you have to cross it off so go ahead and cross that off and here we have a map sales and profit That's it. You can see the business is not doing so well. All right. So, here we are everyone. Okay. So, now we have multiple charts. So, let's go ahead and add a dashboard. How do we add a dashboard everyone? To add the dashboard here, we will go ahead and we add a dashboard. So, either you go ahead and click on the plus second plus sign here which looks like a check box here. Okay. Or you go to the drop-own here and go to the second option, new dashboard. Once you click on new dashboard again observe and tell me what do you see. Try to write in words. Click on new dashboard and tell me what do you see. Very good. We can see all the worksheets. Very good. Drag option for sheet. Instead of data, we have sheets. No. Uploaded file. All five sheets. Right. So, we all can see the file and the sheets. Yes. Uploaded file name is not there anymore. Very good. Good observation. Very good everyone. I'll also add a dashboard here. In this dashboard here, uh we can see list of all the sheets right here and other objects that we can add in a dashboard. And currently, yes, we are in the default view. Right, we have the option to create the phone view also. Very good, good observations there everyone. Now one more thing here to observe. It's a new interface again. Right? Look at this. Do you observe that this is the only white space here and this is grayed out. Meaning if you drop sheets here, drag and drop sheets here, it appears only here in this one uh one single space. Why is that happening here? Because of size. is absolutely right. So, do you see the size dropdown everyone here? This is the size dropdown here. This size is fixed by default. So, let's go to the drop-down. Click on the drop-down. And in this dropdown, it is giving us a range of dashboard size. We don't want to fix a range here. It's quite a small. So, we go to the drop-down of the range. This is where we get to know that there is a fixed size dashboard we can create and we can also keep it automatic. Fixed size means if you create a fixed size as 16 by9 screen someone wants to view in their tab which is quite smaller in a screen okay they will have a difficulty of looking at it so best way is to just keep it automatic so let's go to the drop down here and let's make it automatic what happens when you click on automatic automatic means the dashboard will resize to fit any screen it is displayed easy for us to design also. Why it is easy for us to design? Because now the entire virus space is within your laptop screen as per your laptop screen. Okay, they will resize this dashboard. We good? Now we're about to add the sheets onto it, right? So this entire space it will create a dashboard. To add the sheet here everyone, you can either uh there are two ways to do it. Okay, first let's go ahead and double click and see what happens. So, let's test this out here. Go ahead and double click on sales by category. Is this what you were expecting out of a dashboard? Is this how a dashboard works or looks like? Go ahead. Double click. Tell me what happened. The entire one single chart is taking the uh entire space of the dashboard. Right? That doesn't happen. What is a dashboard everyone? What is a dashboard? Dashboard is a collection of chart, objects and tables. Okay, which gives you a solution or insight for one single objective. That is a dashboard. Meaning it should have been a collection of multiple charts. But when you bring it here, it simply takes up the entire space and we we don't see that. So let me show you how does it work. Go ahead and now doubleclick on the third chart. I saw it. Dashboard is a collection of charts, tables and multiple other objects. Those objects are collectively put at one single screen to solve or give insights for a particular one single objective. That's a dashboard. All right. Now after this here go ahead and double click on the third chart quarter trend by profit. Go ahead and double click on that quarter trend by profit. You will realize that now it is automatically dividing the screen into two parts. Meaning we are doing good. It understands what a dashboard is. Yes. Now it is in two parts. Very good. Right now when you double click it is it is taking its default position. Right now we know that from yesterday that if you want to go ahead and choose our own space we can drag and drop also correct. So everyone I want your attention on the screen please may I have your attention please come back to the screen. Come back to the screen here. Is everyone here looking at the screen? I just want to show you something and then you can go back and do it on your own. But you need to see that first. Okay, great. Glad to have your attention here. Now, let's see what I'm doing here. I am going to pick up sales by state. All right. See here, left click, hold, and I picked it up and I'm moving here. The moment I am here, do you observe? Wherever I move my cursor, there is a certain part of the dashboard which gets highlighted in gray. Are you able to look at that? This gray part here is actually showing us where is the probable space I can keep it in. So you have to left click and hold it where you reach to a certain position. So I will keep this in the third quadrant of the dashboard. See here I'm keeping it at the left hand bottom corner of the uh uh dashboard here and I'm leaving it and it automatically get placed up here. All right. In the similar manner I will pick up sales and profit by city. I will place it in the fourth quadrant of the screen here. Go ahead and do that. Drag and drop. And if accidentally you drop it somewhere you don't want it. Control Z everyone. Control Z is your friend in Tableau. It works. Go ahead and try this. Left click hold for a very long time until you reach to the correct position. Place them properly. Once you're able to do that, let me know. Very good. I hope everyone else is on the same path, too. I'm just waiting for 10 uh seconds more. If you are facing difficulty, ask please All right, we are moving forward then. Also observe right now everyone. Do you see whichever chart is selected? Okay, you can see a gray colored box on top of it. You can see a gray colored box here. Whichever chart you select, there is a gray colored box, right? This box is called as a container. We call this box here as a container. So this particular gray container currently is holding up our charts. Also observe there is a dash lines here. Right? If you hover the cursor over these dashed lines like this, it converts into a double-headed arrow where you can choose to resize them. Okay? So you can hover your cursor over the dash lines here. It converts it to a double-headed arrow. There you can go ahead and resize the charts. I my pie chart count only percentage you know mus. No, you didn't do anything wrong prasant. I was actually helping out uh Bhavna Bhavna or I don't remember the name correctly who has asked that that they are not able to view it properly. So they accidentally added that amount there. Okay. So that is why amount is visible here because I was solving one of the doubts. So everything is correct only. Yes. Yes, I know that zoom was glitching. I have to reshare the screen. Okay. So here we are. Uh have you observed one thing more here? Uh none of the charts have any borders. Only three sheets are showing in the sheets. Now there is a scroll bar. You have to scroll up and down AA. Okay. You have to scroll up and down AA. There are all the sheets shown here. But uh there's a very small space here. Okay. Yeah. Yes. Yes. No worries. It's fine. We will see that about Bhna in next few minutes. First focus on what I'm trying to tell you about the dashboards. All right. See here everyone. Have you observed here? There is no borders on any of the charts. So let's go ahead and give borders to them here. How to give a border? to give the border. Here just towards here we have a layout panel also. This is dashboard here. This is layout. So let's go to the layout everyone. Here's the layout. In the layout, if you scroll down a little bit, you will find border. Scroll down a little bit and you'll find border. Here is the border. Go to the border drop down here. Okay. If this is deactivated, you are not able to select the border. Why? Because first you have to select the object you want to give the border to. So you have to select the chart first. As soon as you select a chart here, the border will appear. Remember that you have to give the border to each chart separately. So select the chart, go to the layout. In the layout you have border drop-down. In the border dropdown you have choices of uh the line, width of the line and color of the line. So choose any color that you want here and that border will be placed. Then you have to select another chart. Go ahead and select another another color or go ahead and select the color. Then select the chart. go to the drop-down and give the color. Now I understand that your next question is why can't we do it for all the charts? Can I controlclick and select multiple charts and give them the border? The answer is no. The answer is no. Okay, you cannot controlclick or shiftclick and select multiple charts and give them borders. It is not possible. Okay. Tableau doesn't allow for that. You have to go ahead give the borders individually to all charts. Okay, clear. Go ahead. Give all the four uh borders. Argy we do have format painter option here. Okay. But it works only on uh very flimsy levels. It is not as detailed as uh Microsoft and it only works from sheet to sheet. We have given the borders. Okay. Now let's go ahead and uh look at the chart titles. They are too big for to be in a dashboard. So let's go ahead and format them to to format the chart titles. Here we have to go to the dashboard menu dropdown. Okay. Go to the dashboard menu dropdown. In the dashboard menu dropdown, go ahead and select format. Go ahead and select format everyone. When you select format, do you have a pop-up box dialog box to where does the format opens up right here overlapping our dashboard panel right inside the dash inside the format our dashboard, you'll find a dashboard shading, dashboard title. We don't have a dashboard title yet, but we do have worksheet title. So, we go to the third option here, worksheet titles. In the worksheet titles, now you can go ahead and select the font style. You can select the font size here. We can also go ahead and give the background shading. Now, when you go to the shading part, observe. Okay. Now, uh Tableau understands that this shading is going at the back of the title. So, by default, it will give you lighter shades. You will not find this in PowerBI. PowerBI gives you uh the colors which are bright. Okay? It doesn't follow any visual analytical properties or principles. Tableau does. So, it automatically gives you a lighter shade. So you can go ahead and put it at the back of your titles set everyone. It doesn't give you the alignment option, but it does give you this option here. Do we have this? Once you're able to do this, let me know. I'll be waiting for your responses here. Once you're done, okay, there is no okay button. So you have to simply cross it off. Cross it off and get our original panels back. Simple double click. Double click it opens up edit title. Oh, we were not there yesterday. Uh, this sheet name is the reference, right? Sheet name is the reference. If you want to type something of your own as we have done before here, you can write off your own also. So in uh tableau okay angular bracket means referencing to an object. All right. Got it. Thank you. All right. So here we are. We are back here. We go back to dashboard here everyone. Now have you observed right now in this entire dashboard? Don't worry about that. it will be included. Stay with me please. You don't add everything into the dashboard. If you create 30 30 35 sheets, it is not required to add all of them in the dashboard. You add in the dashboard what is required. Okay, I will show you how do you create a story. Not everything goes into one single sheet or one single screen. All right. So in this dashboard here everyone do you see there is a white space we are not utilizing that it makes no meaning and all the legends that we had all the legends are added on the right hand side all the legends are added on right hand side as the end user okay will they know that which legend belongs to which particular map or sheet no we know that. So one thing is very clear okay this legend belongs to this part okay these both the sales size one here they belong to our first map and this belongs to the second map now there is one more issue do we need to uh visualize all the legends here do we need to show all the legends here for example is this required anymore Is this required anymore? Because we have already written the names here. So, do we need this legend to tell which color is what category? A minute. Anand is it required anymore since we have written the names here. Okay, we don't need to tell them which color is which category. So, let's get rid of that. Go ahead and cross it off. Go ahead and cross it off. Remove it. Select it. Container will appear. Remove it. And whatever changes you do here on the dashboard. Okay. So, uh let me show you that it doesn't change anything here in the chart title. But if you'll make any changes inside the chart, it does affect your charts. But chart title not affected at all. Removed category. Now let's talk about the sales. Is this particular size legend is it going to help you to find out how much sales something is representing in this map? Is it helping to is it helping in any way here to determine by the size how much sales is there in amount? We don't need it. Delete this two. Delete this two. Now we are left with two legends here. This we need because we have to tell them okay these are sales colors these are profit colors and this is the maximum sales minimum sales minimum profit maximum profit now I want everybody's attention on the screen once you have removed the top two legends here do uh may I have your attention on the screen please confirm by the emojis that yes you're looking at So, Anand Anand, have you got your answer? Yes. Yes. Thank you for the emojis there. Great. All right. Thank you. Okay. So, let's look at here. If you want to go ahead, if you want to go ahead and we want to place the sales uh legend with this particular chart. If I try to move it. Okay. So, I will pick up the handle of the container and if I try to move it, it moves it as a tile. This is called a styling, right? Because it is grabbing a space and disturbing the entire part. We don't want to move it like that. We want to go ahead and overlap it on the chart. We want the overlap to happen. Correct? We don't want to disturb our other charts here. So, we don't want it tiled. We don't want to add as a tile here. We will go ahead and make it float over the chart. So, select your sales legend. You will find the drop-down which is a more options. Go to the more options and simply select floating. When you select floating, tell me what do you see? Do you see any changes? It is moving now. Very good. Are you all able to move the sails now after making it float? Very good. So we click here we click on floating. We will pick it up. We we can place it here. Place it on top of it. Now we can do same with here also. We can same uh we can do same with the profit legend also. Right? We can go to the drop-down. We can make it float and we can place it on this map here. Go ahead and do that. Please make the profit legend also float. And once you're done, let me know. We're able to do it right. Very good. So, I'll also go ahead and click on floating here. I'll also go ahead and click on floating here. Here we are. Okay. Now, we can place it wherever we want. Now tell me one thing while we were making it float so that we can use this wider space even though we have removed them from this wider space. Are we able to utilize that yet? Zena this is profit. Okay. Select it. Do you see a drop down there? More options. Are you able to see the more options? Go there and simply select a floating thing. That's it. Then okay so once you go to the drop down you select floating you have to hold this handle here on top of the container okay and you go ahead and drag them here all the charts in my dashboard has gone light that is something new I'm looking at so first give me 2 minutes okay all right so I was saying Are you able to use this space right now? Are your charts like occupying this wider space? Yes or no? Basel, you also tell me. Are your charts occupying this wider space yet? Yes or no? And uh Zena, are you able to now hold it and move it? Done. All right. I will tell you an where have you missed. Okay, everyone. to go ahead and click on the white space. Go ahead and click on the white space. When you click on the white space, do you see another container? But this another container is blue in color. Observe the difference. If you if you go ahead and select any one object or a chart, it is gray container. But when you are clicking on a white space, you have a blue container. Right? This blue container is called as a vertical container. This container can hold multiple objects inside it. So blue container holds multiple gray bordered objects inside it. So all these legends were getting automatically added inside this particular container. Even the charts that you're looking at here, they are actually held inside a huge big blue container. Do you see on my screen right now? So these are by default here. By default they are added here. So now this white space is occupied by this empty container. We don't need this container here. So we go ahead and we cross it off. So what did you do Anand then? By mistake okay you have made this entire container floating because of that your sales are profit sales and profit are moving together. That's why I specifically said to find and observe that it is gray in color and they are moving individually. Right? So this is what you're supposed to do right now. Go ahead and move them individually. Okay. An So everyone remove this. Please select here and remove it. Remove the container. Now we have better space for the charts. Okay. We might have to move the profit legend also. Is your dashboard ready? But this dash is your dashboard ready? Please confirm. I need few more responses here. Those have given the response. Thank you very much. I hope others are ready too. Friend, uh whatever we have done so far, have you followed that? That's my question. Okay. Yes. All right. Now here, now we have a static dashboard. It is a static dashboard right now everyone. Right now in this static dashboard here these uh these charts are not interacting with each other. These charts are not interacting with each other. What is meant by interacting here? Meaning if I go ahead and click on technology slice right now okay are the other charts changing and telling us only about technology? No. So what happens here is I'm sure you all have seen moving dynamic charts that if we click on something here it will go ahead and uh if I just click on the white space okay by mistake by mistake okay you have suddenly uh filtered them out okay so just click on the white space it will come back everything else is fine with your uh with your chart. This is the white space of the chart. This is the widest space of the chart. Right? Anywhere here. Try to click on there once. Can you click on this here? Can you click on the slice again? If you click on slice is your uh dashboard back uh fessel you have to give me 2 minutes then give me 2 minutes I will ask you to share the screen okay all right so let's understand this here everyone okay so right now what what is the interaction we are looking for here that if we go ahead and select technology. Here the line chart should show us what was the trend in technology. It will show us where we were selling out technology in which state and how the technology is doing over the cities. So all the three charts should change. So what we will do here is this. Go ahead select uh this chart here. Select this chart here. This gray box should appear. In this gray box on the right hand side do you see a filter icon here? Do you see a filter icon here? which is just a white outline. This here filter icon here will go ahead and uh go ahead and click on that. It will make this pie chart to be used as a filter for other charts. It will filter out the other charts with the help of category. So click on your pie chart. Go ahead and select the filter. Everyone select this filter. Once you have clicked on this filter, it will turn white in color. You can also do that. Follow along. Click on filter. Now once you have clicked on filter, I want you to go ahead and click on the slice here. Click on one slice of technology. And once you click on one slice of technology, everyone, do you see your charts are changing? Do you observe that your charts are changing? This is called as dashboard action. This is called as dashboard action. The moment we click on that this here, the moment you click on this here, immediately your charts will reflect as per that selection. How do you get your original chart back? Just click on the same space again or uh okay click on the same space again or outside in the white space. So Anand then select your pie chart right and se once you select your pie chart in the gray box you will see this white colored print white colored filter right please confirm right now once you have clicked and it is filled in white color everyone go ahead and now click on this technology anand click Here. Do you see everything is changing? Do you see it changing now? Anand is it working for you? Are you able to click on the slice? If this is filled in white color, if this is filled with white color, do you see this filter? Share the screenshot, Anand. It's a very small task. Share the screenshot. I will help you out. All right, everyone else, go to this map here. An share the screenshot in the chat box. Share this map here. Select this map and make sure this map is also used as filter. Select this map here. Make sure this map is also used as a filter. Basel is your chart are your charts back now? Yes. Thank you. Wonderful. So everyone just click here on this sales by state map and click on filter. Use this also as a filter. Anand then are you able to get it now? Anand then select this map and click on this filter. Are you able to find this filter? Yes or no? Right. So, right now it is white in color. Okay. Can you go ahead and click on California? Anand, can you go ahead and click on the California? And when you click on California, do you see other maps changing immediately? It means it is working for you. Very good. Now we can see okay once you click on California you will see this cities are zooming in. We can see the sales trend in California. You can see how other categories are doing within California. How do you get your chart back? Click on California again or click on the outside. So, are we able to get the chart back everyone? Back to default. No changes. Got it. Very good. So, this is how the dashboard interact here. All right. And now we can go ahead and read the dashboard. For example, if you want if we want to give double filters, how do we get give double filters here or multiple filters? So for example, I will go ahead and select furniture. I'll select furniture here. Right? After selecting furniture, I simply want to know how well we are selling furniture in Texas. So we will click on control button. We will click on control button which help us to multi select. So first I have selected furniture. Right? Now I will go ahead and select access. So even if I don't click on control I can select both of them separately and now we are filtering out by multiple features here. Furniture in Texas we can see furniture in Texas the sales has been going down and currently we are in a lot of loss there. Yes. Yes. Correct. Fel we filter out other charts. Go ahead and try this out. Please click click on furniture then click on Texas. You will see multiple filters applied and we can see how furniture is doing in a doing in Texas by sales and profit both. Are we able to do this? Are we good? You know how to get it back. Just click outside and you're back. Okay. Double click. Double click. You're back. All right. Right everyone. So now once we have the dash, we have got the dashboard here. Now let's go ahead and create a story. So how do we create a story everyone? How do we create a story? A story should have a beginning um the middle and the end. That's how that's what a story is, right? So go to the drop down here and create a new story. Go ahead. The icon looks like an open book. Add a new story. Everyone there's a storyboard here in Tableau is exactly like your PowerPoint slides. Okay. The only what skill required here is how do you create a story out of your data analysis. The data that you have analyzed here the story is made up based on an objective. So right now we have find found out that furniture in Texas is in loss. So basically we are giving the overview on the business. So when you go ahead and add a new story here you will realize that you are on currently you are on another interface and here we can see both worksheets and dashboard listed out here right we can see a huge widest space and a caption box too that's good we already have a title here so let's go ahead and and on the left bottom corner we have size also set you can see here okay it's a huge size of the slide So let's make this size also automatic. So we have added a storyboard everyone. We go to the drop down here and we will make it automatic again. So make the size automatic. Go ahead and make the size automatic everyone. Done. Very good. Now you can see here this is just like the slide. Now how uh how will you go ahead and represent? What is the first thing that you will talk about? You are here to represent overview of business for past four years. What is the first thing you would like to talk about? how we have been doing from past these years. Correct? Go ahead and pick up your Go ahead everyone and pick up your quarter trend by profit. Simply double click on. There are many ways to add the sheet and the dashboard here. But go ahead and pick up first quarter trend by profit. Pick up that. Once you double click on quarter trend by profit here you can go ahead and talk about how we have been doing uh from past these many years. Okay. And we are in the upper trend so far. So right now once you double click uh entire sheet is added as your first slide. Right. So this is your chart one. Simply go to this box here and you can uh go ahead and uh either write a message here. All right. Or you can simply go ahead and uh type any caption or explanation you want to write about it. I'm simply writing one because this is the first chart we have added. So this is the caption we are adding here. This is first. Okay. We are talking about over the years what we are doing, right? This is what uh this is uh over the years performance in sales sales performance. Now we need to add another slide everyone. Second slide. Now in the second slide we will go ahead and tell them what was happening every year. What was happening every year and how come the last year was better. So now go ahead and you can now double click on trend or you can drag and drop trend just towards the right of the caption box. Both will give you the same result. Drag and drop trend on the right side of the caption box. You will see two arrows will help you to place the caption box there. Now you can show them year on year how we have been doing here and how well we have done in the last year. We will give them good news first. Yes. Are we able once you are able to add both these slides? Let me know whether you're adding it by double click, double click or drag and drop. Both will work. Now in the similar manner here in the similar manner here. Now go ahead double click on sales by uh go ahead and double click on sales by state because over the time we have done this and over uh o over all these states this is the current situation of the sales. The third we will go ahead and talk about okay over the market over the entire states how we are doing. So I think we I'll talk about that. Uh let me complete the technicalities then I'll go into that. I'll remember your question. Now after this here we can go ahead and take them to the entire dashboard. After this here we can go ahead and take them to the entire dashboard where we can go ahead and connect all of these stories together and show them what is happening in each category and in each state over the time and over the cities. Now this here we will talk in detail here where the details lies. So likewise just double click is the easiest way to add here. Now we have a storyboard. Okay. In this story here we can go ahead and present the story. Now, but nowadays what happens is uh we don't only present the story. The story can be seen by the end users intended end users on their tabs and multiple different devices. Right? So we might have to go ahead and write detailed captions here to display what what is happening where now let's talk technicality here. So do you see these caption boxes right and the sequence is decided. What if we want to change the sequence now? If you want to change the sequence, pick up your caption box and drag and drop and your sequence has changed. Now, a simple drag and drop everyone and the sequence will change. Another part about the caption box, you want to delete something, there is a cross button. You want to resize the caption box, select your caption box and you can increase the height. You can decrease the height, you can increase the length, you can decrease the length of a caption box. You just need to select the caption box first. Okay. Are we able to see the caption boxes? You can change the height and width. Right now, I would like you to explore the layout here. What are the layout options available here? If you go to the layout options here everyone, we can go ahead and choose a navigator style. Navigator style means if I want to present this here, I don't want people to read the caption boxes at all. So I can go ahead and choose that only show the numbers. But if I show the numbers, people are counting as at which slide we are at. So maybe we can simply show the dots. Okay? or we simply go ahead and show the arrows that this is the total and this is where we are. So now this is up to what you want to present here. Uh but remember that you don't lose your message that you write. It will still be there. It is just what you want to present. Okay. This is the layout here for the story board. Go ahead and click and see. Are we able to work with caption boxes? Yes. Anyone needs layout with the caption boxes? So in the layout, this is the main part. Okay. There is not much uh we can do here. We cannot do any editing in the sheets. We cannot do any uh editing in the titles of the sheet or anything else. Okay. Neither you can change the colors of anything. Buth whatever we have set here the actions and everything that works perfectly well. Okay. That works perfectly well. There is uh everything will work well. But we cannot do anything else. And another point here is okay if it feels a little bit smooshed in here and compressed here don't worry in presentation mode it will not because you'll be presenting it here like this. Now creating this story board is exactly like creating entire PowerPoint presentation everyone. So I will answer the Swati's question here that during presentation do we use dashboard or we use the story? Now it is a very interesting question here and this is actually decided based on the objective. Okay. So you can go ahead and actually represent uh represent a sheet dashboard and a story board together. Now it is all based on what uh is your objective and who is the end uh user here. Okay. Because sheets also can be dynamic in Tableau. Okay. So one sheet is showing only about the this is how we are doing in the entire state and the city. Then you take them to the dashboard and the dashboard here is showing off uh the connection of two charts together or three charts together and we are looking at the entire story b. Now we want to move into the detailed analysis. So we can take them to the story board and in the story board we can have multiple dashboards there one by one. So usually story boards will have multiple dashboards. So if I click on this caption, I will have a revenue dashboard. Click on another caption, you'll have a sales dashboard. Click on another caption, you'll have a department dashboard, performance dashboard, KPI dashboard. So usually storyboard, usually you'll have multiple dashboards and dashboards are stringed inside the storyboard. So uh these all three things are used together because we are in Tableau and when you go to presentation mode in Tableau everything can uh everything goes into presentation mode. That is why it becomes easier to string the story easily here and I will show you a very interesting mode here. Now you must be thinking that if I can show all the sheets in the presentation mode why are we keeping it in a storyboard because in the storyboard it is easier to manipulate the sequence and I will show you the best part here. Okay go ahead and let's say you don't want you don't want to show them individually you only want them to show the story. Okay then what do you do? Would you like them to see all the sheets? Everything that you have done to create this storyboard. Would you like them to see see individual sheets or would you like them to see the sequence you want them to show? What would you like? Because you have to go ahead and share the entire workbook with them. Not only story will be outsourced. Entire workbook will go to them. So we don't want them to see the individual sheets guys. So go to story one. Go to story one. Right click on this story and hide all sheets. Go ahead, click on hide all sheets. So this is a fantastic feature here everyone. So go ahead and save your changes. Go ahead and save your changes here. So this is it for today. So let's conclude the session for today everyone. So we have seen multiple concepts today. Okay. We have went around with pie chart percen
Original Description
🔥Data Analyst Masters Program (Discount Code - YTBE15) - https://www.simplilearn.com/data-analyst-masters-certification-training-course?utm_campaign=xc0KEwQ8was&utm_medium=DescriptionFirstFold&utm_source=Youtube
🔥Partnership is with E&ICT of IIT Kanpur - Professional Certificate Course in Data Analytics and Generative AI (India Only) - https://www.simplilearn.com/iitk-professional-certificate-course-data-analytics?utm_campaign=xc0KEwQ8was&utm_medium=DescriptionFirstFold&utm_source=Youtube
🔥IITG - Professional Certificate Program in Data Analytics and Generative AI (India Only) - https://www.simplilearn.com/iitg-generative-ai-data-analytics-program?utm_campaign=xc0KEwQ8was&utm_medium=DescriptionFirstFold&utm_source=Youtube
This video on Tableau Full Course 2026 by Simplilearn will help you learn Tableau from beginner to advanced level and understand how to create interactive data visualizations and dashboards for business insights. The course begins with an introduction to Tableau and explains its importance in data analytics and business intelligence. You will learn how to connect to different data sources, clean and prepare data, and perform data analysis. The tutorial covers key concepts such as charts, graphs, filters, dashboards, and storytelling features. You will understand how to use calculated fields, parameters, and data blending techniques. The course also explains how to design visually appealing dashboards and present data effectively. You will learn real-world use cases of Tableau in business reporting and decision making. By the end of this Tableau tutorial for beginners, you will clearly understand Tableau tools, data visualization techniques, and how to build professional dashboards for analytics.
✅ Subscribe to our Channel to learn more about the top Technologies: https://bit.ly/2VT4WtH
⏩ Check out More Data Analytics Videos By Simplilearn: https://www.youtube.com/playlist?list=PLEiEAq2VkUUKnB4Yzmn-B6O_hhcP-DanA
#datavisualizationusingtablea
Watch on YouTube ↗
(saves to browser)
Sign in to unlock AI tutor explanation · ⚡30
Playlist
Uploads from Simplilearn · Simplilearn · 0 of 60
← Previous
Next →
1
 2
2
 3
3
 4
4
 5
5
 6
6
 7
7
 8
8
 9
9
 10
10
 11
11
 12
12
 13
13
 14
14
 15
15
 16
16
 17
17
 18
18
 19
19
 20
20
 21
21
 22
22
 23
23
 24
24
 25
25
 26
26
 27
27
 28
28
 29
29
 30
30
 31
31
 32
32
 33
33
 34
34
 35
35
 36
36
 37
37
 38
38
 39
39
 40
40
 41
41
 42
42
 43
43
 44
44
 45
45
 46
46
 47
47
 48
48
 49
49
 50
50
 51
51
 52
52
 53
53
 54
54
 55
55
 56
56
 57
57
 58
58
 59
59
 60
60

Ethical Hacking Full Course 2026 | Ethical Hacking Course for Beginners | Simplilearn
Simplilearn
AWS Full Course 2026 | AWS Cloud Computing Tutorial for Beginners | AWS Training | Simplilearn
Simplilearn
Data Structures And Algorithms Full Course | Data Structures and Algorithms Tutorial | Simplilearn
Simplilearn
SQL Full Course 2026 | SQL Tutorial for Beginners | SQL Beginner to Advanced Training | Simplilearn
Simplilearn
Microsoft Azure Full Course 2026 | Azure Tutorial for Beginners | Azure Training | Simplilearn
Simplilearn
Shopify Tutorial For Beginners 2026 | Shopify Course | shopify dropshipping | Simplilearn
Simplilearn
Six Sigma Full Course 2026 | Six Sigma Green Belt Training | Six Sigma Training | Simplilearn
Simplilearn
🔥Feeling Stuck? How Upskilling Can Boost Your Career! #shorts #simplilearn
Simplilearn
Growth Hacking In Marketing | Learn Growth Hacking Marketing Strategies | Simplilearn
Simplilearn
🔥Cracked 3 Job Offers with One AIML Course! | 20–30% Salary Hike #shorts #simplilearn
Simplilearn
Top 10 Must-Have Figma Plugins for UI/UX Designers in 2026 | Figma Plugins | Simplilearn
Simplilearn
Business Analytics Full Course 2026 | Business Analytics Tutorial For Beginners | Simplilearn
Simplilearn
Simplilearn Reviews | Getting future-ready with course in Artificial Intelligence | Roopam’s story
Simplilearn
Generative AI Full Course 2026 | Gen AI Tutorial for Beginners | Gen AI Explained | Simplilearn
Simplilearn
Full Stack Developer Course 2026 | Full Stack Java Developer Tutorial for Beginners | Simplilearn
Simplilearn
Simplilearn Reviews | How David Went From Seasoned Engineer to AI Innovator #GetCertifiedGetAhead
Simplilearn
Complete Social Media Marketing Strategy for 2026 | Social Media Marketing Strategy | Simplilearn
Simplilearn
🔥Top 4 Cybersecurity Certifications You Need! #simplilearn #shorts
Simplilearn
🔥Cloud Engineer Salary in India 2026 | City-Wise Breakdown #shorts #simplilearn
Simplilearn
Digital Marketing Full Course 2026 | Digital Marketing Tutorial For Beginners | Simplilearn
Simplilearn
Full Stack Java Developer Course | Full Stack Java Developer Tutorial for Beginners | Simplilearn
Simplilearn
Social Media Marketing Full Course | Social Media Marketing Tutorial For Beginners | Simplilearn
Simplilearn
How To Create LLM Chatbot Demo 2026 | Build a LLM Chatbot From Scratch | Simplilearn
Simplilearn
Digital Supply Chain Management Certification | Supply Chain Management Course | Simplilearn
Simplilearn
AI Agents Full Course 2026 | AI Agents Tutorial for Beginners | How to Build AI Agents | Simplilearn
Simplilearn
ITIL Full Course 2026 | ITIL 4 Foundation Course | ITIL Tutorial For Beginners | Simplilearn
Simplilearn
Generative AI Full Course 2026 | Gen AI Tutorial for Beginners | Gen AI Explained | Simplilearn
Simplilearn
ITIL Full Course 2026 | ITIL 4 Foundation Course | ITIL Tutorial For Beginners | Simplilearn
Simplilearn
Simplilearn Reviews | Integrating AI & Music | Diego's Story
Simplilearn
Digital Marketing Full Course 2026 | Digital Marketing Tutorial For Beginners | Simplilearn
Simplilearn
SEO Full Course 2026 | SEO Tutorial for Beginners | SEO Training | SEO Explained | Simplilearn
Simplilearn
PMP Vs CAPM: Which Certification Should You Choose? | PMP Vs CAPM | Simplilearn
Simplilearn
Complete Data Analyst Roadmap 2026 | How To Become A Data Analayst In 2026 | Simplilearn
Simplilearn
Generative AI Full Course 2026 | Gen AI Tutorial for Beginners | Gen AI Explained | Simplilearn
Simplilearn
🔥5 Jobs That Are Most Likely Safe from Layoffs in Today’s Market #shorts #simplilearn
Simplilearn
🔥Git vs GitHub – What's the Difference?
Simplilearn
What Goes Behind Building the Likes of Uber and Netflix? | Product Management Tutorial | Simplilearn
Simplilearn
AI Agents Full Course 2026 | AI Agents Tutorial for Beginners | How to Build AI Agents | Simplilearn
Simplilearn
Full Stack Developer Course 2026 | Full Stack Java Developer Tutorial for Beginners | Simplilearn
Simplilearn
Product Life Cycle 2025 | Stages Of Product Life Cycle | Product Life Cycle Tutorial | Simplilearn
Simplilearn
Project Management Full Course 2026 | Project Management Tutorial | PMP Course | Simplilearn
Simplilearn
PCB Design Course 2025 | PCB Designing Explained | How To Make PCBs | Simplilearn
Simplilearn
Python Full Course 2026 | Python Data Analytics Tutorial For Beginners | Simplilearn
Simplilearn
🔥Top Product Management Skills You Need to Succeed in 2026 #shorts #simplilearn
Simplilearn
SQL For Data Analytics 2026 | Essential SQL Commands | SQL Tutorial For Beginners | Simplilearn
Simplilearn
Simplilearn Reviews | Paving Way To Success With AI & ML Course | Soumik’s Upskilling Journey
Simplilearn
Six Sigma Full Course 2026 | Six Sigma Green Belt Training | Six Sigma Training | Simplilearn
Simplilearn
Learn Snowflake In 45 Mins | Snowflake Tutorial | What Is Snowflake | Snowflake Explained
Simplilearn
🔥ML Career Tip – How to Start Learning Machine Learning in 60 Seconds! #shorts#simplilearn
Simplilearn
🔥Agile vs Waterfall in 60 Seconds #shorts #simplilearn
Simplilearn
Excel Full Course 2026 | Excel Tutorial For Beginners | Microsoft Excel Course | Simplilearn
Simplilearn
What Are AI Agents? | Types Of AI Agents | AI Agents Explained | AI Agents Tutorial | Simplilearn
Simplilearn
How To Create a Product Roadmap In 2026 | Product Roadmap | What Is Product Roadmap | Simplilearn
Simplilearn
SQL Full Course 2026 | SQL Tutorial for Beginners | SQL Beginner to Advanced Training | Simplilearn
Simplilearn
🔥What Is Phishing? #shorts #simplilearn
Simplilearn
Cloud Computing Full Course 2026 | Cloud Computing Tutorial | Cloud Computing Course | Simplilearn
Simplilearn
Simplilearn Reviews | Overcoming Rejection & career plateau to finding a New Job : Bhaskar Banerji
Simplilearn
Six Sigma Full Course 2026 | Six Sigma Green Belt Training | Six Sigma Training | Simplilearn
Simplilearn
Generative AI Full Course 2026 | Gen AI Tutorial for Beginners | Gen AI Explained | Simplilearn
Simplilearn
VLSI Design Course 2026 | VLSI Tutorial For Beginners | VLSI Physical Design | Simplilearn
Simplilearn
More on: Data Literacy
View skill →






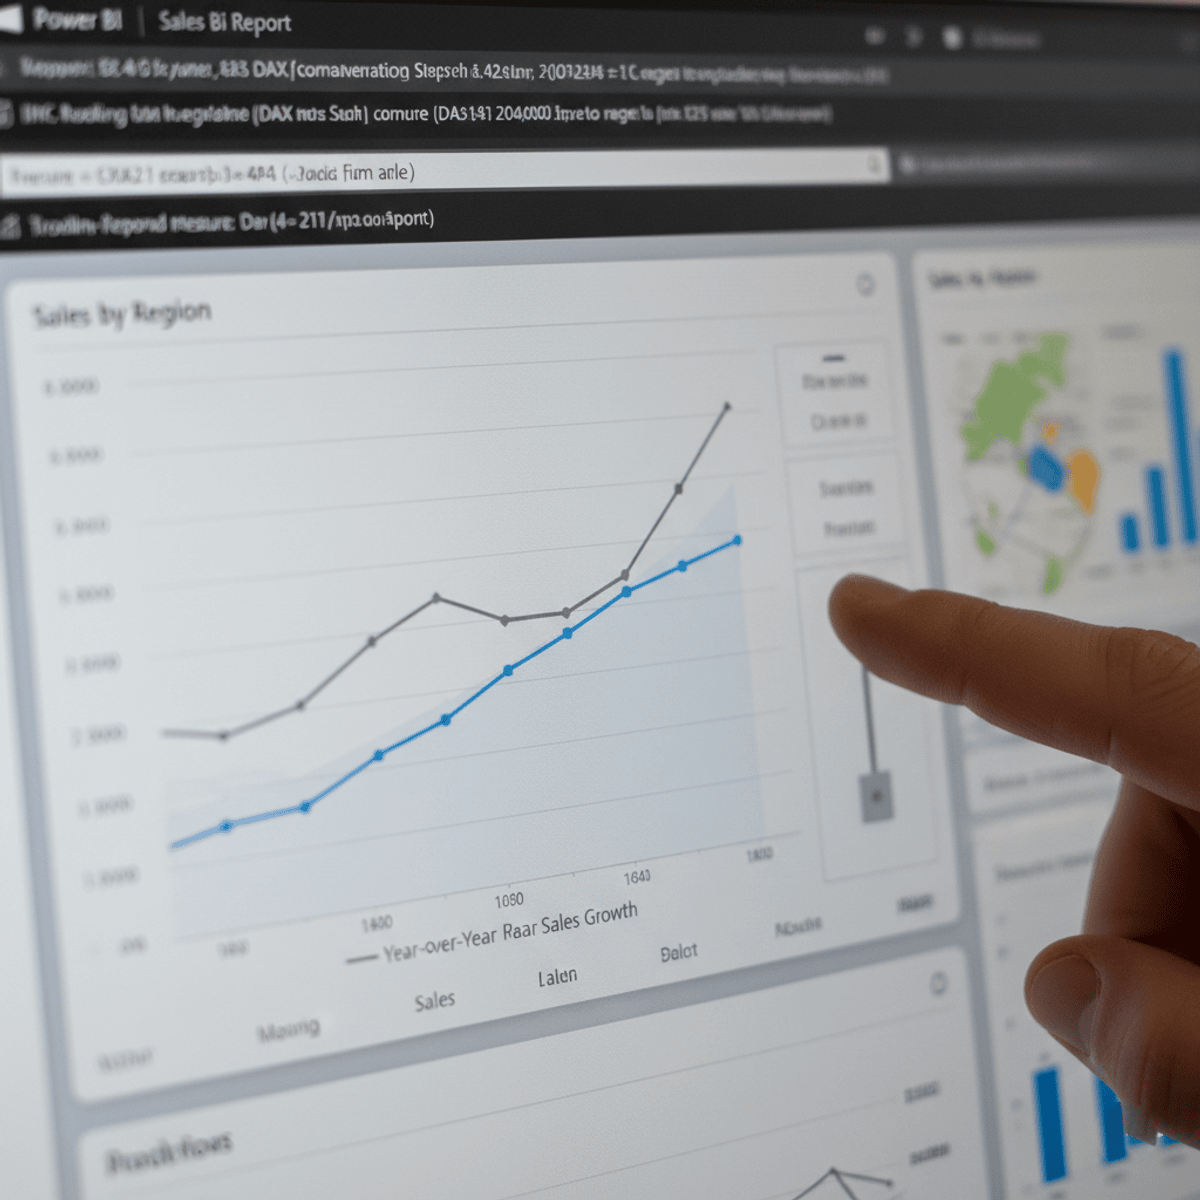


Related Reads
📰
📰
📰
📰
Did the market overreact to BEL.NS’s earnings miss? I Tested It Five Ways.
Medium · Data Science
Power BI July 2026: The Month the Browser Became a Real Modeling Tool
Medium · Data Science
Comprehensive Guide to Restaurant Data: Verified Hours, Pricing Tiers & Meal Schedules
Dev.to AI
Data Management Is Dead. Long Live Data Management
Forbes Innovation
🎓
Tutor Explanation

 DeepCamp AI