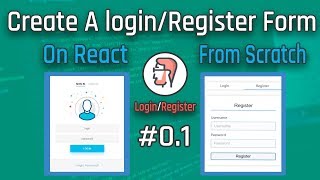
Let's Create a Modern Login Form on React #01
Key Takeaways
This video tutorial demonstrates how to create a modern login form using React, covering topics such as responsive design, user input handling, and conditional rendering. The tutorial utilizes various tools including React, React DOM, Live Server, Emmet, and Bootstrap.
Full Transcript
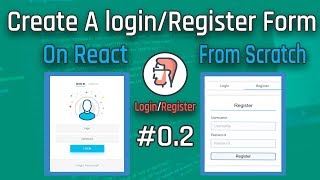
carajo all were doing will continue video tutorial from Ibanez today I'm gonna create something cool with react so we're just gonna go ahead and try to create a login form logging in we just should pretty much be using react so I'm just gonna create a modern login form using the power of a reacts and trying to like manipulate it and like try to create very responsive very friendly user-friendly actually form so he's like a demo what we're gonna create other lots of this video tutorial so as you can see we have a login and register and you can put in here the field just gonna have a really nice overview and layouts and all of us will see the styling here everything looks pretty much fine in here if we try and like to submit something begins user cannot or use your name and fields cannot be empty actually we try to change the register and login we can all go between both of these actually between both of the boxes and we can reduce to all long game and create an email password and stuff like that and we can run a couple of you know some checking my huge you know cannot be empty if it's the field is actually empty we prevent him and so on and so forth so this how we're gonna create it on the end of this video so hopefully you can enjoy it and make sure to know more about react if you're not already so if you haven't actually learners probably Yonsei have a full series on my channel and my website in here so you can go to my parents' calm will react application in shop introduction and getting started and you can learn actually we are watching to be destroying or or you can read through the written we destroyed both of them are very self-explanatory so make sure to go ahead and do one of these actually they're just gonna do the job perfectly for you if you really wanted to get a brief introduction into the react getting started so make sure to go ahead and check this out before starting with this video series so I would personally know that you actually have basic knowledge of how reacts management projects works and how to look like a set up a basic projects on the way yet so let's just go ahead and start creating this so let's start by creating those you're gonna work on make sure to go ahead as I've said to check out the video tutorials about basic setup of normal rehabs project so here this normal our HTML are gonna work on and also the render ideas end of the login folder so this is gonna be like the main renderer Tony J is for our application also we're gonna have like a couple of ready-made tiles CSS styles for us so if you can go ahead long in style so make sure to go ahead and grab this from the github repository of this project or from the video linked in the editorial below my written video tutorial on my website so make sure go ahead and grab that from there so you can just go ahead and follow along the series by putting the style of the same as ours so first things first let's just go ahead and import everything from the rig and so it should also join install everything from NPM and yeah here you should open puts import so I'm just gonna import react from now we'll just go ahead and create the main components that we're gonna render to the actual Dom so this main component is gonna like name it and now component and we're gonna extend normally from the bagasse not components as we normally do so for normal components we're gonna need the prompts or the constructor and a props and we need to initialize the super method into there so prompts as well and we're gonna need like this stage so this top state equals empty state and I'm gonna need as well a couple of other things for the render method they were all gonna add like a multiple methods to this one so not only one render a method or something so we're gonna have more than one rendering method so here we're gonna be like the rendering method the main thing just for now we'll just go ahead and return it get they're gonna hello word simple right now let's just go ahead and render that to the actual Dom using the react Dom so we have dawn don't render and render it firstly it takes which components we want to render so we give it that components and we say you know gonna render the up components right over there and also where we want to render it is in the documents don't against element by ID and through its component so if you can go ahead into the index or HTML you can find here an MC routes them with an ID of fruits so yeah I'm just gonna grab that and render everything into this root container so everything gonna be right over there and this is as simple as this this is gonna eat you is also gonna use like an extension under the visual studio code which is like from live server so we can work client without we login the whole page or something or just gonna like allow us to create a very quick cerebral development server actually so meat you can make sure to go ahead and grab it from there and here we go so as you can see just gonna like automatically does the server for us and refresh everything once you click it it's called live server from the extension source and make sure to go ahead and grab it and let me just go in the distribution folder where everything lines up and here we go so let me just put that back ok now everything seems to be fine let me just go ahead and see the console for everything reiax is not defined well I should not put that like this so we should do this advanced so as you can see reloading and we've got the hello work now let's just go ahead and work for our application so start with the containers and stuff so as I've said these style or the log in style or these pre-made for you so there's like a couple of containers box controllers and all the vast all of the styling class is going to use for our application so yeah make sure to go ahead and grab that if really want to like have the same theme as our walking form so here as I've said we'll just go ahead and create this let me just drop this between a parenthesis and we can stop working with this so the first things we have is Deb with a class of routes container so this rigid container is going to be like the new container that I'm gonna hold of the main layout or the main structure of our application the second thing is we're gonna have like a boss container so also we're gonna have here if you notice me talking really fast using some kind of an dot notation syntax that gonna create automatic HTML elements for me this is called Emmet so make sure to go ahead and learn all that if you really astonished about it yeah it's very nice thing I'm also gonna have like controllers like the control bar we're gonna use for controlling between or toggling between the login and register box and we're gonna have like the main box for the login and the register box is itself so you're just gonna have and go ahead and create like box or I believe I've already done that so yeah I no need no need to do that as well now let's just go ahead and create the controller's so like box yeah gonna be like the controllers we're gonna have a couple of controllers in you so I'm just go ahead and call this normal control or a single controller pretty much another thing is gonna be like control as well so just go Amy creating into this quickly and is gonna be login and there's gonna be register so there's gonna hell of us to register between the login and the register bosses and in this one what we want is to render a brand new components like let's go ahead and created that then you can punish right over the end or just below the main application class so I'm gonna create a login box that is gonna to extends react so this is the same thing gonna happen here I'm gonna have super into the props I'm gonna have this state equals that so like you're just initializing a component over here nothing more nothing less so the render as well and here we're gonna render a couple of things under the actual main component so this like where we want is to create a separate component for the login and the register boxes so we can just go ahead and render them separately here under the main application so we can render the login box and we can render the just your box depending on everyone saw layout so we can just go ahead and create a separate layout for those and I'll just go ahead and do that for the render method so what we want is like a couple of a container that realized container with and without container what we want is like a couple of input fields for the login we want the user name and the password then the login button from the register we want three fills username email password and a researcher I don't we just do bottom pretty much so let's just go ahead and create that what we want in here is an inner container so class of an inner container and under the inner container so we're gonna have like a box and like the old input thought we were gonna meet so here box a class box okay here we go and he lived on the there's no from here I'll put it from over there anyway and here we're gonna need like the import group so you know name this important group so all the bad classes are already included in the log in style so there's no know what classes from bootstrap library or anything like that everything is made for you over there so just go ahead and grab that I'm gonna need label for this is gonna and this is gonna be like username I'm gonna need as well well gonna need an input for that so there's gonna be a place holder and yeah pretty basic things so we want the input valet both for the username both of them and we're gonna need like a couple of other more things they're wrong and that's but this is like the input group on once so the quick easy input group but just gonna copy that and paste it right here and we're gonna create the password input grew up in here so I'll just change out your password as well the toy will need to be a password a set of text and also we need here two classes like a class name just go and copy down and have another class named here the same as the monkey input and the last thing we're gonna need is a button as well so yeah I'm gonna need a button for this job so I'm just gonna be button I'm just gonna be last name instead of class and the class is gonna be logging - login this is gonna be like a login so this login what you want to is like an on click function so whenever we collect advanced we need to submit something into the like submit the actual form so here we use the onclick event or the online event over react component so here the own click means whenever the user clicks that button events just gonna pop up and just gonna put in here between these curly braces the callback that is gonna be executed once this on click but once this event has been triggered so he's gonna create a function they're gonna put it into the class of the context of the login box class so let me just go ahead and name it supplement login upon a make sure to point this one behind this is like because the click event or any other events or any other like JavaScript event it's not gonna happen immediately because it's just gonna take their call that can store somewhere and whenever this callback or whatever this update has been triggered it just gonna grab this like describe this callback that has been registered or store somewhere else and call it so it won't know about the context of this so whenever you hear you you're put in here would say submit login something long and in this one is gonna be like a triggered whenever we stop mean long it takes the event and here whenever we use this keyword so we need to bind it in order to know it so make sure to always bind that so it knows where it's actually but couldn't contacts is working on so yeah really simple like this this is how we trigger or we give it's like a box to work on very easy in a very basic way you can also go ahead and create another component which can be the pretty much the okay this once so we want just copy that and put it and create a register component so yeah let me just go ahead and change everything in here which is true so they're gonna like actually they're gonna be loads of functions or methods gonna be like common between both of these components so we're gonna have the same methods just repeatedly because they all have the same functionality like the validation and the onclick can check in and all events so they think is gonna be a common methods between both of these components and all the things so I guess this is the register and we needed hater in here so before the Box what we want is to so this hitter we use what we need to put in a class name and we put in here like I can't believe a box hitter and here we give it to reach into a socialist importance of the richest your box who put it in your register and as simple as that is gonna like give us a really nice hitter it registers just for now where we actually work you know on and we just go ahead and see this one to make sure like everything's pretty much working fine here we go so we just call hitter instead of the full thing so just gonna hold cold the cold hey let me just copy that and go back and do it the ball game and put it over there so yeah it's just gonna fit correctly over there no problems yeah this is it just see what is actually going on okay okay no something is just happening in you okay the render brain is not returning anything while we should return but it didn't I don't know I can put a return over there as well as the register box or just both of them sign a return statement to them and okay we've got both of them I'm actually have got a return let me just go ahead and here and see what should we be have and here we go so we have this really nice thing we have a login we just you're in a really nice empty box it has like a box container in here and a controller but nothing is being rendered because we haven't included that into the main component yet so we'll just go ahead and call it so under the boss container over here we need to render both of these so actually we can't render both of them because we want to toggle between even the login or register so the toggle happens whenever clever login we show the login box whenever we plug for just Joe be high the log and she'll the register box and vice versa so this the toggling operation we need to perform in order to show either the login or the register under the main like login form so which one we need to do in for this one we need to explore some variables into the state so this verb is going but it is logging open and the first one is gonna be a quite default so we want is quite default whenever the page loads is we want to shell the login boxes to reproduce Joe so it's like by default gonna open up and as register see everything show the register so it's gonna be false and we can create two separate methods and show this this is gonna do this sense date shall remember that the set stage what it does it just gonna change the stage and we rendered everything into the component so this is what it does we can go ahead and see if we just reopen and we can say such as you want to show him you can say true and we also want is to hide the login box so we're not gonna have a connection between of them so it's long enough and we're gonna put an arrow false as concern here so also what we want to show long game this is login open this case logging is gonna be true and the registered gonna be false so I'm just gonna hide between both of them like toggling things up and here under those aren't gonna be the controller that we're gonna need and we need to on like an on click method in there so whenever we click something we need to show in particular once this we are into the login so we can pass in show show login box this contacts and make sure to go ahead and approve that as well under here under the register as you also and this one change it show register box and here we go so everything should be working to be much fun but just go ahead and wind with this depending on the current state so we can say this but state dog is login open and so back end in this like taking this and saying if this is equal to true and if it's like I should stroke and the actual component taught me what you want to render so if this is like a true it just gonna render the components if this is equal force it just got ignore the components and not gonna bring these at all so this like you're really quick hack to use it or trick to use it when whenever you are using three hands and you wanna hide and show or toggle between components or element or whatever this is what you really want you to use so here what I've said what I put into components so who's gonna be the login box the second thing we're gonna need is is register open and here we come so here just gonna check between both of them and whatever me total something I'm gonna know which one is what actually opened and which one is not so let's just go back under the application in here and we can see everything what is going on and as you can see here with God's Bob we've got like an empty area we almost got that we've got the container and we've got the hit or the box so it's actually rendering something it's rendering the register without the register being showed up for us I believe because we have an invisible thing so let me just go ahead and make that visible so like change this because I was doing down just for testing purposes in here we go so as you can see automatically refresh for us and here we go we've got our first in green ground for us so we've got register got username password and login and here instead of register we should be like change that's copy-pasting can be very dangerous to make sure to copy paste in change what it needs to be changed so yeah make sure to do that very quickly and here we've gone belonging and we've got the register but we can't put me us can see we can toggle between you done so we push the register the register shows up push the log in the login shows up and in flies first about the shoes we just doesn't have the email feel that yet so we're just gonna go ahead and add it in a second but what we want is whenever you click the log in one of some kind of a border in the bottom I'm gonna show us we are currently in the blogging section if we aren't in the register we're gonna see that border into the register instead of logging in so you know what I mean like the total in between them so therefore we have like a special class prevents we can go in here as well and what we can do is pretty much under the Box control I believe under the class in here so we can change this to a variable and we can concatenate things make sure to use parentheses in here and we can use an inline F statement so we can say if state is logging open if this is what we want is to add when you've selected a control class so this is selected controller class gonna like take care of the odd in the bottom border I'm just gonna put nothing in there the other one now for the second so nothing more nothing less here just give it a space because we need to like it's approved between classes using spaces yeah instead of this so is registered open and we can put this controller do not forget to power through there so here using the if statement what it means if this is true what once is to return this which means we need to concatenate and return this thing concatenate with this like add selected controller to the class name else which is going to like return an empty string this is same thing so this is the condition and this is what happens so this is the condition if this condition is met it always is true just gonna return this else if it's not true the colon is gonna return this so it was like how or a quick overview about a synthetic or an unlined F States which works without like using a really whole for if statements this is works pretty much fun but just gonna see that it's pretty clean and right now okay then we want just missing an e between on the selected keyword and to see right now but just go ahead and see going back just super socially coming on and here we go just can see we get this really nice thing border from the bottom that gonna show us which actually which walking board so that we are currently on interval login or that we just stood whenever it's like that as we show it into the register click that again we show under the login box so it's can see really basic thing that can make your day we must prepare and actually make the user experience was way way much better so this like you must consider things very little to make your work looks way much person you think and that's actually guys we're going to just continue in the next video tutorial I'm gonna keep implementing all the rest of the feature for the walking on so stay tuned to the next part
Original Description
Written Tutorial:
http://go.ipenywis.com/ipenye13fe
New Tutorial for creating an Elegant Login Form on React
https://youtu.be/juUaJpMd2LE
--- Official Links----
Official Website: http://ipenywis.com
Official Facebook: http://go.ipenywis.com/ipeny4907
Official Twitter: http://go.ipenywis.com/islem9a03
---Support US---
By Becoming a Patreon: http://go.ipenywis.com/ipeny5024
Watch on YouTube ↗
(saves to browser)
Sign in to unlock AI tutor explanation · ⚡30
Playlist
Uploads from CoderOne · CoderOne · 48 of 60
1
 2
2
 3
3
 4
4
 5
5
 6
6
 7
7
 8
8
 9
9
 10
10
 11
11
 12
12
 13
13
 14
14
 15
15
 16
16
 17
17
 18
18
 19
19
 20
20
 21
21
 22
22
 23
23
 24
24
 25
25
 26
26
 27
27
 28
28
 29
29
 30
30
 31
31
 32
32
 33
33
 34
34
 35
35
 36
36
 37
37
 38
38
 39
39
 40
40
 41
41
 42
42
 43
43
 44
44
 45
45
 46
46
 47
47
 ▶
▶
 49
49
 50
50
 51
51
 52
52
 53
53
 54
54
 55
55
 56
56
 57
57
 58
58
 59
59
 60
60

Laravel CMS | N-01 | Getting Started and Environment Set Up
CoderOne
Laravel CMS | N-02 | Routes, Controllers and Views
CoderOne
Laravel CMS | N-03 | Dealing With Assets and Page Layouts
CoderOne
Laravel CMS | N-04 | Migration, Models and Adding Categories
CoderOne
Laravel CMS | N-05 | Showing Added Categories, and Session Messages
CoderOne
Laravel CMS | N-06 | Edit\Remove Categories using AJAX and Popups
CoderOne
Laravel CMS | N-07 | Add New Post
CoderOne
Laravel CMS | N-08 | Creating a Basic Laravel Blog
CoderOne
HTML5 Canvas For Beginners | Getting Started | #01 with Webpack
CoderOne
HTML5 Canvas For Beginners | Drawing Basic Shapes | 02
CoderOne
HTML5 Canvas | Drawing Text With Circles | Part 01
CoderOne
HTML5 Canvas | Text Animation and Circle Collision | Part 02
CoderOne
Complete Guide To Web Development In 2018
CoderOne
AJAX & JSON Explained | Examples
CoderOne
Visual Studio Code Web Development Setup and Extensions
CoderOne
Electron Build Desktop Apps HTML/CSS/JS - Getting Started 01
CoderOne
Electron Build Desktop Apps HTML/CSS/JS | Creating Windows and Processes 02
CoderOne
Electron Build Desktop Apps HTML\CSS\JS | Dialog, Sessions and Cookies 03
CoderOne
Electron Build Desktop Apps HTML\CSS\JS | Custom App Menu & Context Menu 04
CoderOne
Electron Build Desktop Apps HTML\CSS\JS | Package, Build and Deploy your App 05
CoderOne
Node.js Brief Beginners Introduction #01
CoderOne
Node.js How Modules Works & NPM #02
CoderOne
Node.js Working With Events and Event Emitter #03
CoderOne
Node.js File System (Read and Write) FS 04
CoderOne
Node.js Create a Basic Server Using Express 05
CoderOne
Json Web Token Authentication JWT Explained Securing API
CoderOne
CSS Flex Box Design | Practical Examples |
CoderOne
API How It Works With Practical Examples
CoderOne
MongoDB Getting Started 01
CoderOne
MongoDB Working with APIs and Practical Examples
CoderOne
Create a Command Line Interface (CLI) Using Node JS #01
CoderOne
Create a Command Line Interface (CLI) Using Node JS 02
CoderOne
Build React Apps | Introduction And Getting Started #01
CoderOne
Build React Apps | Working With Components And Multiple Rendering #02
CoderOne
Build React Apps | App State Management | Practical Examples #03
CoderOne
Build React Apps | Getting Started With Flux (Intro) #04
CoderOne
Build React Apps | Create a Clock Timer Using React 05
CoderOne
Build React Apps | Create a Clock Timer Using React 05 | PART2|
CoderOne
CSS Preprocessors Getting Started | SASS and LESS | Practical Examples
CoderOne
Regex Introduction | Learn Regular Expressions 01
CoderOne
PHP VS Node.js Which is Best For Web Development
CoderOne
Drag and Drop Using Native Javascript 01
CoderOne
Drag And Drop Using Native Javascript 02
CoderOne
Master Git (Version Control) in One Video From Scratch
CoderOne
Let's Learn The New Javascript ES6 Class Syntax
CoderOne
Let's Create A BlockChain On Node.js
CoderOne
Best Online Code Editors For Web Developers
CoderOne
Let's Create a Modern Login Form on React #01
CoderOne
Let's Create a Modern Login Form on React #02
CoderOne
Laravel CMS | N-09 | Admin Registration
CoderOne
Laravel CMS | N-10 | Login and Authentication
CoderOne
Let's Create a Twitter Bot (Listen and Retweet)
CoderOne
Rapid Webpage Creation With Emmet (HTML & CSS)
CoderOne
Create Popups and Modals Using Native Javascript, HTML and CSS
CoderOne
Promises and Callbacks on Javascript With Practical Examples
CoderOne
Create Collapses using Native Javascript, HTML and CSS
CoderOne
Let's Learn Typescript (Javascript Devs) | Getting Started 01
CoderOne
Let's Learn Typescript | Interfaces and Generic Types (The Typing System) 02
CoderOne
Let's Learn Typescript | Work With Classes, Modules and Enums 03
CoderOne
Let's Learn Typescript | React and Webpack With TS 04
CoderOne
More on: Prompt Craft
View skill →


Related Reads
📰
📰
📰
📰
I Built a Free AI-Powered YouTube SEO Toolkit With Zero Budget. Here’s What Actually Happened.
Medium · Startup
How to Create a Second Version of Yourself Inside Obsidian Using AI (Step-by-Step Guide)
Medium · ChatGPT
How to prepare for Spain civil service TIC exam using AI in 2026
Dev.to · David García
Going Viral! How I Created AI Kissing Videos Step by Step Easily Using AIAI.com
Medium · AI
🎓
Tutor Explanation
