BUILDING AN 8-BIT COMPUTER FROM SCRATCH #3 (Full Stream)
Key Takeaways
Builds an 8-bit computer from scratch using various hardware components
Full Transcript
you hello everyone test test test okay should I'll be working welcome back to the stream if you have been here the past two days then you notice that I'm sitting in a different environment here I've rearranged my room because I was unsatisfied with the place how I was working and like the general setup and so yesterday after the stream I spent a couple of hours completely rearranging my setup and let's see how it works out maybe the angle is a bit weird because so this is where I would usually work on these two spots here and here I have to set up now for building the what well 8-bit computer that we are building but I have way more space now as you can tell and you don't quite see it here but let me show you the top-down camera so this is now I think looking much better and we can then also move the camera forward where we then have the oscilloscope and also the power supply and stuff like this so if we look at some stuff we have those right here in view that should be great I think yeah I'm really excited about this I think that's cool okay yeah I'm still waiting on a few things as you can see I've here the like the overhead camera here like this what's the name at the tripod on the table itself so I want to get a proper desk lamp to go like overhead or something like this the cable here is not so nice but yeah still working on it also not sure about the microphone position right now so I but I think it's better than it was before because it's kind of like now over here just out of reach of the camera and depending on if I'm here or here it should be all good yeah that's about it then you set up let me know what you think do you have favorite meme from last month hmm I'm not sure how many people in here are watching a lot of twitch but I have thoroughly been enjoying the Miss Kip and my amines so what are you gonna use this 8-bit machine for well for education for learning we I want to build this if you haven't seen it let me show you here again what this project is about been either been either has the series on building an 8-bit computer from scratch where you are you know building the whole machine here let me just show you a really quick again screen off that there we go that's the 8-bit computer so I want to build that as well follow along his video series and yeah learn a bit more about in more detail about how a computer actually works and so this is an 8-bit computer just because more bits would be crazy to to implement by hand yeah and and the end goal is if we built this maybe we want to build some extensions to it as well because it only supports 16 bytes of RAM which is not quite a lot for implementing programs and such but then eventually I want to maybe you know hang it at the wall or something like this I think it would be like a cool art piece I think it looks cool in the background and yeah just for the learning learning content that's the main goal hi at Nurik have you been doing many cts recently I haven't been doing CTF a lot for the past like two years or so it feels really bad I really don't get so much time anymore I don't know so it's like sporadically a few CTS here and there from scale from zero to ten how would you describe your knowledge and what you're going to do right now well I think I have some basic understanding of electronics very amateurish I have played around with Arduinos and have made a very simple you know PCB with just a few LEDs and a shift register that's about it so I don't think I could for example build this 8-bit computer just by myself without instructions I think so my level I think is I will be able to understand how it works once I follow this guide but I wouldn't be able to do it myself so that's kind of the level where I expect myself yeah you know workspace look really looks much tidier did it not look tidy before or what or what do you mean are we going to you know thunderstorms in your area during stream I have no clue I didn't check the forecast could be it's pretty it's pretty warm outside let's see I didn't hear about any it's actually you're jealous of the big work place so it's actually not big I mean it's a small room like that basically there's a little bit of space like in front of me but not as much as there's behind me so the room is relatively small but I'm super happy with the rearranging it like this it feels way more cozier to have like the curtains behind me I have the small space now like here I'll write the curtains you know so it feels very cozy and way more relaxed than was before and the way how positioned the tables now I feel like I get more out of the desk space as well and obviously how the camera setup with this code in front of me so it looks like I have a lot of space here but yeah in the South air storm already ended interesting so looking at the forecast no I don't see any there might be rain in the night but no thunderstorm yeah don't intend to scream for that long awesome are you later going to program a compiler with a higher-level language for the computer I'm not sure if that will be possible with this version of this computer I haven't looked at it in detail because I'm just following the series now I haven't watched the videos beforehand but I read a few pieces here and there and my understanding is that the instruction set is extremely limited on here and I mean you have to implement all the instruction hardware yourself so basically as far as I know Ben heater has just implemented a couple of kind of important instructions but in again this machine only has 16 bytes in the default configuration 16 bytes which allows you you know a few bytes for instructions and maybe a few bytes for memory as Ram right so he has this Fibonacci program that uses like I don't know like 14 bytes or so or 13 bytes and then it uses like three bytes as memory to store the current value of the Fibonacci for the Fibonacci algorithm right there the temporary variables so there's not much space so but you know let's let's make some progress with this because I do wanna you know iterate over it myself or improve on it myself like increasing the memory that would be cool and also maybe implementing more instructions but that is definitely something that though we figure out at a later point as of right now I don't know yet why he was only able to do like 16 bytes and what it would take to make it addressable being able to address more more memory but we all learn about this right this is I guess we will learn about more internals about computers about how addressing works and why this only has 16 bytes and stuff like this I am really excited about this who came here to watch the dog I'm sure the dog will join us soon because she has to go to the store later and we'll drop the dog in here because he has separation anxiety and he will freak out so I'm sure the dog will join us soon oh yeah we see more yeah awesome you do realize that you will have to most with tedious process of program the EEPROM EEPROM for processing commands yes I have seen that and I think didn't then he also add a module with like an Arduino to make let the Arduino program the prom yeah for sure I know that would be fun though okay awesome so let me I think it started let me show you what we did the state of yesterday camera there we go so we built this yesterday let me show you so this is the clock module this is the first part of the series where we are building the clock of the computer and we are on the second video of its series right now so let me see so what we have built is the first circuit up here so this is this chip is a called five five five five five five yeah it's a timer chip and you are able to use it you know yeah it's a very versatile chip we as we have learned in the string anyway you can see basically that's a clock that will be the clock signal of the computer we have here this potentiometer that allows us to change the resistance which effects on how fast the clock will run off this computer so this is not running so fast it looks like the LED is constant consistently on and yeah we can slow this down basically so slow that we can really look at you know like see each clock cycle of the CPU slowly executing the programs on the machine so this will be so cool so this is the general clock signal but when either wanted to also for debugging purposes be able to advance the clock only when we want it to go forward so we added here this button that can also automatically you know triggers it and we are also using here the same chip for reasons of glitches because these buttons are you know metal contacts and when they join together they might like bounce a little bit and then you might get like accidentally more clock cycles than you want it from one click so with that you can debounce the the press so that it's really just triggering the LED like once and I think a belief or I suspect that in the third video now we somehow will combine these are like edit switch that we can decide if we want to have the automatic clock or if we want to trigger the clock by hand for debugging yeah so that's what we build a lot the past two two strings are you going to replicate it oh yeah I mean I I assume you're talking about it dyrdek that's the goal I the goal is to build the whole computer and also kind of replicate like that's what the oscilloscope is for to also look at all the stuff works can you build a CPU I don't think so but I'm sure I will be able to follow a guide of somebody who can and build build it based on the instructions okay so then I think it's time to head into the third video sorry we need to switch to desktop and I might move my face how many bread pots do you need for this project and so on Ben eaters website you can find a parts list I think there's like 14 bread boards or something like this and I have them all sitting there I've ordered all the parts you're on this website you can find here a complete parts list he has used 14 bread boards on how much estimated time on how much it will take to make an actual computer I mean that is a computer that is executing instructions and stuff like this or what do you mean can you recommend any CTF challenges for beginners I'm not so sure I mean I think the exploit education series what used to be explored exercises is a great series to start and you have my videos that help you when you get stuck so you can you know watch some videos and try it yourself and stuff like this so I think that is hopefully a good experience otherwise I think also picot CTF is probably a good place to start I think these are good good places after you finish to build your stuff connect the motherboard by USB to see real performance if it is possible I'm not sure what you mean by that okay so let's watch this video so the last two videos we use these triple five timers to build an a stable circuit with the same output and a monostable circuit that's normally off but when we push the button it turns on and it's D balanced so that you know we get a single clean output when we push the button yeah so this we can use for our clock and then we can also use for a manual pulse now what we need to do is figure out a way to switch between the two and so you might think well we should use a switch and I've got a pretty good switch here this is a little push button switch and it's either out or in and it's got these three leads and so there's a center there's a center common pin and then it's connected to either this pin or this pin depending on whether it's in or out and there's there's two so that's double throw called and then it's double hole as well there's sort of two sets that are independent they're just connect to the same button it's a double pole double throw and it's a fairly common type of switch this is another switch here that's the same thing and you've got the the two sets of three connections there of course this doesn't plug into my breadboard and annoyingly neither does this this is actually just a little bit two of these pin spacing it's a little bit too close together to fit into the breadboard and so what I've done is gone ahead and soldered these little header pins to the switch and so that fits in very nicely into into the breadboard and so one thing we could do is we could just connect the output of you know this here that's not the output let's connect the output of that to one side of the switch then we can connect the output of of our manual trigger over here to the other side of the switch and then you know we could look at the middle of the switch connect that to you know an LED and then of course our current limiting resistor here and we see that it's pulsing and then we could flip the switch here and now it's connected to our manual clock pulse and we can flip it back and it's connected to the you know sort of automatic clock pulse there so this is great we could eat we could use this this will work one problem with it is you know again we have the switch in here that's not be balanced and so we could have some situation where you know maybe we have a really slow clock pulse and we're going step by step by step and we want to we're watching our computer execute maybe we're troubleshooting some problem and we're watching it go step by step and then we see we see the problem that we're trying to catch develop and we push the button to try to get it back into manual clock pulse to stop the computer and so we can figure out what's going on well if when we push that we have that D balancing problem and we get a couple extra clock pulses in there and when we were going so slow to catch that one point that we're trying to they were trying to catch that could be really frustrating so we really should find a way to debounce this switch and you could build exactly this circuit and that would work fine I'm going to show you a different way to use the triple five just just for fun just to see yet another use for the triple five and so for this next circuit what we're gonna do is we're basically going to take advantage of the fact that the triple five timer has an SR latch built into it and we're really only going to use the SRA we're just gonna kind of try to ignore the rest of this stuff as much as we can and what we're gonna do is we're gonna you know basically hook this switch up to you know imagine we could somehow get rid of all this stuff and just hook the switch up to the s and the R so in ones in one state it's its setting and in the other state it's resetting and then we have our output the SR latch will actually act as a debounce ER and one of the reasons it'll do that is kind of a property of the switches which is if we look at this switch if I just hook up a couple LEDs so we can kind of examine what the how the switch normally works what you'll see is that you know it switches between the two states when we push the switch which is which is what you'd expect but if we push it very gently you see it actually you can kind of get it in between and it turns off and that that's actually a pretty useful property so it's called break before make and you can buy switches that are make before break if that's what you want but I think most switches are typically break before make and so what that means is that you know it can be you know if we're if this is say our reset or our set condition let's say we're putting a set into this SR light to forget the fact that it's part of a 505 just just imagine we're looking at an SR latch if we're setting it and then we start to push this switch as we let go there's now as we let go as we as we push the switch gently we're kind of in this middle region our latch is still going to be set right and then we continue to push the switch down we get into the reset then that reset comes on well there's any bouncing in the switch it doesn't matter because as soon as that first reset happens the latches reset and and our output is going to be off and then the same thing as we push this and then as we gently let go the reset goes off we're still reset right because we haven't said it yet and then even if there's some bouncing as we go into the set state doesn't matter because as soon as it's first sees that set state boom the output comes on so we can use an SR latch as a D bouncer with a switch like this so the question is you know for using a 5/5 well we could use a just an SR latch on its own which you know I've got a video that shows how to build one but you know we can we can use the five five five timer we can use its SR latch by essentially using the trigger right so remember we've got five volts up here right and then we've got this voltage divider network so this gives us three point three three volts here and one point six six six seven volts here and then of course zero volts down here and so if this trigger goes below one point 6 volts then that sets the latch and then if the threshold goes above 3.3 volts that resets it but we're actually going to ignore the threshold we're gonna we're gonna just tie this to ground and so this will never this will never do anything instead we're going to use pin four which we haven't used yet on the triple five and that's this reset pin and it it's not wired exactly like this in here but you can kind of imagine it but this this just gives you kind of a shortcut to the reset and so if we pull pin four low because it's inverted that resets it and if we pull the trigger low below one point 6 volts that will turn this comparator on and send it until that gives us a way to kind of get into this this SR latch and so what we can do is we can hook our switch up sort of draw the switch down here and so we can hook our switch to ground the middle connection of our switch to ground and we hook one side up over to our reset and hook the other side over to our trigger and then if we flip our switch over to this side that'll ground the trigger which takes this now below one point 6 volts we should probably have a little pull-up resistor here of some sort maybe a 1k resistor will do so that normally you know this is going to be 5 volts so it'll be well above our one point 6 volts and so this will be off and so we won't be setting it but then when we flipped our switch here and this goes to ground that'll pull this down to zero volts and zero volts of course is below 1 point 6 volts and so that'll sit the the flip-flop and the output will turn on and then when we flip our switch over to the other side you know we do that break before make which you know this this diagram actually shows pretty well when we break you know no big deal we're not setting it anymore but it's a latch so the output stays set but then when we first make contact over here even if it bounces doesn't matter the first time we make contact over here we reset the latch and then the output turns off and so we have this nice debouncing that we can use so let's so let's hook that up okay here it is so we got our switch here and the center pin is connected to ground which which is what we wanted here and the the other two pins one is connected over here you can see two pin two and the other one is connected to pin four so just like we've got here so one's connected over here to pin - that's our trigger and the other ones connected over here to pin four and on both of those I have pull-up resistors so you can see on pin 2 and pin 4 I've got a resistor going to 5 volts and draw that over here but you know we want to make sure that these are normally getting 5 volts unless our switches set pin 3 of course is our output so I just have that going to this LED for now with the current limiting you know 220 ohm resistor over there and then you know pin 6 is our threshold so we have that just at ground so this comparator is never going to be it's never going to be on so we don't have this resetting this way the only way we're resetting the only way we're resetting the the latches through our through our reset pin so threshold us is to ground and then pin 7 is our discharge pin no need to connect that we're not discharging anything there's no capacitor in here we're just so would you leave that disconnected and then pin 5 as usual we have our point 0 1 micro farad capacitor in there for you know for noise as recommended so now what we've got is you push the button a light comes on push the button again light turns off so not very exciting but it is fully dee bounced and we're using the SR latch part of the 555 timer and so with that we've actually got the sort of three different modes you can use the triple five time around we've got the a stable mode where it's not stable in either state we've got the mono stable mode where it's got one stable state which is off and then when we push this it goes to its other state but then reverts back to the the state that its stable in and then this is the by stable mode where it has two stable States and so it's either in this state or that state and so now all we need is a bit of logic to combine all three of these into our final clock output and we'll do that in the next video in the last couple videos we built our photo right let me quickly wait and then clearly catch up with Chet [Music] have you seen the videos beforehand or is it gonna be we watch a video together you try to replicate it yep that's been what it is I haven't really watched the videos I just know about the project I have just clicked in a couple of videos just to check it out but yeah if I want to build this right now and to do that I have to watch the videos and I do that on stream basically it is going to be a video per stream this is it seems to be how it is turning out to be as of the first two videos at least I have you played the first CTF no I have not if you want to learn electronics great way to start videos from Great Scott I have not really watched that journal but it looks like a very amazing Channel yeah are you going to make a video on this unlikely because there are all the been either videos which are perfect already so I don't see any reason why I should just make the same videos too however of course I'm streaming this right now which is producing a video in the end of what that you can watch so the wats are archived on Twitch but they are also archived archived on YouTube not on the main dive overflow channel because I don't want to annoy people with these long unedited streams kind of stuff so you can find the the raw streams on a second channel of mine and I have also started to create like highlight cat videos just a condensed version of the stream as well just a very rough cut just to cut down the time a bit not sure if I can keep that up but it's the plan for right now the channel is called random overflow and you can find the link in my youtube channels like related channel descriptions or something like this electro boom yeah I like boom is awesome love those videos are you attending DEFCON does here no unlikely thanks for the cheer newbies how much do the components of the computer cost its again check out the parts list on Benny Earth's website it's roughly $250 plus - depending on where you buy your parts I paid roughly 240 euros right now I think the most expensive parts are the bread boards I think the bread pots alone were easily like mmm a hundred twenty euros or so different questions have you been at the cybersecurity chance Germany in the past yeah I played I played in two years and yes I'm a freelancer okay alright so let's i quickly built that actually so one thing I've been let me I need to gather the parts so I don't really still has anybody has anybody understood like the difference between the the previous debouncing circuit and now the one we build right now they don't seem to fulfill the exact same purpose I don't understand why the monostable is so different from the by stable because the monostable is also if the switch is triggered it's on and if you release it it's off isn't that the same thing as a switch being you know switched on and then it's glowing to the other off so I don't quite understand the difference and maybe depending on how we have time I want to compare those two again and try to understand what the difference is Oh Crocker thanks for the subs again you gifted some subs already yesterday that's absolutely not necessary but thank you so much what's the random yeah it's probably let's see to your l if you go on life overflow and then you go on featured channels it's right here random overflow and there are the tool there were only two streams so far you can find the highlight cut of the two streams and the full stream I don't know how many components I will kill maybe because you need to debounce both states here and previous you only had to be balanced the on state that makes sense that makes sense yeah you are right the off state debugging doesn't matter here because I guess yeah I'm sure you are right as it hasn't clicked yet in my head but that also is the only thing that makes sense to me you don't have to be bound to zero yeah it's like weird well let's build this and then let's see so here are the timer's need to pull up the the thing he built here part three and second okay um see I could yeah that should be fine we can unplug this for now bring it off get this over here so we need green black and red wire it's the others fall down oh no where did they go oh wait they're here black red and this greenish color alright yeah I chose random overflow in the end I don't know well it's still like there still time to rename it maybe maybe I come up with something better yeah there's a difference between zero and floating one is ground and one is just undefined if I remember correctly said you could use the old three bonds or two oh he did say that in the video actually wait maybe he did say that wait let me see essentially using the trigger right so remember into this SR lie to forget the fact that it's part of a 505 just just a couple LEDs so we can kind of examine what the how the switch and so what that means is that then we start to push this switch then that reset comes on well there's any bounce I think it was good chop to you know imagine we could somehow get rid of all this stuff built into it I think it was when he connected these fires right has an SR if we look at the switch if I just hook up a couple LEDs so we in this middle some bouncing as we go into the set state it doesn't matter because as soon as it's first this will never this isn't already describing what does he mentioned the motivation again is kind of a property of the switches the SR latch will actually act as a D bouncer sin they are so in ones exactly this circuit and that would work fine I'm going to show you a different really frustrating so we really should find a way to D bounce to the switch and you could build exactly this circuit and that would work fine I'm going to show you a different way this not to use the triple you all right you were right awesome thanks so funny that I was who said that again now that's on dry thanks so much for pointing that out there was very helpful okay so it wouldn't matter if we built the same circuit he was just building another version of it okay so what else do we need we need okay so we need we've got the wires we need the 0.01 micro farad capacitors again this here we need an LBD and resistors he's using here I think these were all 1k resistors not one second the resistors here and [Music] the switch [Music] so let's see I bought these switches here let's see if they work out as intended thanks for the SAP at the school and asbestos but we got we got emotes or I got we got 1e mode it's it's the glitch okay liar there we go cool I really need I think a monitor here just for the chat so I can kind of look in a camera and we chat and not always like turn away like that so d I thought about trying to also submit just the red circle or I mean so far we only got one in mode again can't just shout out against Odin it's also it's very active streaming streaming C++ it's also very interesting and entertaining I can recommend to follow okay great okay so it's built us so he was putting it a white rabbit that's a good idea - I hadn't thought about that yeah that makes sense we totally need a white rabbit who you are not from or who if you don't know Matty by the way I won in Chet if you don't know it at two if you know it I try to build the circuit on a PCB today after they're all so awesome oscillator I noticed that I have basically all components but not once which way too many ones you really need to travel to droning what sometime it has a you can look it up on Wikipedia academic club Marta Club mate you prefer the neomi Oh ginger you hipster okay so and then we want to add we need [Music] some it's German Red Bull yeah adds a high caffeinated soda drink it's based on Matty but it's like it's it's why I'm mentioning it it's not because it's an interesting drink but because it has its it's like part of German hacking culture and so it it was but well it's very popular in the German yeah hacking communities and it really helps you to like stay up all night and work on something and I think it's even meant at least I think on the at least the German Wikipedia it's mentioned that it has its like big origin kind of in the German hacking culture they sell that a vending machine directly on our campus that's nice Oh No there we go first one okay wait I need to mmm I want chat in front of me let me pull up chat on my phone you got through 35c three without drinking matzah ones that is pretty impressive oh you got my sticker that's cool okay so now I have chat on the phone hopefully okay so now I can put oh crap stop done why are you making noises okay pop up the chat zone why are you here in Mobile okay all right okay so let's continue here what kind of finale we're talking about sorry I missed that again this what you were talking about oh the sound security oh sorry yeah I played in like what some of the earlier ones way was happening so it was like I guess easier to to get into yeah nothing not the best challenges in that event definitely not so these were I think 1k I should buy a wire stripper yes indeed we talked about it yesterday on stream some people recommend that some wire strippers for me and I ordered I ordered one hopefully arrives I don't know maybe even tomorrow otherwise sometime this week I think I have to strip a lot of wires and yeah I don't know why I didn't order one earlier so this goes to pin two and VCC oh wait I put this one higher up yeah the challenge is almost of 10 guessing yeah it's not a good CTF however like the good thing about like why I still like the CSE G was because I met a lot of amazing people that I'm still that have become really good friends of mine and we have is basically our CTF team formed through that and so so that's why I had why I really you know the CTF might be the challenges might be crap but in the end there's a community around it with people and I really enjoyed that just tuned in what step are you on are we are on the third video we are here on the on the still on the clock module and we are following the Ben Eaters series on building an 8-bit computer I think wait did I add I think I added a command no I thought I added a command I'm doing at this moment z-transform for school I'm not sure what the secret for this and participations but this time got in the finale for the first time I believe it's a great way to find friends who are interested in same topic yeah for sure so it's a clock yeah it's a clock module we will plug it in in a second then you see the LED blinking as the clock oh my screen sorry there we go you're participating since around 2005 teen maybe then we have interacted before I didn't play it's like overflow during that time s transformed to that sample data simulators pitch you see okay i snuff I have no damn clue what you're talking about but sounds like a lot of math like algebra or something so this goes into the third the LED goes into the third pin in town year so like here this goes up to there to the third don't think was around 25 so well I don't know maybe you were still hanging out in like the IRC channel or something there we go and then we need the what was it like for the the limiting is a sore for the led I think we used like twenty twenty maybe last time or think so is that a JK flip-flop or not you mean this here like the chip here or what do you mean okay this could have been bad I just realized I plugged in the resistors in the wrong pins this one go to ECC and only this one goes to ground the KSU drone I didn't draw any what do you mean so we need to screen wire here and we have going for up here there is no KS the wait wait wait sorry wait what is key is I think a as like a truth KS diagram I might have am i confusing it I blocked yeah okay block diagram I did not wait KS oh I'm confusing it I think with kV diet diagram I was sorry I I confused it with the kV diagram what you were saying I didn't I didn't know that yeah okay so the block diagram so this is from the video off from been either it's the 8-bit computer part three it's the inside drawing of the 505 IC chip and it's an SR latch yeah excuse my ignorance with the with the with the terms and stuff like this I'm very much an amateur I'm actually not running this on this one to here on in a VM it's here my my think pet what would you recommend to study in Germany University or F applied informatics or general informatics or IT security at some F has can you recommend a special University first of all I cannot make any crap I can't make any decisions for you you have to figure out yourself what you want to do my opinion has zero like has zero importance however my advice would be basically of what I think what goddamnit my advice generally for studying is that you should focus on what seems fun to you because University can be very stressful and very difficult at times and so if you are not in a subject that is motivating you to grind through the difficult and the hard parts then what is going on this one broke - yeah so I was saying if if you don't have fun in the overall subject because then then the struggle of certain subjects will be too much and I think like the best parts of university is not necessarily like like I don't know it's like your environment like the French you're gonna make the study groups you will have studying together learning together with people I think that is the those are the things that help you the most in the end and so it's very difficult to say which university that will provide that because basically it depends on if you find like a good social circle at university or not one second and so also that being said I have not heard a lot of good things about generally the topic of information IT security as a subject like as a degree and a degree as they at least if you are very technically motivated I don't think that that degree gets you a lot I have heard that it's like you know I don't know like I don't have I haven't heard good stuff about it I felt what I've heard is that you learn a lot of like management stuff that might be very important for the industry but I feel like for example I wouldn't like it because I'm way more interesting like the technical stuff and I wouldn't want to deal with all the other stuff around it I also feel like that IT security in general is like a topic that builds upon general IT knowledge and so I feel like starting to study this without having any informatics background and it all feels weird also I have not studied at different universities so I cannot come compare them I cannot tell you which one was great I'm studying in Berlin I didn't study there because that was like somebody taught me it's the perfect University I went there because France went there and I was lazy and they could tell me how all the bureaucracy works yeah so that's that's about it okaythat's which is like really janky it's like really hard to push and it's like not sitting tight in there you know maybe I need to check in a second if we if I have alternatives hot cool Health's that actually makes sense yeah I'm not sure if I want to sacrifice the board's already to hot glue but maybe at some point just to make sure everything sits tight especially if I want to hang it or something that seems reasonable how does German university system works as to any entrance exam that depends on your what you're going to study generally in IT there is no basically no requirements except that you have to have a an eligible like high school degree so that's in Germany that would be an abattoir and if you are coming from a different country then basically your degree from the other country needs to be equivalent to the German ivy tour which kind of over certain countries for example in the u.s. in high school you can already have certain elective courses as far as my understanding is and the German RB tool for example requires that you have as you know at least two foreign languages or that you had two foreign languages in school and a lot or like no one no two foreign languages and so if you haven't had if you only had one or or none in the US then you it wouldn't be equivalent and stuff like that that changes if you get then go to a u.s. University and then do an exchange here or something like this that then is again different then it's all up you can always use jumper cables I really like your YouTube channel and how you managed to do all the fun things on your channel Thanks I I'm glad you like it you think service can help at some stuff I'm not sure what you mean what would help with what we had no entrance exam but the first semesters were hard enough that enough people stopped studying yeah so that's a typical pattern in German universities that you have these extremely hard exams in the first semester to naturally select the people that can cry the most oh thanks for the bids I could product yourself wait what you think service can help at some stuff like a product yourself sorry I don't and what's the context of I sorry maybe I missed even something earlier what product are we talking about any idea where I can get into electronics probably would be better to start with something simple and useful rather than a whole computer I mean to be honest like following the series I think would be a great start but otherwise it's just like I mean I don't know what the good entry is right I'm not a professional as a hobbyist I can tell you that I thought that the that doing Arduino stuff was really helpful for me just getting like an Arduino starter kit and trying to build something with that mmm I also think like small stuff maybe you can like there are these are do we know compatible things I forgot their name but they have Wi-Fi included so that makes it very easy to kind of integrate with like your home network in a way that you can for example send commands from your computer over Wi-Fi to that chip and then you can like control like some LEDs or something like this I could imagine that that could be like a world project to learn the basics the second thing was some necessary with the fact ones are kind of specialized in the direction you can also go to the yeah okay yeah but then again that gets complicated I know I don't like the German system to be honest I wish we would make it much easier for people to go to university I up also if you had wrote a actually before that you can just like proof yourself in a certain way and like do an entrance exam and then it would allow you in I mean make that entrance exam hard I don't care and make people be able to study but if somebody spends like a year or so studying towards that entrance exam to learn it and then to get into studying later in their lives I think that would be so important I don't like our system to be honest yeah the ESP that's the one I meant yeah for yes PA yeah I think that one for example is I think fun because it I mean it already adds a little bit of magic because it does like Wi-Fi and Wi-Fi or Bluetooth is like already like super advanced kind of protocols so it's not as low level as just like serial for example but I think it makes a first kind of application that feels useful a bit easier and so I think you see successes faster and you can make yourself small little gadgets just wondering where your shorts are quite sure this it's in my closet I don't really like it either but it got open up over like my stuff would be kind of a wrongful you could study too with them my stuff oh yeah I'll with a meister if you did like an old spittle it's like you go that path yeah but then again it's like super remove no you got to do a Meister and I don't really think that the Meister is then again equivalent like to I don't think that for example I think a problem for example would be if you would want to go to university in chemistry or physics where you have them really kind of advanced math and Meister degree wouldn't teach you the the math stuff and you would have to brush up on that anyway but suddenly that allows you to let go into it rather than somebody who's self studying all the higher math stuff themselves to like be able to do it I don't know I don't like it I think it's artificially limiting and is punishing people that decided later in life or you know needed a bit of time to realize what they want to do with their life and I think that's bad anyway I think we implemented this let's plug it in and let's see if it burns yes I think should be fired okay so that's those circuits still work so that's good Oh Adam thanks for the host you should also everybody check out Adam Adam is developing for a super long time now already like a browser game about automating BOTS and fighting against each other and he is really great at streaming I cannot comprehend how he can program and interact with chat so well as he does it always amazes me and he has been doing it for such a long time he's super helpful nice and you should definitely check him out okay so yeah this at least seems to work this which allows us to change the LED that's very exciting he stream under the name level you should connect it to 12:30 volts that will give those LEDs a little bit more oomph yeah I so welcome everybody from Adams streams it's very exciting here we just finished this amazing circuit that allows us to control this LED with this little switch it's thrilling it's absolutely amazing we can also press this button which turns this LED on when we press it it's incredible but seriously we are working here on a series of building an 8-bit computer I'm following the video series by Ben either he has a YouTube channel explaining a lot about computers and he has this series on building an 8-bit breadboard computer so on these bread boards on these prototyping boards building a whole computer and this is the clock module so this is providing the clock for the CPU that we are building so you can so this is for example a clock signal that we can control the speed off and what we are building now our other components of this clock that helps us to be back and play around with this computer better so we have the automatic clock here but we also want like a clock that we can just advance ourselves by clicking and then we can like watch the slowly the CPU executing it based on our clicks and now we added this switch with witches which will be used to switch between the automatic clock and our button clock so that is the purpose of this switch and this was the third video of the series Oh Adam also thanks for the cheer see don't forget the power LED on the top oh yeah we should add maybe an LED that indicates of the board has power that since if that's what you mean yeah we should do that the interface in air is bad enough could switch on the compact capacitive lamp in my parents room whoa wait what sorry I didn't catch what you were talking about okay cool so we have been streaming for over an hour I think we can definitely head into the second video as well let's see oh yeah I wanted to check if I have a different switch then this janky one here let's see I have some switches in here oh here's some switches these are dip switches mm we would have to solder this on something else I don't this will not one fit in a breadboard and these are way too thick I mean it will do for now but maybe we can find a better switch some other time I need to order a different potentiometer anyway because this one is like so huge and long it looks ridiculous I want like a nice small one that also better fits on here so I have to order some more parts anyway for that and these ones yeah they are way too thick yeah that's another time I quite like the janky switches see yeah you're right and also the potentiometer that I will order will also be blue with a white turning thing at the top so I think it will also look quite matte it will match so yeah are you leaving No saying yeah that's a great thing about Germany our infrastructure so well that orders will come like directly in the next day however I will probably order from I shall not from Conrad still better than the u.s. though like the because the u.s. is so large like it's typical that things need like three days which sounds horrible to me how can you live without Amazon Prime next day delivery or same-day delivery with Amazon Prime now I have exam tomorrow and have no motivation to study this and help what topic what what is the exam about okay in the last couple videos we okay let's watch the the next episode I think in the last couple videos we built our 5-5-5 a stable timer which is putting out those oscillating clock pulse now we built a monostable 5 5 5 timer circuit which gives us Adi bounced push-button switch so we can push this and we get a nice clean Dee bounced logic output here and then we build our okay you examine us in algorithms okay I know algorithms might seem super dry and it's super annoying to study this now you might have to do like Oh notations and whatever and you feel like why the crap do I need to learn all these different kind of algorithms that's so stupid but Ivan isms are super important when programming and they seem dry now but just imagine their applications what they could be used for you think like why do I need to think about sorting algorithms or stuff like every programming language has already sorting implemented in their modules and libraries I don't need to do this that is true for basic programming but when you get like if you build more complex applications where you handle like masses of data that are like distributed systems streaming data streams to like your machine or some factors and then you need to implement very efficient ways to aggregate them and sort them and stuff like this you might have to implement these algorithms yourself again because you can't simply put this data into what is given to you by the frameworks already because it's way more involved and you not only do you need to consider the basic execution of the CPU but you need to take into account how quickly are certain operations like maybe you know you did the trade-off benefit between reading stuff off disk how fast would the network be how fast with the RAM be and then you need to optimize these things and so maybe one algorithm given that the network is very slow would be better even though theoretically in a perfect world would be worse so just think of if you are good at algorithms you could implement crazy amazing epic later and and that's why you should learn a little bit this theoretical knowledge because it would really help you later when you develop applications and now go study okay okay that's sorry let's continue by stable circuit here which also gives us a nice you know debounce stable output for our toggle switch now what we need to do is just combine these three signals here into a single clock output signal for a clock circuit and what we want is we want to you know either output our oscillating signal or our manual signal depending on whether we've which one we've selected over here so I came up with a pretty simple circuit here that I think I'll do the trick we've got our a stable pulse input which is this guy we've got our select which is the the push button select and then our manual pulse of course is the manual button that we can push there to get a manual pulse and so what you see here is if our select is on like this then we have a 1 coming into this and gate and so our our oscillator here are a stable oscillator if it's a 1 or a 0 then that's just going to come out on this output here because a 1 and a 1 is a 1 and a 0 and a 1 is a 0 so that's just going to pass through and then it's going to come down to this or gate and well first if we look at this other and gate our select here is inverted and so we have a 0 coming in to this hand gate and so no matter what this is the CMV it's always going to output a 0 so then over at this or gate we've got our clock pulse over here on this one input and then we've got a 0 on this other output so again that clock pulse just just flows right through so if our select is on then you know our output over here is going to be our our clock pulse we turn the Select off then of course we have a 0 coming in here and our clock pulse isn't going to come out this hand gates always just going to output a 0 on the other hand our our select when we inverted here we have a 1 here and so if our manual pulse is a 1 then we have got a 1 out on the other side if our manual pulses of 0 then we get a 0 out on the other side and the same thing with the or gate if we have a 0 or a 1 coming in here we get a 0 or 1 coming out here this of course is always a 0 and so if we push our manual pulse then we should see the manual pulse come out there when our Select is off so this looks like it should do everything we we want there's one other feature that I'm going to add - this which is this this halt line and what this is is you know once we build the rest of the the computer we want to have a way for a program to be able to halt the computer programmatically so maybe you have a program that computes something and it gets to the end of the program it outputs its result and then it doesn't have any more work to do and so it doesn't any more work to do and so it wants to halt the execution of the computer there's nothing else to do so what we'll have is we'll have a signal coming from the control module in the computer coming into the clock so it'll just be another input into this into this clock circuit that says halt and what that does is it should just turn off the clock and so if there's no clock then the computer's not going to do anything and so what happens is we have this halt signal come in it's normally going to be low and so we invert it and get a 1 and then that one is just ANDed with our our clock before whether it's manual or or the automatic clock gets handed with that and it comes out here but when the hull goes high if the computer if the program wants to halt an execution this goes high then this goes low and then you can see the final output over here of our hand gate is always going to be a zero so there will be no clock no matter whether you've got it in you know manual mode or using the oscillator pushing the button it doesn't matter you're gonna get nothing out there until you until we reset the computer restart the program or something so if we want to build this up it looks like we've got a couple of inverters three and gates and an or gate so what we could do is we could use the 74 LS 0 for this has six inverters on it yes we're only going to use two of them we've got the 74 LS 0 8 and this has 4 and gates on it we're gonna use 3 of those and then the 74 LS 32 and this has 4 or gates on it of course we're only gonna use one of them a little bit inefficient to use these 3 chips you know we're not using all all six of these we're not using all 4 of these we're not using all 4 of these but it should work and one thing we could do is we could re redraw this using different gates you know for example you could use all NAND gates or all nor gates any any logic circuit can be represented entire in NAND gates or it could be represented entirely in nor gates that are called Universal gates and so just an example I up you know an equivalent circuit here using just NAND gates so these are the same inputs we've got our a stable pulse or select our manual pulse and then our halt line coming in and I'm using just NAND gates and so for example this this NAND gate I just tied the inputs together and it turns it into essentially an inverter there's any the nice thing about this is that you know by using all NAND gates it looks like we've got one two three four five six seven gates total seven NAND gates and so the 74 LS 0 0 chip has four NAND gates on it so we could use just two of these and so normally this would be this would be a pretty good pretty good win here right we're using fewer parts so it's going to take up less space it's going to take less power and it's gonna be smaller and everything else but you know we're not building or we're definitely not trying to optimize for the the smallest computer possible here and I think this circuit is is easier to understand it's kind of easier to troubleshoot we're not trying to save space we're not trying to save power you know the cost of an extra chip is you know less than that you know it's good it's a you know 50 cents or something I don't know whatever these chips cost and so it's not a big deal so I'm gonna I'm gonna use these just because I think this circuit is easier - easier to understand but if you want to you know experiment with something else you can and actually if you want to try to come up with a better circuit here I didn't spend a whole lot of time on this and I got it down to seven gates but maybe you can do better so maybe something to think about okay so I wired it all up here so we've got our 74 LS 0 for our 74 LS 0 8 and our 74 LS 32 all hooked up here and you can see it hooked up the power pin to pin 14 and the ground to pin 8 or pin 7 for all of these and that's how they that's how they all are if we look at the data sheet for 74 LS 0 for for example you can see power pins 14 ground is pin 7 and it's got the six inverters on there we're only using two of them and then the same thing for our hand gate this is the 74 LLS 0-8 and you can see it's got power and ground and then it's got the three and gates or excuse me the four and gates we're only using three of them on there so if we kind of follow this through just to make sure it all looks right are the output of our select here so when we push our select button that output of course is on pin three that's connecting to our input of our inverter and then it's also jump right over here to the input of one of our and gates so that looks right select is going to our inverter and one of our and gates the other input of that and gate should be our a stable pulse and so indeed that was this and gate here the other input is this and it's going all the way over to the output here of our a stable pulse on pin three of this triple five timer so that's our first and gate that looks good and our first inverter the other output of that inverter goes to another and gate so the output of that inverter is here and that goes to an input of our second and gate and the other input of that and gate is this guy here so that comes from the output of our of our manual pulse so indeed the manual pulse goes in the second and gate then the outputs of both of these and gates should go into our or gate so the outputs are here and here so here is going into pin one of our or gate and then our other output is is here and that's going into pin two of our or gate perfect and then the output of our or gate comes around to the input of the third and gate which is up here which is what we'd expect and then the other input of that and gate comes from this inverter that comes from our halt signal so we follow that around the other input is coming from an inverter and I'm just using one of the other inverters on the 7404 up here and then the input of that inverter is coming from our our halt pin which i've just jumpered here to to ground since we don't want to hold and then the output of that and gate is our is our clock signal so I have this nice blue LED showing us what our what our final clock signal looks like so let's take a look at this let's plug our power in and nothing happens but that's because we should be looking at our manual so if we pulse our manual we see the manual output if we turn our select on we're now getting our clock output going through there and we can turn that off go manual if we have that our manual didn't do anything and then if we unground our our halt and put that to five volts it halts it it doesn't matter what we do here the clock outputs halted so if the computer program that's running wants to halt the computer it can do that by by bringing this hot line high so we'll just leave that low for now we can see it looks like it does everything we wanted to do it so the last thing I'm gonna do on this before we we call the clock module done is I you know I don't think we need these LEDs anymore I think the clock module is pretty simple by itself and just seeing the final clock output makes sense but you know you might want to leave these other LEDs here if you want but I'm gonna I'm gonna take them out and then of course we can take out the the resistors here as well I guess I could take the power off while I'm doing this so just pull these LEDs and resistors the current limiting resistors for these LEDs out and that leaves us with this and so this this is going to be our our finished clock module plug the power back in so we can see we can run it we can stop it we can pulse it and if the computer halts it then doesn't matter what we do it's halted and so that's the clock module so in previous videos we've looked at the or gate which if you remember in this case we have two inputs if one input worthy and while other these always better yeah it also it was hurtful to see him rip out all those LEDs that's blasphemy wait there was some yeah sorry for removing my picture in there corner I saw it too late I think the other either but I hope you know that's basically it here these color-changing RGB LEDs yeah that would be funny I definitely need a difference which like switching that it's not so nice I want that I want the one that been eaters using their well that's great ok yeah let's see ok so I I think if you watch this video you get what these black magical chips are I think like this is kind of like a learning experience for me you know when I for the first time when I did like electronics you'll always look at like PCBs and you see these black chips and they are so mysterious like what's in them and so understanding that you know in this case for example this 3 is shown here on in veneers videos 3 laying there on the paper they are just chips that implement different gates so they just have this transistor logic in there to implement an and or an or and there's nothing really crazy about them that's just what they do make a custom made module for those and or gates like what do you mean like with with transistors building it yourself but yeah maybe we could like also find in the store I'm sure there are chips where like there are I don't know to end gates or on it and and to or gates or three ends and like a certain combination I need to go shopping anyway like I want to I thought about like ordering again but I figured for just a few simple parts ordering right away is a little bit and necessary it's not like I need it urgently so when I so I kind of want to collect a few things that I might need and then I placed the order so for the potentiometer a different switch and and stuff like that and then I might also look for different I I see Co just for practice as well I think that would be could be cool yeah FPA FPGAs are interesting I mean I also have only done like the basic and basic but yeah the software is hard to understand at a start and yeah so let's see I need to find chip numbers exactly again of these okay so the end gates are 7/4 okay so we need the 0 8 32 and and was it inverter to 0 for I think he also wait I think oh crap wrong button no wrong button wait I'm confused Oh No let's see I think when you go into the clock module here he was listing again with ships he used you had the hexamers okay 0 4 0 8 and 32 let's see usually only one type of gate on a simple chip okay I mean I don't know it could be maybe that they don't do that I I could imagine that they have also chips that are like mixed but might as well not be I don't know okay so here we have 2 0 4 8 and 32 Oh eight those are the end gates John stiff are you buying some parts not to a watch enter 38 Emma wait what for why did I put the for my stupid holiday somewhere in here I'm stupid yeah 32 there we go 32 why is everyone hating on VHDL I also I mean I don't have much FPGA experience I basically did two small toy things and by Toya I mean like a blinking LV LED basically and I did third look and VHDL I did really like VHDL I think very long looked a little bit simpler but I was starting it via gel and then moving from from very doc so better doc felt very comfortable coming from a little bit more verbose VHDL but I don't know I did not buy the kit because of super high shipping from the US Forest kit and possibly also that or Duty stuff when I'm importing it so I would have ordered if i were sin in the US so I ordered the single parts I ordered them from a German store mostly except the bread boards and these wires I imported those from a u.s. store because I can't find them in a German store we talked I rented about this yesterday he made a virtual washing machine and EH danceable so like I understand like the basics of FPGA I have a video where we used also I used an FPGA for a CTF one time but what I really would like to do and I have never done that is basically you you know like the cool thing about these FPGA aces that there are these components that you can just like buy or they offer free or something or you take them from other people that made them so for example you can and and that's the thing like the easy language is you can just take that block off like an Ethernet or a PCI Express block or something like this and then you build a custom thing on top of that and it seems so it always sounds so simple you just take this block and this block you put them together and connect them and then magically you have this amazing application but in practice it seems a bit harder than that but yeah that's the thing I would like to do for example people were using FPGA s to attack the like the Mac books like the Thunderbolt or something was basically exposing it was basically exposed PCI Express or something like that and PCI Express supports direct memory access DMA and so by using that you could just write you had control of the whole memory of the machine so basically if you plug in anything in that port you could just take over that that computer and so people were like doing presentations on that and they were like saying they just simply used an FPGA and then they used like a PCI Express module and they like to they pulled it together and had this proof-of-concept ready and that seems so crazy to me so I wish I would be able to do that I ordered on the bicycle I can I made like my past list with links to where I bought them I wanted to clean it up and share it as well if you sent me an email I can send you the link right now it's just not cleaned up for like publicly releasing it yeah I still have to order list can you also write me an email or write me somewhere and then I can just share the list with you okay so that's I guess maybe that's a practice and that's work based on this ematic here instead sonic thought slick yeah you can write me there perfect okay so let's plug that out and then we start with so the zero eight was the end gate right okay let's see zero eight zero four was the inverter and we have the 32 which is the or gate when you finish make a PCB out after the Sun yeah that's another thing I'm sure people have actually done that already and that actually would be cool to have like a big boards and your solar it and blinks and you can kind of rearrange said that would be also kind of a cool project yeah I like I kind of like that idea okay so we could put that here I have a little bit of a space problem because I put the wiring down here but either had it on the other side but all huge potentiometers in the way hey I didn't know you streamed on Twitch I just started like that's the third stream basically I mean I have fun enough stream sometime but I haven't done it for a while I guess it's time to sacrifice these for now down here because [Music] maybe I can fit them nicely in somewhere else how does it look it looked kind of weird but whatever fun odds okay I think you could use a SNP component yeah that would be really cool I think that would actually look really nice somebody must have done that already I might look try to search for that later like the been eater on a PCB that would be the would look so cool but then you would want to do the design with more memory and maybe more instructions and read just so that you can run something really cool on it maybe also you know more registers that put like a graphic unit that allows you to control like a small LCD screen or something like that yeah I think that would that would look really cool Oh even if it's like larger you could like really you know arrange it beautifully like if it was as big as like this thing here I think it would look really cool why is your energy so low what you talking about I'm like really trying to be more active it's really straining don't put multiple new sports in one panel though they will tell you extra weight what do you mean you just seem tired man oh man I'm okay wait I feel like I'm okay maybe I don't know what to tell you like I am way more upbeat right now I really try to be like really active in real life I'm even a bit more chill than that so if that's if that is low energy to you then watch yesterday's streams I think like today I really tried to be a bit more I checked out like my own stream yesterday and felt like it was a little bit too too weak for to be entertaining for twitch so I'd really try to be a bit more on it today but I guess it's not working if you want to become serious don't use ego okay good that's a satisfying so I don't know if those were no good order but we will see just unplug those LEDs out okay so so which one is which so in the front we have the end gates we need to look up the data sheet as well that we know which for this which let's see he's linked to schematic directly here perfect okay so we start with the end gates which is 0-8 and this is the diagram okay so and we are connecting so the first end connection is three from the switch and three from the clock at the start oh wow that's becoming our way okay so we need to connect pin three with one with for example crab what's the orientation of this chip I guess 1 & 2 let's cut here okay so three up here okay wait now this just become a little bit gooey here man let me use jumper wires for now for this bridge connection 10 3 is connecting within one hmm correct if I make a pretty bent like this to make it like a line nicer then it's a bit too short will you get apply for a job in until after this I don't think so well what's about smart contracts country writing at school are you fearless partners I never really understood smart contracts yeah that's also like a to do on my videos like that I would like to make videos about at some point like some smart contract tutorials or something this not because I'm I'm not into I need to always I feel like I need to always say this disclaimer like I'm not interested in cryptocurrencies at all and I think most smart contract stuff is all scam or everything is a scam basically but I do find smart contracts from like just like a computational standpoint from like a computer science and what really really fun like the same way we are building a stupid 8-bit CPU to execute some stupid instructions I think it's fun to see like a smart contract execute instructions on the blockchain it's just a weird Oh God just a weird execution environment which is kind of fun I really need that wire stripper mmm what do you love about a theorem like this idea I still lack good examples of applications for blockchain our smart contract specifically didn't get the real use case for smart contract they just did for everything because it's a password the sad thing about the 8-bit computers that you don't have that much programming right yeah but but there are people that did like extensions to it and they modified it to have like a lot more RAM like 20 56 or even the kilobyte of RAM and so eventually I also wanna like once we understand how this whole computer like works that's also one of the modification that I definitely want to want to make okay nice finally well basically the fact that it is transparent so everyone can prove that you did a certain transaction or own a certain total I mean there are other ways to prove that as well I know you can't do gambling on a smart contract though because it has to be fully deterministic there's no randomness make an exclusive club with smart contract what does that mean okay so we connected the first end and now we the second one is connected to the three output of the switch so and thus we go to be make an exclusive club with smart contracts for life love yours I have no clue what you're talking about what you mean what I said what does it mean there's no randomness but you can't really know at which point your code will be executed therefore you could include certain that in the hash which make it untraceable no well that's the thing you know like the the that's true that it kind of makes it a bit hard but in the end it's like not cryptographically great like right the person the miner that might that finds a block and decides to include that execution in the transaction or not knows the hash and can decide if it will execute that or not and if that miner is participating in the gambling the miner can check what I win with that hash nope then let me not include it please stop about this much contract I mean so for example what bothers me the most with a lot of the blockchain smart contract stuff is that first of all most they sell it in the marketing material as this amazing like technology right and so the main focus should be on developers like explaining the technology how to implement it good example applications stuff like this right and then you go on these blockchain websites that explain their new blockchain technology there's a lot of marketing blahblah how the a blockchain is so fast and how their smart contract system is so much better and that it solves all these problems that the other block chains half and it's all magical and then they have a technical paper and they have a white paper and you read it and that's just literally no technical information in it it's like high-level abstract no actual details and that just tells me everything so we connected these two awesome No to it like to your head if anybody talks about smart contracts you're gonna get a 10 word well as long as we are renting about smart countries that's fine nothing okay making progress so far yeah can we implemented this button today so we finished one whole video and we actually working on a second video today so trying to finish this one after this so it's been either version why is it oh the the fourth video in the series oh and if you have just joined look I changed the whole set up isn't this it's so much better to work on now okay so this output here of this switch now also has to go into the inverter well do we deal with that inverter well that's close connectors this output with the second end gate so this third one here has to go into the second and gate let's see so we could connect it to the fourth one there here one two or three four here and so we can cut here Oh what was the question I'm sorry I know Duncan but what is a big computer yeah so it's like yeah okay the dancers the people that answered yeah if was exactly that it's a computer that uses eight bits of addressing basically it's based on the video series from Ben eater I'm sure somebody will link it or something what's the schedule for today around 3 hours I mean ideally actually I also I want these streams to be shorter than 3 hours actually I'm hoping to be kind of more at like 2 hour because otherwise I will not be able to keep that up consistently just too long but I guess I will always make a dependent on how the progress is going like I always want to have kind of like a milestone I think and so far it has always worked out kind of about 3 hours with these videos and we finished already 1 videos in the first one and a half hours so I decided to tackle this next one so I wanna finish another this video as well and then so yeah so it should definitely be I hope we can finish this in within the next hour [Music] okay so this is here going to the fourth pin like so nice Joshua okay and so now the other input for the end gate would be the output of the inverter coming from the from the switch here so I guess we do the inverter here how did that then arrange this nicer okay so this output could go to the inverter so which one was the inverter chip inverter was the Oh for that's this one here the second one what I using s transistors to build object gates we are not using transistors to build the logic gates we are using logic gates implemented in these ICS so this this one includes like six and gates or so here are inverters and here are orchids in it so we need datasheet of the inverter like here this is the datasheet of the inverter chip here so pin 1 & 2 we want to we want to get a wire from here cut here [Applause] what am I currently doing we are following the been eater series on building an 8-bit computer and right now we are working on the clock module of that computer so the part that will generate the clock signal for the computer and this clock module is built in a way that it has the regular clock and also a debug clock where we can like control with a button always press to advance the clock and we are building like the circuit around it now that combines these two different parts to be switchable with a switch so we can select our button press clock or the automatic clock that's what we are building right now okay so so the switch output 3 goes to one end and goes to the inverter and the output of the inverter is here pin 2 and that has to go now up there what part are you considering that's the clock module let's check again the end gate oh it has to be connected so 4 & 5 1 2 3 4 s 1 & 5 is the other one and 5 from here and then the inverter is on true the output cut off that water here and it's stripped from here I really need a wire strap I keep accidentally damaging the for a little bit and I worry that I might break them at some point what is the maximum speed it's actually a good question when we have finished setting this up I actually want to measure the the maximum Hertz that this clock module runs at we actually don't know right now I don't know it's also selectable the speed bass with this pull attention meter here but still I don't know what what we can select this the maximum speed there okay so we have finished setting up the first stage here both these two ends and this inverter beforehand so now these outputs here so that would be pin three and six three and six have to be have to go into the or gate down here and the or gate also I assume yeah also just pin 1 and 2 so 3 and 6 as outputs going into 1 & 2 down here so we could go from here talking like that until one Oh Thanks until Pentium 4 for the sub I you are definitely faster than the this 8-bit CPU that we are building and that we'd panic thanks for the bits you made this for a school project and it took me so long don't be intimidated by the wiring now it gets much worse near the end yeah well I don't mind if it takes a while I'm kind of kind of looking forward to it to be honest ah crap I pulled out the let's cut this again kind of looking forward to it to be honest it seems like I feel like if I would do just that alone like just sitting here I might give up on it and so I am using streaming as like a way to pressure me into keep going with it in the current configuration with the potentiometer to zero it can Maxima run 480 Hertz alright any 5/5 claimed 550 low Hertz yeah but I'm not sure with the configuration how it is set up one two three going down there okay so that is the first and get connected and are the second one so this has to go from one two three four five six so from here from like yep it's short let's see what is your goal with this project yeah just to build it it's an 8-bit computer it's you know to learn more about electronics and you know I I have somewhat of an understanding of how a computer works but actually seeing every single component because there are a few parts that are still a little bit confusing to me especially like the execution of like instructions and and how the bus works I mean it's not you know not quite as complex as modern CPUs to it it's it's a simplified version it's literally it's based on the architecture of SP a simple OSAP simple as possible cpu and so but but it's so I hope to get a better understanding to learn more about electronics and just to have fun okay so now we should have also connected T or gate hit me up the stuff confuses you too much I have a working one nice I don't twitch automotive rated the term cable stripper for obvious reasons yeah I know I put it on I it's on my I ordered it from Amazon maybe it comes on a nut from Amazon I ordered it where did I work I ordered it from somewhere I hope it arrives tomorrow but maybe the day after tomorrow you know about practicing stripping cables it's just a clipper yes maybe also school you need I don't know okay and now this feeds into the or gate so the output of the or is also three and that feeds into the into an or gate all the way up there okay so maybe we can so we need to now use so that's the or gate right wait oh no an end oh I'm sorry it's an end not an or that's an end okay so this this or output has to go into this end up there so we take pin three from here and they have to wire it up on the other side now so for example pin 13 or pin 12 up there so with this bender on the curve like this and then going up there like this but you also have to program cannulate programming using some tips which is as far oh yeah but you also have to program the EEPROM to make it run but he writes a program for the other you know yeah I saw that definitely also gonna do that when you reach that but for example I haven't really I haven't watched the series completely it I just you know picked up a few pieces here and there and so I don't for example know again the purpose of the EEPROM but don't spoil we will learn about it soon enough how much RAM does it have 16 bytes yes it has it's not a joke it has 16 bytes it theoretically it has an 8-bit bus I think so you would think maybe it can address 256 bytes but the as far as I understand the instruction set had been either implements is so basic that you know he and Coates only uses four bits in the instruction encoding for addressing which only allows him to access four bits worth of addresses or sixteen bytes but people have created extensions or different instruction sets so I don't but I don't know exactly how that works yet so we will figure that out once we once we get there this and it here and then we put it I guess in here one three and one oh wait wait wait I'm one pin too far it goes in here no all the way to pin 14 up there is the VCC which obviously is one pin too far there we go I was just gone for 10 minutes what do you mean welcome okay there we go that looks nice I think I was gone for ten minutes I want to know what happened so far well where did you left off I don't know what ten minute ever was we were we are still working on these chips here okay so and now the second one in here the second input is the halt so that's the halt input so I don't think we care about this much right now but let me get some jump away okay so first of all we need and should maybe put that back on the connection floor plus and minus and so this is the halt input oh wait the halt input is also inverted first so we need to go from the with this was the inverter so from here we have a halt input which could be for example here I think we need to check and then we move another wire up there so yeah this would be input and then this would be output okay can you do it can you do an automatic jumper I press a button to halt instead of disconnecting yes basically that's what we have here right like this is the automatic clock up here and this is our clock with the button press so when as soon as we change this that's what we are building right now right that you can select between the automatic clock and the one we click so if we move switch from the automatic clock to our where we click boom now it would halt and it would wait for our button click the hold line here that been either added there as well is additionally there's another input that can completely halt the CPU and as he mentioned this will be later would be implemented as an instruction so that there will be in halt instruction that will just hold the hold CPU by changing this here so this is just an additional halt but if effectively we can also execute a halt by just changing to the manual clock input so we move all right yeah why does he not use a jumper instruction to the current program counter understood to stop this thing I'm not sure me no I mean that is certainly possible I guess just a different way to hold I guess it might might be simple just to have a halt instruction versus jumping I might I feel I think jumping is probably pretty complicated instruction compared to a simple hold meaning maybe you just want to recognize a proper a proper stop okay so wait what am i doing so this is the input this is the output and this goes up to here what's that is okay let's trace this really quick let me see let me make that here and then we quickly verify it and and I know that we still need to do the the power I mean you still need to connect the power but okay so that's good enough so let's see we have I need I need a pointy device I guess this will work okay so up here you can't see it right now but there's this long wire going down this is going as an input in one and gate the second input of that one this pin has to be the switch correct now this switch output also goes into the inverter down here and this output then goes into an or gate here wait that's weird oh yeah no here okay okay and the other input of this or gate no no sorry sorry sorry you know yeah this the switch input goes down here into the inverter and the inverter output goes up into the end gate right here and the other input of that that's the bottom and gate we're talking about right now has another input and that is the click the button input so this is this one going up there and then that output from here so that would be this one here goes down to the or gate as an input the second and output here goes also down there and that output then goes into the other end which has the other input to be the inverter coming from halt so this is halt being inverted going up there and that is an end that has an output here and that will be our led okay so now we need to hook up the VCC and ground and the led and then we should be able to test it you should probably remove the over there sorry whatever we're done you don't need it so big I thought I make it big enough so you can see the tiny connections - you forgot to add VC yeah I know I know I will do that in a moment what is the inverters for please the inverters are simply inverting so from +5 volt they if there's a +5 volt signal that do it zero or if it's zero they do it plus the reason why they are needed is just that you know an end you might want to have an inverted input at the end gate it's just you know sometimes you just need the inverted value and so you need a gate for that come on look at your screen chill dude chill relax relax but thank you for looking out for me okay so the connections I think all had the same VCC was pin 14 and ground was pin 7 I think they all had that in common yeah okay so you need that don't be sorry it's fine don't worry okay so [Music] you see connected for the first chip ah crap I should have measured the length okay I kicked over my trash can oops that was way too long Oh what am i doing oh my god didn't you hook up James II yes I did in yet so 14 that here oh my god okay so there we go my mistake was using a PC power supply to power at first because I didn't have anything else that was almost a dead ship yeah we had some short circuits last time but luckily I have here the like a power supply with limiting current I'm not sure what I said it to but maybe maybe we could have been fine not sure we could have been lucky so far we haven't seen magic smoke okay and now down here yeah but the pc power supply is very different I would have just hooked up the wrong core direction of a five volt but you with a PC power supply you would have like 12 volt Oh busy past place have a five-fold roll - oh then what was the issue or did you also head like wrong connections that turned up so this is G and D wrong wires okay we're trying to overclock it that's that's one thing that I kind of want to try out like if we can glitch the CPU with a much higher clock rate like when it's all set up like when it's all working and stuff like this and we can't actually write a bit more code we have a loop and then I wonder if you can't glitch it to break out of that loop like as an attack that that would be kind of cool I think we should try that and maybe we can like observe this you know like we can maybe add a we find a good point where we can measure with your solo scope and see basically when the glitch happened and why it happened or something oh my gosh it is connected to pin 6 but thanks so much you jet has really good ice right now amazing I feel so confident about this build now with because I can make I easily make stupid mistakes like this and so that that you notice is very valuable okay and now we only need to have the output so we need a blue LED do I have blue LEDs did I order clear blue ones that's dad guess whatever the ground is wrong still I got the other one too I know that now I know it's correct I think it just looks that way I think what what I need is to have like a smoke detector that is connected to some alarm wires and if we ever trigger the magic smoke in this build then we could have like this amazing light show I think that would be cool yeah the wire was shifted weirdest thing is might be shifted up a bit a fire alarm in mode maybe would also be fitting okay so the output of the end of the of this one up here would be the clock how did been hooked it up with the where did he place the resistor and stuff oh he just hooked it up directly without a resistor naughty boy he was also doing a negative clock signal going down again as well into the inverter what is the demand of this 8-bit PC I'm not sure what you mean with the demand there's no demand the Dementors I want to build it okay so maybe we could move it down here and then have a resistor going over like that or I could do the resistor here and after LED go over like that maybe we do it that way carry that I dropped something okay so we can put the led crap here and then we can connect a resistor going from the output here down there oh yeah I know I know about the teleportation of stuff of electronic devices on the floor I mean that's what you get if you work with magic you know sometimes your magic smoke escapes sometimes you are sometimes the aliens take your components back that that just comes with the with the topic okay so now we have the resistor for the LED and now this output also has to go into the inverter for the inverted clock so we need a wire going from here so from here - yeah oh damn reminded me again at the uptime almost three hours again god damn it if I guess if you enjoy screaming started become this room sure of course of course I enjoy it it's just like timewise you know I have other stuff to do unfortunately you know if I would get filthy rich from just doing this you would see me here eight more hours and then we have to invert it out put down here okay okay I'm kind of I I just want to plug it in now and see if it works are you ready oh my gosh okay everybody ready it could blow up so pay attention here let's get the screen out of the way I take safety okay something is wrong this LED should not stay consistently on let me move that switch no wait also sorry no this led sorry I'm confused this led was a switch but clearly this output is not working okay okay so nothing is blowing up this means we can debug it at least connect the hotline or do we need to connect it with the hotline should be connected to plus right to VCC now to ground because there will be inverted I installed an and I are light yeah okay cool so it's blinking according to the clock nice okay now we we do the switch it's off it works now it's our button press we put it back and we have the clock we put it here button press and clock the camera would see the IR I'm not sure if that met a lot of cameras have IR filters also but yeah we should have noticed that I guess ok let's then I would say we just quickly hook up the oscilloscope and also I want to measure the speed I would also be curious if we can see a delay of propagation from the original LED blinking to blinking down here I wonder if going through all these logic aids if there's like if that takes know can we measure that probably not know that it doesn't make sense we probably can't measure their difference like the speed of the switching transistors maybe I don't know maybe this is a dumb measurement we will see the propagation you guys and yeah okay yeah you might be correct okay so let's turn on the oscilloscope place this here and then okay so what do we measure first let's measure the speed first so we hook up ground and we go here to the output I guess we can measure it from down here oh there we go let's make it a bit faster there we go there's a lot of noise I was so ignored the blue one let's disable that but cool there we have our clock signal is that noisy does that look bad alright damn already wanted to finish watching in bed but want to keep seeing the measurement more clearly that's fine ok cool ok so let's see we have the move the button so currently we run at 18 Hertz so let's turn up all that quickly jumps see how we can increase here the speed or decrease it ok so let's see this is 200 Hertz so we have here the measurement screen it's too small for the stream but here is a frequency calculation so it shows here the frequency that it measures and so currently it's 300 Hertz 380 Hertz 500 Hertz okay 500 Hertz is the maximum it is running with 500 Hertz and I plan I hope I can do everyday streaming so tomorrow what are you trying to build this we are built we are following Ben Eaters series on building an 8-bit computer so this is the clock module that we built this is the clock for the computer and we I guess we've just finished the the clock module and so we are measuring right now the clock signal so you can see here the nice square wave of high low high low high 0 1 0 1 0 1 of the clock signal for the CPU which we can adjust the speed because it's our own CPU so we can debug this so now we can also you know switch oh I know that does make sense to measure let me quickly move over plug in the second one to check that off if the inverted clock also works we haven't tested that yet but we should be viewed with should see this here easily with these second Pro so let me turn that on if we don't see anything good break up wait it's that maybe not quite in you check the schematic of the inverter it should go from 13 to 12 hmm there has like a weird level tool no extra clock more stable sorry I don't know what what external clock means the LED pulsing because of the shuttle oh yeah true wow that's cool it's actually super fast right now it's 30 Hertz 30 times per second but the pulsing so I almost matched the FPS rate but not quite so it was pulsing slowly that's 34 Hertz right now so it's a crystal and well the problem is with the crystal crystals are super fast I don't know what the minimum frequency of a crystal is but but we want to see that CPU slowly executing we will want to see each clock cycle slowly that's why there is even a switch on here that allows us to switch to a mode where we can with our button click just execute single clock cycles because we really want it later you have like this whole like the whole table will be full of breadboards with the different components of a CPU and then we can see how to see how each cycle of the CPU is slowly executing our instructions so that's the goal of this that's why we are not using a crystal with like megahertz or thousands of Hertz but we want to actually go down to like visible you know like 2 Hertz or so how does a clock interact with the CPU I mean you can watch been either series but basically well it's dead so it basically comes down to the flip flops that I'm really not sure how to explain it I'm also obviously not knowing it quite that's also why I want to build this you know to understand it better but my how I imagine it right now or how I think about it is that a lot of these electronic components like in flip flops they might react on like a rising edge to set a certain state and that state can then slowly propagate always and that state can like influence the next state and stuff like this and the clock with the rising edge always tells the circuit to now you know now set the output you have something on the input waiting for the rising edge boom set the output next clock cycle set the output and then you have a lot of logic gates and then each rising edge the state is propagated one forward that's how I imagine it but I'm not sure also my my understanding again like again the reason why I want to build this is to understand it better but as far as I know a single clock cycle is a single clock tick is also not executing a single instruction because instructions require multiple cycles to be executed in modern CPUs it's it's very complicated but in this basic CPU as far as I understand we have a defined row of cycles and it might be like the first cycle we fetch the instruction the second cycle we kind of like decode it or something like this in the third cycle we don't set the register values the fourth cycle will check if flags are being set and I don't know like something like this in modern CPUs you have also pipelining so you have you know you don't you don't need to wait eight clock cycles to fetch the next instruction you can always use fetching in every cycle and you will pre fetch the next instruction already so that you can paralyze it and that's then pipelining as far as I know it's not spamming it's alright maybe you don't need to post the same link many Tesla's okay maybe it will be nice to put some decoupling capacitor I think actually we have one here for the bit on the power rails here I think this is a 0.1 micro farad capacitor if I remember correctly is that what a decoupler is sorry if that was not the case okay wait so what did I wanted to do I wanted to understand why the inverting doesn't work so let's look at this again I mean so the inverter must work because the rest of the circuit works so the power supply is correct there so why maybe it is not properly connected no way if we measure the clock cycle down here so this definitely must go in so why does it not show us the output on 12a wait do we need - can we not measure just the output here that we may have to make a connection do we have to put like a pull-up resistor there is that the reason do we need to pull up resistor is that the correct term I'm learning on pin 12 is that did Ben either do something no because right now there's like nothing that draws my reasoning right now is that there's nothing on pin 12 that will consume the output you know like nothing will draw any current so there's no voltage to measure there's no electricity flowing at all because it is not connected so we can't measure anything there but if we put there pull-up resistor yeah like a 1k resistor we should be able to measure something is that correct or will I fry something if I do that No okay I put down 1k resistor if it burns up its probe G g JS fault and you will be banned wait does it have no I have to be connected to ground right no wait where do I want to connect it to okay I pull up would be connecting it to plus right oh wait that's the wrong one I know it's just hi what's wrong do I need to connect the two ground here it's just okay wait this is consistently just higher consistency though but I would assume you don't need it because an ad that also makes sense okay so why is the inverter on I thought I'd try it wait mmm let me check again so the inverter is here so I'm connecting to pin 13 and 12 your channel tool has a high impedance are you really measuring with the channel tool sorry I don't know what you mean since you can pull the signal to VCO GE you can assume it is in hi own state and not driving the pin this could be the case that the input is not connected to the correct [Music] so the check itself must have power because other parts of the like on the other side we have an inverter that is going has output going into one of the gates here and the thing works so it must be should be one but maybe I mean it could be that the single gate is broken so maybe just like maybe we try the next one like 11 and I need some jumper wires for that so if we connect this to this inverter here and we measure yellow now from here oh oh my gosh what's happening this is bad this is wrong why does it not drop all the way down okay wait something is really weird with that with that chip your soul oh crap sorry be careful the schematic is rotating yeah yeah I know so here's from left to right and Here I am going from right to left but look here so what I just showed here so here it was connected before right that wait let me disable a second channel for a moment right you see the nice square wave going from 0 to 5 now see what happens so I wanted to take this output now into the other in the second inverter here and suddenly I'm having this do you see that so I'm connecting basically pin 13 with pin 11 here basically just putting the same input into you know another inverter and then this happens let me completely unplug this one here let me go from here without maybe the doesn't where this really problem there I don't know let's go directly here okay let's measure down here so what is up with this inverter here why is when I mean we disap in out am I just at the peanut can you try to remove the second LED like the blue one so my so so here on here on like 40 on the breath like this green wire here is the output of the clock if I go directly here to the oscilloscope we see a nice square wave all right so now I want to go to an inverter here and so I could go into pin 13 or pin 11 open 9 correct so 13 would be the one right next to VCC so would be here that's 13 and I plug in we measure the clock it's all good and now I plug it in in two so 12 would be the output of the inverter and so 11 would be the input of the other inverter and when I do hear the same now I get this signal and if I go to further down again so this should be the the inverter number 9 and measure there we see the regular clock signal again let's see can we measure the inverse of that over here no that just consistently high that's so weird put one channel on the input and the other one on the outpost oh yeah that's what I did before that's where I saw like completely weird stuff so if I put this at the output the second channel then I have this consistently like high thing like that was brought before load the output of the inverter maybe that's what I thought I did with the resistor but that was stupid I guess if I plug in the resistor to ground isn't that acting as like a load or not am i stupid I mean it's very likely I'm just stupid let's try another LED here I guess and then we take another register see the LED is consistently on so let me try to show you so so right now okay it's ready to see but okay it's here you should see the output where I am plugged in right now that should be pin nine and eight of the inverter all the way here over here and nine would be the input and the LED is on pin eight the output it's just consistent beyond maybe I should look up this ship maybe mine has a different output that could be another reason for error I guess but that would that dish I don't know that that shouldn't happen and if you reverse the led well-being why would I reverse the idea that I wouldn't light anyway because that is ground are you sure that this is the inverter I see [Music] [Applause] oh thanks for the samples honesty yeah it was the wrong chip and I thought we'd but now I have introduced some other bug goddamnit why is he not blinking anymore can I do control-z and go back and undo what I just did why is it not working anymore what did I screw up now turn off the power for changing things you will oh yeah maybe if drive now fry it chip accidentally I don't think so does anybody remember in what button state I would have I would expect the clock to be like the regular clock okay so okay so recap sorry sorry for the silence I was so annoyed at myself so indeed I connected to the wrong chip this here is the inverter and so I thought I just hooked up an inverter there and turned it on and then suddenly the clock was broken now I've ripped back out the cables again in the hope that the that that would fix the clock but I think I just screwed up something else now so here up here we haven't and and it takes oh I think I've ripped out something that I shouldn't have ripped out okay wait wait all right so I need this schematic again III ripped something else I shouldn't have ripped out oh my god no it's the stream so much over three hours again well I mean I'm getting annoyed sorry sorry okay so up here we have the end and that should be the end halt halt that's what you mean I understand what you are saying I know what you mean halt it's blinking again Oh goddamnit thanks that we'd panic and thanks Toby yeah halt was missing scream hit the screen I'm so sorry my god oh my god okay great so now let me fix this again no we take the output okay let's turn off the power real quick we take the output off the clock here this is sick this one here and take that as another input to this to this inverter chip here like that and then we take the output here so the output would be right there but I again use a resistor and put an LED there okay let's see there it is the inverted clock the hotline is flawed is connected to Grodd always yeah maybe because we don't have a hot instruction yet maybe I should add a halt okay so now the inverted clock works it's always the inverted state and that's how you built a police car okay one last measurement at just curiosity even though we probably don't measure much I want to measure the difference from the output up here and the output down here after we went through all the logic gates probably we don't see anything but I'm still curious if we do like I just want to have it measure just to know that that it has no effect so that would be one measurement this Remus hardware Goro I'm sorry why is this half that our current weight that's not because of the resistor is it shouldn't be away we are scaling sorry ignore me ignore me it's the scale second channel was said to okay so now let's see oh yeah okay yes there's no really measure I mean no not there's not really a delay what's going to I have it's the rygel TS 2072 a it's the one that you can unlock it has originally 70 megahertz but you can crack it to think 300 megahertz or something at that the edge is so ugly well we also zoomed in like crazy right now so the time division right now is 50 nanoseconds so each square here is 50 nanoseconds now it's each squares 10 nanoseconds what do you expect now if you go like you know that that edge disappears now we have 2 microseconds no 5 microseconds but if you are looking for an oscilloscope so I can I bought this because I used it at university and I liked it and I knew you could open it up however like about a year after I bought this one keysight came out with an entry-level scope that has based I think on better specs then you know this one not correct which is I think even cheaper and has more megahertz also dual channel I think maybe even more hidden to check again but I remember what I remember was that if I if that would have been out when I walk thought about buying this one I might have gone with the keysight instead exclamation the command downtime works - I didn't know okay cool cool we did it we did it we finished the clock signal there we go what hurts isn't running now the led right now it's running at 2.7 Hertz but we just measured it with the oscilloscope I don't know if you were there or mister or something this whole thing can go up to 500 Hertz pretty precisely 500 Hertz here we can measure it with the oscilloscope it shows here the Hertz so right now it's running so fast if you don't see it blinking any more so 500 Hertz is the maximum speed of this computer oh there was another subscriber eight minutes ago I missed it I'm sorry John handling thanks for the son I need to start building my 8-bit PC I have all the components ready nice you should another energy drink and go for the registers yeah I wish I could do that so yeah if there are any questions left any any comments remaining I think I will wind down the stream in like five minutes or so what speed will be said well that's the thing it's settable with this knob here you can turn you can change the speed of the CPU so I won't set it to anything because we can adjust it however we want also we have to switch here that we can move and that will give us the ability to do a clock cycle per click and so later we can then use that to debug the CPU and slowly step through and we can you know use a very slow Hertz like this I am slower to really watch slowly the CPU executing the instructions you know we will have LEDs throughout the CPU to see the different connections and States and so we can then watch the CPU executing it yeah Benito retweeted or responded or something on the stream that there may be really happy are you going to make a pulse modulator so sending a stroke and not sure what you mean I mean that's the clock module that will provide the clock for the whole CPU is that what you mean with the pulse modulator or is that something more fancy I don't know I I'm not I'm an amateur do you have any electronic studies not really I had the basics of you know logic gates or like you know coming at Oriel logic and and binary logic and stuff like that in university I had mmm like what we did for example in school I was on a technical school we for example simplified truth tables like gates you know like you do this kV diagram and then you simplify it it sounds like that that's as much as it did and as an amateur I have played around with Arduinos and stuff and that's also why I have a little bit this kind of equipment here so I don't that's that's my background very amateur and haven't spent even close to the hours I've spent on software stuff so I probably hadn't reached a thousand hours with electronic stuff in my life yet make a giant PCB with the computer yeah I like every somebody else mention it earlier I think it would actually be cool and I'm sure somebody has already done that been either a bit computer on a big PCB I think that would be kind of cool maybe we can do this when this is all done make it into a big PCB that would be kind of cool about I mean that's something for the future I mean with that modulator thing that you send three times a clock fast and then wait a bit then three times fast to see the next instruction directly oh I think I know what you mean now because like let's say and then each instruction takes three cycles you mean that you can send all three quickly as like like as a kind of like a single step and a single step is three clock cycles for example I guess that what you mean I don't know if it's been either building that if he is building that and I will also probably built it on the other hand might also be a fun debug thing maybe to have like that would be quite a challenge I don't know like that that sounds simple enough that it should be doable but definitely hard enough for me I would not know how I can make a single click and have it followed up with three clock cycles I don't know how you built that with the circuit it's that easy yeah I don't know how something like that work what you need to have a small counter like you always said like two flip-flops to the value three and have it like decrement or something like this I don't know how you would do that that would be maybe interesting to learn with counters I guess yeah more five four five yeah I was also just thinking could you maybe time it with five point five I don't know like you have a one five two five generate just a regular unstable pulse right but have another one that is ending that one so you have it on four on four always three times as long as the first one that could also maybe work that's the that's on reasonable what I said basically we combined this one here that just stays on longer and will always stay on three times as long as this one here and then you end the two together and then you should have one click should always open three what's the next step for the computer yeah I'm not actually sure how we continue because I've seen the next videos he did was on the SR latch D Fletch and the D flip-flop so and all these videos together are quite long so that's like 40 or quiet I have 40 minutes or so to watch those but I guess that he did that in the series because it's kind of important at that point so we definitely want to watch that okay so maybe and then then maybe the next video is also just next minute so maybe next stream will be less building and more just watching and maybe theorizing a bit about it maybe we can I mean he's also basing this on on sets on something that he's building there maybe we have two parts and we can replicate it so that that will be the next stream I guess oh I didn't show my screen I'm sorry so the next episodes in this series are just about the SR latch to the latch and the D flip-flop and so these are more like theoretical so yeah that's what you will continue with this is gonna be on YouTube it will be unlikely be alive overflow video just because why would I make these videos that been either has already made makes no sense I think it's fun to have like a live stream instead about it I see a bit more value in that I guess mmm maybe I will do like a summary video when it's done maybe for life although however all the videos will be in the twitch archive and also I will upload them on a second channel called random overflow you can find the link to random overflow channel on the life overflow channel when you look in the sidebar in the featured channels this is where you can find just the recording of these streams yeah that's why it makes no sense for me to make videos just watch Ben eaters videos they go great they're perfect maybe make every day a highlight today well that's also kind of a goal that I have once I stop the stream I will make a rough condensed cut of this stream so to condense this almost four hours into like thirty to forty minutes just a very rough cut which is I think already better than watching four hours so that's the plan I'm not sure if I can keep that up with my other responsibilities you are the 21st sample fredom oh wow I got a few substances last I checked from zero to ten how much do you think you understand computers and their transform the electron and up I don't know how to answer this question I don't know I could three maybe or Cynthia ref are you on Twitter Cynthia but yet what will be available by Chris likes okay let me finish the livestream we succeeded today it's end on yeah cool and nice photo for coming around okay over nice little visiting using micro instruction video with the concept thanks for sharing okay alright thanks everybody for joining me today thanks so much for the bits and this subscriptions and most likely see you tomorrow continuing building this I have a nice evening keep on learning and see you soon bye-bye [Music]
Original Description
-=[ ❤️ Support ]=-
→ per Video: https://www.patreon.com/join/liveoverflow
→ per Month: https://www.youtube.com/channel/UClcE-kVhqyiHCcjYwcpfj9w/join
-=[ 📄 Info. ]=-
Main Channel: https://youtube.com/LiveOverflowCTF
Twitch: https://twitch.tv/LiveOverflow
-=[ 🔴 Stuff I use ]=-
→ Microphone:* https://amzn.to/2LW6ldx
→ Graphics tablet:* https://amzn.to/2C8djYj
→ Camera#1 for streaming:* https://amzn.to/2SJ66VM
→ Lens for streaming:* https://amzn.to/2CdG31I
→ Connect Camera#1 to PC:* https://amzn.to/2VDRhWj
→ Camera#2 for electronics:* https://amzn.to/2LWxehv
→ Lens for macro shots:* https://amzn.to/2C5tXrw
→ Keyboard:* https://amzn.to/2LZgCFD
→ Headphones:* https://amzn.to/2M2KhxW
-=[ 🐕 Social ]=-
→ Twitter: https://twitter.com/LiveOverflow/
→ Website: https://liveoverflow.com/
→ Subreddit: https://www.reddit.com/r/LiveOverflow/
→ Facebook: https://www.facebook.com/LiveOverflow/
-=[ 📄 P.S. ]=-
All links with "*" are affiliate links.
LiveOverflow / Security Flag GmbH is part of the Amazon Affiliate Partner Programm.
#liveoverflow
Watch on YouTube ↗
(saves to browser)
Sign in to unlock AI tutor explanation · ⚡30
Playlist
Uploads from LiveUnderflow · LiveUnderflow · 10 of 42
1
 2
2
 3
3
 4
4
 5
5
 6
6
 7
7
 8
8
 9
9
 ▶
▶
 11
11
 12
12
 13
13
 14
14
 15
15
 16
16
 17
17
 18
18
 19
19
 20
20
 21
21
 22
22
 23
23
 24
24
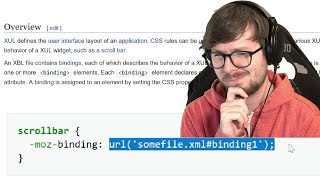 25
25
 26
26
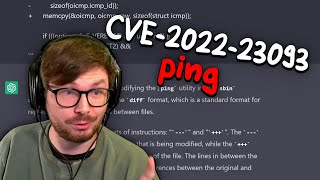 27
27
 28
28
 29
29
 30
30
 31
31
 32
32
 33
33
 34
34
 35
35
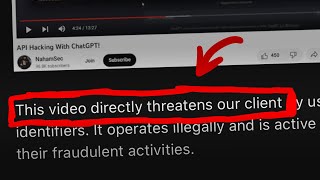 36
36
 37
37
 38
38
 39
39
 40
40
 41
41
 42
42

BUILDING AN 8-BIT COMPUTER FROM SCRATCH #2 (Full Stream)
LiveUnderflow
LiveOverflow's Makeup Tutorial #1
LiveUnderflow
MakeUp Tutorial for Streaming and YouTube
LiveUnderflow
MurmusCTF, SSD CTF Challenge, Google CTF writeups - PwnNews 27/06/19
LiveUnderflow
Google CTF 2019 Chat - Looking at Writeups
LiveUnderflow
Discussing Hacking Videos - Community Guidelines YouTube
LiveUnderflow
Hacking Skills Perspective
LiveUnderflow
Chatting about Cryptography and Exploit Regulations
LiveUnderflow
BUILDING AN 8-BIT COMPUTER FROM SCRATCH #1 (Full Stream)
LiveUnderflow
BUILDING AN 8-BIT COMPUTER FROM SCRATCH #3 (Full Stream)
LiveUnderflow
BUILDING AN 8-BIT COMPUTER FROM SCRATCH #4 (Full Stream)
LiveUnderflow
Studying Cybersecurity in USA vs. Germany | ReHacked
LiveUnderflow
Examining JavaScript Inter-Process Communication in Firefox | Watch Together & Q&A
LiveUnderflow
Reading SECRET U.S. Air Force HACKING Document!!
LiveUnderflow
Why Don't Use alert(1) for XSS? | Watch Together + Q&A
LiveUnderflow
Escaping from JavaScript Sandbox (AngularJS)
LiveUnderflow
Why proofing impact for every XSS is "dumb" - Bug Bounty Reports
LiveUnderflow
Password Cracking Explained | ReHacked
LiveUnderflow
HTTP Desync Attack Explained With Paper
LiveUnderflow
Better than Stack Overflow for Development
LiveUnderflow
Thumbnail A/B Test Experiment for CTR
LiveUnderflow
How To Exploit a Heap Overflow
LiveUnderflow
Log4Shell | Bug Bounty Public Service Announcement #shorts
LiveUnderflow
New Details on Commercial Spyware Vendor Variston - Revisiting Firefox Sandbox Escape
LiveUnderflow
Can AI Hack Websites with XSS? #ChatGPT
LiveUnderflow
ping Vulnerability Patch Analysis (with #ChatGPT) - CVE-2022-23093
LiveUnderflow
Using CodeQL to Investigate GraphQL Resolvers
LiveUnderflow
Security Issue Found in US Gov CISA Tool?
LiveUnderflow
Using joern to Find GraphQL Authorization Issue
LiveUnderflow
Analytics from 7 Years on YouTube...
LiveUnderflow
3D Printer Researching Igus Bearings - Prusa i3 MK3S+ (part 3)
LiveOverflow
Attacking VSCode Extension from Browser? - Live Security Research
LiveOverflow
I Don't Trust Websites! - The Everything API with ChatGPT
LiveOverflow
Do Hackers Need To Know Algorithms and Data Structures?
LiveOverflow
"Remove the video as soon as possible"
LiveOverflow
Arm®-based Video
LiveOverflow
How to make good HACKING videos
LiveOverflow
LEEROY fällt auf HACKER rein?
LiveOverflow
Hacking for an Intelligence Agency
LiveOverflow
Tier List of My Worst Tweets
LiveOverflow
Step by Step Phishing Setup Tutorials are Unethical!
LiveOverflow
Hacker Reacts to 23andme Data Leak
LiveOverflow
Related Reads
📰
📰
📰
📰
How Creative Characters Like Sprunki Inspire Kids to Learn Coding
Medium · Programming
Computer Applications for Primary School Children: A Fun + Safe Guide for Ages 6-12
Dev.to · Ogunkola Adeola
From 0 to 20 Chapters: My Story‑Driven Rust Book for Kids Now Has a Bilingual Interactive Demo
Dev.to · born1987-ir
How Kids Can Build Fighting Games Stickman in Scratch
Medium · Programming
🎓
Tutor Explanation

 DeepCamp AI