Responsive Navbar Tutorial
Key Takeaways
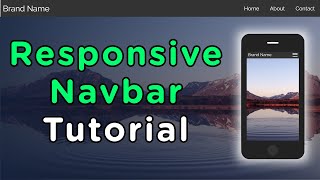
The video demonstrates how to create a responsive navbar using HTML, CSS, and JavaScript, with a focus on styling and layout using flexbox and CSS.
Full Transcript
in today's video we're going to create a fully responsive navbar that when it becomes too small will show a hamburger menu that'll drop down our options and expand and collapse as needed let's get started now to get started I have an HTML file with the boilerplate HTML code to import our different style sheets we're going to create as well as our JavaScript file that we're going to create an inside of the body we just need to put our HTML for the navbar so we're just going to use a nav element with the class of nav bar so that we can use this as our nav bar and we can reference it in our CSS and then it's the inside of here we need to create sections for both our brand title as well as all of the buttons that we're going to have so the first thing we're going to do is just create a div give it the title with a class of brand title and in here we'll just put brand name because this is going to be the name section of our brand and as you can see that pops up in the top left and then we need a second section which is going to contain our navbar links so which point accreditor dip for that give it a class here of the navbar links and then inside of here we're going to put our different links and we'll put them inside of an unordered list just because they have list item and each one of these will be a list item with an anchor tag inside of them and inside of this anchor tag we have home as our first one and we'll just give it here an H ref of just a hash tag since it's not actually going anywhere I'm then going to copy this down twice more so that we have three links in total and this one's going to be in our bow link and then finally we'll have a contact point and now as you save that you see that we have all the different information on our page that we need and we can actually start styling our site for the desktop version first so let's open up our Styles dot CSS here and let's do a little bit of boilerplate CSS that we need to make our project easier the first thing we wanted to use is setup box sizing we're just going to use border box and this will makes time when our widths much easier and then we're going to take our body and we're going to remove all margin and padding from the body so that way we can put everything up right next to the border of our screen just like this now we can start actually styling our navbar element the first thing that we want to do is use flexbox to display these objects because we're going to want them to line up side-by-side we then can justify the content with space between and this will push them as far apart from each other as possible and then lastly we want to line our items in the center so that our links since they're going to be smaller will line up perfectly in the center of our brand name which is going to be larger lastly since this is going to be our navbar the top we want to give it a background color that's going to be darker so we'll just give it a really dark grey color we want to make all the text inside of it white by default so now if you save that we see that we have a brand name over here on the Left what just centered and on the right we have our links which are centered as well so now we can move on to actually style in our brand title first because that'll be the easiest of the two to style all we need to do is increase the font size a bit since we want our brand name to stick out as opposed to our links so we'll make it one point five times our route font size and we'll add a little bit of margin on it so that it doesn't quite line up at the very end of our screen we'll just do a point five here for example and now if we say that you see we got a larger brand name which is going to be centered and pushed away from the edges of our screen now let's move on to actually styling our navbar links in order to style our navbar links we just need to use that nav bar links class that we created earlier and we want to select the UL which is going to be that unordered list and we all know just remove all the normal styling to it so we're going to remove the margin and we're going to remove the padding on it and then we're also going to make it a display of flex so that we can easily align the items inside of our list side by side as we need to and space them out properly next what we want to do is we want to select the actual lis inside of here so we're going to select our navbar links again we want to get all the list items I just want to remove the list style from them because we don't want that underlined to be appearing or have any of the dots on it so we can remove that list style and then we can select the actual any tags the anchor tags inside of our navbar links here we could just do this by selecting the Li and all the anchor tags inside of it and here is where we can actually remove the different underline by just saying text-decoration:none we want to set the color to be white by default and we also want to just keep it a little bit of padding around each one we'll just say one REM and we'll just make them display:block so that they show up as a larger size and there we go we now have our links on the right hand side here and we have a brand name on the left side here pretty well spaced out from each other and these links when we click on them as you can see it adds that hashtag to our URL which is perfect now what we need to do is actually style these so that they have animation on hover so that we can tell that we're actually hovering over them so to do that we're going to want to just select our navbar links here get our li and when we hover over this Li all we want to do is just change the background color so we got our background color and we'll just make this another those grey colors I can actually type and now we hover you'll see that we get that light gray background behind our different anchor tags when we hover over them and we have a non responsive navbar complete but as you can see as we shrink this it doesn't actually make our hamburger menu in the left hand corner so let's actually go about implementing that now the first thing that we need to do is actually add that hamburger menu inside of our HTML we can just put it right here in between our two current divs and we can just make this one an anchor tag we're just going to give it another H ref that is going to lead to nowhere I'm going to give it a class here a toggle button so that way we know that this is our button that we're using to toggle and inside of here we just want to put three different spans that are going to represent the three lines of our hamburger menu so we're going to have a span give it a class here of bar and we're going to copy this three times we don't want anything in this span since we don't actually want any text and that's all we need to do with our HTML now we can go back into our styles and we can work on styling that toggle button so let's first select our toggle button and actually style how we want this to look the first thing they're willing to do is we're going to want to position this absolutely so that we can force it to be all the way on the right side of our screen without messing with the flow of the rest of our elements we also want to make it so it's positioned not quite at the very top of our screen so we'll push it Oh point seven five REM from the top of our screen and we're going to do the same thing but one REM from the right side of our screen we want to make sure this does not display by default because we don't want this to show up on our larger screens only our smaller screens and inside of here we're going to change our Flex direction to be column so that all of our different spans line up on top of each other from one at the very top and the third one at the very bottom and we're going to justify it's our content with some space between them again so that we have as much space as possible in between these different elements inside of our toggle button and lastly we just want to set a width and a height we'll just do 31 pixels as the width and we'll set the height here to be 21 pixels so now if we change this display:none to display effects you'll notice that it doesn't actually do anything and that's because our toggle buttons don't actually have any bars inside of them that are styled so let's select the bars inside of our toggle button so we'll just select that bar class here and all we need to do is just add a little bit of styling here to make these extra show so we'll make them three pixels tall we're going to make them take up 100% of the width inside of the container of our toggle button we want to give them a background color here of white so that they show up whoops white and then lastly just a little bit of a border radius around these so that way we can see a little bit of a rounding of the corners we'll just say 10 pixels for example this border radius and now if you say that we see without have our hamburger menu up here in the top right hand corner which is perfect and it looks exactly as we want it to but we don't actually want this to display on our larger screens so we'll change this display flex back to display:none and there we go we have our normal menu and now when we shrink this menu down we want to actually change this to be our hamburger menu so down here we're going to use what's called a media query which allows us to say when a certain condition is met run the code inside of here but if it's not met then don't so in our case if the max width of our screen is 400 pixels or less so if our screen is less than 400 pixels wide we know that we want to run the code inside of this media query and your media query may be a different value here I have my browser zoomed in to 150% so it's easier for you to see so you may need to use larger numbers such as 600 as opposed to 400 so now inside of here what we can do is we can take our toggle button and we just want to change the display of this to flex so that'll actually show up and then we want to make our navbar links here we want to make them disappear so we'll select our navbar links we'll set the display to none and now if you say that you see we get our hamburger menu on the right-hand side but if we increase our screen you see that we get our normal icons which is exactly what we want and as we decrease we get hamburger and it'll go back and forth as soon as we hit that 400 pixel breakpoint now let's instead of making this display:none let's just comment this out for now so that we can actually see our different icons in here and we want to style our icons our links over here to be below our brand name so that when we click this menu it'll slide in and slide out as we want it to so the order to do that all we need to do is take our navbar here and we just need to change the Flex direction to column and now as you can see everything is going to be positioned above each other and below each other as we want and in order to make our brand name appear back on the left side we just want to align our items in here we want to align them at the Flex start and now if you say that you see we get our brand name all the way on the left and we have our items here which are going to be stacked right below it but currently they're being stacked left to right and we want to stack them top to bottom and that'll be an easy fix for us what we need to do is we need to select our nav bar links class again we want to select the actual UL inside of it and this ul as we remember earlier we made a display of flex so we can just change the Flex direction here to column and if we save that you see the now stacked above each other as we want them to but we want them to be dead center over here instead of on the left so I one order to do that we're just going to set the width here to a hundred percent and that will give us our UL spanning 100% and we just need to make our actual container also span a hundred percent so our navbar links all we need to do here is make our width 100% and now you can see that our actual items are spending 100% of the width and we just want to make them aligned in the center so we're just gonna go down here select our navbar links again and we're going to want to select the actual allies inside of them and we just want to say text-align:center so now our text is going to be dead center just like this all I think that really needs to be left is you need to remove some of the padding that's around these elements because they're a little bit too far spaced out in my opinion so let's go down here we're going to select our navbar links again and we're going to select the actual anchor tags this time we're just going to change our padding on these anchor tags to be 0.5 REM and 1 REM and if I spell that correctly you see that we now have our elements being closer spaced out together as opposed to being farther spaced out as we want on the larger desktop view and lastly we're going to use an active class in order to determine if this should be shown or not so we're just going to have navbar links here dot active so when it is active we want our display to be flex and now we can go back and completely uncomment this display:none so as you can see by default our menus not being displayed but when we click this we want our menu to come down and if we click it again we want our menu to go up and that's where we're going to have to start using javascript in order to implement that luckily the JavaScript for this is going to be fairly straightforward so let me just walk you through it real quick the first thing we wanted to do is actually get that toggle button element that we have inside of our code so we can just say document dot get element by a class name and we can just pass in the class name here which as we know is called toggle button and since this returns an array we just want to get the first element in that array which is going to be the toggle button right here on our page next we want to get the nav bar links that we have so we can do essentially the same thing document dot get element by a class name and instead of using toggle button will just use navbar links and again there's only one of those so we just want to get the very first point on our page here and now we have our toggle button and our links that we can access in the rest of our code so we could just take our toggle button here and we can just add a event listener so we can say whenever this element is clicked we just want to run a certain function which we are going to define it here and inside of this function all we want to do is take our navbar twinks and when it access all the different classes on it and we just want to toggle the active class essentially all this means is if the active class does not exist it'll add it and if the active class does exist it will remove it and now if we save that if we click on our button over here you can see that our menu pops open and if we click it again you see that it disappears and that's exactly perfect that's what we want and as we expand our screen you can see it turns back into a normal menu and these links work just as before look exactly the same and as we shrink it we get the hamburger menu which will open up down and close as we click on it and that's all it takes to create an incredibly simple navbar that is completely responsive from mobile and desktop views if you guys enjoyed this video make sure to check out my other CSS tutorials which are going to be linked over here and subscribe to my channel for more content just like this thank you guys very much for watching and have a good day
Original Description
In this video I am going to walk-through the process of creating a quick and simple responsive navigation menu. Responsive navbars are increasingly important to have as mobile web browsing becomes more popular, and they are surprisingly easy to create. This means that we no longer need to turn to bootstrap just to get a fancy responsive navbar.
Code For This Tutorial:
https://github.com/WebDevSimplified/css-tutorials/tree/master/Responsive%20Navbar
Code Pen For This Tutorial:
https://codepen.io/WebDevSimplified/pen/LqKQRK
Twitter:
https://twitter.com/DevSimplified
GitHub:
https://github.com/WebDevSimplified
CodePen:
https://codepen.io/WebDevSimplified
#Responsive #WebDevelopment #Navbar
Watch on YouTube ↗
(saves to browser)
Sign in to unlock AI tutor explanation · ⚡30
Playlist
Uploads from Web Dev Simplified · Web Dev Simplified · 56 of 60
1
 2
2
 3
3
 4
4
 5
5
 6
6
 7
7
 8
8
 9
9
 10
10
 11
11
 12
12
 13
13
 14
14
 15
15
 16
16
 17
17
 18
18
 19
19
 20
20
 21
21
 22
22
 23
23
 24
24
 25
25
 26
26
 27
27
 28
28
 29
29
 30
30
 31
31
 32
32
 33
33
 34
34
 35
35
 36
36
 37
37
 38
38
 39
39
 40
40
 41
41
 42
42
 43
43
 44
44
 45
45
 46
46
 47
47
 48
48
 49
49
 50
50
 51
51
 52
52
 53
53
 54
54
 55
55
 ▶
▶
 57
57
 58
58
 59
59
 60
60

Introduction to Web Development || Setup || Part 1
Web Dev Simplified
Introduction to Web Development || Understanding the Web || Part 2
Web Dev Simplified
Introduction to HTML || Your First Web Page || Part 1
Web Dev Simplified
Introduction to HTML || Basic HTML Elements || Part 2
Web Dev Simplified
Introduction to HTML || Advanced HTML Elements || Part 3
Web Dev Simplified
Introduction to HTML || Links and Inputs || Part 4
Web Dev Simplified
Learn Git in 20 Minutes
Web Dev Simplified
5 Must Know Sites For Web Developers
Web Dev Simplified
10 Best Visual Studio Code Extensions
Web Dev Simplified
Learn CSS in 20 Minutes
Web Dev Simplified
How to Style a Modern Website (Part One)
Web Dev Simplified
How to Style a Modern Website (Part Two)
Web Dev Simplified
3D Flip Button Tutorial
Web Dev Simplified
How to Style a Modern Website (Part Three)
Web Dev Simplified
Animated Loading Spinner Tutorial
Web Dev Simplified
How to Write the Perfect Developer Resume
Web Dev Simplified
Animated Text Reveal Tutorial
Web Dev Simplified
Learn Flexbox in 15 Minutes
Web Dev Simplified
Custom Checkbox Tutorial
Web Dev Simplified
Start Contributing to Open Source (Hacktoberfest)
Web Dev Simplified
JavaScript Shopping Cart Tutorial for Beginners
Web Dev Simplified
Responsive Video Background Tutorial
Web Dev Simplified
1,000 Subscriber Giveaway
Web Dev Simplified
How To Prevent The Most Common Cross Site Scripting Attack
Web Dev Simplified
Transparent Login Form Tutorial
Web Dev Simplified
The Forgotten CSS Position
Web Dev Simplified
How to Code a Card Matching Game
Web Dev Simplified
10 Must Install Visual Studio Code Extensions
Web Dev Simplified
Learn CSS Grid in 20 Minutes
Web Dev Simplified
Learn JSON in 10 Minutes
Web Dev Simplified
10 Essential Keyboard Shortcuts For Programmers
Web Dev Simplified
What Is The Fastest Way To Load JavaScript
Web Dev Simplified
Differences Between Var, Let, and Const
Web Dev Simplified
How To Install MySQL (Server and Workbench)
Web Dev Simplified
Learn SQL In 60 Minutes
Web Dev Simplified
How To Solve SQL Problems
Web Dev Simplified
What Are Design Patterns?
Web Dev Simplified
Null Object Pattern - Design Patterns
Web Dev Simplified
Your First Node.js Web Server
Web Dev Simplified
How To Setup Payments With Node.js And Stripe
Web Dev Simplified
How To Learn Any New Programming Skill Fast
Web Dev Simplified
Asynchronous Vs Synchronous Programming
Web Dev Simplified
JavaScript ES6 Arrow Functions Tutorial
Web Dev Simplified
Are You Too Old To Learn Programming?
Web Dev Simplified
JavaScript Cookies vs Local Storage vs Session Storage
Web Dev Simplified
JavaScript Promises In 10 Minutes
Web Dev Simplified
Builder Pattern - Design Patterns
Web Dev Simplified
JavaScript == VS ===
Web Dev Simplified
JavaScript ES6 Modules
Web Dev Simplified
8 Must Know JavaScript Array Methods
Web Dev Simplified
CSS Variables Tutorial
Web Dev Simplified
JavaScript Async Await
Web Dev Simplified
How To Choose Your First Programming Language
Web Dev Simplified
Easiest Way To Work With Web Fonts
Web Dev Simplified
Singleton Pattern - Design Patterns
Web Dev Simplified
Responsive Navbar Tutorial
Web Dev Simplified
CSS Progress Bar Tutorial
Web Dev Simplified
Learn GraphQL In 40 Minutes
Web Dev Simplified
What is an API?
Web Dev Simplified
Learn How To Build A Website In 1 Hour!
Web Dev Simplified
More on: Tool Use & Function Calling
View skill →
🎓
Tutor Explanation
