Advanced Excel Full Course 2026 | Advanced Excel Tutorial | Advanced Excel Course | Simplilearn
Key Takeaways
Covers advanced Excel techniques for data analysis and visualization
Full Transcript
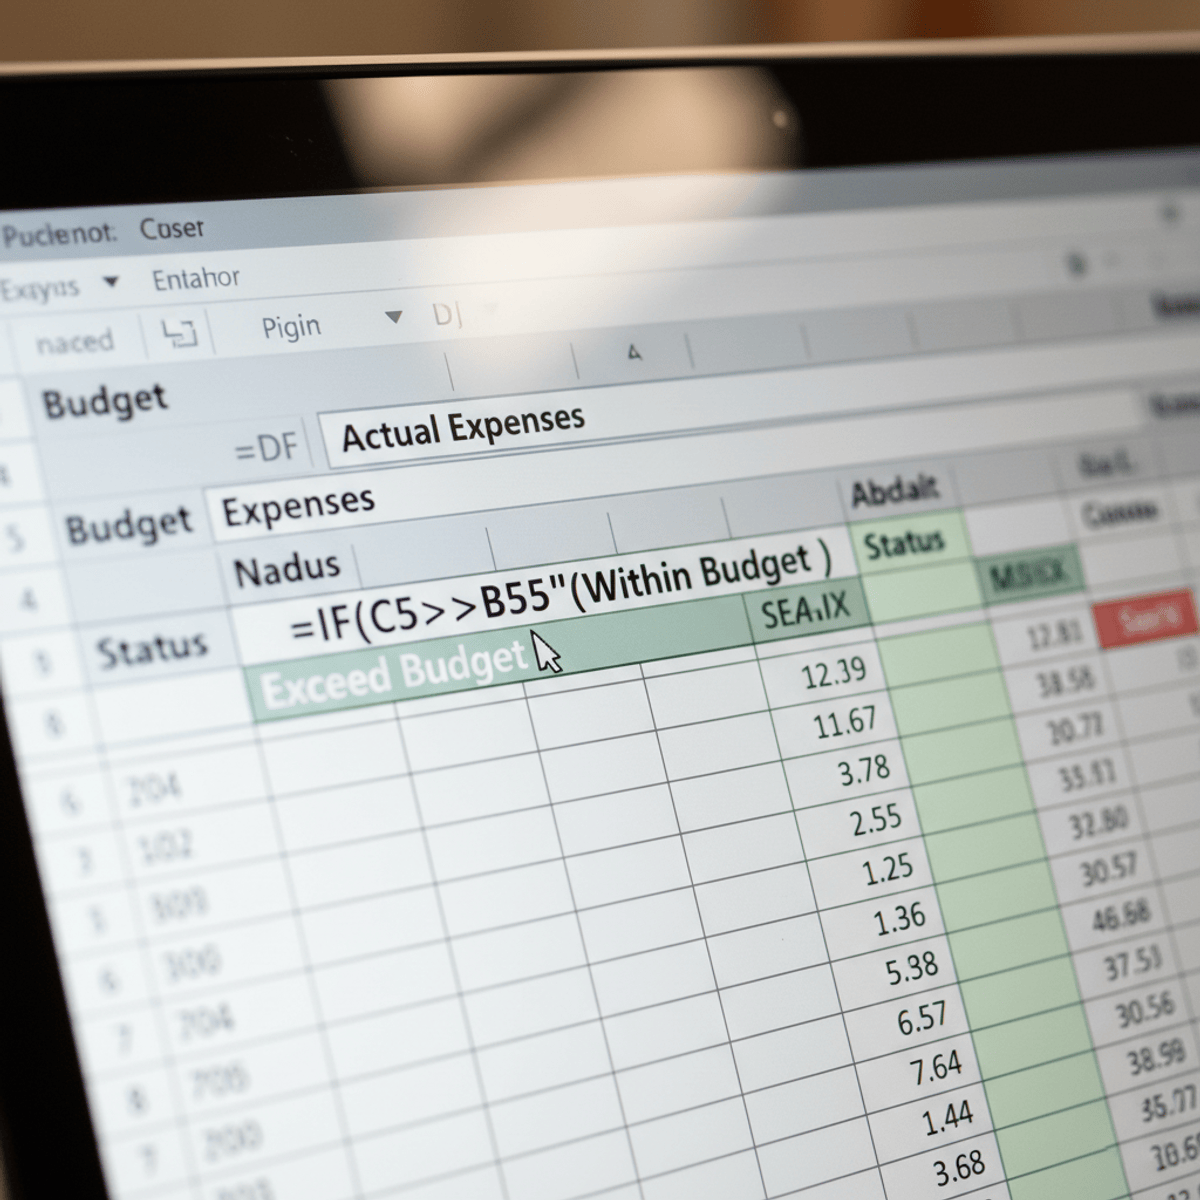
Hey everyone, welcome to advanced Excel full course by Simpler. Ever wondered how to turn all that raw data into something useful? Well, with Microsoft Excel, you can just do that. It's an amazing tool for organizing, analyzing, and even visualizing your data. In today's world, knowing Excel is a total gamecher. It helps you create amazing reports, simplify task, and build interactive dashboards that make decision- making a breeze. In this course, we'll start with fun, hands-on look at all the cool features Excel has to offer. We'll learn about how to use tools like Power Query to transform your data with ease, and we'll show you how AI tools like Excel Copilot can give you valuable insight. We'll also teach you 10 powerful formulas to speed up your work and even show how to create interactive dashboards using smart techniques including chart GPD. There's more. We'll also dive into database management explain difference between data science and data analytics and map out the steps to become a successful data analyst. So let's get started. Just a quick information guys, the professional certificate program in data analytics and generative AI is your gateway to master the most in demand skills in the industry. Taught by IT Gojhati expert faculty. This program will take you from beginner to pro with hands-on experience in tools like Excel, SQL, Python, Tableau, and many more. You'll dive into the world of generative AI. Learn how to use cuttingedge technologies like Chat GBT and Gemini to tackle real world data challenges. Not only you'll earn a prestigious certificate from IIT Gojhati, but you will also enjoy interactive live master classes, campus immersion and exclusive industry insights from IBM. So guys, hurry up and apply now and find a link in the description box below and in the pin comments. Microsoft Excel. So Microsoft Excel is a software product designed and developed by Microsoft for storing data in an organized way that is rows and columns. And Microsoft Excel is also capable to manipulate data through some mathematical operations. Followed by that, Microsoft Excel is also used to extract the insights from the data and represent it in the form of visually appealing graphs and charts. Now we have a basic understanding or an overview of what a Microsoft Excel software product is. Now moving ahead, we will understand the fundamentals of Microsoft Excel. So following are some fundamentals that you need to know before getting started with Microsoft Excel. So basically when you install the Microsoft Office in your computer, you will have various Microsoft products out of which Microsoft Excel is one of the product. So we will be dealing exactly with that particular product that is Microsoft Excel. So when you get started with Microsoft Excel, this is what you will see in the first page. So this particular page is called as Microsoft Excel homepage where you will be having various varieties of sheets. Microsoft Excel will give you some suggestions based on the type of sheet you want to work with. We will see this in a better way through the practical session. So once you get started with the sheet, you will have some more options. So this particular option is called as the toolbar menu. You will have the file, home, insert, draw, page layout, formulas, data, review, view and help. So these are the tools that you will be using to work on your data using Microsoft Excel. Furthermore, we have a toolbar ribbon. So when you select some or the other option from the file, home, insert, draw, page layout, formulas, data, review, view and help buttons, you will have a ribbon. So for example, you can see that I have selected the home tool here. So when I press on the home tool, this is the ribbon which Microsoft Excel gives me. So this ribbon has some options in it which can perform various operations. Now in a further more detailed way we will have toolbar groups. So when you see in the previous slide we have a complete toolbar ribbon. So this particular ribbon is segmented into groups. So you can see the first group as paste, cut, copy, format, painter etc etc. And the second group is the font, the size of the font and to increase the size of the font, to decrease the size of the font, bold, itallic, underline, etc., etc. And here you can see the text alignment. So each and every group has separate functions. So each set is called as a group. And I think you can see a small arrow option over here. So this arrow option is used into the toolbar groups when the group is not able to fit all the operations or all the functionalities in one single provided section. So when you click on this particular arrow mark you will have another dialogue box. So this is called toolbar more options. So you can see that when I clicked on this icon you can see a new dialogue box which opens me a new set of operations which are not able to be fit in this particular group. So we will also see more about this in a better way in the practical session. Now moving forward we have cell and address. So when you open a Microsoft Excel sheet you can find boxes. So each and every box is named as a cell and each cell has its own address. For example the highlighted cell over here has an address B3. So B is the column name and three is the row name. And apart from that, you can have the sheet tracker in the bottom left corner of the Excel sheet where you can navigate through different sheets. And in the bottom right corner, you have an option of increasing or decreasing the sheet size. So these are the basic fundamentals of Microsoft Excel that you need to keep in mind before getting started. So we will have more on this in the practical session. If you are new to Excel or looking to improve your skills, learning these functions can really help. Excel isn't just making spreadsheets. It's a powerful tool for analyzing data and managing projects. In this guide, we will cover some basic but important Excel functions like sum, average, if, count, and sum if. You'll see how these functions do and learn and how to use them with practical examples. This knowledge will help you with daily task and make you more confident in using Excel. So let's explore these functions together and see how they can make handling data easier and more efficient. Let's get going and make the most of your data with Excel. Why learn basic Excel functions and formulas? Functions and formulas are crucial for mastering Excel. By learning even a few essential ones, you can outpace many around you. They are fundamental for daily Excel task. To deepen your knowledge or explore advanced functions, consider exploring a comprehensive database of all existing Excel functions. Microsoft consistently updates Excel, introducing new functions like XLOOKUP in Microsoft 365, enhancing your data management capabilities. So now let's move on to the demo part. Okay. So first we will understand the sum function in Excel. As we know the sum function in Excel is used to add up the numbers. It provides a quick way to calculate the total of several values whether they are typed into a function directly included within a range of cells. So these are the cells. So you just have to type the numbers in this cell and uh give the function over here and it will give you the desired result. Let's check how. So first we will understand the sum function. I'm just I'll just uh write it over here. So the first step is like open your Excel file in your computer and select any column or row. So like here I'm selecting the column. For instance, you might just put them in cells A1 till A5. So uh in the A1 part I've mentioned some for your understanding. So we'll start with A2. We'll type all the values over here. So just type any values like I'm typing 40 then we have 78 then 35 and then we have 67 from A2 till A5 we have typed the values and using the formula in the formula bar it will add all the numbers from cell A2 till A5 and it will display in this particular cell. So just select the cell where you want your answer to be shown and just insert the formula over here. The formula for sum function is equal to sum A1 till A5. So we just go back to this bar and just select this particular cell. And here in this bar just type the formula A1 till A5. But then here we have A2. So we're just going to change it to A2 till A5. All right and just press enter. So here you get the value 220 which is the sum of all the values which we have mentioned over here. So it was pretty simple right now let us understand the if function in Excel. Okay. So the if function in Excel is used to perform logical test and return values based on the results of these test. This function checks whether a condition is true or false and then returns one value for a true result and another for a false result. It is extremely useful for decision making process within your data set. Let us now understand what are the steps to use this if function. So just input your data and put any numeric values in the cells from B2 till B5. Okay. So 56 90 36 23 and here I want my result to be shown. So I'll just insert the formula here in the function bar. So okay just check out the formula with if function which is equal to if a1 if greater than 800 above 300 300 or below. So let's see how it works. We're just going to enter the formula. Okay. So this will tell Excel to check if the value of B2 is greater than 300. If true, it will display above 300 and if false, it will display 300 or below. Let's check it out. Okay. So, there's some mistake. Going to paste the formula here again. So, in place of A1, we will mention B2. We just type B2 over here. If greater than 300 above 300 or 300 below just press enter. So we'll just enter the formula over here and in place of A1 we will provide B2. All right. So we just type here B2. That's it. And we just press enter. So you can see the result has come to 300 or below because the value is less than 300. And you can also drag and fill handle from B1 down to B5 and apply the same logic in other columns as well and it will give you the same result. Let us now understand the next function which is the average function in Excel. The average function and okay so what is this average function used for? Basically the average function in Excel it will calculate the mean or average of numbers provided to it. This function is particularly useful for quickly finding the central values in a set of data which can be helpful in various statistical analysis. Let us now understand the steps to use the average function. So the first step is like you just click on the cell wherever you want your value to appear. All right. So just provide any values. Suppose um let's provide some bigger values like bigger numbers like 430 here we type 2 78 then we have 98 then we have uh 79 and here I want my value to be shown so I'll just insert the average formula which is let's check out the formula which is equal to equal to average what is the um column we have chosen from C2 so we'll just type C2 over here till C2 till C5 C5 all right and we will just press enter so as you can see the average function value is shown over here. So after pressing enter, the Excel will compute and display the average of all the cells in the selected cell. The next function is the minimum and maximum functions in Excel. It's very simple. Let's discuss what is the minimum and maximum function used for the min and the max functions in Excel are used to find the minimum and maximum values within a given range of data. These functions are useful for quickly identifying the smallest and largest numbers in a data set helping you to analyze different ranges efficiently. So let us now understand what are the steps to use this formula. It's very simple. Just type any values over here. 500. Next we have 389. Then we have 200. 190. 98 and here I want my value to be shown the minimum value. So in the function bar I'll just press I'll just type the function which is equal to min and in the bracket you just mention the column which is starting from D2 right so D2 D2 till D5 so just type the formula over here and after pressing enter You can see the minimum value shown over here is 190 and it's similar for the maximum function as well. So for the max let's let's uh use some different values and I want my uh function to be shown here. So same you have to use the same formula just type in place of max we're using in place of minimum we are using the max function. So just type maths and then the column name which is from uh I think G no yeah E. So just type so in place of we will just write E. Okay, sorry. We just type E2 till I think it's still E5, right? E5. That's it. And just press enter. So you can see the maximum value shown over here that is 800. So it's very simple. The Excel will display the largest and the minimum value using min and max functions. The next is to understand the trim function in Excel. Let us now understand the trim function in Excel. So basically this trim function in Excel is used to remove all the extra spaces from text except for a single space between words. This function is specially used for cleaning up the data that comes from other sources of data that has been entered inconsistently. Let us now understand the steps to use the trim functions. It is same as we have seen for all these functions. The only difference is that this trim function will exclude the spaces. So assume your text data with some extra spaces in cells. Suppose over here I type any sentence any text. Okay. Like hello and then I provide some extra space every one. And suppose I want my value to be inserted over here to remove all the extra space. Or if you want some bigger text, you can do that. But let us now check how this trim functions work for this text. Just click on the cell where you want your clean text to appear. That is F6. And using the function over here, just write uh equal to trim. And then in case of you just have to mention over here which is uh F2 which is F2 just press enter. Now you can see that I've provided some extra spaces over here but here using the trim function it will remove all the extra space and just make it in a clean manner. So you can also drag the fill handle from B1 like from this F2 down to G2 and all of that. And then you can use a trim function in other column as well to clean up the text. The second function is the concatenate function. So let's discuss the concatenate function over here. Okay. So this concatenate function in Excel is used to join two or more text strings into one string. It helps in combining data from different cells which can be useful for creating full names from first and last names, combining addresses or any situation where text needs to be merged. So let us now look the steps how to use this concatenate function. So just assume that you have written your name. Suppose I've written Andrew in this column H2 and here I have written car field. Now if I want what if I want to combine Andrew Garfield together. So just by using this concatenate function I can make it happen. All right. So if I want my uh result to be shown in this particular cell, I'll just click on this and then in the function bar I'll just enter the formula which is which is uh equal to concatenate and then I have to mention the cell name which is H. This is H2 right? H2 And this one is I2. So I'll just mention the yeah and here and here after mentioning okay I have to provide some space over here. So I'll just put comma and then some space then comma and then here I'll just I2 all right and here I'll just press enter so you can see in this particular row and geography both name has been combined concatenated together into a single name. So this is how we use the concatenate function. And the next function we have is the count function in Excel. Let us now understand how to use this count function. Okay. The count function in Excel is used to specifically count the number of cells that contain numbers in a range. It's a crucial function for quickly assessing the numbers density in a data set, especially when dealing with mixed data types. We'll just assume that you have added transaction counts in column J starting from column J2 till J5. So the transaction counts are as follows. 7 89 90 100 till J5 and then click on the cell where you want your count to appear. say J6 and then you just go to the formula bar and just press just enter the formula over there which is equal to count bracket this should be J2 J2 J5 and Just press enter and you can see the Excel will display the number of cells that contain numbers in column J which is 1 2 3 4. Okay. So this was all for count, concatenate, trim, maximum, average, if and sum functions. Next we have is the count a function. Let us now understand what is this count a function used for and how is it different from count function. So this count a function in Excel counts the number of cells in a range that are not empty. It is useful for determining the size of data sets that include various type of data such as numbers, text or even logical values. So just it will just count the number of non-MPT cells in a specific column. Just click on the cell where you want the count to appear. Okay, let me just tell you the difference between count and count function is that the count function generally used to count a range of cells containing numbers or dates excluding blank. Whereas this count a function will count everything including numbers, dates, text or a range containing a mixture of these items but does not count blank cells. So suppose if I enter 56 and I leave it blank and then I enter 98 and then again I leave it okay and then just enter 56 and I want my formula to be shown over here. So I'll just go in this formula bar and just enter equal to count a and then from k column this is k column right? k2 k2 till k5 okay and I just press enter. So as you can see it's showing three 1 2 3. it will not count the extra space or the empty column empty cell we have left behind. And also one more thing that we can also type text over here. It's not necessary to type only the numbers. You can also type the text. For example, I type apple. Here I type banana. Okay. Here is the function. Just press enter. it will count three which is 1 2 and three. So this count a function is used both for text as well as the dates as well as the numeric values. But the count function is only used for the numeric values and the date. It will not count the text over here. Now let us understand the count if function in Excel. We have now understood count and count a function and what is the difference between both of these function. We will now understand the count if function over here. So let's understand the count if function. Okay. So this count if function is used to count the number of cells in a range that meet a specified criteria. This function is valuable for filtering and analyzing data based on specific conditions. To count the number of transaction that exceed ex exceeds a certain amount of value a threshold value for example five. Just click on the cell and suppose you want your values to appear in column L2. So suppose I type here 89 7 3 and 5. And here I will enter the formula which is equal to count if and then from L2 till L5. Okay, just close the bracket. And here you just also have to input the threshold value. Suppose I take the threshold value as uh let's say three or let's say five. Okay, let's take it five. So this is my threshold value greater than five. So it will display only the numbers which are greater than five. And I just press enter. So you can see it's showing two. Okay. Because 7 and 89 are the only two values which are greater than five. So you can see that using any threshold function even if I could have written over here let's say three. So it will show three because the numbers greater than three are 5 7 and 89. So this is how count if function works. We will now understand the last function which is the sum if function in Excel. So what is the sum function used for? Basically the sum if function in Excel allows you to add up values in a range based on specified criteria. This function is extremely useful for performing conditional sums where you can want to show the sum numbers that meet certain condition. So to calculate the sum of transactions where the number is greater than five, click on the cell where you want your total number to appear. Let's say over here I select which is M6. And you just have to enter the formula. Before that just write any number values like 7 5 3 and 10. And over here just mention the formula which is equal to sum if and the column name is starting from m_sub_2 till m5 value should be greater than five comma this is m_sub_2 right? M2 till M5. That's it. And we'll just press enter. So it's showing 17. So based on this formula bar, the formula will check the values from M_sub_2 till M5 and if the number is greater than five and sum only those number. So as I've mentioned the value five. So it will only calculate it will it will only sum numbers which are greater than five which are 10 and 7 which is equal to 17. So this is how the sum function is used. We have come to the end of our video and this was all for the top 10 most important basic Excel functions. So now we enter the demo inventory in Microsoft Excel. So we will be using Microsoft Excel to create a sheet of the employees in a company. So basically an employee in a company has employee ID, name and designation, salary etc etc. So we will be trying to create the same table using Microsoft Excel. But before that let us understand the fundamentals of Microsoft Excel through the practical demo first. So I have started my Microsoft Excel and this is how the homepage of Microsoft Excel looks like. So you have a blank workbook over here. If you want to create a new workbook you can select new option. So, Excel will provide you with various variety of sheets. You can see money in Excel, adjustable meeting agenda, streaming show list, small business cash flow and many more. If you're not able to find what you're looking for, then you always have an option of selecting the particular type of sheet what you're looking for. So, you have various options. If it's business, if it's personal, if it's planners and trackers, list, budgets, charts, etc., etc. So, let's imagine that you wanted something from business. So just by clicking at business option the Excel will load a variety of sheets related to business options. So this might take a while. So you can see that the Excel is loading few types of sheets. So you can see that Excel has provided us with some online varieties of sheets. For example, any calendar, business expenses, channel marketing budget, budget summary report, blue product list, etc., etc. You can see construction proposal, invoice, you name it, Excel has got it. So, Excel will provide you with some variety of options based on your requirement. Now, for this session, let's get started with a blank workbook which looks something like this. Since this tutorial is based on the fundamentals, we'll go with a blank workbook. Now, over here you can see the toolbar that we discussed earlier that has the file, home, insert, draw, page, layout, formulas, data, review, view, and help. So this is the toolbar and under the toolbar I have selected home and you can see this is the particular ribbon what we discussed about this particular ribbon belongs to homepage and when you select file option you'll get back to home and if you select insert option you'll have another different ribbon with different groups etc etc. So every particular tool has different ribbons in them and remember the extra options that we discussed when you press over this arrow key this is it. So when you press the arrow key you'll have few more settings which cannot be fit in this particular section of groups. So you can have some variety of options over here of changing the font, changing some FX to the text, font size and font style etc etc. Apart from this we have also discussed about the cells in every sheet. So this particular cell has an address. So you can see the address over here which is B3. So B happens to be the column name and three happens to be the row name. Now, we also had a discussion about the sheet tracker. Right now, we just have one sheet. If you want multiple sheets, you can just feel free to select on the plus option, which will always create you some extra sheets. And you can navigate through sheets just by pressing on the sheet name. And when you get back to the bottom right corner, you have an option of increasing and decreasing the cell size or the sheet size. Now, let's keep it default with 100%. Now these are the few fundamentals that you need to keep in mind before getting started with Microsoft Excel. Now that we know the fundamentals of Microsoft Excel, let's get started with a practical session which is about the employees details in a company. Now let's select this particular cell. Let's type in employee details. Yeah, we have the cell. Now an employee details table will have the information related to employees. So the information will be about name. It will be about employee number. It will be the designation and maybe salary and maybe blood group as well. And uh let's take another one which is phone number here. So so far so good. And uh you can see that we have some problem with this particular column. The designation the name uh the the name of the designation is practically good but it is not visible. So when you uh when you're not on that particular cell you can see that the name is incomplete over here. So you can always fix that. You can just you know manually change the size of the row or cell or you can also feel free to you know double click on that cell which will automatically you know set the size of that particular cell and same goes to the blood group. Just let's try to double click on that and same goes to phone number. Great. So you can see that the employees details are just confined to the first two cells. It's supposed to be somewhere in the middle. Right? So no problem we can do that as well. We can select all the cells and we have an option of merging them. You can just select this one which will help you with merging and centering that particular data to the center part. So that's how we do it. Now let's get started by adding the names of the employees. Uh let's add the names. Joe, John, uh, Mary, Mark, Susan, and then Jennifer. Let's type in Mike. Let's them. Chef Jeffrey. Yeah, we have a couple of employees. Now, let's type in the employee numbers. Yeah, we have the employee numbers. Now, let's type in the designation. Okay, let's choose uh Joe to be the CEO of the company and John as the software developer and Mary as tester. Mark and finance, Susan also in finance and Jennifer in testing and Mike in uh marketing. Same goes for Tim and again Jeffrey into software development and uh Morgan into testing again. Now let's click on C so that it gets you know resized according to the length of the text. Now it's done. So let's get into salary. Uh $10,000 and $15,000 and $19,000. Let's increase the salary of a CEO. So let's keep it $1 and finance again 20,000. So yeah, the salaries are allocated again the blood group. Yeah, we have the blood groups. Now, let's type in the mobile numbers. [Music] Yeah. Now we have typed in some random mobile numbers as well. So uh yeah this is how you can add in some data into your table and now let us imagine that you forgot to add or uh remove a column. So let's imagine that we wanted to add a serial number as well but somehow we forgot to add it. Now you can always add a new row or column. For example here we wanted to add a new column. So we just have to right click on a select the insert option. Here we have a new row. Now, now let's type in serial number and let's type one. Now, can you see the small box option over here? If you just drag it, you can, you know, copy paste all those over here. And now, let's right click and fill series. Now, we have the employee number starting from 1 to 10. That's how you do it. And apart from this you you can also uh you know change the font of the entire row. You can change the font to say uh Aroni and you can always also change the font and same goes to the employee table. We can select it bold it and you can also increase the size and again select a color for the text. Maybe a different color. Green would be better. And uh you can also select the entire cells and align them to the center. Looks more good. And you can select or double click the row names. So you'll have the proper spacing between all the rows and columns. So we have double click on the column, right? Yeah. So basically that's how you make things happen. Now let's save this. So I'd like to go to the save option and uh emp data. Let me save this in my local location and just save. It's done. So that's how you work on your Excel file with some basic data. And to learn more, don't forget to get subscribed to SimplyLearn's YouTube channel. And don't forget to hit that bell icon to stay updated. So you are the first person to get an update on any technology not just Excel. Now let's get back to the practical mode. And now we are on our Excel spreadsheet. So here we have some text boxes on the column A and on column B we have lower and upper. Okay. So um we have a mix of uh upperase and lower case in our text. So first we'll try to convert them to lower case and then we'll try to convert the entire text into upperase. So for that you need to press on equal symbol and select the lower formula. Tap and you selected the function and now click on the cell A3. That's your select and press on okay. Now all the letters are converted to lower case. So we had J in the upper case which is converted to lower case. Now all you can do is drag the formula to all the cells and it will be applied to all the cells. Right? Now let's similarly try to convert into uppercase and tap space and there you go. You have selected the formula. Now the cell address enter the same address I mean drag the same formula to all the cell addresses and there you go all the cells are converted to uppercase. Now that's how you convert the cells or data in Excel to uppercase or lowerase in Excel. Now we are on the Excel spreadsheet. Now here we have some sales data based on a store. Now what we going to do is we going to add some multiple rows or a single row in this particular data. So here you can see the region wise, category wise, state wise, subcategory wise and their sales and quantities. Right? Now let us imagine that you must start to add a sale data here. Right? So let us imagine that on the row 7th you were supposed to add some detail for example some technology related sale happened on that day and you missed out to add it right. So how do you create a new row now? So for example if multiple sales happened on the same day like 3 to four and you missed out them. So how do I add three to four rows in between the existing data right? So don't worry about it. It's completely simple. All you have to do is select the row and right click and press on the option insert. Now this will insert one single row. If you wanted to add one single u row or uh you know tpple and if you wanted to add multiple rows for example you wanted to add three rows all together then it's also simple. All you have to do is select three rows and right click and press on insert and then you have three rows. So there you go. So that's how you add multiple rows in a Excel spreadsheet or that's how you add one single row in an Excel spreadsheet. Now we have started our Excel worksheet and here you can see we have employee details on our worksheet. Now all of a sudden uh you wanted to add employee second name as well or a last name, right? So you are a beginner and you don't know how to add a column or you know you might be a little ambiguous, right? So instead of using this simple step, you might end up creating a whole new sheet or maybe other approaches as well which are timeconuming. So let me give you this simple step. All you have to do is select the column. So here you wanted to add a last name, right? So B is your column with the first name and here you wanted to add a second name or the last name which is in between the columns B and C. So remember that Excel adds a column always towards the left side of a column. So here if I if you wanted to add a column next to B then you want to select the column C and right click and select the insert option so that it can be added in between B and C which is adjacent to B. So let's look at it right. So you have added the next uh column or a new column right next to the column B and it's in between the designation and employee name. Now you can add your you know second name. So that's how you create a new column in Excel. Now in case if you wanted to you know create multiple columns al together. So uh here we have or here we needed a second name also here you have a designation and you wanted to add another column which you know assigns managers to the employees right so let's delete it uh delete the second column and let me explain you how what I want to do. So here you wanted to add the second name of the employee and also the manager of these employees, right? So here you wanted to add two columns altogether, right? Uh and now you might be wondering could I add two columns together uh or will it work only for the one column thing, right? No, it it works for two columns and also more than two columns altogether. So you wanted to add two columns here, right? So select the two columns. You can you can select or you can click on the column C and hold that left key and drag it along the right side. Okay. So here I have selected two columns and here it's three. Right? So you can see here uh it's 1 0 4 8 5 6 7 6 R cross 3. See that means you have selected three columns. If I navigate to the four you can see we have selected four columns. Right? Now right click and select on insert and you'll have four columns in between employee name and designation. Now you might have to add your second name, manager's name, manager's employee ID, you know, and the department everything or you can add anything or any number of columns in between the existing columns. Now we are on our Excel spreadsheet. Now you might want to you know add uh some extension to your data since we have sales here you might want to add the dollar logo right so if you have like five to 10 rows then it's easy but if you have multiple rows then it might be a little timeconuming in such scenarios you might want to select the entire column right so how do you do that in a shortest method so there are multiple methods to do it so the easiest one the first and the easiest one is clicking on the column number or column name. So here we have the column name that is E and if you click on it the entire column is selected and here we have numbers. So let us imagine that you wanted to select the row number two. Click on number two and you have all the rows I mean the entire row selected. All the cells are selected. Right? So this is one way and again there is another way where you can just you know uh click on the first table header and press control spacebar. So the combination key is control spacebar for columns and if you want to select the entire row it is shift spacebar. So this is the method two and another method. So you might have a doubt here right? So when you click on the column name or when you click on the row number the entire row or entire column gets selected right and you wanted to select only the cells which have data. So we have another way for that. So you can select the cell. Now hold the control and shift key and press the lower arrow key to select the entire column with cells having data. So there you go. You have selected all the cells in one single column with only data and all the cells which do not have data are not selected. Same applies to rows as well. Control shift right arrow key or left arrow key based on your rows and all the rows with data will be selected. I mean all the cells in a row are selected not the entire row. And um coming back to the first question that is adding the dollar symbol. So here we have general. So go to the data type and add currency. So you have rupees here. So currently we are in India. So we have rupees. Now what is the advantage of selecting the entire row when you don't have any data in the 57th row or the next cell. Right? I'll show you. Now let us add the number 100 and press enter. There you go. Let us add another number like 1,000 and press enter. So the data formatting is automatically applied to all the cells. So most of the time your cells or the data sheet will be varying. You might have to add or remove elements or numbers. Right? So in such scenarios this will be helpful. Now comparing two different columns or multiple columns happens to be an important job when you're working in data analytics as you have to come up with some decisive decisions based on the data. Now if you had to do it manually then you might end up taking hours or even days based on the data set you're working with. But if I say that you can do it within minutes then it would be interesting to work with. Right now we'll be doing the same. Now we'll work on our sample data set right on my screen. So here we have column one and column 2. Now our job is to compare the column one and column 2 and come up with the result. Now the first and the simplest way to do it is use the built-in conditional formatting which comes with Excel by default. Now all you have to do is select all the data and navigate to home and in the home go to styles group and select conditional formatting and in conditional formatting you can see highlight cells. So in that you can use duplicate values. When you click on duplicate values a small pop-up window will come on your screen and here you have an option of choosing whether duplicate or unique. So duplicate means you're comparing the cells and you can see there are some duplicate cells which are present in column one are also present in column 2. Now you can also check how to uh you know find out the unique values which are only present in column one but not in column 2. So you can just press unique and there you go you can find it. Now you can also try to you know change the color by filling with green for the unique columns and duplicate cells with color red. Now this was the first method and you can also work out some different ones like uh you can just directly uh press equal to and select the cell and equals to and the next cell. Press enter and if there is a match it will give you true. If there is no match then it will give you false. Now you can drag it down and see which all are matching and which all are not. Now you can also make some minute modifications to this. So uh if in case you didn't find the data then you can say not found. So for that uh you can try if and inside brackets and then you can give the value as not found. If true it's found first you have to give the true values. So for true you can write it as found and in case if it's not found then you can write it down as not found. There you go. Close the bracket. Press enter. And there you go. If there is a perfect match you will have found. And if there is no match then you'll get not found. Now, so far we have discussed uh comparing two cells using conditional formatting and also by using equals to operator and trying to uh add some tweaks to the equals to operator by involving with if operator and uh apart from those we also have another way to compare two columns in Excel. So uh another way is using the lookup functions. So we'll use a simple VLOOKUP function to compare both the cells. So for that let's type in equals to V lookup space and um select the cell you want to check for and then the range of elements you want to uh compare and then I'll press F4 to log them. Now uh you want the data from column 1 and now you want the exact match. So zero press enter. So there you go. So the elements which are present in column one and column 2 are been displayed here. So but in case if the elements are not found you'll get an error. So let's look at that. Simply drag the formula to all the cells and there you go. So the elements which are matching will give you the proper result but the ones which are not matching will give you not applicable or error message. This can be fixed. We can make some minor tweaks to the same formula. So uh we can add if error comma simply write as not found and close the bracket. So that should do. So we have closed the bracket and press enter. There you go. Now simply drag this and soon you can see the data which is having no match is shown as not found. Now uh there is another possibility. Okay, let's get back to another different sheet. So this should work. So uh we we already have the formula. So let's erase that first. I'll erase the whole data and even this one. Yeah, now we have the clear column four. So here you can see we have four India and here you can see we have just four. And similarly here you have Mahendra and Mahendra and here you have Mahendra. Right? So in some situations you might have to compare two different columns but the names might be a little different right? So for example uh if you're working with Oracle and if you're working with Oracle America and you have in the first case is Oracle and then the second column is Oracle America then those are one and same but you have some minor text changes right just like here you have for India and here you have Ford so what if you had such kind of issues so you can also make some minor tweaks to it so using the same lookup formula you can add equals to V lookup and also the comparison cell which is this one and you're not you're not stopping there you're trying to add the wild card here. So the wild card is aster which means if there is anything like if you get the comparison between the first cell and the second cell which matches and if there is anything extra rather than the actual cell please try to consider it. So that's what we going to do. So after entering entering the wild card symbol you'll select the range of columns which you have to uh you know fetch the data from and then try to fix them using function key F4. You're looking from the column number one and then you're finding the exact match. Now you can close it and enter. Now let's try to drag it. There you go. So you have the data Mahendra and Mahendra. Hyundai India Honda India. So that's how you try to use uh comparing cells in Excel. Now you can see I'm on my Excel worksheet and I have one table on my worksheet right now. So you can you know transposing or you know converting rows to columns is a very simple task. I'll explain you in two different ways. So the first way select all the cells that you have on your sheet and press on Ctrl C. So it will give you the copy option and then you can also paste in the same sheet or if you want you can go to a whole new sheet and select the paste option over here. But before selecting the actual paste option you can see a small drop-own icon. Click on that and navigate to paste special and in this you can see transpose option. Click on that or you know make sure that it's checked and press okay. Now you can see all your columns have been converted into rows and all your rows are converted into columns. So this was the first way and uh what is the second way you ask me? So it's really simple. Select one cell somewhere and you know you can or let's create a new sheet as well. So here you can you know write down the formula as transpose and select the array which you want to transpose. So this is the array. So transpose is basically an array function in Excel. So once you are done with you know selecting your data press enter. There you go. So all your rows are now columns and all your columns are now the rows. Now on my spreadsheet you can see some data which is the sales data of quarterly basis in the four different zones that is northwest southeast. So you can you know make things look better by hiding these columns and if you hide these columns it's critical for the end user to identify which columns are exactly hidden. Right? To make things a little easier for your end user, you can select the columns and then go to the data option and in the data option, click on the group option. So this will group these columns and you will have the symbol of minimization which will help you hide these columns automatically and unhide these columns automatically. Now let's also try to group GHIG columns and there you go. Now similarly let's also try to group the rows of north and rows of west. Then you have the rows of south and rows of east. Right? Now all these rows and columns have been grouped. Now all you can do is just click on the minimize button and those will be minimized. Similarly the rows right and to unhide them all you can do is click on the plus icon and they will be unhidden. You can also try to ungroup the columns and rows. All you have to do is select the columns and click on the ungroup option. Similarly the rows as well. And that's how you can group and ungroup rows and columns in Excel. Now we are on our spreadsheet and you can see I have some sample data on my spreadsheet and it does have some blank rows. Now how do I eliminate these blank rows? So one step is you can you know select the entire row and try to right click and delete it. Again, this sort of method might take hours to get rid of all the blank rows. And most of the time, you might end up even selecting the rows with data in it, right? So, if I want to select multiple rows, then I'll be selecting some rows with data as well, which might be a little troublesome in the future. Now, let's try to use the easier way. Now, for that, go to the find and select option. Select the go to special option and in that select the blanks option and press okay. Now hold control key and press minus key and you will have an option of deleting the cells. Now select the entire row. Now we are selecting the entire rows with blank data and press okay and the cells will be shifted. Now this was simple but let me show you another example. So even here we have some blank rows but in between those blank rows for example take cell 17 or cell D17 or row 17 we have some data testing and here in the employee ID we have some data in A26 and again in B39 we have some data that is first name right in such scenarios how do I eliminate data so we have a simple logic for So all we need to do is add another row which is to count the number of cells in the row. Now that can be count. Now here equals to the function is count a tab and the sales will be from A2 to G2. Press enter. Now you have seven. So now we are basically calculating the number of cells. So if you apply the same to the entire um data set. Let's drag it. And there you go. So there are certain places where you find zero which are basically the empty columns. Right? Now let's do some formatting if you need. Let's try to add filters. Crl A Ctrl D and now table will have filters and headers. Now here you can see the drop-down icon. Click on that. Now instead of select all, what you can do is select zero. Now you will be highlighted with all the rows which do not have any data. Select all those and press on delete. Or what you can do is the same way controll minus and there you go. Now clear the filter. Now all you have is the data without any kind of blank rows. So all the rows that had some amount of data are retrained and all the data or all the cells or all the rows which do not have any data which are completely blank they have been eliminated. So here you can see columns and rows. So especially the fourth row and the column C right. So uh currently we have data on our uh spreadsheet and it is exceeding the number of rows currently visible on our screen right. So when you scroll down you can see that the header or the headers of all the columns are getting vanished or scrolled up along with the data. Right? And you might want to keep that so that you'll have reference to every single aspect of or every single cell data you're referring to. Right? So for that reason you might want to freeze this and also you might have a doubt what if uh even even I had this data in the column section right and what if I had to freeze that and you know when when you scroll this and keep that data uh set on the column as it is right so we can also do that let's look at both of them. So there is a simple process to do that. All you have to do is select the cell uh for which you want to uh you know set the or freeze the column adjacent to it or the row adjacent to it. Right? So currently I want to let me expand it. So currently I want to freeze this particular row right and this particular column. So the cell I would be selecting is the first cell here that is D5 right. So when I select this particular cell, I can be able to freeze this particular row and this particular column. So now you need to navigate to the toolbar and then select the view menu and inside view option you can see there is an option of freeze panes. Right? So click on the drop-down. So you can see three different options as we discussed earlier. We can either choose to freeze an entire row, that is the second option, or you can freeze the entire column, that is the third option, or you can freeze both, that is the first option, right? Freezing rows and columns. So, let's select this one and see if our rows and columns are frozen or not, right? So, now let's scroll down and you c
Original Description
🔥Data Analyst Masters Program (Discount Code - YTBE15) - https://www.simplilearn.com/data-analyst-masters-certification-training-course?utm_campaign=9kXxf9PRLh8&utm_medium=DescriptionFirstFold&utm_source=Youtube
🔥IITK - Professional Certificate Course in Data Analytics and Generative AI (India Only) - https://www.simplilearn.com/iitk-professional-certificate-course-data-analytics?utm_campaign=9kXxf9PRLh8&utm_medium=DescriptionFirstFold&utm_source=Youtube
🔥IIT Delhi - Data Analytics, Generative AI And Adaptive System - https://www.simplilearn.com/ihfc-iitd-data-analytics-genai-course?utm_campaign=9kXxf9PRLh8&utm_medium=DescriptionFirstFold&utm_source=Youtube
🔥Professional Certificate in Data Science and Generative AI - https://www.simplilearn.com/iitk-professional-certificate-course-data-analytics?utm_campaign=9kXxf9PRLh8&utm_medium=DescriptionFirstFold&utm_source=Youtube
🔥IIT Kanpur - Professional Certificate Course in Data Analytics and Generative AI - https://www.simplilearn.com/iitg-generative-ai-data-analytics-program?utm_campaign=9kXxf9PRLh8&utm_medium=DescriptionFirstFold&utm_source=Youtube
The Advanced Excel Full Course 2026 is a comprehensive guide designed for aspiring data analysts and Excel power users. It starts with an introduction to Data Analytics, covering key industry insights and steps to become a data analyst in 2026. Learners are introduced to Microsoft Excel, followed by essential topics like the top 10 important Excel formulas and Excel for Data Analytics. The course also includes Excel Dashboard Tutorials, Power Pivot, and Microsoft Power Query to enhance data manipulation and visualization skills. Advanced concepts like Descriptive Statistics using Excel, ANOVA, and Web Scraping in Excel are also covered, enabling users to handle complex datasets efficiently. Additionally, it explores how to leverage AI in data analytics, including ChatGPT with Excel and Python in Excel, providing automation and advanced analytical capabilities. Career
Watch on YouTube ↗
(saves to browser)
Sign in to unlock AI tutor explanation · ⚡30
Playlist
Uploads from Simplilearn · Simplilearn · 0 of 60
← Previous
Next →
1
 2
2
 3
3
 4
4
 5
5
 6
6
 7
7
 8
8
 9
9
 10
10
 11
11
 12
12
 13
13
 14
14
 15
15
 16
16
 17
17
 18
18
 19
19
 20
20
 21
21
 22
22
 23
23
 24
24
 25
25
 26
26
 27
27
 28
28
 29
29
 30
30
 31
31
 32
32
 33
33
 34
34
 35
35
 36
36
 37
37
 38
38
 39
39
 40
40
 41
41
 42
42
 43
43
 44
44
 45
45
 46
46
 47
47
 48
48
 49
49
 50
50
 51
51
 52
52
 53
53
 54
54
 55
55
 56
56
 57
57
 58
58
 59
59
 60
60

Ethical Hacking Full Course 2026 | Ethical Hacking Course for Beginners | Simplilearn
Simplilearn
AWS Full Course 2026 | AWS Cloud Computing Tutorial for Beginners | AWS Training | Simplilearn
Simplilearn
Data Structures And Algorithms Full Course | Data Structures and Algorithms Tutorial | Simplilearn
Simplilearn
SQL Full Course 2026 | SQL Tutorial for Beginners | SQL Beginner to Advanced Training | Simplilearn
Simplilearn
Microsoft Azure Full Course 2026 | Azure Tutorial for Beginners | Azure Training | Simplilearn
Simplilearn
Shopify Tutorial For Beginners 2026 | Shopify Course | shopify dropshipping | Simplilearn
Simplilearn
Six Sigma Full Course 2026 | Six Sigma Green Belt Training | Six Sigma Training | Simplilearn
Simplilearn
🔥Feeling Stuck? How Upskilling Can Boost Your Career! #shorts #simplilearn
Simplilearn
Growth Hacking In Marketing | Learn Growth Hacking Marketing Strategies | Simplilearn
Simplilearn
🔥Cracked 3 Job Offers with One AIML Course! | 20–30% Salary Hike #shorts #simplilearn
Simplilearn
Top 10 Must-Have Figma Plugins for UI/UX Designers in 2026 | Figma Plugins | Simplilearn
Simplilearn
Business Analytics Full Course 2026 | Business Analytics Tutorial For Beginners | Simplilearn
Simplilearn
Simplilearn Reviews | Getting future-ready with course in Artificial Intelligence | Roopam’s story
Simplilearn
Generative AI Full Course 2026 | Gen AI Tutorial for Beginners | Gen AI Explained | Simplilearn
Simplilearn
Full Stack Developer Course 2026 | Full Stack Java Developer Tutorial for Beginners | Simplilearn
Simplilearn
Simplilearn Reviews | How David Went From Seasoned Engineer to AI Innovator #GetCertifiedGetAhead
Simplilearn
Complete Social Media Marketing Strategy for 2026 | Social Media Marketing Strategy | Simplilearn
Simplilearn
🔥Top 4 Cybersecurity Certifications You Need! #simplilearn #shorts
Simplilearn
🔥Cloud Engineer Salary in India 2026 | City-Wise Breakdown #shorts #simplilearn
Simplilearn
Digital Marketing Full Course 2026 | Digital Marketing Tutorial For Beginners | Simplilearn
Simplilearn
Full Stack Java Developer Course | Full Stack Java Developer Tutorial for Beginners | Simplilearn
Simplilearn
Social Media Marketing Full Course | Social Media Marketing Tutorial For Beginners | Simplilearn
Simplilearn
How To Create LLM Chatbot Demo 2026 | Build a LLM Chatbot From Scratch | Simplilearn
Simplilearn
Digital Supply Chain Management Certification | Supply Chain Management Course | Simplilearn
Simplilearn
AI Agents Full Course 2026 | AI Agents Tutorial for Beginners | How to Build AI Agents | Simplilearn
Simplilearn
ITIL Full Course 2026 | ITIL 4 Foundation Course | ITIL Tutorial For Beginners | Simplilearn
Simplilearn
Generative AI Full Course 2026 | Gen AI Tutorial for Beginners | Gen AI Explained | Simplilearn
Simplilearn
ITIL Full Course 2026 | ITIL 4 Foundation Course | ITIL Tutorial For Beginners | Simplilearn
Simplilearn
Simplilearn Reviews | Integrating AI & Music | Diego's Story
Simplilearn
Digital Marketing Full Course 2026 | Digital Marketing Tutorial For Beginners | Simplilearn
Simplilearn
SEO Full Course 2026 | SEO Tutorial for Beginners | SEO Training | SEO Explained | Simplilearn
Simplilearn
PMP Vs CAPM: Which Certification Should You Choose? | PMP Vs CAPM | Simplilearn
Simplilearn
Complete Data Analyst Roadmap 2026 | How To Become A Data Analayst In 2026 | Simplilearn
Simplilearn
Generative AI Full Course 2026 | Gen AI Tutorial for Beginners | Gen AI Explained | Simplilearn
Simplilearn
🔥5 Jobs That Are Most Likely Safe from Layoffs in Today’s Market #shorts #simplilearn
Simplilearn
🔥Git vs GitHub – What's the Difference?
Simplilearn
What Goes Behind Building the Likes of Uber and Netflix? | Product Management Tutorial | Simplilearn
Simplilearn
AI Agents Full Course 2026 | AI Agents Tutorial for Beginners | How to Build AI Agents | Simplilearn
Simplilearn
Full Stack Developer Course 2026 | Full Stack Java Developer Tutorial for Beginners | Simplilearn
Simplilearn
Product Life Cycle 2025 | Stages Of Product Life Cycle | Product Life Cycle Tutorial | Simplilearn
Simplilearn
Project Management Full Course 2026 | Project Management Tutorial | PMP Course | Simplilearn
Simplilearn
PCB Design Course 2025 | PCB Designing Explained | How To Make PCBs | Simplilearn
Simplilearn
Python Full Course 2026 | Python Data Analytics Tutorial For Beginners | Simplilearn
Simplilearn
🔥Top Product Management Skills You Need to Succeed in 2026 #shorts #simplilearn
Simplilearn
SQL For Data Analytics 2026 | Essential SQL Commands | SQL Tutorial For Beginners | Simplilearn
Simplilearn
Simplilearn Reviews | Paving Way To Success With AI & ML Course | Soumik’s Upskilling Journey
Simplilearn
Six Sigma Full Course 2026 | Six Sigma Green Belt Training | Six Sigma Training | Simplilearn
Simplilearn
Learn Snowflake In 45 Mins | Snowflake Tutorial | What Is Snowflake | Snowflake Explained
Simplilearn
🔥ML Career Tip – How to Start Learning Machine Learning in 60 Seconds! #shorts#simplilearn
Simplilearn
🔥Agile vs Waterfall in 60 Seconds #shorts #simplilearn
Simplilearn
Excel Full Course 2026 | Excel Tutorial For Beginners | Microsoft Excel Course | Simplilearn
Simplilearn
What Are AI Agents? | Types Of AI Agents | AI Agents Explained | AI Agents Tutorial | Simplilearn
Simplilearn
How To Create a Product Roadmap In 2026 | Product Roadmap | What Is Product Roadmap | Simplilearn
Simplilearn
SQL Full Course 2026 | SQL Tutorial for Beginners | SQL Beginner to Advanced Training | Simplilearn
Simplilearn
🔥What Is Phishing? #shorts #simplilearn
Simplilearn
Cloud Computing Full Course 2026 | Cloud Computing Tutorial | Cloud Computing Course | Simplilearn
Simplilearn
Simplilearn Reviews | Overcoming Rejection & career plateau to finding a New Job : Bhaskar Banerji
Simplilearn
Six Sigma Full Course 2026 | Six Sigma Green Belt Training | Six Sigma Training | Simplilearn
Simplilearn
Generative AI Full Course 2026 | Gen AI Tutorial for Beginners | Gen AI Explained | Simplilearn
Simplilearn
VLSI Design Course 2026 | VLSI Tutorial For Beginners | VLSI Physical Design | Simplilearn
Simplilearn
More on: Excel & Spreadsheets
View skill →







Related Reads
📰
📰
📰
📰
Bulut Bilişim ve Veri Bilimi: Model Eğitiminden Canlıya Uzanan Bootcamp Yolculuğu
Medium · Data Science
10 Benefits of Enterprise AI Analytics Every Organization Should Know
Dev.to · Ravi Teja
Your rolling_std Is Lying — The 21,000× Error You Can’t See
Medium · Data Science
Your rolling_std Is Lying — The 21,000× Error You Can’t See
Medium · Python
🎓
Tutor Explanation

 DeepCamp AI