Grid Snapping Basics Every Scratch Programmer Needs
Skills:
Visual / Block Coding80%
Key Takeaways
Grid snapping technique in Scratch for kids coding, useful for games like tower defence and inventors, using Scratch programming language and sprite placement.
Full Transcript
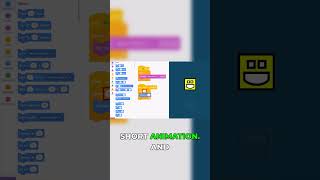
Hello, fellow Scratchers. Watch this. I can move my mouse anywhere, but the bot sprite always snaps perfectly onto a grid. This little trick shows up everywhere: inventories, level editors, tower defense [music] games, including my Bots versus Aliens tutorial found inside the Griffpatch Academy. Now, I'll tell you what. Let's spin up a fresh Scratch project, and I'll show you exactly how grid snapping works and why it's so useful. Let's get scratching. First, we need to set up a visible grid so that we can snap our sprite to it. Under the stage sprite, click the choose a backdrop, and then scroll right down to the very bottom and select the fantastically named XY grid 30 px. Haha, great name. Now, doesn't it suddenly feel like we're about to have a math lesson? Haha, the name grid 30 px is very purposeful. It means each grid line is spaced exactly 30 pixels apart. Now, that's something worth remembering as we code up our grid snapping. Talking of which, sorry Scratchy, you are far too large for this experiment. I'm going to create a brand new costume, just a simple circle. And to do that, we use the circle tool, and holding the shift key on our keyboard as we drag, we drag out a perfectly round circle. We're going to make sure that it's smaller than 30 pixels, the size of a grid cell. Somewhere between 20 and 30 pixels should be just fine. And then, one last step, and this is super important, so don't skip it. To get perfect snapping, the costume must be perfectly centered on the drawing canvas. As we click and drag the shape, the center point of the canvas becomes visible, and we simply drag the costume so that it snaps exactly onto that central point, like so. Brilliant. And I'll delete those other costumes. >> [music] >> Okay, so let's begin simple. When the green flag is clicked, we want the sprite to follow the mouse pointer. And this isn't a one-off event, it has to happen over and over again. So, drop in a forever loop, and inside that, a go to block. But, make sure that it's set to go to mouse pointer. All right, smash the green flag, and there we go. Our delightful purple circle is now following the mouse all over the stage. Smooth, continuous, but completely unsnapped. And that's exactly what we don't want. Because right now, the sprite can stop anywhere, halfway between cells, nice and messy. So, now comes the fun bit. Let's take this free movement and snap it cleanly to the 30-pixel grid cells. Okay, so right now, the sprite's position is measured in pixels, counted from the center of the stage. But, our grid doesn't think in pixels, it thinks in cells. One cell, two cells, three full grid cells, again measured from the center. So, we need to switch units. Let's create a new variable, and we'll call it grid X. Okay. So, what we're really asking now is how many of these 30-pixel steps across the stage are we? And the way we answer that is simple. We take the current X position, and we divide it by 30. That is, how many 30s go into our current X position. Smash the green flag, and you'll see. Now, this gives us the grid cell number, but it also gives us extra detail. If I can position my mouse exactly in the middle of the stage, then the grid x is zero. And as I move across, we're getting fractional numbers until we hit the next grid line, and then we get one, one grid cell across, and then two, and three, and so on. But most of the time, we haven't got a nice whole number, we have numbers like 1.963, or if we're on the left-hand side of the screen, -6.78. That decimal part is just telling us how far inside the cell the mouse is. And for snapping, we don't care about that. We don't want 1.something cells across, we just want one cell or two cells. So, we're going to simply round the value. And just like that, we've stripped away the fluff. Now grid x is a clean, whole grid cell number. Splendid. So, that's a step in the right direction. How about we do the same for the Y position, then? Create a new variable, naming it grid y. Again, for this sprite only. Okay. And just like before, we're going to set the grid y variable, and why not just duplicate the line above? The rounded result of dividing, and this time the Y position, again by 30. Just drop in that Y position. Perfect. And hurrah! We've successfully converted the mouse positions from pixels into clean grid cell coordinates. We know which column we're in, and we know which row we're in. Now, we're ready for the satisfying bit, snapping the sprite back onto the grid. But the sprite still lives in a pixel world, so now we need to do the reverse. We need to take our grid cell numbers and turn them back into pixel positions. And that's easy. Each grid cell is 30 pixels wide, so to get back to pixels, we just multiply by 30 again. So, instead of going to the mouse pointer, we do this. Go to XY. We're going to multiply our grid X multiplied by cell size of 30 pixels. For the Y position, we multiply up our grid Y, again, by 30. Now, watch what happens. Smash the green flag, and the sprite is no longer moving freely. It is snapping to the grid itself. Oh, well, when I say snapping to the grid, what it's actually doing is it's snapping to the grid lines, the intersections where the lines cross. And that is really useful, and for some projects, it might be exactly what you want. But, in the majority of games, what you actually want is for this tile to sit in the middle of each cell. Indeed, that's exactly what I do in Bots versus Aliens. Everything snaps neatly onto the center of each grid cell. That way, towers line up cleanly, paths behave properly, and the whole game stays predictable. So, let's find out how to snap to the center of a cell. Well, one quick hack way of doing it is to move the costume itself up and away from the center of the canvas. And as you can see, this almost is working already, but we'd have to be a lot more accurate with our positioning if we wanted to work properly. So, rather than offsetting the costume itself, what we'll do is we'll use some maths to precisely reposition the sprite by half a tile. So, I'm going to click back into the code tab, and look back at our go to XY. To move half a grid cell to the right, we just need to add half to our grid X. So, with an addition, add 0.5, that's half, and on the left-hand side, drop in our grid X. Then, pop that back into the go to, and because we're multiplying up by 30, we're now half a grid cell more to the right than we were before. But, we should really sort out the Y position, too. So, it's exactly the same. Add 0.5 to the grid Y. Drop that into there, and now our little round token is sitting perfectly inside the middle of each grid cell. Well, that was easy, right? But, that's not quite the end of the story. As I move my mouse around, do you see how the circle isn't always appearing in the cell under the mouse cursor? Well, the problem isn't with our positioning on the screen. No, that works perfectly. What's wrong now is the calculation of which cell is closest to our pointer, and the error is due to us using this round block. Round finds the nearest cell, whether it's rounding down or rounding up. We only want to round down when we're positioning inside the cell. And luckily, Scratch has a block that does exactly that, and it's hidden under the abs block. If we click the drop-down, we can switch it to say floor. Now, we just need two of these, one for grid X and one for grid Y. So, having swapped out the old round blocks, drop in the floor instead, and reconnect everything up. And look at that. Now, the sprite is beautifully clamped to the center of each grid cell again, exactly where we expect it to be. Brilliant. >> [music] >> So, that's the hard work done. But just to finish off this tutorial, let's make this actually useful. Wouldn't it be fun if we could just click to place a tile? You could use the when this sprite clicked, but that can get a bit messy once other sprites are involved. So, my preferred method is to use when green flag clicked, then pop in a forever loop, and inside that, we simply use a wait until the mouse button is pressed. Wait until mouse down. And as soon as it is, we can create a clone of ourselves. That will drop a new copy of this sprite onto the screen. So, run the project and give that a try. And at first glance, this looks perfect. Hey, we can even draw some pretty cool patterns with this. But, be careful. There's a small problem. Because I've got Scratch Addons installed, I can see the clone counter ticking up. And if I keep holding the mouse button down, more and more clones get created. Too many. Once we hit 300 clones, Scratch refuses to make any more. Oh, no. So, why is this happening? Well, it's because we are cloning when the mouse is pressed down, and it just keeps on cloning until the mouse is released again. So, we can put a quick stop to that by having another wait until. This time waiting until the mouse is no longer down. Wait until not mouse down. That forces the player to release the button before another clone can be created. And then we loop back around and wait for the next click. Simple, effective, and nicely controlled. And with that, you've got a really solid grid snapping system. And the sprite snaps cleanly into the center of each cell. It always appears under the mouse, and we've got full control over placement. Indeed, this exact idea, the snapping, centering, and controlled placement is something you'll use again and again once you start building bigger projects. So, before we finish, here's a quick look [laughter] at how this grid snapping system gets used inside a full game built. This is Backyard Battle Bots versus Aliens, one of the walkthrough builds inside the Griffpatch Academy. A tower defense style game built step-by-step from scratch. Systems like grid snapping sit right at the heart of this project, helping us place bots neatly on the grid, managing lanes, detecting collisions, and control the whole battlefield. As the build grows, you'll add new bot types, unlock [music] more lanes, and create increasingly challenging alien waves. If you'd like to try building Backyard Battle yourself, I've created a special page linked below where you can continue the journey. There's even a backyard battle workbook that walks you through the project step-by-step if you'd like some extra help along the way. So, I hope you enjoyed this tutorial. If you did, then like the video and subscribe to the channel so you don't miss the next exciting video. That's all we've got time for, so until next time, have fun experimenting with what you've learned today, and as always, scratch on, guys.
Original Description
Learn how to snap sprites perfectly to a grid in Scratch!
In this tutorial I’ll show you a simple but powerful Scratch programming technique used in many games: grid snapping.
Grid snapping lets you place sprites cleanly into tiles, making it perfect for things like:
• Tower defence games
• Inventories and item placement
• Level editors
• Tile-based games and maps
By the end of this scratch tutorial you’ll understand how to convert sprite positions into grid cells and snap objects precisely into place — a key skill for Scratch game development.
*Continue Building With Me*
If you'd like to build a complete Scratch game step-by-step, check out my full game build:
*Backyard Battle: Bots vs Aliens*
The step-by-step path to creating a finished Scratch game.
👉 https://griffpatch.academy/build-a-scratch-game
You can even grab the Backyard Battle Workbook to help guide you through the build.
------
Scratch was developed by the Lifelong Kindergarten Group at the MIT Media Lab. See http://scratch.mit.edu
Playlist
Uploads from griffpatch · griffpatch · 0 of 60
← Previous
Next →
1
 2
2
 3
3
 4
4
 5
5
 6
6
 7
7
 8
8
 9
9
 10
10
 11
11
 12
12
 13
13
 14
14
 15
15
 16
16
 17
17
 18
18
 19
19
 20
20
 21
21
 22
22
 23
23
 24
24
 25
25
 26
26
 27
27
 28
28
 29
29
 30
30
 31
31
 32
32
 33
33
 34
34
 35
35
 36
36
 37
37
 38
38
 39
39
 40
40
 41
41
 42
42
 43
43
 44
44
 45
45
 46
46
 47
47
 48
48
 49
49
 50
50
 51
51
 52
52
 53
53
 54
54
 55
55
 56
56
 57
57
 58
58
 59
59
 60
60

Burrow Blitz - A game by Griffpatch
griffpatch
Burrow Blitz Level 1 Speed Run!
griffpatch
Scratch Messaging Extension (for chrome & firefox)
griffpatch
Scrolling Platformer Tutorial | Part 1 | Get Scrolling
griffpatch
Scrolling Platformer Tutorial | Part 2 | Gravity
griffpatch
Scrolling Platformer Tutorial | Part 3 | Platform Detection
griffpatch
Scrolling Platformer Tutorial | Part 4 | Off Screen Sprites and Player Death
griffpatch
Scrolling Platformer Tutorial | Part 5 | Collectables
griffpatch
Scrolling Platformer Tutorial | Part 6 | Danger Sprites (Bug fix)
griffpatch
Scrolling Platformer Tutorial | Part 7 | Exit Portal
griffpatch
Scratch 3 | Box2d | Physics Extension
griffpatch
Scrolling Platformer Tutorial | Part 8 | Vertical Scrolling
griffpatch
Zombie Cube | Speedrun challenge
griffpatch
Scratch 3 | Physics Extension | Version 2
griffpatch
Top Down Scroller | E1 - Scrolling | Scratch Tutorial
griffpatch
Top Down Scroller | Part 2 | Enemy AI
griffpatch
Top Down Scroller | Part 3 | Enemy Clones & List
griffpatch
Top Down Scroller | Part 4 | Live Die Repeat (Game Over)
griffpatch
Top Down Scroller | Part 5 | You've Won!
griffpatch
Cloud Game Tutorial | Part 1 | The Basics
griffpatch
Cloud Game Tutorial | Part 2 | Encoding and Decoding
griffpatch
Scratch 3 Dev Tools Browser Extension by griffpatch
griffpatch
Cloud Game Tutorial | Part 3 | Multiplayer
griffpatch
Scrolling Platformer Tutorial | Part 9 | Momentum
griffpatch
Scrolling Platformer Tutorial | Part 10 | Wall Jumping
griffpatch
Cloud Game Tutorial | Part 4 | Auto Game Joining
griffpatch
Game Preview - "Getting Over It" with Griffpatch - A fan recreation in Scratch
griffpatch
Speed Run with Outtakes | Getting Over It | 4 minutes 30 seconds
griffpatch
Griffpatch's Live Stream
griffpatch
MMO Platformer Speedrun Challenge
griffpatch
Appel Platformer | Scratch Game Blog
griffpatch
Cloud Game Tutorial | Part 5 | Smooth Movement
griffpatch
How to Design a Level for Appel
griffpatch
Fastest Appel Speedruns | Jan 2021
griffpatch
Tile Scrolling Platformer (Mario) | 1. Setup
griffpatch
Tile Scrolling Platformer | 2. Grid List
griffpatch
Tile Scrolling Platformer | 3. Tile Collisions
griffpatch
Tile Scrolling Platformer | 4. Platforming Scripts
griffpatch
Tile Scrolling Platformer | 5. The Level Editor
griffpatch
Tile Scrolling Platformer | 6. Level Codes
griffpatch
Tile Scrolling Platformer | 7. Drop Through Platforms
griffpatch
How to make Physics in Scratch | Full Tutorial
griffpatch
Tile Scrolling Platformer | 8. Enemy Clones
griffpatch
Simple Pathfinding Tutorial
griffpatch
Tile Scrolling Platformer | 9. Enemies in Level Editor
griffpatch
Simple Maze Generation | Scratch Tutorial
griffpatch
Tile Scrolling Platformer | 10. Mystery Blocks
griffpatch
Simple Car Steering Simulation | Scratch Tutorial
griffpatch
Simple Background Scrolling Tutorial
griffpatch
Tile Scrolling Platformer | 11. Death, Background & Sound
griffpatch
Mid Week Update & Channel Membership
griffpatch
Simple Grid List Tutorial with Image Scanning
griffpatch
Tile Scrolling Platformer | 12. Auto Arranging Tiles
griffpatch
Code a Fun Space Shooter Game 🚀 | 1. Move & Shoot | Scratch Tutorial
griffpatch
Space Shooter 2 - Enemy Collisions
griffpatch
Tile Scrolling Platformer | 13. Level Progression & Editor Improvements
griffpatch
Space Shooter 3 - Camera Shake & FX
griffpatch
Tile Scrolling Platformer | 14. Sloping Tiles
griffpatch
Pathfinding a Maze using Lists
griffpatch
Tile Scrolling Platformer | 15. Crouch & Slide
griffpatch
More on: Visual / Block Coding
View skill →




Related Reads
📰
📰
📰
📰
Best platform for teaching young kids to code for free
Reddit r/learnprogramming
12 Scratch Project Ideas for Students to Learn Coding the Fun Way
Dev.to · Danieldsouza
Why Building a Virtual Pet Game in Scratch Is the Perfect Coding Project for Kids
Medium · Programming
Scratch for kids
Reddit r/learnprogramming
🎓
Tutor Explanation
 DeepCamp AI