GPIO Tutorial for Raspberry Pi Part 1 - Setting up
Key Takeaways
This video tutorial by sentdex covers the basics of setting up and using GPIO pins on a Raspberry Pi, including identifying usable pins, understanding pin labeling, and gathering necessary materials such as a breadboard, LED light, resistor, and male to female jumper cables. The tutorial is geared towards beginners and provides a foundation for further exploration of Raspberry Pi and GPIO programming.
Full Transcript
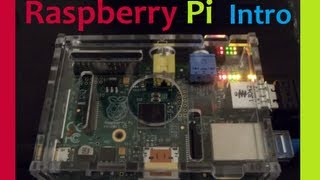
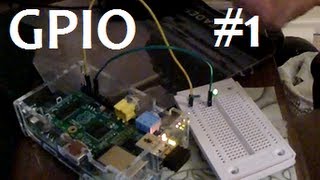
All right. Hello everybody and welcome to another Raspberry Pi tutorial video. In this video, I'm going to be showing you guys how to make a basic um circuit and also use your GPIO pins on your Raspberry Pi. So, just a little bit of information before we get into it of what we're going to need and what we're actually looking at. For one, on our actual Pi here, um, our GPIO pins are these pins here. There's 26 of them. Though, you can't actually use every single one of them. Uh, what I do suggest is you look up a um, basically a diagram online and, uh, and see which what the pin which of the pins do what and so on. I believe there's eight total pins that we can actually use for input output. And then there are some pins that honestly I don't know enough about the Pi or computers to know why they're even there, but there are some pins that you're not to plug into like ever. So, I don't know why they're even there, but anyway, they are there. And so, just be really careful with some of the ones that you plug into. Um, so anyway, we'll just go ahead and get started. the there are a couple pins or like the uh whenever you're looking at a diagram, it's assuming that you're oriented like this and it's the top right um is where the GPIO uh pins are located on the board. So whenever you see a diagram that's how it's ordered and the pins go like one two three four five and so on. And then the other thing to keep in mind is the GPIO actual like label of the pin is a little different than the actual pin's label. And there so when you're programming you need to like by default it's actually going by the name of the pin not pin's number but you can also program in um to your you know your your Python program to say actually we're going to use pin number whatever. But for now, what we're going to do is actually call the pin by its, you know, program name. So anyway, that's the board. I'm going to move it out of the way now. Uh, a few other things that you're going to need. I did kind of warn you in a previous video, but if you don't have these things, you can, I guess, still watch the video, but you should definitely get your hands on some is a breadboard. This is a cheap breadboard. Um, and you can really get a breadboard and like all kinds of fun stuff um on like eBay or something like that. just type in like breadboard kit and you get just a bunch of stuff. Um, but the next few things that you're going to need is at least for this tutorial is an LED light, which I already have. I just got this little tiny LED light. And you'll need a proper resistor uh for the LED light. Now, um if you don't if you do know like the forward um the forward voltage and such of your LED light, you can just do the math and figure out what resistor you need. But naturally, I mean, you you will need a resistor because you're pushing uh 3.3 volts out of your uh Raspberry Pi um out of I believe it's the top left for the uh 3.3 volts. Um you're pushing that out. And so if you plug that directly into this LED, it'll probably shine for like a few seconds and then it'll just burn out. So you're going to need a proper resistor for that. And for that, you'll just have to do the math because um each LED is going to be a little different. So anyway, for example, this one's like a little tiny LED. Most people have like these Mondo LEDs. So this one requires a little bit more resistance than most. Most of them are probably going to require something in like the under 100 uh ohms resistance. Uh this one, this is a 220 and um the LED uh flash is pretty bright. If you don't know though, like I didn't have any documentation on this. If you don't know, then what you can do is just like start really high and then work your way down until you can um start to see it blinking. It'll be like really dim probably at first and then just go until it's bright enough. Um so anyway, you'll need that. And then finally, last thing that you'll need is a little bit trickier to find than most of this stuff is male to female jumper cables. It has to be male to female because um most jumper cables are male to male, right? Like this is the male end and like this is female because you can, you know, insert into it where all the GPIO here is is male. So you have to have a female um cable. So, keep that in mind when you're buying like a breadboard kit. You'll probably have to buy these separately unless you go for like an Arduino kit or something like that or even a Raspberry Pi kit. Um, then it'll have like the male to female um cables. But really, the whole kit should cost like $15. Like, don't pay for anything more than that. So, um anyway, we'll need those, the resistor, LED, and obviously your board. And now what we're going to do is pop over to our uh Raspberry Pi and begin um getting the things that we need for the GPIO and then also programming our um our simple program for GPIO. So let's get started.
Original Description
Sentdex.com
Facebook.com/sentdex
Twitter.com/sentdex
http://www.raspberrypi.org/
Playlist
Uploads from sentdex · sentdex · 60 of 60
← Previous
Next →
1
 2
2
 3
3
 4
4
 5
5
 6
6
 7
7
 8
8
 9
9
 10
10
 11
11
 12
12
 13
13
 14
14
 15
15
 16
16
 17
17
 18
18
 19
19
 20
20
 21
21
 22
22
 23
23
 24
24
 25
25
 26
26
 27
27
 28
28
 29
29
 30
30
 31
31
 32
32
 33
33
 34
34
 35
35
 36
36
 37
37
 38
38
 39
39
 40
40
 41
41
 42
42
 43
43
 44
44
 45
45
 46
46
 47
47
 48
48
 49
49
 50
50
 51
51
 52
52
 53
53
 54
54
 55
55
 56
56
 57
57
 58
58
 59
59
 ▶
▶
Matplotlib Python Tutorial Part 1: Basics and your first Graph!
sentdex
Python Encryption Tutorial with PyCrypto
sentdex
Python's Logging Function
sentdex
wxPython Tutorials 1: Making Windows GUIs with Python : Installing + 1st window!
sentdex
wxPython Tutorials 2: Making Windows GUIs with Python: Customizing Window Parameters
sentdex
wxPython Programming Tutorial 3: Menu Bar and Menu Button
sentdex
wxPython Programming Tutorial 4: Panels
sentdex
wxPython Programming Tutorial 5: User Input Saved To Variables
sentdex
wxPython Programming Tutorial 6: Multiple Choice Input
sentdex
wxPython Programming Tutorial 7: Adding Static Text and Colors
sentdex
wxPython Programming Tutorial 8: Custom Button Images
sentdex
wxPython Programming Tutorial 9: Tool Bar Items and Sub Menus!
sentdex
Basic PHP Tutorial 13: Multi-dimensional Array
sentdex
Basic PHP Tutorial 15: Functions and Global Variables
sentdex
Basic PHP Tutorial 12: Associative Array
sentdex
Basic PHP Tutorial 14: Foreach loop
sentdex
Basic PHP Tutorial 16: Include and Require
sentdex
Basic PHP Tutorial 7: Assignment, comparison and Logical operators
sentdex
Basic PHP Tutorial 4: Variables and Comments
sentdex
Basic PHP Tutorial 11: Arrays part 1, basic array
sentdex
Basic PHP Tutorial 6: If else and else if conditionals cont'd
sentdex
Basic PHP Tutorial 1: Intro to PHP
sentdex
Basic PHP Tutorial 3: HTML with PHP
sentdex
Basic PHP Tutorial 9: While Loop
sentdex
Basic PHP Tutorial 10: Switch Statement
sentdex
Basic PHP Tutorial 2: Print and Echo
sentdex
Basic PHP Tutorial 5: If else and else if conditional statements
sentdex
Basic PHP Tutorial 8: Arithmatic Operators: Doing math with php
sentdex
Basic PHP Tutorial 17: User Input Form Example / String Manipulation
sentdex
Basic PHP Tutorial 18: HTML Entities and forms cont'd
sentdex
Basic PHP Tutorial 19: Finding words in strings
sentdex
Basic PHP Programming Tutorial 20: Saving to a File / writing and appending
sentdex
Basic PHP Programming Tutorial 22: Hashing part 2: salting
sentdex
Basic PHP Programming Tutorial 23: Variables in Strings and tokenizing
sentdex
Basic PHP Programming Tutorial 21: MD5 Hashing For Security
sentdex
Basic PHP Programming Tutorial 24: String similarity
sentdex
Basic PHP Programming Tutorial 25: Time and Time stamps
sentdex
Basic PHP Programming Tutorial 26: Die and Exit
sentdex
Basic PHP Programming Tutorial 27: MySQL Databases Part 1
sentdex
Basic PHP Programming Tutorial 28: MySQL Database Part 2: Reading From Database
sentdex
Basic PHP Programming Tutorial 29: MySQL Database Part 3: Inputting Data
sentdex
Basic PHP Programming Tutorial 30: MySQL database in Use
sentdex
Django Tutorial Web Development with Python Part 1: Installing Django
sentdex
Python Tutorial: File Deletion and Folder Deletion / directory deletion
sentdex
Python Tutorial: How to Rename Files and Move Files with Python
sentdex
3D Graphs in Matplotlib for Python: Basic 3D Line
sentdex
3D Plotting in Matplotlib for Python: 3D Scatter Plot
sentdex
3D Charts in Matplotlib for Python: Multiple datasets scatter plot
sentdex
Sikuli Tutorial 1: Visually programming in python!
sentdex
Sikuli Tutorial 2: Program visually in python!
sentdex
Sikuli Tutorial 3: Program visually in python!
sentdex
3D Bar Charts in Python and Matplotlib
sentdex
3D Plane wire frame Graph Chart in Python
sentdex
Raspberry Pi Part 1 Introduction
sentdex
Raspberry Pi Part 8: First Download and Update! (Firmware)
sentdex
Raspberry Pi Part 10: How to set up a Linux Web Server on your Pi
sentdex
Raspberry Pi Part 11: Remote Desktop
sentdex
Twitter Analysis: How to rank a user's influence
sentdex
GPIO Tutorial for Pi Part 2 - Programming the GPIO
sentdex
GPIO Tutorial for Raspberry Pi Part 1 - Setting up
sentdex
Related Reads
📰
📰
📰
📰
I Tested 15 AI Side Hustle Tools in 2026 -- Here's What Actually Made Money
Dev.to AI
¿Quién Decide el Tenant? Un Rust…
Dev.to AI
I Use AI Every Day. I'm Also Googling Crop Rotation.
Dev.to · Marvin Okafor
AI and Real Estate Analytics: How Machine Intelligence Is Reshaping Property Markets
Medium · Machine Learning
🎓
Tutor Explanation

 DeepCamp AI