Create a 3D AI Website using Three.js | Frontend Projects | GeeksforGeeks
Key Takeaways
Creates a 3D AI website using Three.js and React.js
Full Transcript
hi everyone welcome back to Geeks for geeks YouTube channel and I am your host for today and myself Rish so in today's video we are going to learn complete mon stack development by building a course selling website like Udi most of you have might have used that one like learning react or any of the stuff right so yeah we are going to build a complete Monch application having a full Mo with all the backend in nodejs and express and mongod DV as a database and front end is obviously in reactj so I hope that you guys will be liking this video so give it a thumbs up and subscribe gigs for G channel for receiving more videos from my side so I hope that you will be liking this video so without wasting any time let's get started in the video right so yeah let's get started so getting started so as you can see that we first have a home screen which is looking pretty much nice then we have courses section in which we have our courses like Udi which is having the title pricee off and all those stuff we have login feature also and where you can sign up and login basically so we will be learning authentication also and you can see that it is looking pretty much uh awesome right the design is looking cool so we will be learning all of this stuff in this tutorial so so after that coming back you can see that we can add to card we have favorite section we have ratings and if you click on each any of the card then we can see multiple videos under each course and then you can go through that and we can if you buy you can just uh get those videos right so I hope that uh this website is looking pretty much cool it is built in reactj as we already told you so let me just log out and then just uh sign up so yeah now let's getting started so first uh what I've done here is I have created a new folder Cod and then after that we have to uh initialize our reactjs project basically right as we are working on reactjs so for that what command we have to give here is npx create react app and then your app name so for of now as we will be having a back end also so I'm just naming it client right in our main root folder which is coding and once you hit enter it will be installing all the dependencies and all those stuff that are required for starting your basic react application the starter application right so uh it will take a little bit of time and after that it will be creating our application so then we can start so let's just wait and see [Music] [Music] so it's basically you can see like what it's installs like react react Dom react scripts and the C template and all those stuff right so reactjs is basically a framework you can go into its documentation if you're are a very beginner in react CHS right and this is a very beginner friendly course you can just learn from it there are many previous video in gfg of mine where I have made multiple projects like forood delivery application and then other application like e-commerce stuff and Etc you can also go through that videos also link will be provided in the description or in the end cards right so yeah now you can see that it is uh completed it has installed all those stuff so you can see that it is giving a message Happy hacking now you can also use white which is now quite popular in these days using white configuration also you can create your react application it is pretty simple and same thing is done only the command is different so there will be like white create react app something like that you can go through that also but the main concept is same like what we are going to build right so as you can see it is done now after this The Next Step that we are going to do here is I will go inside the client and then I will simply start our react application so I have done CD client and then I have written npm start which is basically react start Command right so yeah so you can see it is showing the message that starting the development server and now you can see that it has started our react application right so this is basically the empty template that comes by default so after that sorry yeah so after that I have provided a readme txt file in your drive you can go into the drive link and you will be getting this readme.txt file where all the dependencies are present which you need to install right so just uh paste it and now let's clear the Sassi part so we have many uh things that are not required so I'm just deleting this stuff so you can just delete them right so I have cleared all the stuffs logo then app CSS we don't need so I have just removed that one and simply a high message is coming as you can see now we have to copy the button toast message and text input now these are the components that I have already created so basically you can pass your props and this will be useful right because I don't want to get into deep you can see my previous video also and this file will be provided in your drive you will be getting this right from there so I will just create a new component folder and inside that I have pasted all of them then I have pasted utils and then I have pasted the index. CSS file so basically the scroll bar and the font I have set in the index. CSS now after that all the things are pretty much done I guess so we will be creating a new folder that is Pages like what are the pages that we are going to have in the components we will be having the components that are reuseable or reusable right so yeah now starting in the app.js so first we will be having style components right so I have import styled components for like style from style components then I will Define my own component so I have written const container equal to style. div so this is basically our predefined container where we pass our CSS uh in this only so that is why it is useful like uh style components right so now first thing that we have to do is we have to add our theme right so I have wrapped the whole thing in a theme provider and then in the theme we will be passing light theme that is already present in the utils let's just import that one you will be getting that from the drive right so yeah import light theme from u/ theme okay perfect now our theme can be useful uh everywhere after that in the theme provider inside that we will be having our browser router so basically for our routing purpose like navigating to different pages we need browser router so I have imported uh browser router routes and route from react router Dom and then after the inside the browser for we will having our container basically that we have defined right so in this container uh first thing that we are going to have here is a nav bar basically as you have seen right so now let us just create the component Navar so I have done navb bar. jsx in our components folder and then our default react and then nav bar is created I have just imported it and now you can see that nav bar is coming right so that is how you can create multiple components and Link them right now in the container we will be having our color as text primary and then background BG and overflow XY are hidden by default yeah that's pretty much good now CSS is done for app.js now in the nav bar I have imported all the stuff that are required style components button menu icons shopping cart icon Avatar log out uh this thing will be done later the Redux part so I have just commented that so yeah now let's just get started with the Navar so first thing in the nav bar I will have our component nav style component basically then inside that we will be having our nav bar container now inside this Navar container we will be having our nav logo so basically nav logo is uh as you can see that the CD is there kod me right so let us open in the big screen also so you can see the logo right so yeah so first we have our n nav and after that we are having uh inside This na logo we will be having our logo where in SRC I will pass logo image and we will be having codes Demi name right of our logo after that nav logo is done we will be having on navigation items as you can see home and that links right so we have nav items inside that we have nav links where our basically home is defined right so yeah [Music] now let us see yeah let's close the logo yeah done right now let's just Define this style components so that the error will be removed and we can just style this thing so I have written Na and then I have just copy pasted and now I am just changing the names for all of them let's change that [Music] one so yeah now we have done now have logo is the image so I have change that to style image right so this part is done and uh after this the next part what we have here [Music] is yeah then the nav link uh we need a uh we need to navigate right so nav link will be basically a nav link right from react Dom in which we have to pass a prop to where it will be naviga now starting with the style components first is nav I have given background color and then I have given height of 80 pixel display is flex align itm Center just by Center font size I given position sticky top zero Z next 10 and color I have given white right so yeah that is what uh it is going to be done then in the nav container we have with 100% Max with 1 14 pixel padding and then display FX align itm Center just Center font size one R and then na logo we have a width we have display Flex we have align item Center then we have padding font weight font size Etc and GAP and text decoration none and I have given a color right so now you can see that our Navigation logo is looking perfect sorry now in the nav logo we have given a height of 34 Pixel now cons nav items now in this na items I have it is unored list so I have given style. UL with is 100% display FL X align item Center just Center Gap 32 pixel padding 0 by 6 and let's just see and for smallest screen display is none and for the naving it will be a styled and then inside that we will be passing naving in Brackets because that is also another component imported right and then we have added our style display Flex align andem Center and all the stuff now you can see it is looking perfect then give c a pointer transition text decoration none and in the hover I I am changing the color and giving a border bottom of 1.8 pixel solid right with primary color so that is how our navigation items is going to look like for bigger screen not for smaller screen right now next we have our button container where we will be having our sign up button and the search button and all those stuff right so in the button container we will be having first our naving that is for search and we have the icon search rounded color inedited and then we have font size and Etc then we have one button where the text will be sign in and it is kind of small so Props can be passed I have passed small now let us Define uh first of all open o set open o so basically this and current user so these are basically props which I will be passing from app.js open out and set open out is basically if you want to log in then it will be open right so first Define button container let's UNC commmand this now in the button container uh we will be having withd 100% height 100% and displays Flex right just if I can then flex and gap of 20 align item Center and padding right so now you can see it is looking perfect now after that uh what we sorry yeah now for smaller screen we have to do it right for bigger screen it's completed now for smaller screen we will be having a hamburger icon right or menu icon so I have written mobile icon container inside that we have menu rounded and in it I have given the style color of inherit so it will inherit from mobile icon the color basically it is Mu mu icon right so I have given color then I have given display none and for smaller screen it will be visible right so I displ flex align item center now after this we will be defining a use effect sorry use state which is is open comma set is open in which we have U State and by default it is false this is basically our [Music] uh use St is done then we have mobile icon mobile icon is done I guess for smallest is visible then we have yeah now we have to do the navigation links for smaller screen right so e open is basically it will be opening a menu bar right for smaller screen from where we can select that one right so I have just copied and pasted nav items there and now let's just change the name to mobile menu and then let's define that one const mobile menu equals to style. div and uh then in the mobile menu we will be passing that whether it is open or not so I have passed is open as is open now in Mobile menu it is a style. div so it will be a same thing on our list and let's just style that one okay so display Flex Flex Direction column ROM start Gap padding list style none with I have given and padding and background position absolute and transition and all the stuff I have given right so this is done basically okay now uh when I'm clicking on the hamburger icon so it should be open right but when we click on the nav link it should be closed right so if we click on home then our container should be disappeared but like uh we should remove that one so uh if you click on it I am just changing the set is open to the opposite of what it was currently so it will be closed basically so yeah so this are done after that we have our div where we have our two buttons in this only you can see the container how it's looking good then we have our sign up and sign in button right so the similar props we have to pass and it is looking good so now nav bar is almost uh completed and we need to do one or two three changes so we will will be having current user check so if current user is present so in that case what we will do here is we will be passing a log out button right and on click it will for of now say do console. log logout right so we have done this one and current user if current user is not there we will be showing this button to sign up and sign in right so basically that is our functionality I was talking about so now it is so if if you don't have current user it will be showing the stuff and if you have current user then it will be showing the um log out button now the mobile icons uh on the left side we will be needing our search and all those stuff so I have just written mobile icons and we have naving the same thing and then we have a search icon right and let's just Define mobile icons container it will be again a style. div and then inside that uh let us add color Play N media screen display Flex andom Center just and a gap right so basically this is done now I guess so we are having our search button and now let's see what else we need yeah so we will be having our favorite and this stuff if current user is not present sorry current user is present right so I have just added that thing now our nav bar is completed I guess so it is is looking pretty much good now the next thing we will be defining our pages right so we will be having our home page and the course listing page and all those stuff so that is how basically we Define our routes on which we will be passing our component or you can say our element that are basically pages so first I have defin routes and inside that we have route where path is slash where I have element home like that I have refin other also now you can see in the third one third route it is courses slash colon ID right so B basically it is dynamic we will be passing our ID in the props only and we will be fetching it and showing accordingly right now let us create a new state that is open o basically a hook and set open o this will help us to open our login and sign up uh you can say a model and now I will check if open not is present we will be showing authentication right now let us just create the pages here so first one is home. jsx second one is what we had checkout. jsx so RFC and default react component then we have our course say course details. JS jsx and then we have RFC then we have our course listing. jsx [Music] then what else do we have yeah we have user dashboard. jsx then we have authentication page basically where our login and sign up will be shown so yeah that's pretty much the pages now let's just import them basically so home then let us import home so yeah now I have imported all of them home is not yet imported let us import home yeah so I have imported all of them from do/ Pages now you can see if you navigate get through you can see that our text is changing basically so that is how basically our page will be coming right and now you can Define your page and if you click on Au it is basically a model so it is coming after the home right so yeah now let's uh get started with the homepage right basically as you can see that it was looking nice so there's a disclaimer here homepage is basically having multiple images we are not going to do it code because it is not useful I guess because uh we are not going to learn here UI or modern ux building so we are learning the full stack development for that reason in the homepage what we will do here is we will be passing multiple images so first thing we have a container where we have added our same style and then we will be having our image which is the style. image and inside that we will be passing the style that is with of 80% and now we will be having the images so images as is hero image then we will be having our other images so let's just reload and see if it comes yeah so now you can see it is coming right the hero image is coming and for biger screen it is looking perfect so this are basically image that I have taken from figma design so you can just do it the code also like we have one video of building modern UI web application in react J you can see that and build that your own uh home.js page now we have other elements let's see home page we have done now we have our authentication so in the authentication we are having the sign in and sign up page right so let's just go in the [Music] authentication so authentication let us first import all of the things that are required so we have model from Material UI we have logo image Au image and close and sign up signin components let's just Define the sign up and signin component so sign in. jsx and sign up. jsx in our component we have created right so that is done after that um we will be using them in our code so first let's define authentication page so that is first I will write container the same thing that we do we will be following that only it will maintain M our consistency so first we have a container inside that container we have passed the style Flex one height 100% display Flex background we have passed right that's done after that uh next thing that we need here is sign up sign in let us just comment for of now let's just create the Authentication page so yeah now we have to wrap this whole thing in a Model B basically because we will be having a popup kind of thing which can be closed basically so a model right so yeah model inside that we have our container having name authentication and now we will be taking two props that is open o and set open o this will be passed from our app.js file so in the model we have open equals to open o and on close equ Al to we have a function Arrow function where we are setting the value to false basically of open o right so yeah that is done and after that we have container inside that we have two section in the authentication one is left and one is right as you can see in the bigger screen left we have a image and logo and right we have a form right so yeah so in the container in the left section we will be having our logo and image as I said and in the right section let let us just create so first there will be a close button where we will be having our close uh that is basically icon from mui and on click of this close I will set the set open out to false right so this is basically done after that uh let us just create the style components so cons left equals to style. and let's just change the names so we have write we have close button we have left we have already defined we have our logo and image perfect so you are done right so now the next thing if we reload what we are going to see here is the image is coming right so let's just style it so in the left we will be having Flex of one height would be 100 % then okay so position would be relative hide 100% for of now let's just remove this one so Flex would be one position would be relative in the logo we have position absolute and top and left and Z index are there and then in the image we have position relative we have height 100% we have with 100% And object fit is cover right so that's done and for media screen I have given Max withd of 768 pixel so that's also done now we on the right we will be having position relative Flex would be 0.9 display Flex Flex Direction column padding I have given and a gap and Aline item Center and just by Center I have given right now it is looking perfect that we wanted so yeah it is looking pretty much cool so basically we are having two section display flex and flex Direction row right and when it will be small screen we will omit the left part and only show the right part on the close button I have defined the style position absolute top light because it will be absolute so I given top right padding and all the stuff you can see that close button is working fine and yeah now the next thing that we are going to have here is the text Fields but that will be in the sign up and signin page right so there would be cons login and set login that is a used State hook basically based on this Boolean check we will be either showing signin component or sign up component so let's just do that so if login is opened so I will just call the sign in done and if not then we will be calling sign up so it is giving some error let us see why sign up is not coming so so let us just uh initialize the sign up export default and I guess it should come [Music] now sign up. GSX done so sign up Pages done but why it's not showing it's showing some error that is [Music] compon let us change the name to small U and let's just see if it works now so sign up yeah smaller one is coming right I guess so yes it has imported yeah let's move the previous one so yeah now it has either sign in or sign up page based on the condition and we will be having one text at the bottom using which we will switching that thing so for sign in we will be having a text that don't have an account and there would be a text button which will be having sign up right and after that we will be having our on click and then we have already have an account and then the text button that is sign in right so yeah now con text equals to style. div and let's just Define those components sty components then we have conext button equals to style. div and then we have [Music] our text would be a p and text button is a div right so you can see that sign in don't have an account sign up sign in is coming let's just style it font size for text align color and for smaller screen I have reduce the font size and for the text button I have given a color primary so you can see that it is working perfectly fine right so now let's just uh get started with our main part that is basically our sign in and sign up uh component so we will be having the same thing a container inside that we are having a div where there would be title and a span that is pleased loging with your details here then we have one another div inside that we will be having our text inputs right so we have text input and uh what else okay so let's just import this thing style component and input then we will be defining our Styles so for container we have defined the same thing with 100 Max with this Flex Flex Direction and GAP now for the title and other stuff let us just Define them first so we have title span then text button then yeah for title we have font size 30 pixel font WID 800 color would be themed primary for span it is like phone size 16 pixel and rest is good text input we will be we have to pass our label that is email address so I have given add email address and then a placeholder and all those stuff then let us Define the use state so that it can be handled easily if user enters the email and password so we have to use State hooks having email and password right then we have the label placeholder value and handle change then we have text input that is label having password then we have placeholder enter your password then we have a value as password then we have set [Music] password then we have our text button where we have passed forgot password and we have one another button [Music] where import button then we have button so we have imported the button then we have to pass the props that is text equal to sign in yeah done now it is looking good right and then for got password let us just style it so basically it is a text button so we have with 100% text line end and I have given a color and now in adding a h effect of primary color font W font size given and C would be pointer right so if you just going to log in it is looking perfect right now let's just see that we don't have any gapping right so yeah for that we have to manipulate the div basically so we have a div where we have added our style that is just Flex gap of 20 pixel and flex direction would be column right so that is how our thing is looking perfect now so sign up is completed I will just copy and paste that in sorry sign is sign in is complet I have pasted that in sign up and let's just change the name and add one extra field so first thing title and the span has changed create a new account please enter your details and then we have the text input one more that is basically name and set name right so perfect set name and in the button we have text sign up and forgot password we don't need now you can see that our sign in and sign up both are completed and it is looking perfect so for bigger screen also it will be looking good right so our sign in sign up is done now so this is completed right so moving to pages so yeah now moving to the next part so we will be creating a new component that is basically our cards right so cards the mostly used that will be you going to see that is course card right and we have one more card that is the video card that we will be showing right the multiple videos inside the course so I have created the two cards basically the course card and video card and then we have done the default reacting now we are going to build the course listing page right so yeah you pumped up I guess so yeah let's just start with course listing so the same thing that is we are going to do here is the container part then inside that container we will be having our products and set products equal to use State then we have 1 2 3 4 5 and after that this is basically the default thing to map our card I'm just putting the values now let's just get started with the style component right the same thing the container I will paste the same thing that we have in our homepage also the same thing right and inside that we will be having a our products sorry the courses and then inside this courses basically we will be having our card wrapper which will be wrapping all the cards right and after that inside this card wrapper we will be mapping our product so mapping means basically if you have an array of objects of or an array so that we map in JavaScript and we map our course card right our component so that it will be rendered multiple times the object you have inside the AR right so based on that so yeah now after that we have our container courses W one card wrapper so now let's just do that thing courses. map we have done and now if you reload let's just see in the courses so courses is not defined let us reload and see so you can see nothing is coming because we haven't given anything let us just put a high there and let's just refresh so you can see that uh high is coming I guess right yeah so I have imported all the things that are required in our course card so first thing we will be doing style component so the first would be the card that will be that we have to define basically then inside this card we will be having two section one is the top and the description or the details basically right so I have done that now let's just Define this style component so that it will be easy to understand we have card we have top and we have details right so yeah done now in the top we will be having our image so top we will be having our image that is basically a style. image and uh after that we will inside this details we will be having our title that is we provide some title then we have description so we have added some description about the course that is description and uh title description and we have our price section right so we will be having our price so inside this price we will be having three things one is the original price that will be displayed then we have the MRP basically the higher price and we have the discount right this discount percentage so like that we have the original then we have a span and then we have a percent where we will be showing the 50% off S like that right so yeah now let's just get started with uh adding these components we have titles we have description we have price and we have uh the span right and we have the percentage right so that is all now let's uh see how it looks so you can see the things are coming right and in image we don't have anything so first let us add one image so I will search in the Google uh image of any Cor and I will just copy the URL and I will just use it as SRC in the image right so yeah that's it basically we are done it will be in double quotes yeah done it will be inside two double yeah done perfect so now if you come back you can see the image is coming right so that is how basically we do the things so now let's just get started with the designing so in the card we will be having maximum Maxum WID of 250 pixel display Flex Flex Direction column Gap and then all those stuff and for smaller screen WID will be 170 pixel for of now right then in the top we have display Flex align item Center justify content Center position would be relative then border radius and transition right then we have image so const image equals to style. image with 100% perfect and uh let us give it 200 pixel for smaller screen I guess it looks good or if we remove the whole thing also let us change it to Max with of 250 now I guess it looks perfect right so we don't need for smaller screen yeah so with image is 100% for the image now coming back to border radius we have 6 pixel object cover transition all uh 0.3 second is out then we have uh what else we have our details so display would be Flex Flex Direction column padding would be 36 pixel and then in the title we have F size 16 pixel font weight 700 and color and in the description also we have all the things that are font weight font size color overflow and WID space node app so we are tapping it now in the price section we have the TT primary then we have a span then font weight perfect and I guess it looks good now so let us change the color to Green for the percentage now it is looking good right so for description just make it 14 pixel I guess it is looking nice now so done right perfect so it is done then after that um what we are going to have okay so we are done with this thing so yeah now in the menu section so we will be having our favorite and the cart option right so that we are going to Define in the menu so in the menu we have menu items so I have return that in the menu items we will be having our favorite rounded icon and we have one more menu item that is uh adding shopping cart right and we have given some SX property that is font size and color right so yeah now let's just uh have our rating part so we have one rating bar also so rate and then inside that we have rating for off now let's just give it a value of 3.5 and then we have SX with Fone size 14 Pixel Perfect now let's just Define this containers sorry the components so in the top after the top I will Define them top and image so I will write const menu is equals to style. div and we are having menu top sorry then we have menu menu items perfect on stop menu items and we have a rate right so yeah perfect so this is done so we have menu menu item and rate perfect so now you can see all the stuff are coming but not in a proper manner right so let's just style them so in the menu we have absolute so that it will be overlay in the top then Z index then color then top right and then display would be none in by default and place Direction column and a gap right so we need that in the hover part but for of now let's just uh remove this display none and let's just see how it looks so yeah perfect menu item is also looking good and in the rate it will be position absolute Z index 10 now it is looking perfect right and we have given some padding border radius background y display Flex alom Center so let us change this Gap to 12 pixel the Gap is not coming so why so so first let us add the hover effect because uh the display needs to be added as Flex so that it will be shown so the top I have added the hover effect background color with theme. primary and after that we will be having hover and then in the image I will set the opacity and over and menu I have set the display Flex right so by default for menu it will be display none if it is coming and also you can see the Gap is coming now perfectly right so that is how we are going to do it after that the next thing is the percentage is done so mostly our card is I guess uh completed pretty much so yeah our card section is completed now the next thing that is we are going to start is designing the co listing page right so first we have the container so I have given the style of this container the same thing that we have in all the pages right then after that we have the courses which will be having a padding overflow and height with me with and overflow Y and height right perfect so we have the courses and then we have the card wrapper in the card wrapper we have display Flex Flex W WAP Gap 24 pixel Justus by content Center and GAP and Max with perfect so yeah done now after this the next thing that we are having is co video card so in this uh we have our course uh details so now in this Details page we will be having our description of the card sorry the course and then we will be having our video cards so we have the same thing the container at the root then we will be importing our style components and after that we will be defining const container equals to style do div style it will be style. div perfect and uh then we are going to have inside this div inside this div we are having our padding of 20 pixel 30 pixel padding bottom then height and overflow y display Flex Flex station column Al Center and the Gap right perfect so that's done now in the course we have our card for this we have to link this card because this card will be taking us to the details page right so for that this card needs to be uh having and uh so we are not going to do that in the card we will do that in the details part not on the image if someone clicks on this details he will be or she will be redirected to the course Details page right so I will write the simple onclick method so on click I will call navigate so this navigate is basically from react rou Dom that we be using use navigate and here will be navigated to slash courses SL ID for of now I given ID but we will be have to change it dynamically with the course ID so let us just import the use navigate so const navigate equals to use navigate perfect so after that this is done course details course na navigation and all those stuff are done then after this uh yeah coming back to the course Details page first we will be having our top section having the details of the course and then we have video cards right so in the top section we will be having our image that is basically having an SRC and inside these details we will be having title say react JS code complete guide on the react JS Force then we have our description we have our tags say tag one tag 2 three we can have multiple tags also and at the end we have our episodes so in the episodes we have topic say all videos and we have our episodes rapper where we will be having our episode cards or you can say course video cards right so that is basically how you first structure the whole thing and then we just add the CSS or The Styling part right so it makes it simpler using the style components I guess for beginners so yeah now let's just Define the top and then just copy paste and then just change the names so we have top then image then we have details then we have title we have description we have tags and uh tag right so this is done then we have other things like episode then we have our episode rapper then we have what else episodes rapper will be later and uh I don't think anything is left topic is left so topic I have added so that is pretty much now if you refresh the thing you will don't see any error it is coming perfectly so now let's just add the CSS part right so let us copy this image and I will just use the same for here also and yeah now let's just St it it perfectly you can see the image is coming perfectly right so in the top it would be display Flex Flex Direction row gap of 20 pixel then media Max with 768 and that stuff after that so yeah after that we will be having our image withd of 250 border radius of six if you click you will see then background color then object fit cover and uh now it is looking perfect I guess so with of 350 pixel and Border radius and background color and object fit cover right then we have our details where display would be Flex Flex direction would be column gap of 10 pixel with of 100% then we have call stle also style. div then display would be Flex justify content say space between description would be font size 14 pixel and the things are I guess pretty much good font size font weight good right so so after that we have font size of 22 Pixel Perfect it's looking perfect 26 pixel is looking perfect I guess then we have tags right so in the tags we have display Flex Flex Direction grow Gap and flex w w will be wrapping all the things after that we have our tag single tag having a background color normal color padding border radius and font size perfect it looking perfect now now the next thing that we are having here is the episode so it will be having display Flex Flex Direction column and a gap and then we have topic where color font size font weight display just by content and align atem Center these are given then we are having episode wrapper where all the episodes are going to be wrapped right so all videos you can see so perfect right so it is looking good then after that we will be having our course video card done so then we can see that thing right so it will be having the style components we have imported that thing then after that we will be having the card I guess and yeah now after this card inside this we will be having one image and the details so image container will be containing image and play icon kind of stuff so play circle outline icon let's just import this one and uh what else so yeah that only in the image container and we will be having the side part that is details where we will be having our title say episode one then we will be having description so that is episode one description something you can add I'm just adding random text so perfect so in the image you can copy that thing here also but let us first Define this components so const card equals to style. dev then we have image container then we have image that is style. image then we have details that is on title we have our description and uh what else description I have added play circle outline icon is also done so I have just imported that thing play circle outline let us refresh and see so now you can see that the things are coming but the image is not present so I will just copy and paste this SRC the same manner perfect perfect right now in the C we will be having display Flex Flex Direction row gap of 20 pixel align item Center padding border radius background color and cursor right and on the hover effect also we will be adding some effect right so now you can see the card is looking perfect for smaller screen just change the direction and align items Flex start we can say now in the image container having a width of 100 pixel height of 100 pixel and sorry not in the image container in the image it will be having with height 100 pixel border radius background color object just remove the height having only the width is better I guess and say give it 200 pixel now it looks good or 180 would also work right perfect then after this we have our details so display is flex Flex Direction column we have one Gap and withd of 100% then we have our title font size 18 pixel font weight color width dis flex and all the this stuff perfect then in the image container we will be giving position relative and this stuff so now it is looking I guess pretty much good so in the play ciruit outline we have to add the inline style so I have added position would be absolute so I want that in top then I have given top left and color white and width and height of 50 pixel by 50 pixel top let us just give it 50 pixel and left let us just 50 pixel or you can do it 60 also not 60 we have to reduce it say 25 yeah it looks good now and left let's just add it 60 yeah now it looks good perfect so for bigger screen let us just refresh and see so I guess it is looking good but something is overlapping let's just see why so in the card I have given width of say 100% still it is not working let's see why okay so in the image container we have with height okay so in the image container we have with of 180 we have to do that and height you can give 100 also or you can remove that one just remove it simply so yeah now it is looking perfect as we wanted right so this is done so now in the course detail our course video card is ready so what you can do so in the PO d [Music] ta we will be having a WID of 100% but it is not looking good I guess so let us just give it a with of 8 and check it's not looking that good but uh if we give it 30 not working right so just uh leave it as it is yeah this is looking good I guess yeah done so our course uh Details page is also done just give it a thumbs up if you're liking this video our homepage is done course detail is done authentication is done now we are left out with our checkout and the user dashboard right okay [Music] so the next thing yeah so if you click on on shopping cart outline you will be redirected to so we are going to use navigate we are going to just navigate to the card page for of now we will be implementing the functionality later where your item will be added in the cart so yeah for of now just we are going to the card page so let's just Define this card check out or card page basically so yeah so same thing the style component after that uh we will be having our [Music] container so container and inside that we have a section where we will be having our two section in the container one would be the left and right so first we have our title that is your shopping cart you can say or your course cart you can say anything you want right so that is basically the title of the section then we have a wrapper inside that I guess uh we will be having one section itself because left and right we will be adding inside the wrapper so yeah wrapper will be having left and right now in the left we will be adding table so table will be having table item product that is course and we will be having multiple codes sorry the codes price and all the stuff so we have price we have the sub total and the last one would be mty basically and then we will just copy paste this table again for using our basically when we have our cart items right so we will be mapping using this table itself then after that in right section what we have here is subtotal now in the subtotal we will be having subtotal say R 500 kind of thing we are taking then we will be having after this subtotal we will be [Music] having top right perfect so yeah now uh we have payment so in the sub total we have uh after that we have payment in the payment we have payment details basically now in this payment details we will be having a div having a text uh input basically perfect right so we have payment then we have text input and then we have button in this button we will be having our finalized button where we place our order now let's just uh create the style components because the structure is pretty much done right so first thing the container that we have and then after that I will copy paste this one let's change the name to section then we have our title then we have our rapper then we have our left and right so left after that inside left we have our table we have table item then adding some more we have a right we have subtotal we have our payment I guess yeah and the text input payment itself text input will be coming from the component that we already have right so I have imported that thing text input and button we have imported uh one delete outline icon which will be required so yeah pretty much done let us uh just try to see that we have our text input perfect do do/ component SL text input perfect so yeah that's it I guess now text inputs let us see it is giving some problem I guess so yeah now that it is done the spelling was mistaken so yeah so we have text input and button now now you can see it is coming right on the page so yeah let's get started with the styling so padding 20 pixel 30 pixel padding bottom I have added something more then we have height of 100% then overflow and flex Direction and GAP and a padding of 20 pixel x 12 pixel then we have a section which have its width of 100% then Max width then display Flex Flex Direction column font size and a gap of 28 Pixel Perfect then what else do we need I will be aligning this items in the center then we have wrapper display Flex gap of 32 with of 100% padding of 12 pixel Flex direction is column and in the left we have Flex One display Flex Flex Direction column gap of 12 Pixel Perfect and then we have Flex of 1.2 so in the table we have font size of 16 pixel display is flex align item Center gap of 30 pixel and L of same then we have con stable item also that is style. div we have Flex Flex X1 font bold and font 600 font size 18 Pixel Perfect then we have con to WR style. DD and then subtotal the same thing font size font WD display the same CSS we are using as you can see and you can customize accordingly you want perfect then we have payment so now you can see it is looking pretty much perfect let's just add this button perfectly so we will add small parameter in the button and in the text input also small and then in the placeholder just add card number first thing then in we will be having our expired date and CVV so in the display Flex mode so I have added a div and in the first div just add a display flex and we will be adding a gap of 6 pixel then we will be having our same thing pasted inside this one because we want this uh side by side so yeah perfect is looking perfect now so let us in in bigger screen yeah now it is looking perfect okay so instead of small you can just remove this small that also looks nice I guess so yeah in this side you will be having all the course listed that is in your cart perfect now let's add one by default so that we can see it so in the table now we will be having uh our table item having Flex display uh it will be I am passing a prop Flex so that it will be flexed to full then we have inside this table item we have our course that is having image SRC then we have details so I will pass title and in this title I will pass reactjs course and then we have description perfect and then we are removing this thing we don't need that one that quantity uh so yeah so in the first item we have done the table item first one then in the second table item we will be having say rupes 4.99 then another one that is table item delete outline SX equals to color red perfect so this one would be course title not simple title so it is looking because we already have one title defined right so this is course title and course description perfect so yeah now moving back we have cons Co equals to style. div some problem is there but yeah let's just have this thing so we have our details then our course title and course description right so that is basically the course thing that will be present so yeah in the details we have one image also so I added that one let's just change this div name to image image right perfect then after this uh what else do we need yeah in the course we will be adding display flex and gap of 16 pixel in the image I will add height of 80 pixel then we have a course title a color theme. primary font size 16 pixel font weight 500 course description we will be having phone size of 14 pixel font weight 400 then color overflow text overflow white space perfect rest of the things are same right so yeah now in the table items we have bold and flex then I will add bold bold because these are the headings right so you can see how it is coming perfectly what else do we need everything is perfect I guess let me see this the price is coming little bit um right Centric I guess it it will work right for me so yeah you can also customize this if you want so I will just copy paste this image and let's just see now you can see it is looking perfect now right so yeah that is basically done our homepage is done our course page is done our uh cart page is done basically so many of the pages we have completed so give it a thumbs up if you are liking this video right so yeah now the coming to the next part and the last part in the front cont I guess that is our user dashboard right where our courses will be listed and our profile will be displayed right the courses that we take so yeah in the user dashboard we will be having our profile container the root one or you can also just give it a container that we have by default and all then inside that we will be having our user details part so first would be user details and the coures so in the user details first would be a profile Avatar inside that we will be having one Avatar so that is Avatar and what else so yeah profile Avatar and we have a profile container that is profile name so I have given the profile name is of Chanda I am adding profile email so rar@gmail.com [Music] then we have our courses container so in this course container uh we will be having our topic and then in the topic you will be having say your courses you can see your courses or you can say what else you can say your courses would be better I guess right that you have buyed so then inside that we will be having our uh courses rapper or say courses which is basically rapper course rapper then inside that we will be having our course card C card right so we will be doing the same mapping part that we did in the course listing basically so yeah that's it basically our structure is done now let's just Define them so I will import the course card first of all import course card from dot slash do do slash component SL card SL course card perfect now let us Define the style components so first let us import style components so I have imported style from style components then after that we have cons container equals to styled. div then I will just paste it just change the name to user details then we have profile Avatar profile Avatar then we have profile container then we have profile name email profile email perfect then we have our uh courses container then we have our topic and what else do we need so courses rapper I guess perfect so done so I have course card yeah rest of the things are good I guess perfect right so now what do we need padding of 20 pixel by 30 pixel padding bottom I have added then I have added the height overflow y scroll display would be flex and uh rest of the things are good gap of 120 pixel media Max width of 76 68 pixel with the will be fit content rest of the things are pretty much same that we are done right so now our let us move into that page profile page and let's just see so yeah so now in the profile Avatar what change can we do so yeah in the profile AAR we have a padding left of three them then we have Max with of that thing and then in the profile container we have plx direction of column justify content Center and align item Center then in the profile name we have font size font weight and the color right then we have profile email also so there we pass our color basically blue color and then we have font size and font F when in the course container we have display Flex Flex Direction column justify content we have Flex start we have a box we have background color we have theme. BG we have B radius of 10 pixel padding of 20 pixel by 30 pixel topic a color font size we have 24 pixel font WID 540 display would be Flex justify content Center space between align item Center then we have our Flex wrapper and the Gap rest is pretty much good I guess so yeah after this H what do we need need next Avatar we have SX height of 165 width of 165 on size 24 if we do Local Host profile let's just see okay it is not the display Flex is not coming I guess so in the user details why it's not coming let's just see that in the profile container if we remove nothing is [Music] happening I have Flex direction of row if we reload this one now okay we haven't added the colon basically inlex now it is coming perfect right so let's just undo this thing so it was having justify container Center and uh what else we have aine item Center okay I was doing in profile container basically but we need to change in the uh user details so just let us add just align item Center and it will be centered perfect right now it is looking good and your courses is also coming now I guess it is done pretty much so yeah that is pretty much about our front end and we have all the stuff done now we will be implementing the back end now the search page and other page that you have to do is by on your own because it is a homework kind of thing also you can see my other videos also for there you can check the pages right so I want to make this one for beginner friendly course so I am not showing that things but we will be creating our API right so first of all let's start with making our API so I have right written in the mkd server so we are getting in the server then inside that basically we have to create our server backend code so we need to create a directory server so let us see where it is okay I have made a mistake the server let's just ignore this one so yeah just do CD dot now in the you are inside code Demi folder then just create a uh directed server right so folder and then just do npm in it so it will initialize your node repository and create a package just okay so it has made it outside only first thing is uh you need to install this things I will just paste it and just hit enter so we have made a mistake right so we need to do CD server and then inside that we have to add this thing but I'm making the mistake package.json is initialized outside the server we need to do it inside right so let's just uh let's just turn off this one you can hitr C I have made this mistake sorry for the mistake inside server you can see nothing is there right so let's just delete this package or Json from here and inside the server we need to do that thing just hit contrl C and then do npm in it in the server and just do default things and now then uh paste that code and it will be installing now all the dependencies that I have added right that is basically mongodb no demon then bcrypt c. EnV Etc right now first thing that you have to do in the server is creating a index.js file which is the main file which is going to be run inside the server site right when we are going to uh do that thing so yeah so create a file the next thing where we have mongod URL and W mongodb URL you can create a new mongodb Atlas uh account and then you can get the EnV from that also that I'm also not going deep inside that so next thing that is index.js file where we just import all the dependencies that is Express EnV C and mongus then we configure our EnV so I have just written env. config after that what else do we have m after that we have a package.json [Music] so in the script we have to add that start nodon index.js so it will start our nodon index.js file then in we have to add a type of module so that we can add UT or else we have to add required basically so after this EnV is configured you can see that if you hit npm start it is starting our application so let's define our app basically that is our server so first I will write con app equals to express then we will be having that is app. use course where we have our course then we write app.use that is express. Json where we have a limit of say 50 mb then we have app.use express. URL encoded that is extended true then we have cons St start server equal to asynchronous function where we will be having try and Cat block so I have added try inside this try we will be having a catch also and in this catch we will be passing the eror block where if any eror occurs we will just pass that one so in the start server it is a function basically as synchronous function let us just see so Y is not missing there so just type y as synchronous function now there has gone so in the start server we will do is we will listen on the port that is say 8080 also you can Implement that through EnV file but I'm doing just manually because this is a test server so yeah app. listen 8080 and once it is successful then just uh print in the console that server has started that port 8080 right and after that uh let me just see in the error just write console.log error so it will just print the error and let us just restart so yeah it is not coming because we have to call this function so I've have called this function a start server now you can see that it is showing server started at 8080 perfect now the next thing that we have to do is we have to create a connection of the mongod database right so we will be doing cons mongod DB equals to uh basically connect DB we have this function and then inside this we will be having do set that is strict query is true then we have doc connect process. env. mongodb URL this is the URL that will be coming from EnV file and it will then create a connection with our database and if it is successful we will just print that connected to mongod DV and if it is not we will just SA able to connect to the server then we will just call this function before The app. Liston right so now you can see that server started at port 8080 and connected to mongodb coming perfectly right so now you have successfully configured your server and now we are going to implement the three or four main parts where the back end is being divided first would be controller then we have routes then we have our middle words or you can say our models which is the most important so models and at the end we have a middle words so I will do that later I guess so yeah coming back to models first thing we have to build is uh in the let us just add the middle word also so yeah now it is structured perfectly so yeah now in the models uh now in this four things that are most important where we structure the stuff now in the models we will be having two models right one is the user who will be logging in and the stuff and one will be the basically the courses that are present right so let's just create the model course. JS and we have user.js right the two models perfectly done now the next thing we are going to import mongos from mongos then write const course schema equal to new mongus this is how basically we Define our schema right so yeah new mongos do schema where we have our title now we have to give our type that is basically string that is required or not so I will I required the right title is required so I will just give it title required true type is string then we have our description basically of the course so these are basically the schema and how you structure it so in the description we have type string we have next thing is required is true perfect and we have image in the image we will be having type string default is null we have rating that is type number and default is null and what else H we will be having tags also which is an AR of string right it is AR of string you have to remember this thing if you want to declare something in add so like this you have to define the type right then after this uh what else tags are done rating is done image is done then we have our price also so in the price we will be having original that is type number required is true then we have MRP where type is number required is true then we have off that is type number required false we don't require it and Bea also default is zero right perfect price structure is also done then we have our duration of the course so it is a type of string you can give anything right so yeah that's it I guess and now the most important we have videos linked in each of the courses right so we have videos then we have type in this type we have array of uh object where we have title that is having a type of string required true then we have description that is type string required true and the last thing is link basically the link of the video right so that is how we are structuring we have videos which is an array of object having each videos right so perfect we require this time stamp when it has been created so I will just simply add a time stamp true and it will be adding that thing so our core schema is completed this is how the schema looks like basically now I will just export this one so export default do model and we have our course thing so this uh model is going to be named as course right and we passed the course schema now I will copy the same thing for user and just change some of the few of the things first one the model name will be user so I have just written in the model that is user then what else C schema we have user schema user schema is done now in the new mongos do schema we have a title uh we can say name then just copy cut it name is required unique is not required name is not unique then we have email required true and it must be unique so I have given the props unique true then we have password that is typ string requir true then we have favorites where we have the reference courses because basically area of links sorry the IDS and then we remove this all the stuff so we have our cart the same thing that we have in favorites and also the purchased one the same thing the schema right so now course and user schemas are done now we are going to move into the next part right that is our controllers basically so let's just see that one so now we will be creating a creating the controllers we will be having the same the true two controllers one is co. JS and the user.js controllers will be having the functions basically through which we will be connecting to a backend uh database and we will be manipulating the things and getting so I have imported all the stuff that are required bcrypt is for encrypting and hashing the password jwd token. EnV user and course model right so now let's just create our first sign up uh controller right so we will be having a synchronous function which will be having request response and next so we will be adding a TR catch block and then in the cat we will be passing the error as next ER then we will be taking email password and name from our body and we will be checking that if existing user is present that is by user. fine1 and we are checking that if user email is already registered in our database so we are checking that then we will be passing an error that his email is already in use right so let's create error. JS file where it will be handling our errors so you can just use this one create error function having status and message that is basically creating our error right so you can just use that one now after this what we will do here is we will be salting our password so b. gen salt sync 10 and then we have hashed password that is bp. hasing password and Sal right then we have cons user equals to new user then we have name email password is hashed password then we will be having cons created user equals to await user. saave and then we will be having our token that will be exped ing in 9999 years then we will be returning that thing right as raise. status perfect now the next thing that we are going to do here is calling a signin function that is email and password perfect the same thing for sign in now we don't need to check existing user yeah we need to check existing user but in this case if user is not present then we will found send that user not found with this email address if someone tries to log in now we need don't need this thing just we need that is password correct where we are checking that bp. compare we will be comparing the password and uh the hash password right and if the password doesn't match we will send incorrect password now instead of creating a new user and saving that what we will do here is we will generate a token that is jw. sign with user ID and just we will be send creating a new token so that jwd token so user can be stay logged in right so now just change that name to user instead of existing user and rest of the things are same so now we have completed the two uh controllers right for sign up and sign in basically right now the next thing is coming back to the course we will be having the same things imported now in this what we are going to do here is having the controller for adding new course so you can add as an admin also you can say so yeah that is here present that is con uh add course then we will adding we will be adding try and catch block where we will be having our next eror and course info will be coming from our body but instead of course info just replace it with the things that are needed that is title description image tags price decoration videos right and then I will create a new course and then once it is done I will be saving that one that is created course right and then simply we will pass that course added successfully and created course so in the response you will be getting created course right so that is done so so simple the back end is right so yeah that is done so our new course has been created like this so add course is done now after this the next controller what we are going to have let's just see so we will be having that get course right so we need to get the courses so we will be adding the same try and catch block and we will be passing next eror just copy and paste the same thing now in the try block uh we will be having user JWT so request. user then we have con user equals to A user. find by ID that is user jw. ID right and if user is not present just we will we will be returning next and creating an error but instead of that in get course what we will do here is we will be adding a search functionality where we are getting the filters and we will be match ing the regx right reg expression with the title and the description if someone searches right but if it don't search then we will pass all the courses basically right so we have done that one that we are finding with filters or we will be passing the courses and then in the response we will be passing the courses that we are found right so uh using this only you can add the search functionality in the front end part right same API call after that coming back to the users first thing would be uh cart right so you adding the courses in the cart so that controller we are going to build so we will be doing the same thing we will be taking the ID as the parameter right from the params so the course ID we have to take right and then in the catch we will be doing the same thing that is passing the next error right now we will be having our JWT we need to verify that if user already exist uh means he is logged in then only we can add it to his card right so for that we need to get the user and then we are checking that if the thing is already present in your cart right so in that case we will be saying that course already in cart and if not then we will be pushing that right the ID we will be pushing we are taking the ID of the course and pushing that to the user database where we have our cart right so we have done that and then we will be simply giving a message that added to cart the same process we will be adding remove from card right in the remove from card same thing try catch Block in all the controllers we follow the same thing right the TR catch block and after that inside that we will be taking the ID the same way we are verifying if user exist then we will be checking that if the item is in the card that is product Index right we are checking that if the item is already present in the cart or not so if not found uh so say product index not equal to equal to minus1 we are doing what we are deleting that one right so that means that if it is present we are removing that one so I have done spice splice so and we are saving that and we are sending a message that product is removed from your card and else we are passing a message that if it is not found in your card that it is not found right so the same way so our add to cart and delete to cart is done now the next thing that here is get all cart items right we need to see all the cart items so for that we will be doing the thing so the same try catch block with the error message and then then we will be passing the next eror and uh what else in the tri block we will be having like the same verification if user exist we will be getting the user and then we will be populating users card right basically we have the field right in the use attribute in the user schema so we are just populating so we have given a path that is card and then we have to pass the model and whatever things we need like title description tag rating price image right so that we are taking right so we have done that thing so we are populating it and then we are returning the card items then we have to do favorites so in the same manner that we did for cart the favorite is also the same thing so try Gat block and after that we are verifying the co like the user if it is present then we are checking that if the course ID is already present in user if not it is not present then we are adding it and if it is done then we are just course added to favorite done then we are adding the remove also so remove from favorite the same try cat block the same thing like the card that we did we will be doing the same thing right create the next eror and in the try we will check that if the item is in the favorite or not and then we will remove that one right so first we will verify the user getting the user the course ID from the body and the user JWT then we are checking that if it is present then we will be just uh deleting that one and then then we will be saving and in the response I will pass that course remove from your favorite successfully right perfectly done right so favorite is also done what else so yeah getting all the favorite right so that we have to do so now the same manner that we did we will be doing that get user favorites try cat block with the error and then in the triy block we will be having user id request. user. id we will be doing const user equals to await user. find by ID we are getting user ID we populating the favorite and populating the purchased right all the stuff and then we are checking that if uh the course ID is matched we are deleting and rest of the things are same so that is how you will be getting the favorites also so you you can use this apis now one thing is left is purchase right if user purchase so we have to add that course ID also in your in the user right so the same TR catch block we are checking the course ID we are finding that if course is already present that if the course is valid or not the ID then we are checking that uh user is present or not then we will be checking that if it is all not included in user so I will just push the course ID and then we will just pass the message that course added or course first successfully perfect now the next thing is uh getting the purchased items right so I have added a try cat block the user JWT and the same way we will be populating the model would be course right and after that uh let us see yeah so we will be having purchased item we will be getting that from user and just pass it right so this is done just we are commenting that for buying courses then these are for favorites and the first one is for cart right so this is basically how we can categorize now our controllers are done now we have to Define our routes and middle wires are right so let's define this route so routes also we will be having two things that is CES route so I will write c. JS and we have user route right so user.js perfect now in the user dot JS we will be importing all those stuff that are the controllers and then what we will do here is we will Define our router that is express. router now then for do router. poost for registering or you can do sign up also instead of register let us remove this one so user login user register so this is this will be sign in and sign up right instead of login and this so yeah delete this one change the path to register instead of that we will be using sign up and uh we will be calling this method that is sign up and sign in right so that is how simple you can create your routes basically so after that we will be having export default router so this will be exporting the router by default right and now we need to create a middleware that is verify token so I will just create a verify token. JS file where we need to uh decode the JWT and get the user ID basically from that right so in this we will be importing create error and then we have a function or a controller that is verifi token same try catch block and passing the error right the same way now in this triy block we will be checking the header the request header where I will check if authorization is not done you it will pass you are not authenticated and now it will take the token and then split it that is be token and then it will decode it one using the jw. verify token and uh it will decode the user right basically and it will pass that one so basically in the JWT we are creating the token JWT with the user ID and in uh description that is verify token we are doing that and now to verify we have to pass that in the middle word so for adding card and removing card and get card favorite card we have to pass that verify token on all because it's a middleware right so it will be getting uh called First and after that if it is successful it will call the add to cart or all these controllers that we have done so in the course uh we will be having the same router kind of thing with the router we have defined then we have the post get and delete method for adding course getting and deleting right so yeah that's all what we need now all the things are done let us see in the index.js now we have to define those routes right basically so that we can call our API so I have imported user routes and course route done and now we have to define the that thing the routes so here I will be defining the error Handler first so app.use it will be using error Handler which will be used to handle those errors right and after that we will be using app.use that/ API SL user then it will be calling user routes so for user we will be having our URL then SL API SL uh user and then we have all those routes that we have defined now there is some problem I guess so in the Imports it will be user dot uh let us just change this one dot SL rout user.js and/ course. JS now I guess it is fixed still it is crashing some of the errors are still left let's just see so let I have opened the postman but before that let us just see where theor is okay so in the user.js routes we have the problem let us just import it again controller SL user.js and verify token still error has not gone let's just restart and see verify token we have some issues I guess it is exported let us just reimport this one so it will be dot dot slash middle w/ verify token now I guess the error should be gone okay still the error is coming so okay now in the courses we will be having middle paes okay there was a spelling type of mistake basically so for that reason the was coming so what else errors do we have in the user we have dot dot SL models SL user.js and dot do/ models SL courses. JS what else we have Mongol error was there was some error yeah we have reimported that one what error else the error we have let's just fix this let's fix all the Imports basically it might be like I have pasted that so the errors are coming okay in the Middle where Also let's import the error delete course okay we haven't had any delete course right so for that the was [Music] there what else okay this route we don't need we have deleted that yeah now you can see that errors are gone and it is showing to be connected right now let us just add one user and just see that our API is working or not I will just log into my post man and just copy paste this one and then I will add sign up and sign up right yeah perfect sign up a AP user sign up then we will be adding our Json body having our name I will give my name I will give my email and I will give a password you can give test at 1 2 3 4 5 and now you can see that our user is been created and token is generated that is how basically uh our sign up is working but some error has came so okay in the catch you have to pass the error I guess yeah one thing in the index.js so what you have to do import create eror now you can see email already news but it is not coming in a format so just cut this and paste it before the error Handler now you can see it is coming perfectly right the success message status and message right so yeah user can login user can sign up so basically all our apis are going to work I guess so yeah now I that's the time for implementing the back end with our front and right so all our things are done in the back end let's just start so let us create one course or get one and see so in the index it would be get method you are not authenticated so in the course we have to remove this verifi token because a course can be seen by anyone right so you can see one course is being passed right so yeah basically our courses are coming perfectly so this thing is done now let us just implement this in our front end part right which is the interesting part so yeah so we have created one folder API under SRC in our client and then we have index.js file where we are importing xos and then we have defined our const API equal to x. create Local Host 880 API right then we have defined our function that is user sign up and user sign in where it is calling this API basically using exos and and posting with the URL and the data right basically that so data is basically what we will be passing in our body Json body right so that is thing now get all courses and in the similar way we will be defining all the routes basically that are needed so get cut then we will be having so you can see that uh the authorization token is passed in this manner headers then authorization be token right so then get cut add to cart delete from cart then we have our favorites so we will be having the same thing just the URL will be changed right so get favorite then we have add to favorite and finally we have our delete from favorite right and then we have our part buying options the buying apis basically so we will be having we need to change the API names H the routes are little bit different that I have [Music] defined remove from favorite it will be add get favorite and add to favorite and uh for cards okay so for placing order it will be user. purchase and then data and getting orders it will be like user SL get purchased perfect and getting orders let's change it to get all get courses get ordered courses perfect right now it is perfect and for cart you need to change this names we will do that later while implementing so yeah Now API is done now let us set up our Redux part right because for State Management we need Redux right so in Redux we will be having our store so I have written store.js and we will be having reducers right so we will be having two reducers for of now one is for user and is for snack bar purpose right so in the reducer we have the slice that is uh snack bar slice or user slice right so yeah now in the user slice we will be having create slice that is initial State and then we will be exporting that as const user slice create slice name as user and initial State we have to pass that we have defined that current user is null and reducers are the functions that will be present so for login success function we have state and action where we are setting the state that is current user to action. payload and location would be saved as Cod a app right so for log out also we are just removing that one from local storage and that thing and updating that we are just simply updating the user details now in the snack bar we have the same kind of thing I got I think you have understood how the reducers are working so we have initial state in the snack bar SLI we have reducer function where we have say open snack bar where the state is my true message and sority then we have close s just state that open as false and we are importing this function so all the reders basically perfect now the next thing that we are having yeah is a store.js right now we need to store the things right so for that we need all this configuration from Redux you can just import them and after that we have a persist config where we have to pass key as root version and storage then we have root reducer where we have user and snag bar then this user and snag slid are present right so y root reducer then we have to do persisted reducer where we do persist reducer equal to and then we will be passing our reducer then we have a middle we where we have ignorable actions say flush rehydrate and all those stuff not necessary to know all those stuff you can go in the documentation and see now we have done with our Redux setup now let's just configure that in the root so that we can use our Redux so in the root we will be having our provider first inside that we will be having our pursed gate right and in the pursed gate we will be having our app so in the provider we will be passing our store store equals to store then we have persist G that is persisted equals to persisted perfect right uh just hit a like button if you're liking the video so don't forget to subscribe GS for GS Channel also right so yeah the next thing after this is what else do we have yeah implementing this one right sign in sign up first thing we let us do the sign in sign up so we have a dispatch method so use dispatch basically coming from react Redux right dispatch is used basically whenever we call in a reducer right so that it will update globally all the states so yeah so dispatch is defined then we have button loading so I will simply set the button loading then we have validate inputs so validate inputs are basically we will be checking that if all are present else we will be passing as null then we have our text input put as value email password now just pass the password so that toggle icon will be present right so yeah non we have used uh is loading and is disabl and whenever we click on this button sign in it will be calling a function handle sign in let's define this handle signing so handle signing we have defined the function as synchronous function we have to do so first is we will be defining set button loading and set button disabled as true so user can't click and reloading will be shown and then we will be calling validating inputs so it will validate the inputs let us make it as sync yeah so it will validate the input if it is true then only it will call the API that is user sign in right that we have defined in our API index.js then once it is done it will pass the user email password and it will dispatch as login success and it will set raise. data in the Redux State Management and if it is giving some error it will catch it and it will just dispatch a snack bar and said the loading as false right so that is basically how it works let's do a sign in and see so if we do our email and password password let's just check in the network you can go and see that um yeah token is coming right so that means our login is successful so this is perfect the API is calling perfectly but now what we have to do here is sign up right we have we will doing the same thing right in the sign up also we will validate the thing then we have the sign up function from our API dispatch SNB s and redu slice rate so we have defined the loading and button disabled as the two states then we have validate inputs where we have name email password then we will be having the props that is set open o right and uh handle signup function where we have the same thing that we had in signin method and in the text input we have password perfect then button we have on click handle sign up and the [Music] app.js m yeah we will be having current user as a selector and that one that is open message right so in open that is coming from the Redux State Management so if it is open we will show the toast message now let's just import the toast message that I have already provided in the Drive Link you can use that one right so it will be imported from dot dot SL component SL toast message perfect I guess [Music] then we have to pass our current user also in our nav bar basically so that we can check if user is present then we will be showing that now in the login also we have to pass set open o uh in our sign in and sign up basically whenever user is signed up we need to close the stuff right so for that reason we will be passing set open not and now in the sign in we will be using that sign in we will be taking set open o and we will just do set open o as false right so it will close the uh dialogue for login and sign up right and current user will be shown so that is done in the nav bar so toast message is giving some error let's just see okay it is exported by default so just remove the curly Braes now I guess it is perfect so yeah now just let's just log in and just see if it works perfectly or not I will give my email address email address I have provided I have to provide the [Music] password yeah so in the nav bar now we have a current user also that we we have already implemented while checking that one so current user. name and all the stuff will be shown right so if we log in we can see that what else if I miss something let's just see so yeah in the current user uh we are checking that current user uh if current user is present then we will be showing this button if it is not present and if is present then we will be showing that naving for favorites and all those stuff shopping cart outline right yeah and Avatar and a text button for logging out right so that is basically what we wanted so we will just simply call dispatch log out so text button let us import uh let us just create create a text button so I will Define first of all dispatch cons dispatch equal to use dispatch and then we have a text button basically we have a text button yeah so you can just uh copy the CSS that I have done basically the same thing that we have in the forgot password perfect now you can see that log out is also coming and user is logged in right so yeah that is basically how you manage your States and now the next thing is basically the course listing the pages basically right so course listing pages will be calling the get all course API right so for that I will write cons get all courses which will be as synchronous function where we will be having a await method and we will just call the API uh we have get all course so I will get all codes and just import that one from API and then we will be uh we don't need to pass anything and then we will call a then method and the response we will be taking and in the response we will set this as the course right so set course response. data perfect and in the use State uh by default remove all the things the numbers and we will have a loading basically so that we can check if it is loading or not and then use effect we will be calling this function right whenever the page is being loaded so use effect Hook is used for that only whenever the page loads the use effect functions are called so we will pass mty ARR because we need only once when the page loads then we have a loading that is a circular progress and if it is not loading we will show the courses right the course rapper and now what we have mapped we have to pass that in our course card so I will write simply course equal to to course so that we can use this props in our course card and just simply show the image and all those stuff so now in the course you can see one is one item is present right that is fetched from the API itself so now let's just go into the course card and uh let us just modify the thing so what we have to modify in the course card the first thing is the image right so long image SRC was provided so let's just remove that one SRC we will be passing image SRC we have course card course card having title description and all the stuff so in the image SRC we will pass codes. image so we are adding a question mark that for if some case it is not present then it should not throw any error right so we have codes. image codes do rating then codes. title codes. description what else do we have then price so R course. image like price do original price then we have the price. MRP and the discount right so it will be course price. off percentage off now it is coming perfect the image was not there that is not coming right so yeah so this is done I guess and now when we click on this it should navigate us to the details page with the perfect ID so we will be just simply adding course sl. let's just see if you click it is it is taking us to undefined okay it would be underscore ID not simple ID underscore ID now if you just reload and see yeah it is taking us to the perfect ID right so that is done now the next thing that we are going to do here is adding the card functionality right so in the details page we want to add that thing so in the user dashboard first let us complete the user dashboard which will be easy so we are having current user we will be just copying and pasting that from our app.js and we will be importing the use selector and now instead of profile name uh just pass current user if present then name the same way current user. email right and uh cons are of courses selected set courses equals to use State we'll be having courses. map we will map this to course card right so course and course will be course we are passing the same way what we did in the uh course listing page right the same manner we have done that one and we will call this API in the user dashboard for getting all the CES that are of user right so user effect we have imported inad of get all CES we will be just changing that to what was the name get ordered course right ordered courses and just Define the loading set loading perfect use State false true then we will be at that loading there so if it is loading we will be showing a circular progress bar and done perfect right so this is done now what's next so we have the favorite and add to card and all this stuff right so for that we have to add that in our card right for adding to card or favorite right so yeah let's just first of all Define the [Music] what to Define first yeah Define the use states that is favorite and set favor it and favorite loading and set favorite loading and use State false right that is basically by default and adding a dispatch right so yeah after that uh we will be having a function that is add to add favor it the same way we have to pass the let's see what we have to pass in the favorite so in the favorite uh we have to pass the course ID so I will change it to course ID and course uncore ID and then open snag bar let's just import the open snag bar I will just import this here open snag bar it will be having dot dot slash I guess one more yeah store reducer then snack part perfect so yeah now our course here is also done course card so that is for adding to favorite the same with the API call and handling it with the errors just for removing the favorites we will be having that the API name is delete from favorite so just do that delete from favorite just import yeah perfect what else do we need add to favorite perfect delete from favorite add to favorite course ID will be present and that will be course now we have to check also but before that should we do the cart yeah adding the cart so in the cart the method was add to cart the same way we need to pass the ID course ID and it will navigate us to the card page then we will be checking the favorite so we are getting all the favorite list and then we will be checking that if the current one is in the list so in that case we will set the favorite as true and if not we will set the favorite as false perfect so we are doing that and after that H what else [Music] yeah in the menu item we have uh added that one check that if it is favored then we will be showing that field and if not we are showing bordered one right with not a red color we have to add a on click function also in the menu items that whenever it is clicked it should be shown up right put it on click h what else what else so let us just create some courses so I will change the price and the MP title I have provided then you can provide any description then we will be adding some of the tags and let's just check that if it works perfectly or not let's see what let's check one image from Google you can take any image you can take any of the image I'm just selecting randomly just copy this URL and just in the image pass the string what else do we need let's just send it so the method would be post and it would be code slash add right instead of get so course validation will duration is required okay so we need to pass the duration and the video I guess right so let's just add the duration let's just see what was it I guess it is a string most probably yeah duration is a type string so just we can provide anything what we want duration say 0150 hours perfect H what else what so yeah in the videos we have the type title link description we have to do that area of object title we will say you can give any title you want module one intro to react JS you can give that HTML CSS then we have description so in this description you will be passing the course complete tutorial in HTML CSS just add it like what you want then we have a video so in that we have a link sorry not a video we have a link so in that link you can just uh add any of the link of your videos private videos that are being hosted in any of the servers for of now I'm just using a YouTube link but you can definitely use your own video and you can add a video player also but we are not going in depth of that we need to understand the code structure how it works I will just copy and paste the same thing and just change the name here say module 2 and say introduction to react CHS right so complete tutorial on react JS perfect then let us create so you can see that created course is coming so now if you remove all this thing and reload you can see that it is coming perfectly fine right I guess you have like this one the card right so give it a thumbs up if you're liking it right so yeah after that what do we have next so let's just create some multiple uh this courses but before that just let let us go to the checkout page and let us just Implement that thing and check out page if we are adding something in our card so for that what we need to do here is dispatch method use dispatch and then we have the loading say set state used it and let us import the dispatch from react Redux what else get products so we have copied pasted that one and just simply change the API name to get cart I guess what was in the API so get card right so just do get card import it and then just set course create a use it for the course and then the get card once it is done just set the courses data set loading will be false then a delete from cart Perfect Right rest of the things are done the same manner we are implementing the apis just import the open snag bar open snag is not imported sub total return codes. reduce then we have a use effect where we have get products so I will write get courses then we will be having what we will be having we will be passing SRC courses then yeah now we are going to map this courses simply basically so we will put this inside our map function so it will be over the table so yeah now we are mapping that in the image Parts codes. image then we have to pass the title and description right so it will be course. title description [Music] perfect table item rupes doc. price and the stuff are done so yeah it's done I guess perfect what else remove from card we need to pass only the ID and the H type we don't need let us check in the delete what we are doing so in deleting from cart we are taking the ID from the params right so it would be ID like that perfect uh I think it is pretty much completed remove from card just pass the ID we don't need any quantity and all those stuff right so yeah then the next thing what we are having what else do we have I guess the things are pretty much done check out page is done we have your dispatch error yeah now if you click on favorite it is performing perfectly right and also in the card codes. map is not defined it is showing but why let us just see instead of that let us change the sub tootal also so calculate subtotal we have called that one then CES then we have course. map is not defined not a function where it is failed with status 404 okay so it is having some issues let's just see okay the API calls are having some issues because we have mismatched the names basically let's just change the names as we have in our routes we have to pass the ID as the props okay so remove card add to card and now we have to pass the ID that is basically the data we have to write a dollar and ID okay was in favorite not in favorite it will be in the card right so yeah in the data we will be just changing that to ID and then just simply pass that ID along with the URL right so we don't need any data so like that we will do and what else done right so yeah now remove from card it will be only passing the ID we don't need any object kind of thing so this is done then in the course card also we have implemented that now if you reload you can see nothing is coming present and if you add it is taking taking us to the card page right but it is not showing you can inspect this thing but I not going into deep into this thing because we are almost uh done with this one and also we can see the you can see the other videos like the delivery app and the e-commerce where we have implemented the card successfully along with the favorates also you can go and that's your homework basically right kind of thing so yeah the token I guess it was the error it will be Cod me because the authorization error was coming so you can just check this I'll debug this thing where the error is coming right and if you get any problem you can reach out to me easily or you can write in the comment box also so it will be navigating us to the cart now we can fix this issue later but let us see what else are left what else yeah all the things are done I guess pretty much right so we can do one thing is we can add some more courses so that it can look beautiful right so just sear react JS go image and just uh simply just uh get an image and just add it into your database so that it will look nice right so we we should have multiple courses right so just check for images and just do that thing you can also skip this part if it is boring because I'm searching the image and just using that one you can also skip that or you canut this [Music] [Music] part so now if you come back you can see some of this Cod is coming and it is looking pretty much nice I guess right uh similarly like the Udi part perfect so T of the apis you can simply Implement them we have built that but uh you can Implement them and also there are videos my previous videos you can go and watch that also you will be getting understanding of that favorite and the same thing it is very simple just call those API and map it so yeah now it is looking pretty much good I guess so hope you have liked the video one thing is left that is our Details page where we need to show the stuff that are in our course so for that come back to the course Details page so it will be in the course Details page right so we will be simply just uh calling that API using the ID that we are going to get so just get the ID from the params so will be CES instead of courses and just uh have that get course we have our index get all course right just change this one to get course details it will be a get method get and you can add a ID instead of filter and it will be code SL ID right but we don't have made this API in our back end we will be just creating that API also so it will be a use State then use effect import that things yeah now let us just create this one so in the codes I will just copy and paste that one and instead of that I will just uh remove the find by ID I will just do find by ID and remove all the stuff and I will pass the ID here now the ID we have to take it from params so just take the ID and just pass the ID and just simply return the course right yeah perfect and name it to get codes details and in the users sorry it will be consed then in the routes you have to Define this one so I will write router. getet with ID then we will write get codes details and if we pass one ID say this one and just change the method to get you can see we are getting it right so we have just simply buil this one in some few seconds right so yeah so now this API is callable I guess perfect we have done all the stuff right now let's just change this uh to Dynamic instead of static so I will change this one to image that is course. image the same thing that we do right so course. image then we have course. title and codes. description right H perfect then we have the tags we have that course tags so perfect we have to map the tags basically just simply use a map function that we do and just map it basically so we have tag videos we will pass the video and then in the course video card we have to modify this one H going back to the card course video card let's just let's just make this Dynamic [Music] again so I will just delete this part the image part I will delete I will taking video as a props then I will just write video do title and video do description in the card when we click on this card we have to pass HF so that it will be linked to the take us to the video right because we haven't implemented any media player so it will take us to the link it will be a and just give it a text decoration none so request failed with 500 why so it's taking time to load it's taking some time to load I don't know why let's just restart it I don't know why it's taking the time but uh meanwhile uh let's just remove this text recordation and see yeah compiled successfully it should come okay fail with 500 if we inspect internal surer is occurring but why so in the course detail okay we need to pass the ID right we haven't passed that one so ID will be coming from use PMS basically out to we will be taking the ID from the parameter right so yeah using use params you can just implement this one use params let us import use parum from react router Dom and we will be good to go react rou perfect and if we now reload yeah it's coming right so just add that one as I said first thing is we have to pass the image also with the video so that it will be shown in the video cards right so yeah give it a text decoration of none and the image pass the image we have a image prop and just simply pass that one as the image Right image IMG perfect now let's just see yeah now it is looking perfect right if you click it will take us to the video right so like that it will be working so yeah that's it about today's video there are few homeworks like the search the cart and um what else yeah and also you can do the one thing login and sign up part so that's all for today's video thank you if you have liked that just give it a thumbs up and I will see you in my next video till then bye-bye
Original Description
Have you ever tried #udemy website???
And tried of making one for yourself?
Then let's make one! In todays video we will be making a #fullstack udemy website using #reactjs #threejs #openai and #ai
Resources:
https://drive.google.com/drive/folders/1uAFip-AeBtT43FVZmobDvnOXARJF68eM
GitHub Link: https://github.com/rishavchanda/Ecomerce-website
12 Best Full Stack Project Ideas in 2024
https://www.geeksforgeeks.org/best-full-stack-project-ideas/?ref=header_search
Top 10 Full Stack Development Trends in 2024
https://www.geeksforgeeks.org/full-stack-development-trends/?ref=lbp
Explore Premium LIVE and Online Courses :
https://practice.geeksforgeeks.org/courses/
-------------------------------------------------------------------------------------------------------------------------------------------
Follow us for more fun, knowledge and resources:
📱 Download GeeksforGeeks' Official App: https://geeksforgeeksapp.page.link/gfg-app
💬 Twitter- https://twitter.com/geeksforgeeks
🧑💼 LinkedIn- https://www.linkedin.com/company/geeksforgeeks
📷 Instagram- https://www.instagram.com/geeks_for_geeks/?hl=en
💌 Telegram- https://t.me/s/geeksforgeeks_official
Also, Subscribe if you haven't already! :)
#GeeksforGeeks #Learntocode #GFG #udemy #project #fullstackdeveloper #frontenddeveloper #frontend #backend #backenddeveloper #github #learndsa #mentor #3d #threejs #reactjs #nextjs #dsalgo #openai #api #website #websiteproject #websitedesigns #chatgpt #projects #codingcareer #computerscience #live #javascript #java #javascriptdeveloper #developertips #javacoding
Tags
projects
computerscience
live
javascript
java
javascriptdeveloper
javacoding
microsoft project
project management
ms project
fullstackdeveloper
frontenddeveloper
frontend
backend
backenddeveloper
github
learndsa
mentor
project management software
gantt chart
microsoft project
best full stack developer course
front end web developer
microsoft copilot
it project manager
udemy power bi
pmp project man
Watch on YouTube ↗
(saves to browser)
Sign in to unlock AI tutor explanation · ⚡30
Playlist
Uploads from GeeksforGeeks · GeeksforGeeks · 0 of 60
← Previous
Next →
1
 2
2
 3
3
 4
4
 5
5
 6
6
 7
7
 8
8
 9
9
 10
10
 11
11
 12
12
 13
13
 14
14
 15
15
 16
16
 17
17
 18
18
 19
19
 20
20
 21
21
 22
22
 23
23
 24
24
 25
25
 26
26
 27
27
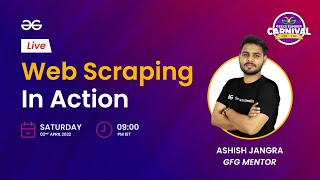 28
28
 29
29
 30
30
 31
31
 32
32
 33
33
 34
34
 35
35
 36
36
 37
37
 38
38
 39
39
 40
40
 41
41
 42
42
 43
43
 44
44
 45
45
 46
46
 47
47
 48
48
 49
49
 50
50
 51
51
 52
52
 53
53
 54
54
 55
55
 56
56
 57
57
 58
58
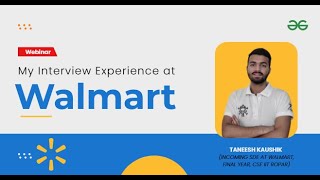 59
59
 60
60

How I got into Walmart | Shailesh Sharma
GeeksforGeeks
Upgrade yourself In 29 Days | GeeksforGeeks
GeeksforGeeks
Learn AWS Fundamentals For Free
GeeksforGeeks
Conversation With Young Achievers | Meet the winners of Bi-Wizard Coding Contest | GeeksforGeeks
GeeksforGeeks
Meet The Winners Of Bi-Wizard Coding Contests | GeeksforGeeks
GeeksforGeeks
Interview Prep Strategies | PayPal
GeeksforGeeks
OLX Interview Preparation Strategies | Hukam Singh
GeeksforGeeks
Meet Some More Winners Of Bi-Wizard Coding Contests | GeeksforGeeks
GeeksforGeeks
Live Mock DSA
GeeksforGeeks
Microsoft Azure For Absolute Beginners
GeeksforGeeks
Python for Data Science | Data Science Master Bootcamp | Arpit Jain
GeeksforGeeks
Getting Started with Data Analysis | Data Science Master Bootcamp | Ashish Jangra
GeeksforGeeks
How to prepare theory subjects for SDE interviews | Geeks Summer Carnival 2022
GeeksforGeeks
Get Your Tickets To The Geeks Summer Carnival | GeeksforGeeks
GeeksforGeeks
TED Talk Data Analysis Project | Data Science Master Bootcamp | Ashish Jangra
GeeksforGeeks
How I Secured AIR 9 in GATE'22 | Tushar
GeeksforGeeks
Learn Java Backend Development | Geeks Summer Carnival | GeeksforGeeks
GeeksforGeeks
How to Recognize which Data Structure to use in a question | Geeks Summer Carnival | GeeksforGeeks
GeeksforGeeks
Learn Data Structures and Algorithms | GeeksforGeeks
GeeksforGeeks
Interview experience at Flipkart | GeeksforGeeks
GeeksforGeeks
Lets Prepare for GATE'23 the Right Way | Sakshi Singhal | GeekSummerCarnival
GeeksforGeeks
Highest Paying Jobs in 2022 | Ishan Sharma | Geeks Summer Carnival 2022 | GeeksforGeeks
GeeksforGeeks
Geeks Summer Carnival 2022 | 5th April- 11th April | GeeksforGeeks
GeeksforGeeks
Preparing for SDE interviews | Soham Mukherjee | Geeks Summer Carnival 2022 | GeeksforGeeks
GeeksforGeeks
Full Stack Development with React & Node | Utkarsh Malik | Geeks Summer Carnival | GeeksforGeeks
GeeksforGeeks
Introduction to Open Source and Roadmap to GSOC 2022 | Geeks Summer Carnival 2022 | GeeksforGeeks
GeeksforGeeks
Web Scraping in Action | Geeks Summer Carnival 2022 | GeeksforGeeks
GeeksforGeeks
Getting Hired at BITCS via GfG Job Portal | Get Hired With GeeksforGeeks
GeeksforGeeks
How to build a faster landing Page | Geeks Summer Carnival 2022 | GeeksforGeeks
GeeksforGeeks
Geeks Summer Carnival | 5th To 11th April, 2022 | GeeksforGeeks
GeeksforGeeks
How to get ideas for Startup | Geeks Summer Carnival 2022 | GeeksforGeeks
GeeksforGeeks
Journey from Tier 3 to JusPay | GeeksforGeeks
GeeksforGeeks
Geeks Summer Carnival 2022 | GeeksforGeeks
GeeksforGeeks
Dispelling Myths and Pre conceptions of Programming Languages
GeeksforGeeks
Must Do System Design Questions
GeeksforGeeks
Understanding Sorting Techniques in an hour | Keerti Purswani | Geeks Summer Carnival
GeeksforGeeks
Get Hired at NEC | Job-A-Thon 8
GeeksforGeeks
Journey from Tier 3 college to Microsoft | GeeksforGeeks
GeeksforGeeks
Get Hired with GeeksforGeeks at SuperK | Job A Thon 8
GeeksforGeeks
GeeksforGeeks: Redesigned
GeeksforGeeks
From Tier 3 to cracking multiple interviews | GeeksforGeeks
GeeksforGeeks
Live Mock DSA
GeeksforGeeks
Youtube Data Analysis | Ashish Jangra | GeeksforGeeks
GeeksforGeeks
DSA Self-Paced Course Preview | Sandeep Jain | GeeksforGeeks
GeeksforGeeks
GATE Live Classes | Prepare for GATE CS 2023 | GeeksforGeeks
GeeksforGeeks
Journey from JIIT to Adobe
GeeksforGeeks
Life Is Unfair Ft. Shonty badmash | LIVE Discord Session | A GeeksforGeeks Exclusive
GeeksforGeeks
Interview Experience at Google | Tech Dose
GeeksforGeeks
Live Mock DSA
GeeksforGeeks
Interview Experience @ Amazon | GeeksforGeeks
GeeksforGeeks
My journey through the tech world from India to US | Vidushi | GeeksforGeeks
GeeksforGeeks
Complete Interview Preparation Course | GeeksforGeeks
GeeksforGeeks
Live Mock DSA
GeeksforGeeks
Getting Hired at FiftyFive Technologies | Job-a-thon 9.0
GeeksforGeeks
GFG Karlo, Ho Jayega | GeeksforGeeks ft. Khaleel Ahmed
GeeksforGeeks
How I got job offers from 2 big companies : Arcesium & Microsoft | GeeksforGeeks
GeeksforGeeks
LINUX for Beginners | GFG x Itversity
GeeksforGeeks
My interview experience at Walmart | GeeksforGeeks
GeeksforGeeks
Get Hired at Speckyfox
GeeksforGeeks
Live Mock DSA
GeeksforGeeks
Related Reads
📰
📰
📰
📰
How Dev Agencies Can Handle Client Revisions Without Burning Out (or Losing Money)
Dev.to · SarasG
Give a Dead Side Project an Exit Report, Not an AI Eulogy
Dev.to · Sam Rivera
How I’d Scope a Project Before Writing a Single Line of Code
Medium · Startup
Where to Start with my Project Idea
Reddit r/learnprogramming
🎓
Tutor Explanation
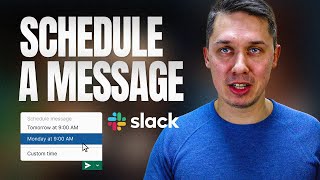
 DeepCamp AI